- First Name
- Duke
- Joined
- Jul 27, 2020
- Threads
- 67
- Messages
- 9,883
- Reaction score
- 47,296
- Location
- Kitchener, Ontario
- Vehicle(s)
- 2019 XLT SuperCab - FTW!
- Occupation
- Retired (P/T) Caregiver (F/T)
- Vehicle Showcase
- 1
- Thread starter
- Banned
- #1
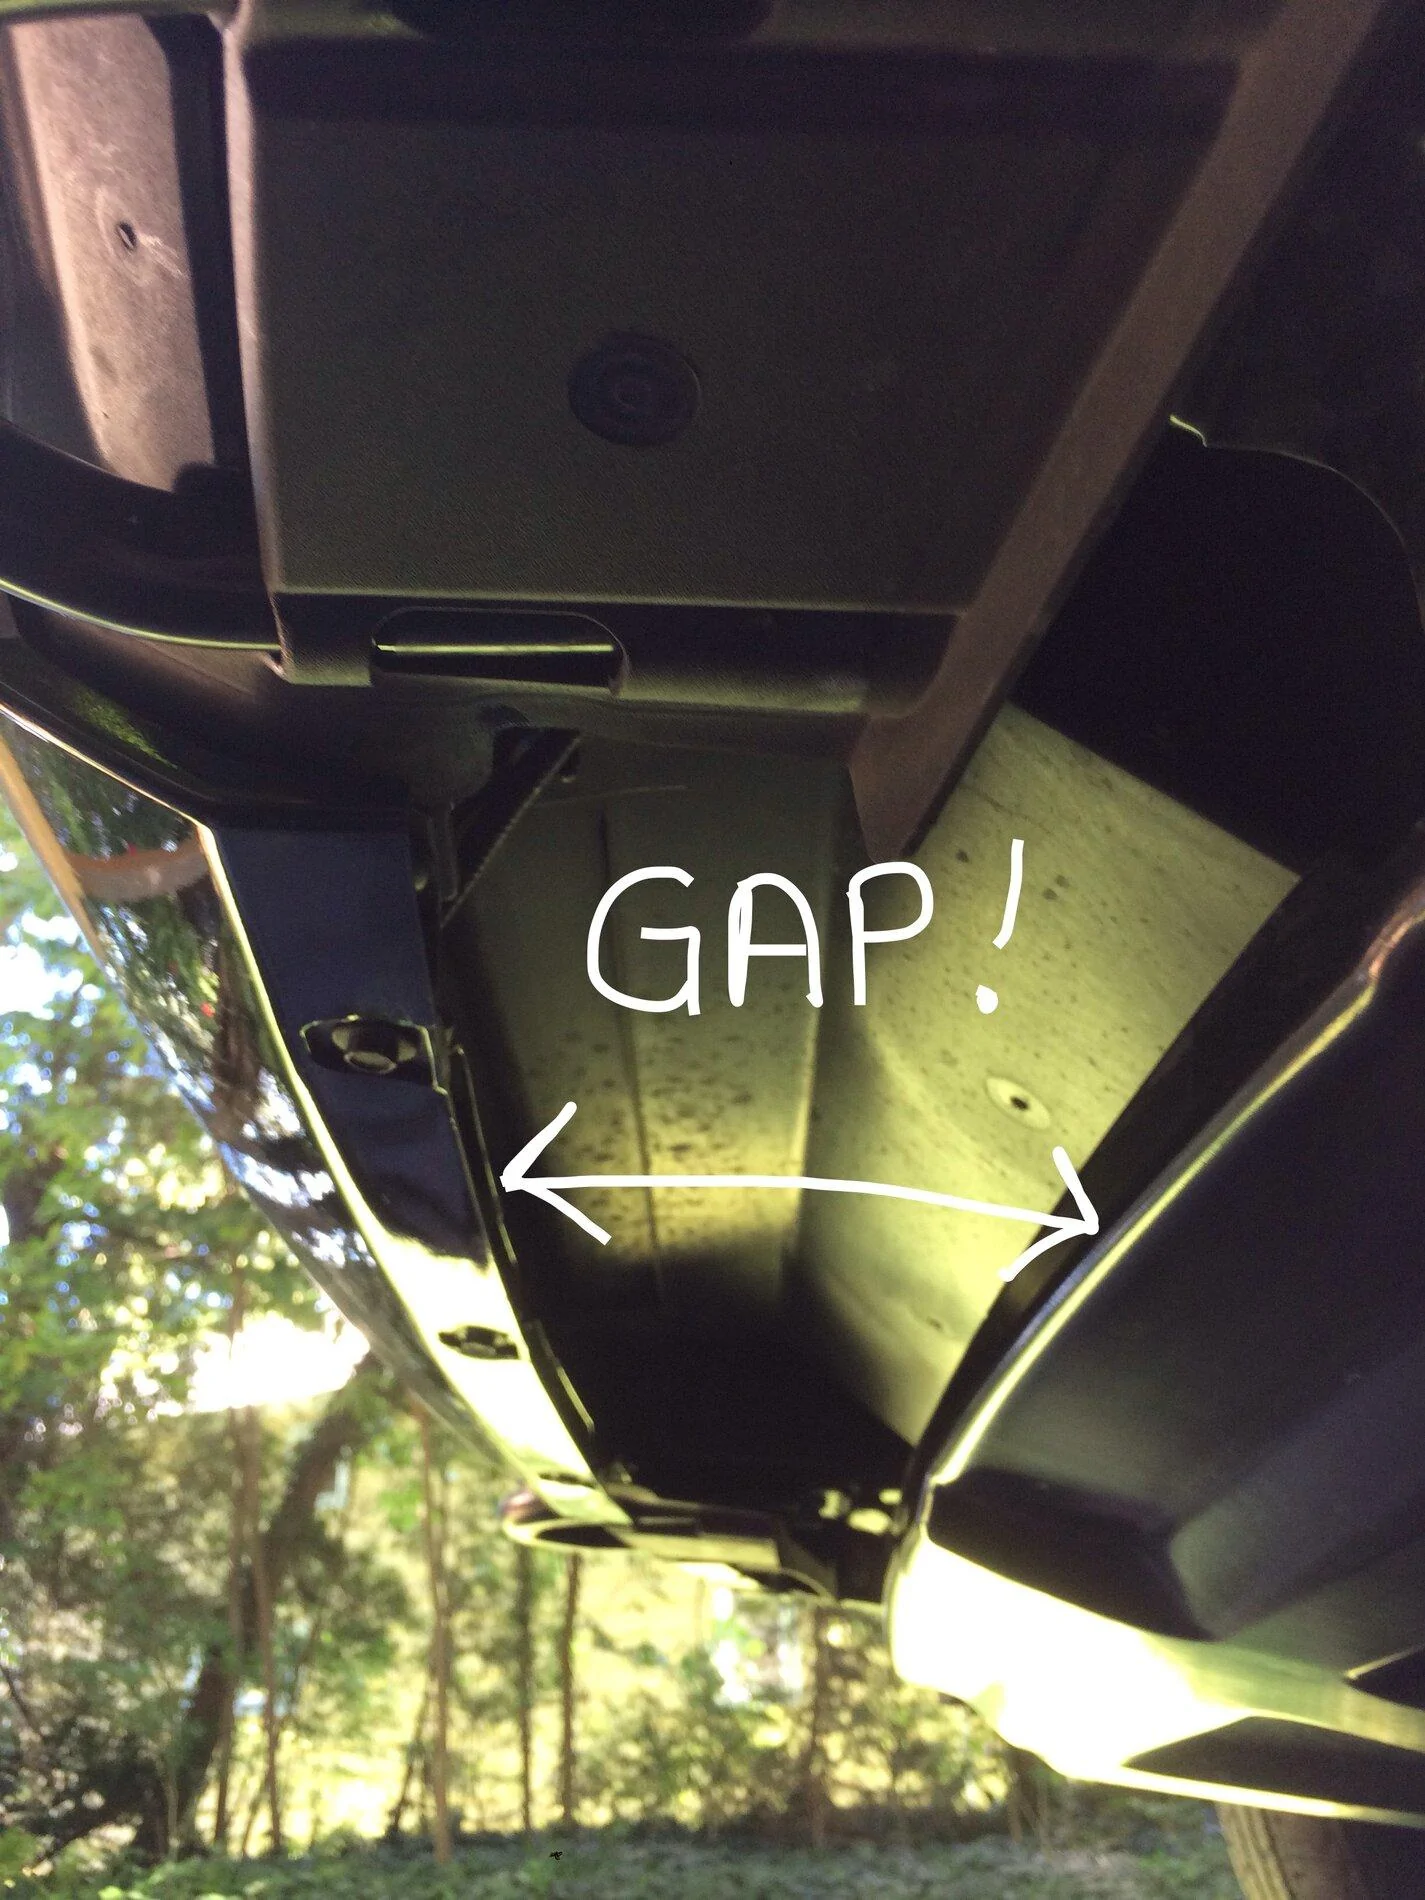
I removed the air dam on my XLT and, like many others who have done the same, I didn't like the gap between the bumper and the existing skid plate. It just looked odd and I could see it scooping up mud, snow, etc.. Solution: buy a factory skid plate or modify your old air dam to fill the gap.
You'll need a drill or 1/4" impact driver (contractor kind, not mechanic kind), 1/4" hex to 3/8" drive adapter), 10mm socket (long), 15mm socket (long), razor knife, tire crayon, 3/16" drill bit. (Don't freak out - you're not drilling into your Ranger).
If your air dam is off, you'll need to partially mount it to make the mod. Using the 10mm socket, mount the middle (short one) of the three outer mounting tabs in its original mounting spot, while leaving the other two long tabs on the outside of the bumper ( will be easily understood when you're doing it. Repeat for other side. This makes it way easier to re-install the middle tabs and to mark up your air dam for cutting.
Remove the three bumper skin bolt from the bottom of the bumper, push the bumper skin away and install the three middle air dam bolts in their original mounting position using the 10mm socket. Do not re-attach the bumper skin at this point.
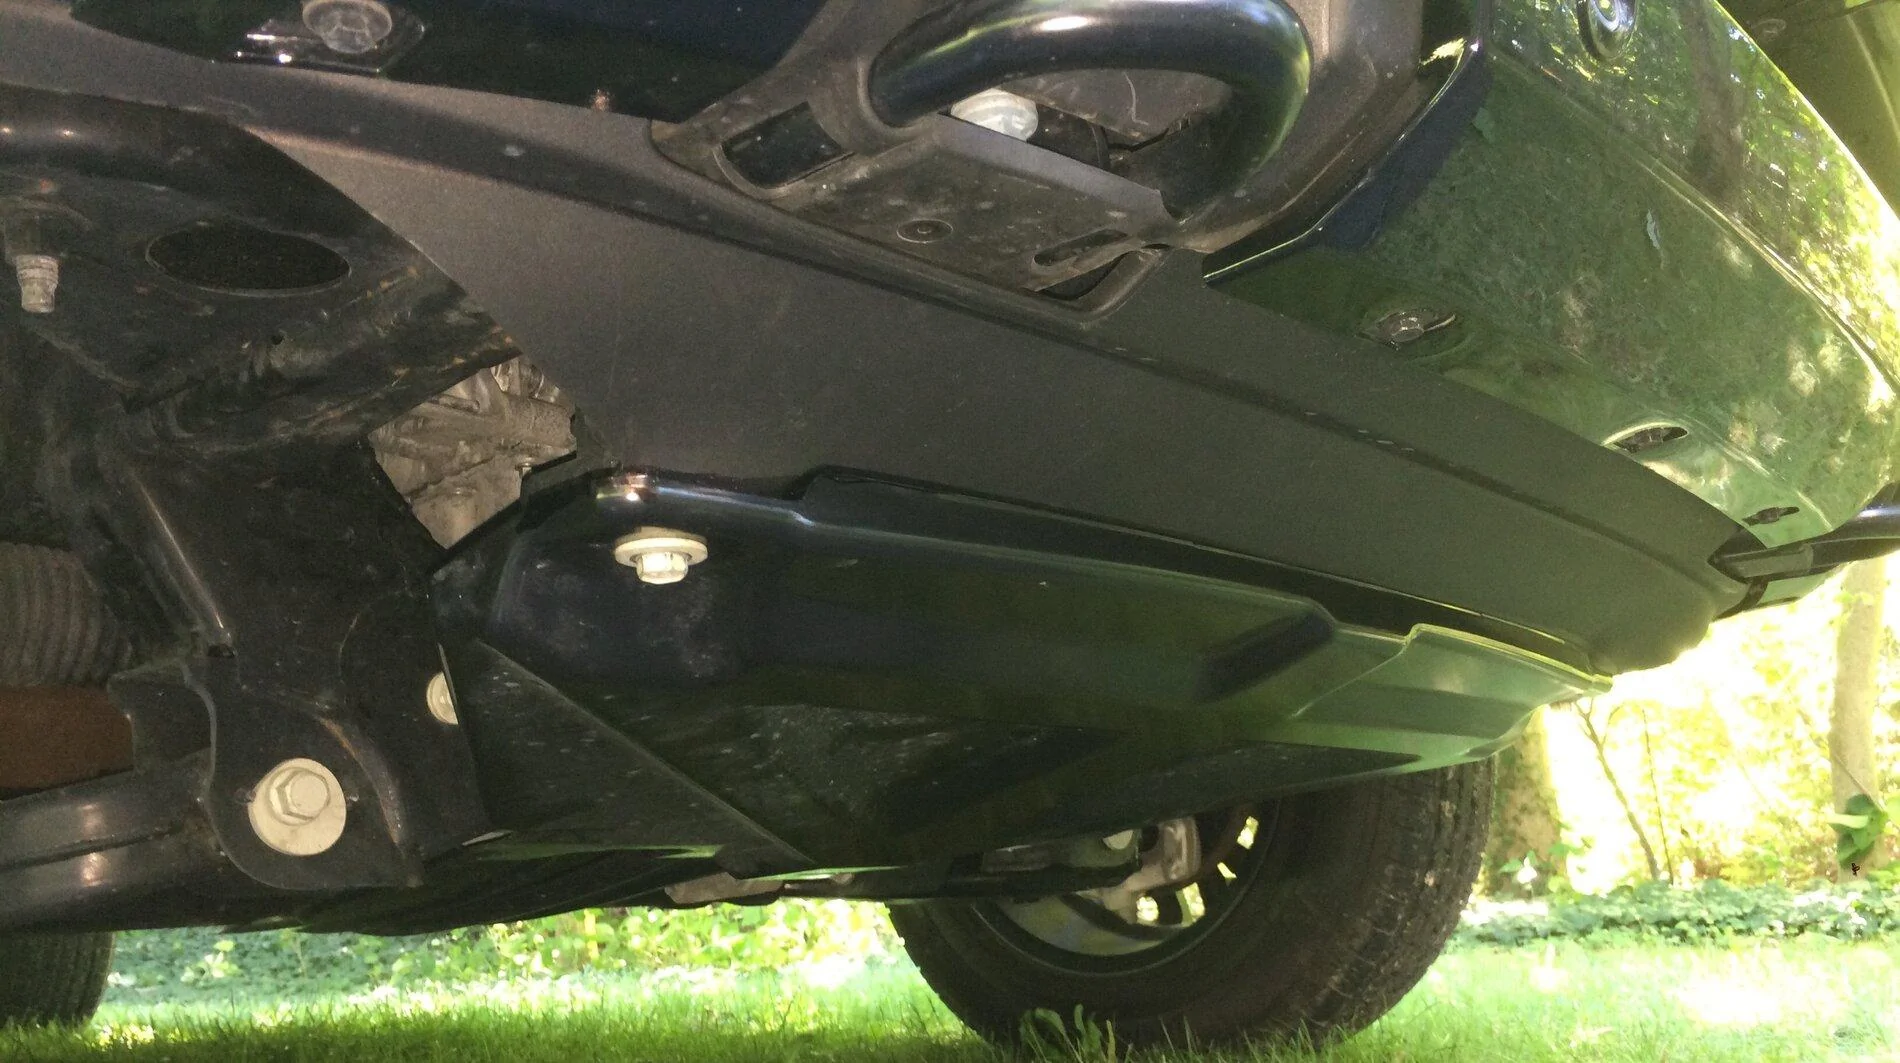
Remove the two forward skid plate bolts using the 15mm socket. The skid plate should sag - if not, loosen the next set of bolts toward the rear of the skid plate but do not remove them. Tuck the air dam above the skid plate and secure one side with a 15mm bolt to hold in place. Wrestle the dam in place and secure the other side. You don't need to fully tighten the bolts but they need to be snug enough to hold things in place while you figure out where you need to cut. Ignore how poorly the dam fits at the outer tab - we'll be fixing that by cutting off the tab and drilling a new mounting slot in the air dam.
Use the tire crayon to mark where you need to cut - the outside edge of the skid plate should be your guide.
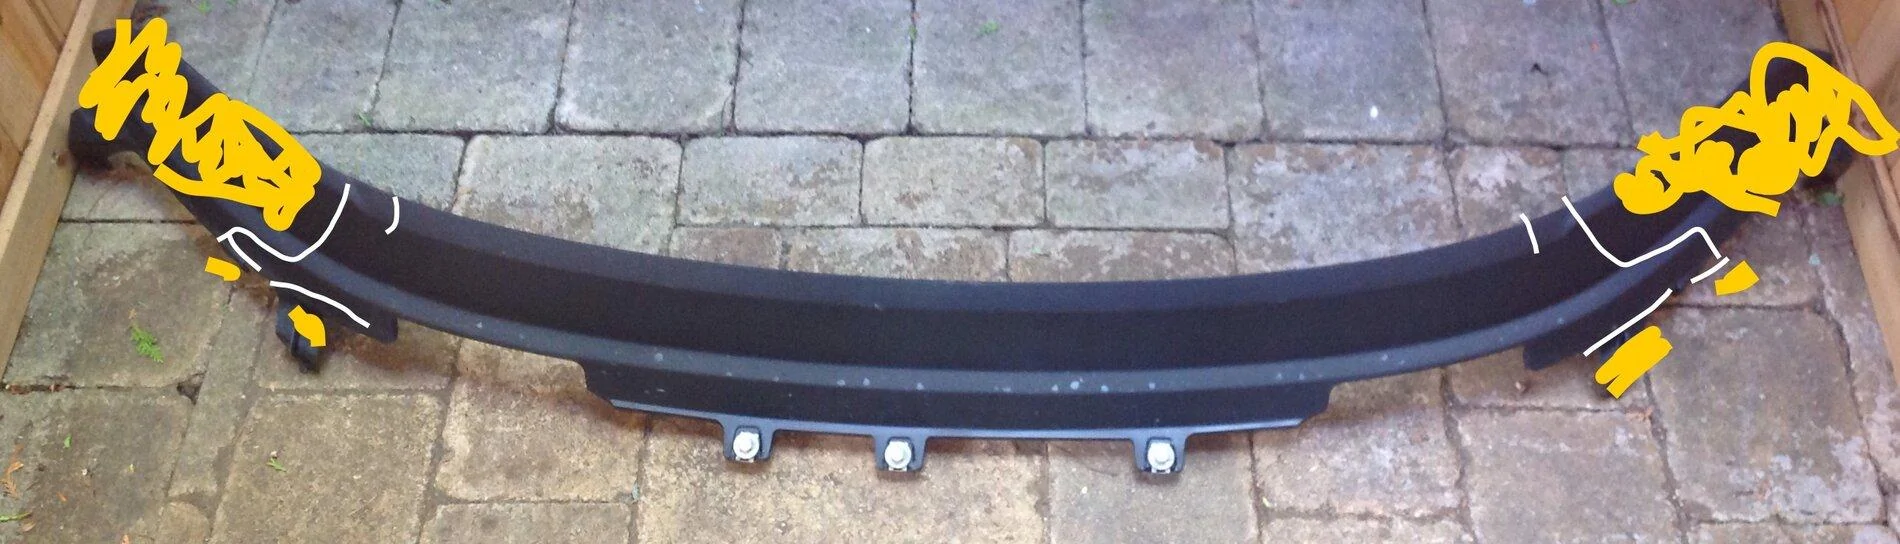
Remove the air dam to make the final markups and cut the air dam. Starting from the outside edge of the middle tab, draw a line straight down to the bend, follow along the bend for a few inches, then arch toward the line you traced along the outer edge of the skid plate. Mark a 1" line about 1-1/2" to the inside of where the skid plate will end - this will be a relief cut to allow the air dam to suck up against the skid plate mounting point See photo. Repeat for the other side.
Make sure your razor knife has a new blade. Carefully score where you need to make your cuts. Score again. Score again until you cut through - slow and steady wins the race here! The large outer piece should be completely cut away at this point. Cut off the two outer tabs, flush to the air dam. Make your relief cut. Repeat for the other side.
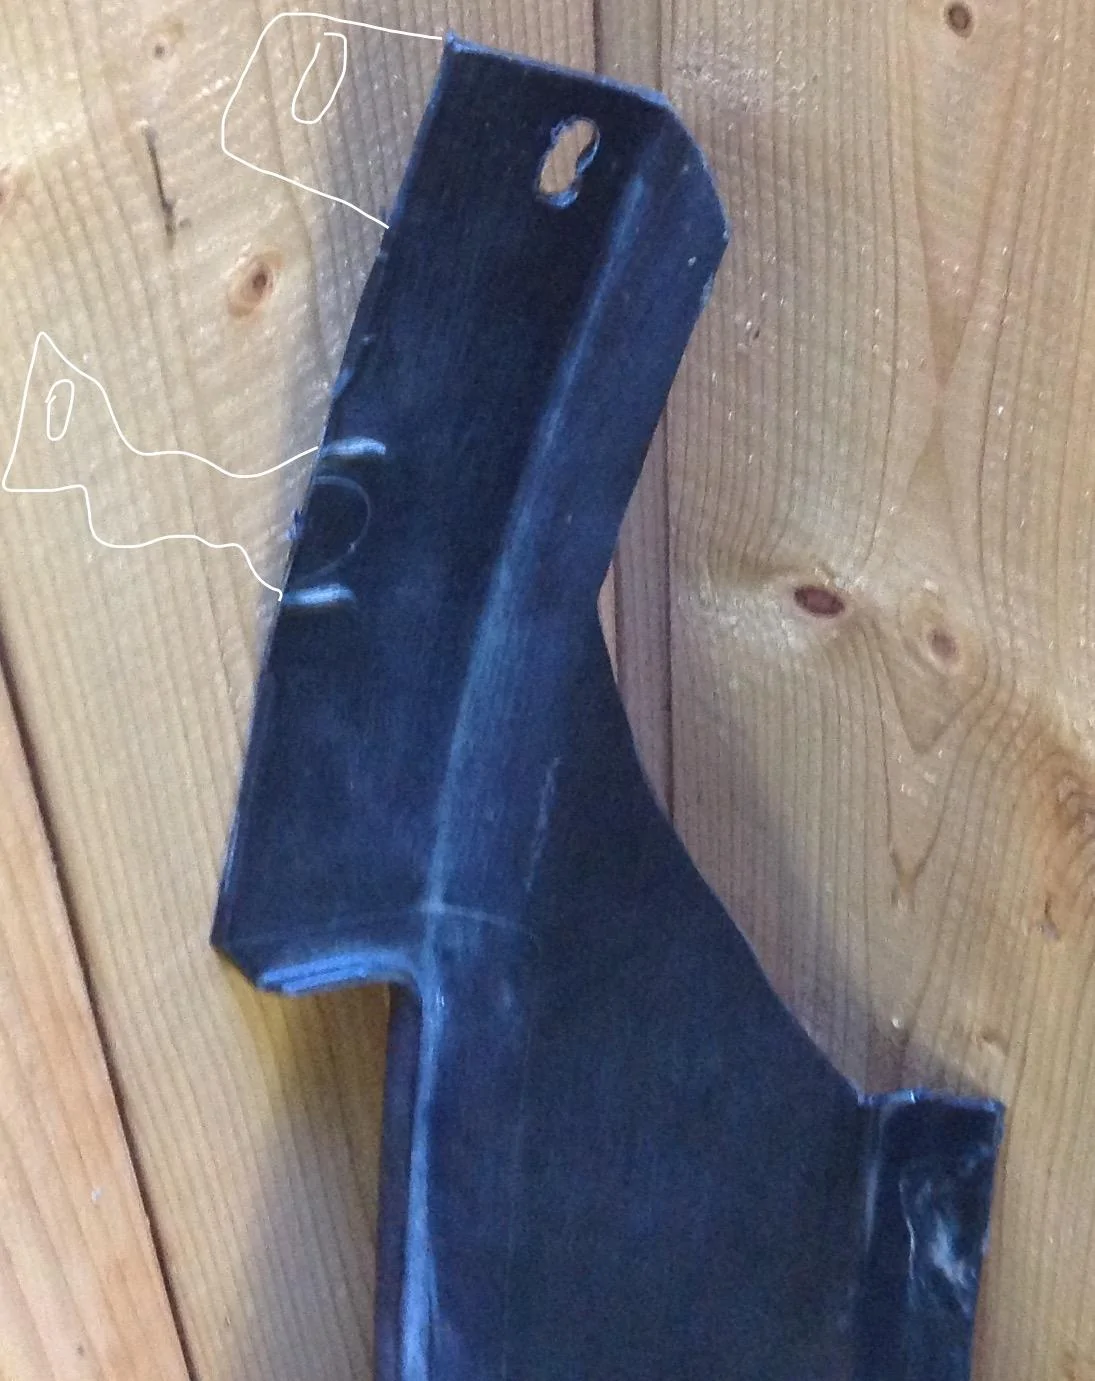
Using the 3/16" drill bit, make a slot on the outer end of the air dam by drilling two holes very close together and about 3/16" from the end of the air dam. Use the drill to "router" the slot - it doesn't have to be perfect, only functional. Repeat for the other side.
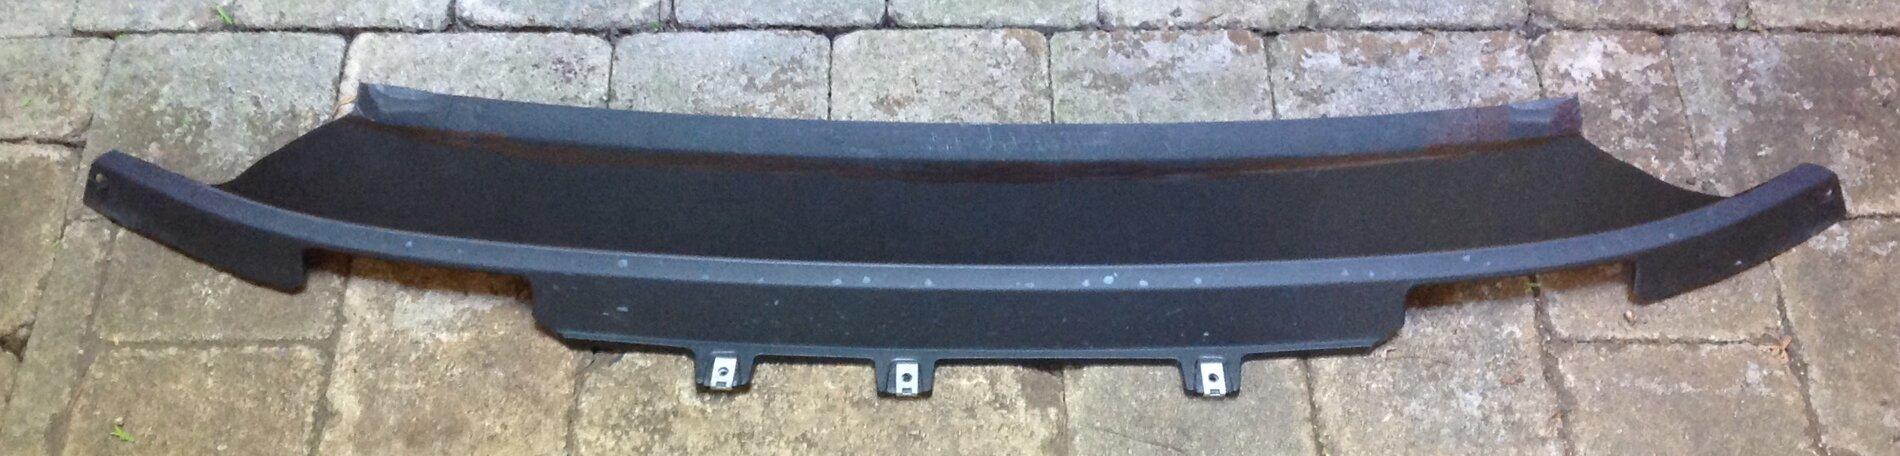
Now, re-install the dam, starting at the outside, now the other side, finishing with the three bolts under the bumper skin. The fit at the outside edges should be much better. Do not fasten bumper skin yet.
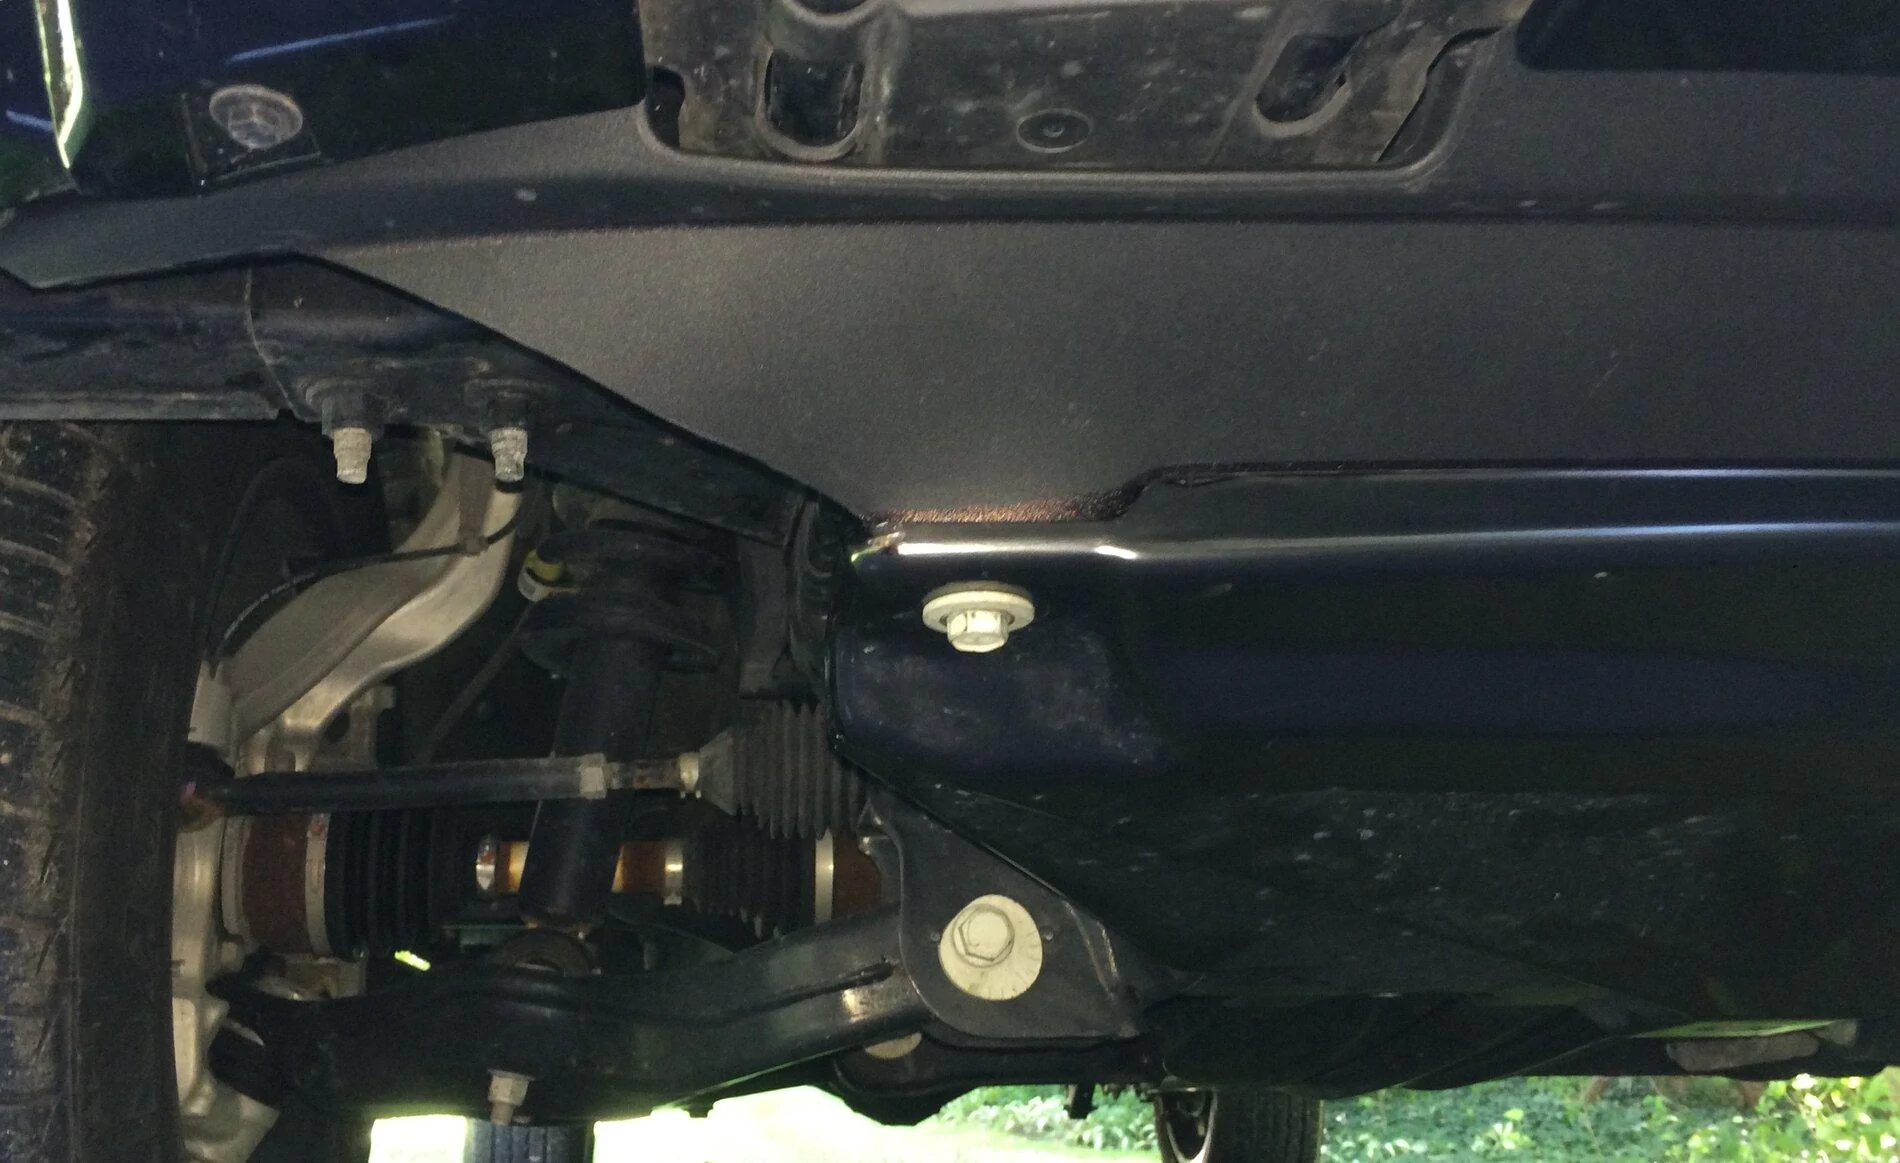
Snug the air dam under the skid plate and loosely fasten one side of the skid plate, then the other. Now tighten both skid plate bolts - you should be able see how the relief cuts were helpful. Tighten the rear bolts if you loosened them.
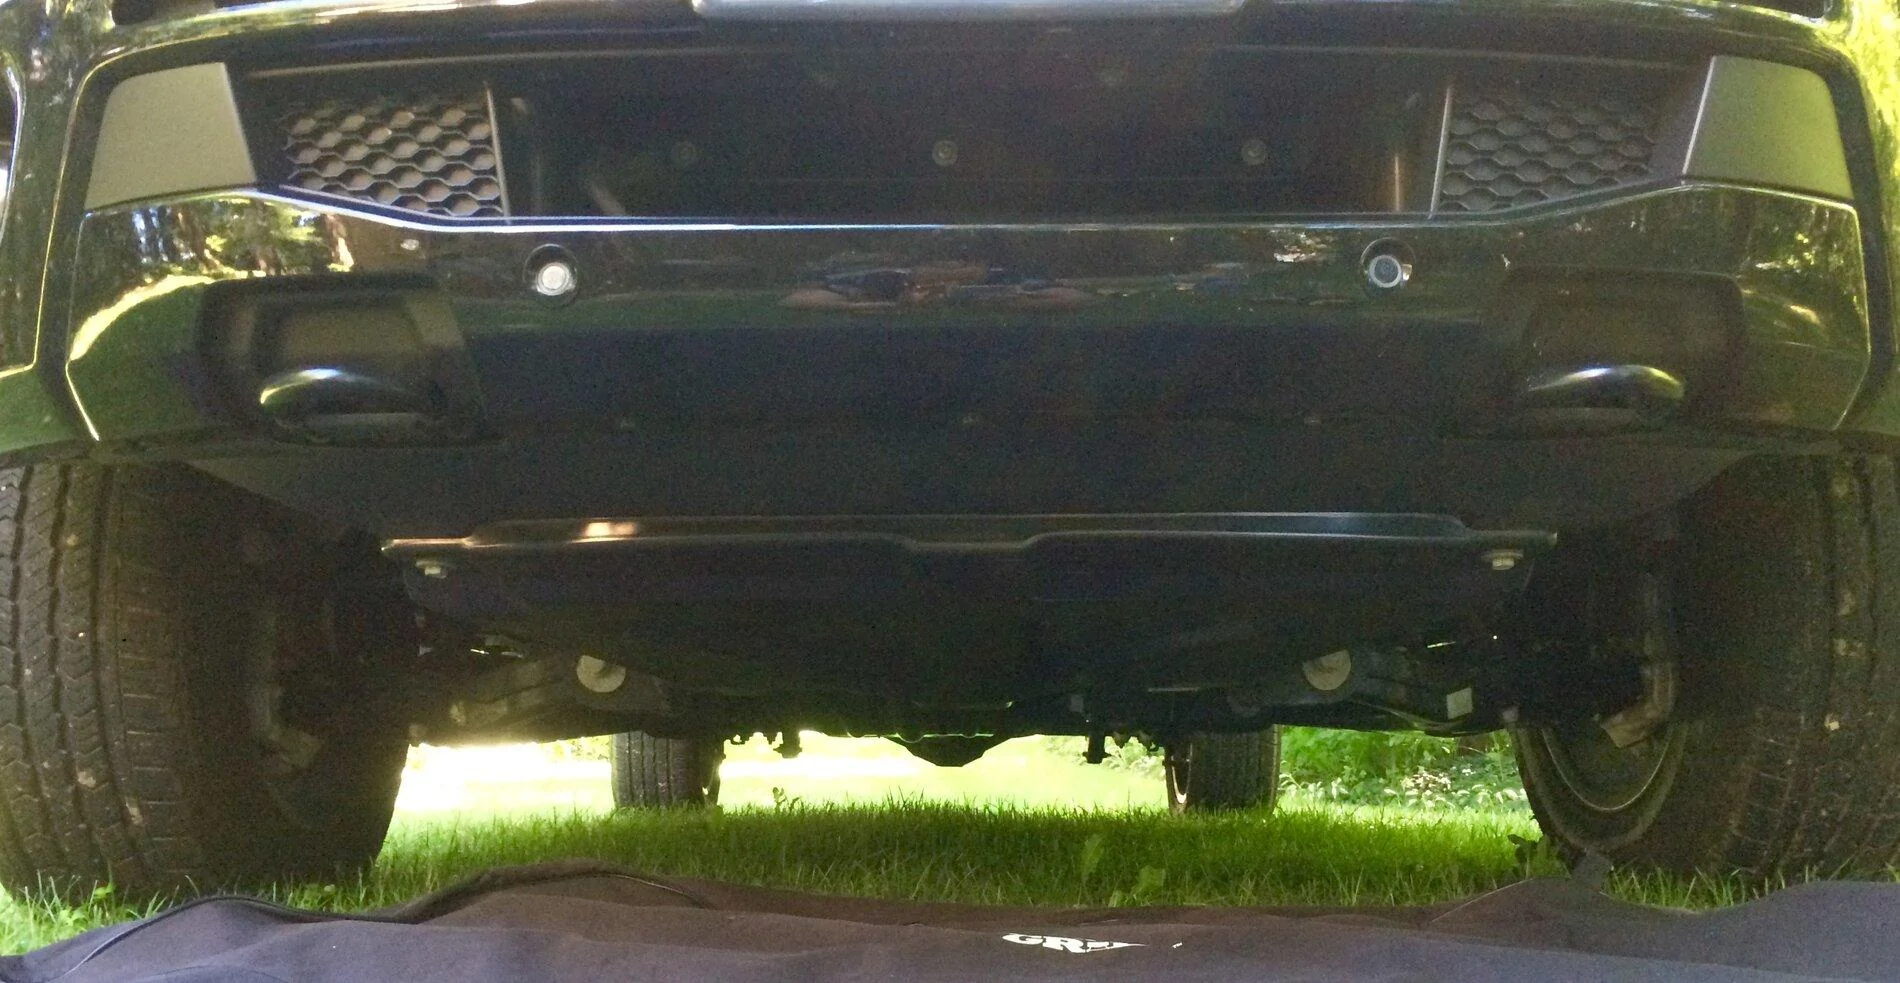
If everything looks good, install the three bumper skin bolts using the 10mm socket.


You'll need a drill or 1/4" impact driver (contractor kind, not mechanic kind), 1/4" hex to 3/8" drive adapter), 10mm socket (long), 15mm socket (long), razor knife, tire crayon, 3/16" drill bit. (Don't freak out - you're not drilling into your Ranger).
If your air dam is off, you'll need to partially mount it to make the mod. Using the 10mm socket, mount the middle (short one) of the three outer mounting tabs in its original mounting spot, while leaving the other two long tabs on the outside of the bumper ( will be easily understood when you're doing it. Repeat for other side. This makes it way easier to re-install the middle tabs and to mark up your air dam for cutting.
Remove the three bumper skin bolt from the bottom of the bumper, push the bumper skin away and install the three middle air dam bolts in their original mounting position using the 10mm socket. Do not re-attach the bumper skin at this point.
Remove the two forward skid plate bolts using the 15mm socket. The skid plate should sag - if not, loosen the next set of bolts toward the rear of the skid plate but do not remove them. Tuck the air dam above the skid plate and secure one side with a 15mm bolt to hold in place. Wrestle the dam in place and secure the other side. You don't need to fully tighten the bolts but they need to be snug enough to hold things in place while you figure out where you need to cut. Ignore how poorly the dam fits at the outer tab - we'll be fixing that by cutting off the tab and drilling a new mounting slot in the air dam.
Use the tire crayon to mark where you need to cut - the outside edge of the skid plate should be your guide.
Remove the air dam to make the final markups and cut the air dam. Starting from the outside edge of the middle tab, draw a line straight down to the bend, follow along the bend for a few inches, then arch toward the line you traced along the outer edge of the skid plate. Mark a 1" line about 1-1/2" to the inside of where the skid plate will end - this will be a relief cut to allow the air dam to suck up against the skid plate mounting point See photo. Repeat for the other side.
Make sure your razor knife has a new blade. Carefully score where you need to make your cuts. Score again. Score again until you cut through - slow and steady wins the race here! The large outer piece should be completely cut away at this point. Cut off the two outer tabs, flush to the air dam. Make your relief cut. Repeat for the other side.
Using the 3/16" drill bit, make a slot on the outer end of the air dam by drilling two holes very close together and about 3/16" from the end of the air dam. Use the drill to "router" the slot - it doesn't have to be perfect, only functional. Repeat for the other side.
Now, re-install the dam, starting at the outside, now the other side, finishing with the three bolts under the bumper skin. The fit at the outside edges should be much better. Do not fasten bumper skin yet.
Snug the air dam under the skid plate and loosely fasten one side of the skid plate, then the other. Now tighten both skid plate bolts - you should be able see how the relief cuts were helpful. Tighten the rear bolts if you loosened them.
If everything looks good, install the three bumper skin bolts using the 10mm socket.

Sponsored
Last edited: