Sponsored

My Leveling Kit Nightmare

OP
OP
ylwjacket

ylwjacket

Well-Known Member
Joined
Jan 18, 2023
Threads
13
Messages
259
Reaction score
742
Location
N. GA
Vehicle(s)
2019 XLT FX4
I’m just glad to meet another Georgian who’s not a Dawg. Good luck with the repair.
Name gives it away, eh?

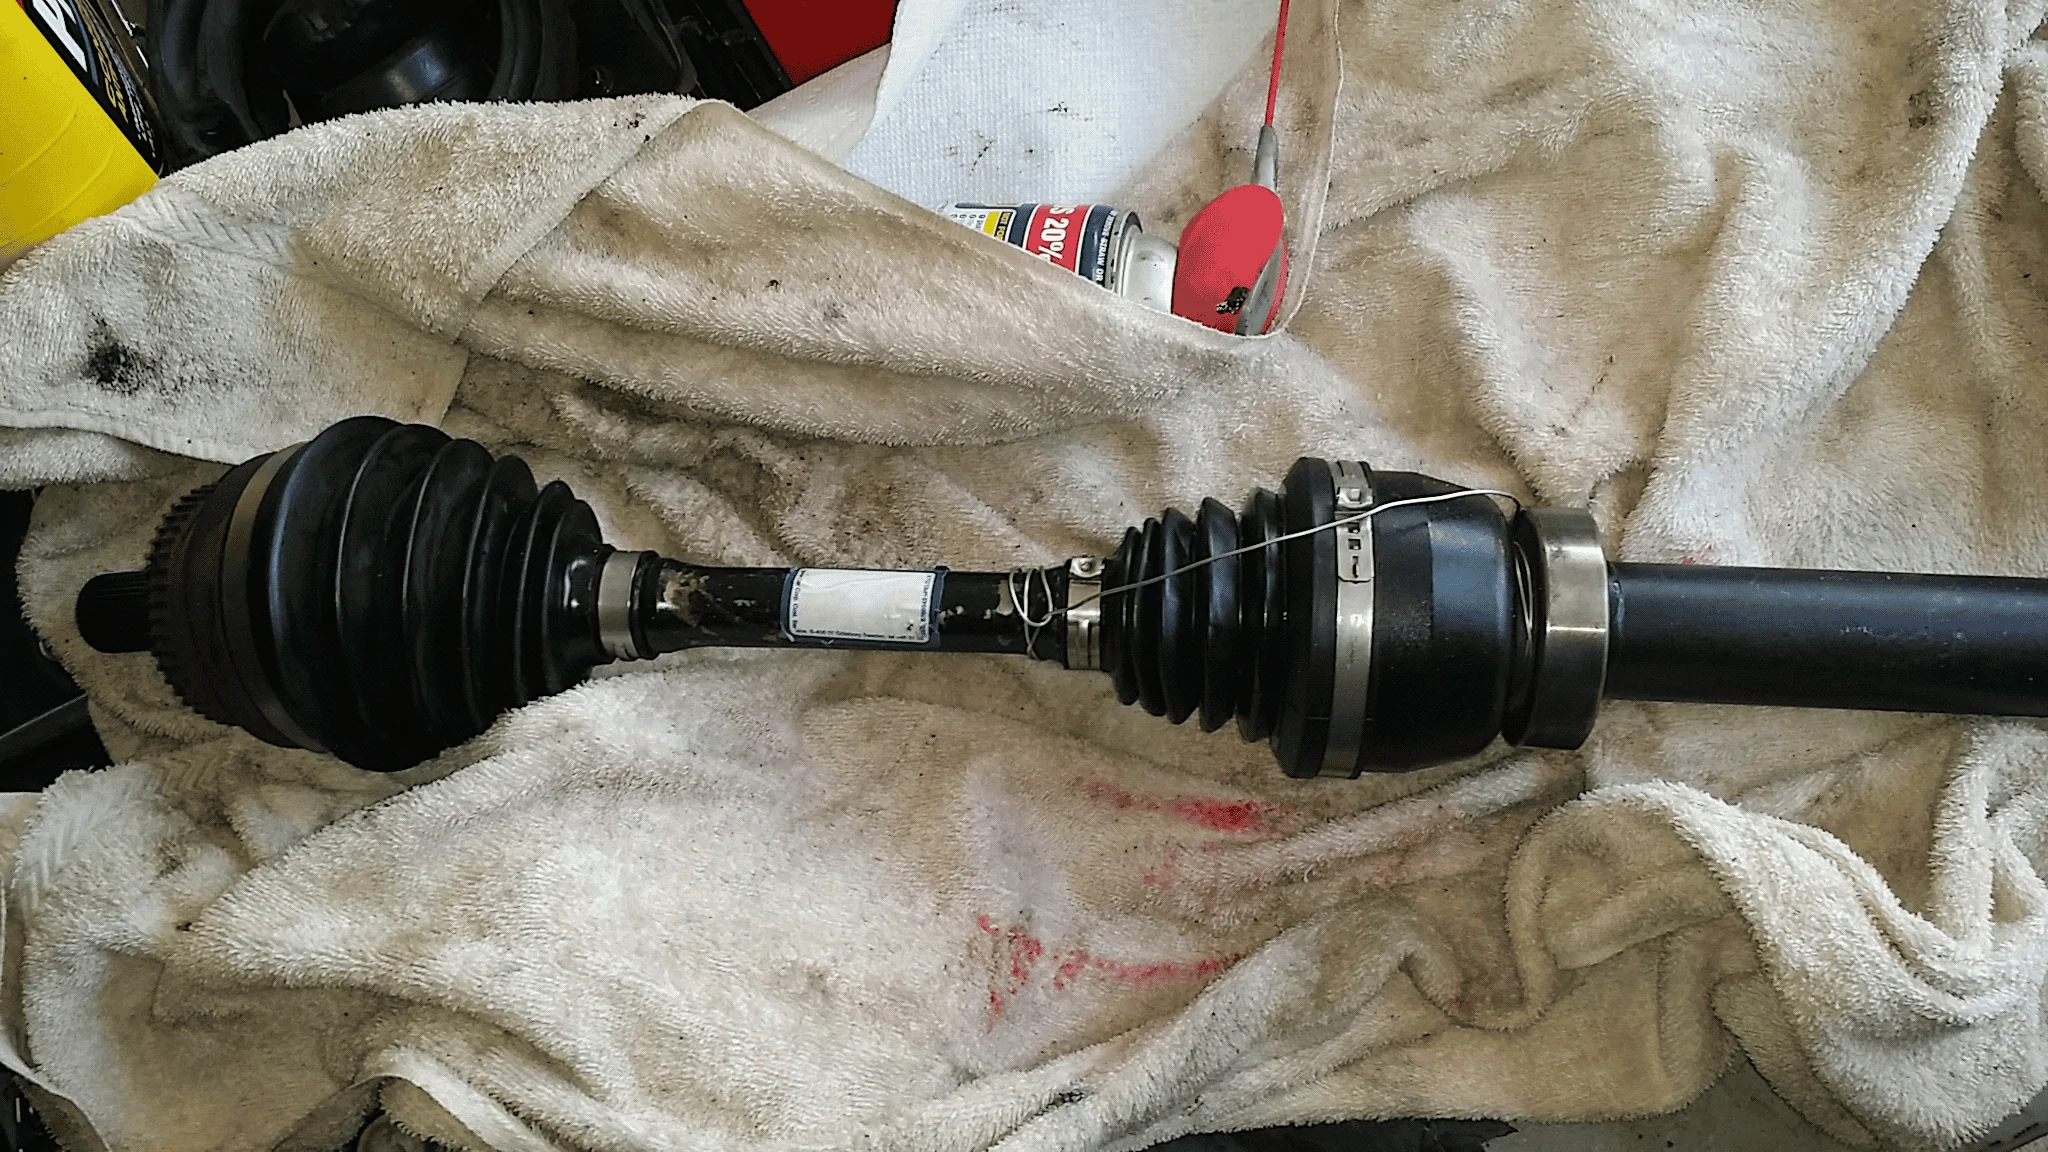
I traded a Jeep for this truck. Hopefully this will all be fixed by next weekend, then I'll go ride some trails before the leaves come back.

Want to do a hidden winch up front too, but might just keep the hijack handy for now. Not too many places in the natl forest to get stuck on the main trails.
Sponsored


PltFX4

Well-Known Member
First Name
Richard
Joined
Jan 29, 2020
Threads
26
Messages
692
Reaction score
1,269
Location
Minneapolis, MN
Vehicle(s)
2019 Ranger Lariat FX4
It may be to late for you but for others this may help.
NOTE: This is from work I did on a Volvo CV joint but the basics are valid.

Note also, I went to my mechanics shop at the end of the block and used his parts cleaner to remove all the old grease, reassembled it dry, then packed it with new grease.

This over extension happened putting new front struts in a friends Volvo.

The 3 tricks are: Take the shaft off inner race (IR)... the snap ring is not squeezed together, but spread outward, while pulling the shaft.

1. The inner race has to be about 1" off the bottom of the outer race (OR). Without enough hands to hold all the moving parts, we cut the finger off a latex glove (did not have any small balloons) inflated it, tied it off with a zip tie. Sat the IR on the "balloon" in the bottom OR, snap ring up. Now we could manipulate the cage to put the balls back in. Once done, pop the balloon and pull it out... the IR stays right where it was.

2. Notice in the photo, the white marks we made. At first, we thought the two "wide" sections of the IR and OR had to be opposite each other (the marks lined up) ... it can be done that way, BUT the CV will then not articulate. So it's wide opposite narrow sections does the trick.

CV 1.png


3. Finally, we packed in to packets of new grease. Pack in the first one with the shaft out, pushed all around the cage and down on the ball bearings. Put as much as you can down the center of the IR... when you put the shaft back in, it will push the excess grease up under the BB and cage as it has no where else to go. Pack the remaining grease up around the shaft like a snow cone, and slip the boot over it, set the new (or used) boot clamps and reinstall in car.

Careful not to hyper extend it again. To help prevent that, I wired it together till install and then cut the wire off.


cv 2.png


I am sure this is more than anyone wanted to know but there it is.

Hope this is helpful.
 

AzScorpion

Moderator
First Name
Dave
Joined
Jul 25, 2019
Threads
335
Messages
26,248
Reaction score
132,183
Location
Back Home In AZ!
Vehicle(s)
2023 Ford Ranger Tremor
Occupation
Retired...Full Time Slacker
Trying to find a silver lining.

The place i'm taking it to buy and sell wheels and tires. I like the stock wheels, and I was going to wait til the hankooks wear out to replace the tires. With 19k miles, there's plenty left.

Maybe I'll trade in the tires now, and bigger ones to match the lift, and eat the whole elephant in one bite.

Well, except the tune I want to do. After this mess, that's gonna wait a bit.
I kept my stock wheels and just replaced the tires. They only had 900 miles on them so I sold them on Craigslist and recouped some money towards the new ones. If you're planning on going off road I'd try and get new tires soon as the Hankooks aren't the best for off roading.

I have the same Eibach kit and while I use to do just about everything myself I paid a shop to do mine. Honestly it was easier to just drop it off and go to a job I know how to do and work to pay for it. lol As I get older I find myself not enjoying working on vehicles like I use to. Hopefully you get it straightened out and can enjoy driving it soon. Good luck!
 

JesseS

Well-Known Member
First Name
Jesse
Joined
May 26, 2021
Threads
19
Messages
1,755
Reaction score
4,824
Location
NorCal (Roseville)
Vehicle(s)
2021 Ranger XLT FX4, Jayco 26' Class A
Occupation
Retired, work is a four letter word.
I normally do my own work, including top end rebuilds, but so glad I decided to take mine to a local off road shop that specializes in lifts, he had it swapped out and alignment done in 3 hours for a reasonable amount while I had breakfast.
 

JesseS

Well-Known Member
First Name
Jesse
Joined
May 26, 2021
Threads
19
Messages
1,755
Reaction score
4,824
Location
NorCal (Roseville)
Vehicle(s)
2021 Ranger XLT FX4, Jayco 26' Class A
Occupation
Retired, work is a four letter word.
I kept my stock wheels and just replaced the tires. They only had 900 miles on them so I sold them on Craigslist and recouped some money towards the new ones. If you're planning on going off road I'd try and get new tires soon as the Hankooks aren't the best for off roading.

I have the same Eibach kit and while I use to do just about everything myself I paid a shop to do mine. Honestly it was easier to just drop it off and go to a job I know how to do and work to pay for it. lol As I get older I find myself not enjoying working on vehicles like I use to. Hopefully you get it straightened out and can enjoy driving it soon. Good luck!
THIS!!!!


Dgc333

Well-Known Member
First Name
Dave
Joined
Aug 24, 2021
Threads
17
Messages
1,742
Reaction score
4,112
Location
Massachusetts
Vehicle(s)
21 Ranger Lariat
Occupation
Engineer
20 mins per side?! shops have been telling me hours and hours.
Took me 2.5 hours start to finish working at a leisurely pace which also included running to the hardware store for a 35mm socket (which I thought I had) and a Coke break between sides.

I have a Tremor which has Fox coil overs so I was just adding a spacer on top of the coil over to level it. In this situation you do not even need to loosen the nuts on the bottom of the coil over just pop the top of the shock out, put the spacer on and pop the top back into place.

I have a lift and I feel comfortable saying if I worked quickly I could get both sides done in an hour. If you are getting quotes of several hours it is because they have never done a Ranger and are padding the quote to unsure they have more than enough time.
 

JohnnyO

Well-Known Member
First Name
Jon
Joined
Apr 8, 2021
Threads
23
Messages
1,969
Reaction score
6,143
Location
Pittsburgh, PA
Vehicle(s)
2020 Ranger STX 4x4
Occupation
Asst. Greenskeeper, Bushwood Country Club
Thing is if you take the hub nut off to pop out the axle shaft you need a big ass torque wrench to put it back on because it needs torqued to like 185 ft. lb. Mine only goes to 100 and my bud's was 150 so we didn't pop it off. We were close to having the strut out but didn't like the odds of getting it back in with the spacer on top of it.
 

Msfitoy

Well-Known Member
First Name
Sid
Joined
Mar 5, 2019
Threads
67
Messages
9,192
Reaction score
28,360
Location
North Carolina
Vehicle(s)
2019 Ranger, 2003 MINI Cooper S, 2021 Honda CT125
Occupation
NWO Robot Polisher
Vehicle Showcase
1
I've gone no where near an engine tear down like you have and took the dive with the same kit...not knowing any better...although this was before the axle nut trick was known so to get the strut in I had to push down on lower arm and over extend the drive shaft which pulled something out of joint...but luckily it went back in after a few panicky minutes of cursing...same thing happened on the other side...not doing that again...
 

DukeCanBuildit

Well-Known Member
First Name
Duke
Joined
Jul 27, 2020
Threads
66
Messages
9,627
Reaction score
46,072
Location
Kitchener, Ontario
Vehicle(s)
2019 XLT SuperCab - FTW!
Occupation
Retired (P/T) Caregiver (F/T)
Vehicle Showcase
1
I still don’t understand why many take that approach. It’s far easier to mark the lower control arm mount adjustment points and then crack both sides and drop the lower control arm from the frame mount. You’re going to need an alignment anyways after doing the shock swap over. This negates the CV joint separation doing it this way. Sorry for the pain but you could try taking the boot clamps off so you can see the alignment and then a sod hammer tap should get it reseated. Then you just need new compression clamps and you’re good to go.
I think this method is used by so many because there are some “step by step” videos out there. Unfortunately, they miss a few important steps.

The LCA method definitely looks easier.
 

DukeCanBuildit

Well-Known Member
First Name
Duke
Joined
Jul 27, 2020
Threads
66
Messages
9,627
Reaction score
46,072
Location
Kitchener, Ontario
Vehicle(s)
2019 XLT SuperCab - FTW!
Occupation
Retired (P/T) Caregiver (F/T)
Vehicle Showcase
1
Thing is if you take the hub nut off to pop out the axle shaft you need a big ass torque wrench to put it back on because it needs torqued to like 185 ft. lb. Mine only goes to 100 and my bud's was 150 so we didn't pop it off. We were close to having the strut out but didn't like the odds of getting it back in with the spacer on top of it.
221 lb.ft
 

Attachments

Msfitoy

Well-Known Member
First Name
Sid
Joined
Mar 5, 2019
Threads
67
Messages
9,192
Reaction score
28,360
Location
North Carolina
Vehicle(s)
2019 Ranger, 2003 MINI Cooper S, 2021 Honda CT125
Occupation
NWO Robot Polisher
Vehicle Showcase
1

Whiplash

Well-Known Member
First Name
Kern
Joined
Oct 17, 2021
Threads
2
Messages
270
Reaction score
848
Location
The southwest Missouri Ozarks
Vehicle(s)
2021 Ranger XLT FX4 / 2004 Mazda RX8
Occupation
Retired
I think i'd drop that lca next time around.
I was lucky on my first coilover swap, doing the Ford Tech manual ( your way) method . When I got to the prying down on the LCA to get the strut studs on the stock FX4 to clear, I got uncomfortable leaning on a 4 ft
Pry bar. So I used a cut off wheel to cut the studs off flush with the bottom of the strut.

I"m going to go back thru my history of posts to find and share the how to
for the disconnrct LCA method I used on my next 2 swaps.
 

DukeCanBuildit

Well-Known Member
First Name
Duke
Joined
Jul 27, 2020
Threads
66
Messages
9,627
Reaction score
46,072
Location
Kitchener, Ontario
Vehicle(s)
2019 XLT SuperCab - FTW!
Occupation
Retired (P/T) Caregiver (F/T)
Vehicle Showcase
1
Oh well...glad I didn't try to take the nut off lol...
It’s easy enough if you have a BFTW.

The Ford instructions are great and if people use this method, they can make it even easier by removing the calliper and rotor. Ford mentions the hex-holding feature right up front, explains the axle nut issue, shows you which nuts to toss out, and includes the part numbers for replacing them and torque specs.

They even tell you the proper way to torque the axle nut and how to re-aim the headlights.
 

JohnnyO

Well-Known Member
First Name
Jon
Joined
Apr 8, 2021
Threads
23
Messages
1,969
Reaction score
6,143
Location
Pittsburgh, PA
Vehicle(s)
2020 Ranger STX 4x4
Occupation
Asst. Greenskeeper, Bushwood Country Club

Whiplash

Well-Known Member
First Name
Kern
Joined
Oct 17, 2021
Threads
2
Messages
270
Reaction score
848
Location
The southwest Missouri Ozarks
Vehicle(s)
2021 Ranger XLT FX4 / 2004 Mazda RX8
Occupation
Retired
I was lucky on my first coilover swap, doing the Ford Tech manual ( your way) method . When I got to the prying down on the LCA to get the strut studs on the stock FX4 to clear, I got uncomfortable leaning on a 4 ft
Pry bar. So I used a cut off wheel to cut the studs off flush with the bottom of the strut.

I"m going to go back thru my history of posts to find and share the how to
for the disconnrct LCA method I used on my next 2 swaps.
Not a step by step just a list of the nuts and bolts for the LCA drop method...I'm not able to post a direct link to my post,... but it can be found in 5G
Forum Suspension/ Chassis .thread titled "Labor Shop Time for Shock/Strut Installation 2019 4x4 Lariat"...thread started by Progeny2021
...March 23 2022..
Post #15 by Whiplash...

A couple tips: clearly mark the Alignment Cam bolts with paint pen or Magic Marker to ge them really close when bolting LCA back to frame. Jack was used under LCA for lowering and reinstalling.. Disconnecting the tie rod end ball joint from spindle is not absolutely neccessary. I did it just so I would have more room to swing my ratchet on the strut to LCA bolts...
Sponsored

 
Last edited:


Top