OP
OP
XionUAV
Well-Known Member
- Thread starter
- #46
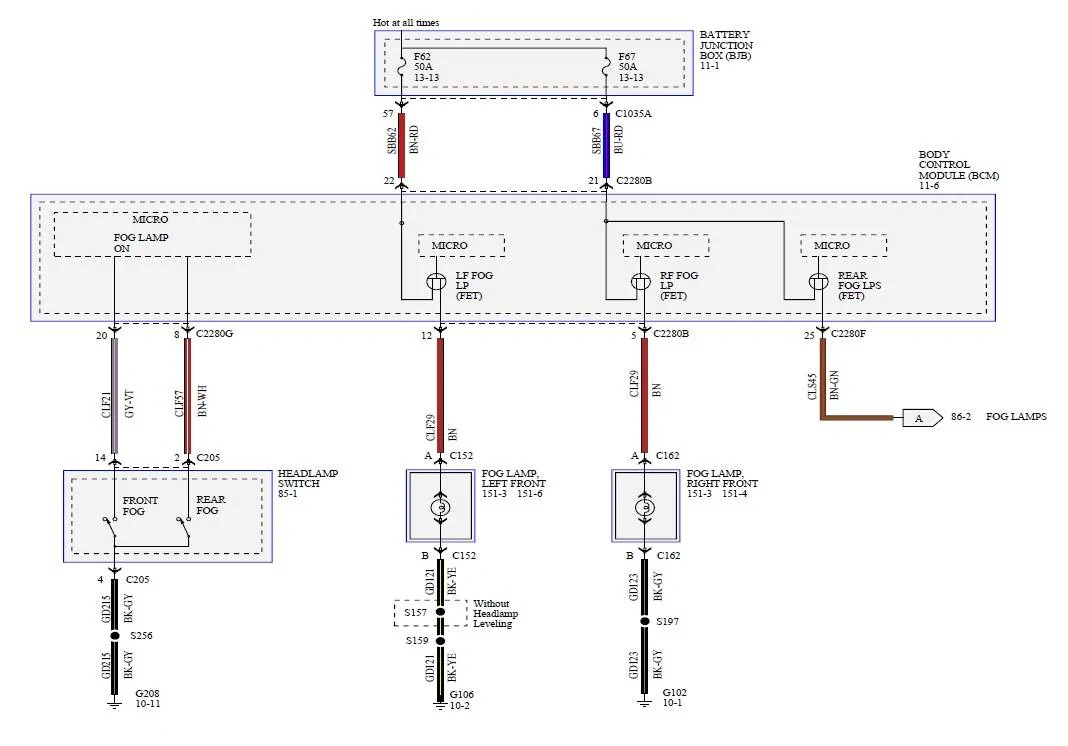
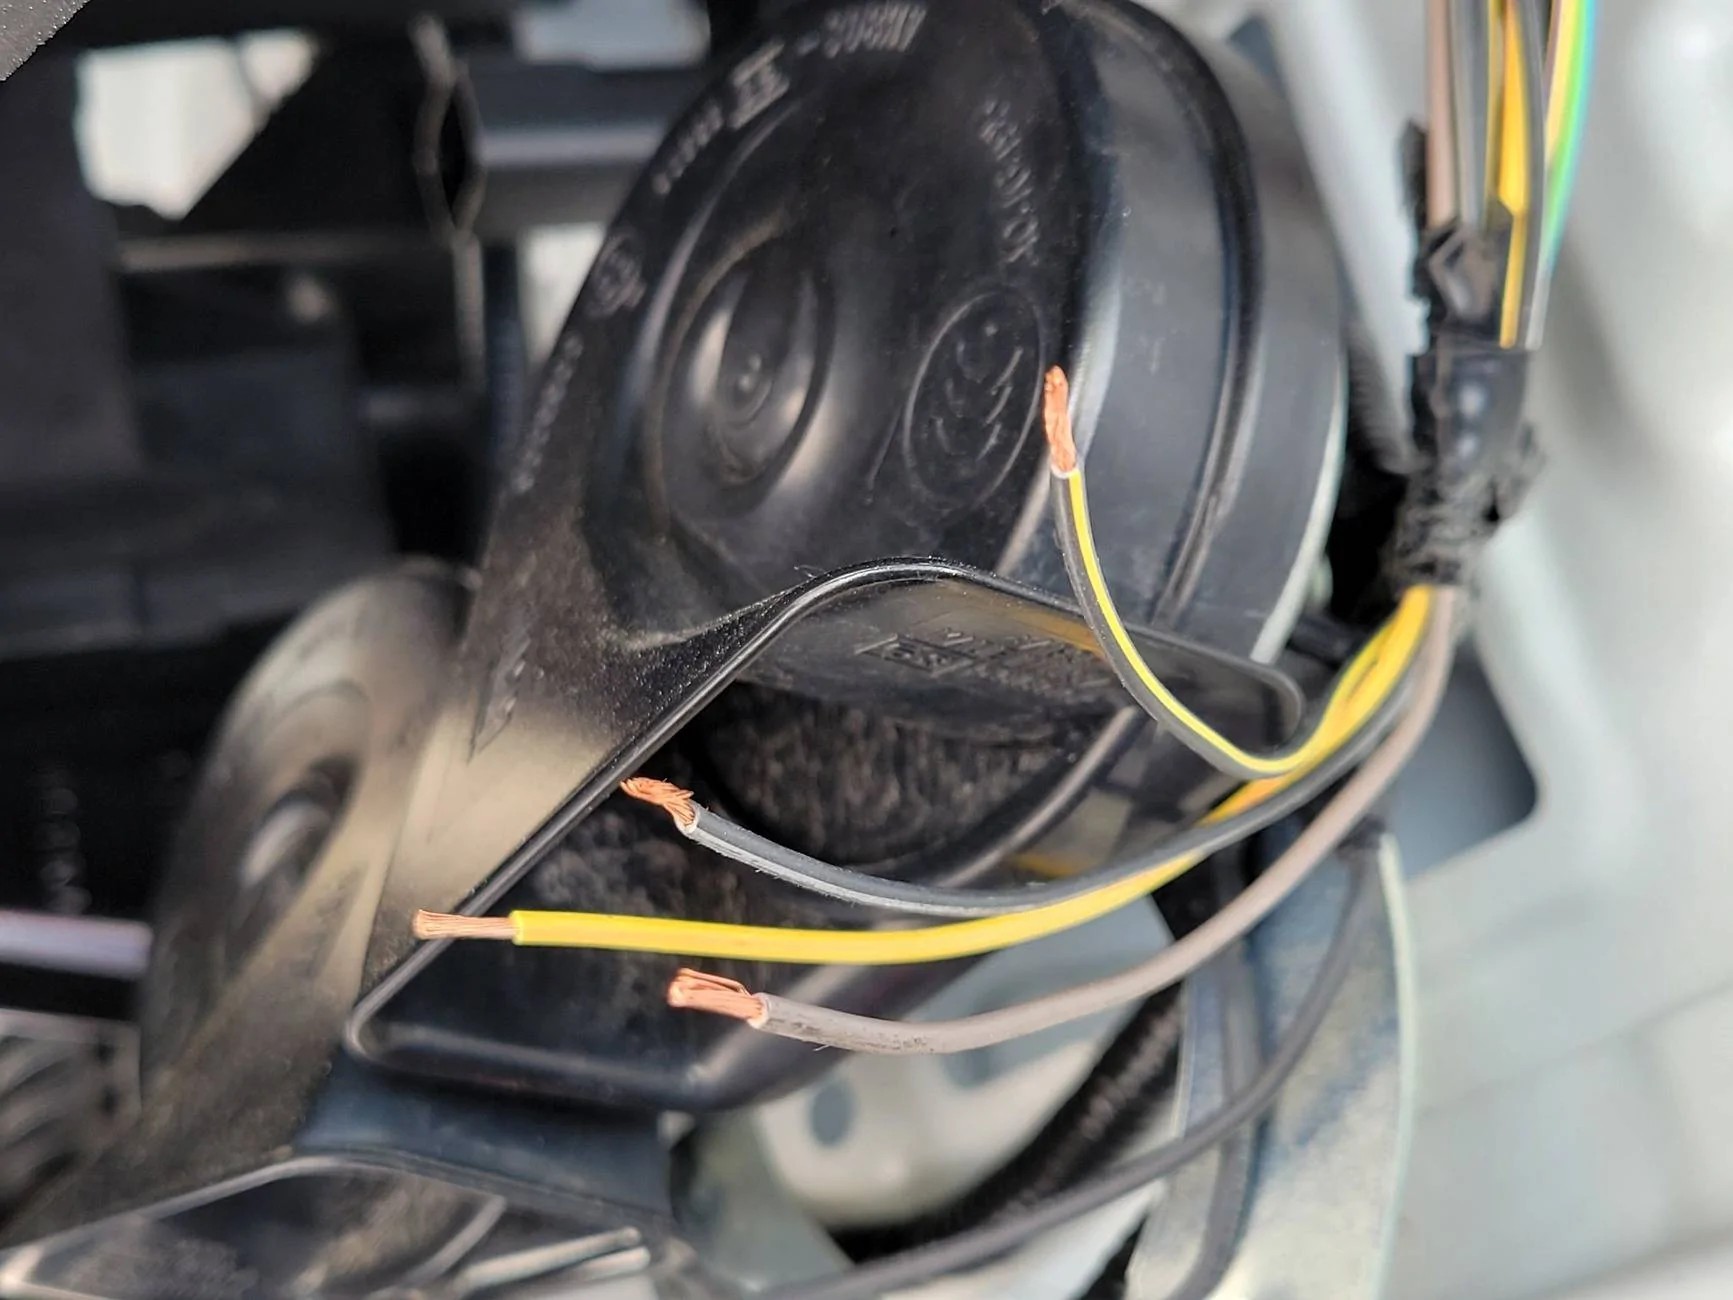
Would you be kind enough to check your wiring diagrams to see if your version is different than mine? Mine shows a brown wire for both left and right positive fog light wires. My wiring has one brown and one yellow/pink for positive. Both black/yellow, black/gray are ground as shown. Obviously one pair is supposed to be left and one right.Update - Well I do not have a detailed exploded view like I thought, it's just a generic and the same as the dealers IPCs, so it is of no help in showing the internals of c-clips etc..
Since both black wires are ground, it doesn't really matter which positives are which. But me being me, I'd like to wire them correctly with the left pair on the left side and right pair on the right side. Thanks.
Sponsored