Sponsored

2.3L EcoBoost SP-594 Spark Plug Change Write-Up (60k Miles)

mgallo13

Well-Known Member
First Name
Matt
Joined
May 28, 2020
Threads
8
Messages
206
Reaction score
404
Location
Neptune City, NJ
Vehicle(s)
2015 MM Focus ST (sold), 2020 MM Ford Ranger XLT
Occupation
Financial Controller
Vehicle Showcase
1
If you’re itching to wrench, now wouldn’t be a bad time.

Might as well add the DPFE sensor (the primary cause of our truck surging/bucking(there’s a 42 page thread on it)) to your project list if you haven’t already. Mine is on the way and another write-up to follow. :crackup:
@airline tech convinced me halfway through that thread I need a new one.
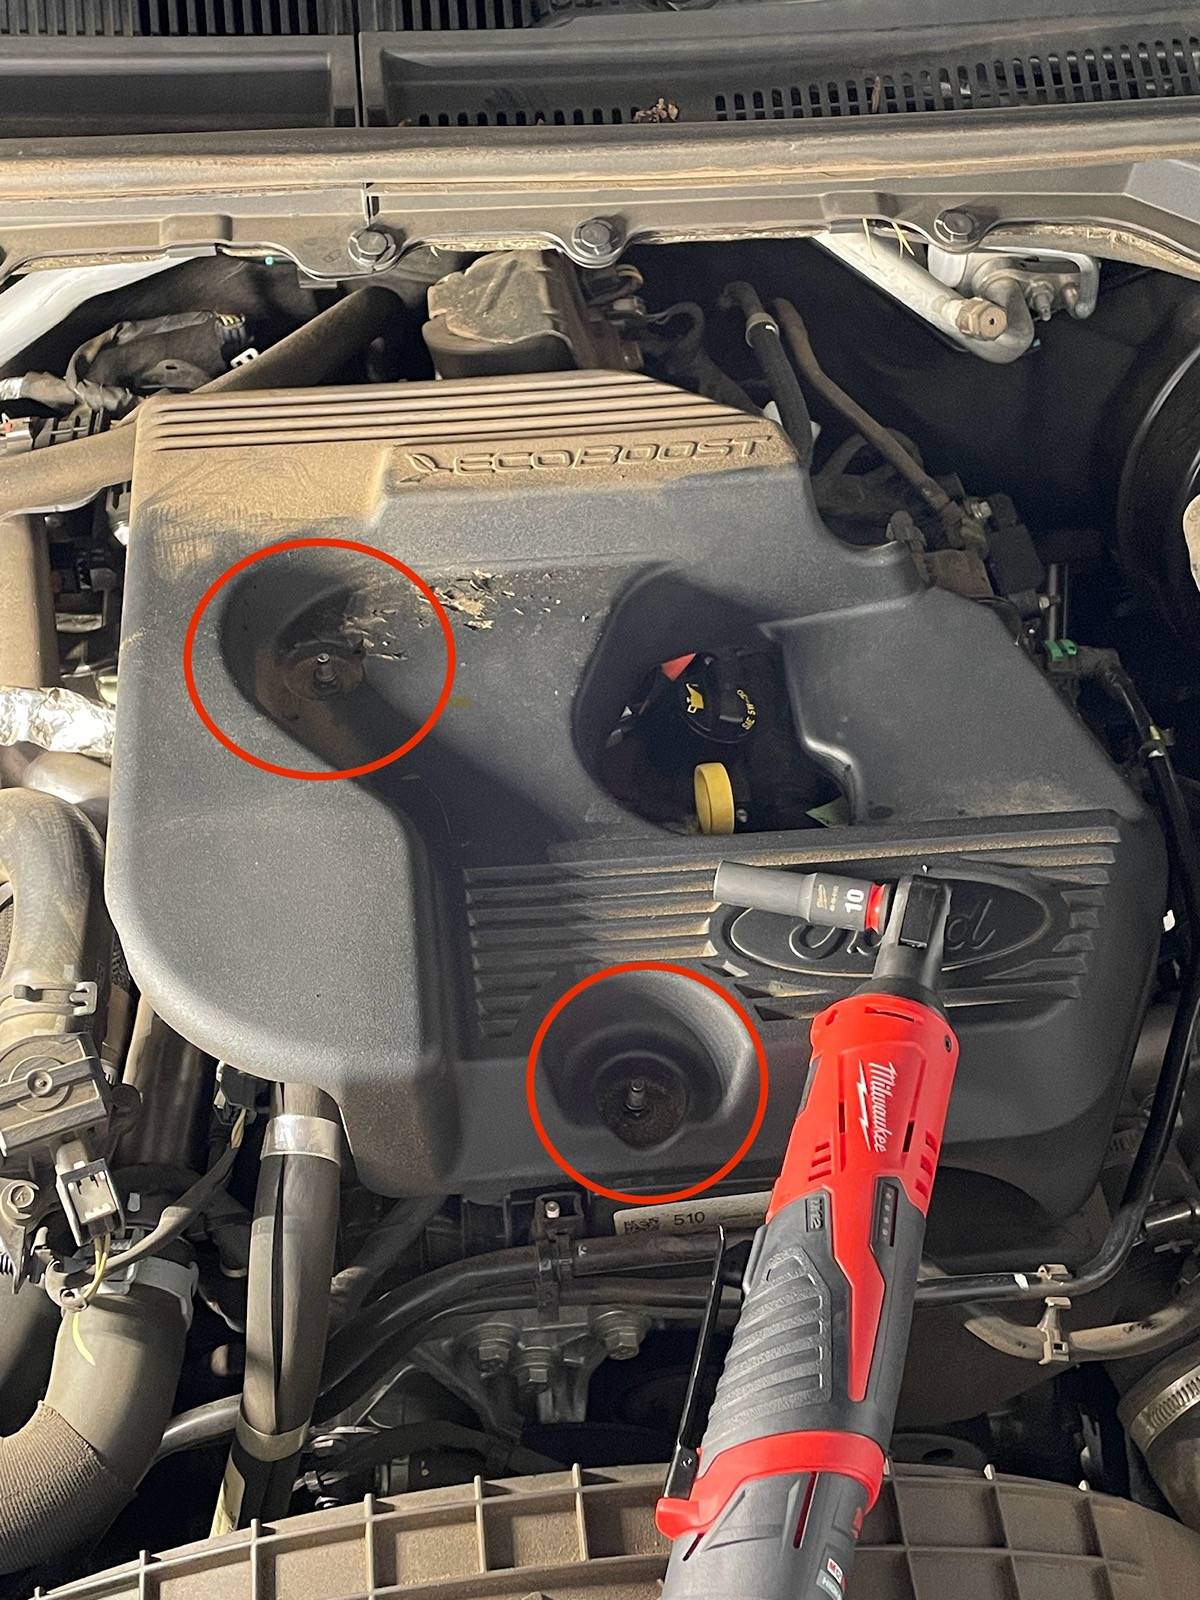
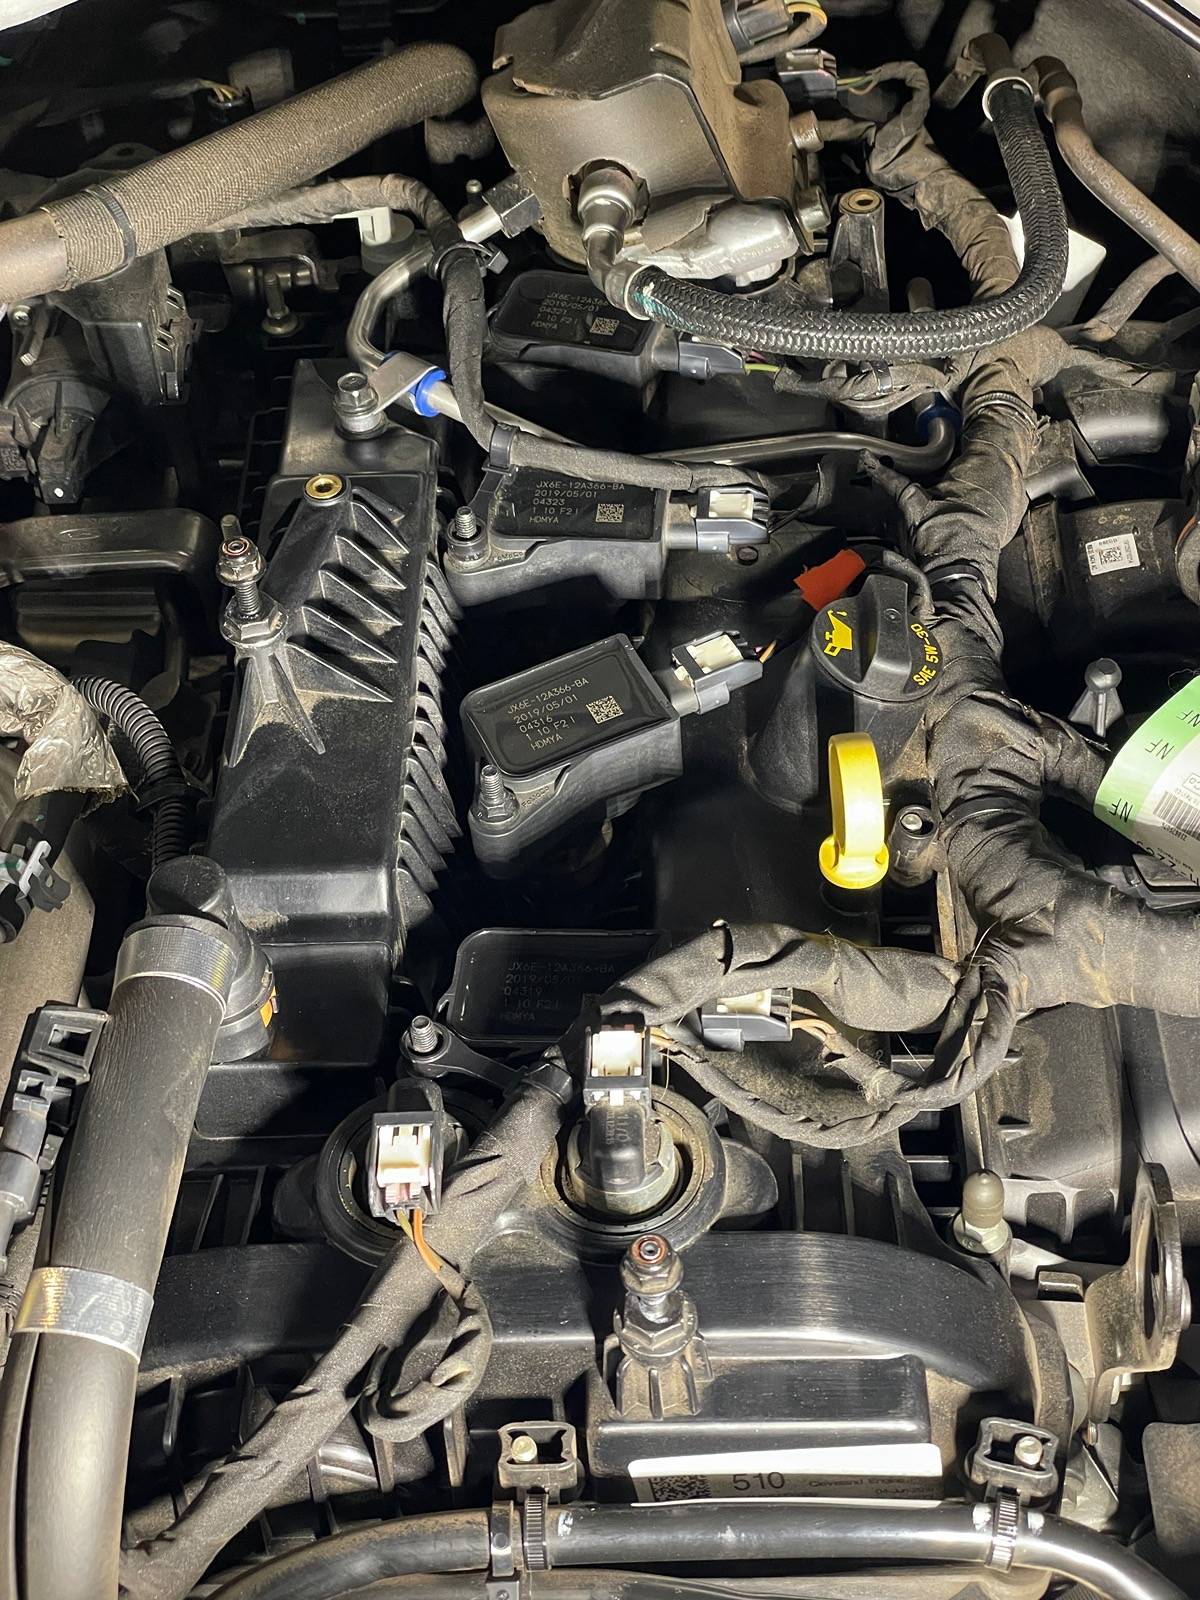
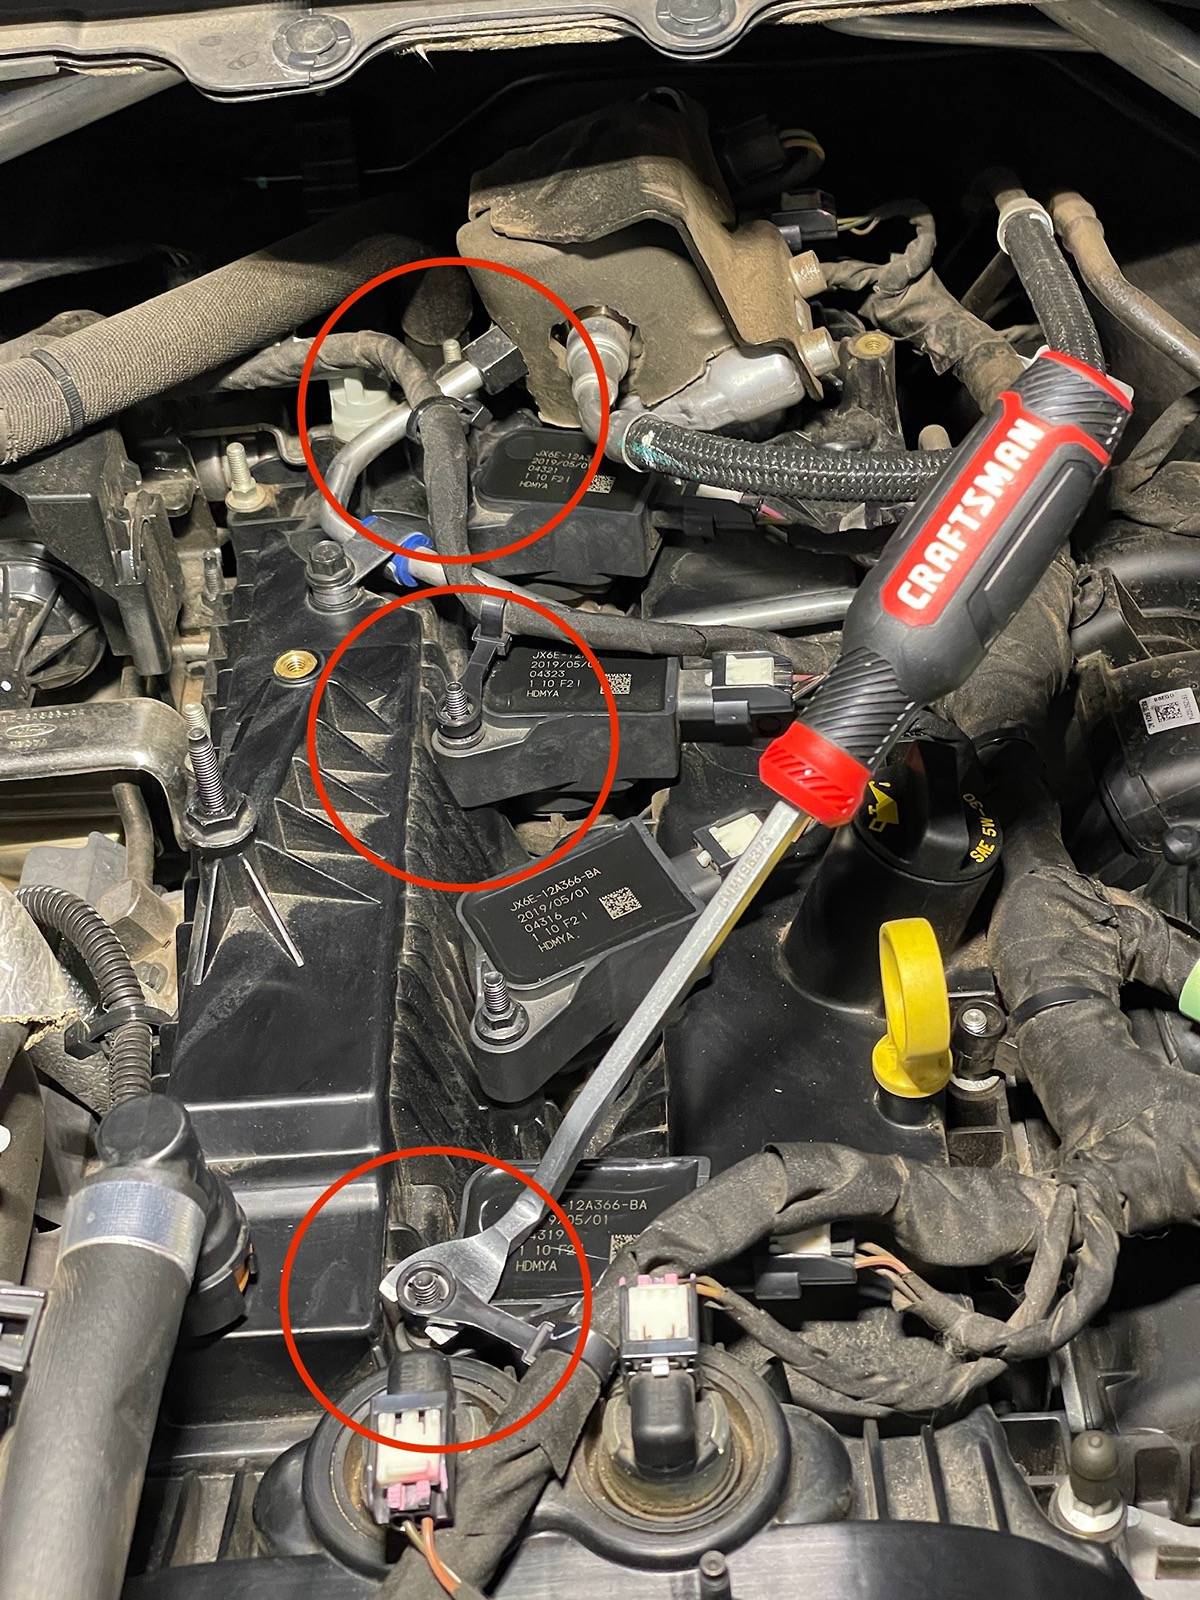
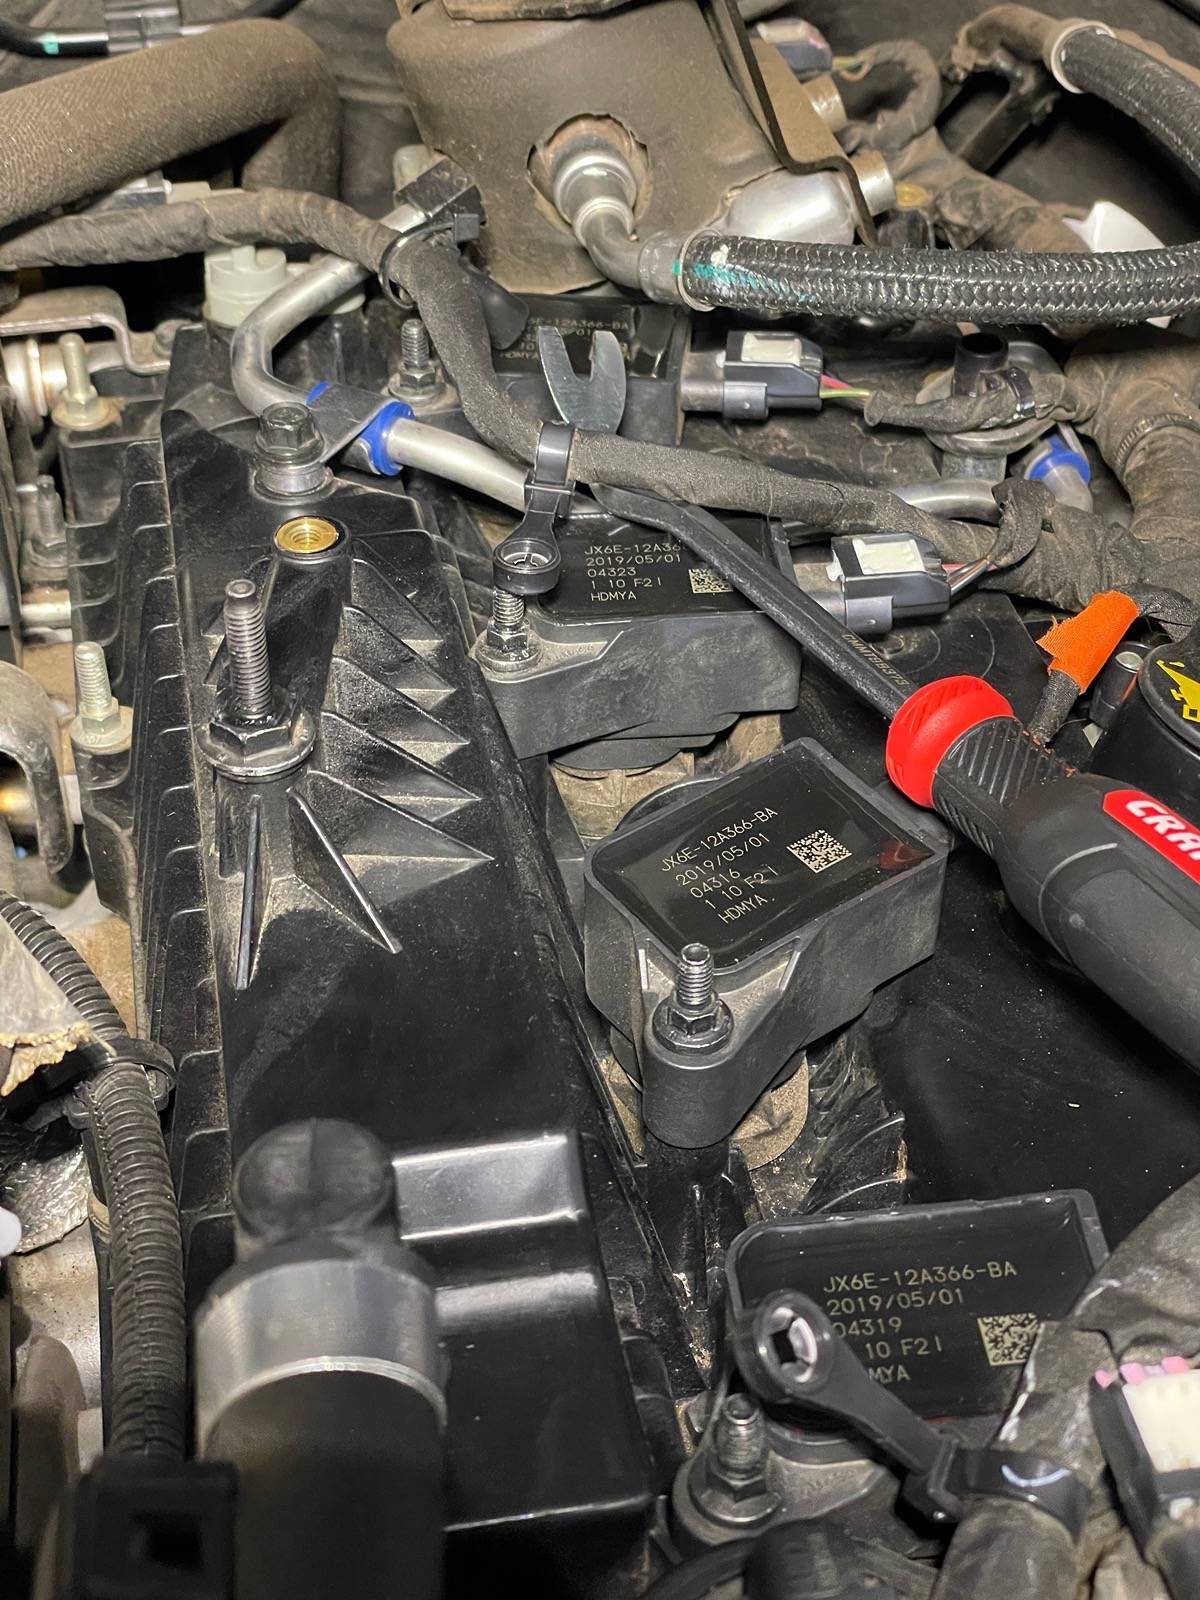
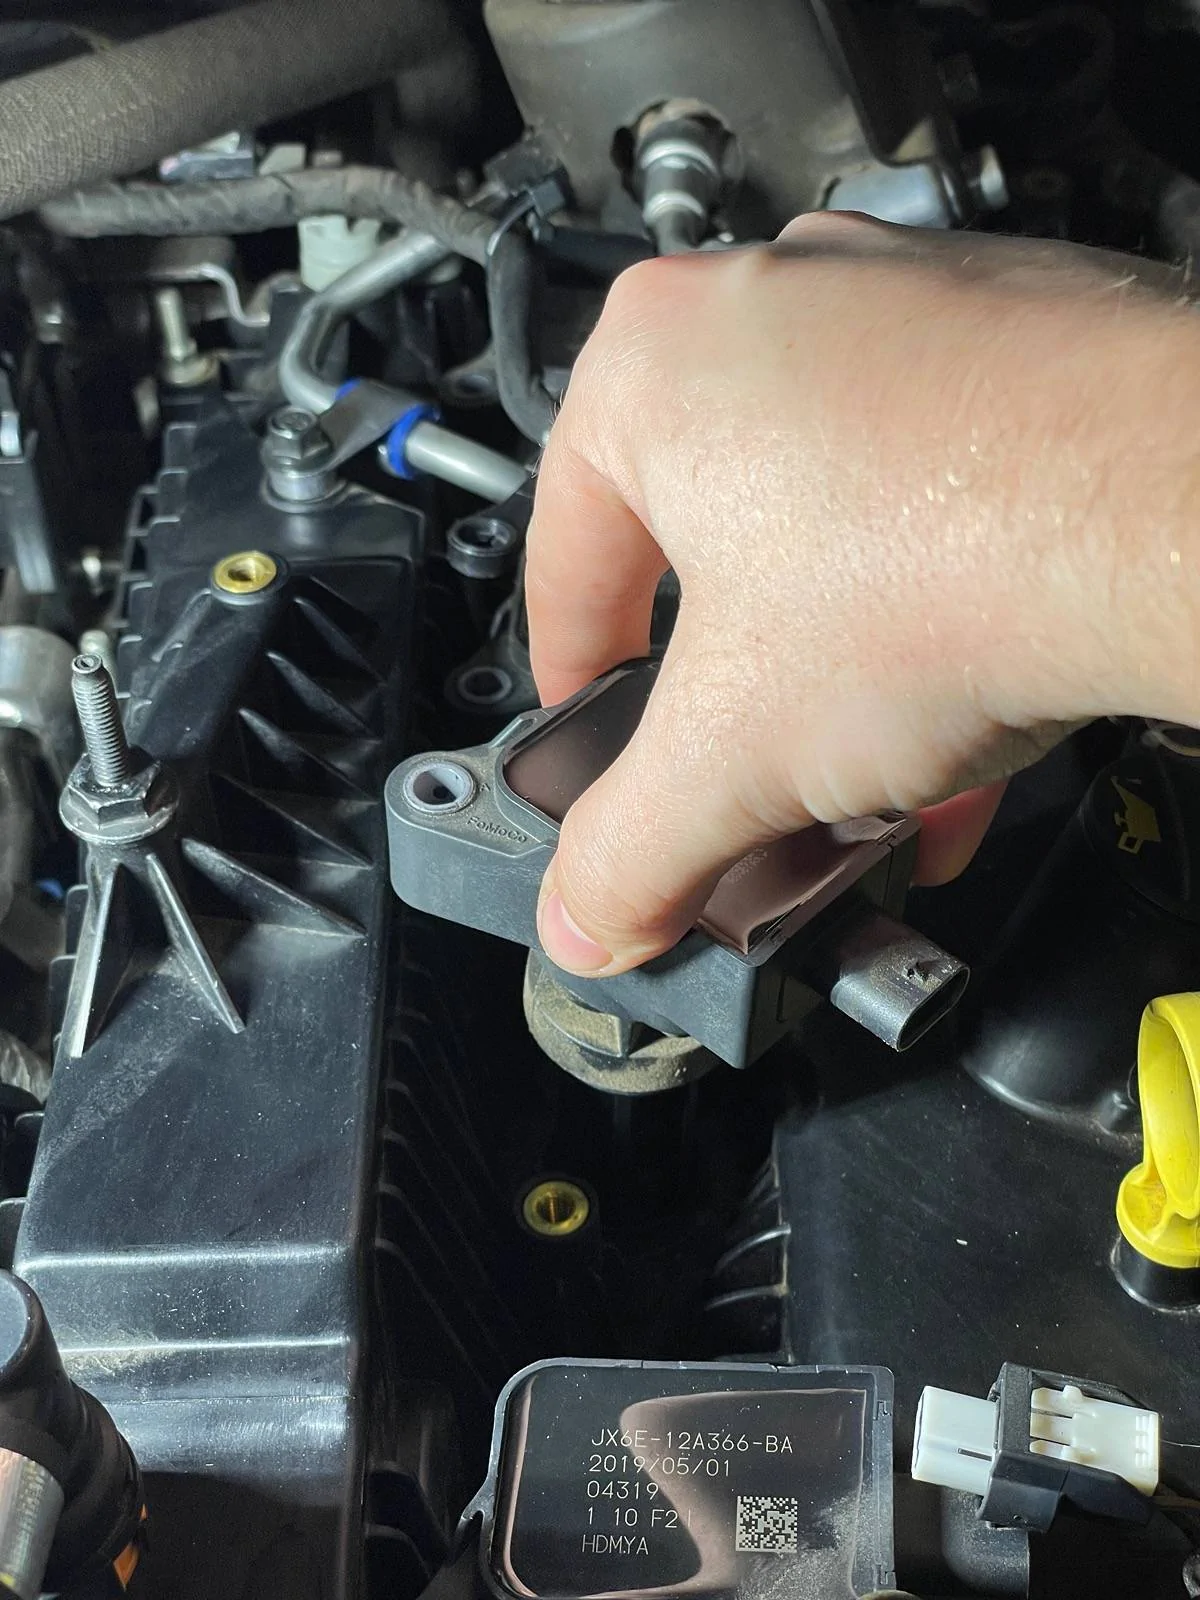
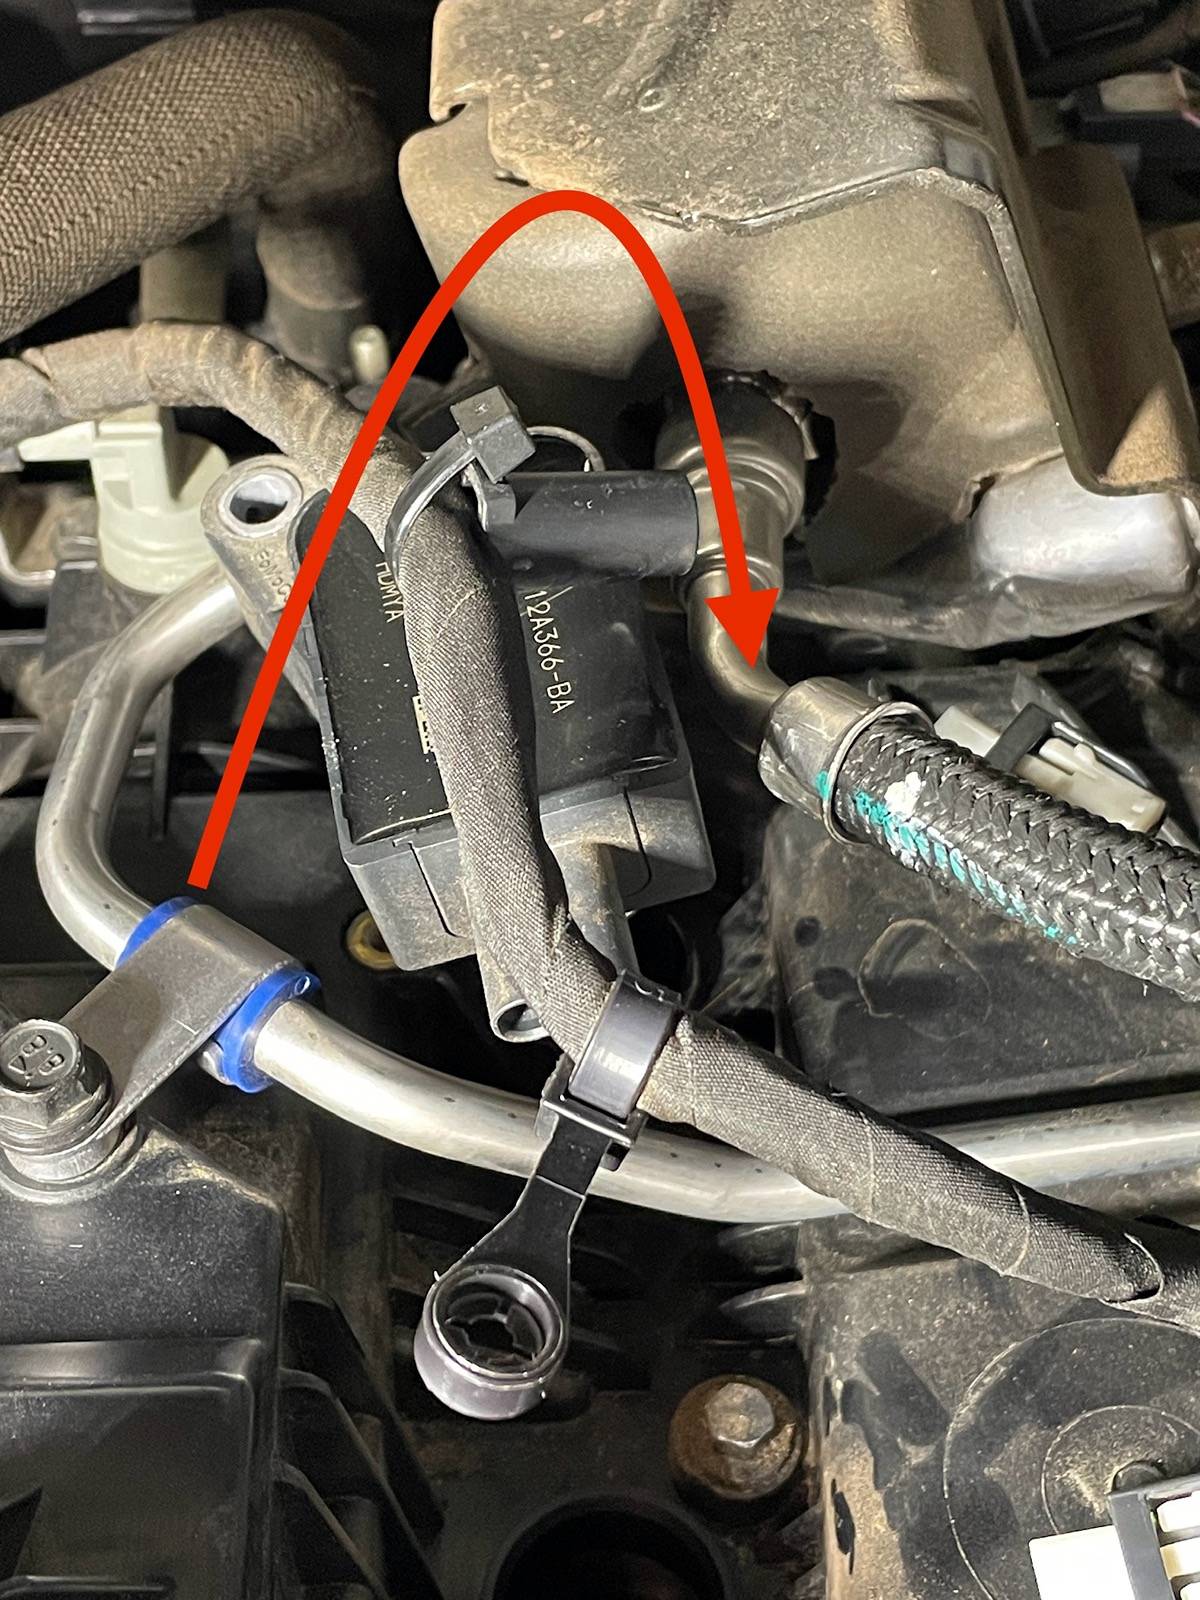
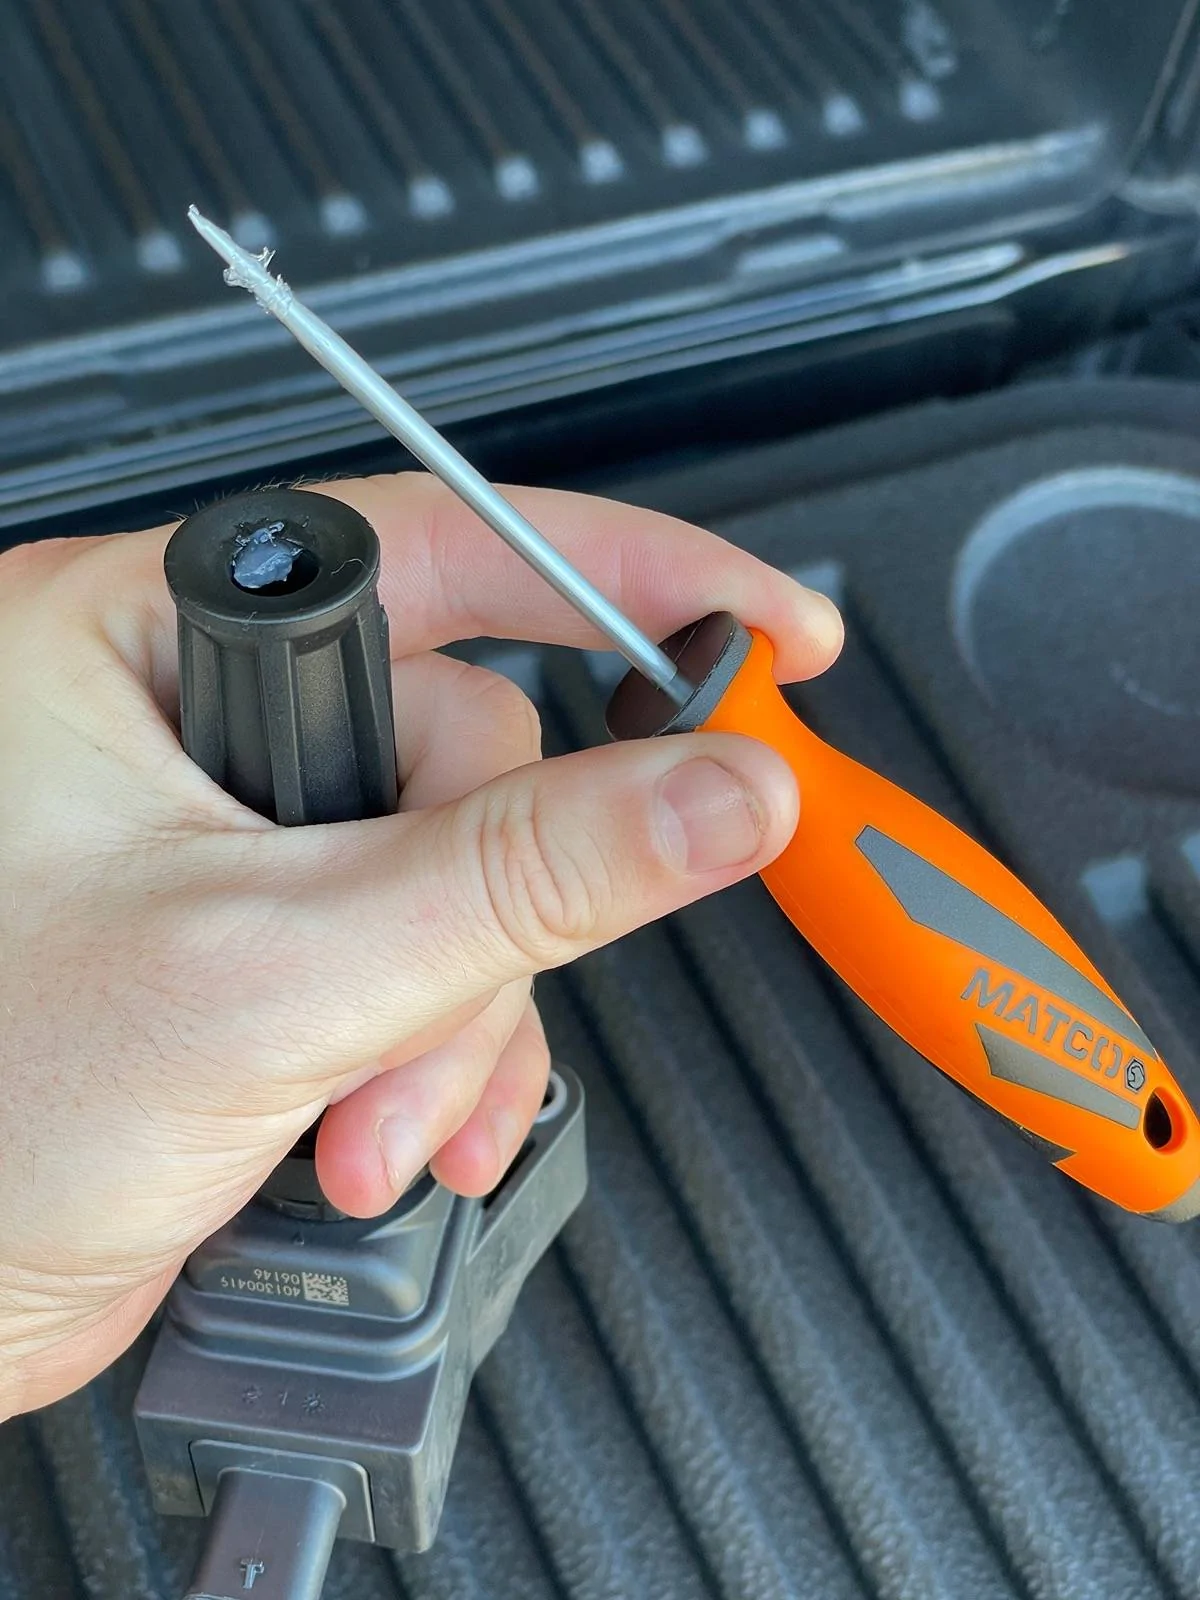
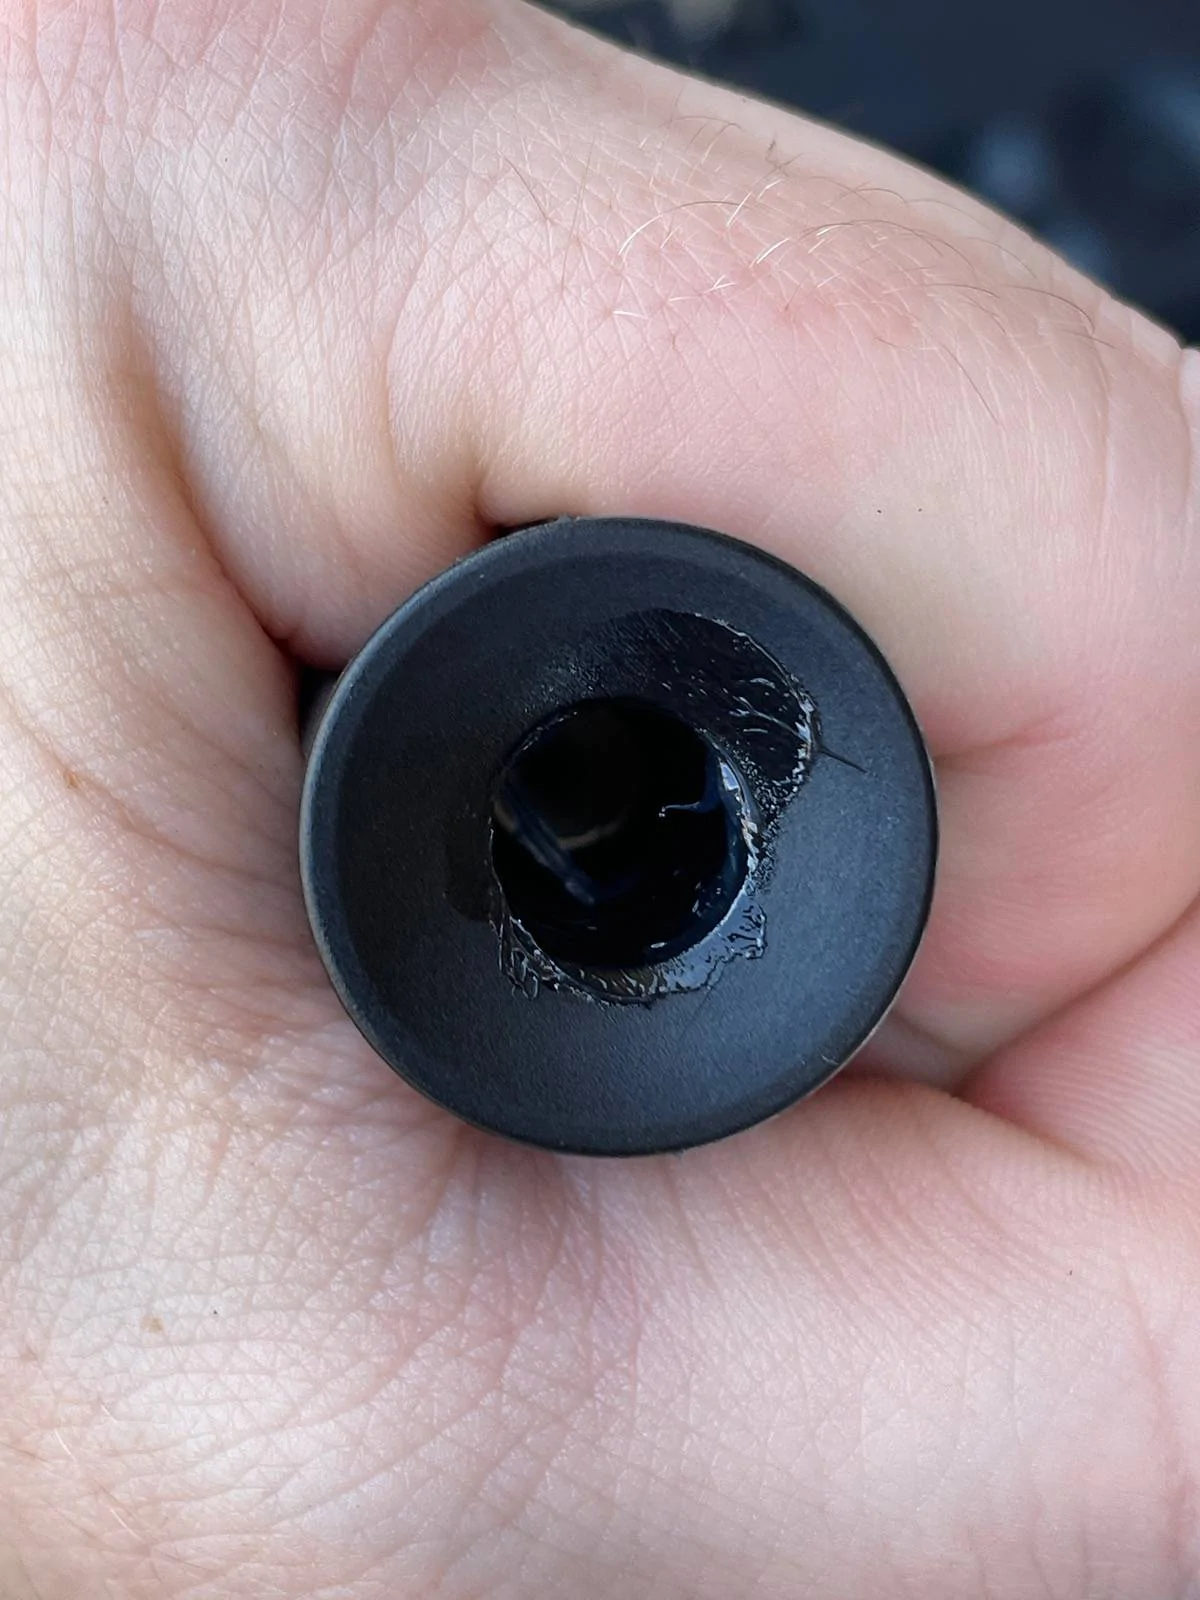
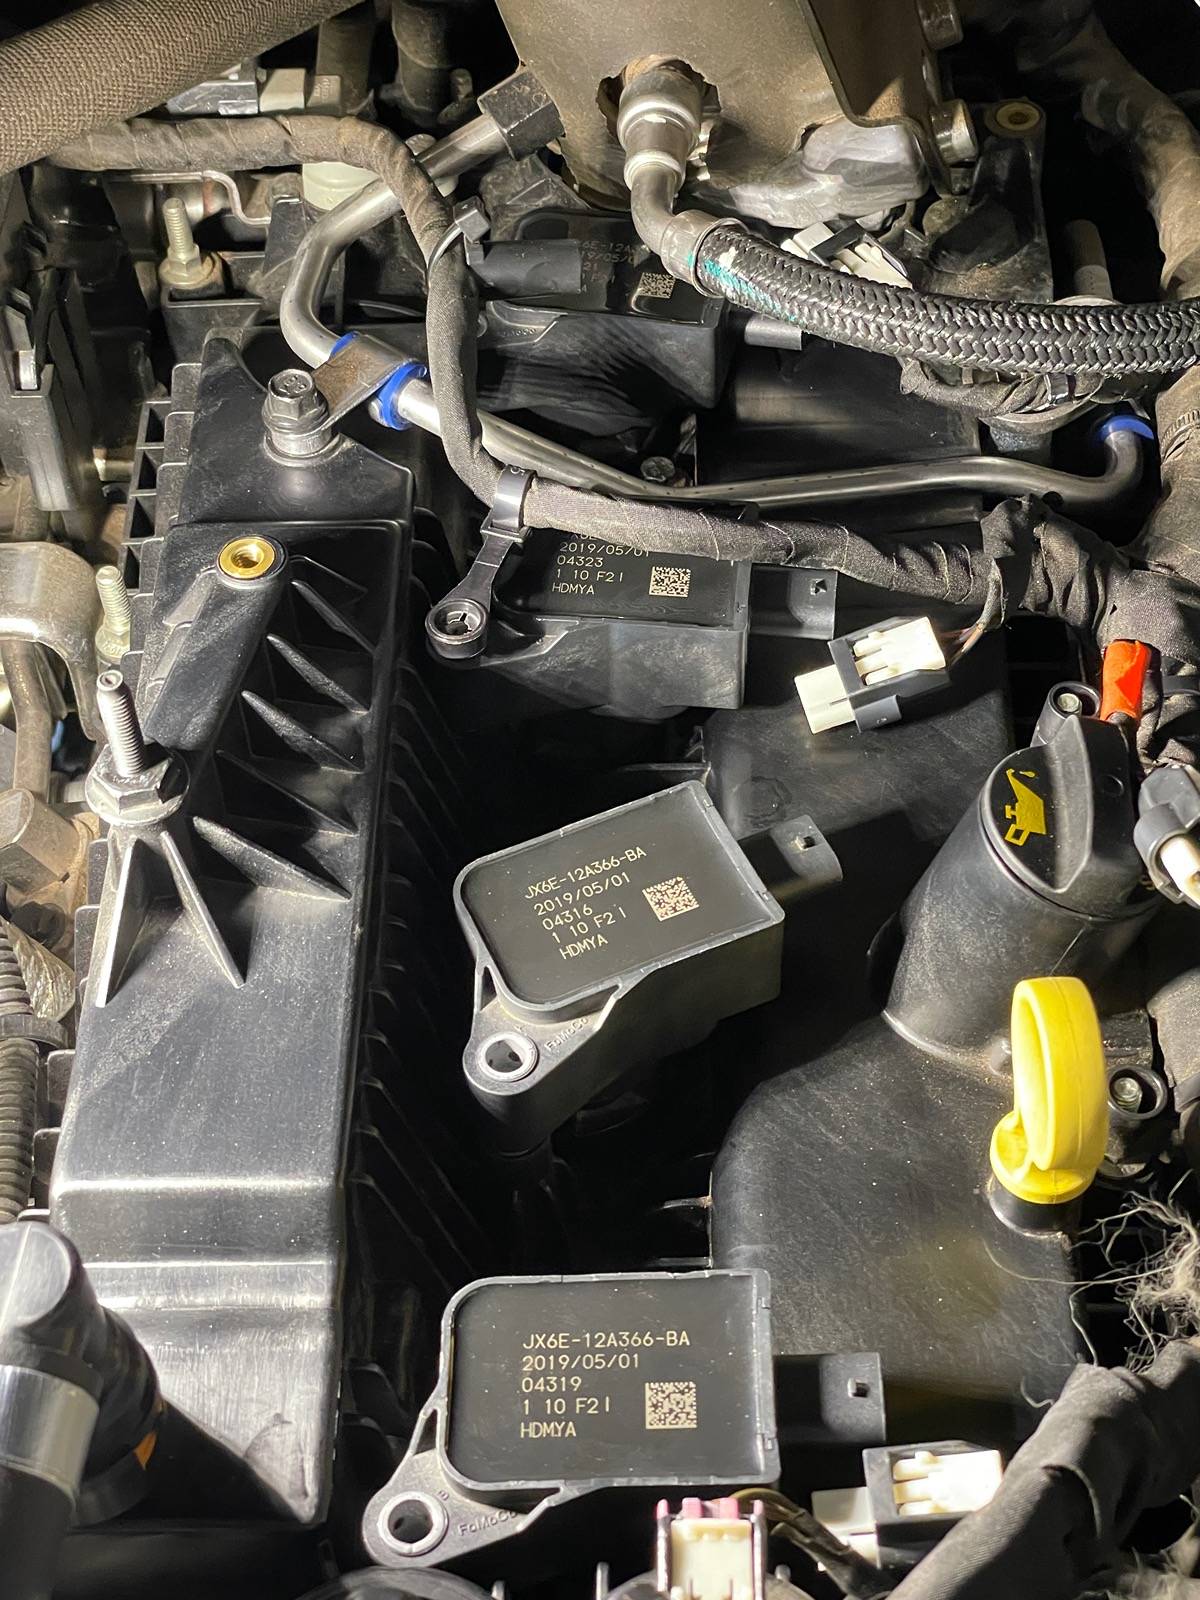
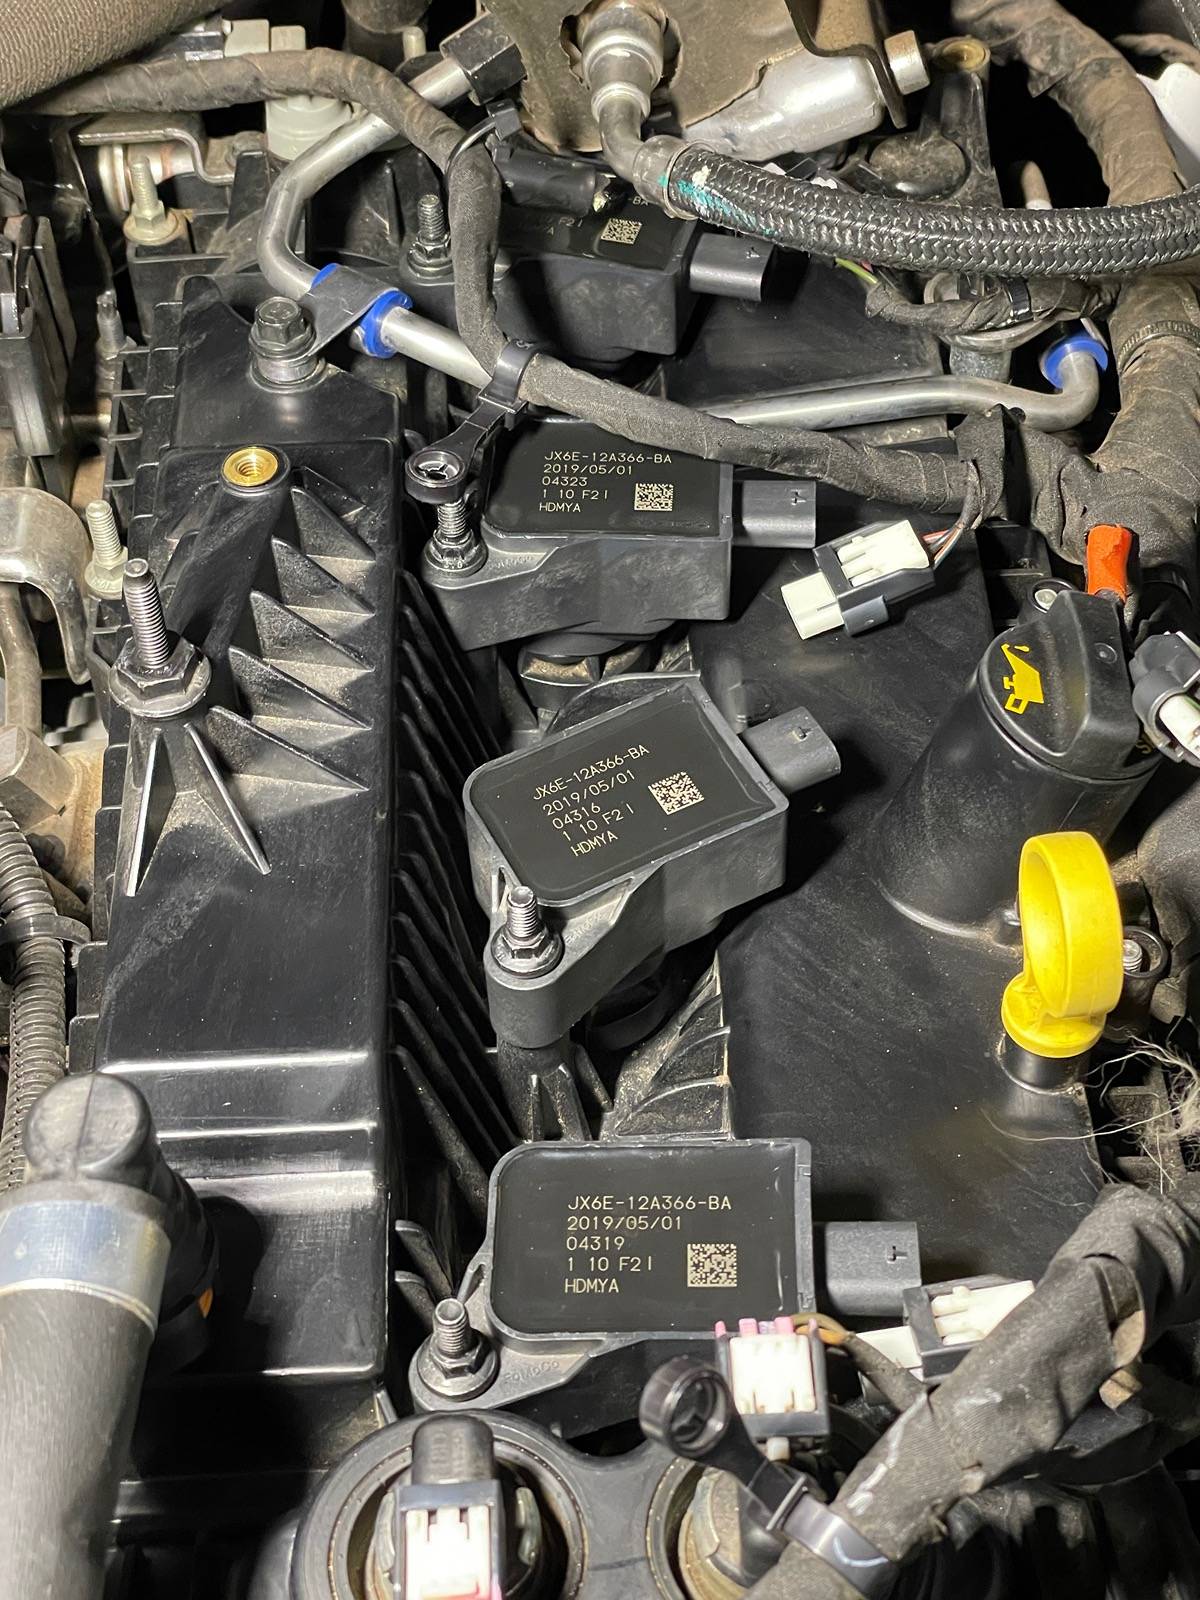
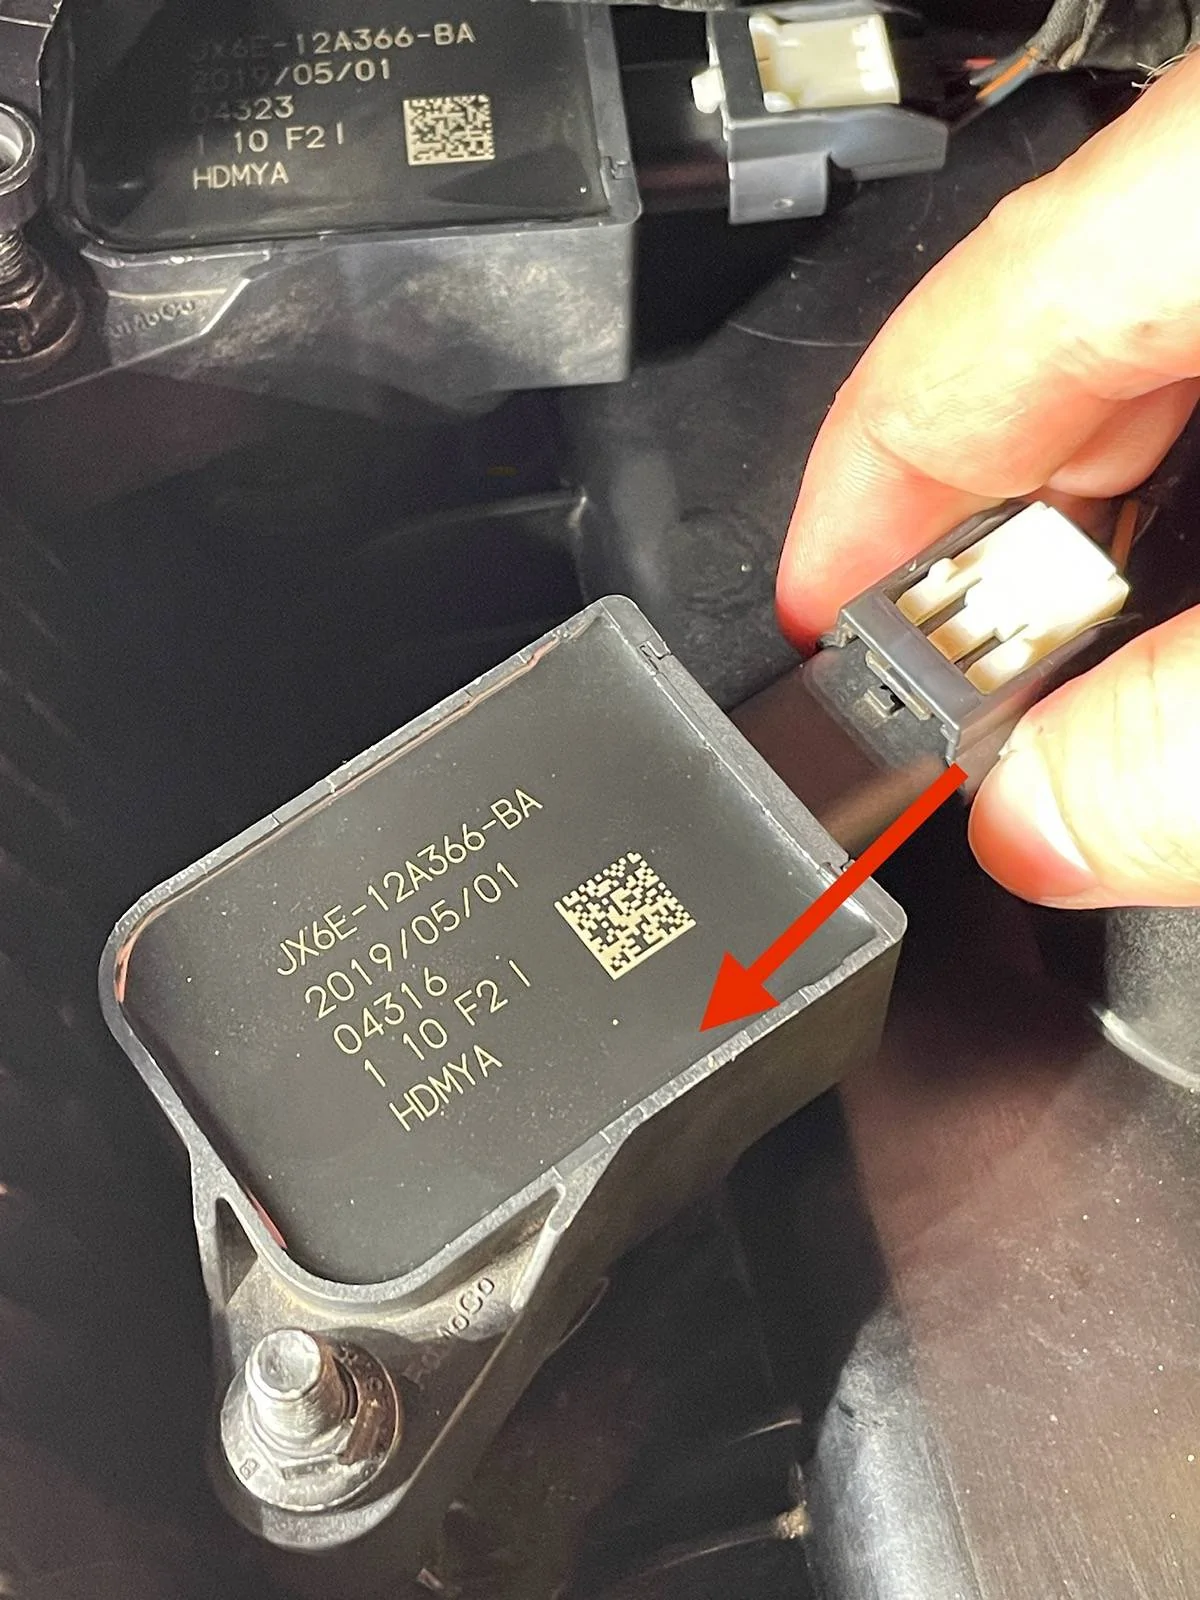
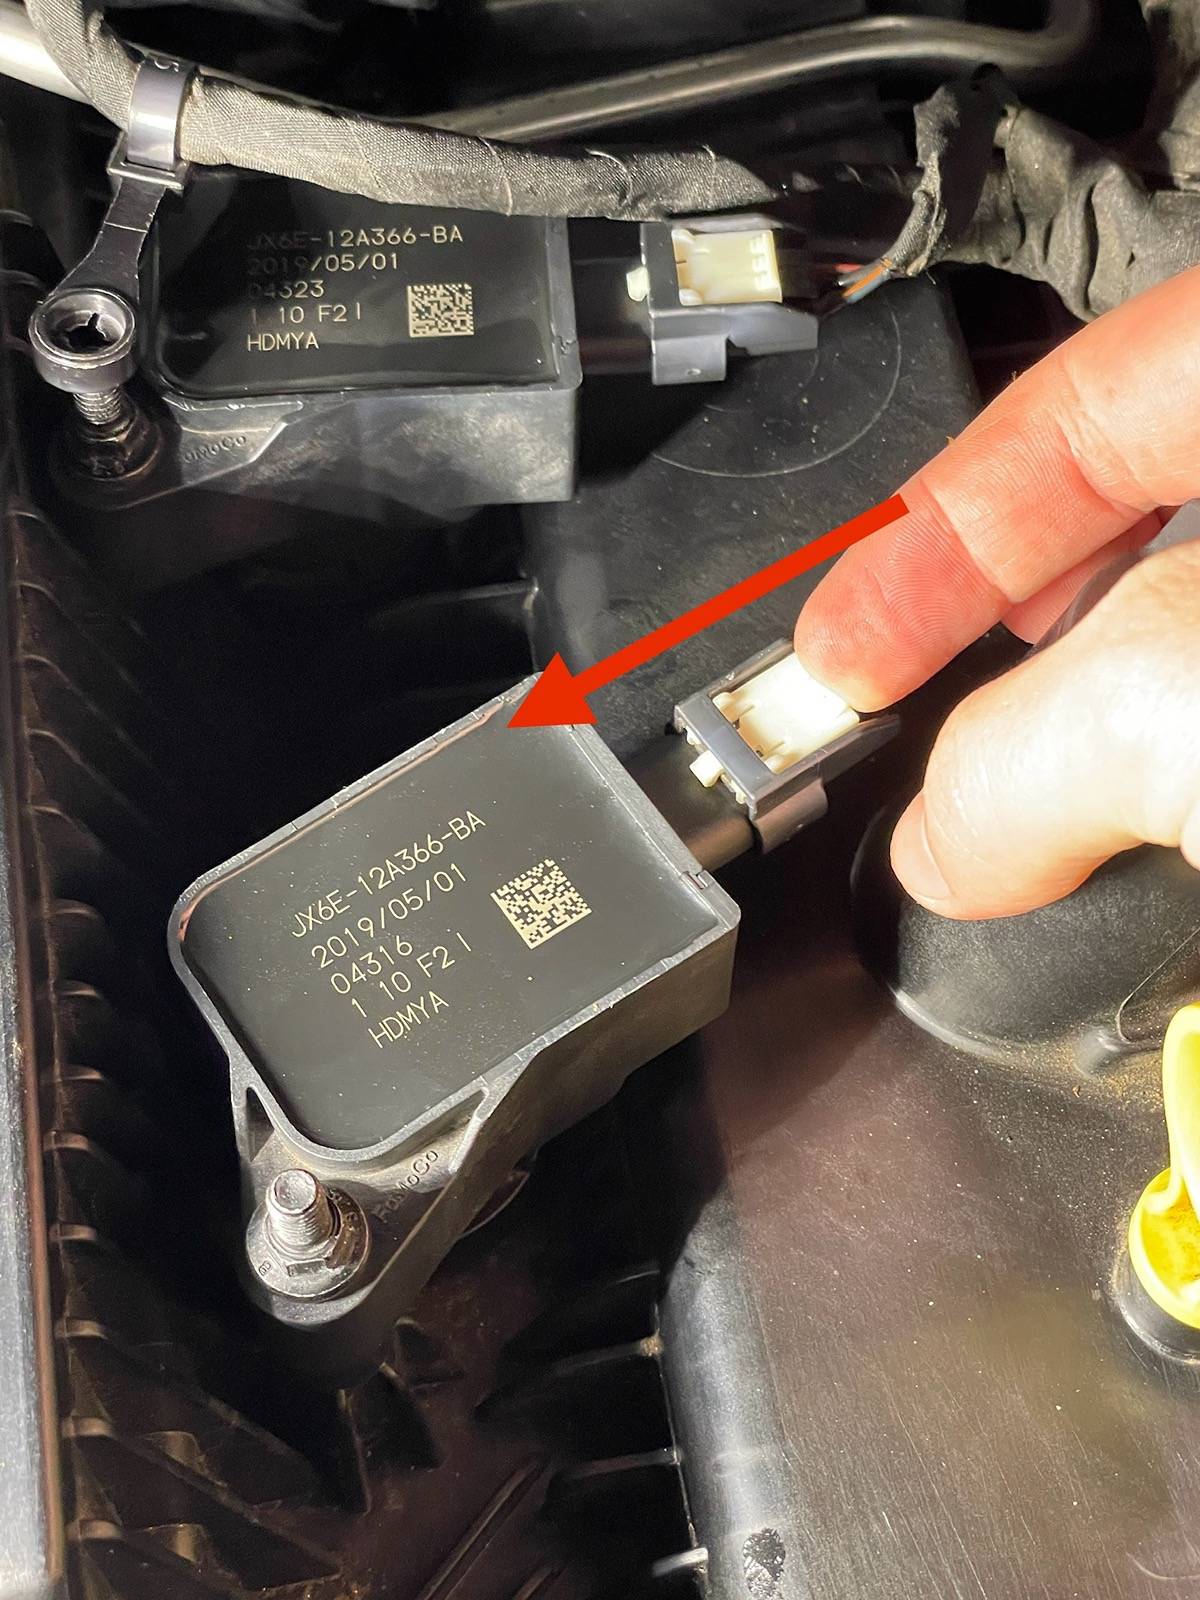
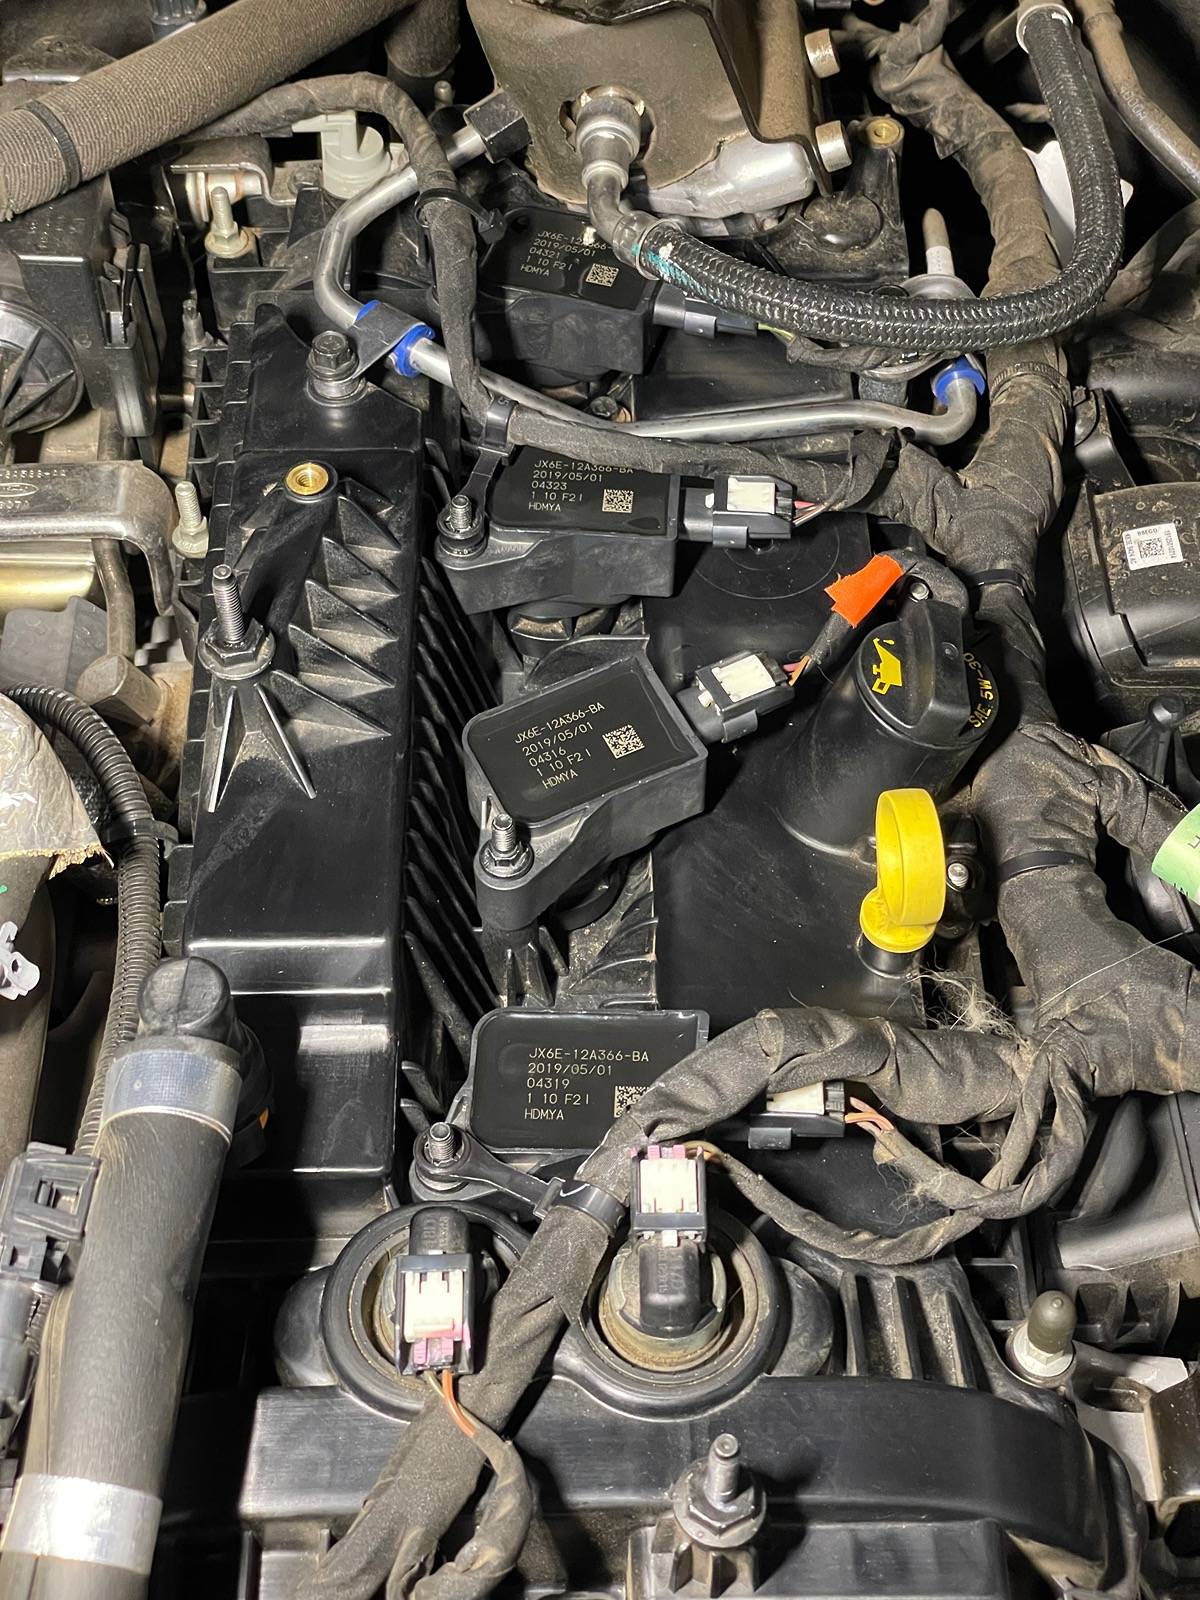
already handled the DPFE around 45k. Had the part sitting in the shed until even my gf was noticing the surging. Glad I did it. Such a rinkydink little part with such a huge affect on driving quality...

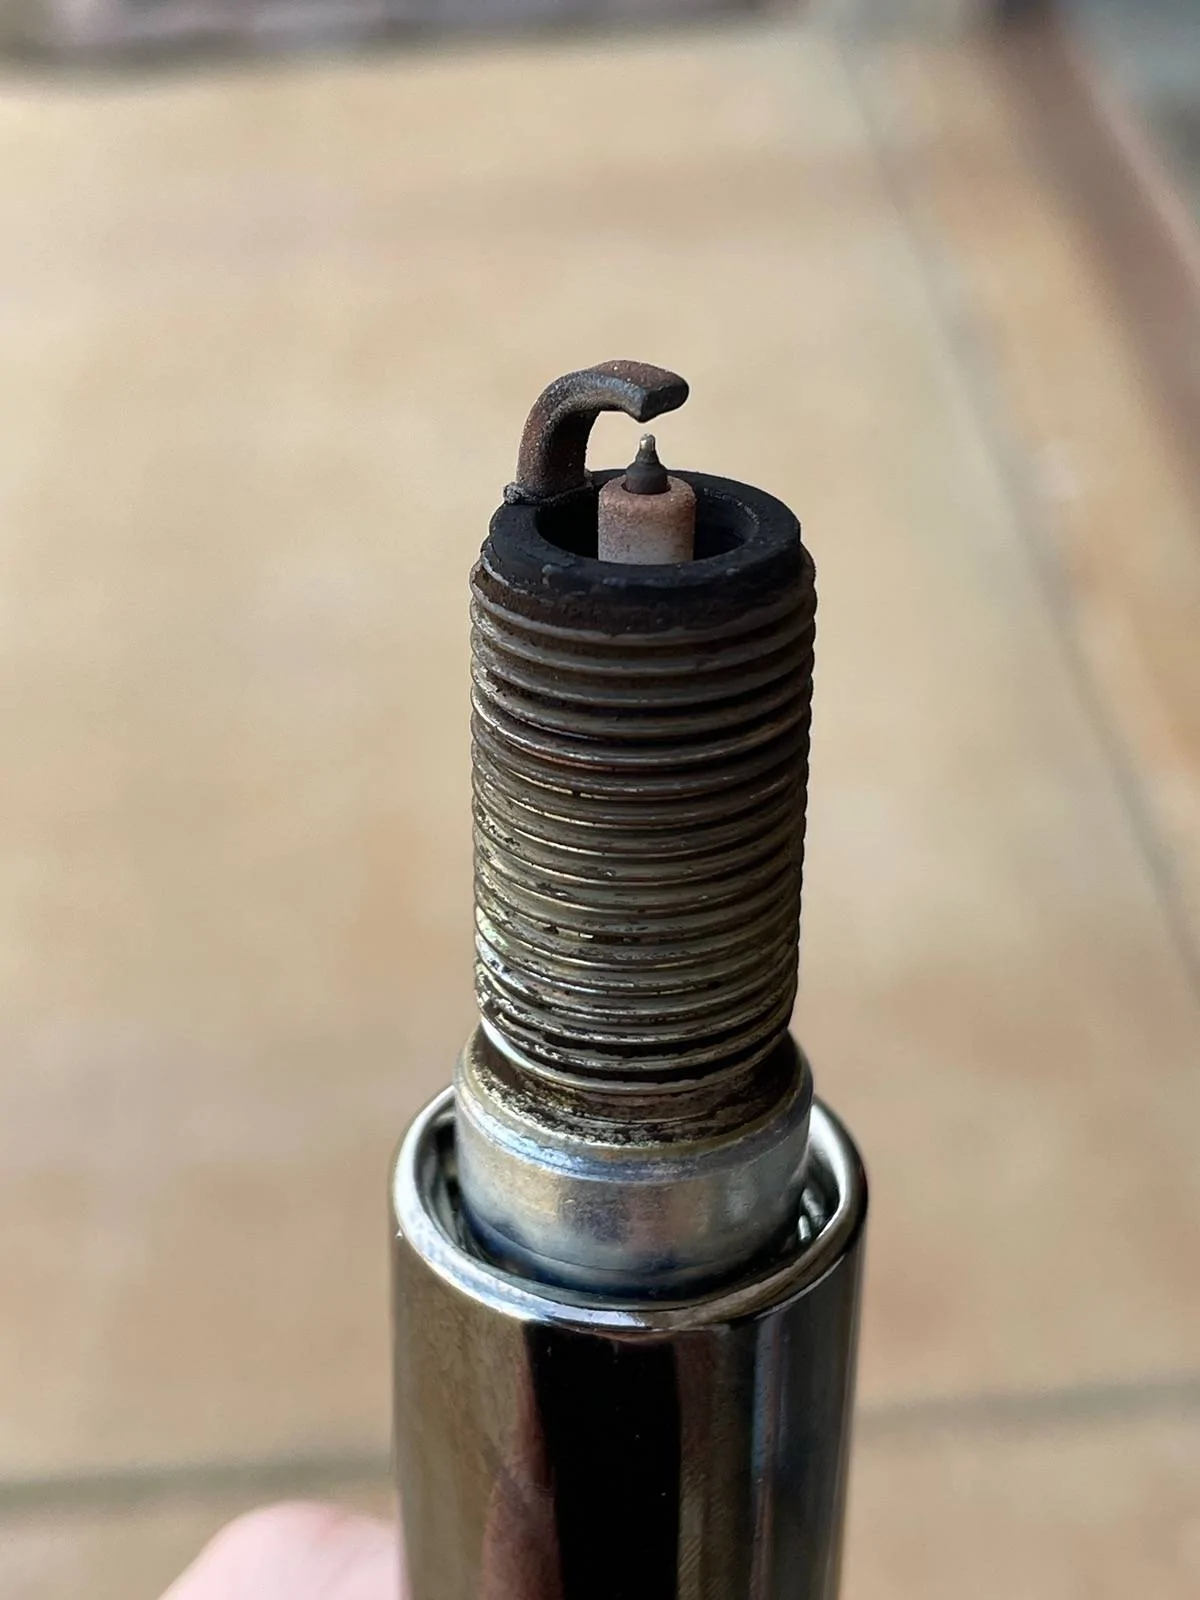
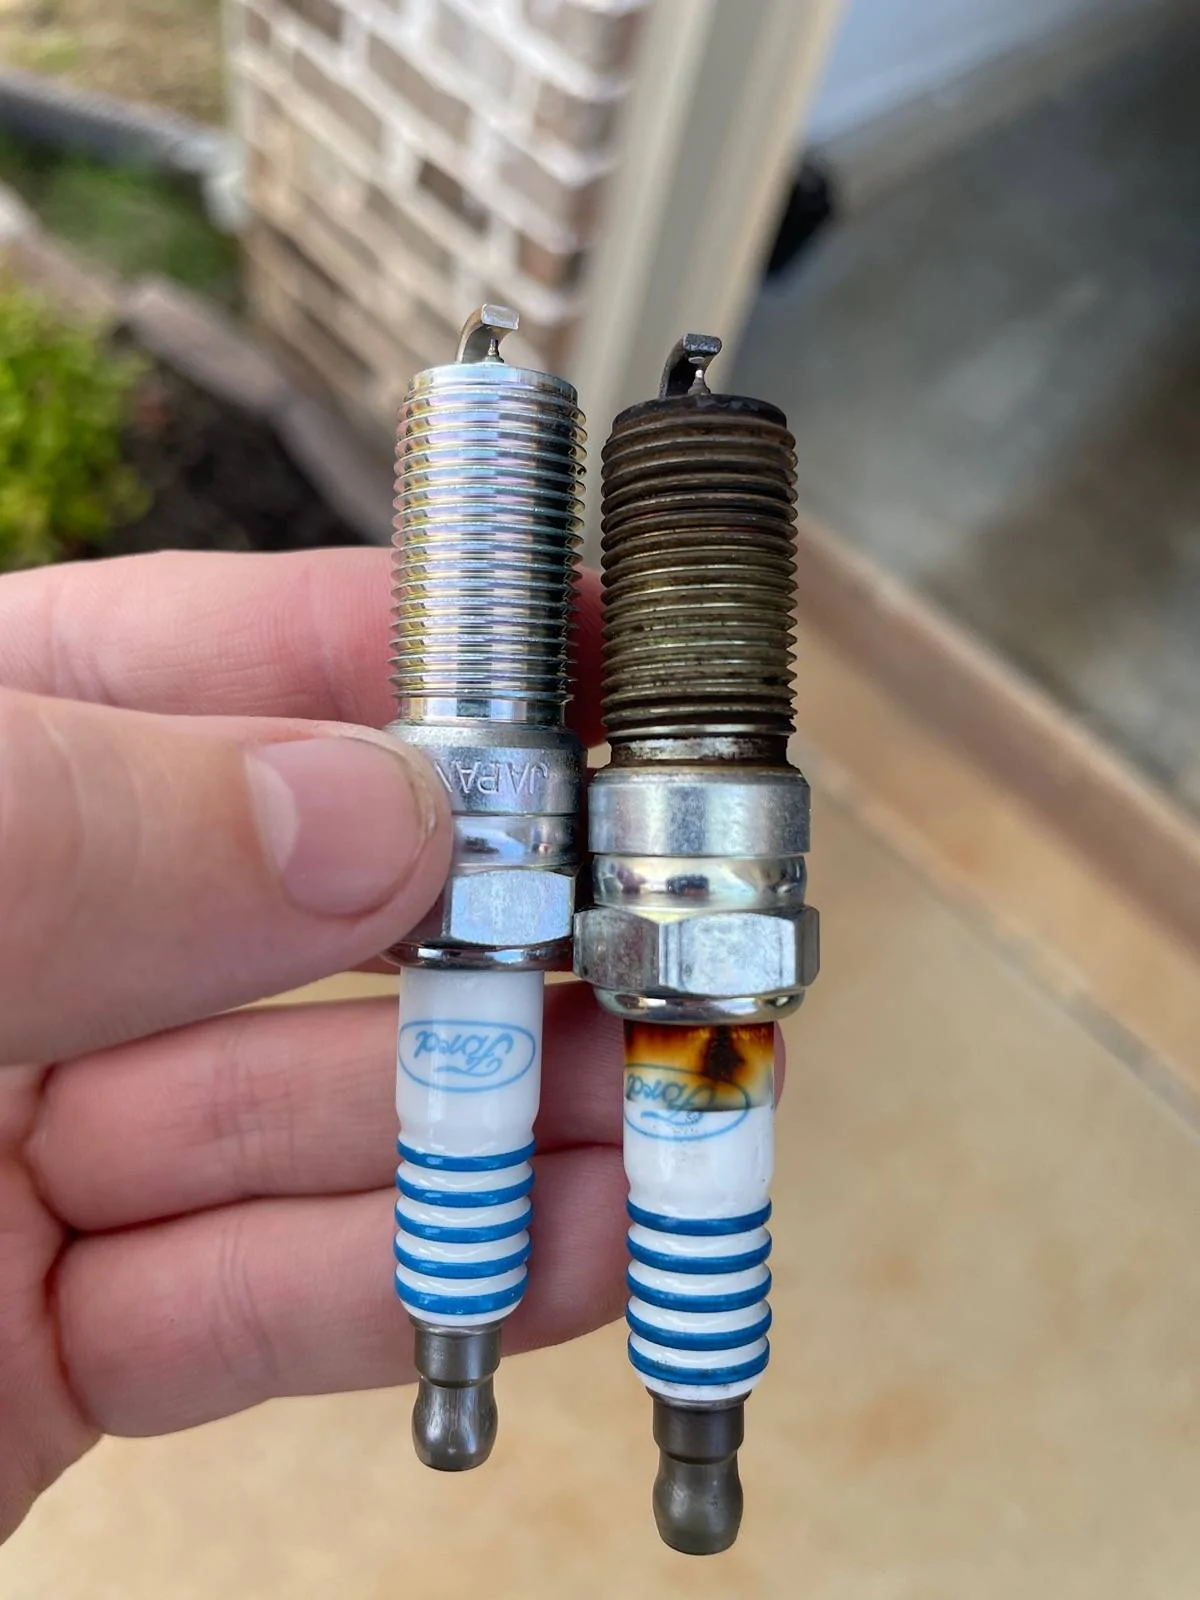
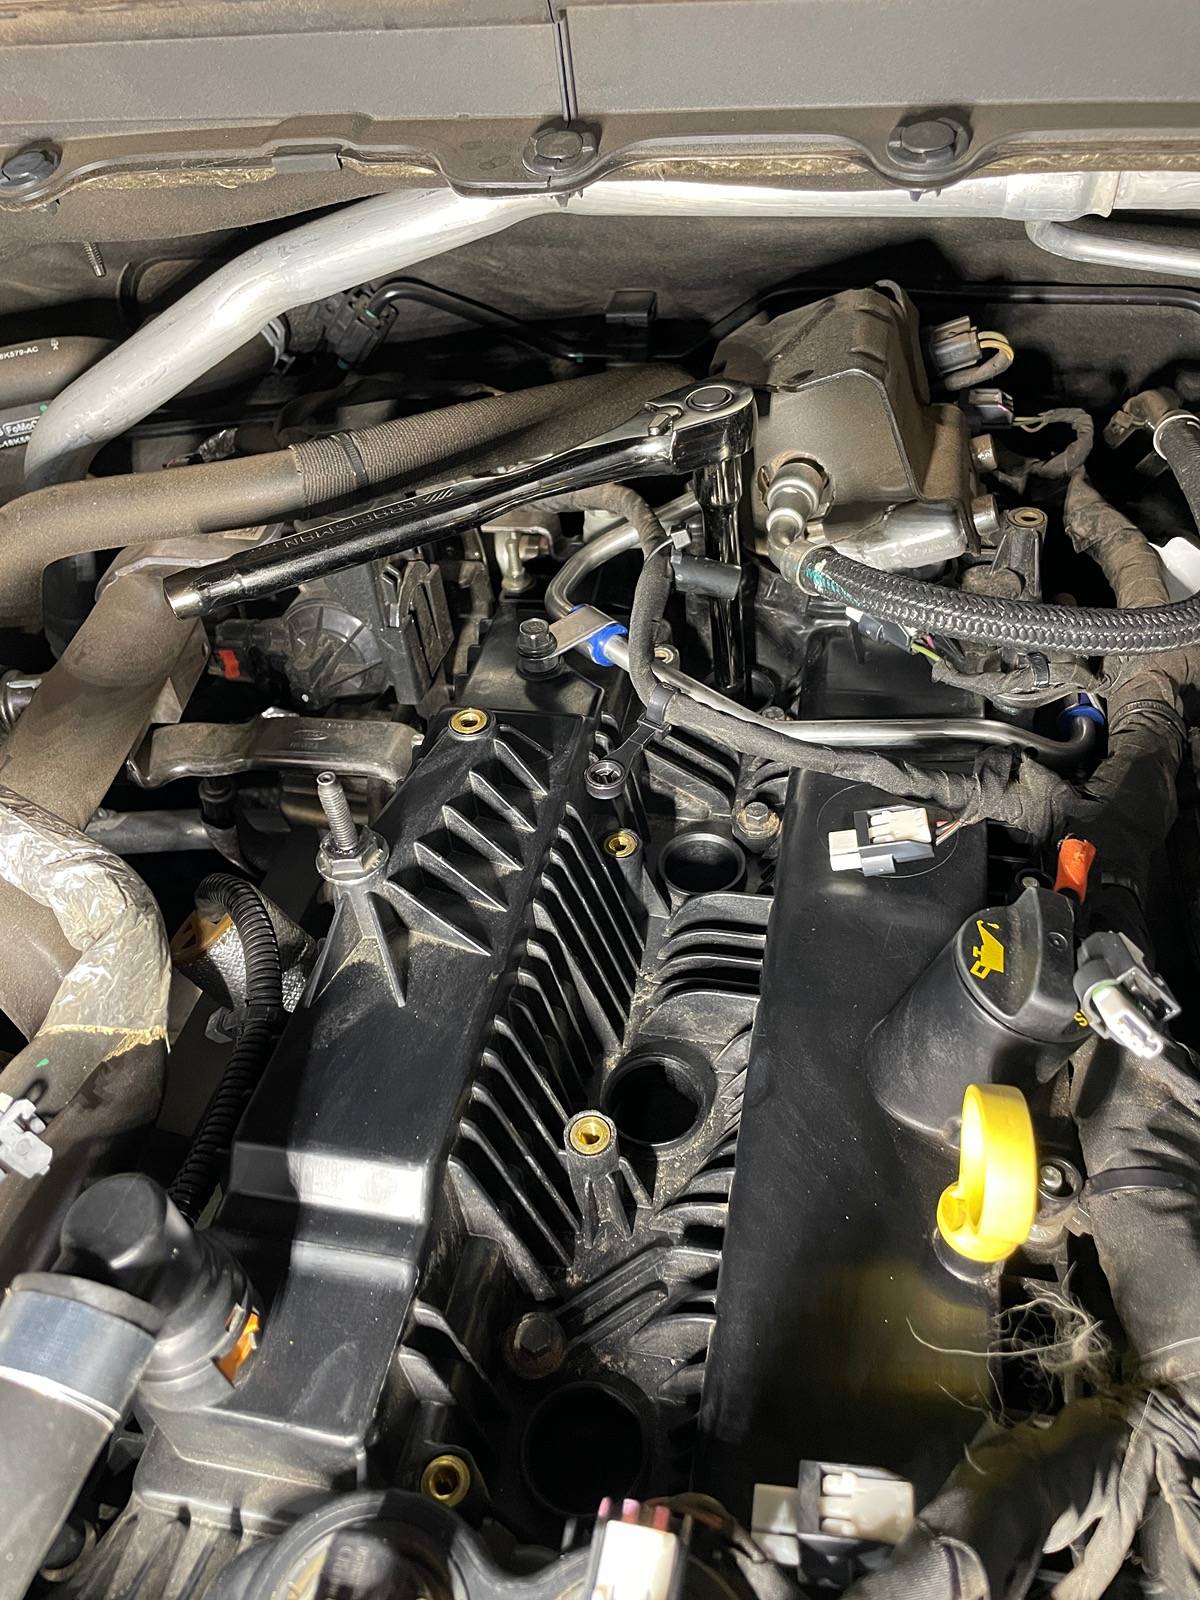
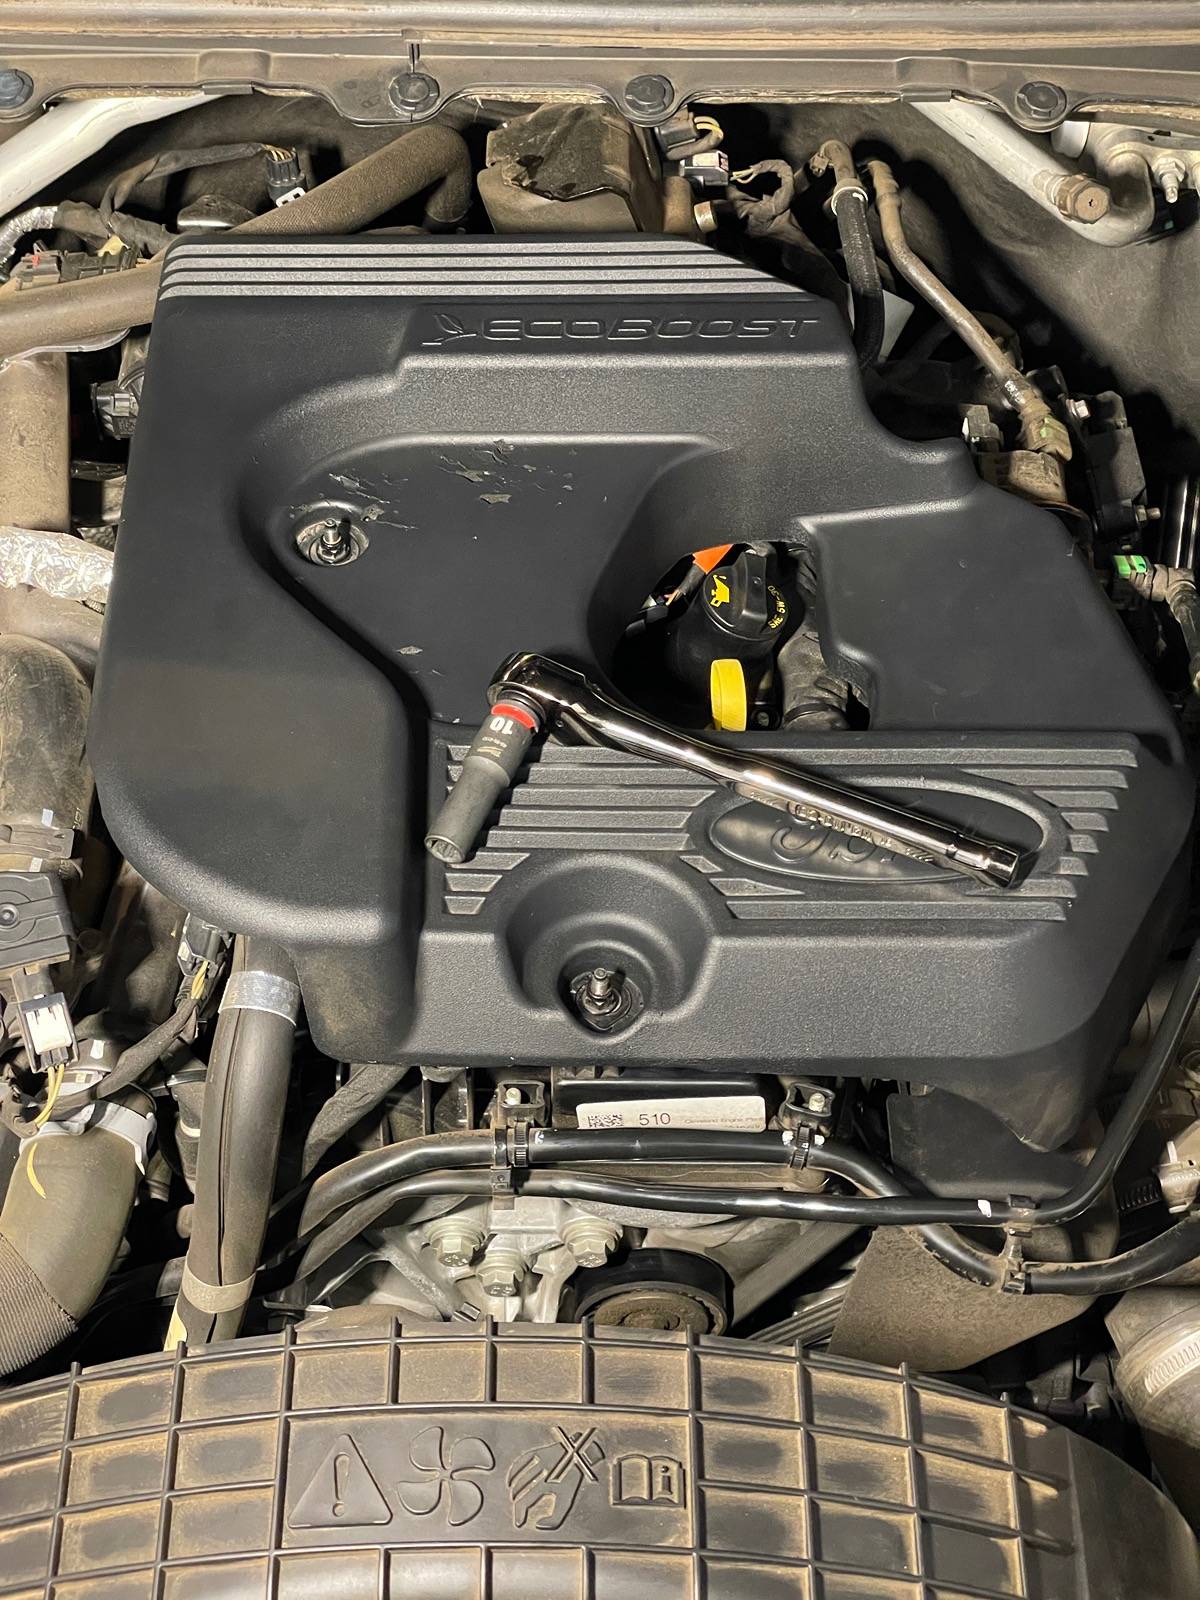
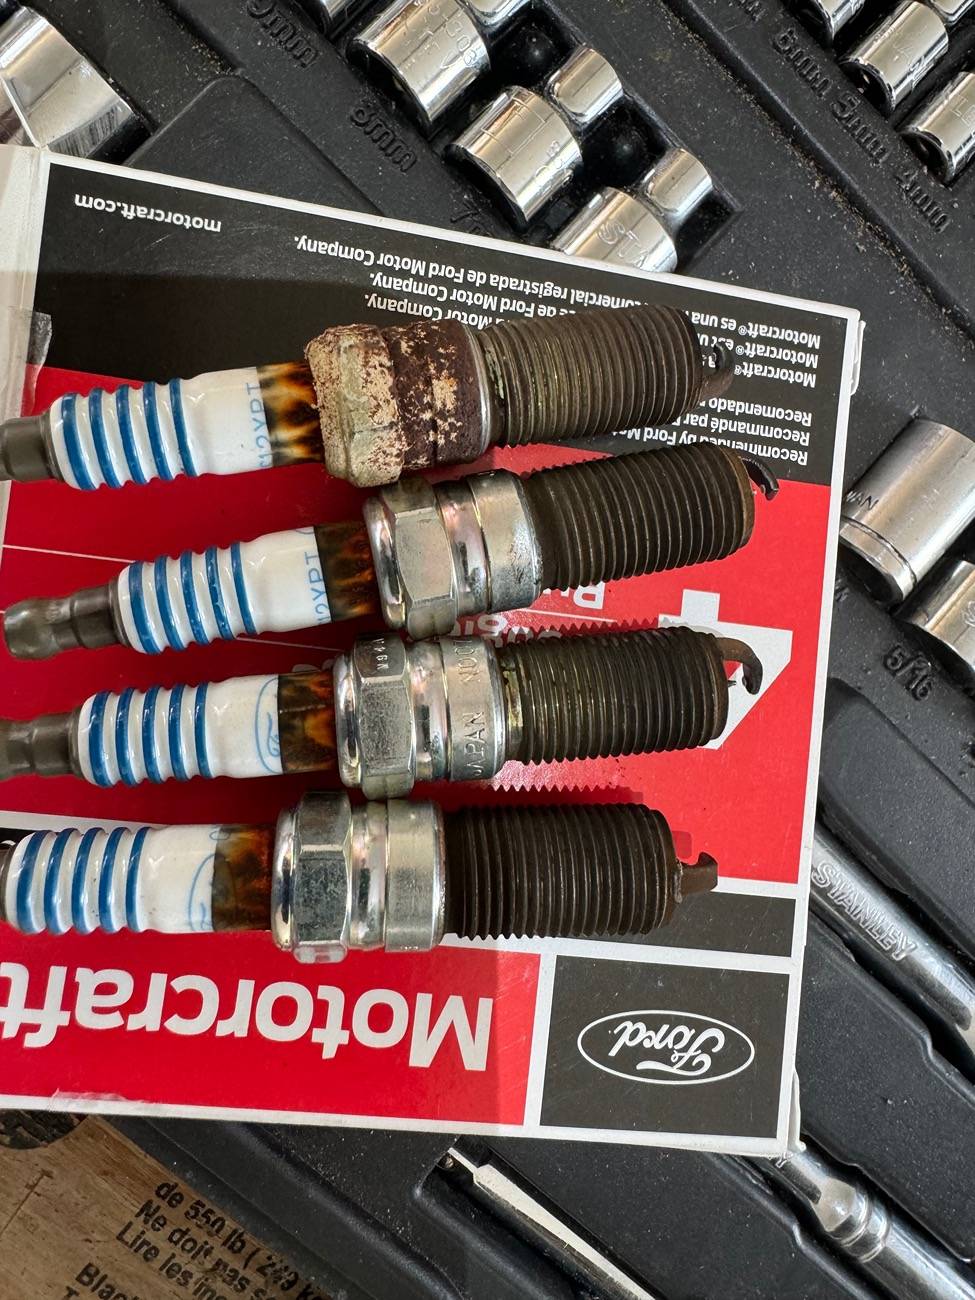
Was figuring next oil change i'd do my plugs tho!
Sponsored


JHC14

Well-Known Member
First Name
Joel
Joined
Jun 6, 2020
Threads
12
Messages
259
Reaction score
745
Location
Baker, LA
Vehicle(s)
2019 Ranger Lariat 4x4, 2017 Escape Titanium
Occupation
Executive Pastor
I waited till the suggested maintenance point and changed out the plugs at 105K miles. I asked for some anti-seize for the threads at the parts house when I bought the plugs. I trusted the counter help, won't do that again as they gave me boot protector grease. With the plugs out, too late to to back and get it. I hope this won't be a problem with the Motorcraft recommended plugs. At 105,000 miles, this is what I took out. I think it was time. Maybe I will do it sooner next time.
Thanks for the great write up.

IMG_8195.jpeg
 

DukeCanBuildit

Well-Known Member
First Name
Duke
Joined
Jul 27, 2020
Threads
66
Messages
9,602
Reaction score
45,985
Location
Kitchener, Ontario
Vehicle(s)
2019 XLT SuperCab - FTW!
Occupation
Retired (P/T) Caregiver (F/T)
Vehicle Showcase
1
I waited till the suggested maintenance point and changed out the plugs at 105K miles. I asked for some anti-seize for the threads at the parts house when I bought the plugs. I trusted the counter help, won't do that again as they gave me boot protector grease. With the plugs out, too late to to back and get it. I hope this won't be a problem with the Motorcraft recommended plugs. At 105,000 miles, this is what I took out. I think it was time. Maybe I will do it sooner next time.
Thanks for the great write up.

IMG_8195.jpeg
My guess is that the plug at the top is from cylinder #4. Looks like you got to this just in time.
 

JHC14

Well-Known Member
First Name
Joel
Joined
Jun 6, 2020
Threads
12
Messages
259
Reaction score
745
Location
Baker, LA
Vehicle(s)
2019 Ranger Lariat 4x4, 2017 Escape Titanium
Occupation
Executive Pastor
My guess is that the plug at the top is from cylinder #4. Looks like you got to this just in time.
Yep, #4 had the rust on it. I hope since I got 100k+ miles out of it I won't have much problem.
 

got3fords

Well-Known Member
First Name
James
Joined
Apr 12, 2021
Threads
131
Messages
5,317
Reaction score
13,787
Location
22973
Vehicle(s)
2026 Marsh Gray Ranger Raptor, 1995 Harley XLH1200
Occupation
Mom Joke Professional


DukeCanBuildit

Well-Known Member
First Name
Duke
Joined
Jul 27, 2020
Threads
66
Messages
9,602
Reaction score
45,985
Location
Kitchener, Ontario
Vehicle(s)
2019 XLT SuperCab - FTW!
Occupation
Retired (P/T) Caregiver (F/T)
Vehicle Showcase
1
I am confused, what is this tool needed for?
“The precision clamp on end of the flexible cable allows for extended reach where other models cannot get to while the heavy-duty 24-inch flexible cable allows for use in any position. The pliers also feature a locking mechanism which holds the clamp in the open position to enable the user to remove and install clamps with ease.”

It’s not needed for changing the spark plugs but the utility of it is such that I have convinced myself I now need it.

Wait until David gets a load of this. ?
 
OP
OP
Trash Panda

Trash Panda

Well-Known Member
First Name
Cody
Joined
Aug 8, 2021
Threads
12
Messages
167
Reaction score
668
Location
Alabama
Vehicle(s)
2019 Ranger Lariat
I am confused, what is this tool needed for?
It’s a decent tool for removing spring hose clamps. I originally bought mine to help with the DPFE sensor but I found regular ol pliers worked better in that situation.

Definitely do not need it for the Spark-plug job though.
 

Motorpsychology

Well-Known Member
First Name
Chris
Joined
Nov 13, 2019
Threads
21
Messages
3,290
Reaction score
11,482
Location
Prescott, WI
Vehicle(s)
2021 Ranger STX SuperCab 4X4 Carbonized grey; 2025 Mazda CX-90 Platinum Quartz
Occupation
Vagabond
I would recommend using an inch-pound(lbf' in)/Nm torque wrench for any torque values less than 10lb ft/13.5Nm. Most big box stores carry them and auto stores have them for rent or sale. The lighter the torque setting, the less resistance there for the break away to click, potentially over tightening, especially with fine pitch threads like spark plugs. If you are using anti-seize, lower the torque value to from 8 to 6.5 lb ft/78lbf' in or roughly 20%. The AS will not allow the plug to "bottom out" like a dry plug will, and could be overtorqued, which may interfere with the plug's ability to dissipate heat properly and crack. Most newer brand name plugs have a coating on the threads which help the plug guide down smoothly reducing the possibility of cross threading.

I'm also on a Suzuki forum, where there are a lot of spark plug threads (pun intended), as Suzy recommends plug changes every 7,500 miles! :oops: 
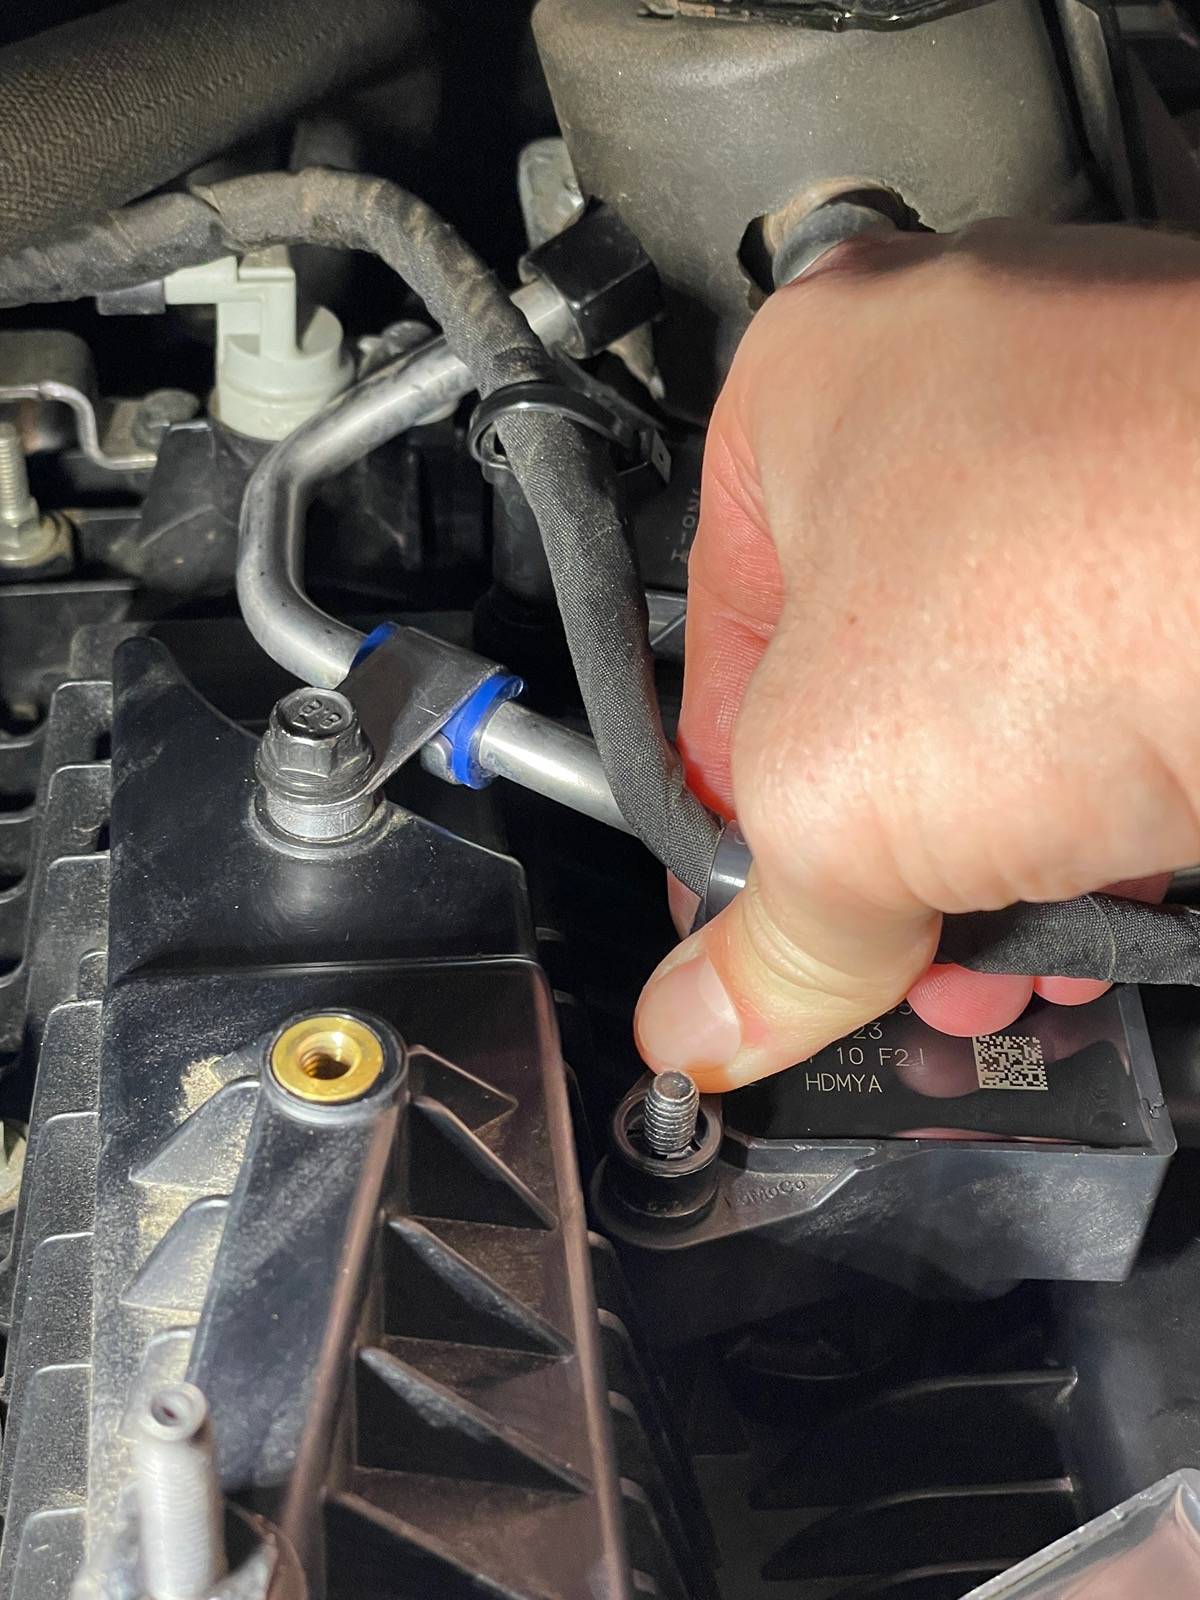
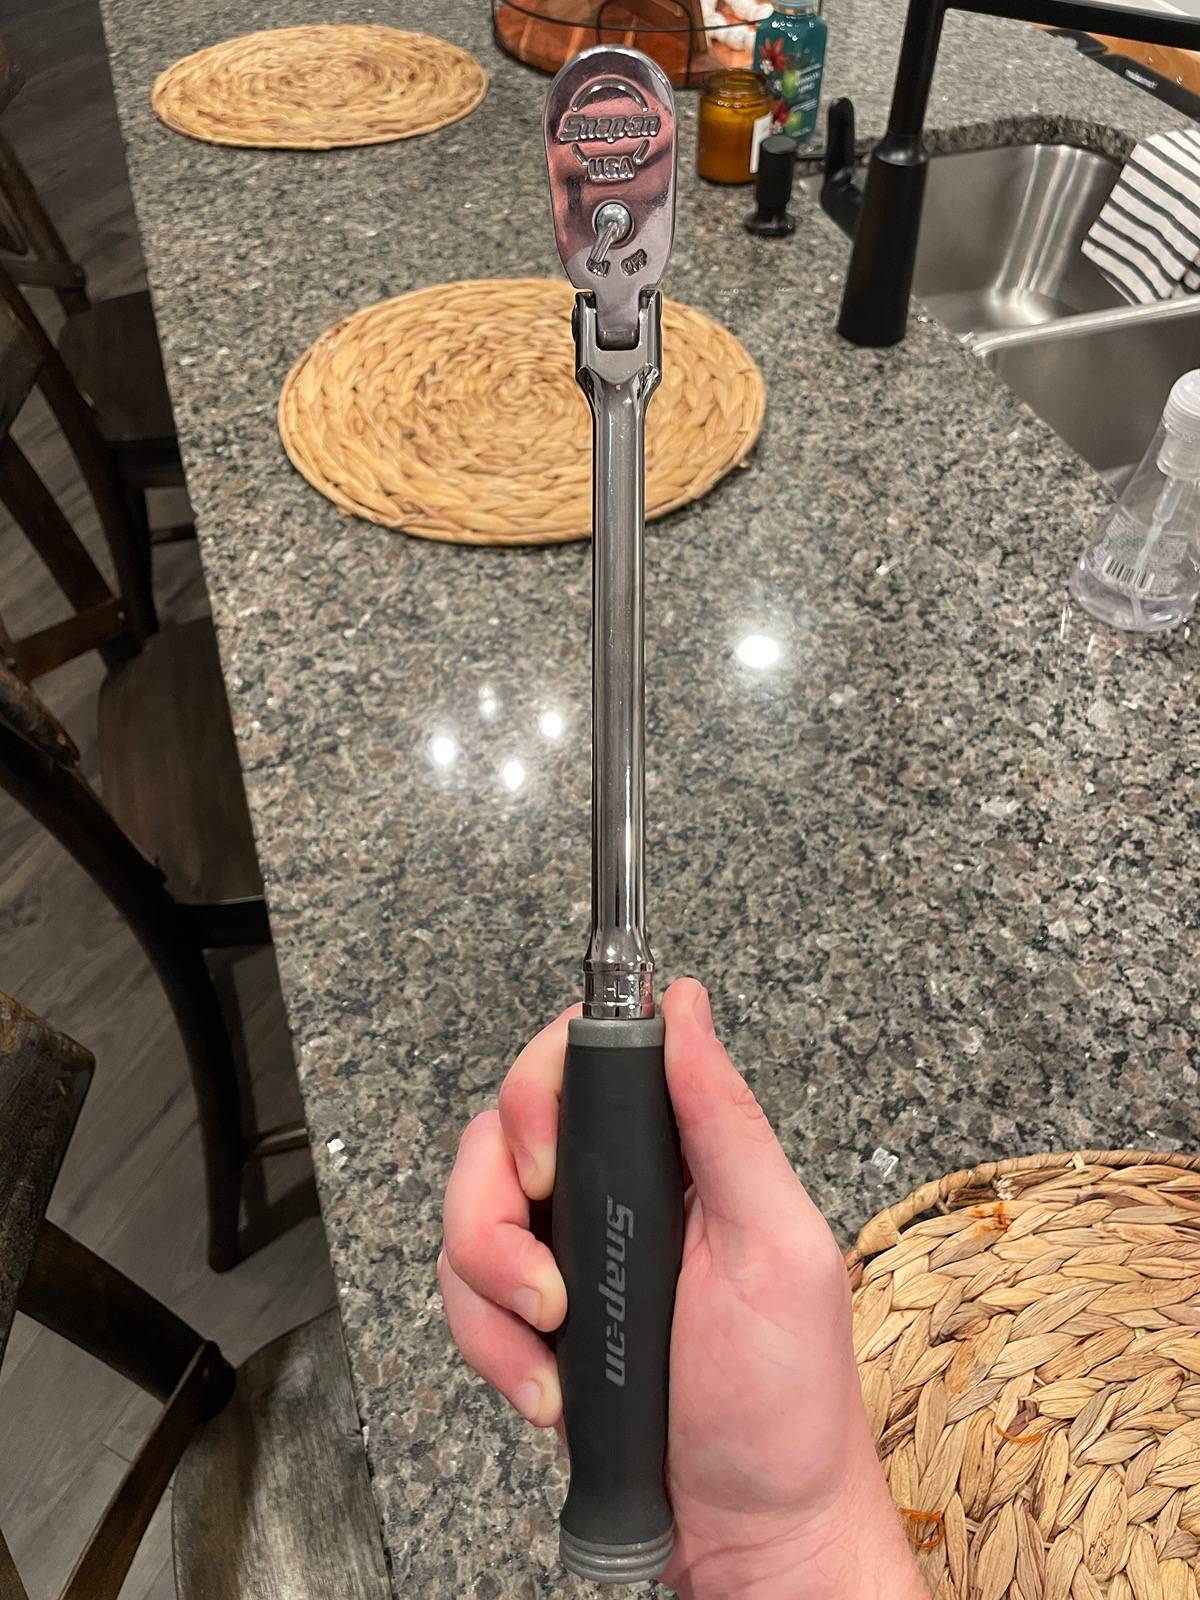
Also, my bike and bicycle have several fasteners with torque values in the 7-13Nm/62-88lbf' in range, which is about finger tight.
 
Last edited:

got3fords

Well-Known Member
First Name
James
Joined
Apr 12, 2021
Threads
131
Messages
5,317
Reaction score
13,787
Location
22973
Vehicle(s)
2026 Marsh Gray Ranger Raptor, 1995 Harley XLH1200
Occupation
Mom Joke Professional
It’s a decent tool for removing spring hose clamps. I originally bought mine to help with the DPFE sensor but I found regular ol pliers worked better in that situation.

Definitely do not need it for the Spark-plug job though.
Glad to know this exists. Thanks.
 

TomSim

Well-Known Member
First Name
tom
Joined
Dec 11, 2023
Threads
8
Messages
148
Reaction score
156
Location
toronto
Vehicle(s)
2019 Ranger Lariat
Occupation
retired
Greetings all,

Thought I would do another one of my write-ups on a fairly simple, yet important maintenance task on your Ranger. (This guide is geared towards those of us who have never performed this procedure)
The Ford Scheduled Maintenance is "Every 100,000 mi (160,000 km) Replace Spark Plugs."
The spark plug specifications are gap (0.027 - 0.031 in (0.70 - 0.80 mm)) and torque 12 Nm (106 in.lb (8 ft.lb))

Supplies Needed :
-4x Motorcraft SP-594 (CYFS-12Y-RT3) Spark Plugs (Our manual states SP-578 but SP-594 superseded it) ($57 total from my local dealer)
-3/8" Ratchet or 1/2" Ratchet with 1/2"-3/8" adapter (You can use a cordless like my Milwaukee 2457-20 to remove bolts after loosening them with your ratchet)
-8mm and 10mm semi-deep or deep sockets
-5/8 Spark Plug socket
-6" or 8" extension (I used a 6 inch with no issue but an 8 inch fit just fine as well. If you have a wobble extension it can help on cylinder 4)
-1/4" in.lb Torque Wrench set to 106 in.lbs (12 Nm) or 1/2" ft.lb Torque Wrench set to 8 ft.lbs (11Nm)
-Plastic/Trim Clip removal tool (I used a Craftsman CMMT98373) or small slotted head screwdriver
-Dielectric Grease (Permatex 22058)
-Straight Pick (I used my Matco PMO1C)
-Old microfiber towels

Optional :
-
Step Ladder or Work Platform
-Compressed Air or Forced Air Unit (I used an Adam's Air Cannon)
-Nitrile gloves (can't forget about PPE)

Step One :
Remove the EcoBoost Engine Cover if equipped (my '19 Lariat came equipped) by removing the 2x 10mm lock nuts and pulling up

*OPTIONAL: Upon removal deep clean the cover and underneath around the spark plugs using a damp microfiber rag or brush

IMG_2301.jpeg
IMG_2302.jpeg


STEP TWO :
As I mentioned in Step One, clean as much as you want on the top of the engine using low pressure compressed air to blow out large particles and using damp microfiber towels. I opted to clean as much as I could to prevent anything from falling in to the cylinder holes.

STEP THREE :
Drive up the road or get your family some breakfast like I did to warm up the engine prior to disassembly. I am a Quality Engineer so I follow procedures. :LOL:
The procedure states "Do not remove the spark plugs when the engine is hot or cold soaked. Make sure the engine is warm (hand touch after cooling down) prior to spark plug removal.

STEP FOUR :
Use your plastic clip removal tool or slotted screwdriver to remove the 3x plastic wire guides/retainers. It is super easy and you do not have to apply much force at all. You can pull the harness away from Cylinder 1 (closest to you) to fully expose that ignition coil now.

IMG_2304.jpeg
IMG_2305.jpeg


STEP FIVE :

Unplug the 4x Ignition Coil connectors. The design is pretty neat, the white sliding locking tab can be unlocked by using your fingernail and sliding it away from you. Once the locking tab is unlocked, simply wiggle the connector off.

IMG_2306.jpeg
IMG_2307.jpeg


STEP SIX :
Use your Ratchet & 8mm socket to remove the 4x Ignition Coil Studs and use a twisting motion to remove the Ignition Coils (mine did not take much force at all). The trickiest one is the back one on cylinder 4, but simply rotate the Ignition Coil clockwise where it is not obstructed by the high pressure fuel pump and pull up.

IMG_2309.jpeg
IMG_2310.jpeg

IMG_2311.jpeg
IMG_2312.jpeg


STEP SEVEN :
Remove 4x Spark Plugs using a 6" or 8" extension with a 5/8 Spark Plug Socket. Mine were fairly easy to break loose and did squeak a little bit while loosening.

IMG_2317.jpeg


My plugs were in decent shape, but I am probably going to make my change interval 5 Years/60,000 miles. The staining on the porcelain is not rust, it is corona staining and is a completely normal byproduct per NGK.

IMG_2313.jpeg
IMG_2315.jpeg


STEP EIGHT :
Check gap and Reinstall your 4x new Motorcraft SP-594 Spark Plugs. All 4 of mine were at a 0.029 inch (0.74 mm) gap out of the box so I did not adjust it. I measured the factory plugs I removed and they were between 0.028 and 0.029 inches.
Simply hand thread each plug until it's snug to prevent from cross threading. I was actually able to get it fairly close to the proper torque value by simply hand threading. If you have a knurled extension it makes it easier.
A trick for cylinder 4 is to place your ratchet at around the 8 o clock position to both loosen/tighten the plug so the high pressure fuel pump is not in the way.

*OPTIONAL : Torque Spark Plug to 12 Nm (106 in.lb or 8 ft.lb) depending on which torque wrench you use. I used my 1/4" In.lb torque wrench using a 1/4" - 3/8" adaptor to get mine to 106 in.lb. It did not take much force at all to reach that torque value.

IMG_2319.jpeg
IMG_2320.jpeg


STEP NINE :
Reinstall the 4x Ignition Coils and snug the 4x Ignition Coil Studs using a 8mm Socket. Reverse how you removed the cylinder 4 Ignition Coil by installing it at the 6 o' Clock position and twisting it counter clockwise.

*OPTIONAL : Apply a pea sized drop of Dielectric Grease on the inside of the Ignition Coil Boot and spread it around evenly using a pick (I used a Matco Straight Pick) and wipe the rim clean.
I say optional because some people use grease, some do not. Same thing with anti-seize.


IMG_2322.jpeg
IMG_2323.jpeg

IMG_2325.jpeg
IMG_2326.jpeg


STEP TEN :
Reposition the wiring harness and reattach the 3x plastic wire guides/retainers. Simply push down on them and they instantly bite on the Ignition Coil Studs.
Reattach the 4x Ignition Coil Connectors. Push on until you hear a 'click' and then use your finger to push the sliding lock tab forward.

IMG_2329.jpeg
IMG_2327.jpeg

IMG_2328.jpeg
IMG_2330.jpeg


STEP ELEVEN :
Once everything is reattached and properly tightened, crank your Ranger to see if a check engine light or any error message appears. You can always take a drive around the neighborhood as well prior to engine cover reattachment.
My Ranger roared to life and it seemed like it appreciated new plugs and the new engine air element I installed last weekend.

Reattach the EcoBoost Engine Cover if equipped by pushing down and reinstalling the 2x 10mm lock nuts. These just need to be hand tight.

IMG_2332.jpeg


That's it! Grab a cold one and enjoy a job well done! :sunglasses::thumbsup::beer:
The local dealer quoted me $130 just for installation (parts extra) so that is worth celebrating.
For the record it took me longer to write this write-up / take pictures than the actual job did. :LOL::beer:


To celebrate, I bought my first Snap-On ratchet with the “savings” from the spark plugs. Follow me for more financial advice. ? :crackup:

IMG_2369.jpeg
thanks for all that great advice ...well done
 

Chris M

Well-Known Member
First Name
Chris
Joined
Jun 11, 2020
Threads
20
Messages
4,490
Reaction score
19,739
Location
Surprise, AZ
Vehicle(s)
2021 Ranger XLT Sport 4X4
Occupation
Security Supervisor
I waited till the suggested maintenance point and changed out the plugs at 105K miles. I asked for some anti-seize for the threads at the parts house when I bought the plugs. I trusted the counter help, won't do that again as they gave me boot protector grease. With the plugs out, too late to to back and get it. I hope this won't be a problem with the Motorcraft recommended plugs. At 105,000 miles, this is what I took out. I think it was time. Maybe I will do it sooner next time.
Thanks for the great write up.

IMG_8195.jpeg
Man...that top one!
 

Jason B

Well-Known Member
First Name
Jason
Joined
May 19, 2021
Threads
9
Messages
3,008
Reaction score
8,315
Location
Louisiana
Vehicle(s)
2021 XL STX SE 4x2
Occupation
machinist
Yep, #4 had the rust on it. I hope since I got 100k+ miles out of it I won't have much problem.
How hard was it to get that #4 out. Many 5G Ranger experience water getting in the #4 plug well.
 

JHC14

Well-Known Member
First Name
Joel
Joined
Jun 6, 2020
Threads
12
Messages
259
Reaction score
745
Location
Baker, LA
Vehicle(s)
2019 Ranger Lariat 4x4, 2017 Escape Titanium
Occupation
Executive Pastor
How hard was it to get that #4 out. Many 5G Ranger experience water getting in the #4 plug well.
It was not hard at all. Just a bit stuck, but nothing terrible. The worst part was trying to fish the rubber boot off the spark plug #2 after it came out of the spark plug socket. Thankfully my granddad left me his long needle nose pliers. Then some super glue held the rubber boot in for me to finish. If it had come off on #3 or #4, I don't think I would have ever gotten it out.
Since I did not have any anti-seize grease I may just wait for another 100k miles or sell it before I hit that point. ?
 
OP
OP
Trash Panda

Trash Panda

Well-Known Member
First Name
Cody
Joined
Aug 8, 2021
Threads
12
Messages
167
Reaction score
668
Location
Alabama
Vehicle(s)
2019 Ranger Lariat
It was not hard at all. Just a bit stuck, but nothing terrible. The worst part was trying to fish the rubber boot off the spark plug #2 after it came out of the spark plug socket. Thankfully my granddad left me his long needle nose pliers. Then some super glue held the rubber boot in for me to finish. If it had come off on #3 or #4, I don't think I would have ever gotten it out.
Since I did not have any anti-seize grease I may just wait for another 100k miles or sell it before I hit that point. ?
The good news is these OEM Motorcraft plugs are made by NGK. They plate the threads with tri-chrome (you can see the sheen in my image) so there is no reason to use anti-seize!

I only used dielectric grease inside the coil boot to assist with removal in the future.
 

OGMix376

Well-Known Member
First Name
Bryan
Joined
Jun 30, 2024
Threads
3
Messages
1,033
Reaction score
3,528
Location
California
Vehicle(s)
2023 Oxford White Ranger Tremor
Occupation
House Maintenance Technician ;)
Greetings all,

Thought I would do another one of my write-ups on a fairly simple, yet important maintenance task on your Ranger. (This guide is geared towards those of us who have never performed this procedure)
The Ford Scheduled Maintenance is "Every 100,000 mi (160,000 km) Replace Spark Plugs."
The spark plug specifications are gap (0.027 - 0.031 in (0.70 - 0.80 mm)) and torque 12 Nm (106 in.lb (8 ft.lb))

Supplies Needed :
-4x Motorcraft SP-594 (CYFS-12Y-RT3) Spark Plugs (Our manual states SP-578 but SP-594 superseded it) ($57 total from my local dealer)
-3/8" Ratchet or 1/2" Ratchet with 1/2"-3/8" adapter (You can use a cordless like my Milwaukee 2457-20 to remove bolts after loosening them with your ratchet)
-8mm and 10mm semi-deep or deep sockets
-5/8 Spark Plug socket
-6" or 8" extension (I used a 6 inch with no issue but an 8 inch fit just fine as well. If you have a wobble extension it can help on cylinder 4)
-1/4" in.lb Torque Wrench set to 106 in.lbs (12 Nm) or 1/2" ft.lb Torque Wrench set to 8 ft.lbs (11Nm)
-Plastic/Trim Clip removal tool (I used a Craftsman CMMT98373) or small slotted head screwdriver
-Dielectric Grease (Permatex 22058)
-Straight Pick (I used my Matco PMO1C)
-Old microfiber towels

Optional :
-
Step Ladder or Work Platform
-Compressed Air or Forced Air Unit (I used an Adam's Air Cannon)
-Nitrile gloves (can't forget about PPE)

Step One :
Remove the EcoBoost Engine Cover if equipped (my '19 Lariat came equipped) by removing the 2x 10mm lock nuts and pulling up

*OPTIONAL: Upon removal deep clean the cover and underneath around the spark plugs using a damp microfiber rag or brush

IMG_2301.jpeg
IMG_2302.jpeg


STEP TWO :
As I mentioned in Step One, clean as much as you want on the top of the engine using low pressure compressed air to blow out large particles and using damp microfiber towels. I opted to clean as much as I could to prevent anything from falling in to the cylinder holes.

STEP THREE :
Drive up the road or get your family some breakfast like I did to warm up the engine prior to disassembly. I am a Quality Engineer so I follow procedures. :LOL:
The procedure states "Do not remove the spark plugs when the engine is hot or cold soaked. Make sure the engine is warm (hand touch after cooling down) prior to spark plug removal.

STEP FOUR :
Use your plastic clip removal tool or slotted screwdriver to remove the 3x plastic wire guides/retainers. It is super easy and you do not have to apply much force at all. You can pull the harness away from Cylinder 1 (closest to you) to fully expose that ignition coil now.

IMG_2304.jpeg
IMG_2305.jpeg


STEP FIVE :

Unplug the 4x Ignition Coil connectors. The design is pretty neat, the white sliding locking tab can be unlocked by using your fingernail and sliding it away from you. Once the locking tab is unlocked, simply wiggle the connector off.

IMG_2306.jpeg
IMG_2307.jpeg


STEP SIX :
Use your Ratchet & 8mm socket to remove the 4x Ignition Coil Studs and use a twisting motion to remove the Ignition Coils (mine did not take much force at all). The trickiest one is the back one on cylinder 4, but simply rotate the Ignition Coil clockwise where it is not obstructed by the high pressure fuel pump and pull up.

IMG_2309.jpeg
IMG_2310.jpeg

IMG_2311.jpeg
IMG_2312.jpeg


STEP SEVEN :
Remove 4x Spark Plugs using a 6" or 8" extension with a 5/8 Spark Plug Socket. Mine were fairly easy to break loose and did squeak a little bit while loosening.

IMG_2317.jpeg


My plugs were in decent shape, but I am probably going to make my change interval 5 Years/60,000 miles. The staining on the porcelain is not rust, it is corona staining and is a completely normal byproduct per NGK.

IMG_2313.jpeg
IMG_2315.jpeg


STEP EIGHT :
Check gap and Reinstall your 4x new Motorcraft SP-594 Spark Plugs. All 4 of mine were at a 0.029 inch (0.74 mm) gap out of the box so I did not adjust it. I measured the factory plugs I removed and they were between 0.028 and 0.029 inches.
Simply hand thread each plug until it's snug to prevent from cross threading. I was actually able to get it fairly close to the proper torque value by simply hand threading. If you have a knurled extension it makes it easier.
A trick for cylinder 4 is to place your ratchet at around the 8 o clock position to both loosen/tighten the plug so the high pressure fuel pump is not in the way.

*OPTIONAL : Torque Spark Plug to 12 Nm (106 in.lb or 8 ft.lb) depending on which torque wrench you use. I used my 1/4" In.lb torque wrench using a 1/4" - 3/8" adaptor to get mine to 106 in.lb. It did not take much force at all to reach that torque value.

IMG_2319.jpeg
IMG_2320.jpeg


STEP NINE :
Reinstall the 4x Ignition Coils and snug the 4x Ignition Coil Studs using a 8mm Socket. Reverse how you removed the cylinder 4 Ignition Coil by installing it at the 6 o' Clock position and twisting it counter clockwise.

*OPTIONAL : Apply a pea sized drop of Dielectric Grease on the inside of the Ignition Coil Boot and spread it around evenly using a pick (I used a Matco Straight Pick) and wipe the rim clean.
I say optional because some people use grease, some do not. Same thing with anti-seize.


IMG_2322.jpeg
IMG_2323.jpeg

IMG_2325.jpeg
IMG_2326.jpeg


STEP TEN :
Reposition the wiring harness and reattach the 3x plastic wire guides/retainers. Simply push down on them and they instantly bite on the Ignition Coil Studs.
Reattach the 4x Ignition Coil Connectors. Push on until you hear a 'click' and then use your finger to push the sliding lock tab forward.

IMG_2329.jpeg
IMG_2327.jpeg

IMG_2328.jpeg
IMG_2330.jpeg


STEP ELEVEN :
Once everything is reattached and properly tightened, crank your Ranger to see if a check engine light or any error message appears. You can always take a drive around the neighborhood as well prior to engine cover reattachment.
My Ranger roared to life and it seemed like it appreciated new plugs and the new engine air element I installed last weekend.

Reattach the EcoBoost Engine Cover if equipped by pushing down and reinstalling the 2x 10mm lock nuts. These just need to be hand tight.

IMG_2332.jpeg


That's it! Grab a cold one and enjoy a job well done! :sunglasses::thumbsup::beer:
The local dealer quoted me $130 just for installation (parts extra) so that is worth celebrating.
For the record it took me longer to write this write-up / take pictures than the actual job did. :LOL::beer:


To celebrate, I bought my first Snap-On ratchet with the “savings” from the spark plugs. Follow me for more financial advice. ? :crackup:

IMG_2369.jpeg
Very nice snap-on Torque wrench… friggin amazing write up, my wife read it with me, now she thinks this is something she can do with how much detail you put in..
Maybe ill just sit back and supervise with a fine beverage while she does the work?
Sponsored


Top