2.3L EcoBoost SP-594 Spark Plug Change Write-Up (60k Miles)

fusseli

Well-Known Member
Joined
Aug 11, 2019
Threads
21
Messages
580
Reaction score
840
Location
Colorado
Vehicle(s)
2019 Lariat FX4 White Platinum Tri-Coat
Occupation
EE
Vehicle Showcase
1
Yes. I have done some research and couldn't find any good answers. Why I asked here on the forum.
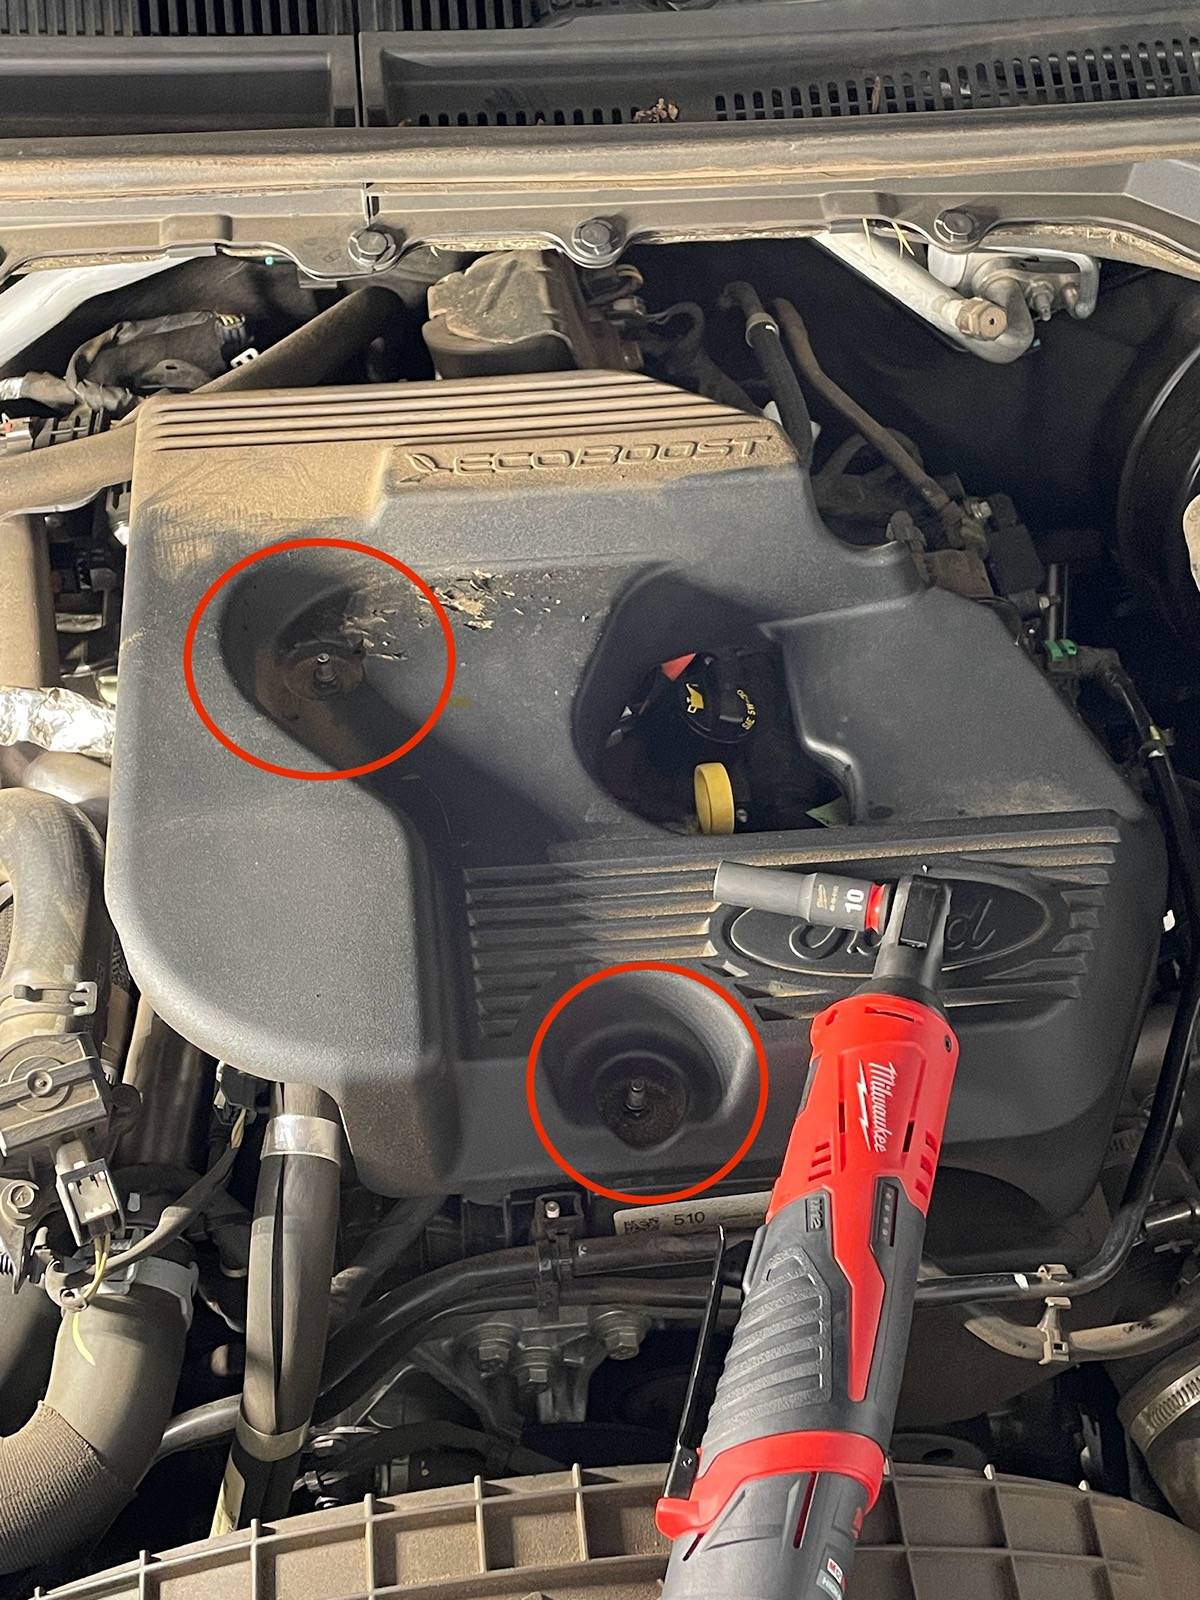
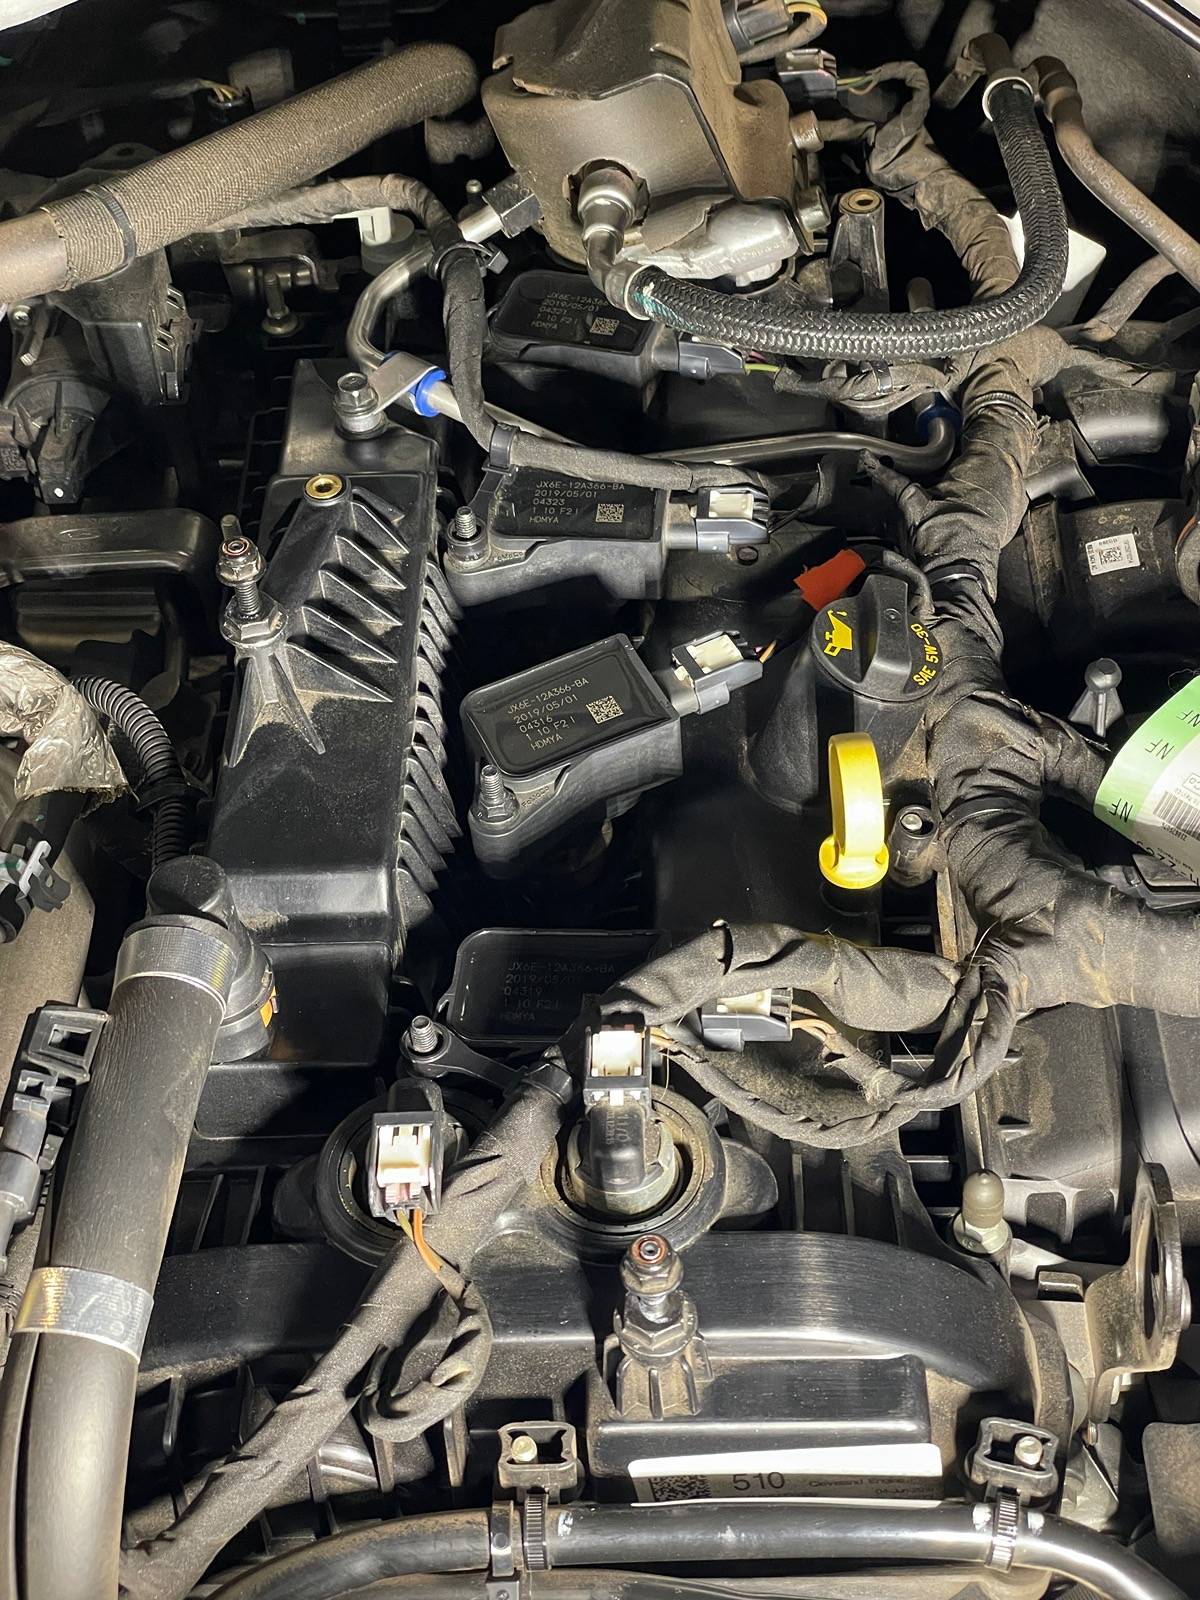
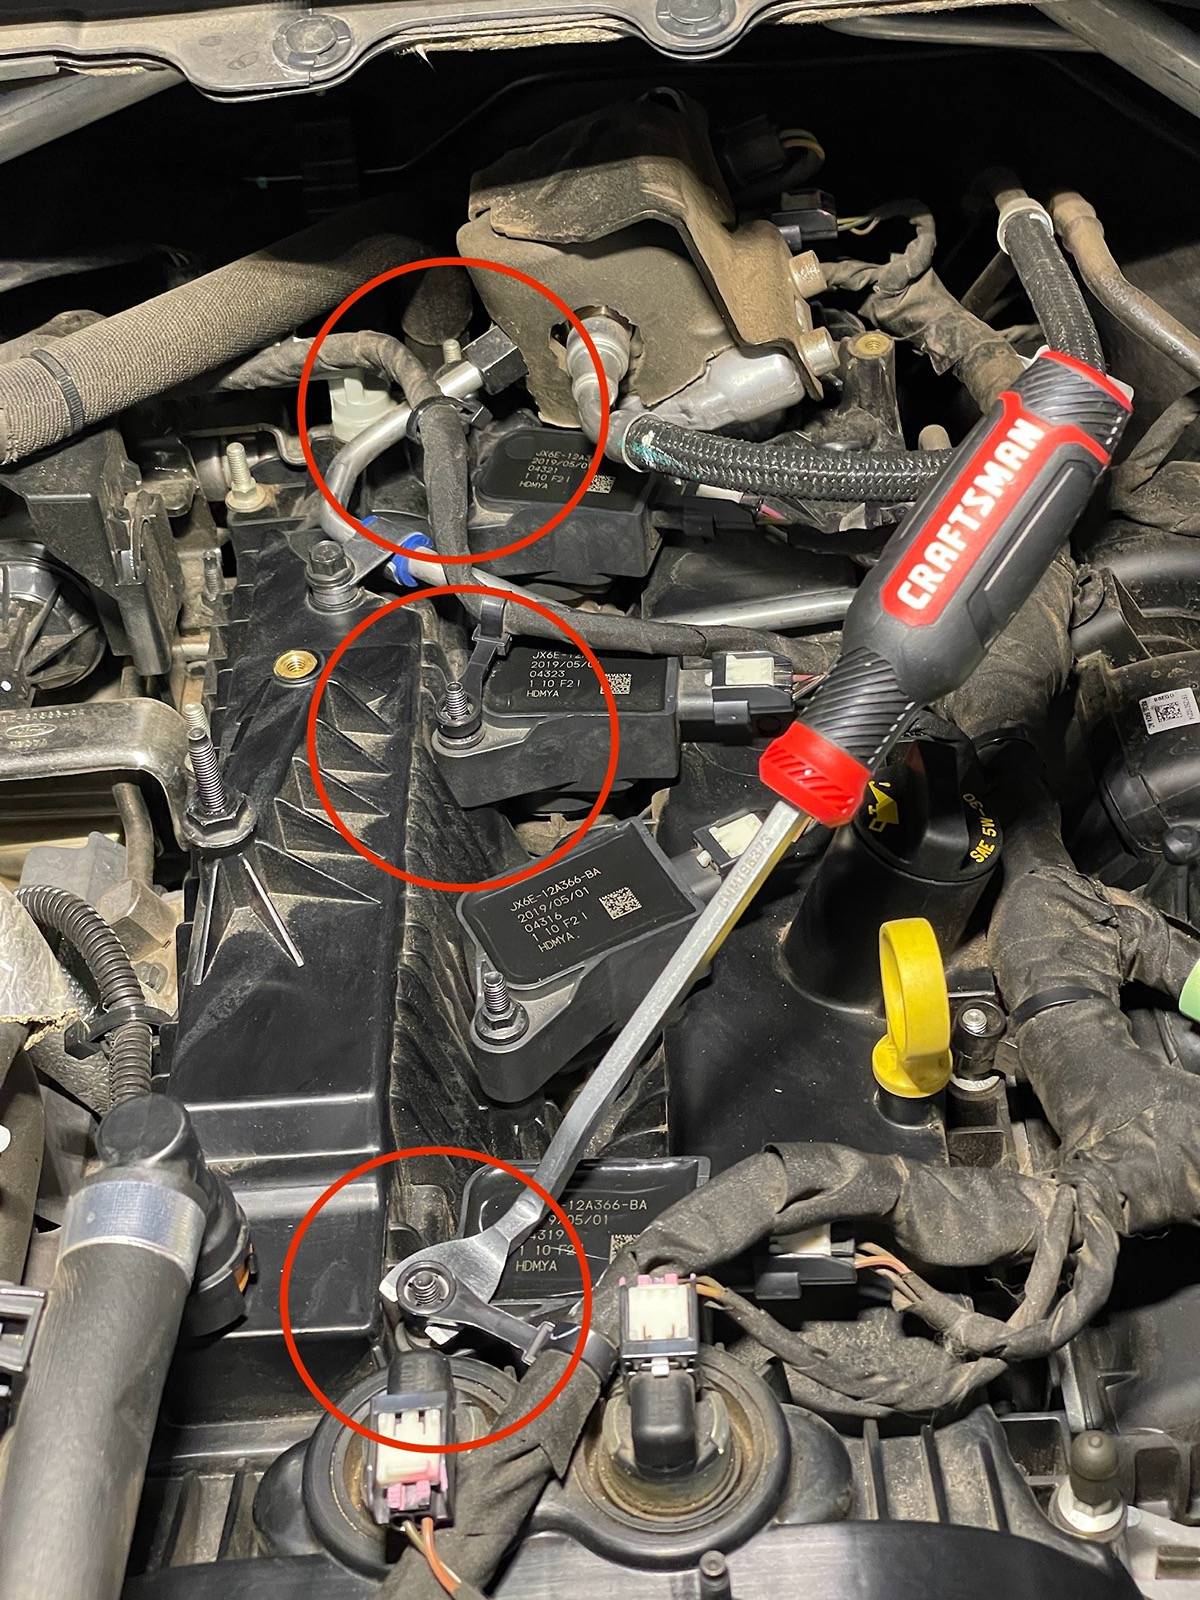
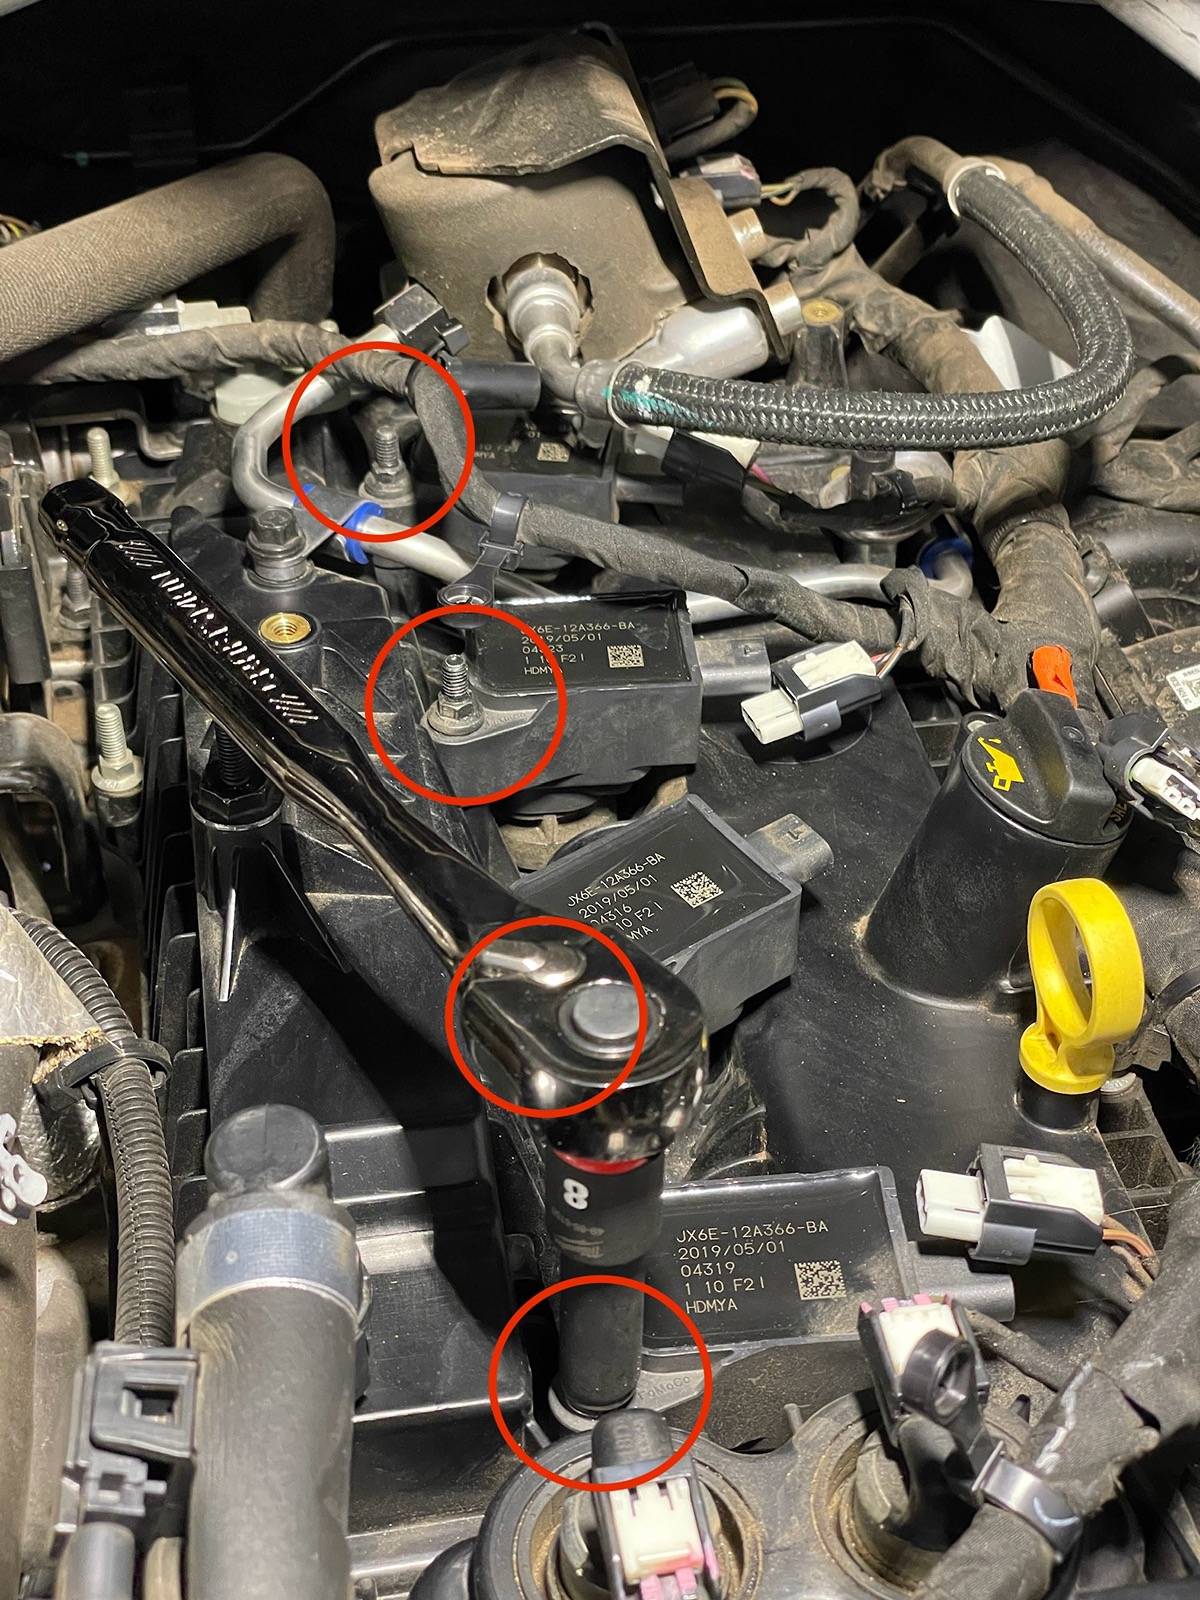
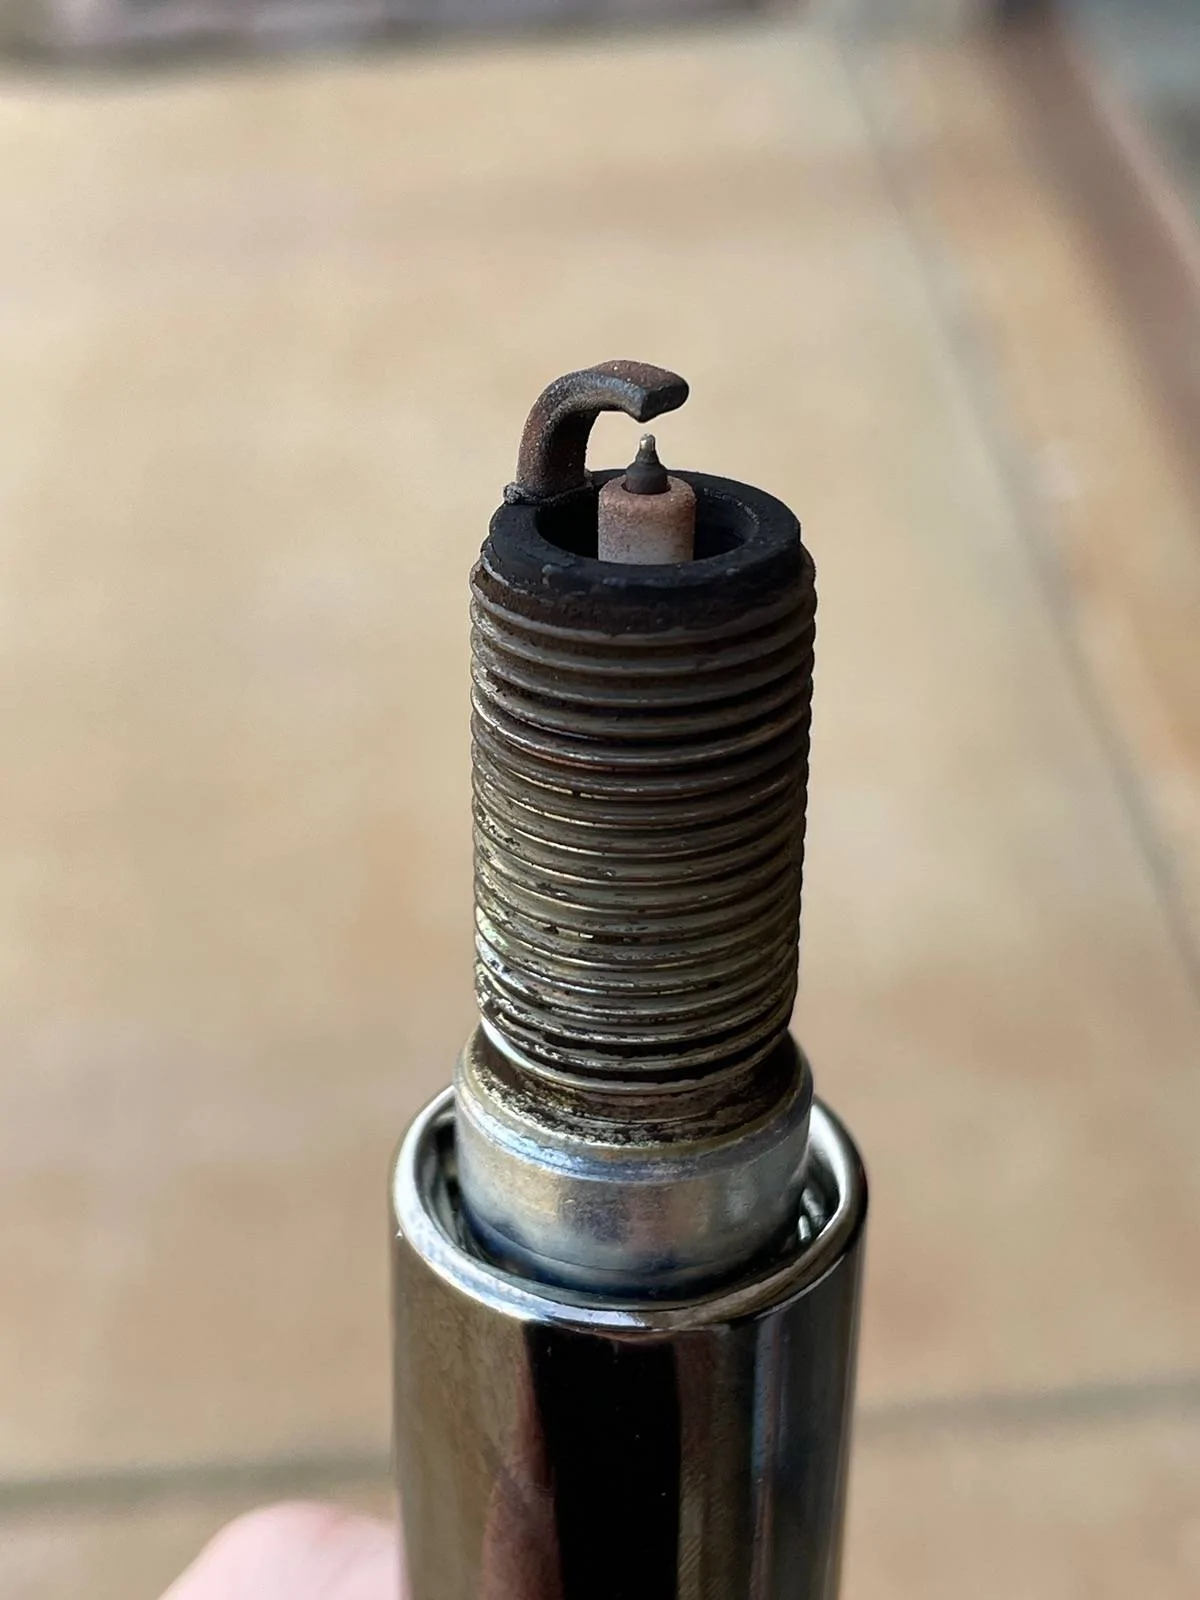
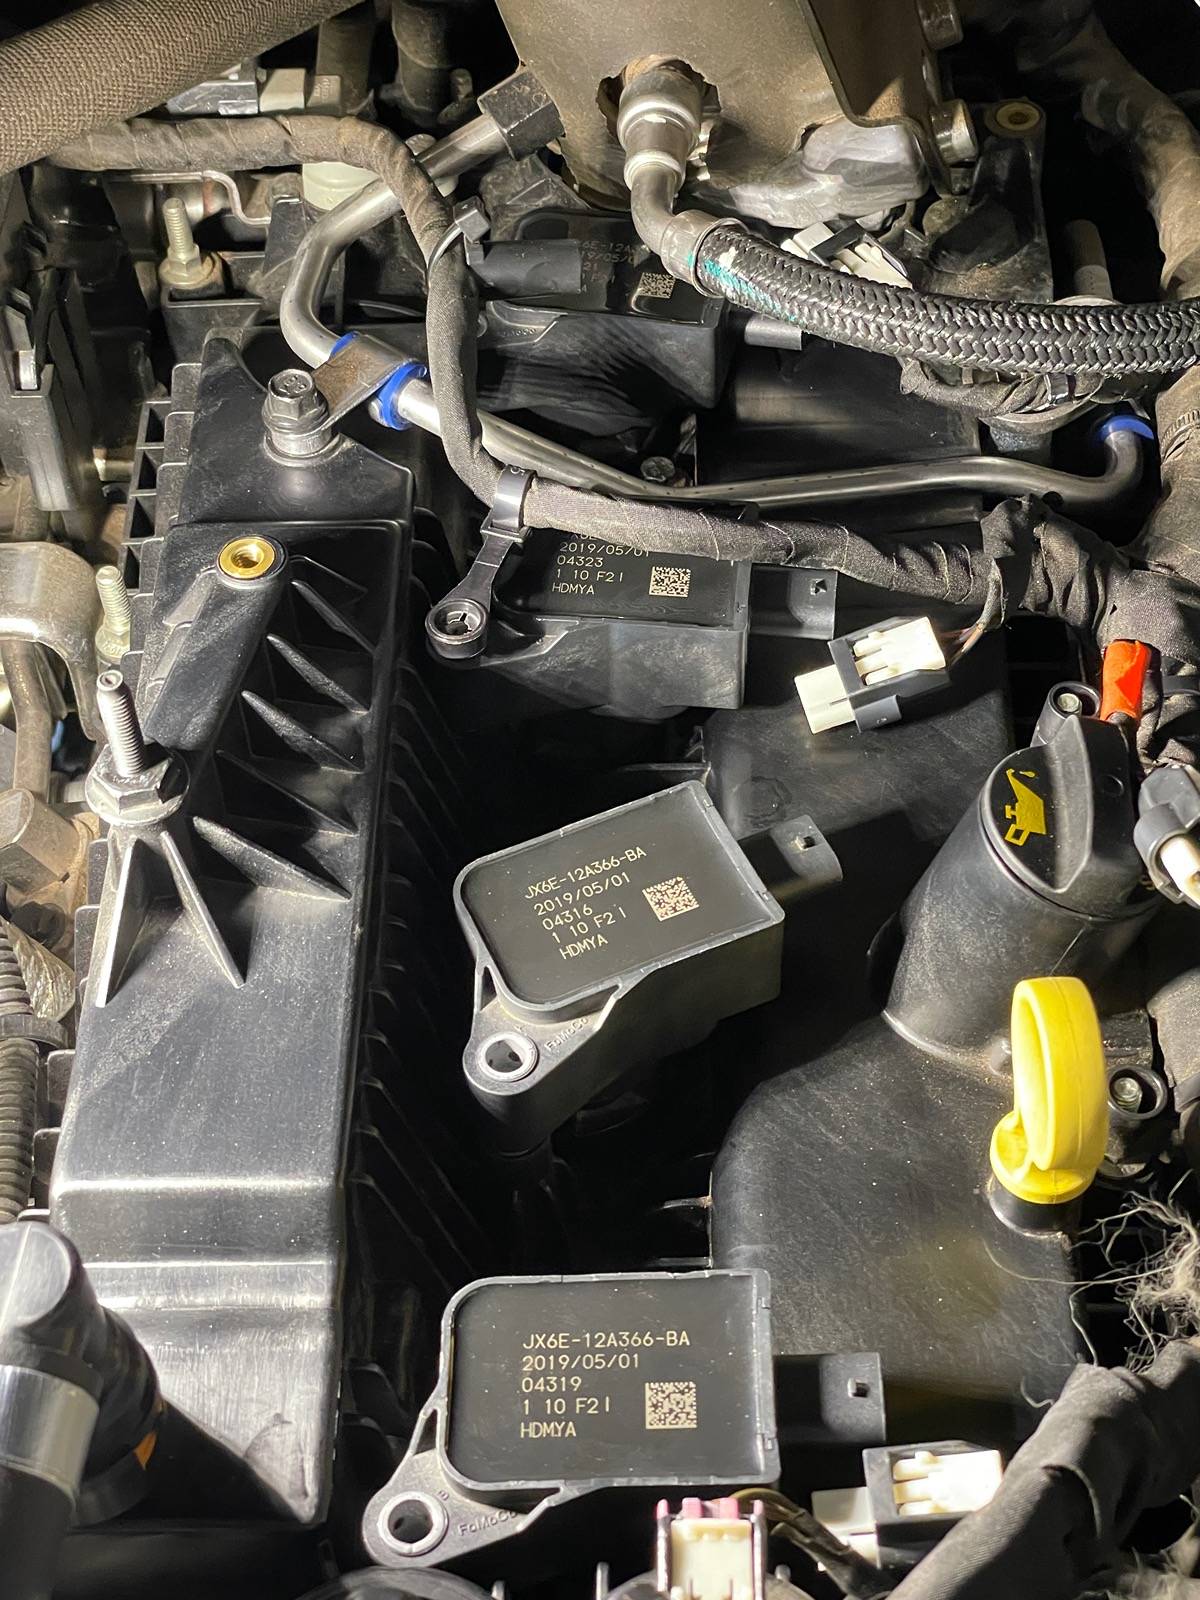
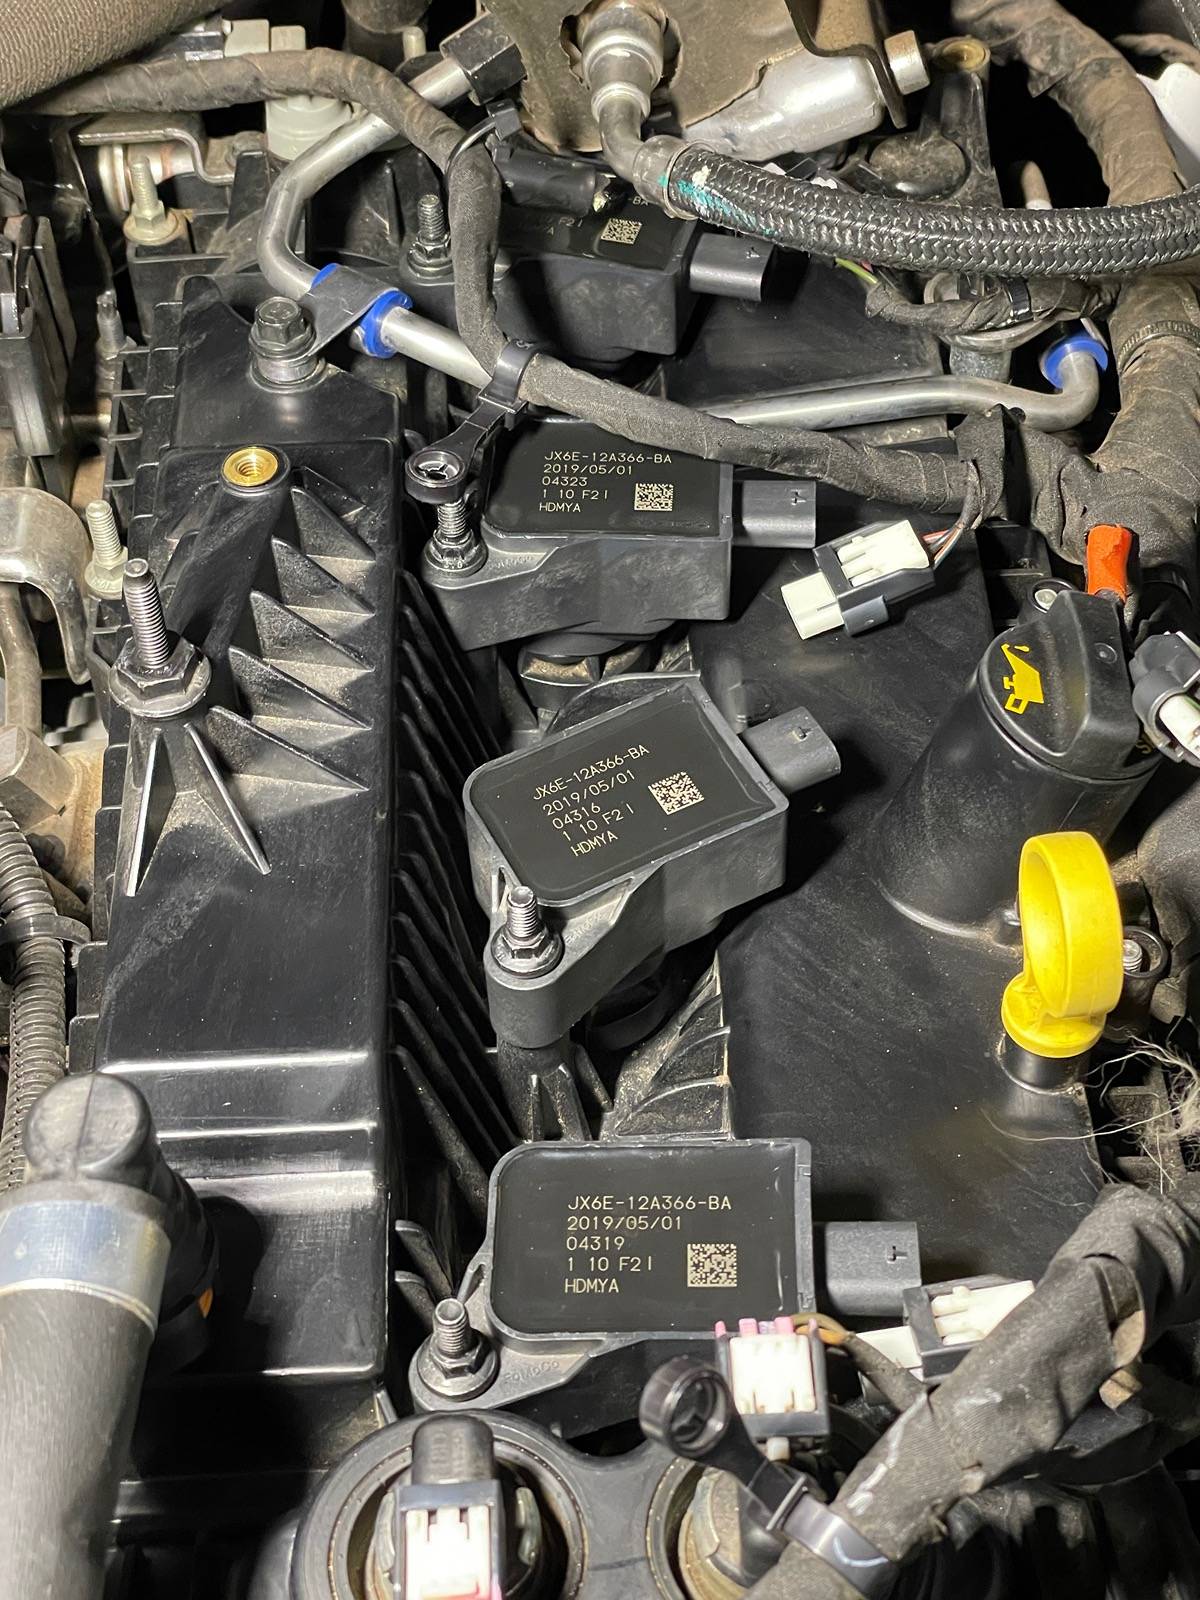
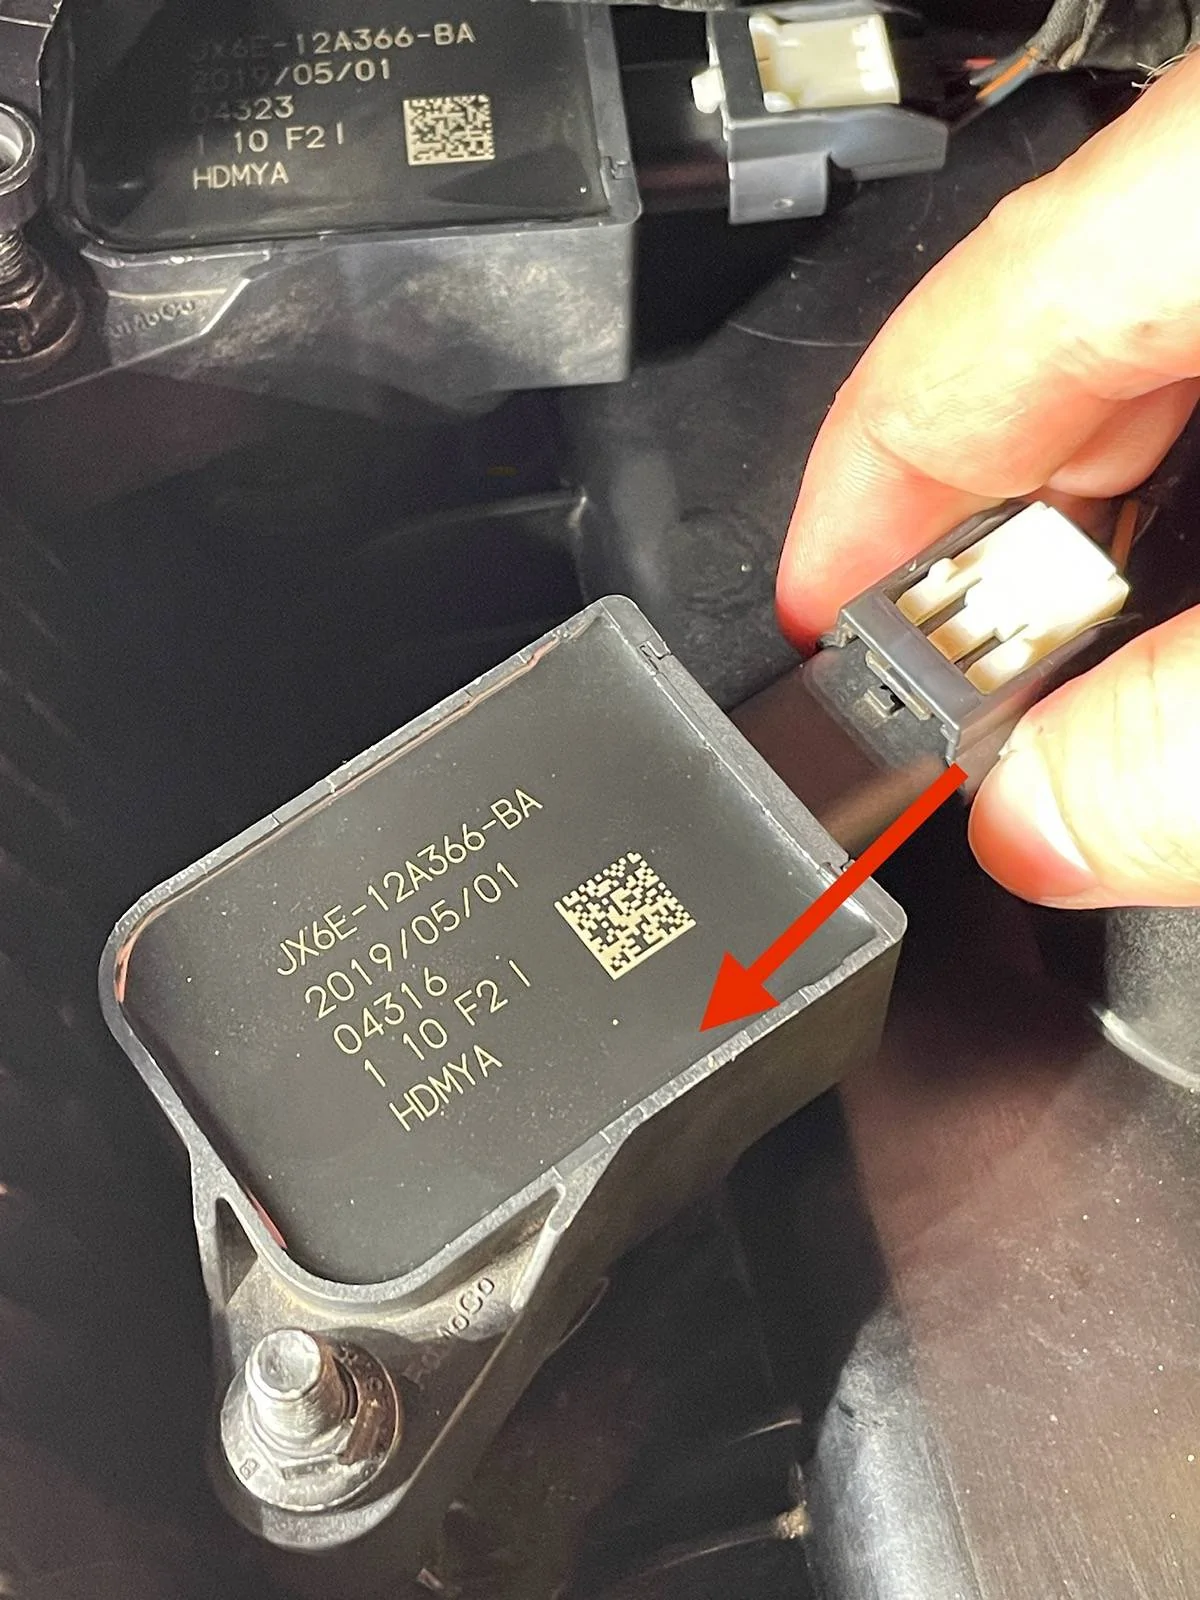
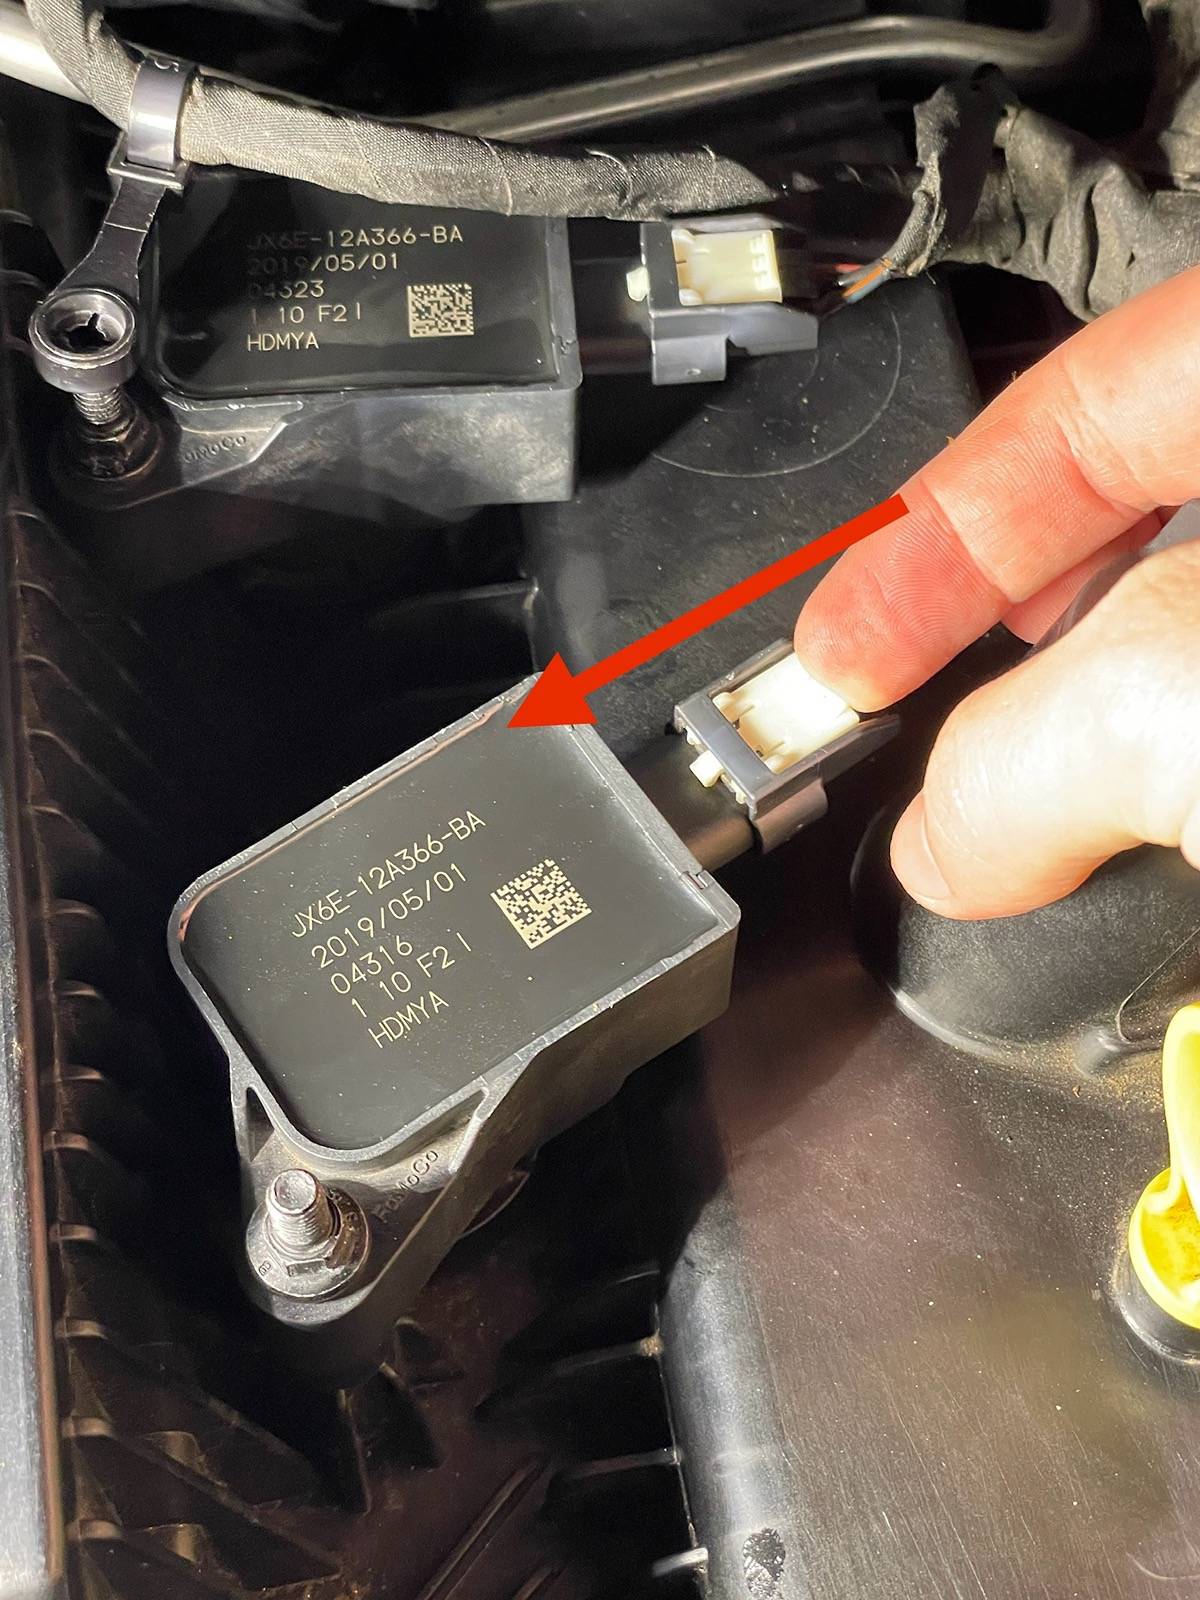
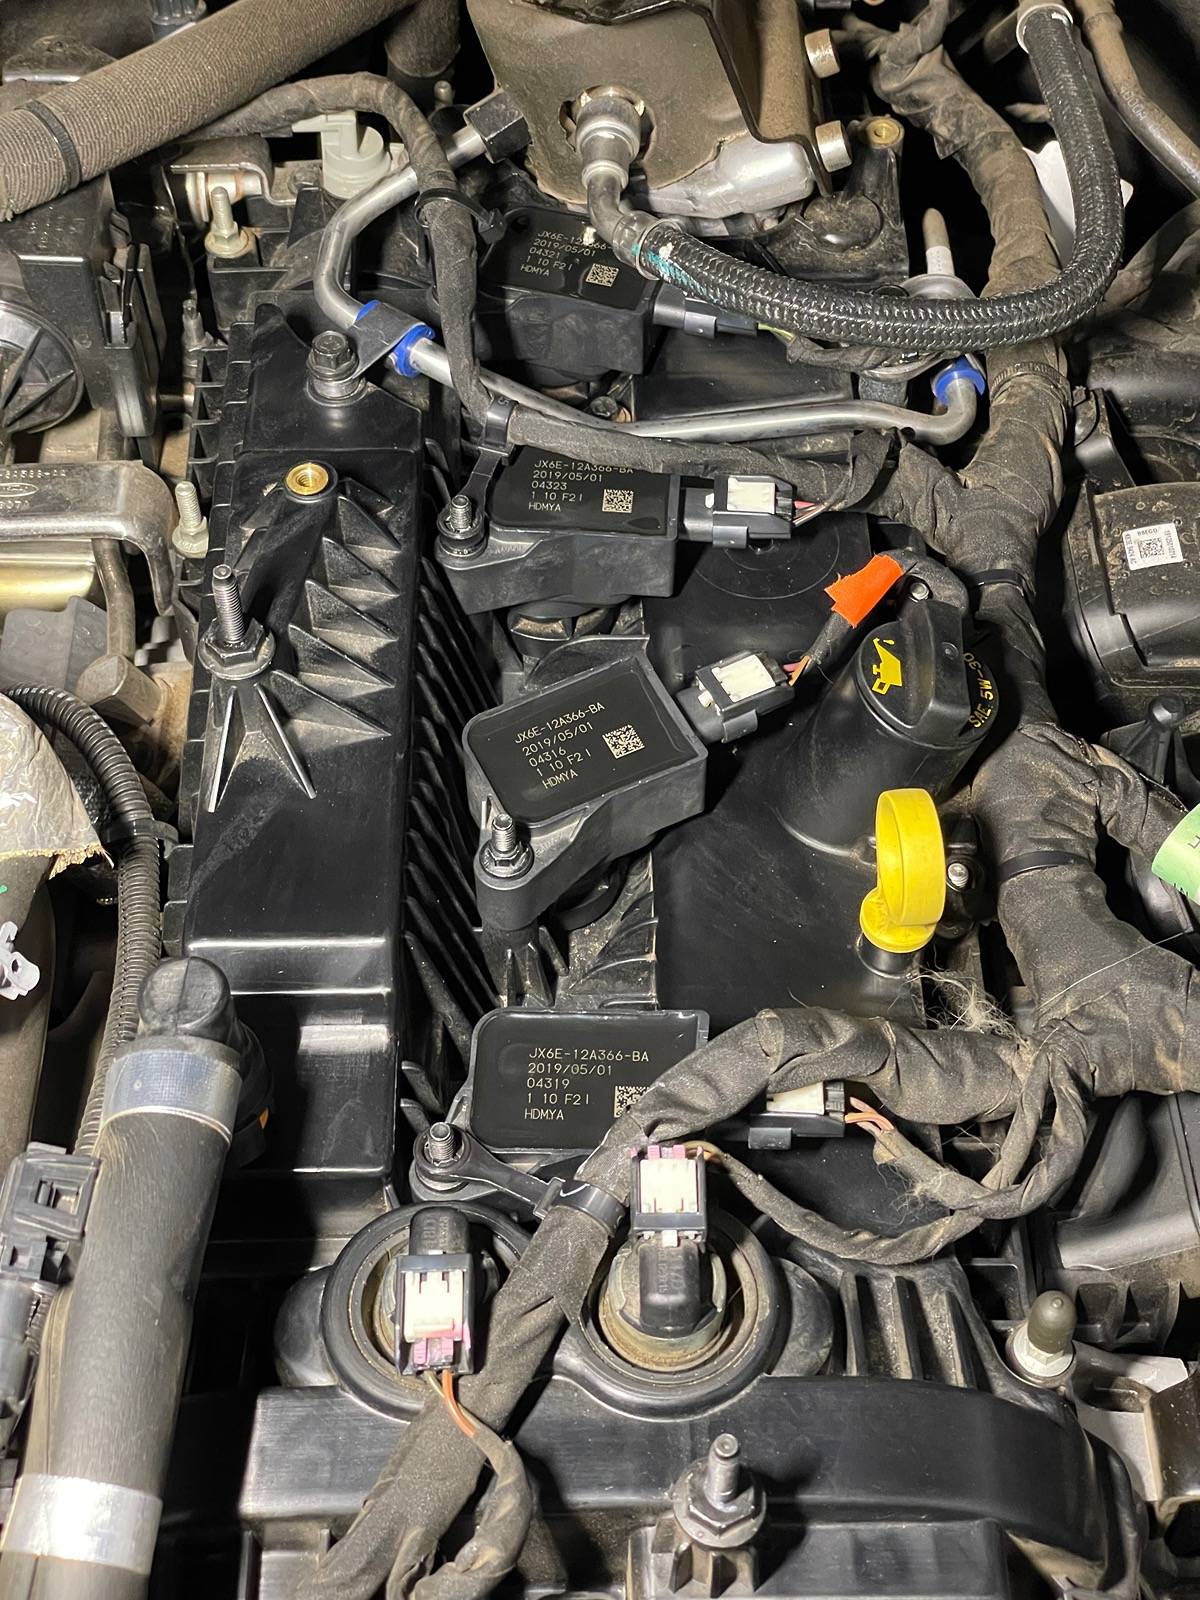
I have looked around for a nice cross reference part lookup for plugs on the 2.3 EB and have not been able to find anything good. It would be a valuable community resource if we could put one together or find a good one.

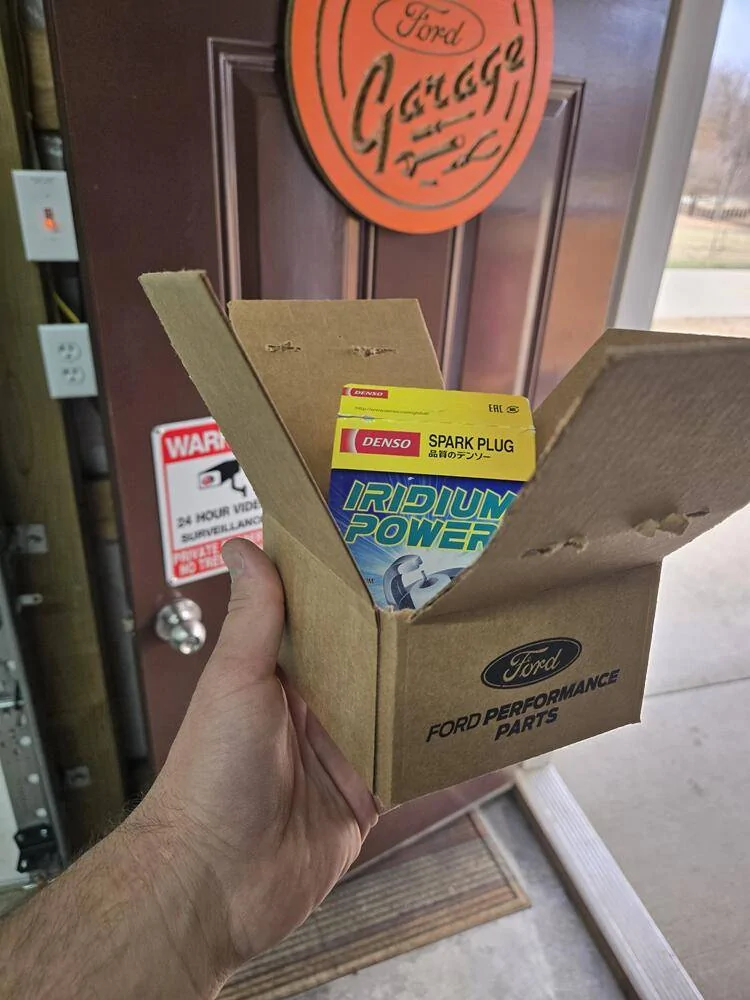
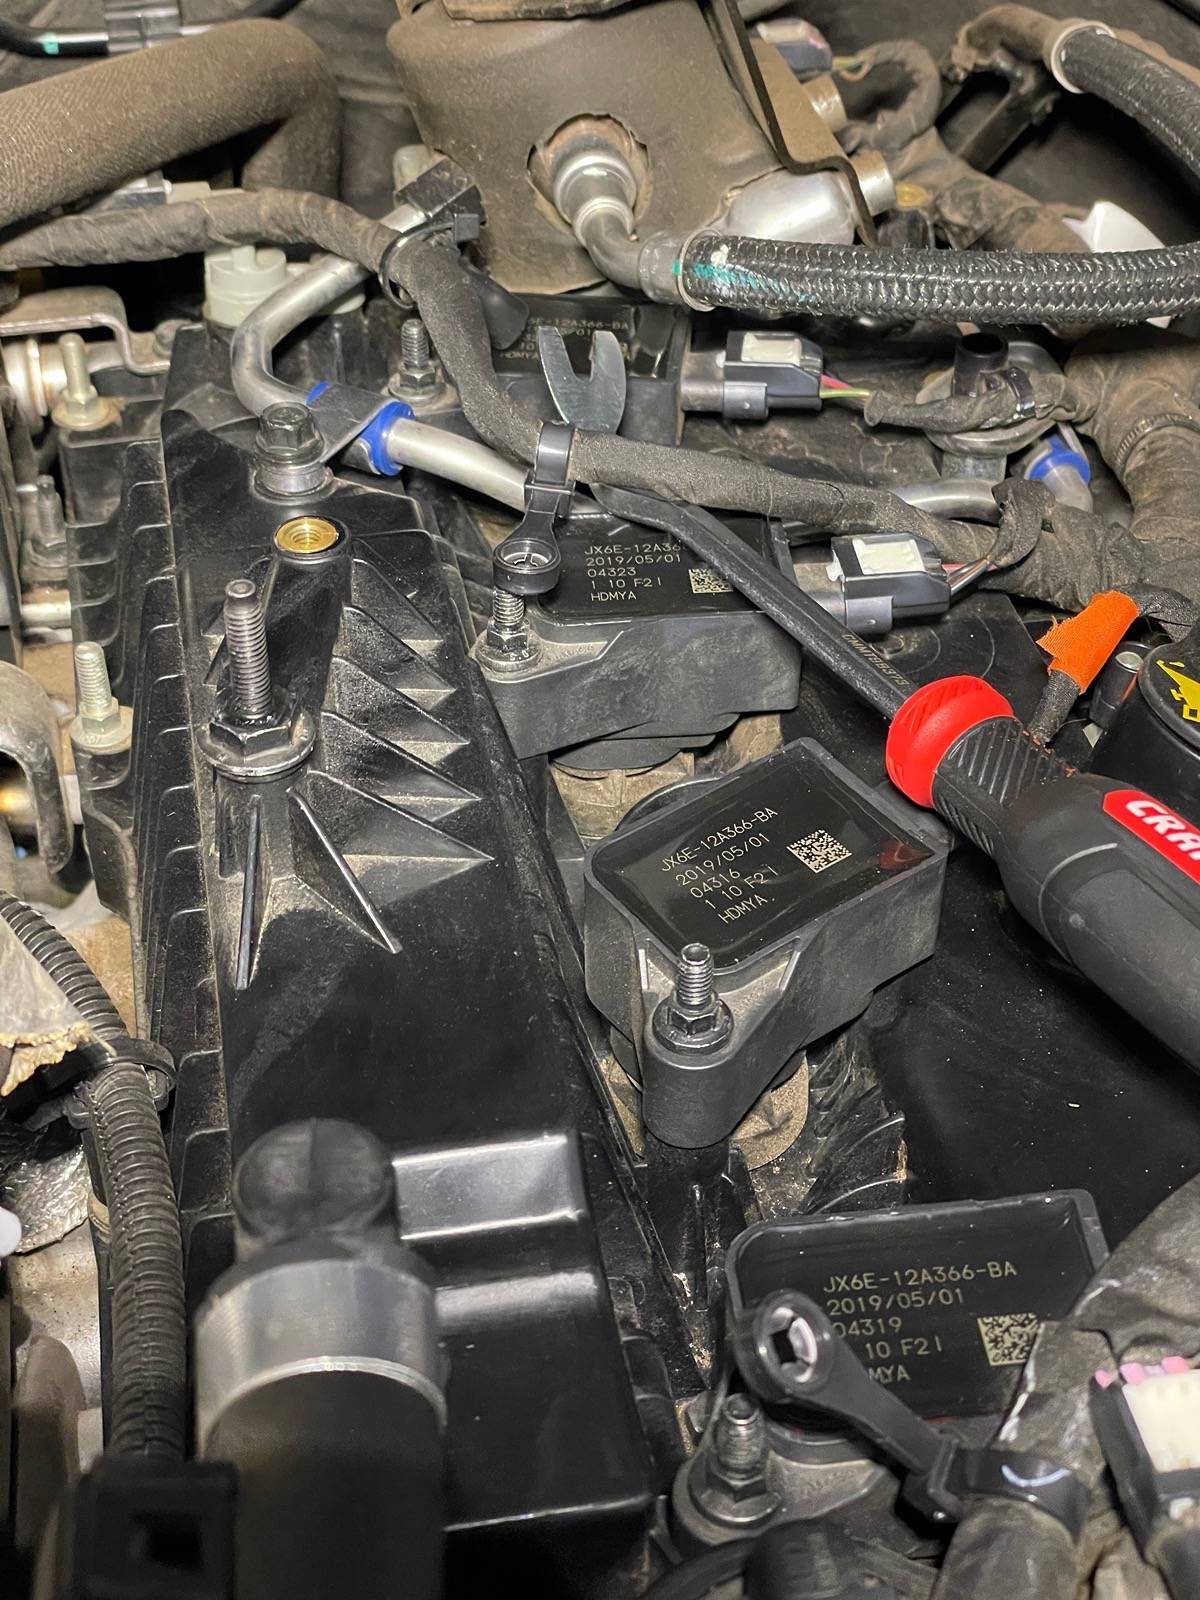
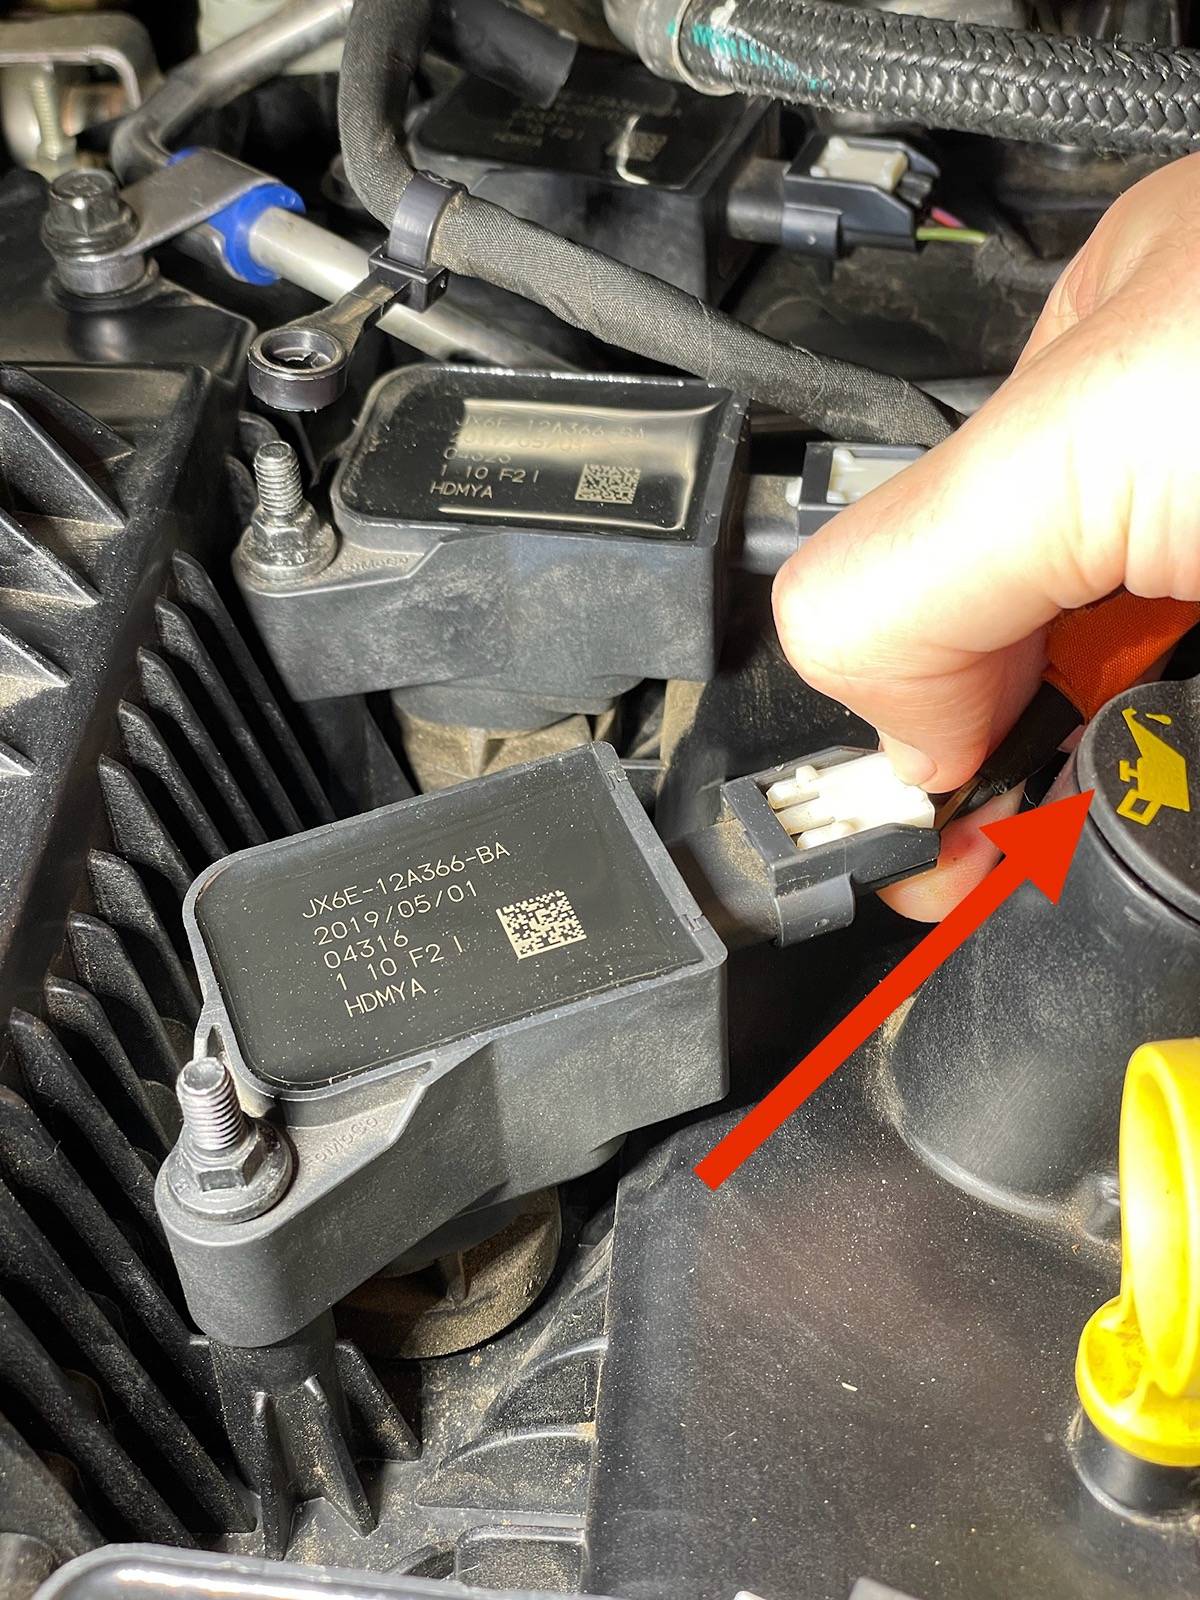
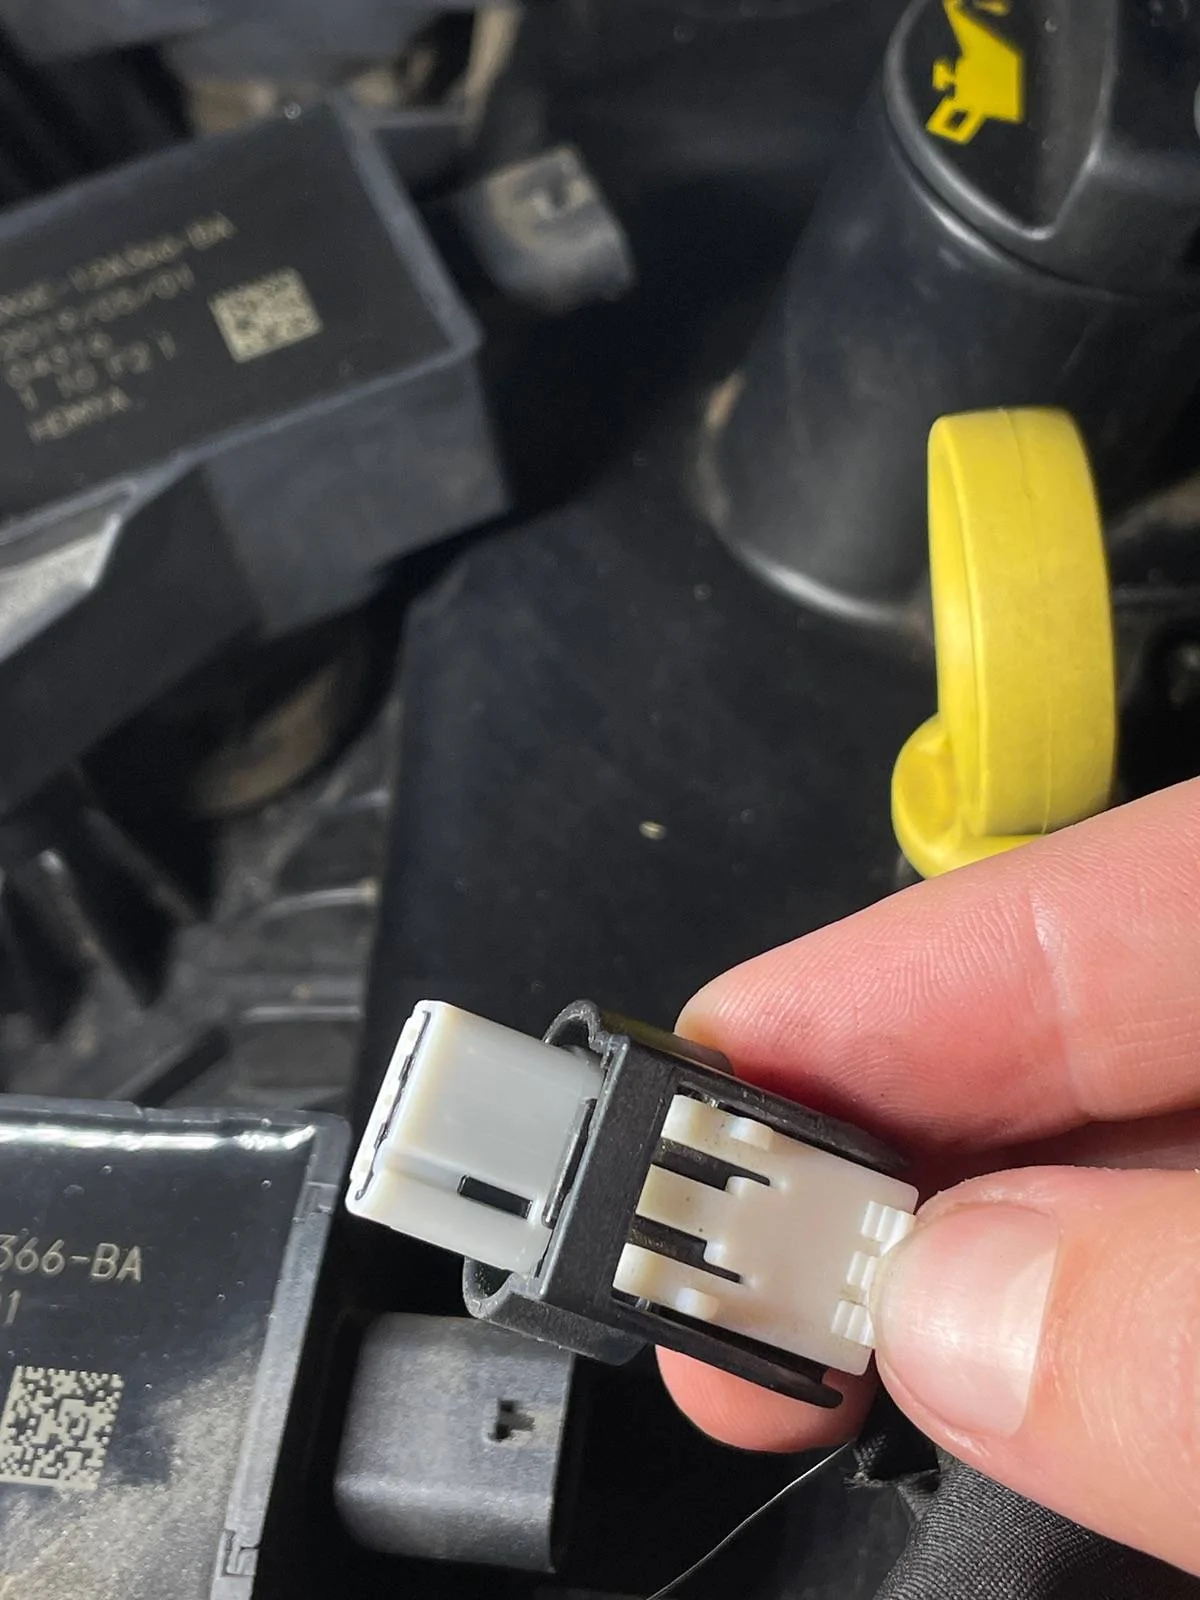
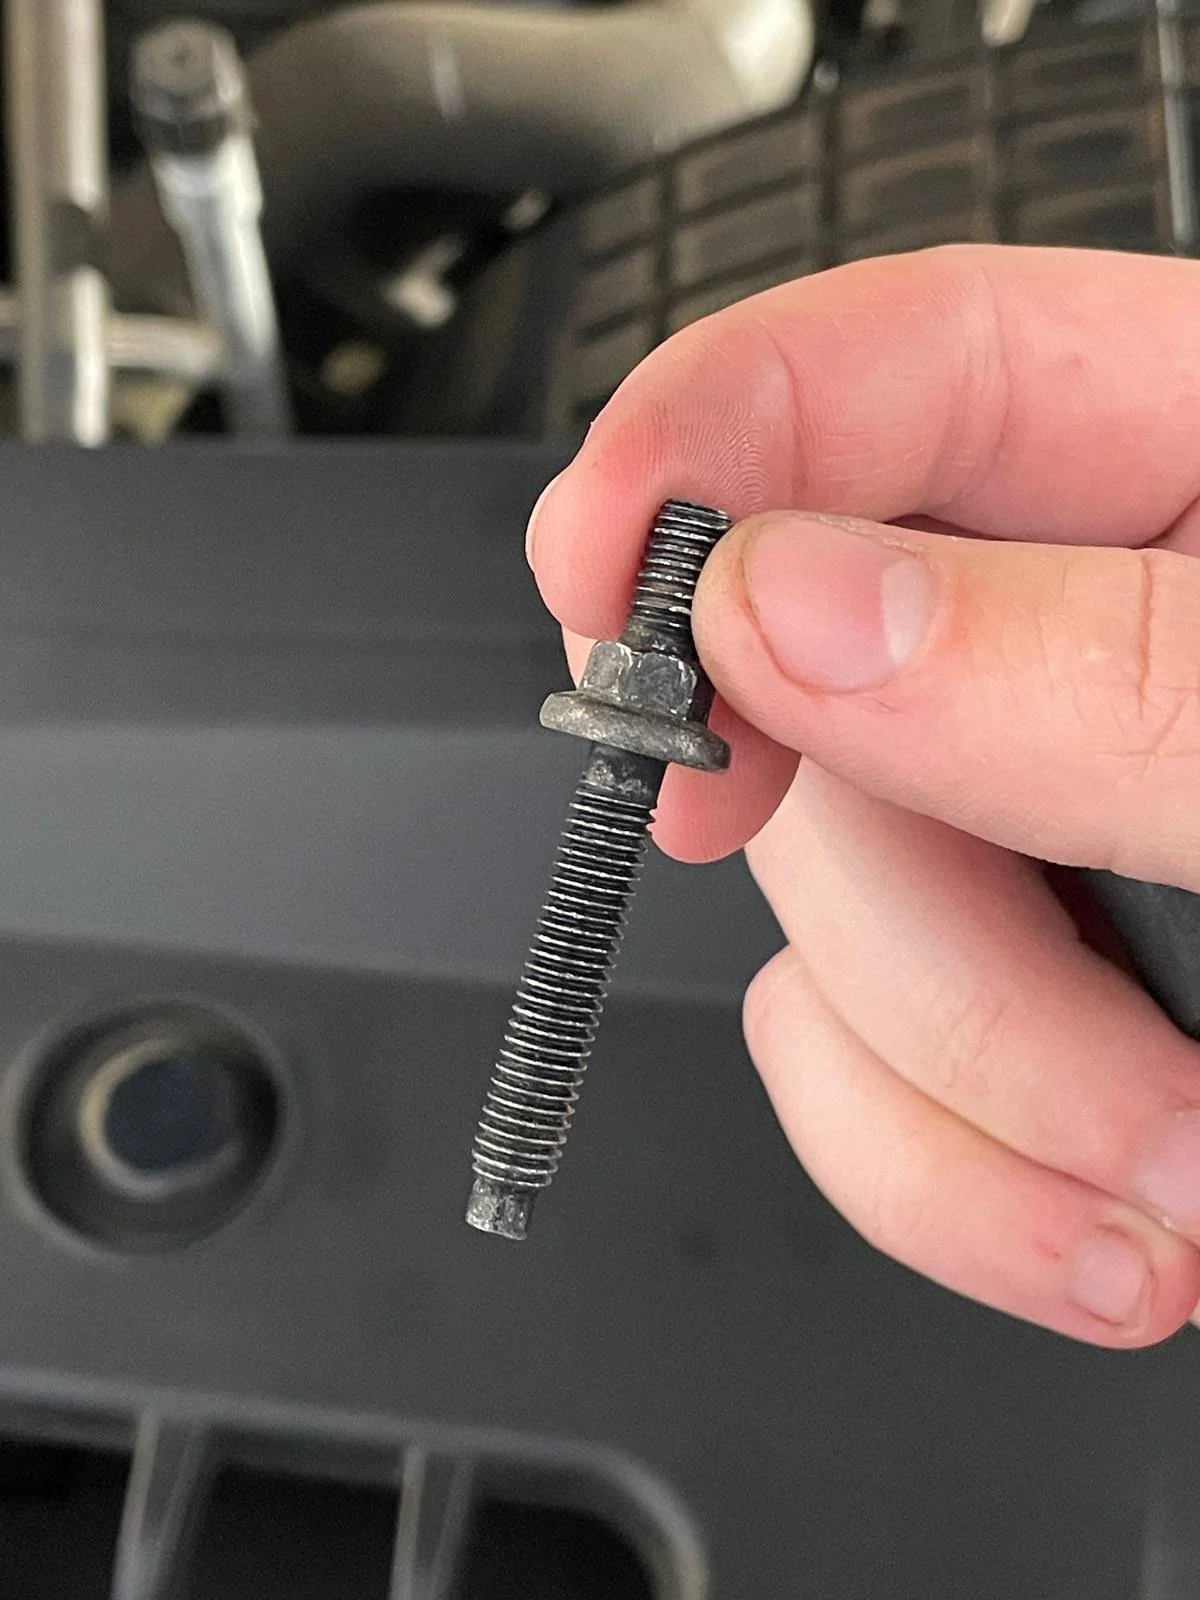
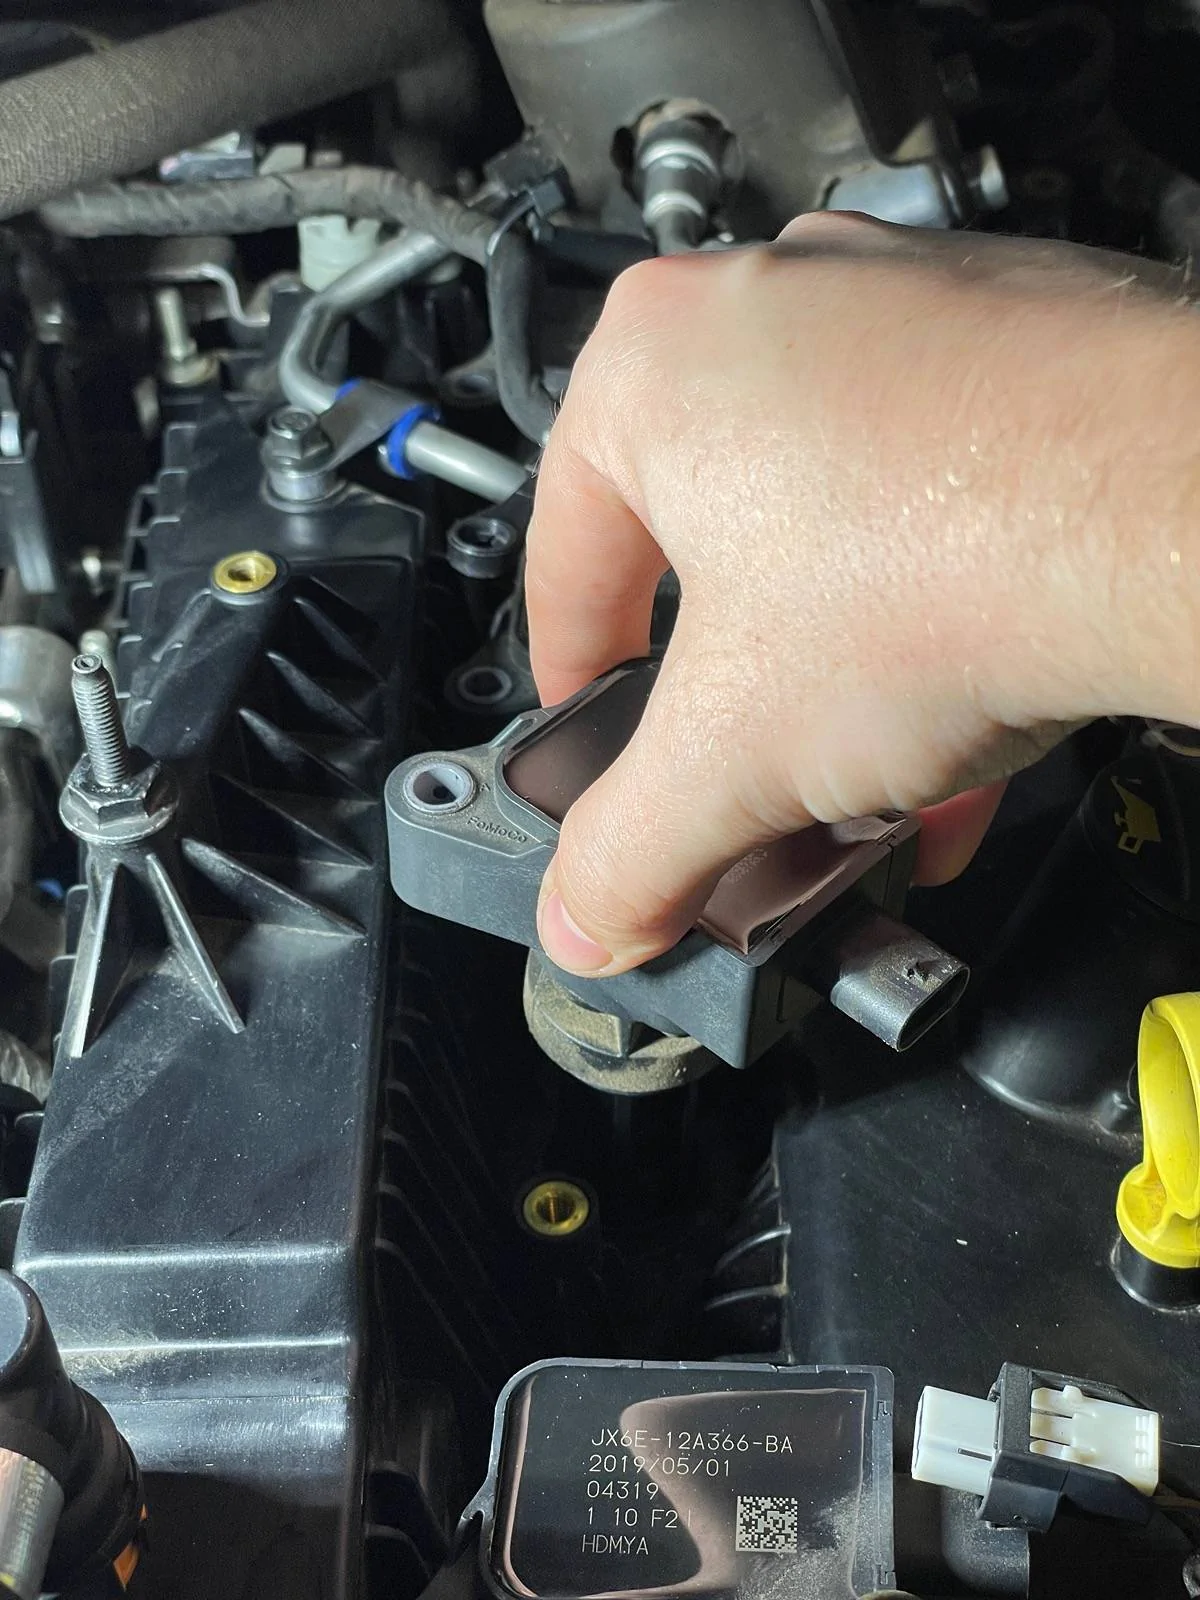
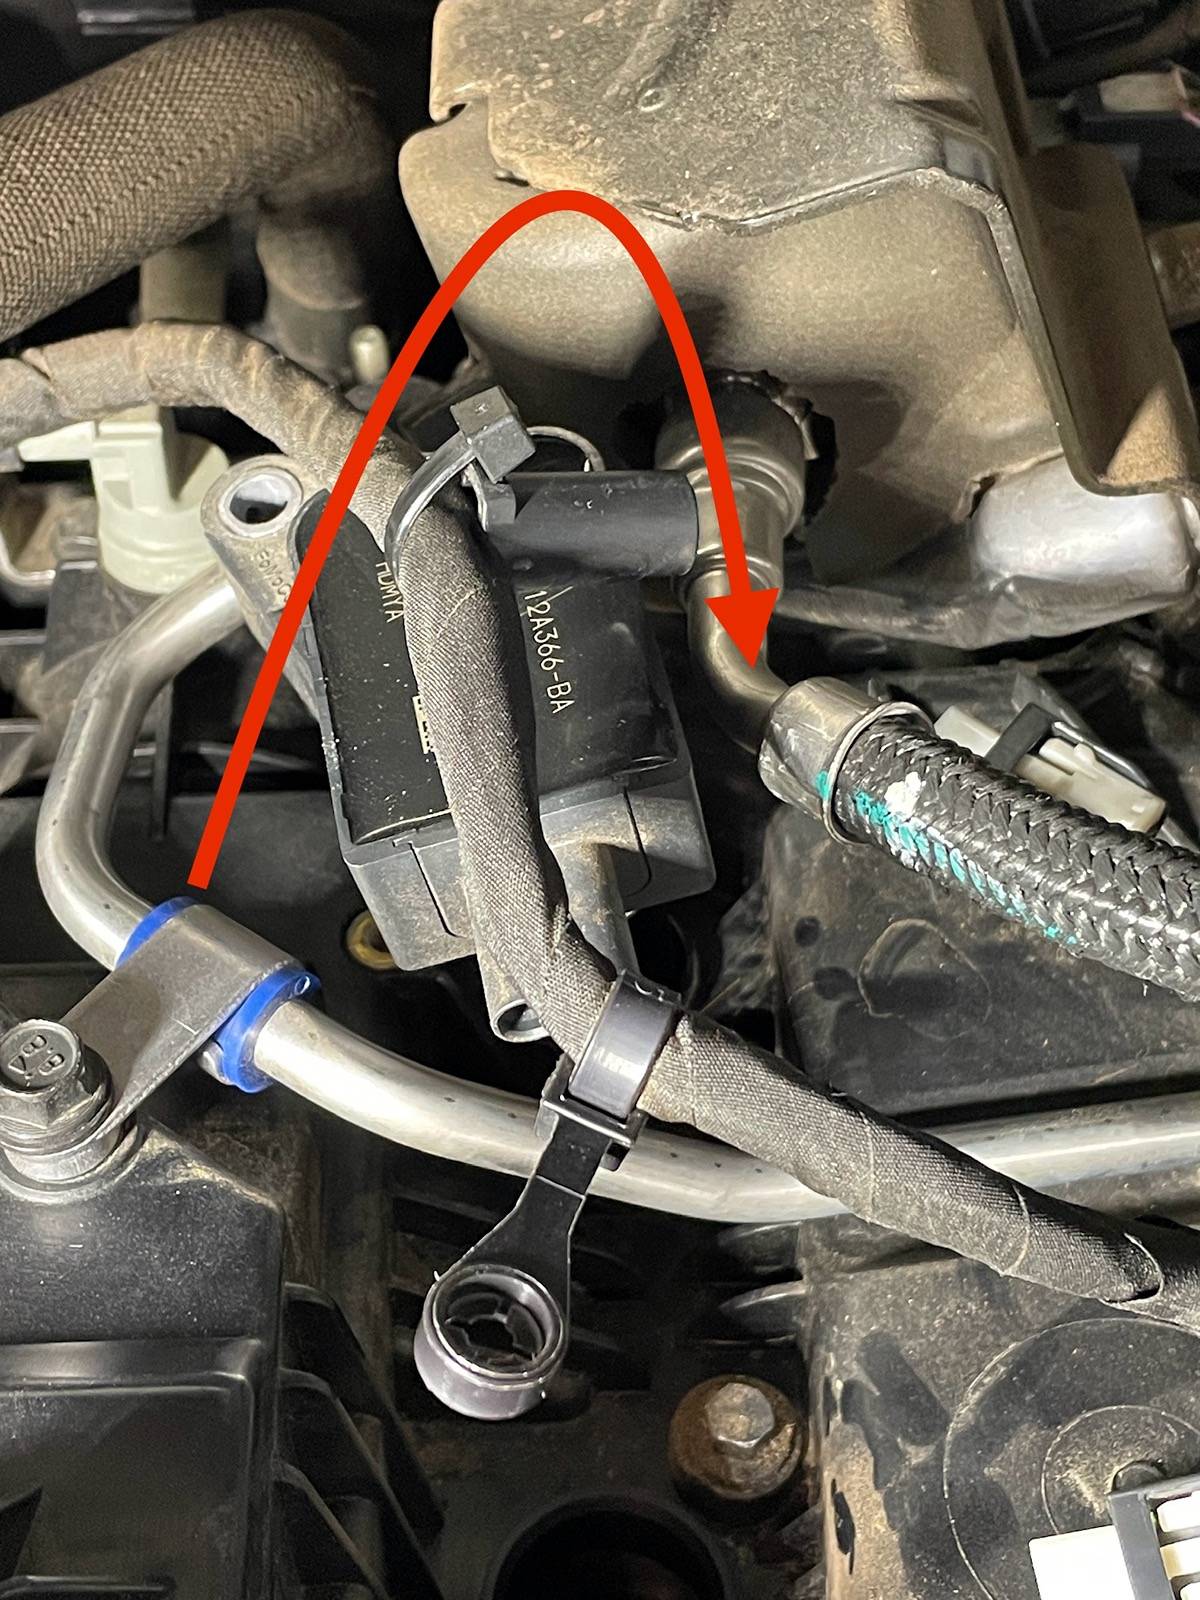
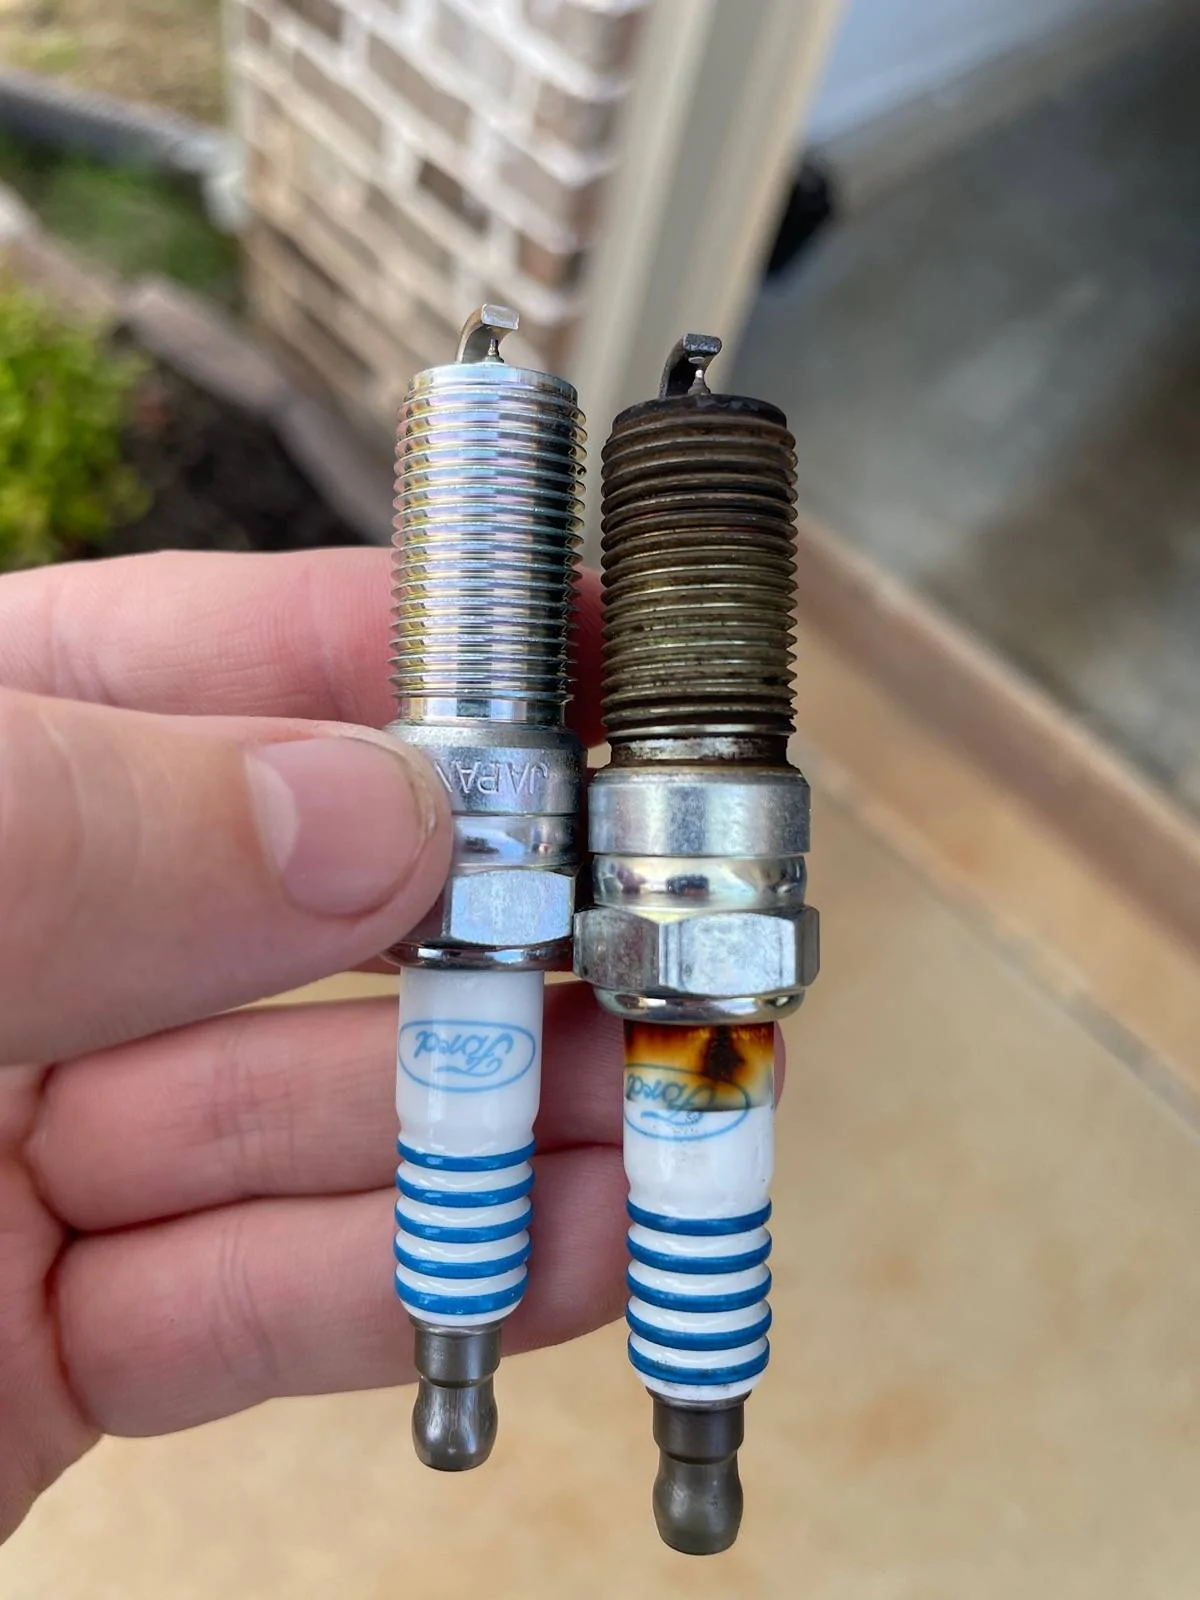
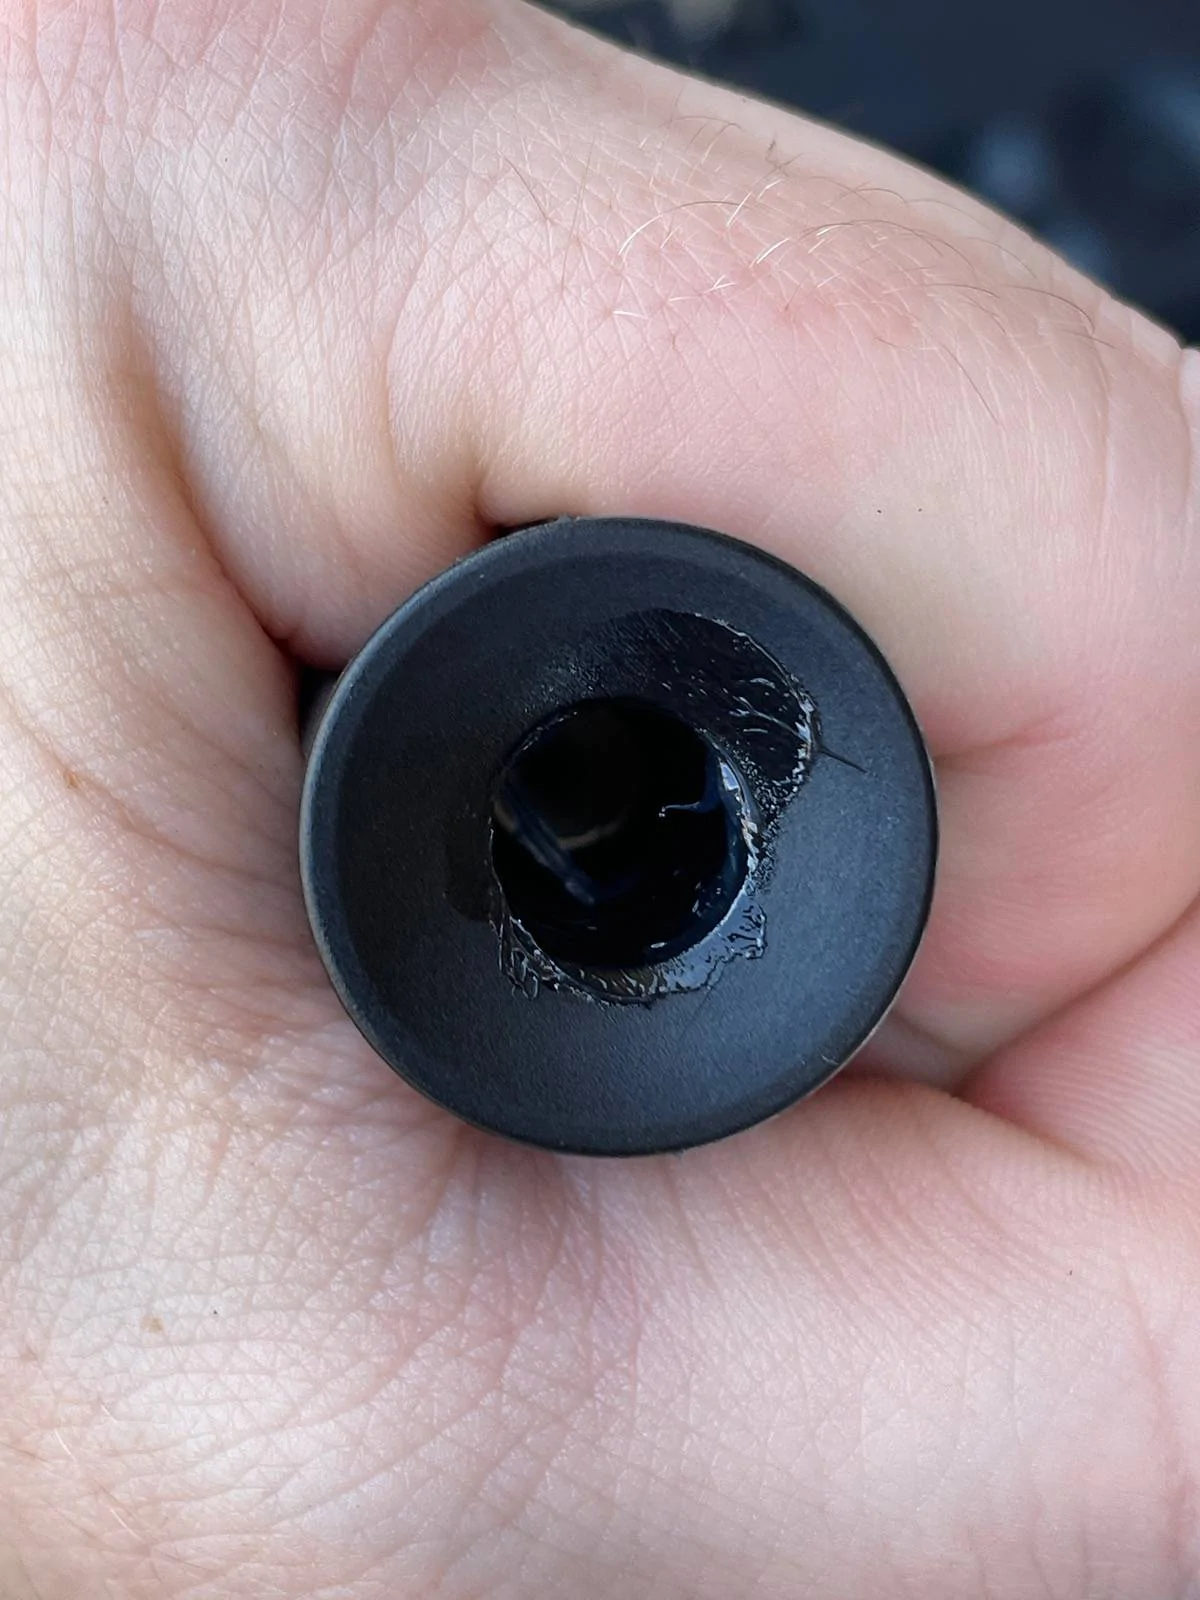
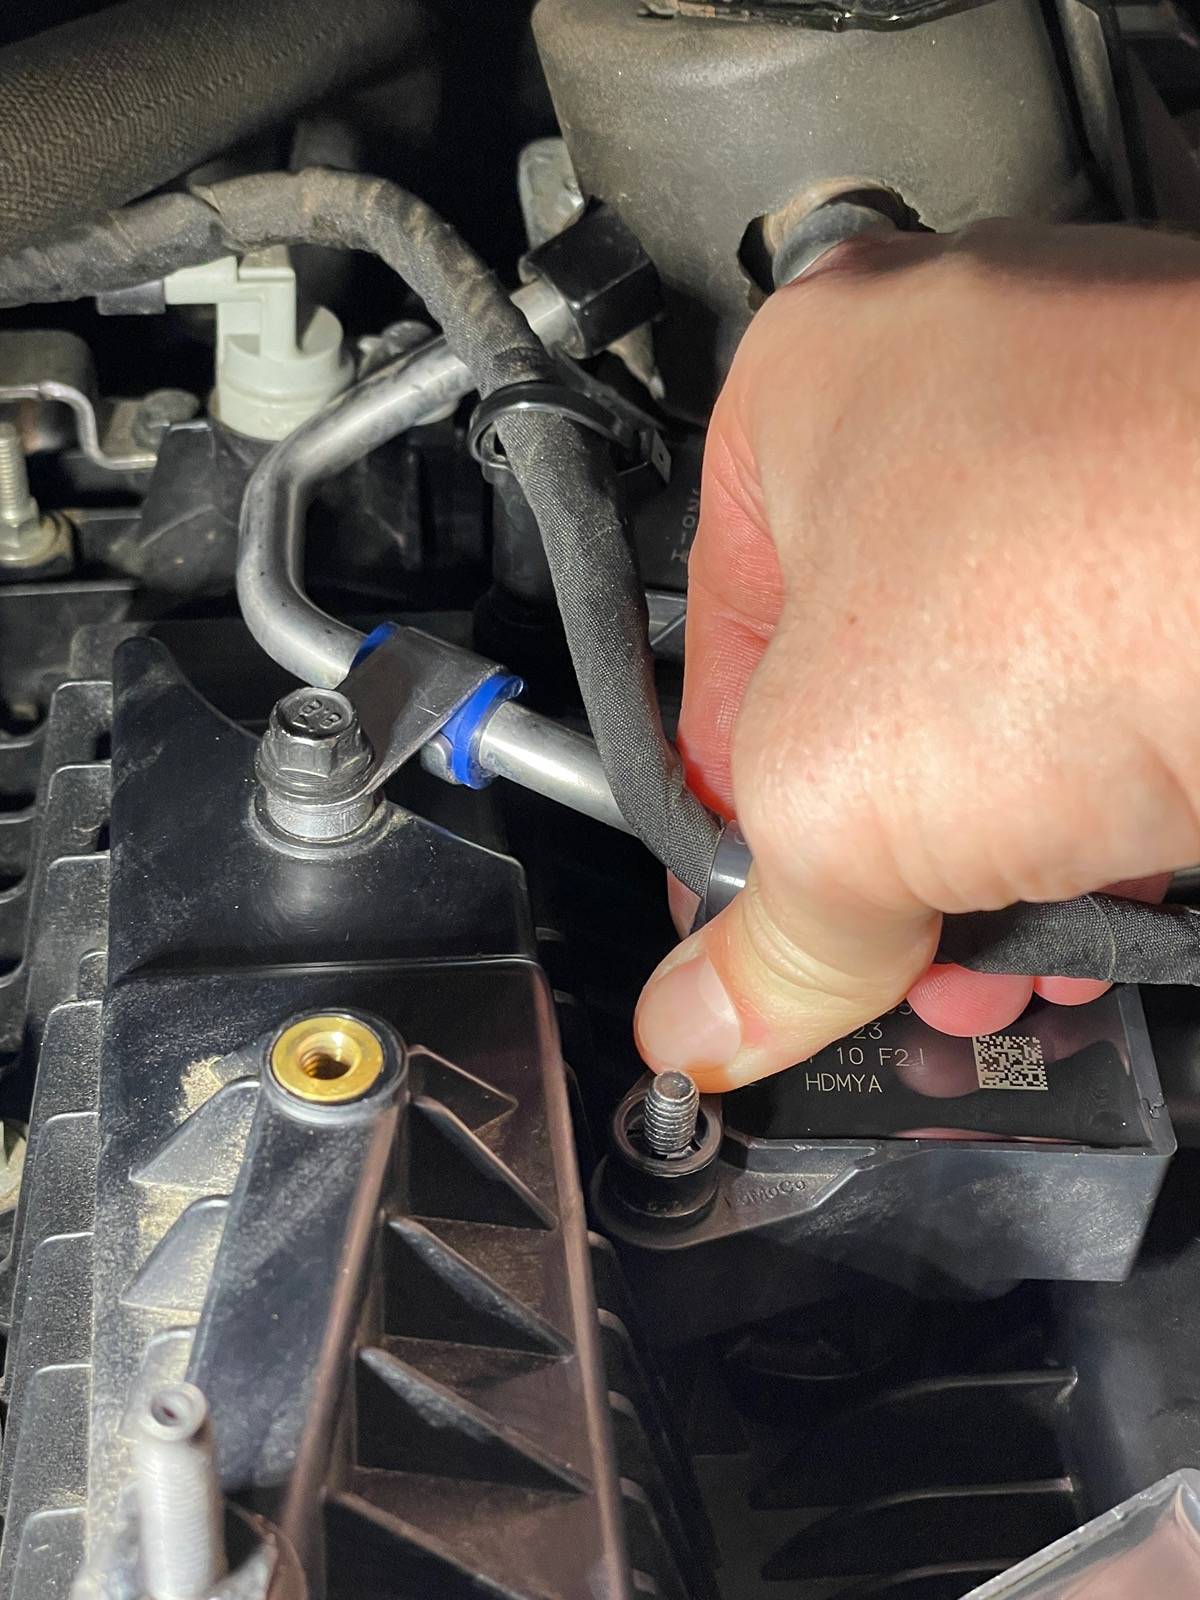
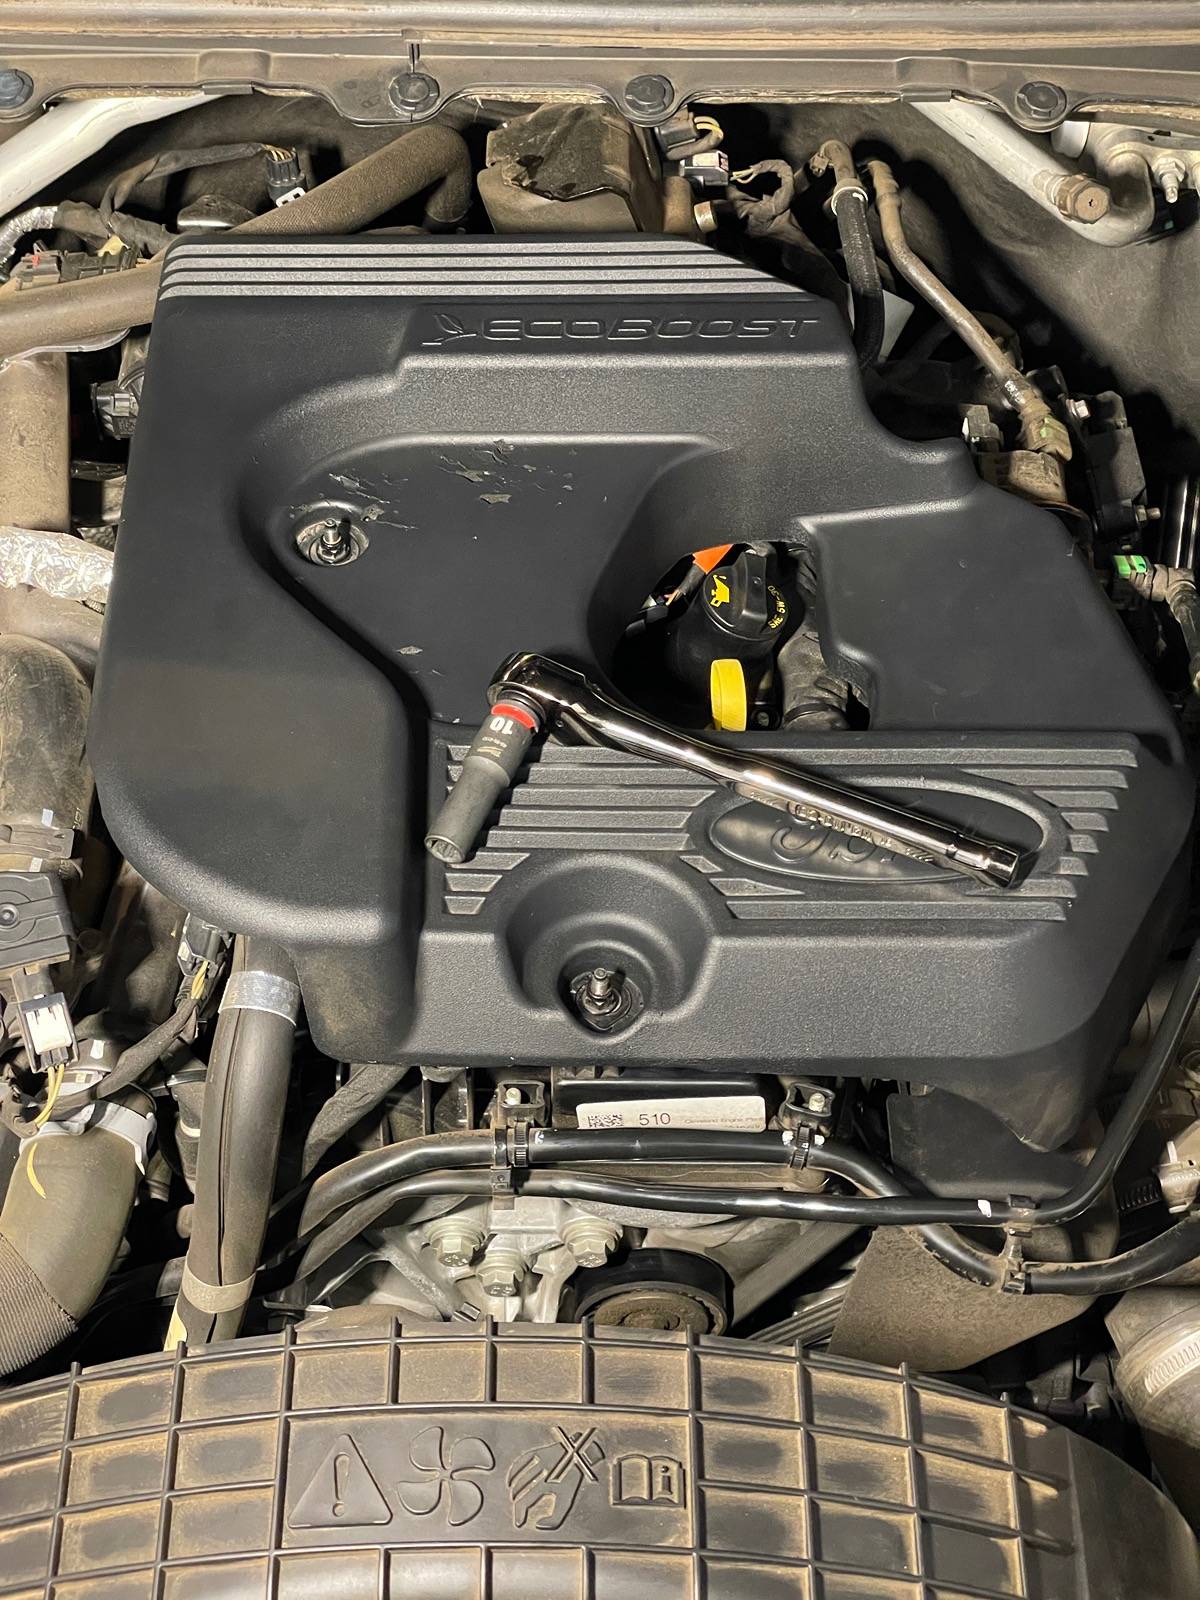
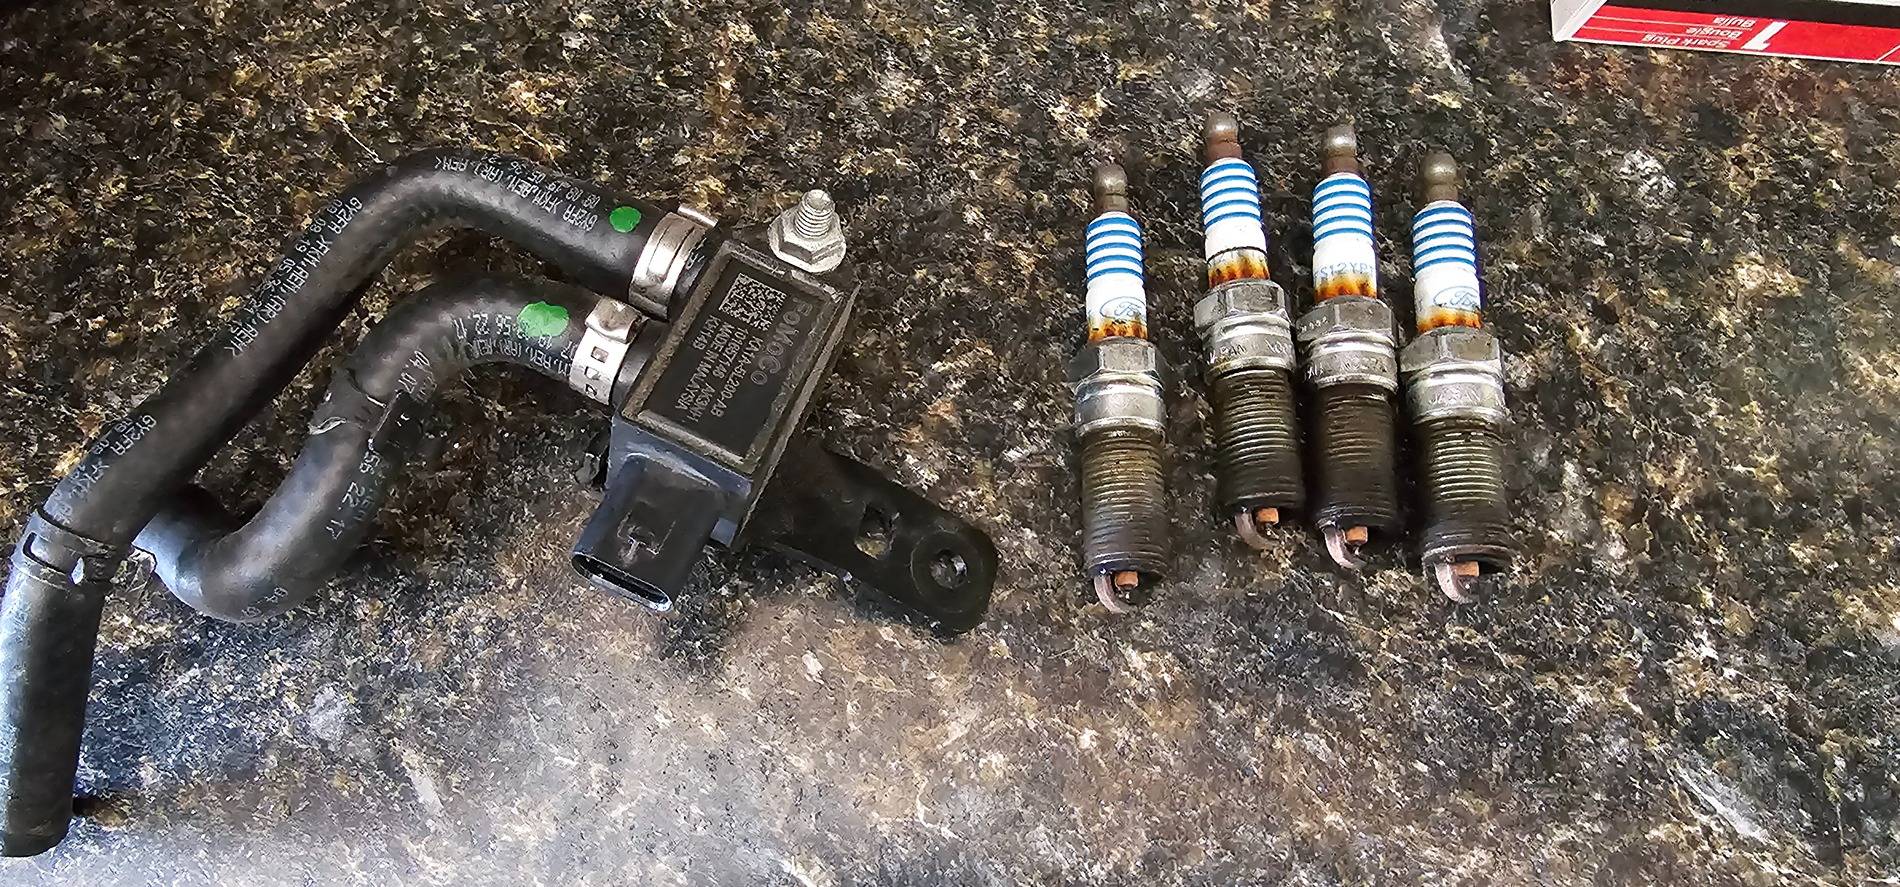
It might be placebo but I think I idle smoother now and have nicely restored (or better) low end torque with the FP/Denso plugs.
Sponsored


Reaper_Less

Well-Known Member
First Name
Andrew
Joined
Mar 12, 2024
Threads
5
Messages
52
Reaction score
39
Location
90807
Vehicle(s)
2021 Ranger
Occupation
N/A
Anyone know why sp-578 was replaced with sp-594? I can't find too much info but isn't that downgrading? To go from iridium to platinum?
 

21SCAB

Active Member
First Name
Ken
Joined
Feb 9, 2025
Threads
1
Messages
35
Reaction score
164
Location
Louisville, KY
Vehicle(s)
2021 SCAB Ranger XLT
Occupation
Retired
Figured I’d give some feedback on a previous post. I ordered these (Ford Performance Parts Spark Plug M-12405-20T) from Summit Racing for $101.74. I figured there would be some type of magical markings on them showing they were Ford Performance parts and not the exact same Denso Plug. Hell, maybe I thought they were just rebranded,

Wrong.

Denso (5341) ITV24 are $10.18 each on Amazon, $37.52 for a 4 pack. I could have saved $60.

Anyway, my truck runs fine with the new, colder plugs (and FP tune). It might have a little more lower end pep, but probably not. The one thing I will note, and it makes no sense to me at all, is that my tail pipe exhaust condensation appears substantially cleaner. I strongly noticed what looked like carbon in the pool of exhaust drip previously. A lot, kind of like my carbureted cars with a rich idle. Now it looks clean. That makes no sense with a colder plug, but for whatever reason it’s real. It might have changed with I put on the FP tune, but I’m not sure.

FP Denso Plugs.jpg
 

Sojourner

Well-Known Member
Joined
Jul 25, 2023
Threads
1
Messages
169
Reaction score
403
Location
Maryland
Vehicle(s)
2023 Ford Ranger XLT Tremor
Occupation
Retired Army / Disabled Vet
Denso (5341) ITV24 are $10.18 each on Amazon, $37.52 for a 4 pack. I could have saved $60.
Speaking of good deals..., for once in my life I was able to "score a great deal" as I was able to get 3 4-packs from Amazon Resale for just over $8.00 per 4-pack! First 4-pack is in hand and it was brand new (it was the outer box that was a mess). Waiting on the other two 4-packs.

Hoping to use them on my Ranger (and other Fords where it appears they may be compatible; I'm not running tunes on any of my Fords). And at $8 per 4-pack even if they aren't and/or I don't use them I'm not out much.

If all goes well I'll still need two more 4-packs, but I'm in no hurry as I have miles to go before needing to swap out plugs.
 

McFly121

Member
First Name
Chris
Joined
Feb 18, 2021
Threads
0
Messages
7
Reaction score
17
Location
Pingree Grove, IL
Vehicle(s)
2020 Ranger
Occupation
Courier
Greetings all,

Thought I would do another one of my write-ups on a fairly simple, yet important maintenance task on your Ranger. (This guide is geared towards those of us who have never performed this procedure)
The Ford Scheduled Maintenance is "Every 100,000 mi (160,000 km) Replace Spark Plugs."
The spark plug specifications are gap (0.027 - 0.031 in (0.70 - 0.80 mm)) and torque 12 Nm (106 in.lb (8 ft.lb))

Supplies Needed :
-4x Motorcraft SP-594 (CYFS-12Y-RT3) Spark Plugs (Our manual states SP-578 but SP-594 superseded it) ($57 total from my local dealer)
-3/8" Ratchet or 1/2" Ratchet with 1/2"-3/8" adapter (You can use a cordless like my Milwaukee 2457-20 to remove bolts after loosening them with your ratchet)
-8mm and 10mm semi-deep or deep sockets
-5/8 Spark Plug socket
-6" or 8" extension (I used a 6 inch with no issue but an 8 inch fit just fine as well. If you have a wobble extension it can help on cylinder 4)
-1/4" in.lb Torque Wrench set to 106 in.lbs (12 Nm) or 1/2" ft.lb Torque Wrench set to 8 ft.lbs (11Nm)
-Plastic/Trim Clip removal tool (I used a Craftsman CMMT98373) or small slotted head screwdriver
-Dielectric Grease (Permatex 22058)
-Straight Pick (I used my Matco PMO1C)
-Old microfiber towels

Optional :
-
Step Ladder or Work Platform
-Compressed Air or Forced Air Unit (I used an Adam's Air Cannon)
-Nitrile gloves (can't forget about PPE)

Step One :
Remove the EcoBoost Engine Cover if equipped (my '19 Lariat came equipped) by removing the 2x 10mm lock nuts and pulling up

*OPTIONAL: Upon removal deep clean the cover and underneath around the spark plugs using a damp microfiber rag or brush

IMG_2301.jpeg
IMG_2302.jpeg


STEP TWO :
As I mentioned in Step One, clean as much as you want on the top of the engine using low pressure compressed air to blow out large particles and using damp microfiber towels. I opted to clean as much as I could to prevent anything from falling in to the cylinder holes.

STEP THREE :
Drive up the road or get your family some breakfast like I did to warm up the engine prior to disassembly. I am a Quality Engineer so I follow procedures. :LOL:
The procedure states "Do not remove the spark plugs when the engine is hot or cold soaked. Make sure the engine is warm (hand touch after cooling down) prior to spark plug removal.

STEP FOUR :
Use your plastic clip removal tool or slotted screwdriver to remove the 3x plastic wire guides/retainers. It is super easy and you do not have to apply much force at all. You can pull the harness away from Cylinder 1 (closest to you) to fully expose that ignition coil now.

IMG_2304.jpeg
IMG_2305.jpeg


STEP FIVE :

Unplug the 4x Ignition Coil connectors. The design is pretty neat, the white sliding locking tab can be unlocked by using your fingernail and sliding it away from you. Once the locking tab is unlocked, simply wiggle the connector off.

IMG_2306.jpeg
IMG_2307.jpeg


STEP SIX :
Use your Ratchet & 8mm socket to remove the 4x Ignition Coil Studs and use a twisting motion to remove the Ignition Coils (mine did not take much force at all). The trickiest one is the back one on cylinder 4, but simply rotate the Ignition Coil clockwise where it is not obstructed by the high pressure fuel pump and pull up.

IMG_2309.jpeg
IMG_2310.jpeg

IMG_2311.jpeg
IMG_2312.jpeg


STEP SEVEN :
Remove 4x Spark Plugs using a 6" or 8" extension with a 5/8 Spark Plug Socket. Mine were fairly easy to break loose and did squeak a little bit while loosening.

IMG_2317.jpeg


My plugs were in decent shape, but I am probably going to make my change interval 5 Years/60,000 miles. The staining on the porcelain is not rust, it is corona staining and is a completely normal byproduct per NGK.

IMG_2313.jpeg
IMG_2315.jpeg


STEP EIGHT :
Check gap and Reinstall your 4x new Motorcraft SP-594 Spark Plugs. All 4 of mine were at a 0.029 inch (0.74 mm) gap out of the box so I did not adjust it. I measured the factory plugs I removed and they were between 0.028 and 0.029 inches.
Simply hand thread each plug until it's snug to prevent from cross threading. I was actually able to get it fairly close to the proper torque value by simply hand threading. If you have a knurled extension it makes it easier.
A trick for cylinder 4 is to place your ratchet at around the 8 o clock position to both loosen/tighten the plug so the high pressure fuel pump is not in the way.

*OPTIONAL : Torque Spark Plug to 12 Nm (106 in.lb or 8 ft.lb) depending on which torque wrench you use. I used my 1/4" In.lb torque wrench using a 1/4" - 3/8" adaptor to get mine to 106 in.lb. It did not take much force at all to reach that torque value.

IMG_2319.jpeg
IMG_2320.jpeg


STEP NINE :
Reinstall the 4x Ignition Coils and snug the 4x Ignition Coil Studs using a 8mm Socket. Reverse how you removed the cylinder 4 Ignition Coil by installing it at the 6 o' Clock position and twisting it counter clockwise.

*OPTIONAL : Apply a pea sized drop of Dielectric Grease on the inside of the Ignition Coil Boot and spread it around evenly using a pick (I used a Matco Straight Pick) and wipe the rim clean.
I say optional because some people use grease, some do not. Same thing with anti-seize.


IMG_2322.jpeg
IMG_2323.jpeg

IMG_2325.jpeg
IMG_2326.jpeg


STEP TEN :
Reposition the wiring harness and reattach the 3x plastic wire guides/retainers. Simply push down on them and they instantly bite on the Ignition Coil Studs.
Reattach the 4x Ignition Coil Connectors. Push on until you hear a 'click' and then use your finger to push the sliding lock tab forward.

IMG_2329.jpeg
IMG_2327.jpeg

IMG_2328.jpeg
IMG_2330.jpeg


STEP ELEVEN :
Once everything is reattached and properly tightened, crank your Ranger to see if a check engine light or any error message appears. You can always take a drive around the neighborhood as well prior to engine cover reattachment.
My Ranger roared to life and it seemed like it appreciated new plugs and the new engine air element I installed last weekend.

Reattach the EcoBoost Engine Cover if equipped by pushing down and reinstalling the 2x 10mm lock nuts. These just need to be hand tight.

IMG_2332.jpeg


That's it! Grab a cold one and enjoy a job well done! :sunglasses::thumbsup::beer:
The local dealer quoted me $130 just for installation (parts extra) so that is worth celebrating.
For the record it took me longer to write this write-up / take pictures than the actual job did. :LOL::beer:


To celebrate, I bought my first Snap-On ratchet with the “savings” from the spark plugs. Follow me for more financial advice. 🤣 :crackup:

IMG_2369.jpeg

I'm attempting to do (oem)plugs and egr sensor on my 2020 tomorrow..i see you said 8 ft/lbs I've also seen others say factory is 12ft/lbs I've heard others do more or less.. what do you think ideal is..is 8 enough? Just perfect. Just want to make sure I don't over or under torque. Let me know thanks


airline tech

Well-Known Member
Joined
Aug 24, 2022
Threads
23
Messages
3,394
Reaction score
6,848
Location
Midwest - KS
Vehicle(s)
2022 Ranger Lariat-Super Crew, Cactus Gray
Occupation
Aircraft Tech
I'm attempting to do (oem)plugs and egr sensor on my 2020 tomorrow..i see you said 8 ft/lbs I've also seen others say factory is 12ft/lbs I've heard others do more or less.. what do you think ideal is..is 8 enough? Just perfect. Just want to make sure I don't over or under torque. Let me know thanks
Manual Specs = 106 In lbs
106 in lbs converted to ft lbs = 8.83 ft lbs

Most small Ft lbs Torque Wrenches average the lowest setting 20 ft lbs, some will go as low as 10.
so, to be precise you need a (in lb) T-Wrench, however if it will scale down to 10 ft lbs you can get by with using (10 Ft Lbs) as a torque.

However - all torque wrenches have an accuracy variance (generally +/- 4%) and it is not recommended to use the lowest setting as the accuracy decreases.

The aviation side of me says- get the proper (in lb) wrench (no discussion) as its mandatory.
 

McFly121

Member
First Name
Chris
Joined
Feb 18, 2021
Threads
0
Messages
7
Reaction score
17
Location
Pingree Grove, IL
Vehicle(s)
2020 Ranger
Occupation
Courier
Manual Specs = 106 In lbs
106 in lbs converted to ft lbs = 8.83 ft lbs

Most small Ft lbs Torque Wrenches average the lowest setting 20 ft lbs, some will go as low as 10.
so, to be precise you need a (in lb) T-Wrench, however if it will scale down to 10 ft lbs you can get by with using (10 Ft Lbs) as a torque.

However - all torque wrenches have an accuracy variance (generally +/- 4%) and it is not recommended to use the lowest setting as the accuracy decreases.

The aviation side of me says- get the proper (in lb) wrench (no discussion) as its mandatory.

Thank you for your response I did pick up a loaner 3/8 torque wrench with in/lbs guess I'll set it around 106 in/lbs give or take a few
 
OP
OP
Trash Panda

Trash Panda

Well-Known Member
First Name
Cody
Joined
Aug 8, 2021
Threads
12
Messages
159
Reaction score
630
Location
Alabama
Vehicle(s)
2019 Ranger Lariat
Thank you for your response I did pick up a loaner 3/8 torque wrench with in/lbs guess I'll set it around 106 in/lbs give or take a few
I was able to get it close enough by hand tight with my 3/8 ratchet. I may have used the in-lb torque wrench a second before it clicked. It was the Harbor Freight special in-lb wrench for the record.

1 year later no misfires or anything so I must have done something right. 🤣
 

McFly121

Member
First Name
Chris
Joined
Feb 18, 2021
Threads
0
Messages
7
Reaction score
17
Location
Pingree Grove, IL
Vehicle(s)
2020 Ranger
Occupation
Courier
I was able to get it close enough by hand tight with my 3/8 ratchet. I may have used the in-lb torque wrench a second before it clicked. It was the Harbor Freight special in-lb wrench for the record.

1 year later no misfires or anything so I must have done something right. 🤣

Perfect. I know it won't take much ill just set near 106 inch pounds.. other guy in ranger group on Facebook said 12 foot pounds not sure the exact exchange to inch pounds but seems like a big jump from 8. Something 🤷‍♂️
 

TJC

Well-Known Member
First Name
Tony
Joined
Aug 28, 2020
Threads
32
Messages
2,750
Reaction score
6,571
Location
North Carolina
Vehicle(s)
93 Miata, 05 Ranger 4x4, 20 Ranger 4x4, 23 CX-5
Manual Specs = 106 In lbs
106 in lbs converted to ft lbs = 8.83 ft lbs

Most small Ft lbs Torque Wrenches average the lowest setting 20 ft lbs, some will go as low as 10.
so, to be precise you need a (in lb) T-Wrench, however if it will scale down to 10 ft lbs you can get by with using (10 Ft Lbs) as a torque.

However - all torque wrenches have an accuracy variance (generally +/- 4%) and it is not recommended to use the lowest setting as the accuracy decreases.

The aviation side of me says- get the proper (in lb) wrench (no discussion) as its mandatory.
Yep, I just used both today when installing my PPE deep transmission pan - in lb came in real handy. My ft lb wrench goes to 5, and I used it at 8 as well on the long bolts, but I prefer the in lb for finer accuracy.
 

McFly121

Member
First Name
Chris
Joined
Feb 18, 2021
Threads
0
Messages
7
Reaction score
17
Location
Pingree Grove, IL
Vehicle(s)
2020 Ranger
Occupation
Courier
*update*
Bout an hour and half and plugs and egr sensor are done. So far everything seems good but time will tell. I'm so used to it i can't tell if I'm making myself feel the issue even tho It might not be there. Just for reference 62,000
1000007816.jpg
 
Last edited:

JaysOnTheEDGE

Well-Known Member
First Name
Jay
Joined
Oct 17, 2019
Threads
11
Messages
791
Reaction score
1,452
Location
North Carolina
Vehicle(s)
2019 Ranger XLT Sport 4x4, 2021 Escape SEL AWD
Occupation
Office Equipment Technician
FYI Advance auto has the Motorcraft plugs on sale right now i got 4 SP-594 for $40
 

Arccra12

Member
First Name
Christopher
Joined
Apr 5, 2025
Threads
0
Messages
14
Reaction score
1
Location
Florida
Vehicle(s)
2021 Ford Ranger XLT
Occupation
IT technician
1000005634.jpg
Great write up as usual. I had the wrong torque wrench so hopefully I got the torque right. No noticable change but they were needed regardless.
 

airline tech

Well-Known Member
Joined
Aug 24, 2022
Threads
23
Messages
3,394
Reaction score
6,848
Location
Midwest - KS
Vehicle(s)
2022 Ranger Lariat-Super Crew, Cactus Gray
Occupation
Aircraft Tech
1000005634.jpg
Great write up as usual. I had the wrong torque wrench so hopefully I got the torque right. No noticable change but they were needed regardless.
Can you post a better pic of the Tips?
They appear carbon fouled (Dark) - Rich Fuel Mixture
Sponsored


Top