2020FX4
Well-Known Member
- First Name
- El Jefe
- Joined
- Jan 11, 2020
- Threads
- 9
- Messages
- 392
- Reaction score
- 694
- Location
- Los Angeles
- Vehicle(s)
- 2020 FX4 Ranger
- Vehicle Showcase
- 1
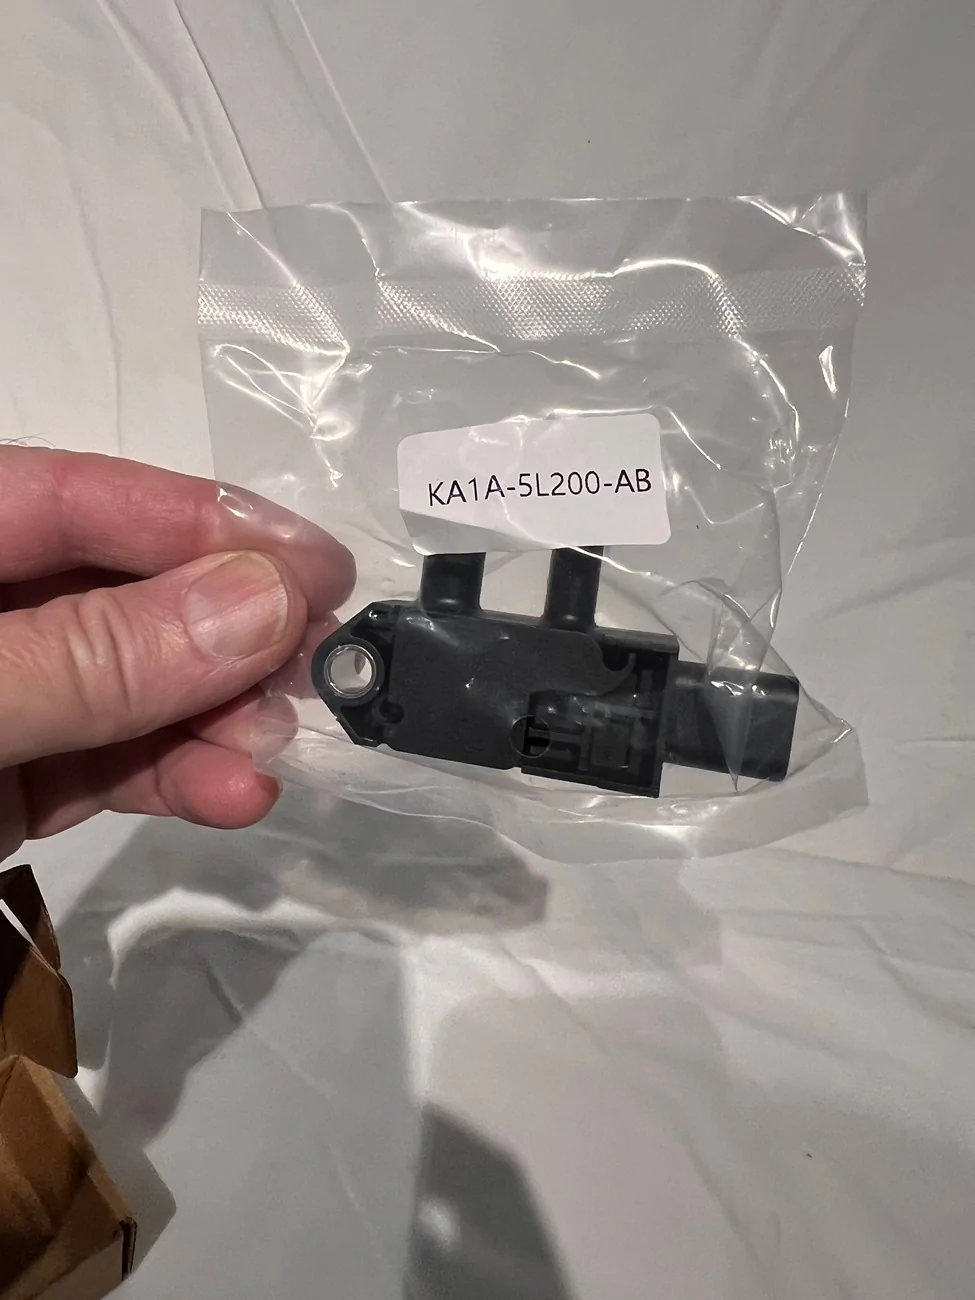
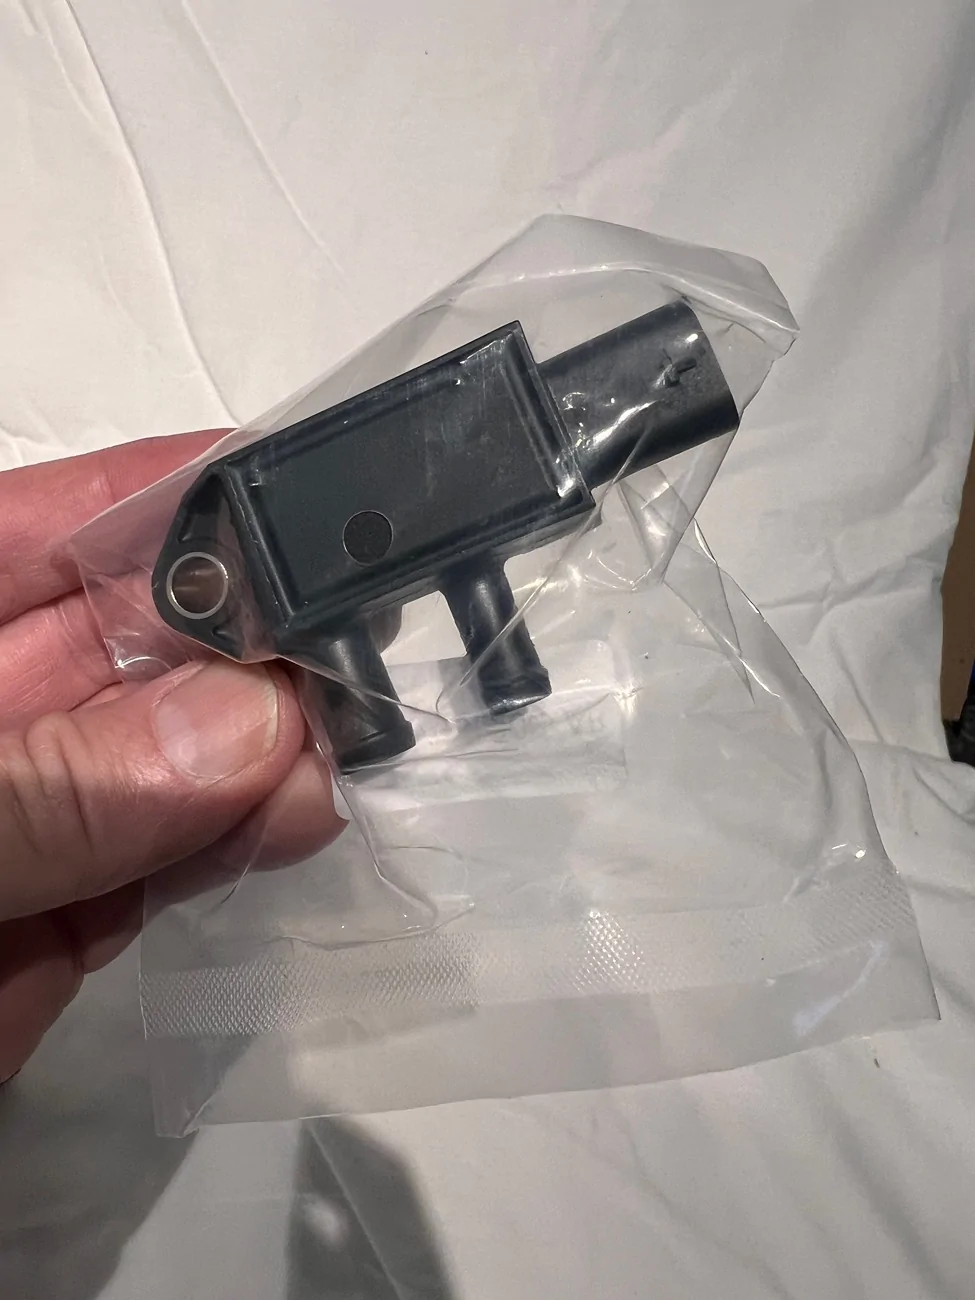
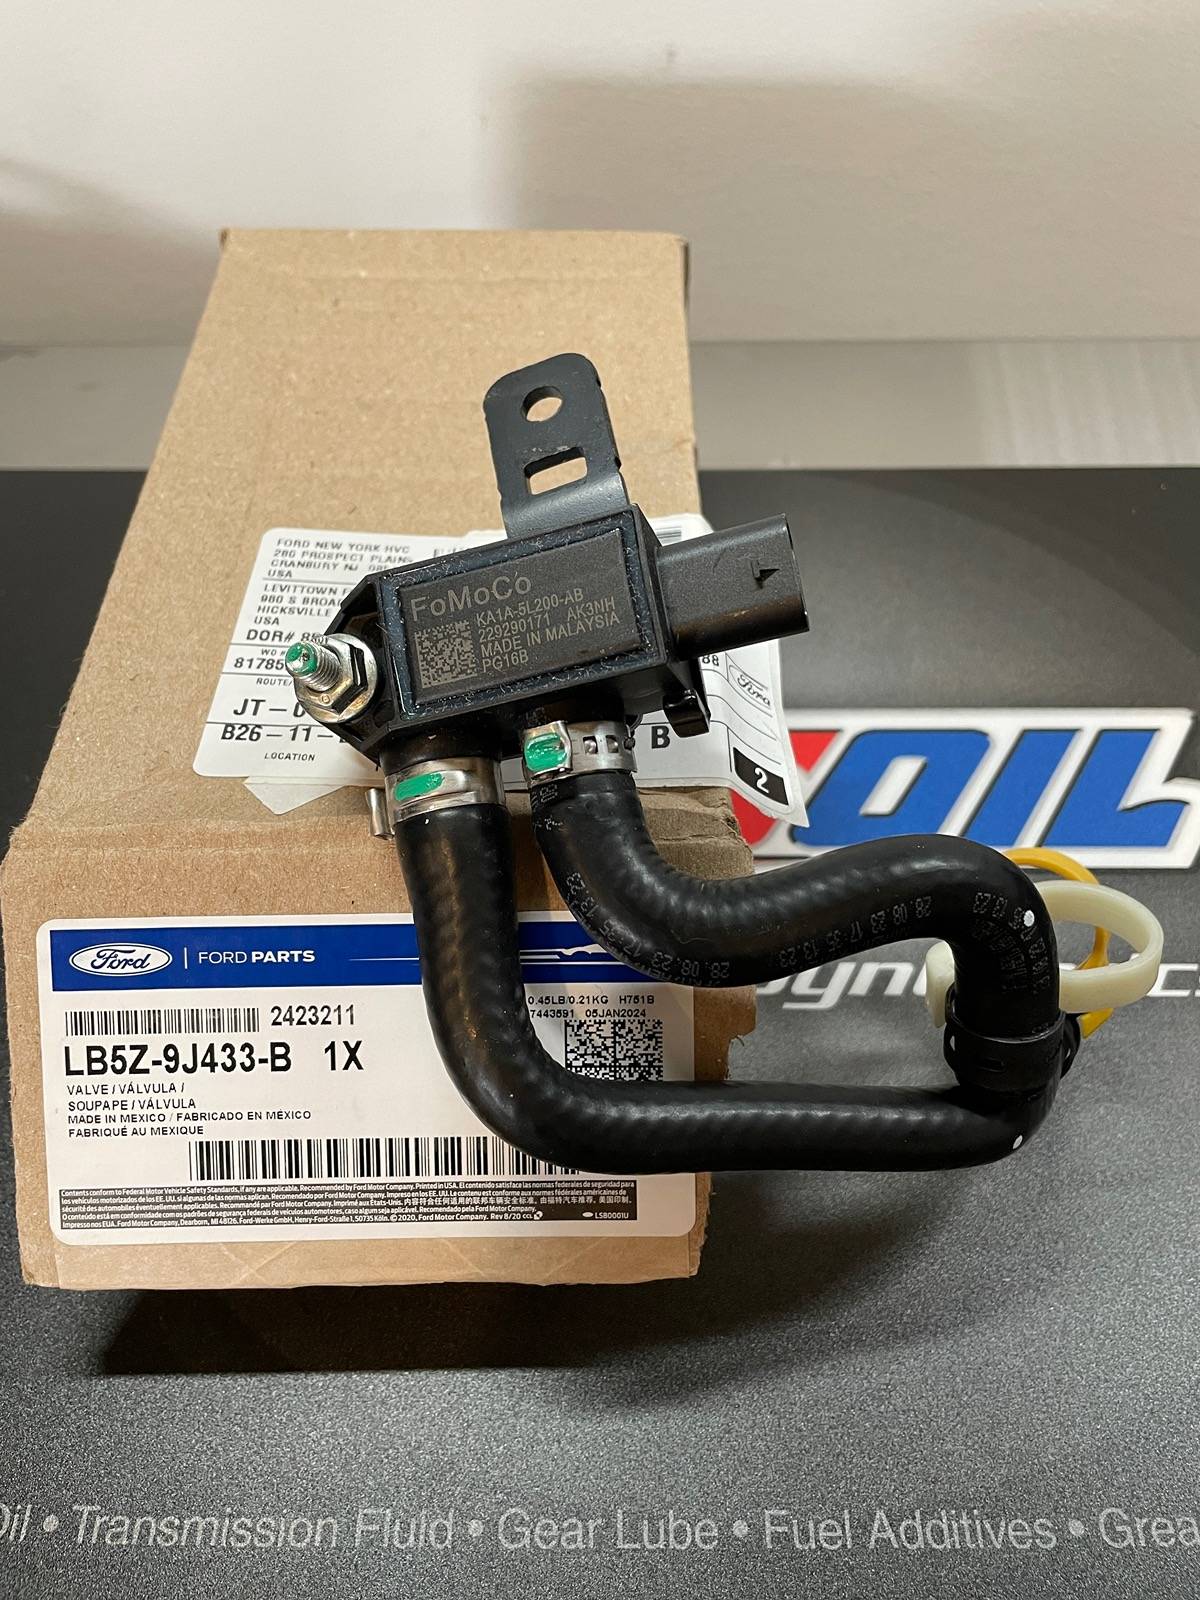
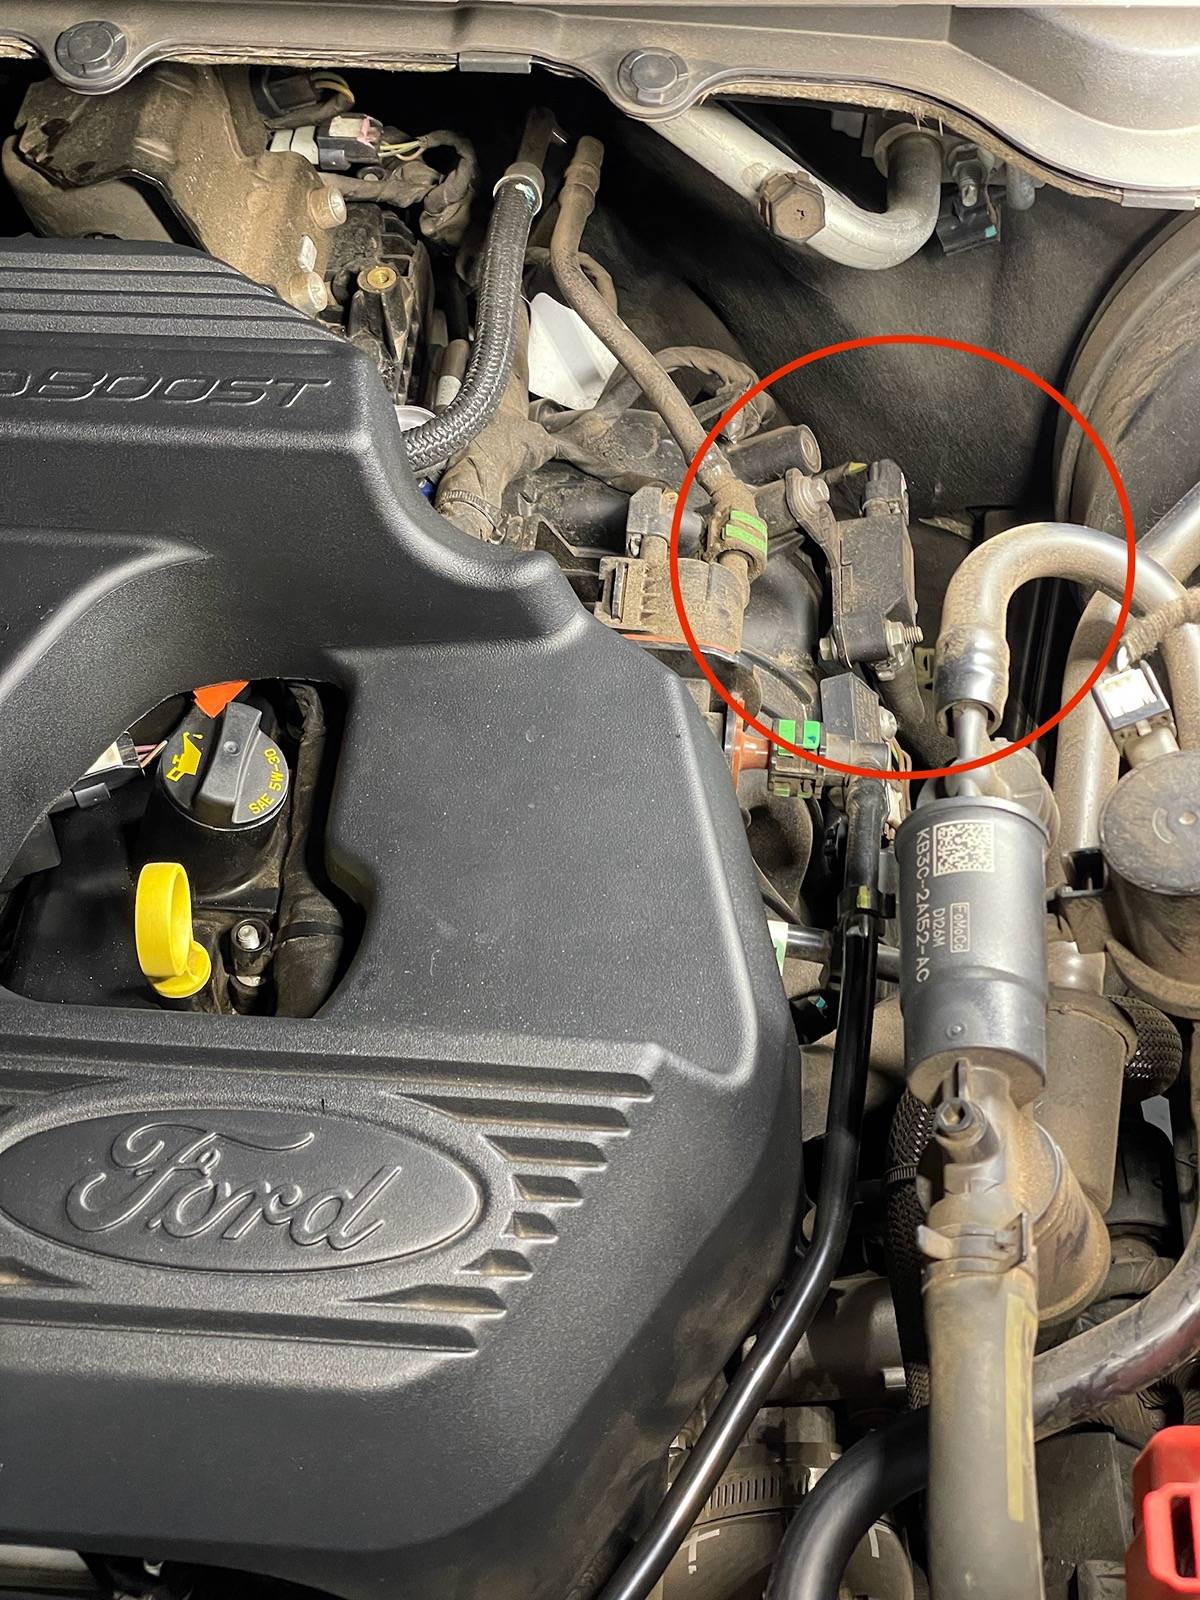
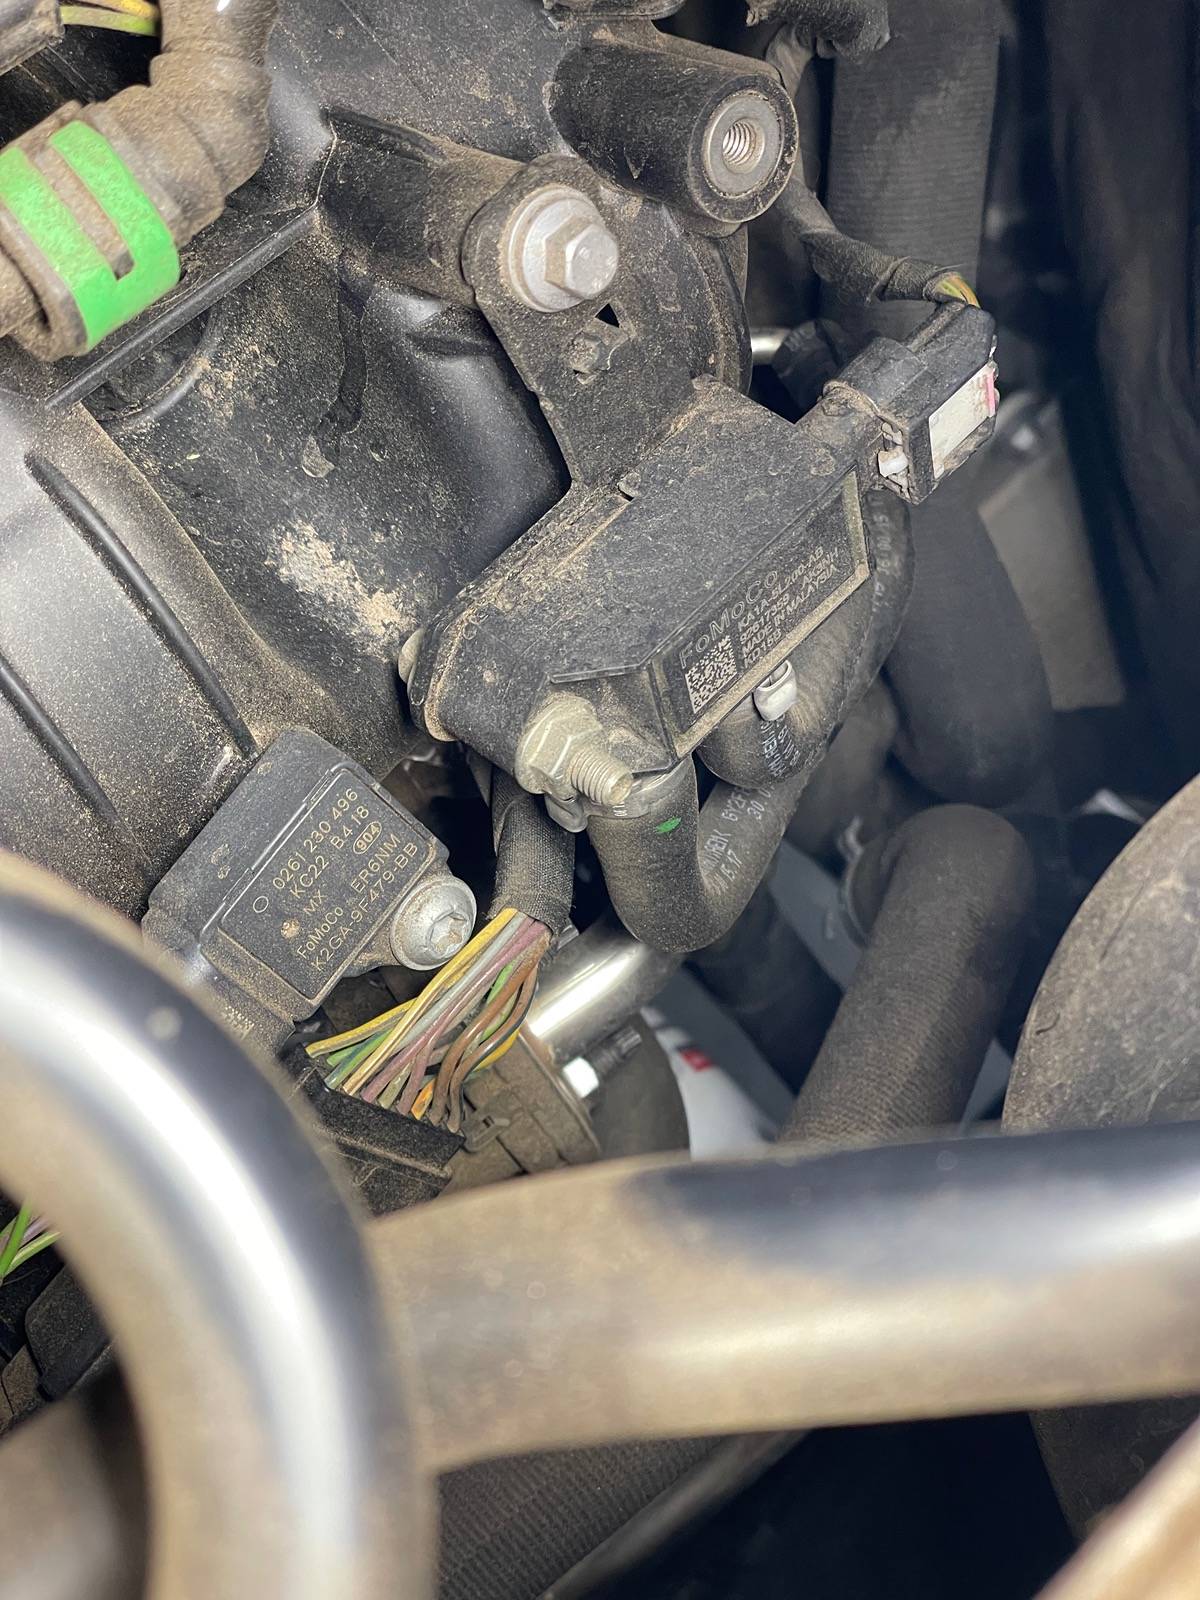
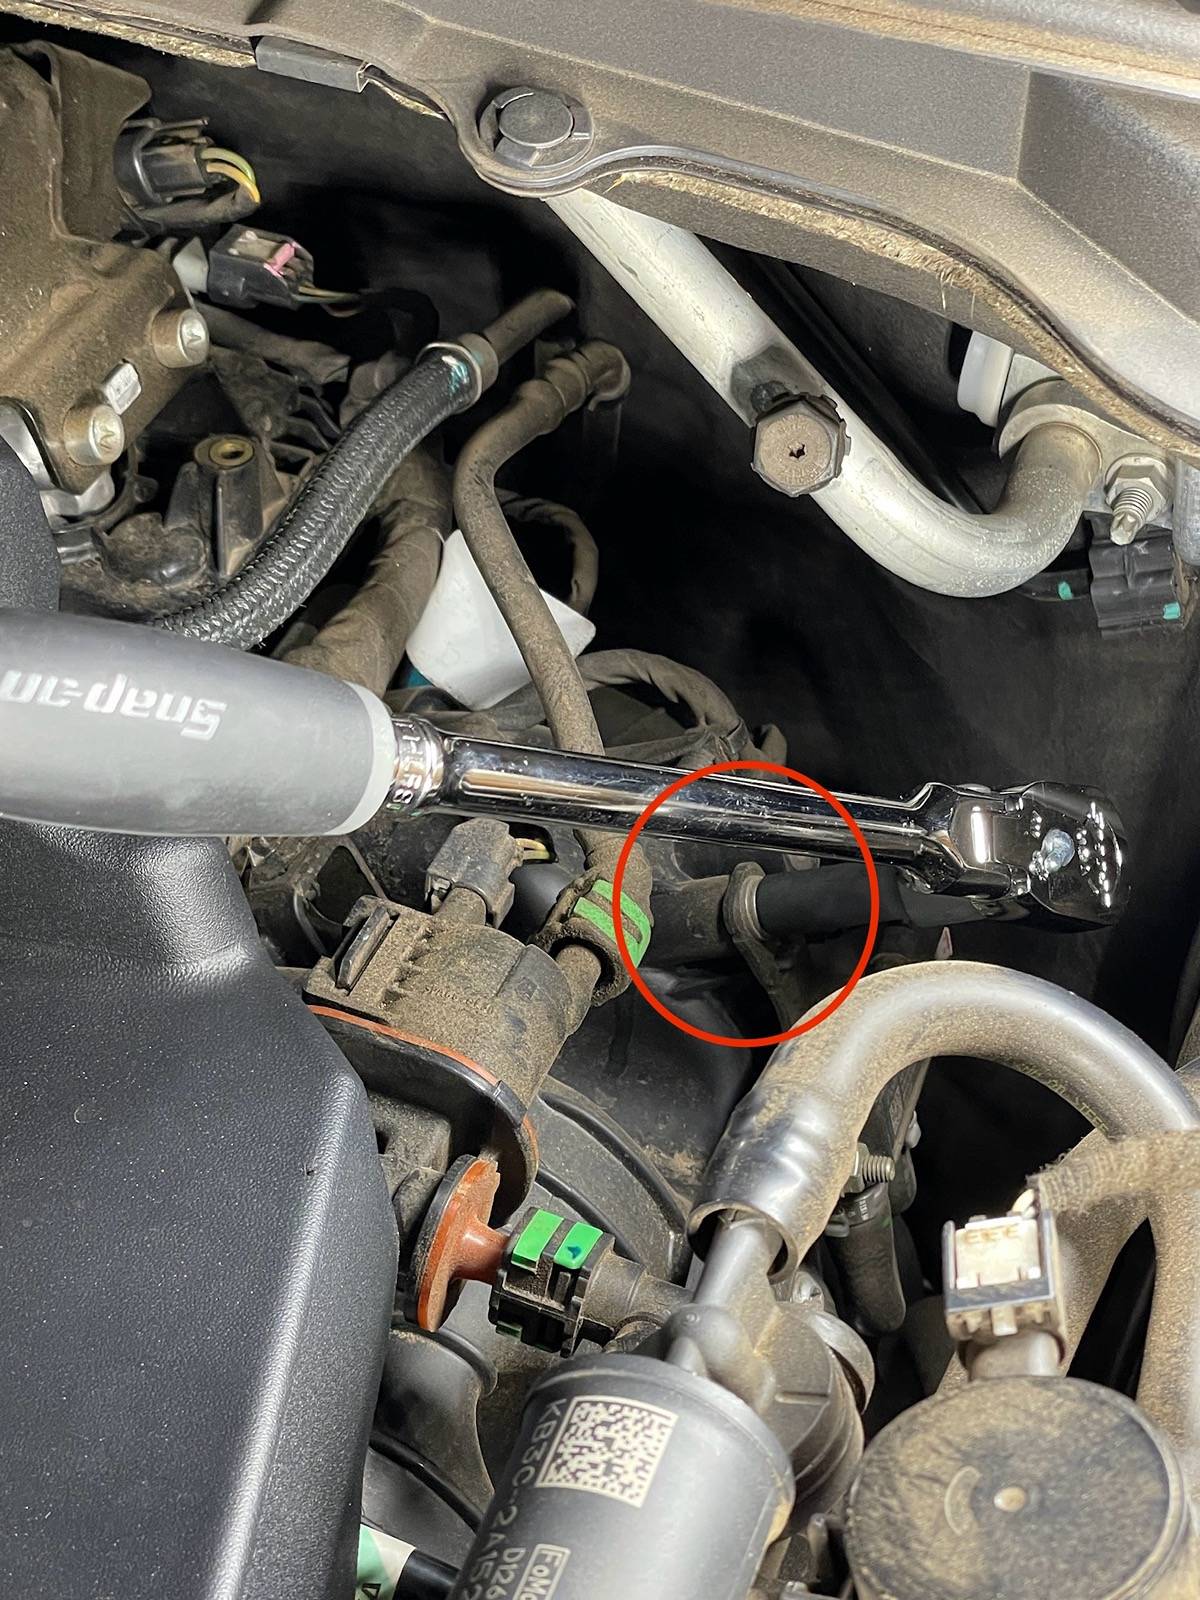
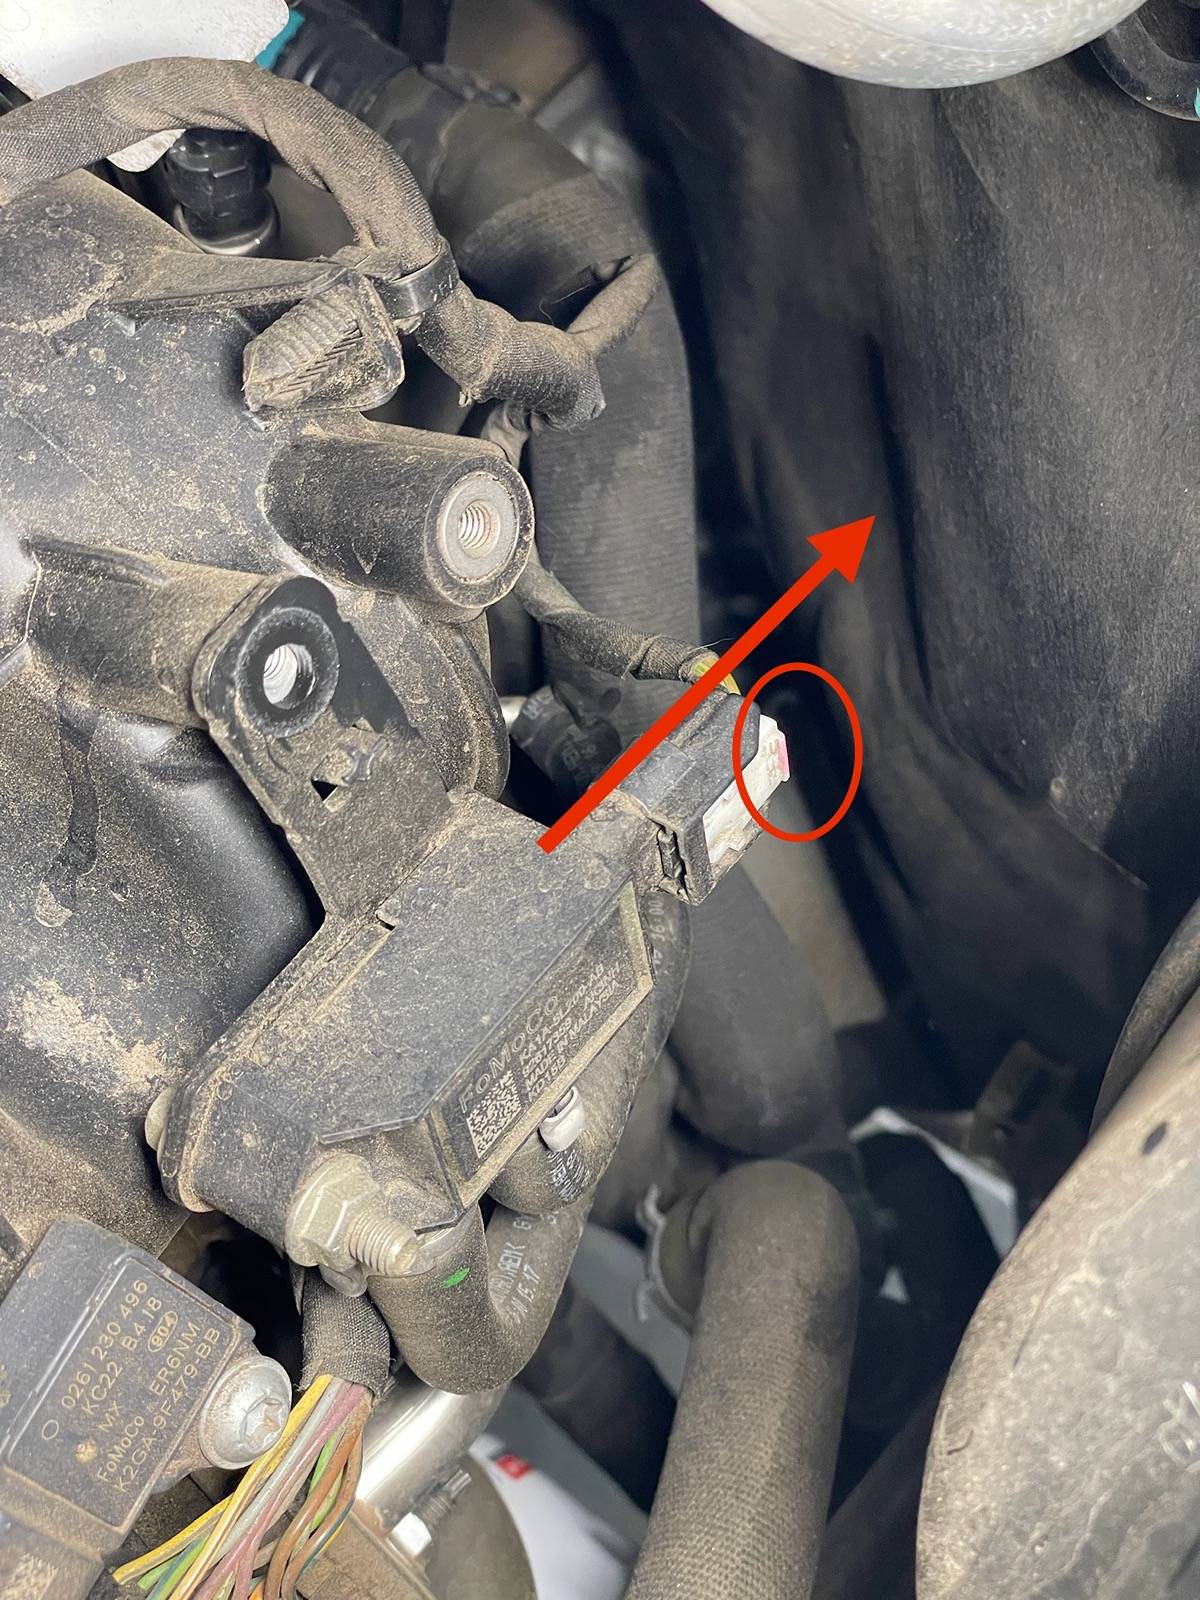
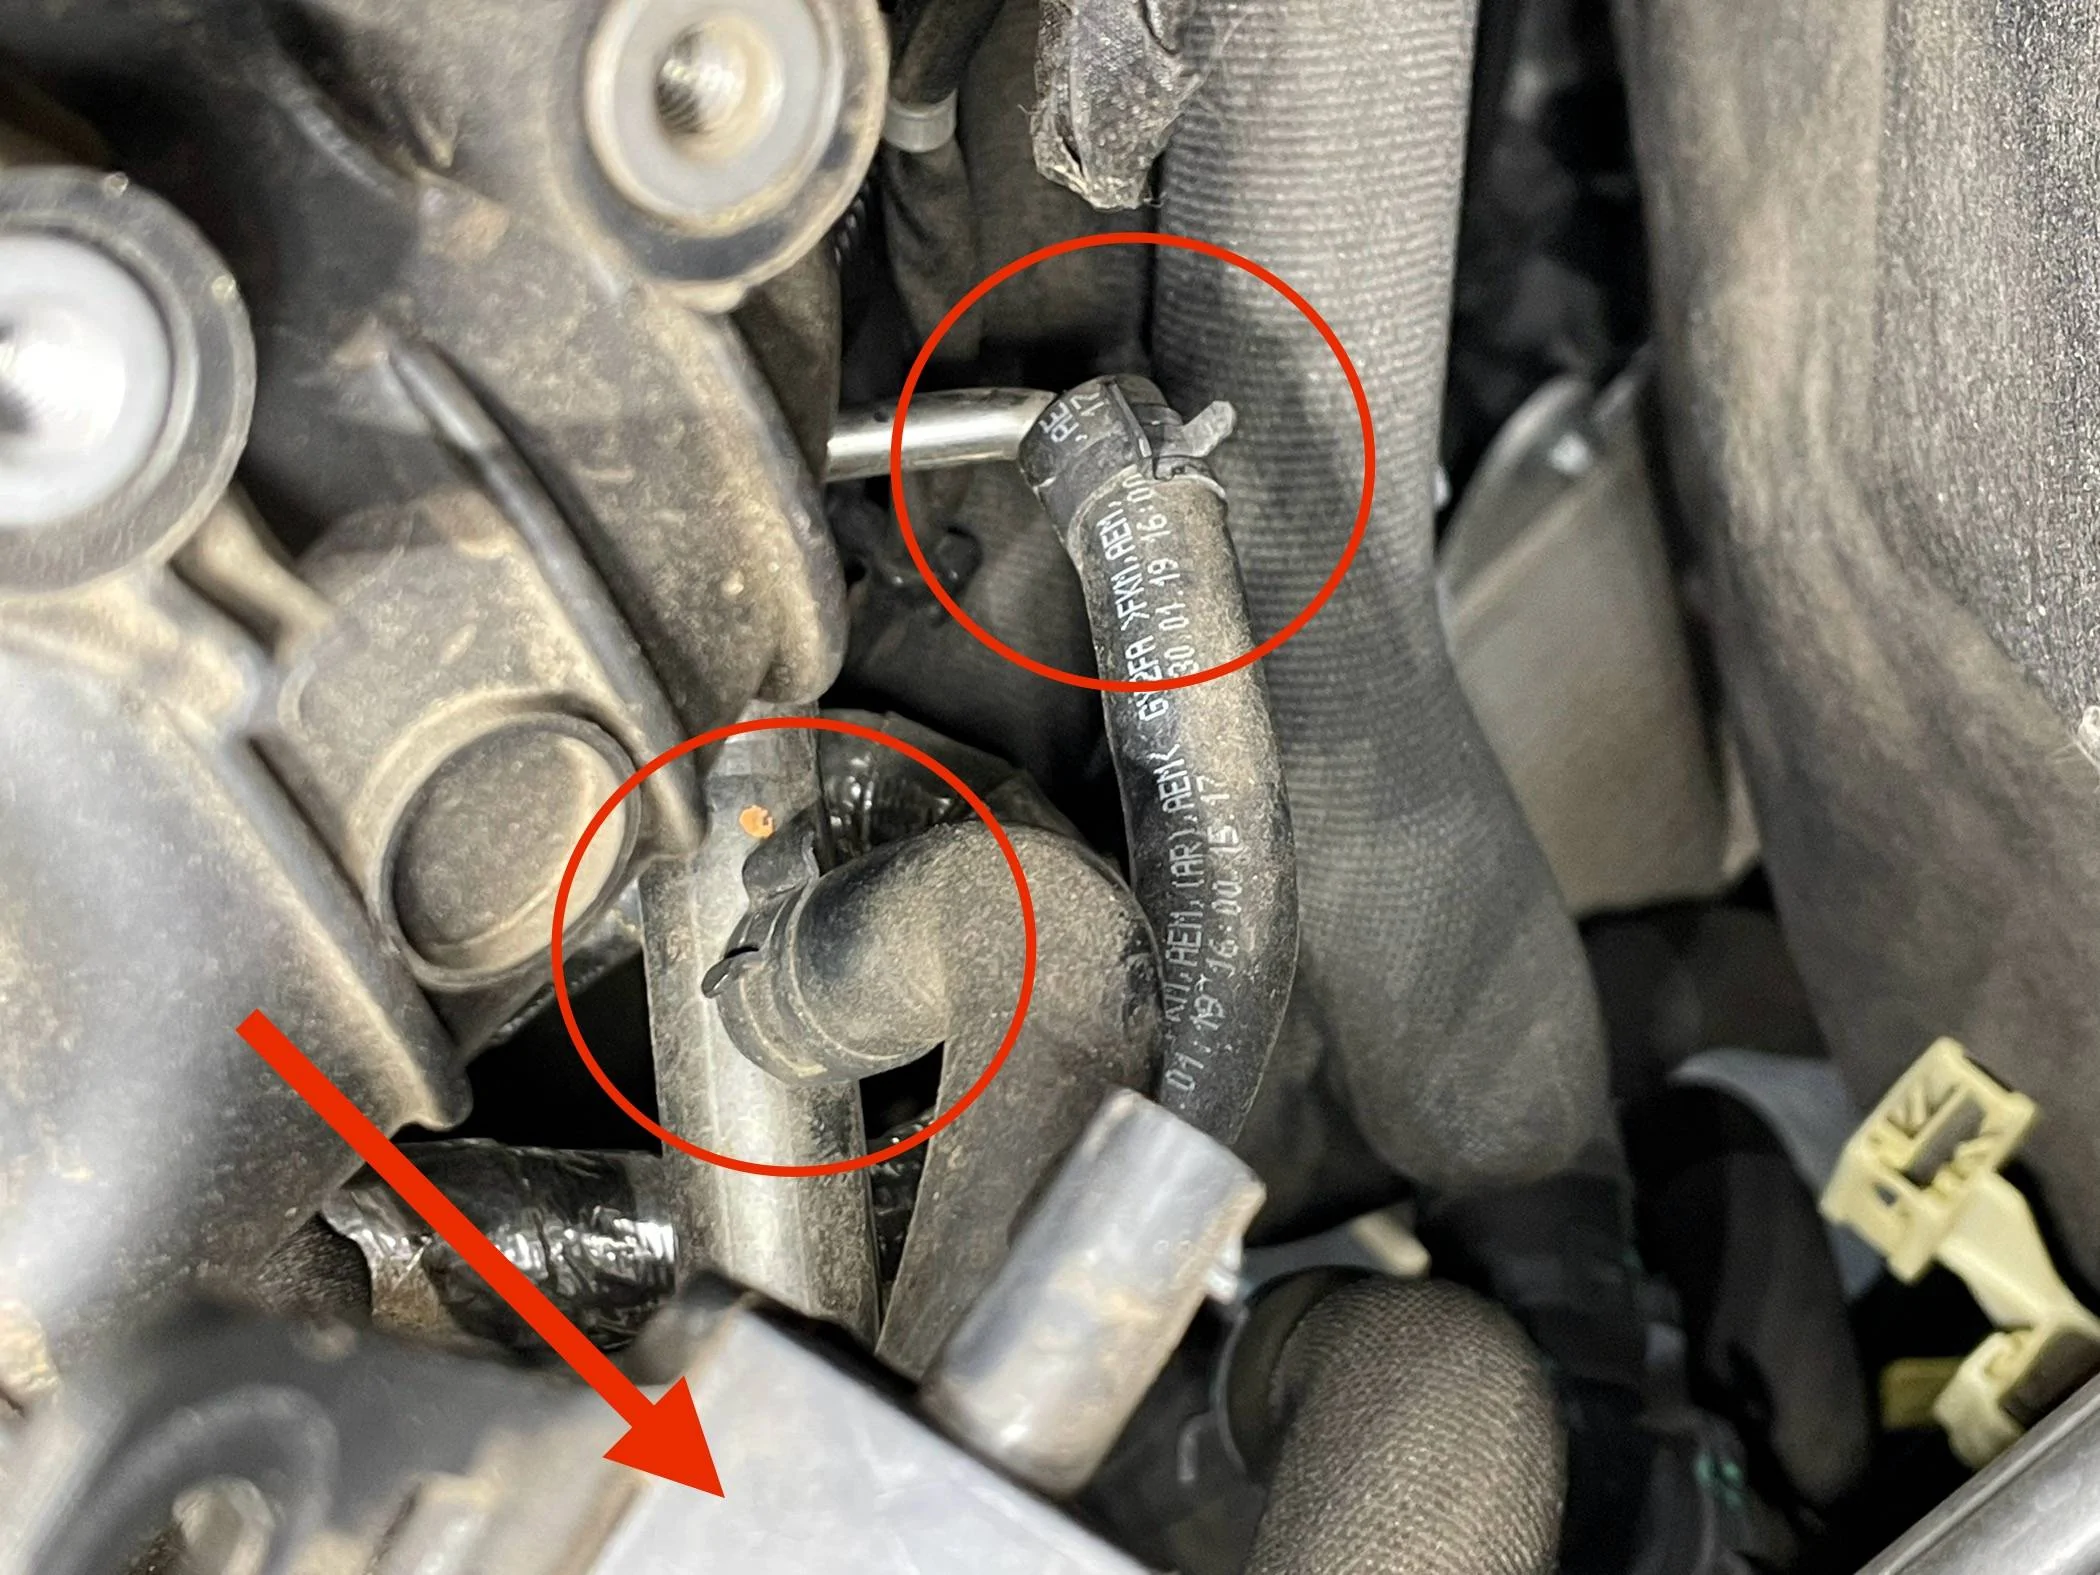
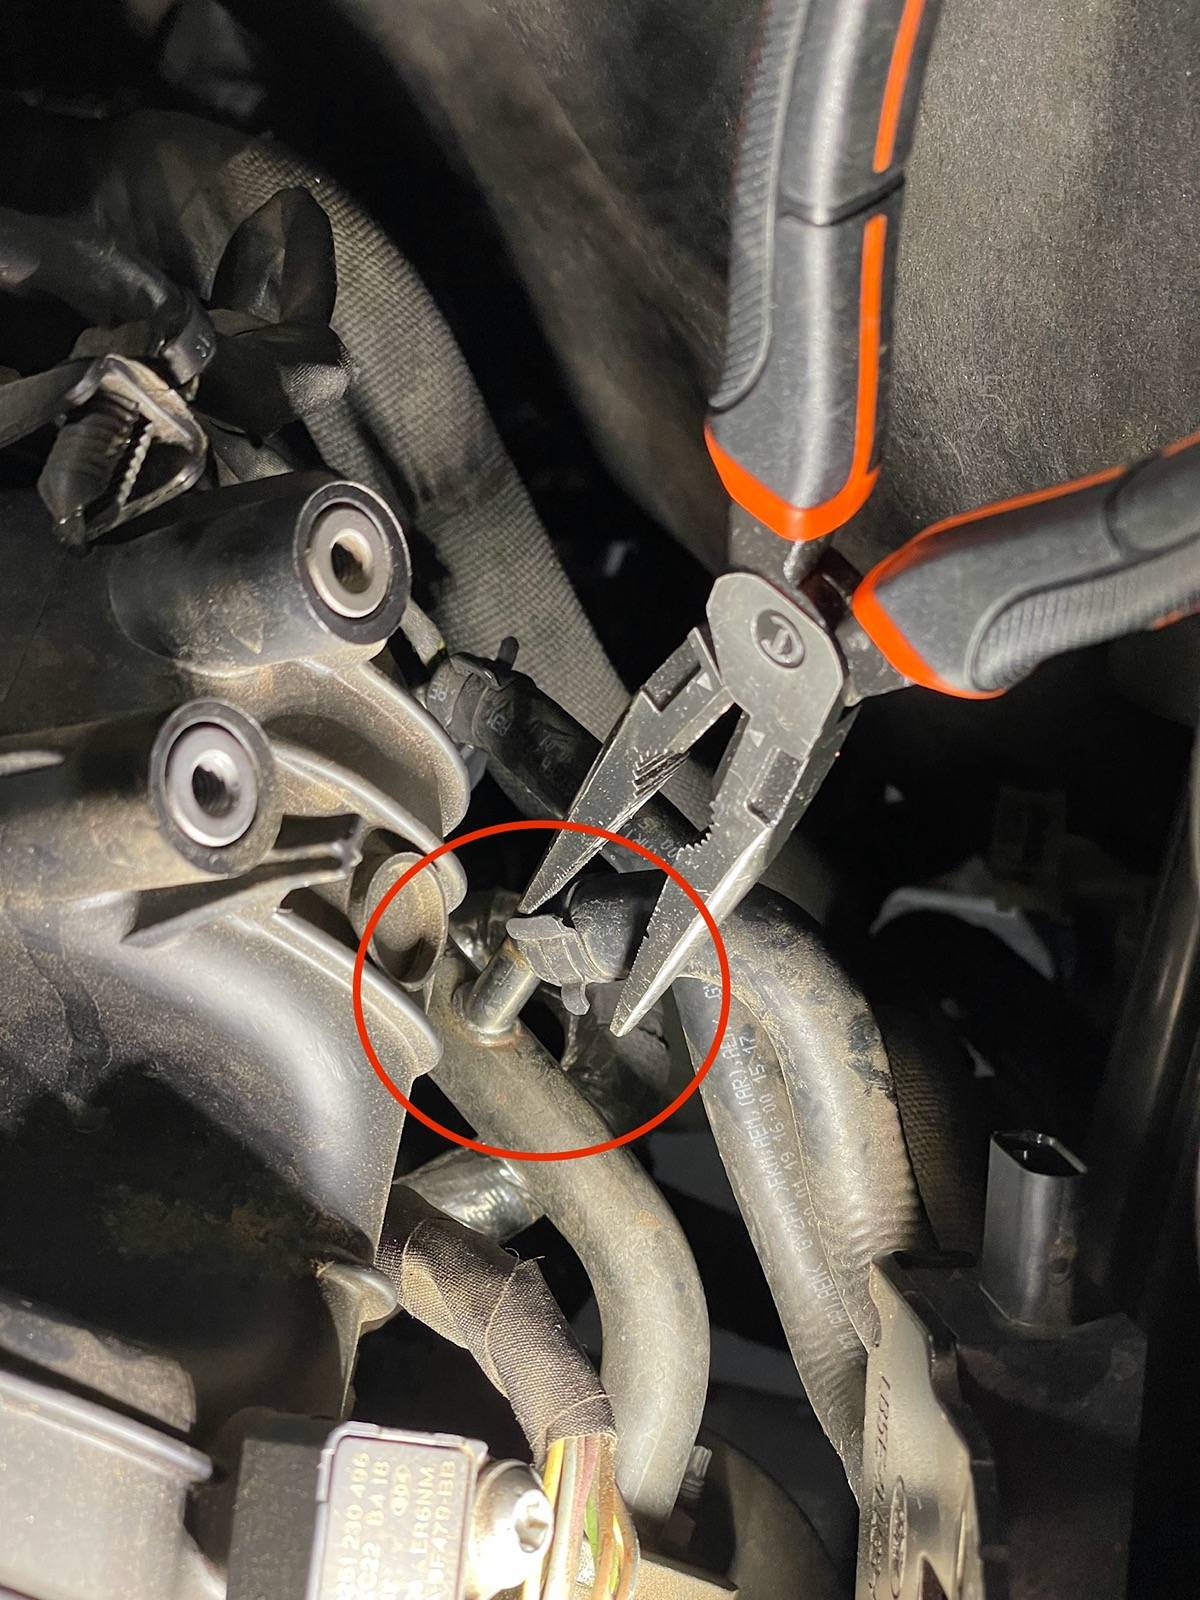
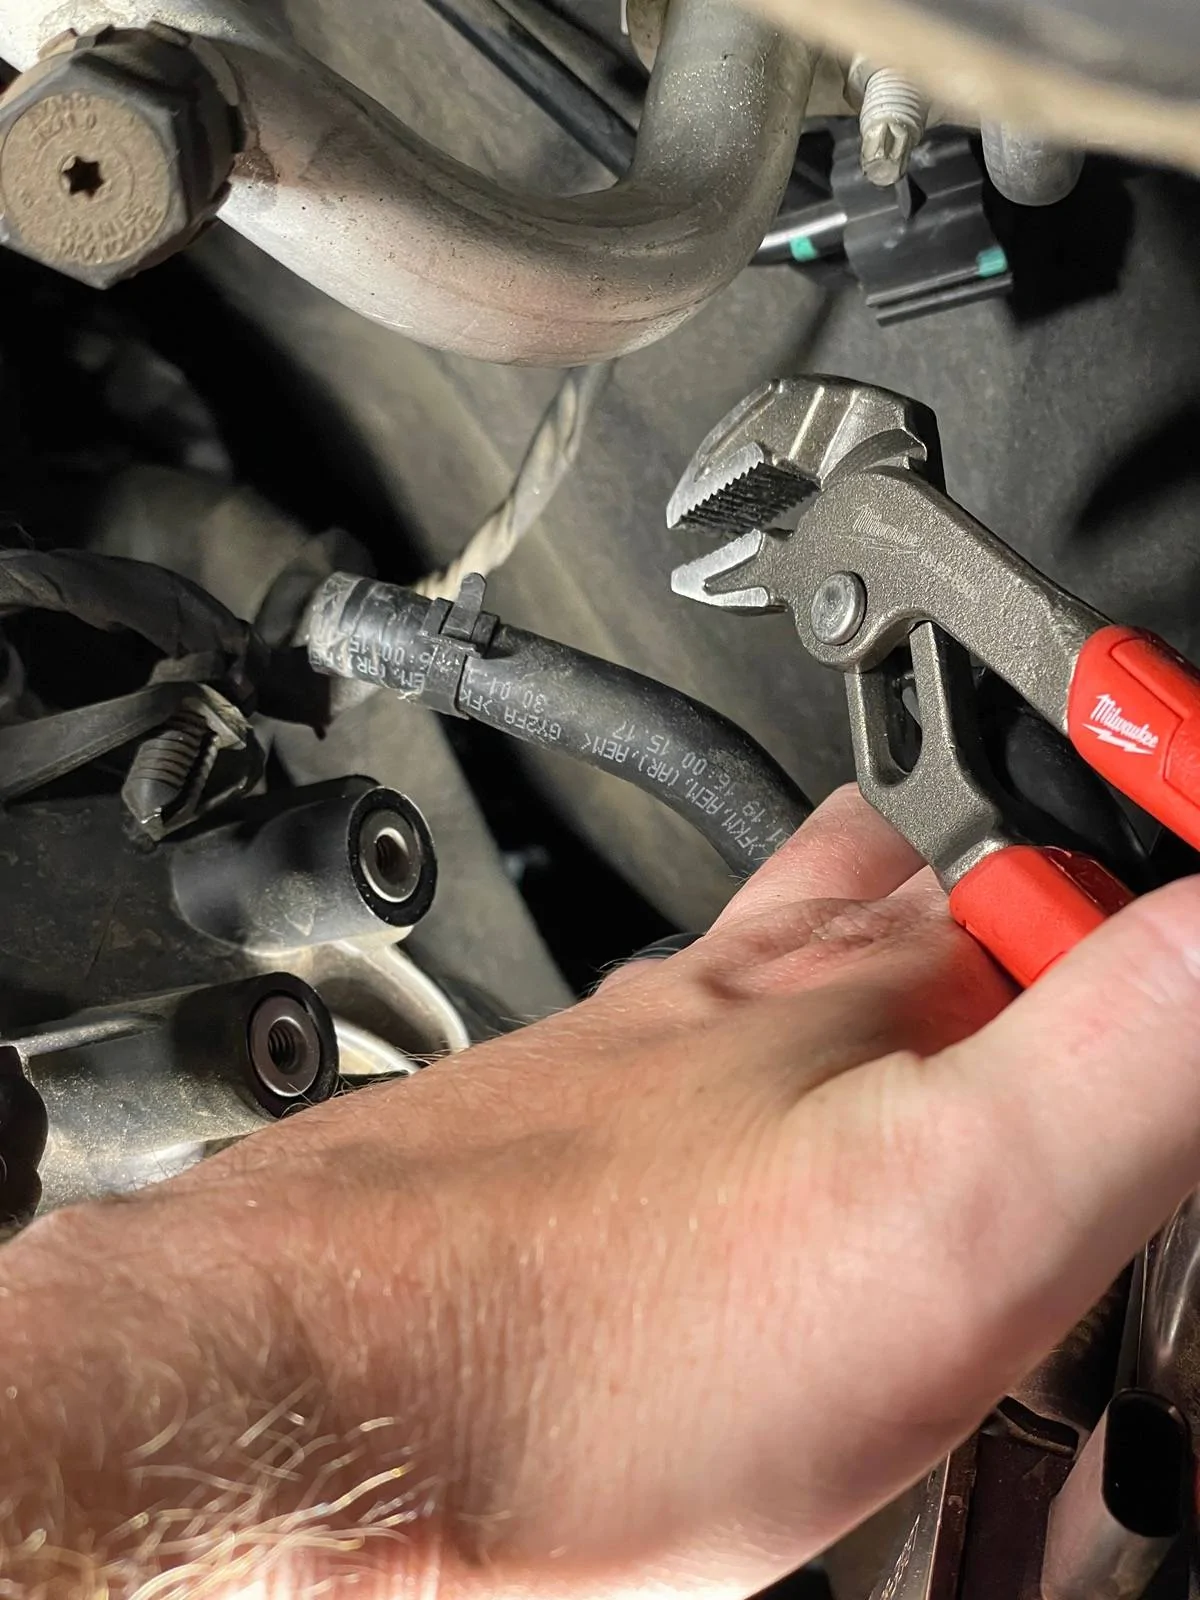
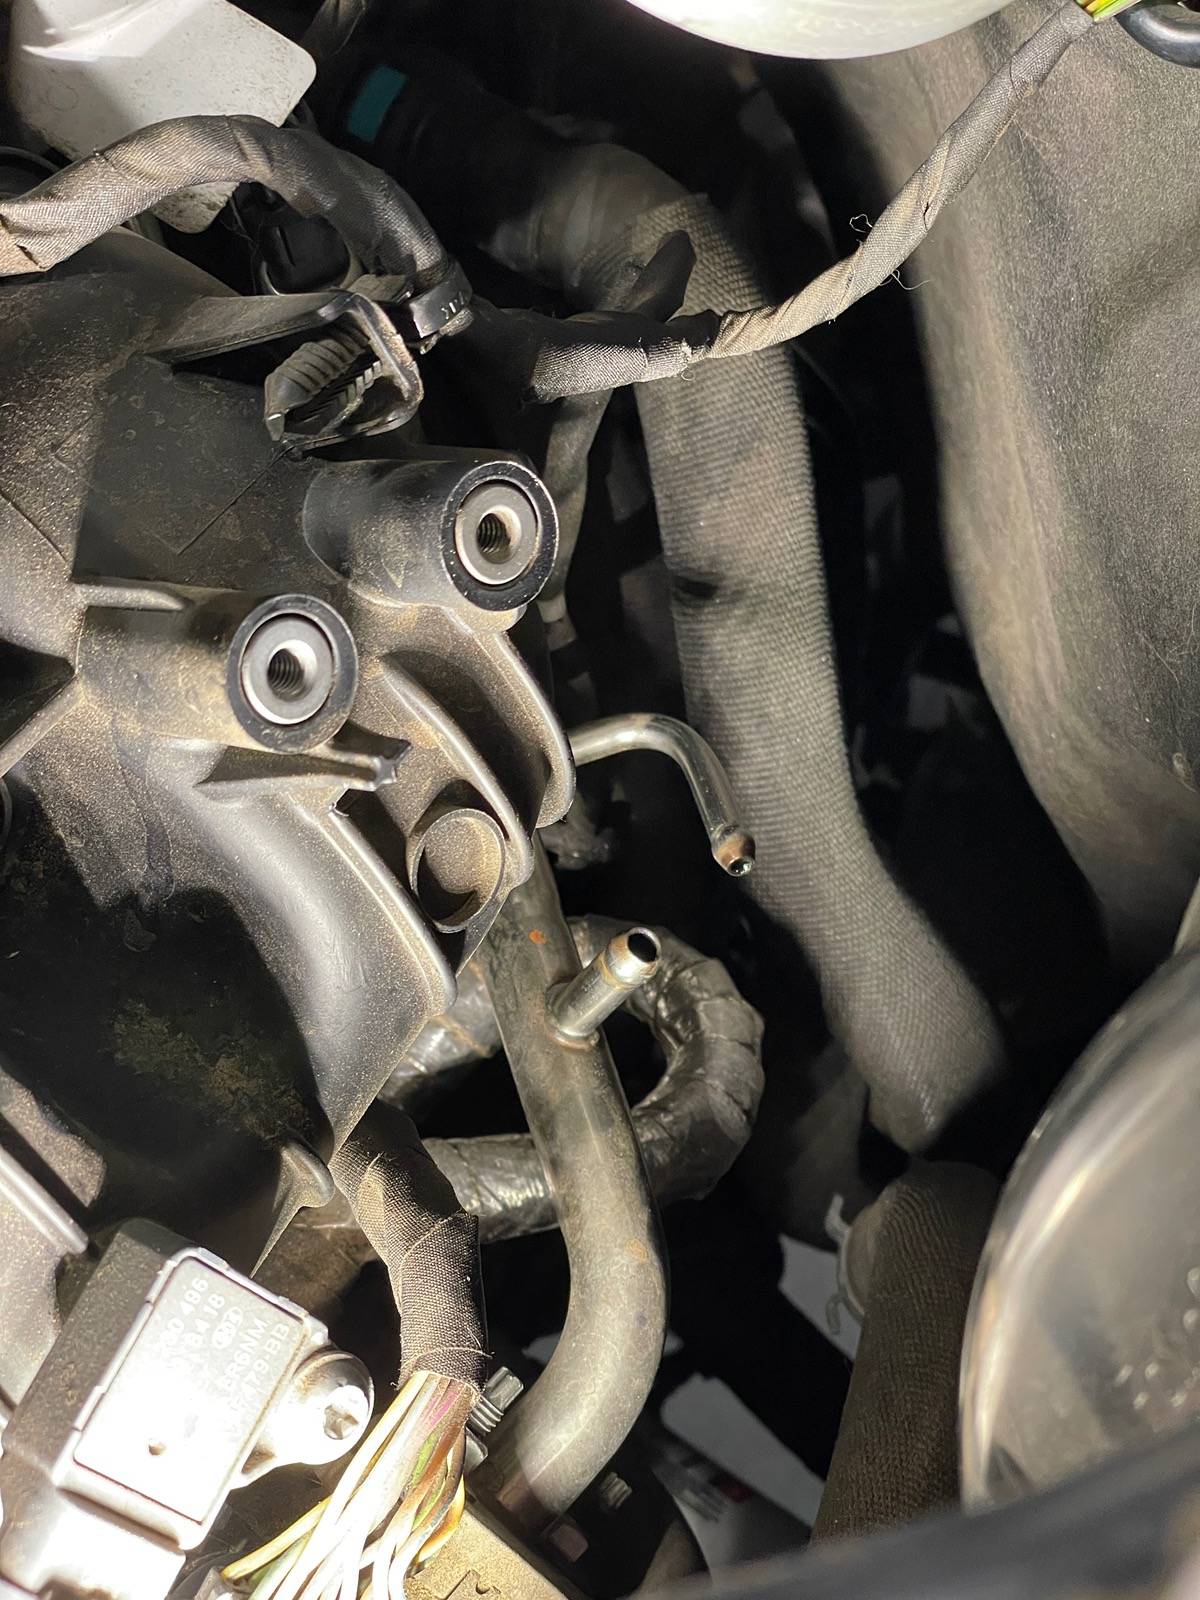
Here's another link on Amazon for faster delivery for $34 for the guy who needs it now!!
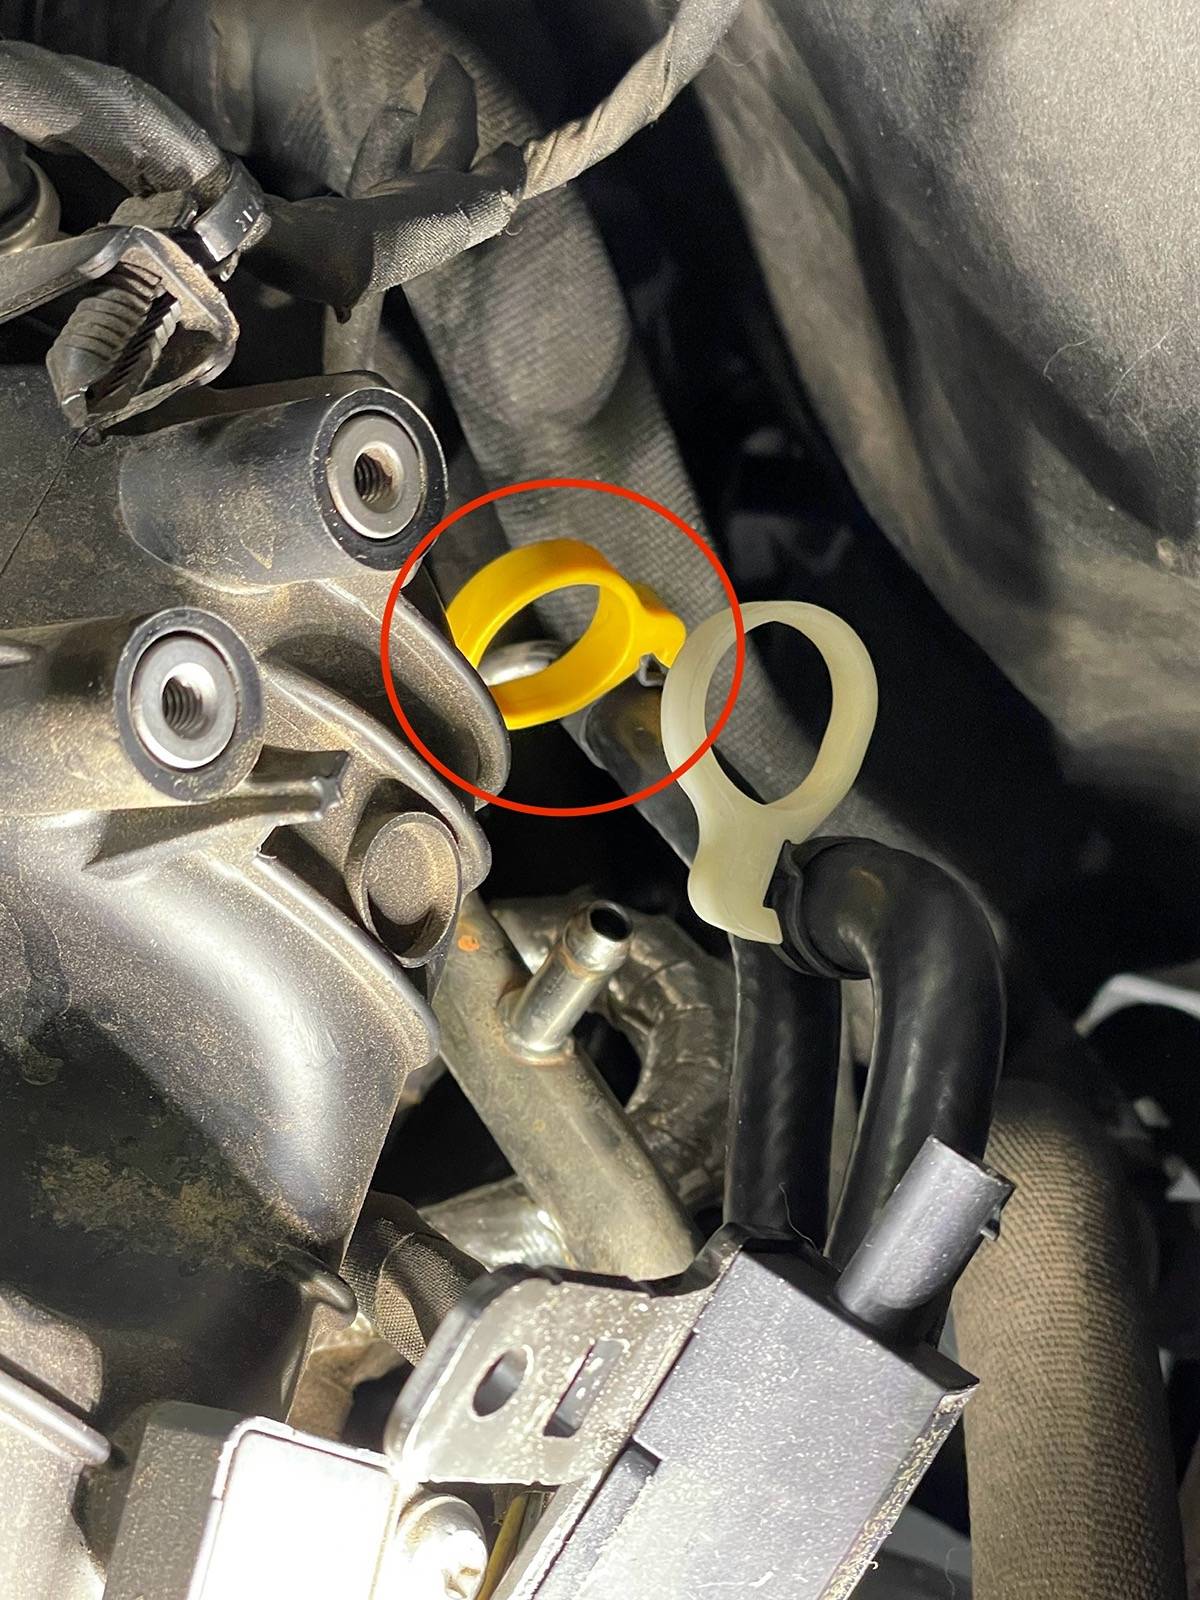
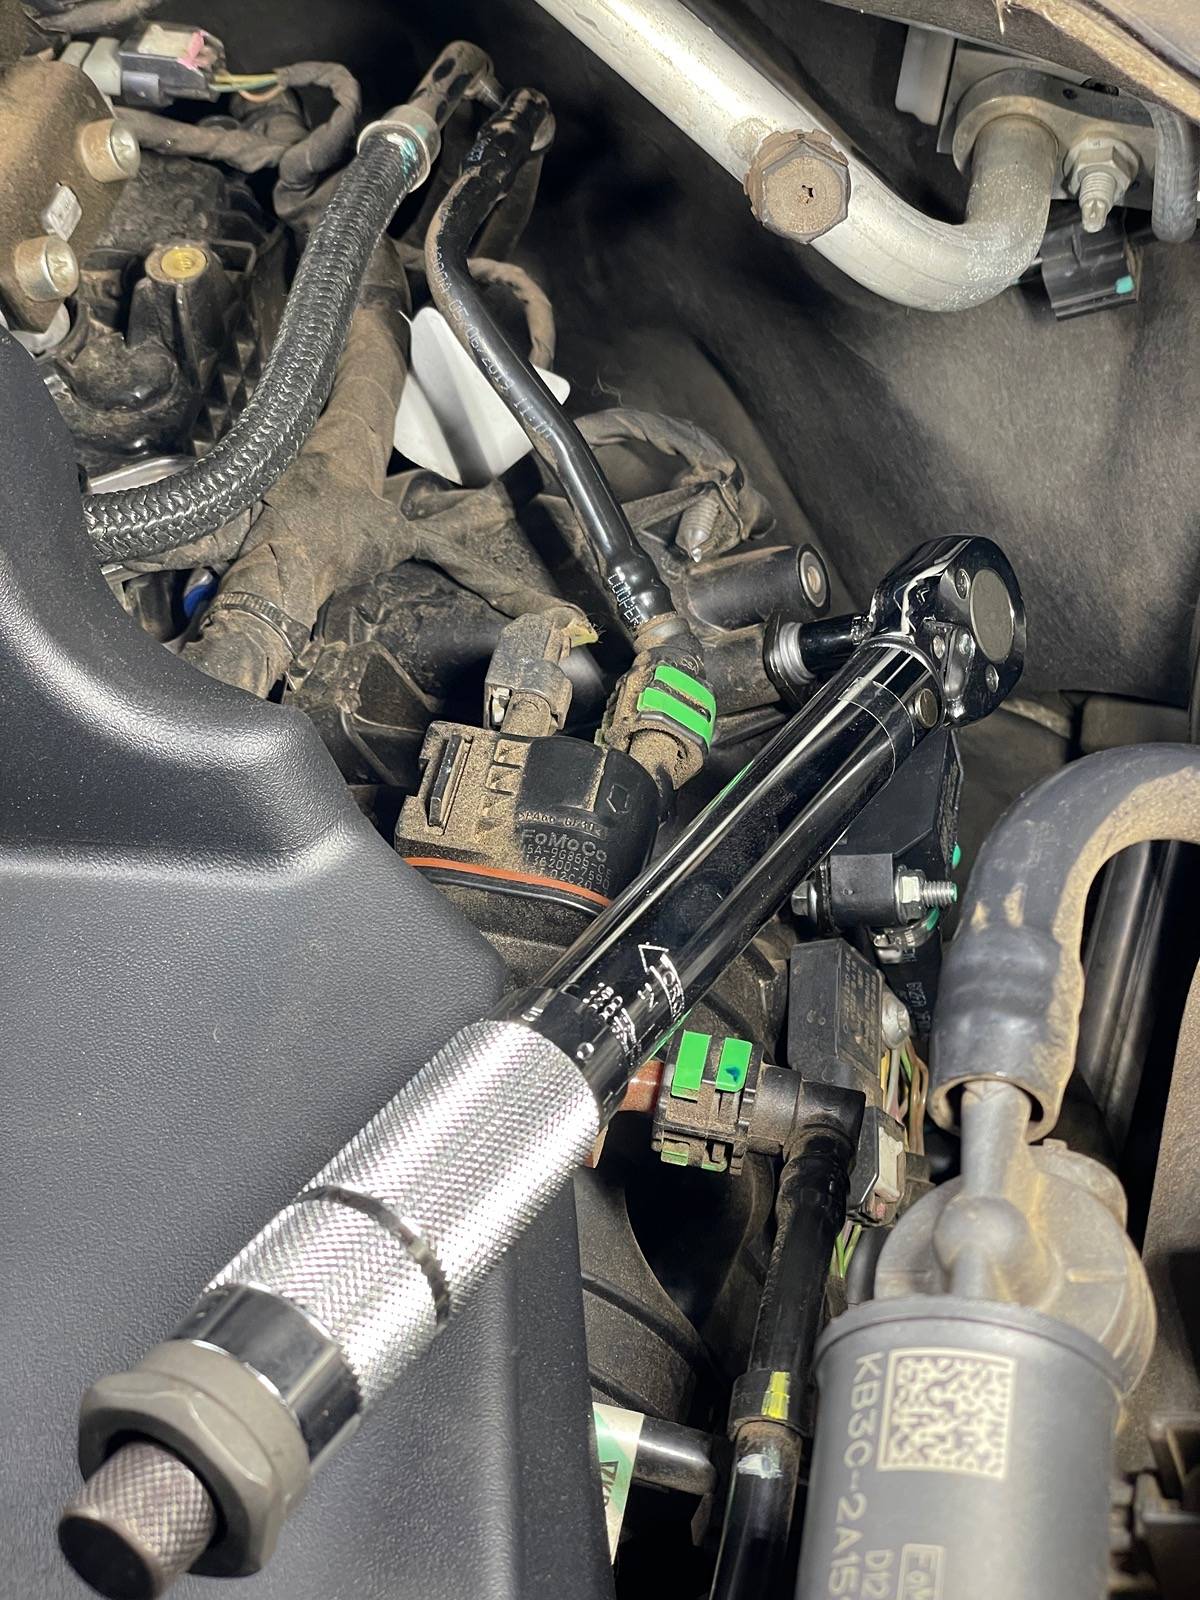
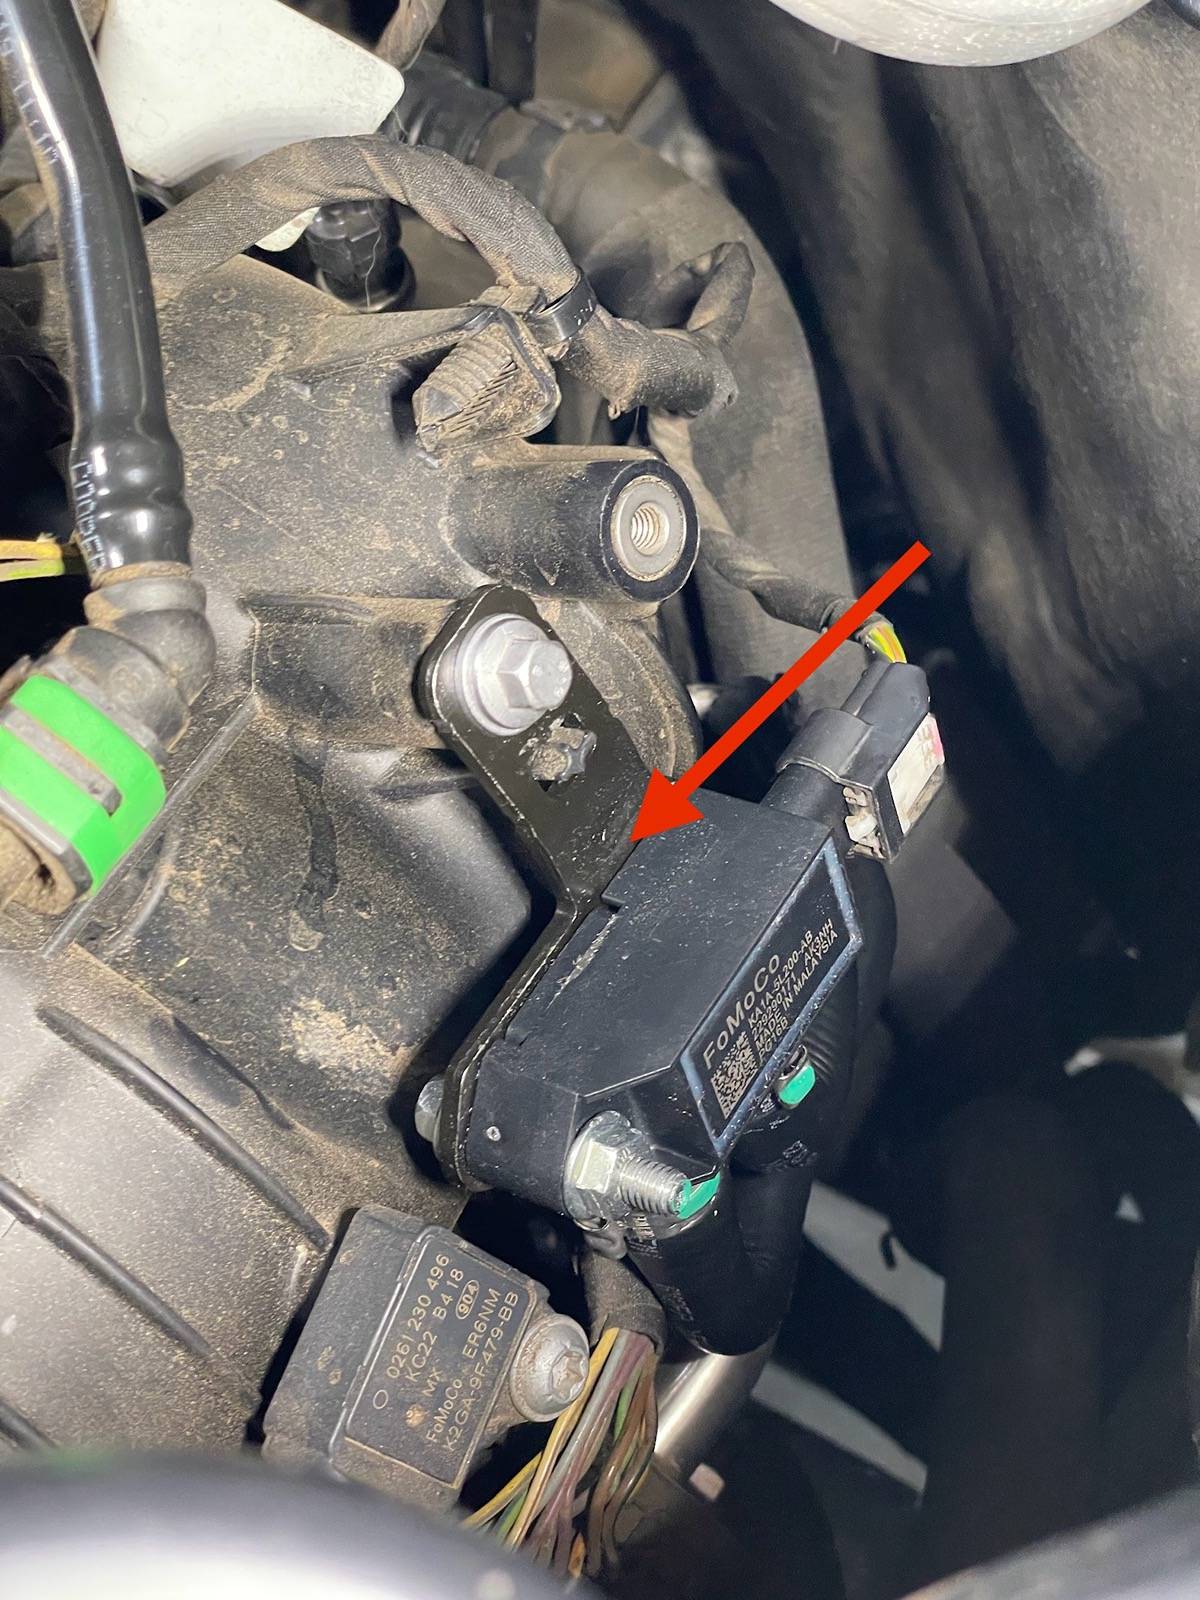
Amazon.com: Exhaust Gas Pressure Sensor Fit for Ford Explorer 2020 2021 2022 20223 2024 2.3L Replace KA1A-5L200-AB : Automotive
Of course you need an amazon account to receive free shipping
I bought one of these too..... I will update when it gets here if it is actually labeled "Ford"
Sponsored