Mastodon
Well-Known Member
- First Name
- Jacob
- Joined
- Apr 16, 2021
- Threads
- 2
- Messages
- 118
- Reaction score
- 488
- Location
- Corn country
- Vehicle(s)
- 2020 Ranger Lariat FX4, 2020 Explorer Limited
People laugh, but with the a decent amount of prep work, some mineral spirits to thin the paint down, and some wet sanding between coats, a roller job can look halfway decent.True North looked so good after the clay bar and a coat of Meguiar’s Detail Spray, it got me thinking about how great it would look with a fresh coat of paint. I KNOW, RIGHT!?
Brandon, @dondonbabyraptor , you should really pay attention here.
So, I did just that…

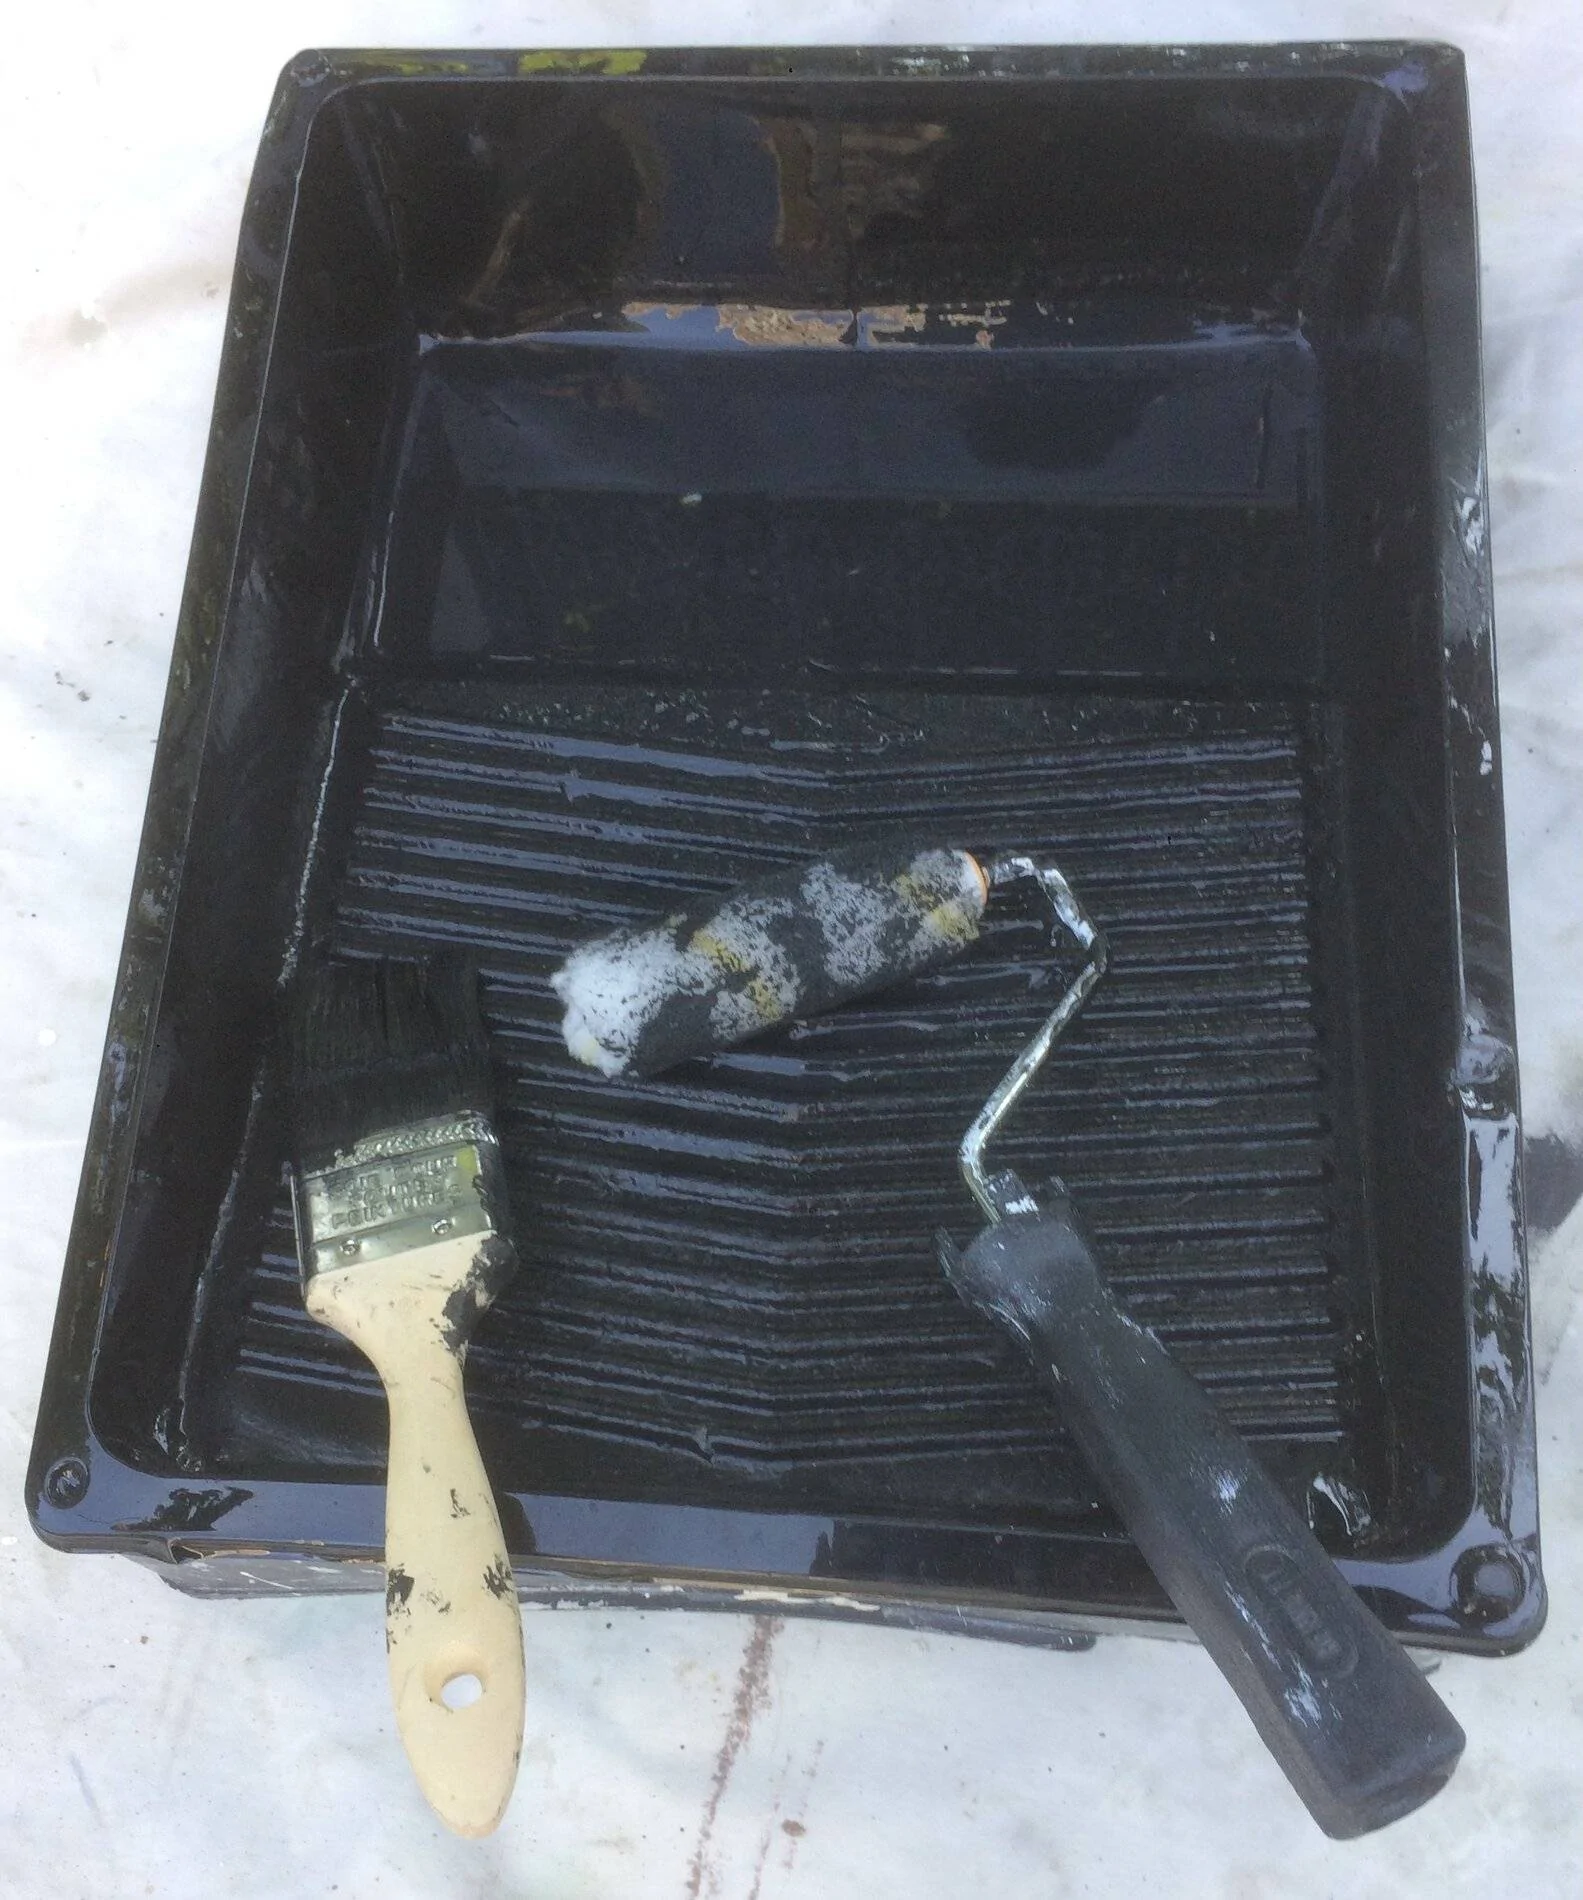
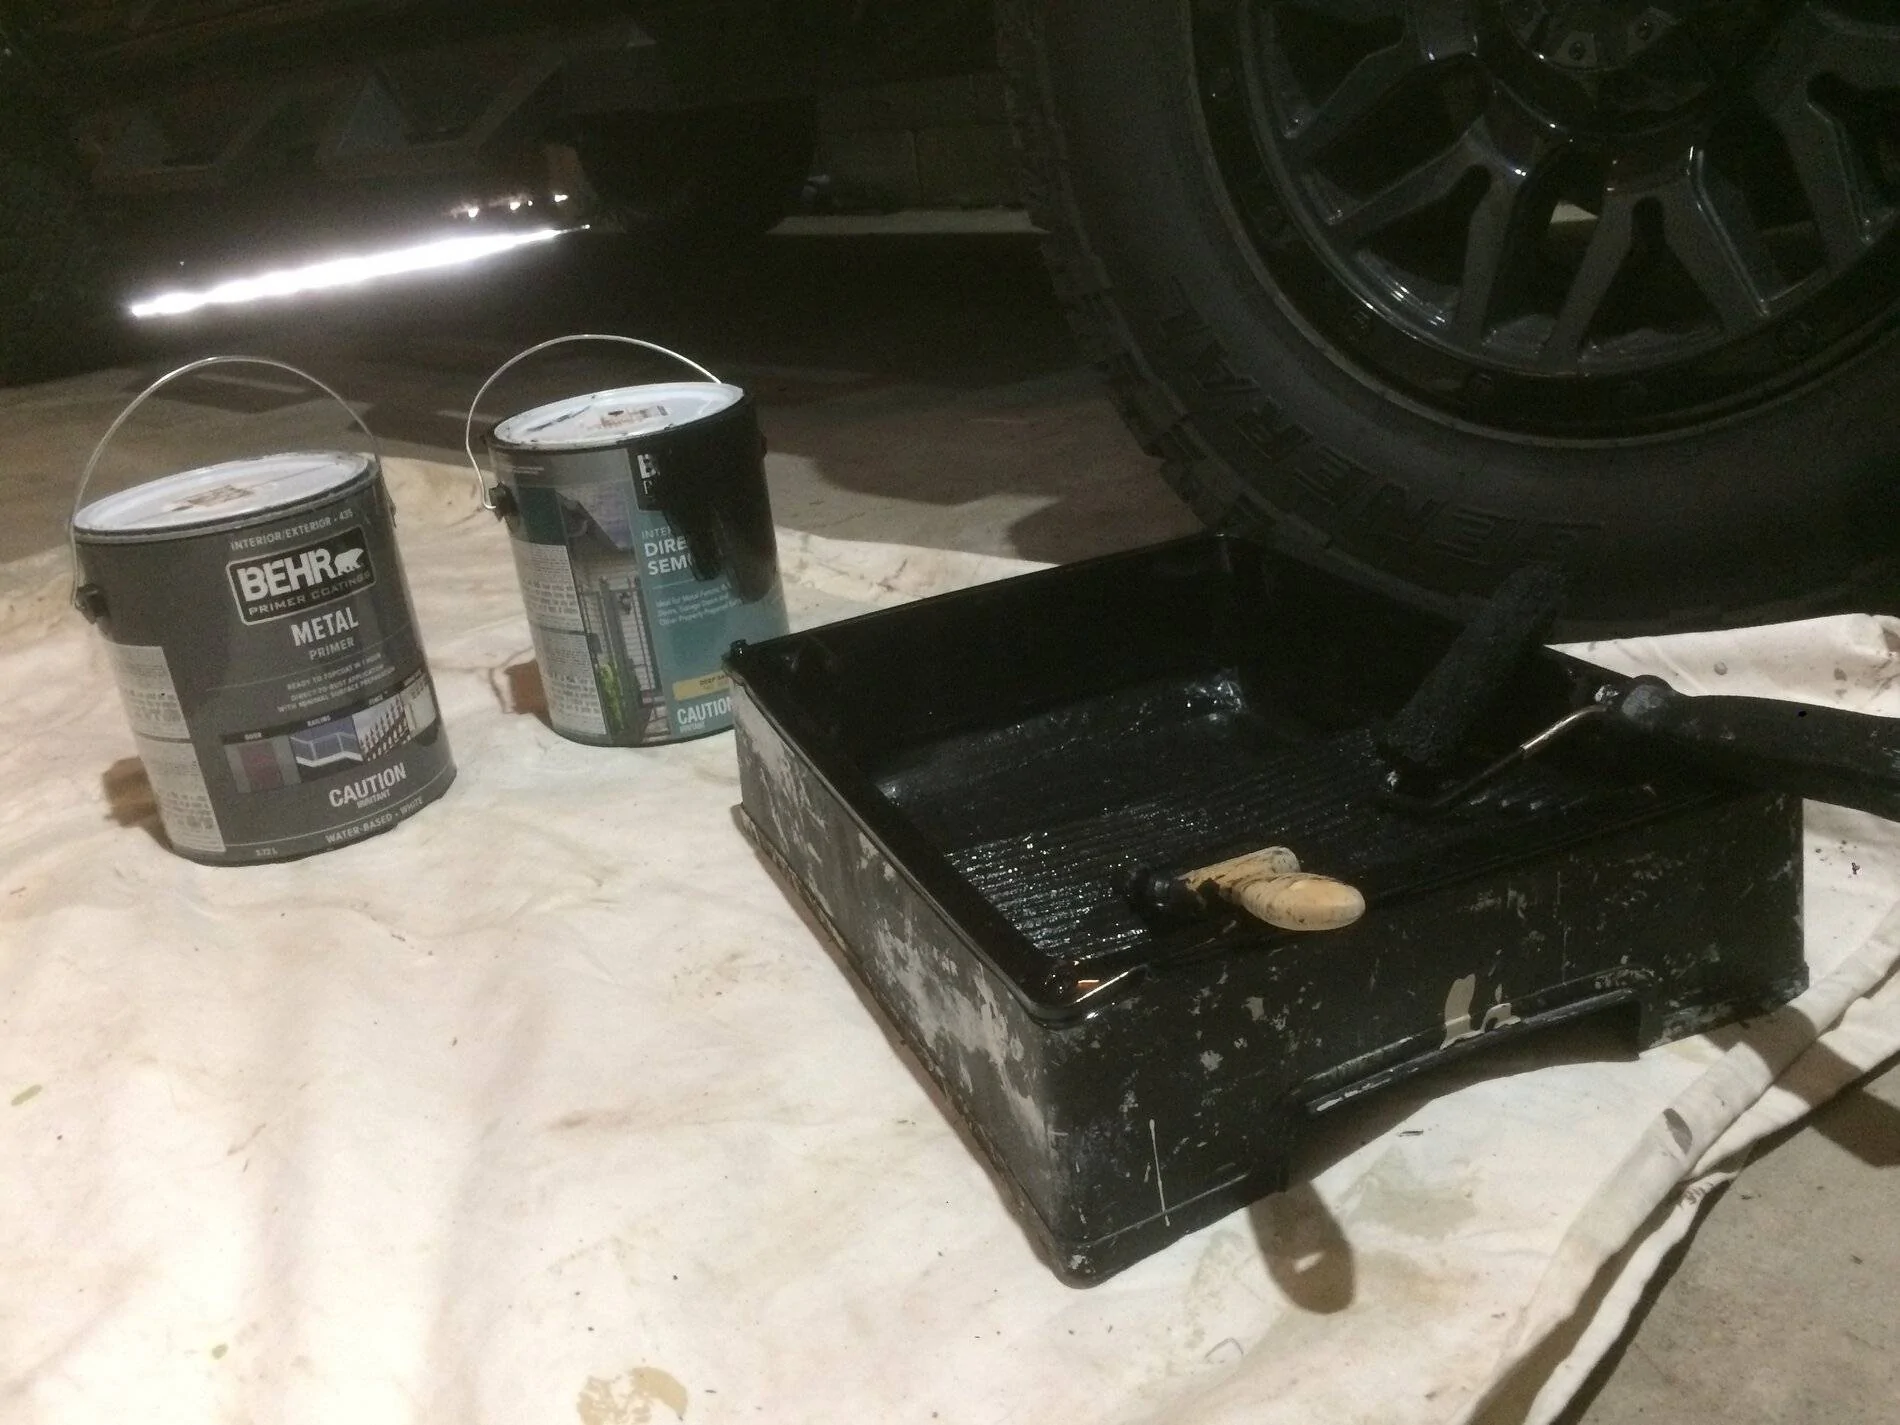
Dave @AzScorpion turned me on to this, so I knew it was a tried and true method. First, you need a few supplies. Cheap brush, paint tray, and a wiz roller - tray liner and drop cloth are optional but Dave recommends them for some reason. So, yeah, I used them too.
Use the brush for the initial application - back and forth, up and down criss-cross, it doesn’t matter at this point. Do the entire truck at once, none of this one or two panels at a time crap - it’s a time suck, and you’ll want to get out and show off your handiwork before dark.
For a showroom like finish (this is the most important step), apply the second coat with the wiz roller - don’t be afraid to use LOTS of paint and don’t worry about roller overlap marks - they’ll hardly be visible. Use long strokes with the roller from bumper to windshield, windshield to rear brake light, front headlight to taillight - you get the idea.
Most importantly, don’t use automotive paint - it’s a complete rip-off. Dave swears by Behr Direct to Metal Alkyd, so that’s what I used. Be sure to use DTM Primer as well. Maybe $80 all-in for all the supplies and paint. PPG can suck it.

I’ll post pics later, it’s still a bit tacky to the touch.
Good luck Brandon!
http://www.rickwrench.com/index79master.htm?
I actually did this method on a 1970 Mustang In my younger, poorer days. It helped that I had to rebuild the front passenger side corner and couldn't afford an actual paint job. Sure, I might have had all the patience of a 20-year-old and rushed/skipped some steps, but from more than 5 feet away it didn’t look half bad, especially since I did it in a parking lot! At least, it looked better than the hodgepodge of rust and unfinished parts that it was before...
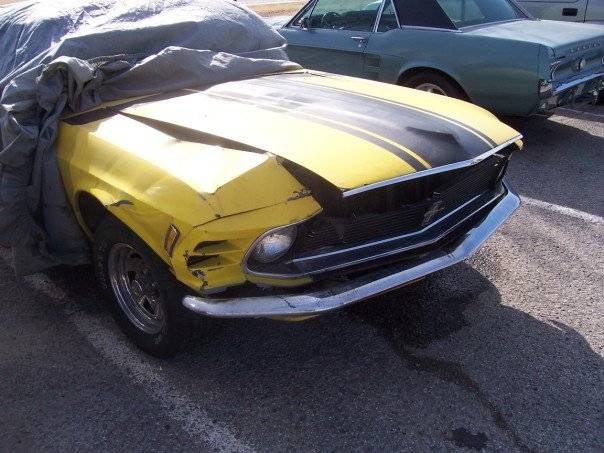

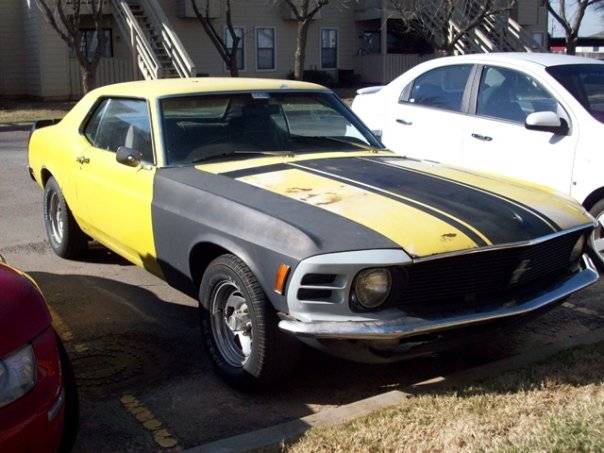
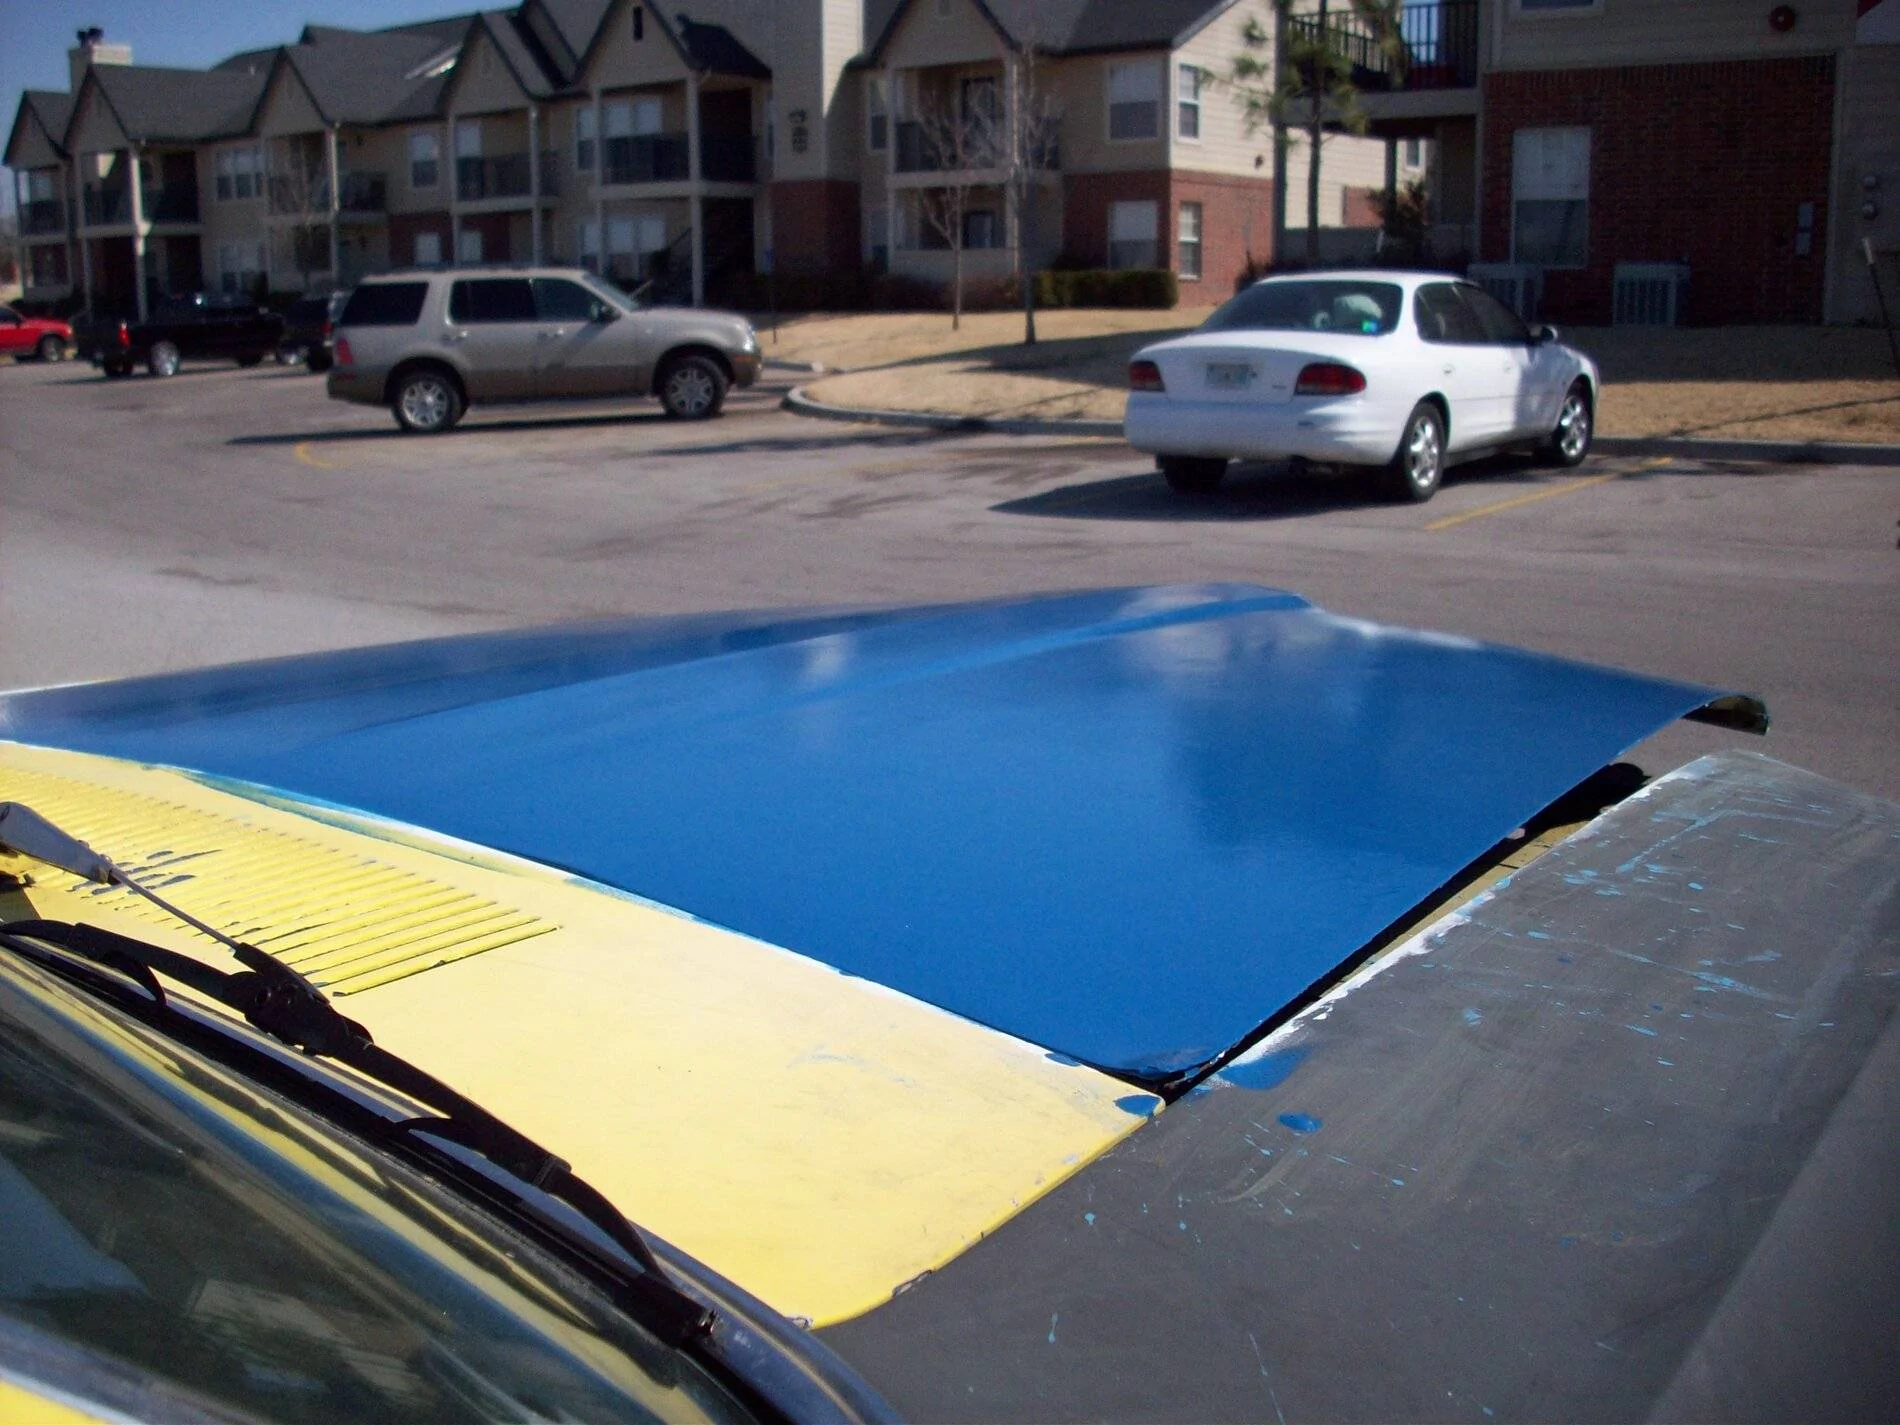
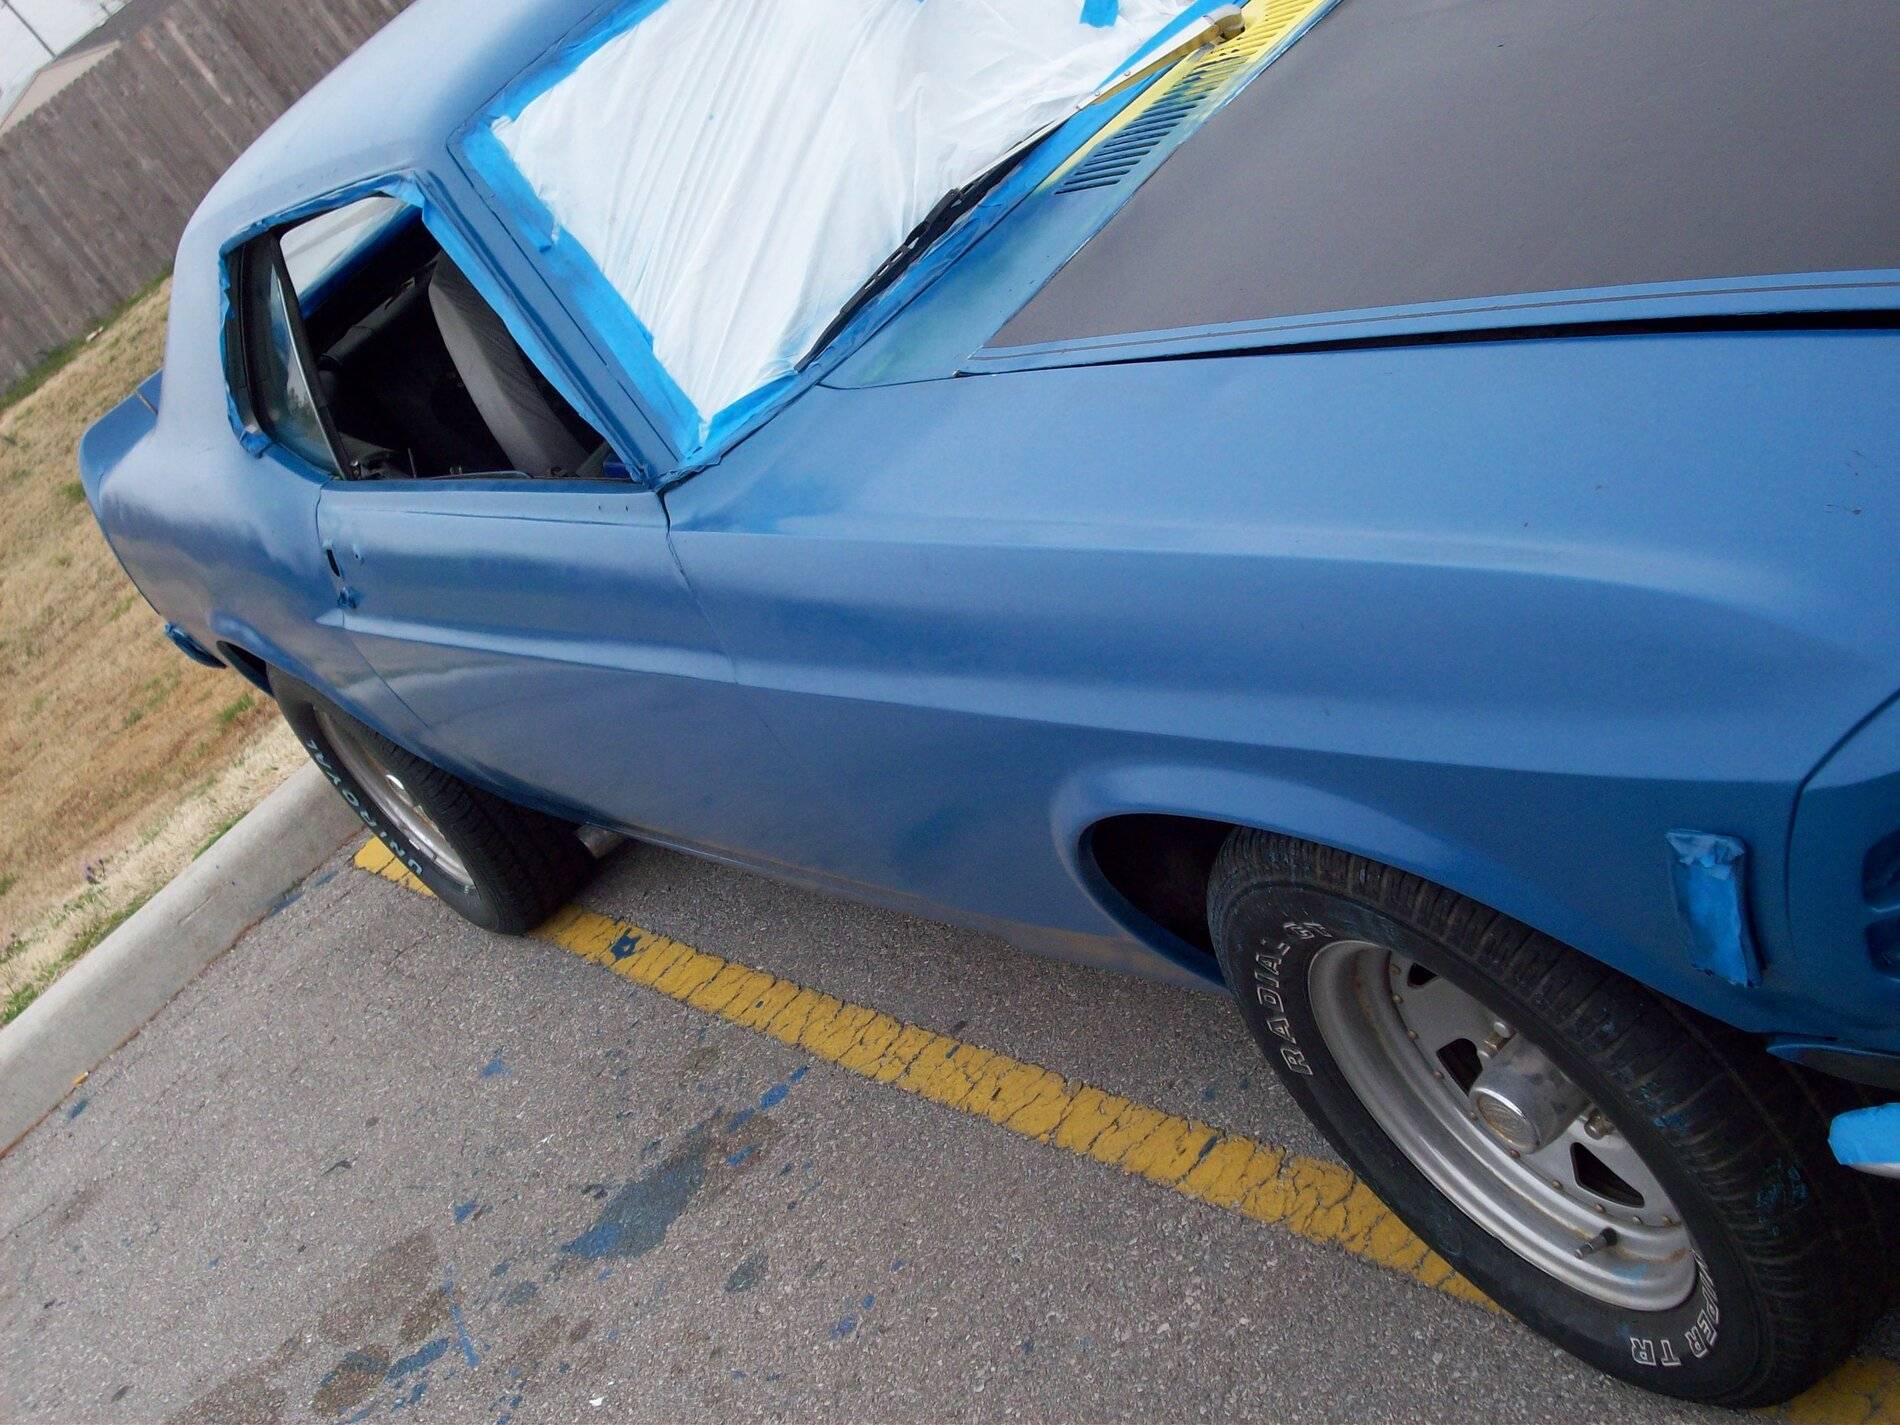
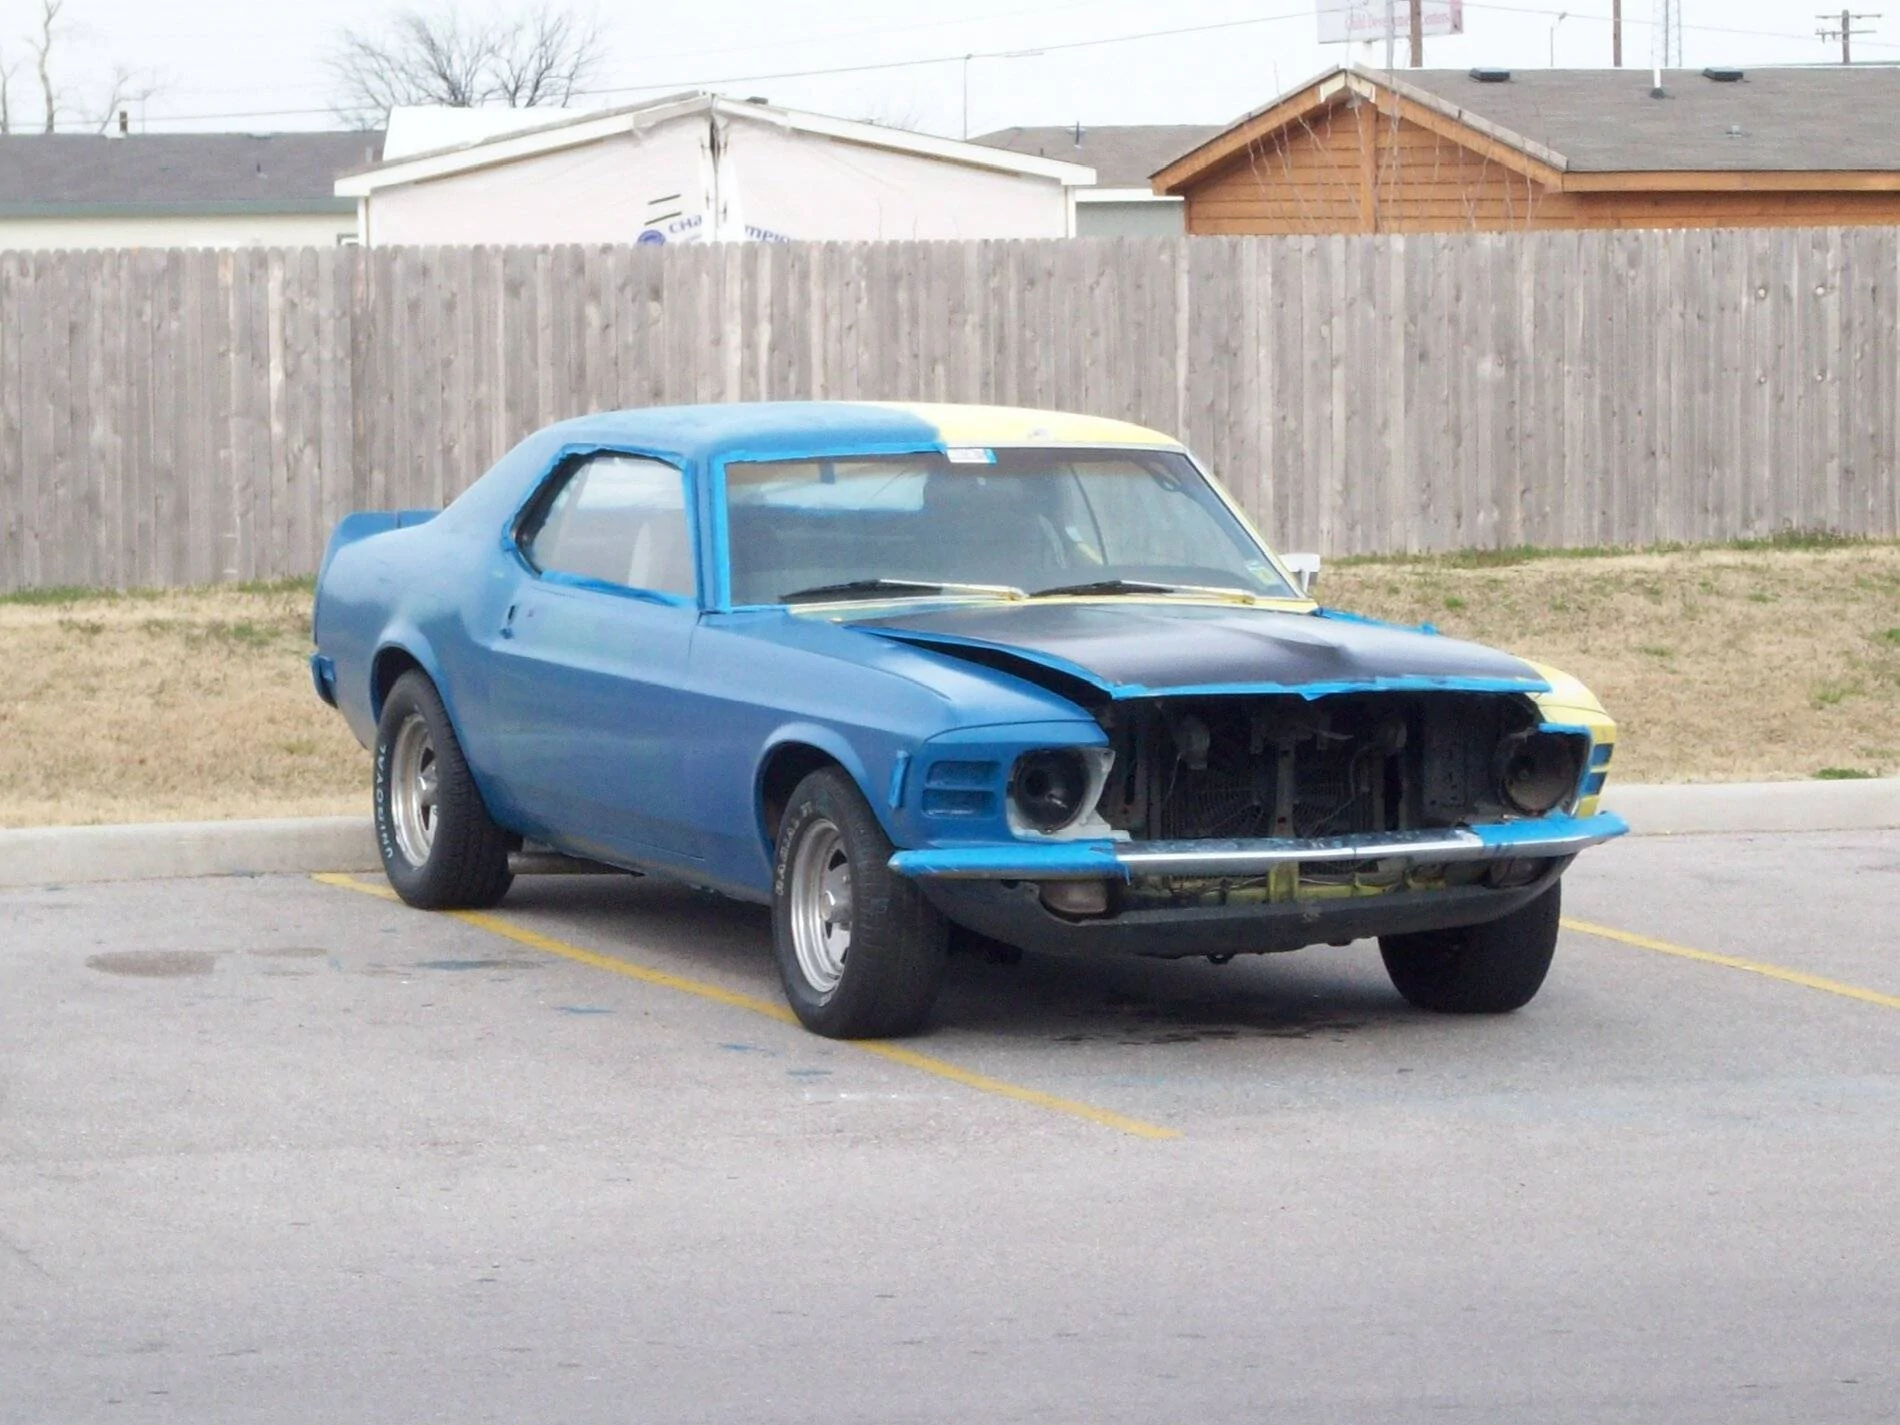
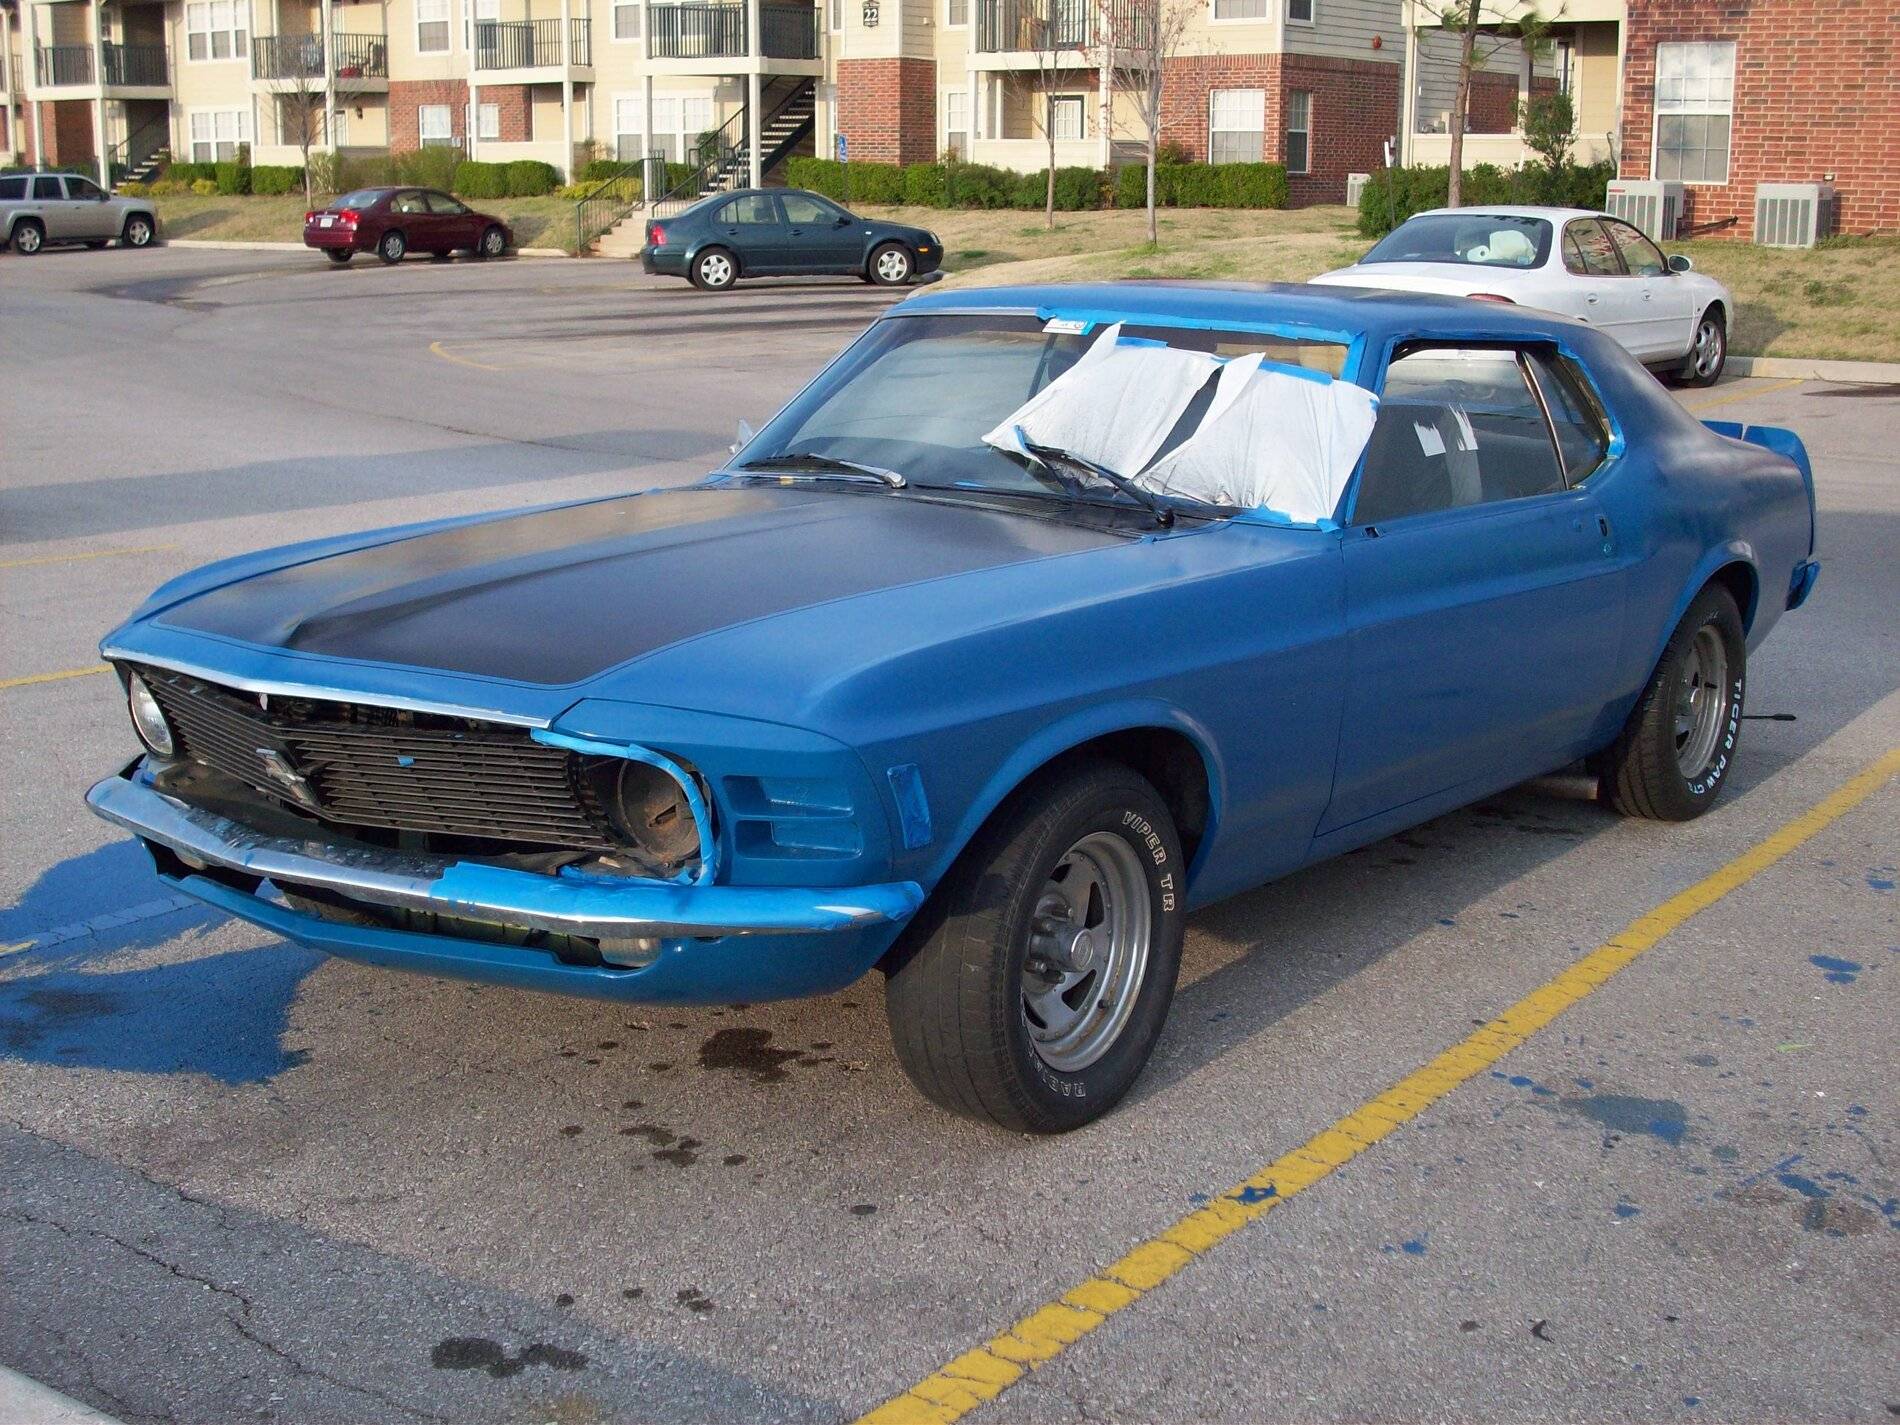
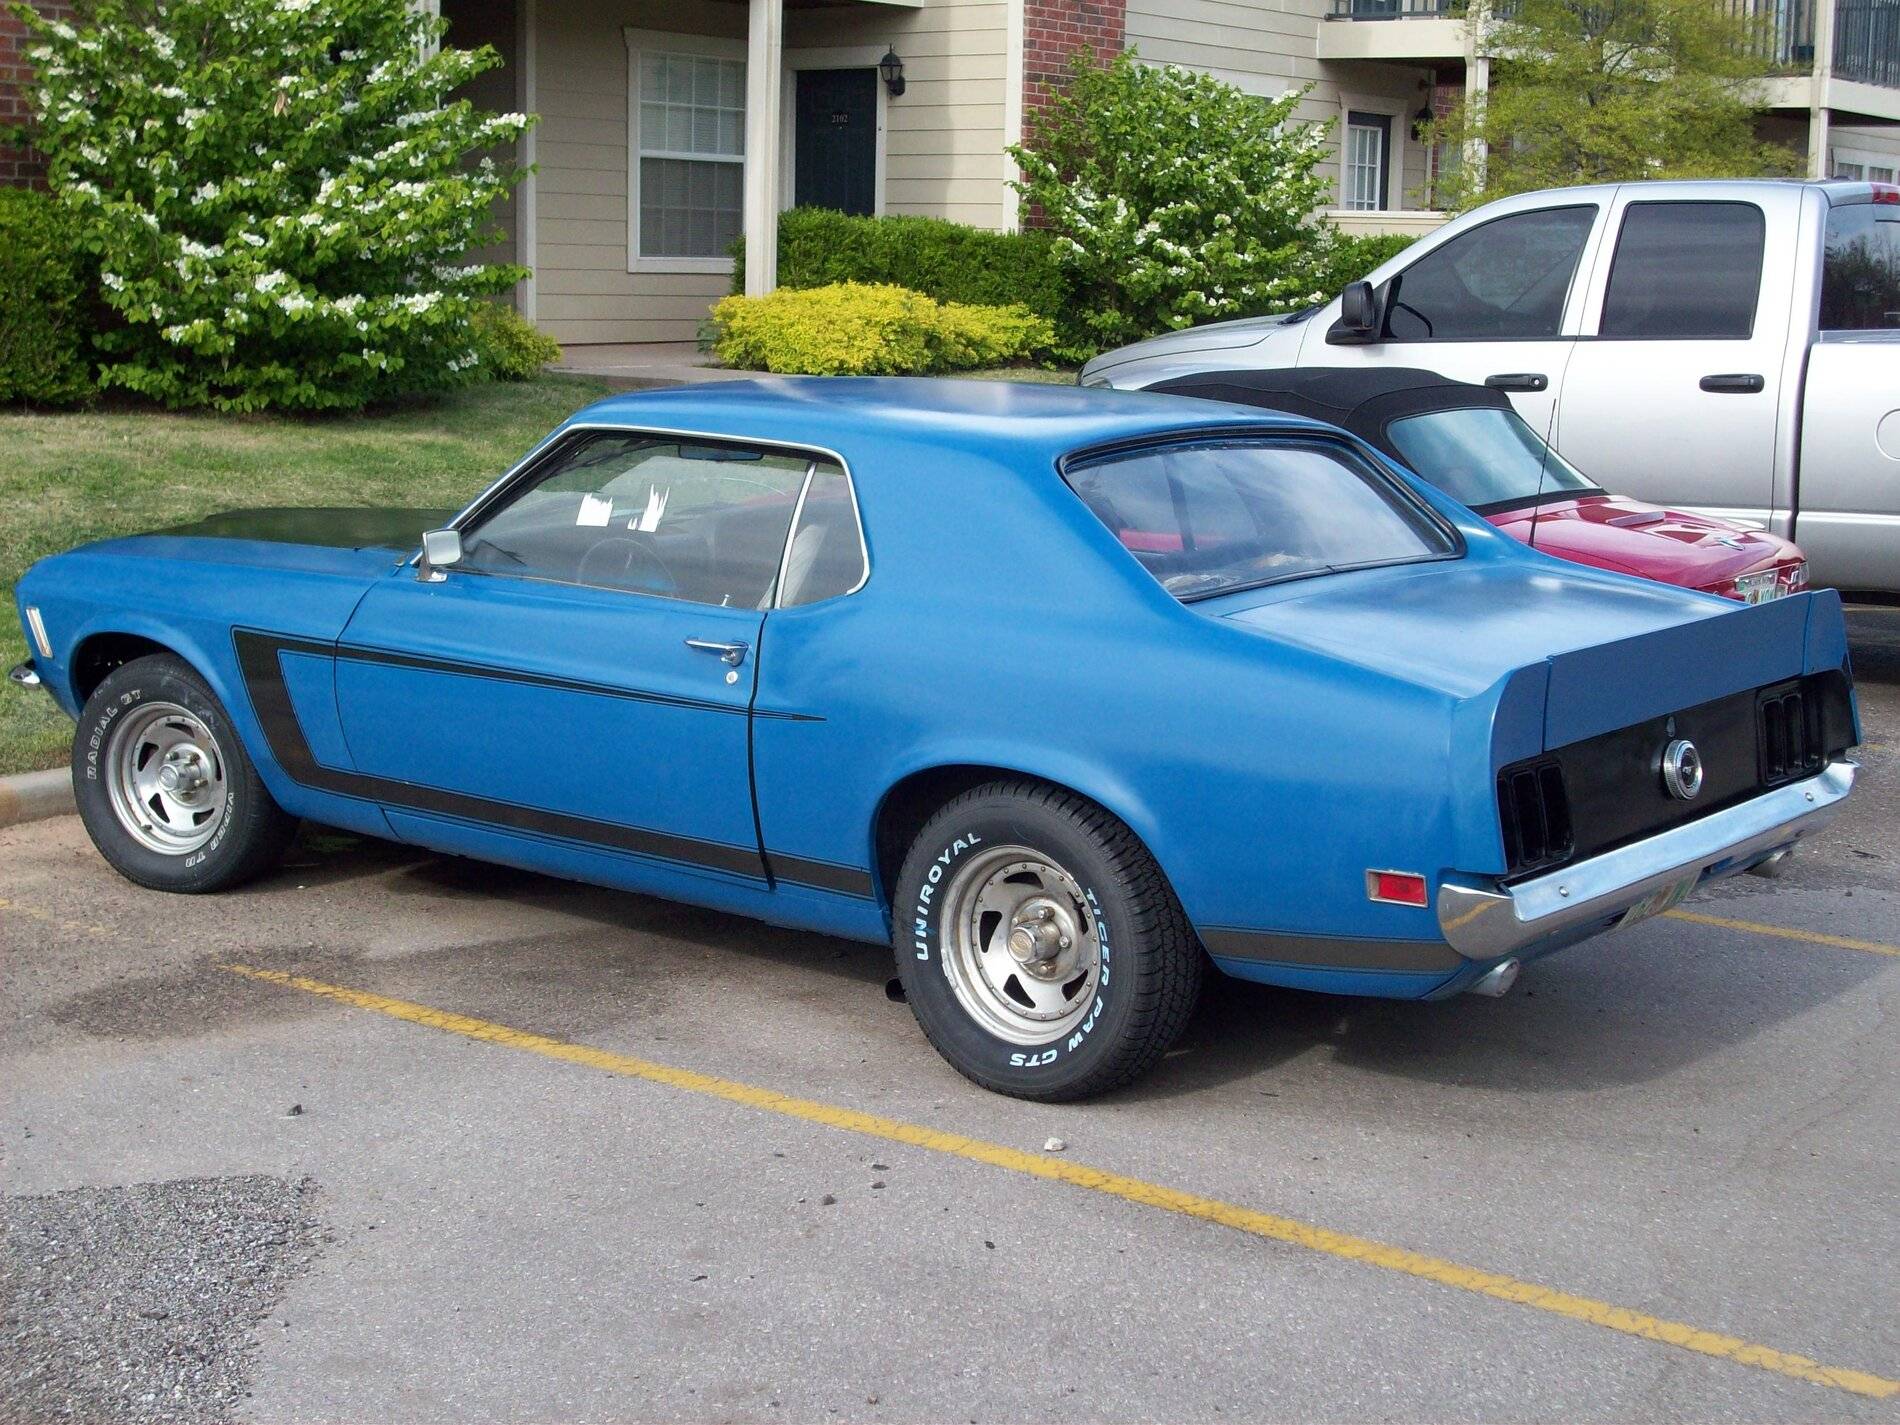
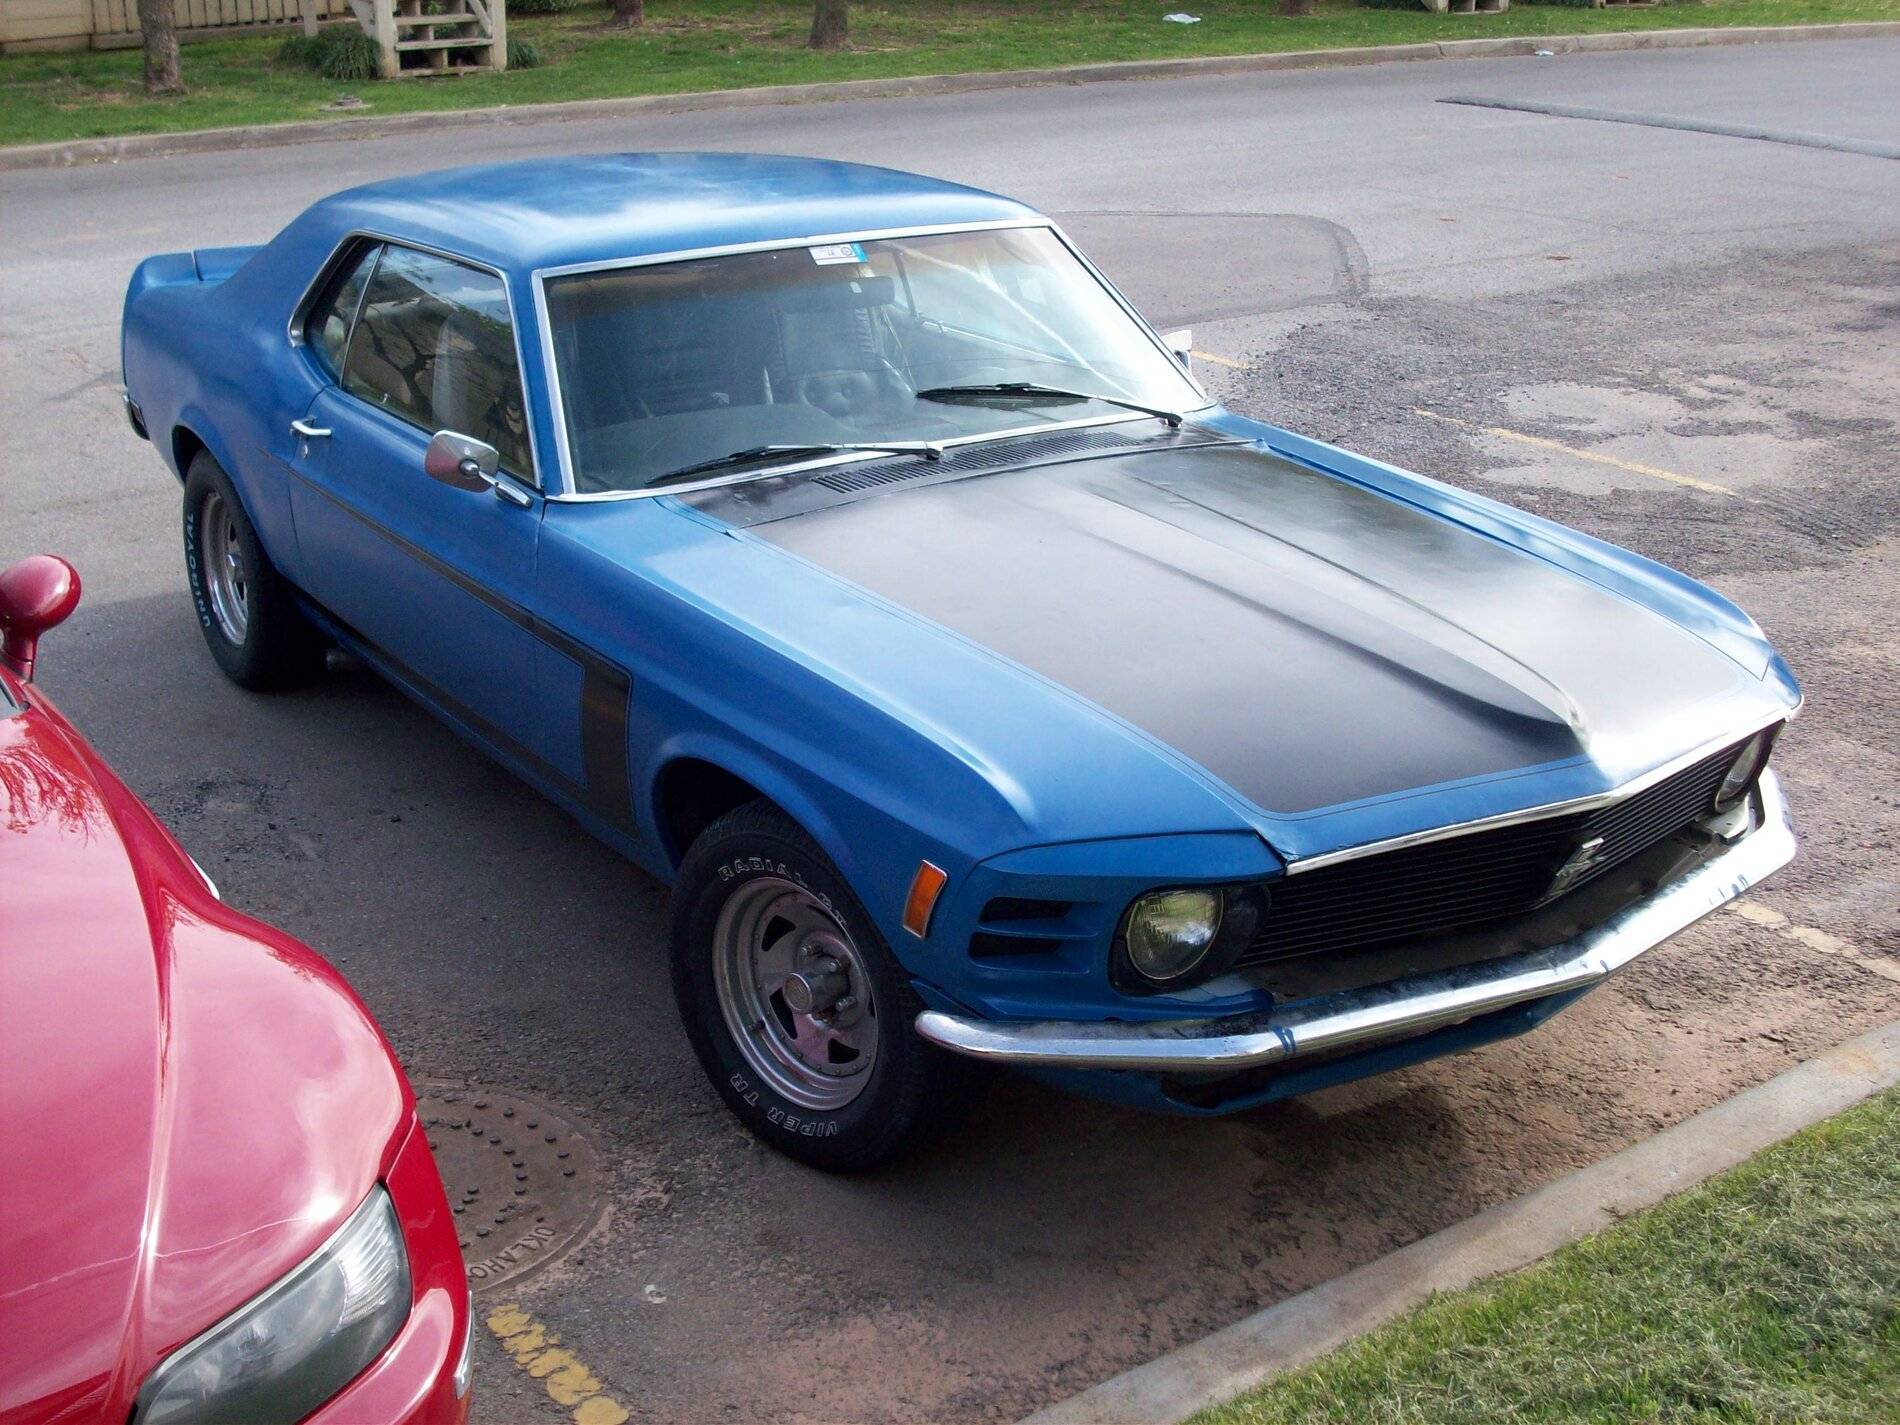
And for the record: this was Rustoleum enamel, in Royal Blue.
Sponsored


 ) with a stripped torx. So, there is no way I can get in there to pound a slot or larger torx in; can't grab it with a bolt remover (the Irwin type that you hammer onto the head); no channel locks. Fortunately, my Krell like brain solves the issue, take a metal hack saw blade and remove the head (especially since there is a washer between head and bracket). Only took 6 hours and no, don't have a shop air sawzall.
")