airline tech
Well-Known Member
- Joined
- Aug 24, 2022
- Threads
- 28
- Messages
- 4,511
- Reaction score
- 8,605
- Location
- Midwest - KS
- Vehicle(s)
- 2022 Ranger Lariat-Super Crew, Cactus Gray
- Occupation
- Aircraft Tech
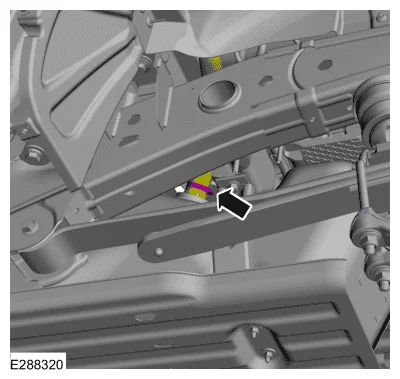
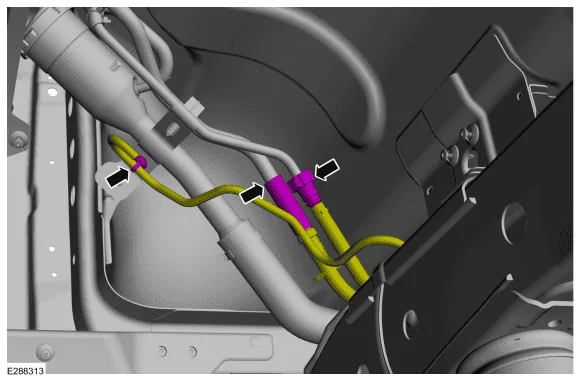
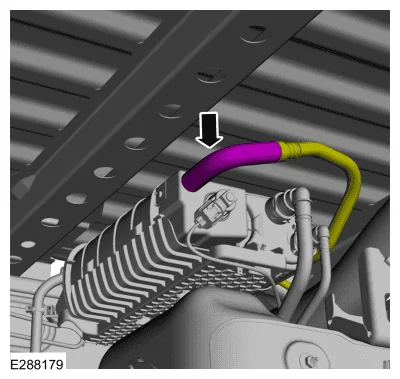
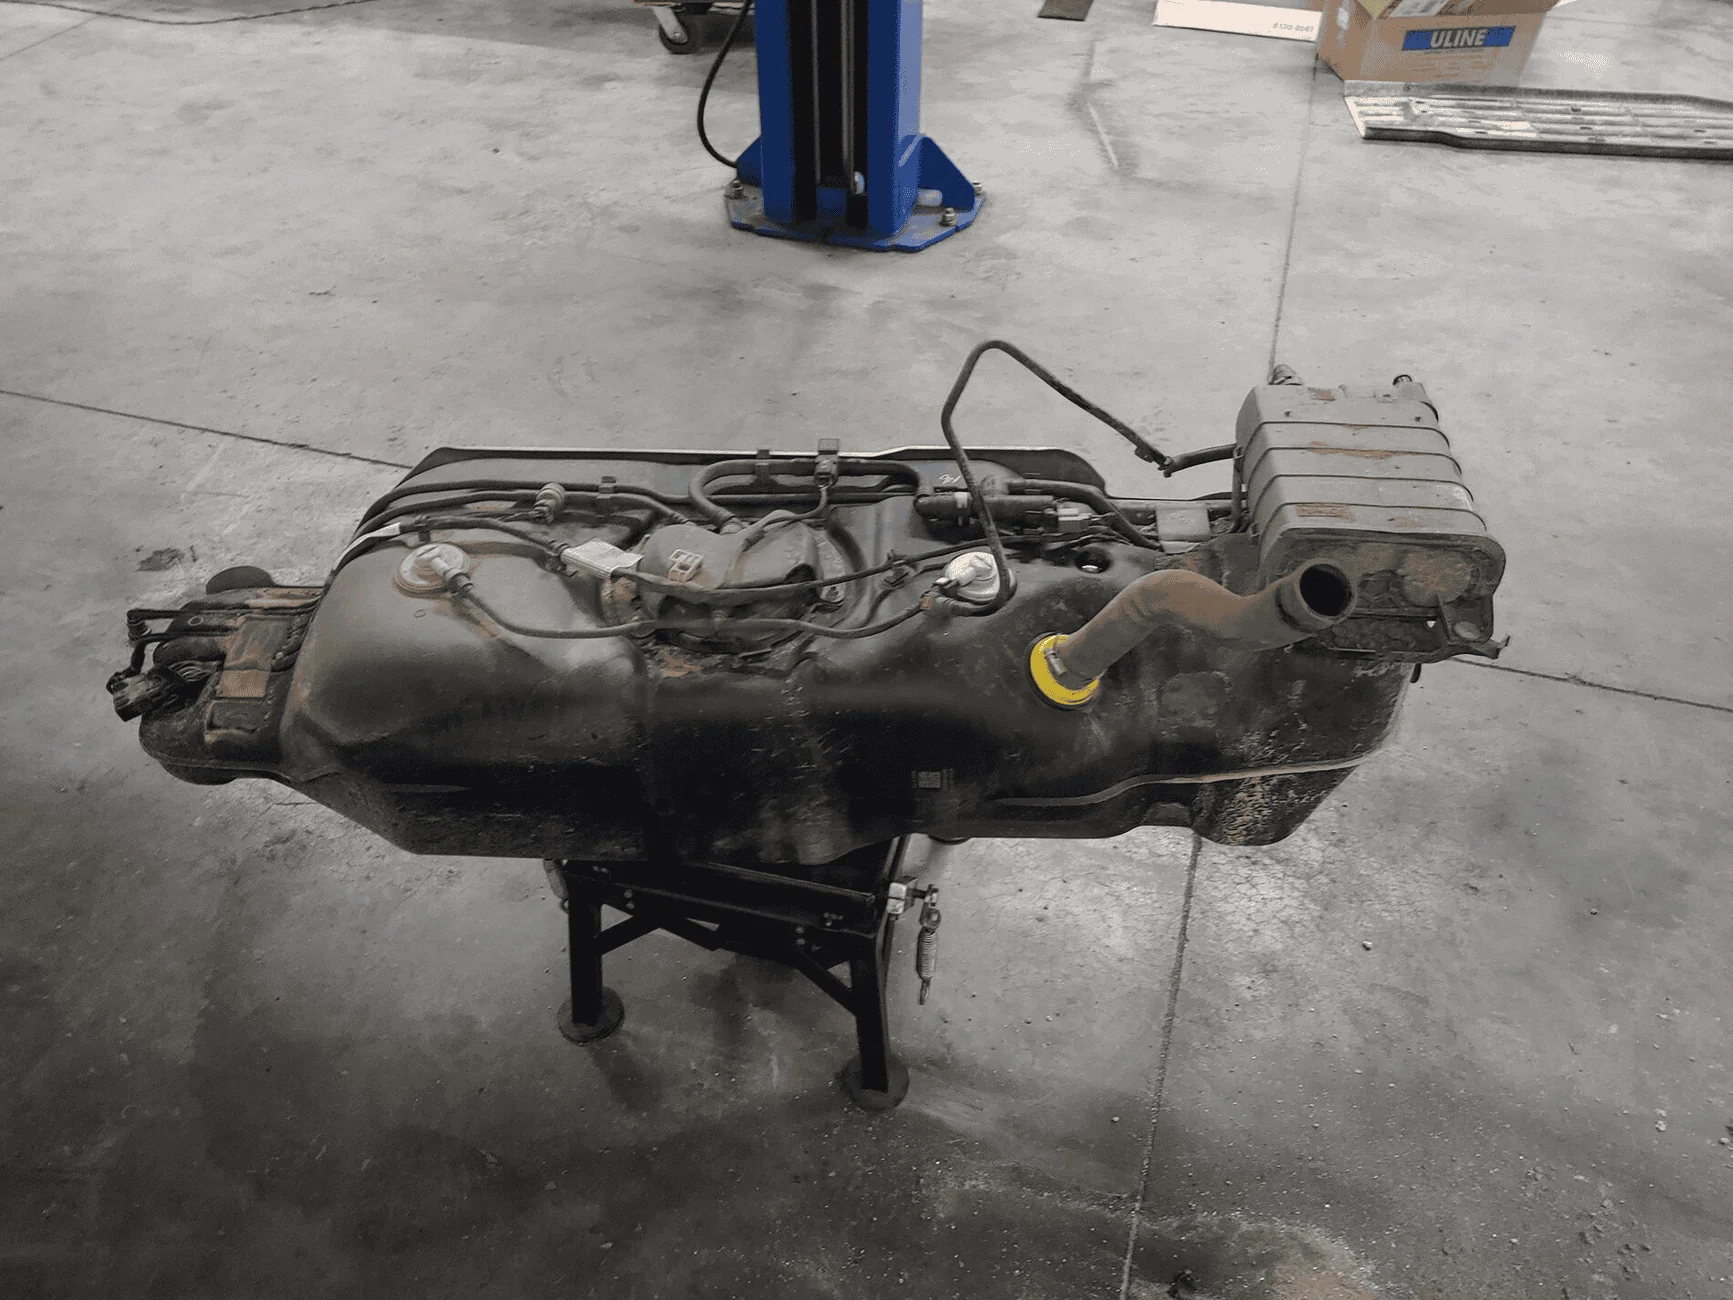
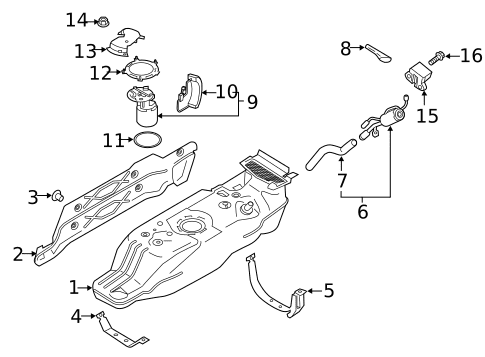
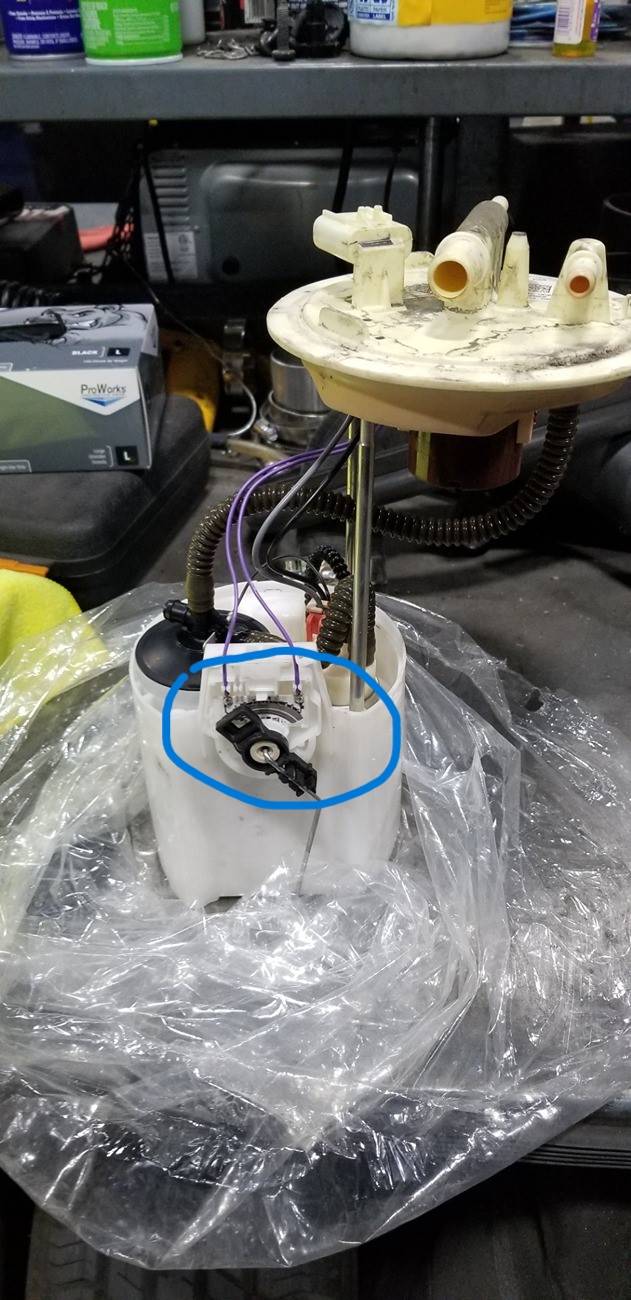
It is not necessary to disconnect this connector for Tank Removal, as the Lines and Harness run across the top of the tank - Removed as an assembly
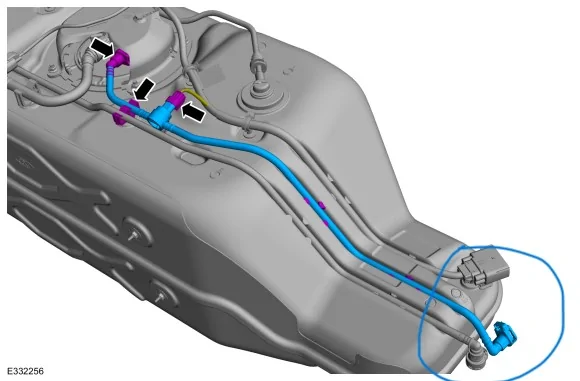
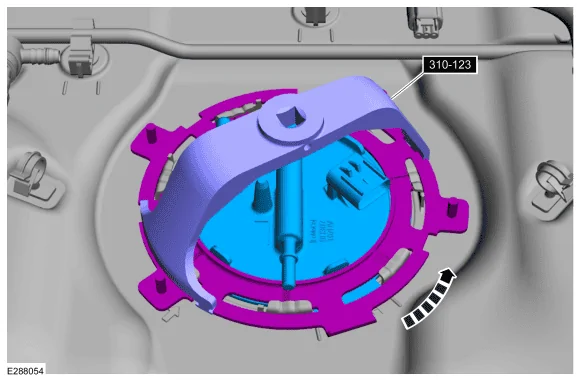
C4430 (Pump Connector)

When you drop the tank, this is a top view of what you will see, note how Ford did something right and give us QD's in another location - instead of only at the very top of the tank, where it is very easy to break a connection when trying to lower the tank (Just Enough) to (SQUEEZE) your hand up there to disconnect being very careful not to drop the tank too far (breaking the connection)
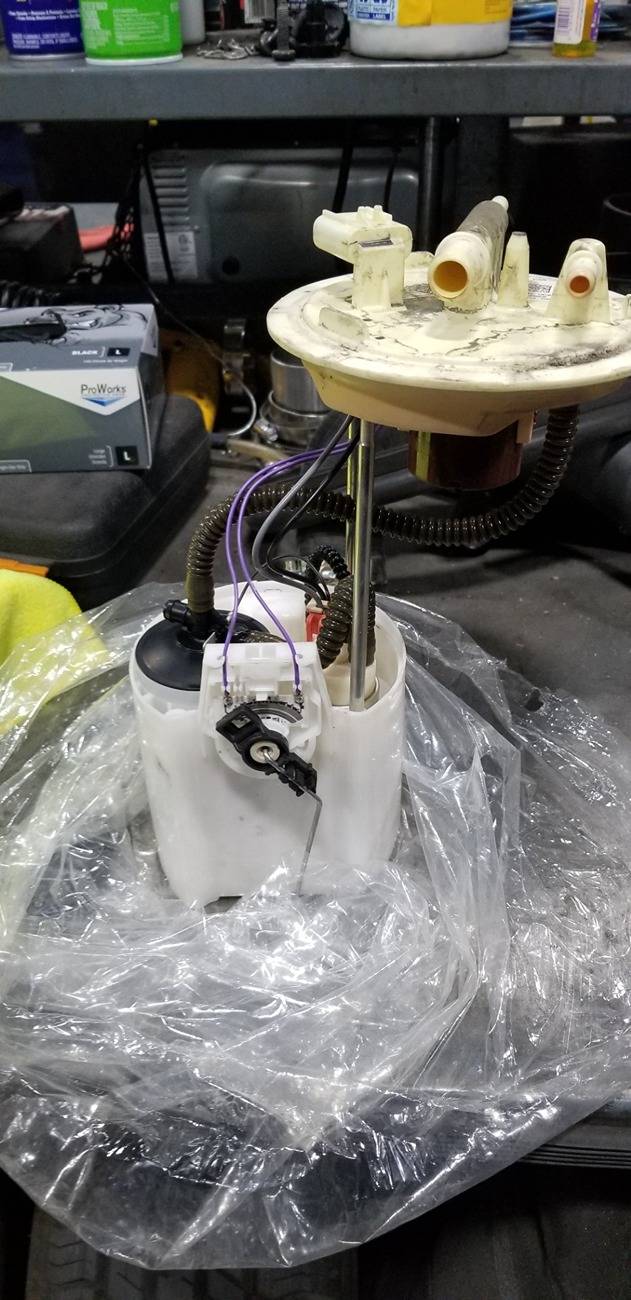
It does call out for the Tool (to clock out the pump) but every fuel pump I have changed (it is not required) I was able to R&R without it, although the tool will make it easier. (If I recall correctly, I have replaced a dozen or so over the years- various makes)
The trick is - remove any and all corrosion / dirt build up at the Locking Ring mating surface, use a blow gun to clean the area and then spray with some penetrating oil. That build up is what creates a fight.
You want to do this anyway, so you are minimizing the debris that will fall into the tank.
Installing them helps to have a helper - pushing down on the pump (compress the O-Ring) down enough to get the Locking Ring low enough to engage the locking tabs (while turning CW) as this will be a (NEW) O-Ring
You are also fighting the Spring Tension of the Lower Pump Housing (Pressing against the bottom of the tank)
Removal (CCW)
If you decide to replace the pump assembly:
I will also suggest not trying to save money on a Pump Assembly, do not be tempted to go aftermarket (if you do) there is a HIGH Probability you will be dropping the tank again in under a year.
There is a REASON that the pumps have a (1 Year) Warranty, if you are lucky, you can find a Lifetime Warranty (Saves the Cost) of a pump, but still have to pull the tank to replace.
C4430 (Pump Connector)
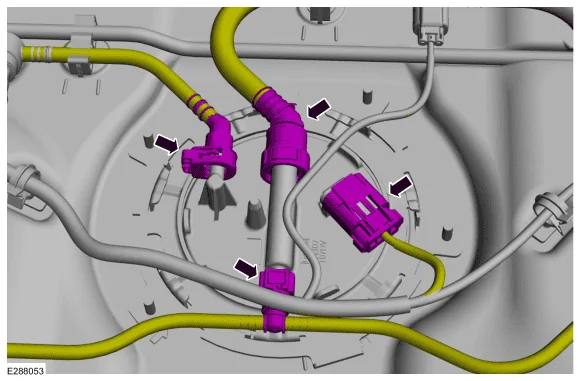
When you drop the tank, this is a top view of what you will see, note how Ford did something right and give us QD's in another location - instead of only at the very top of the tank, where it is very easy to break a connection when trying to lower the tank (Just Enough) to (SQUEEZE) your hand up there to disconnect being very careful not to drop the tank too far (breaking the connection)
It does call out for the Tool (to clock out the pump) but every fuel pump I have changed (it is not required) I was able to R&R without it, although the tool will make it easier. (If I recall correctly, I have replaced a dozen or so over the years- various makes)
The trick is - remove any and all corrosion / dirt build up at the Locking Ring mating surface, use a blow gun to clean the area and then spray with some penetrating oil. That build up is what creates a fight.
You want to do this anyway, so you are minimizing the debris that will fall into the tank.
Installing them helps to have a helper - pushing down on the pump (compress the O-Ring) down enough to get the Locking Ring low enough to engage the locking tabs (while turning CW) as this will be a (NEW) O-Ring
You are also fighting the Spring Tension of the Lower Pump Housing (Pressing against the bottom of the tank)
Removal (CCW)
If you decide to replace the pump assembly:
I will also suggest not trying to save money on a Pump Assembly, do not be tempted to go aftermarket (if you do) there is a HIGH Probability you will be dropping the tank again in under a year.
There is a REASON that the pumps have a (1 Year) Warranty, if you are lucky, you can find a Lifetime Warranty (Saves the Cost) of a pump, but still have to pull the tank to replace.
Sponsored