harringtondav
Well-Known Member
- First Name
- Dave
- Joined
- Jan 6, 2020
- Threads
- 25
- Messages
- 448
- Reaction score
- 797
- Location
- East Central Iowa
- Vehicle(s)
- 2019 Ford Ranger SuperCab, 2016 Jeep Cherokee, 2014 Dodge Dart Aero DDCT
- Thread starter
- #1
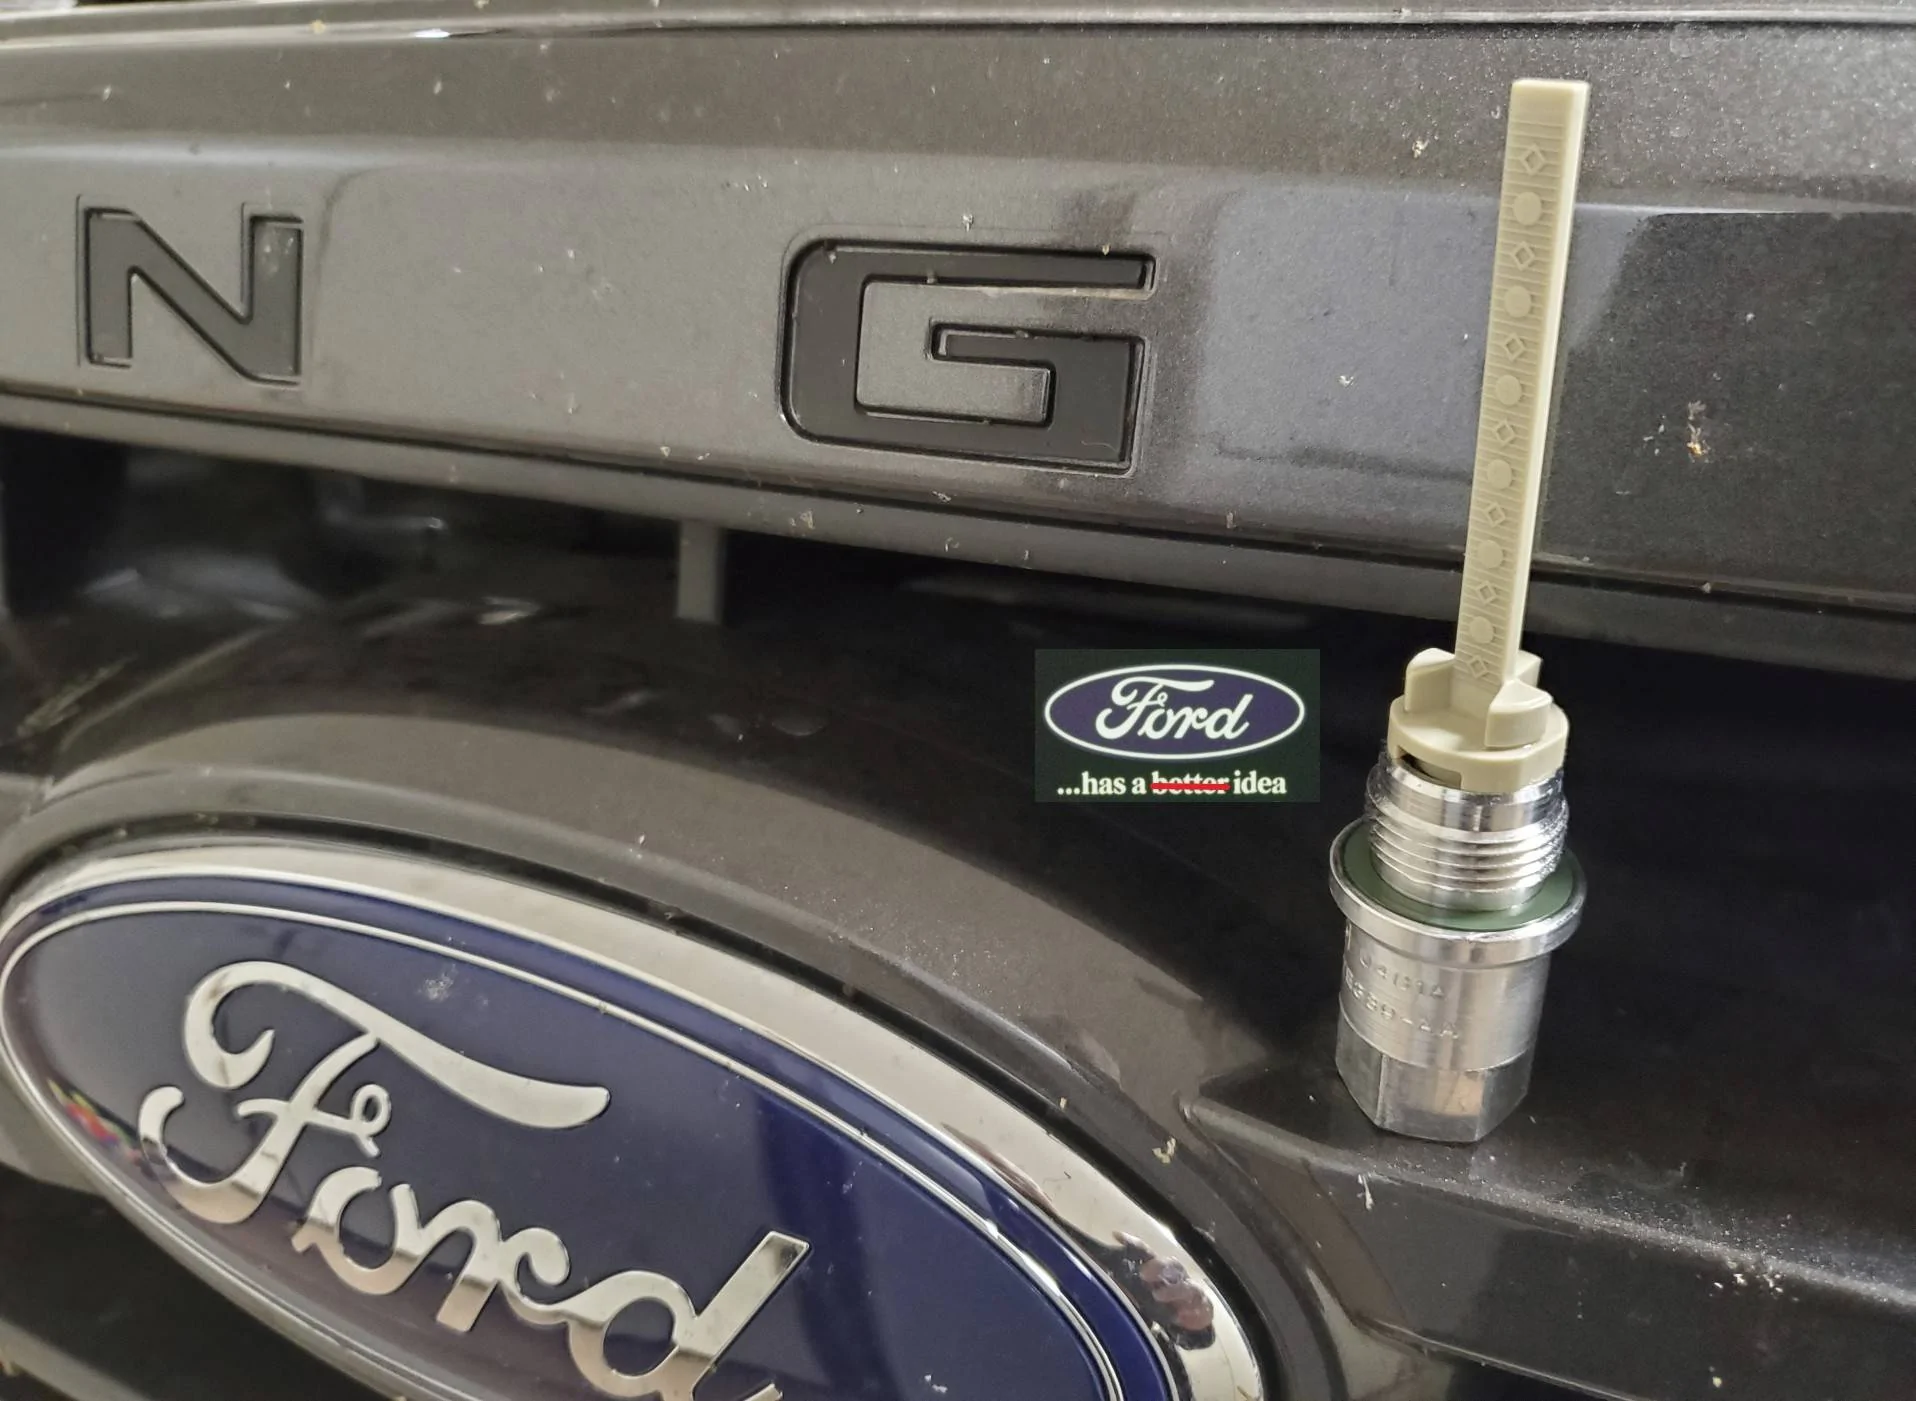
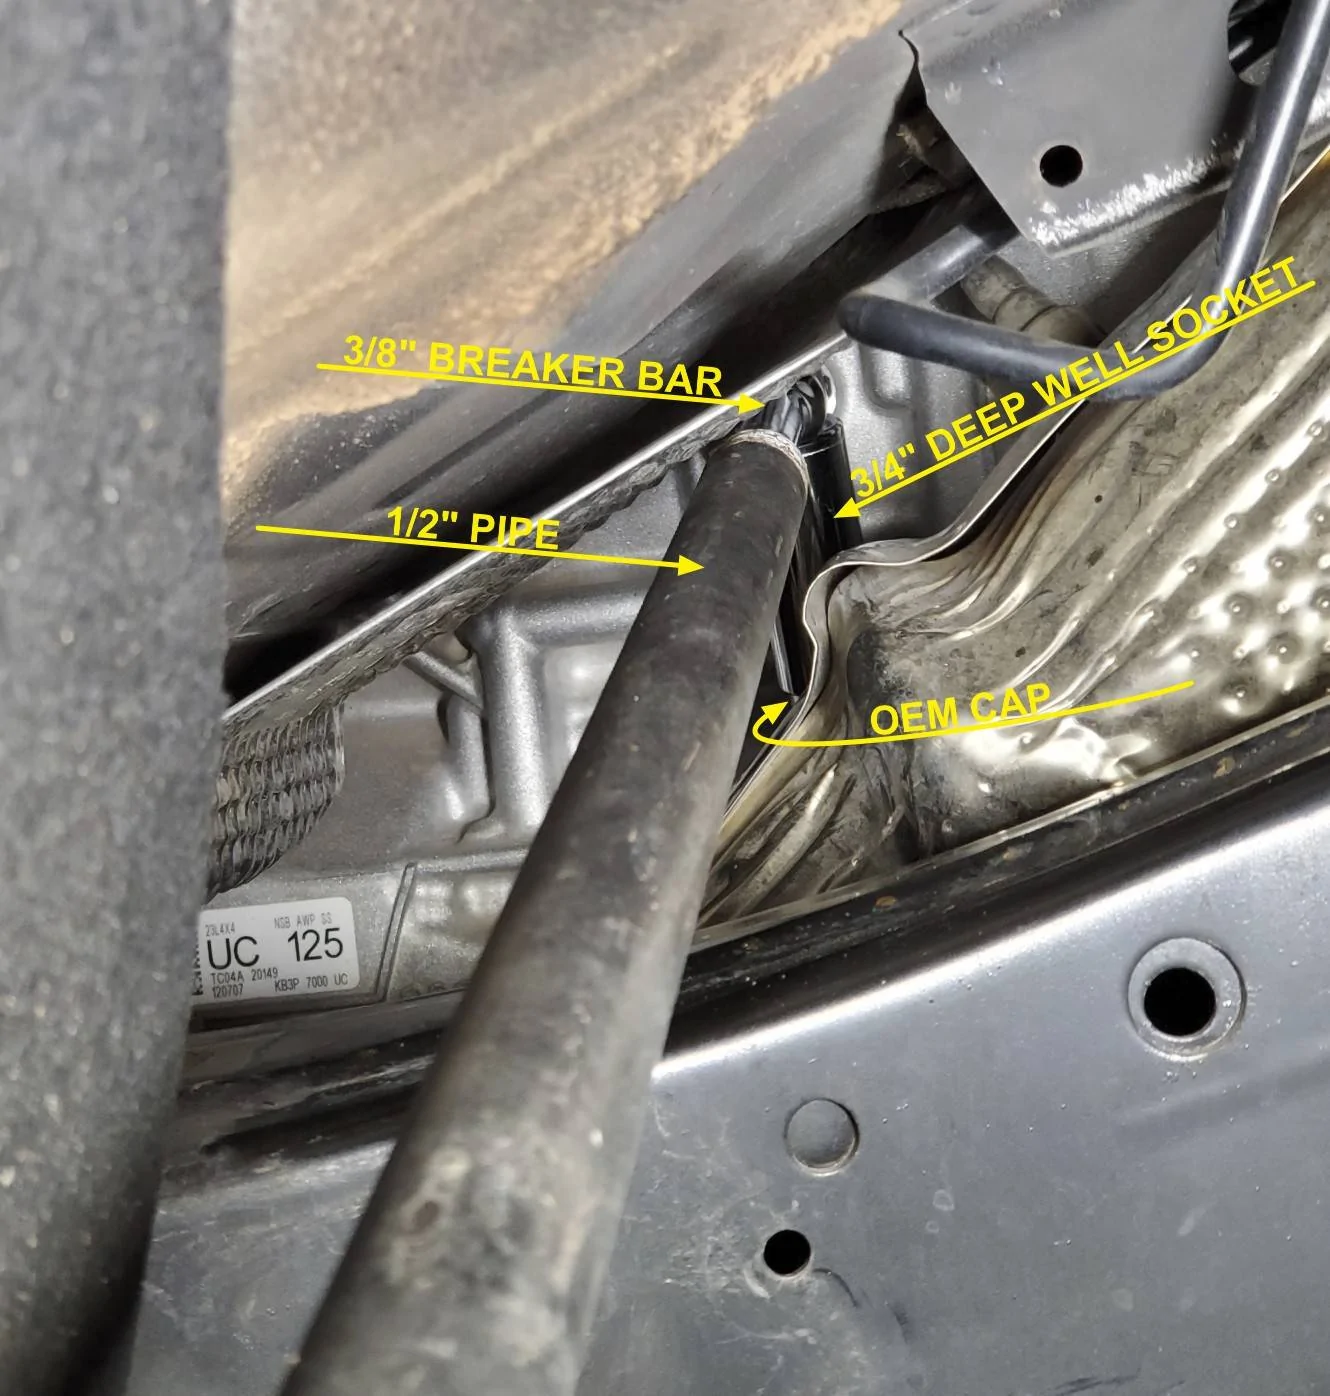
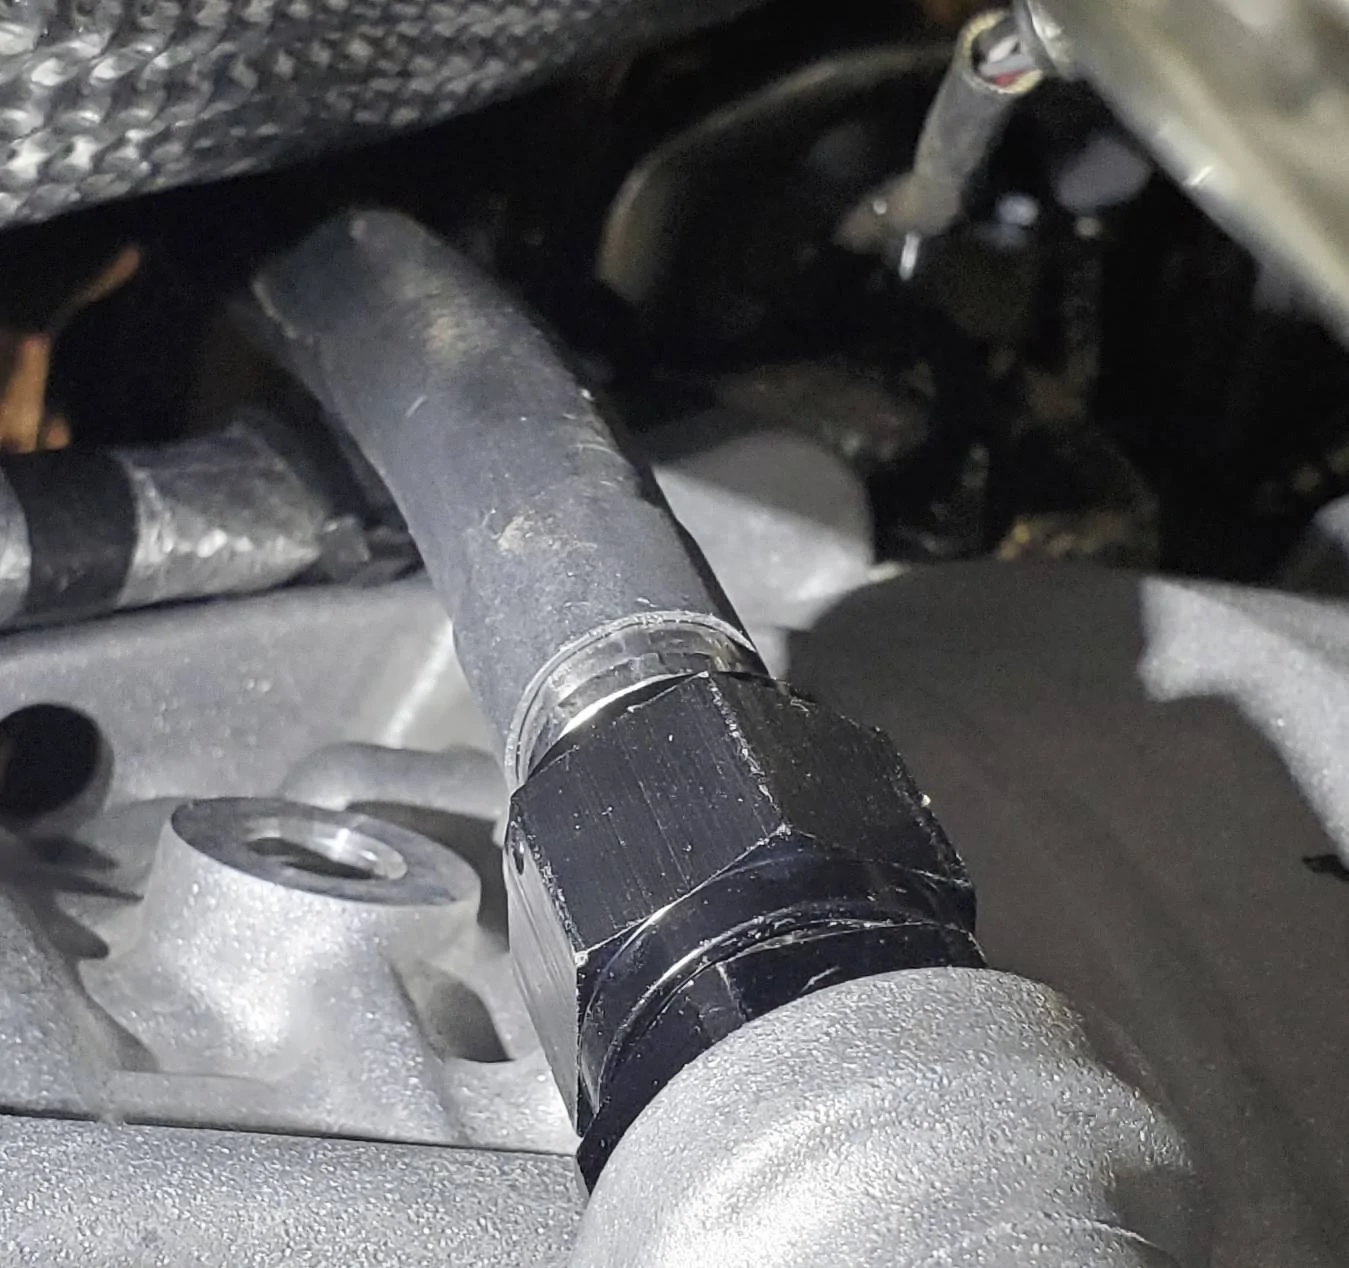
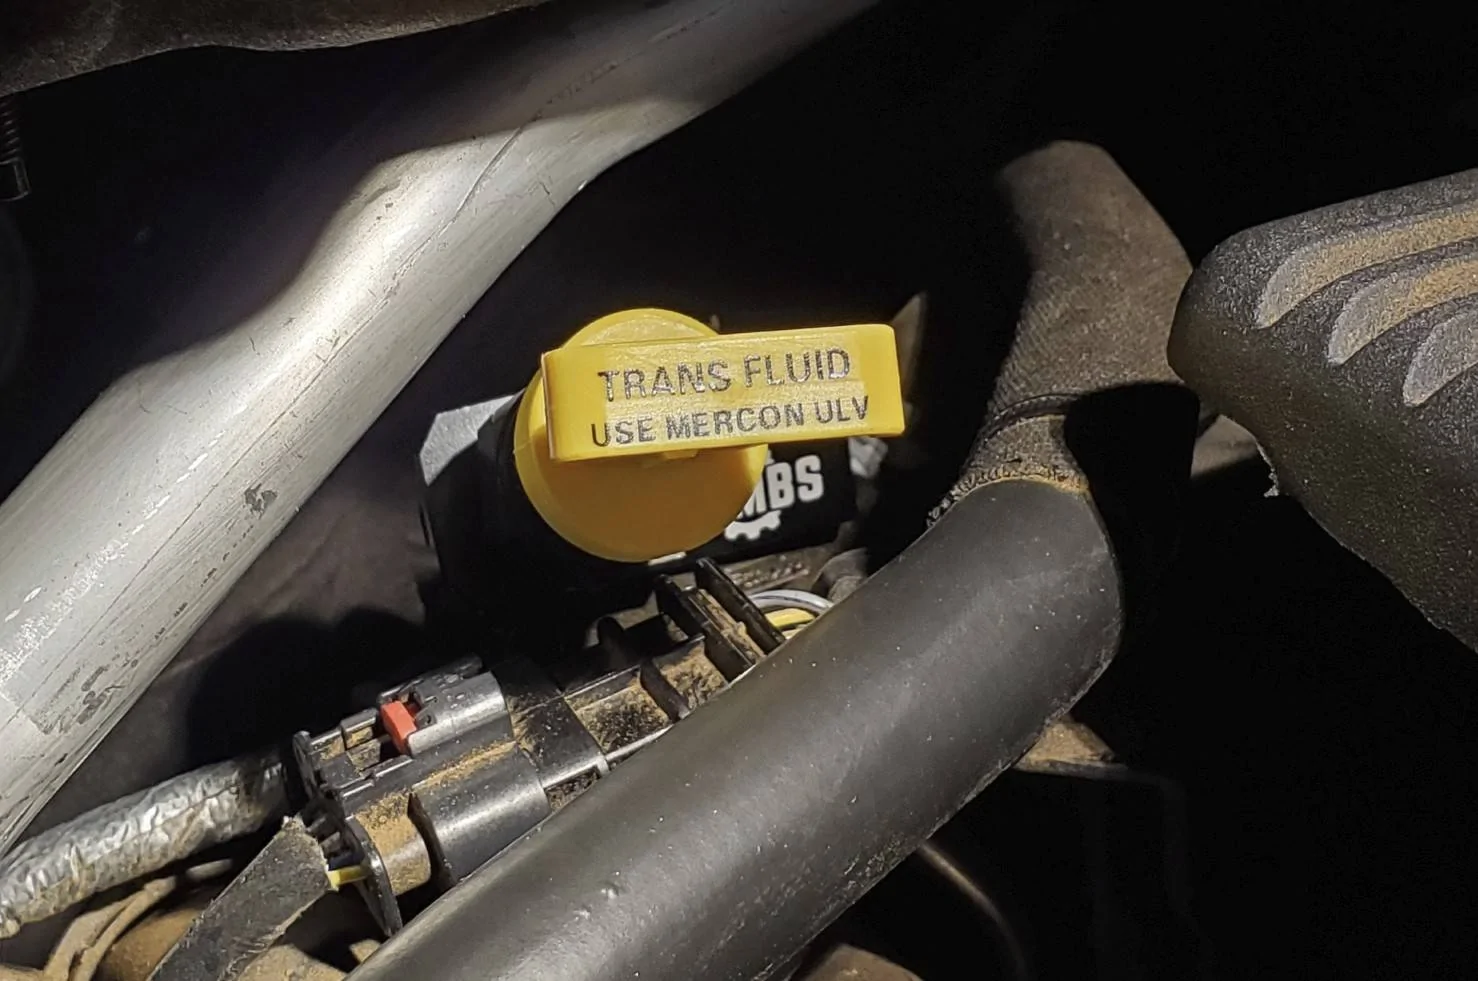
I'm taking a break from my Fitzstick installation. As the instructions stated, getting the OEM fill plug out is tough, and has me stumped so far. Going after it from under the truck isn't working. ...no room for leverage.
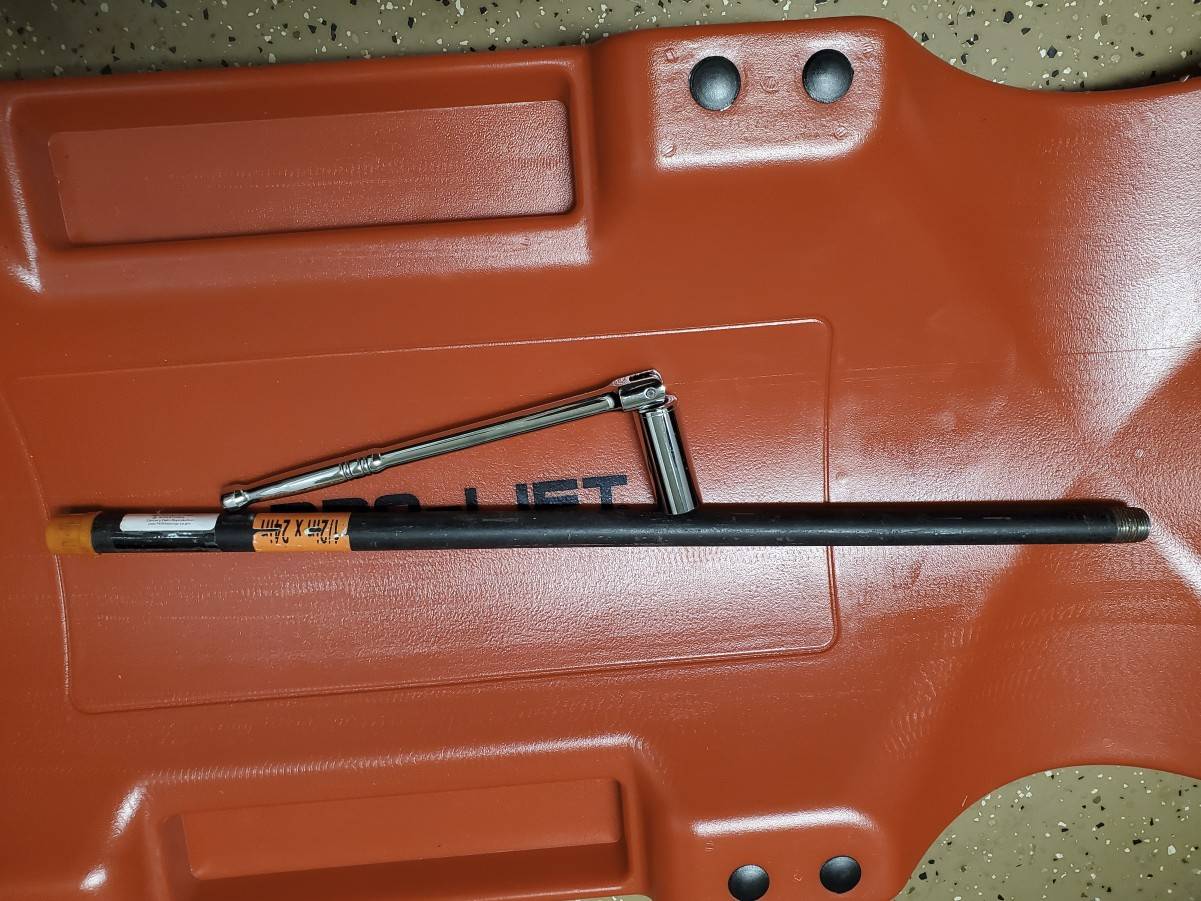
So I stacked every socket extension I own, with a U joint swivel on the 19mm socket to get at it from the top. I can get a breaker bar or my impact on it, but no-go still. The chain of extensions is a bit wimpy with a few 3/8 spliced in with the 1/2 and lots of joints. The 30 deg swivel angle isn't helping.
I gave the plug a squirt of PB Blaster before a beer and cigar break, but I'm not holding my breath.
My plan is to buy more 1/2 extensions, maybe a 20" to reduce the stack up and twist. Also I'm considering heat from a heat gun or propane torch.
I know several of you got the stick installed. What was your trick? TIA, Dave
Sponsored