XRANGER2019
Well-Known Member
Hears what i did made a bracket similar to yoursWanted to write up a quick post on how I installed the B&M transmission dipstick (part number B&M 22200), and share what I learned. And, hopefully if anyone else finds better ways of installing or other alternatives can post their experience as well.
Step 1, I thoroughly cleaned around the stock transmission dipstick before removing. My truck has ~68k miles and lots of offroading trips behind it, so there was a lot of dirt around the dipstick port. Additionally, I was very careful to cover the hole when moving parts above, as dirt would fall into the transmission if left exposed.
Step 2, remove the stock dipstick. I removed the rear two fasteners for the passenger side wheel well cover to get a little more access. I'm not sure how it's possible to check the stock dipstick without A) burning yourself B) dropping dirt onto the dipstick or into the transmission hole and C) Seeing what you're doing? All reasons I decided to spend the money on the external dipstick.
Step 3, I had to jack the truck up in the front to get a reference fluid level that registered on the dipstick. On my downward sloped driveway the fluid level was above the top of the dipstick. After raising the front of the truck ~6 inches, I was registering around the #2 mark on the dipstick. This is with a completely cold engine/transmission and around ~80 degrees ambient temperature, engine off.
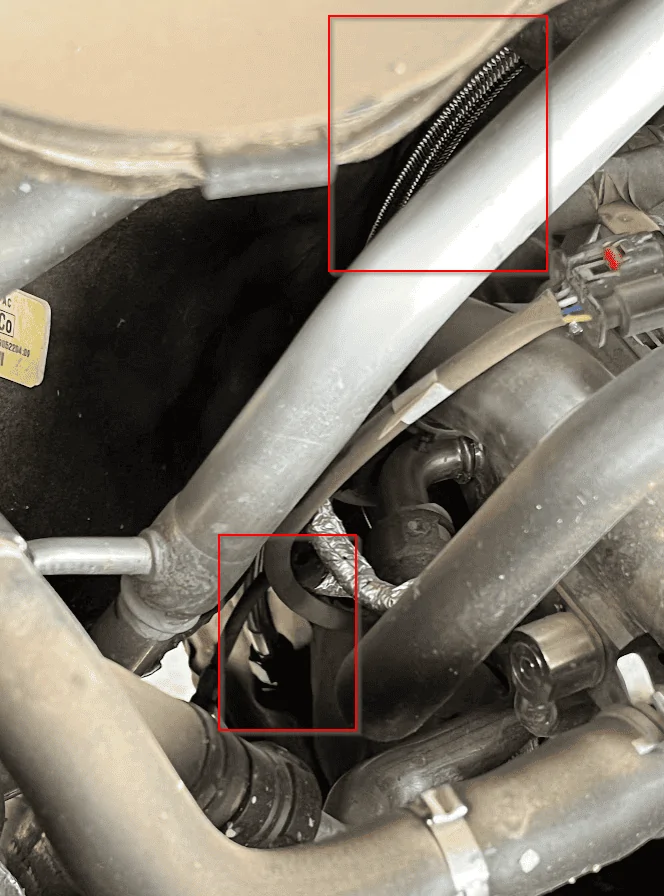
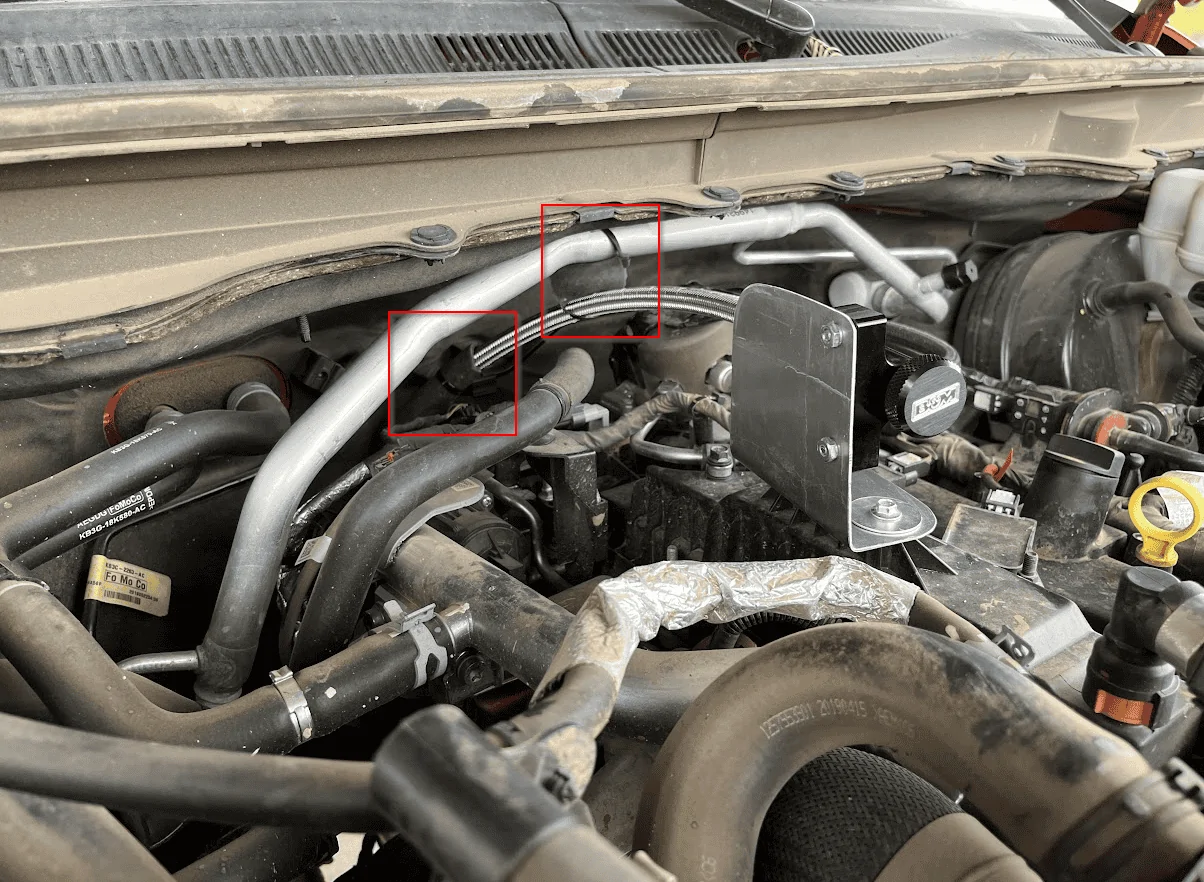
Step 4, figuring out the routing and mounting of the dipstick outer tube. Starting with installing the bottom, I went straight up to the rear of the engine. Note that the outer tube is braided steel, I was careful to choose a path that avoided any wiring or hoses that could be abraded against with the tube vibrating against them.
I decided to mount the top of the dipstick to the engine, since the engine and transmission will move due to flex of the motor mounts relative to the body/chassis. Hopefully this will reduce the amount of vibrating/rubbing on other components. Alternatively it could be mounted somewhere on the passenger side fender with enough slack in the tube to allow for movement.


I secured the upper part of the hose on the stock AC line with a rubber tube as a spacer, and I put a section of rubber hose where the tube passes the (plastic) brake line to prevent any chance of the brake line getting damaged from the tube vibrating (even though there was a couple inches in between the two).
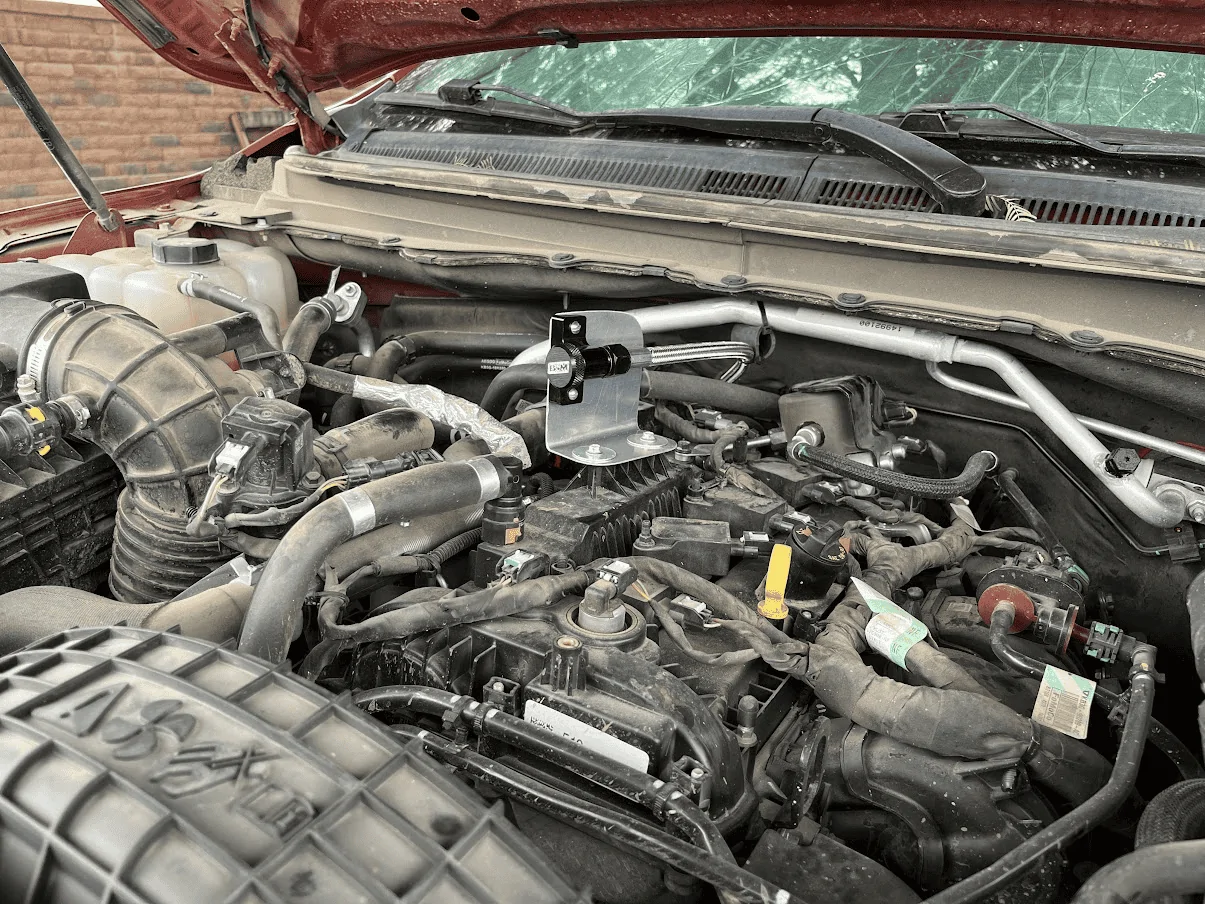
I quickly made an aluminum bracket that mounted the end of the dipstick onto the two mounting holes on the valve cover (I'm guessing these were used for the stock engine cover if equipped?).
Note on the mounting bracket, if I were to do it again I would make it a bit higher up and angle the dipstick tube downwards. In order to add fluid with this setup requires removing the bracket to angle the end of the tube upward (with a tiny funnel).

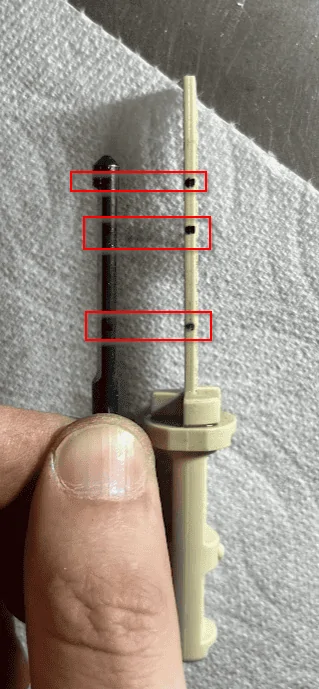
Step 5, transfer the oil level marks from the stock dipstick to the B&M dipstick. Following the instructions, the method is to mark the stock dipstick fluid height, then the B&M dipstick fluid height (this is the "reference height"). Please note that depending on the routing/bends of the outer tube, this height may change, so do this after the outer tube is fully installed to reduce error.

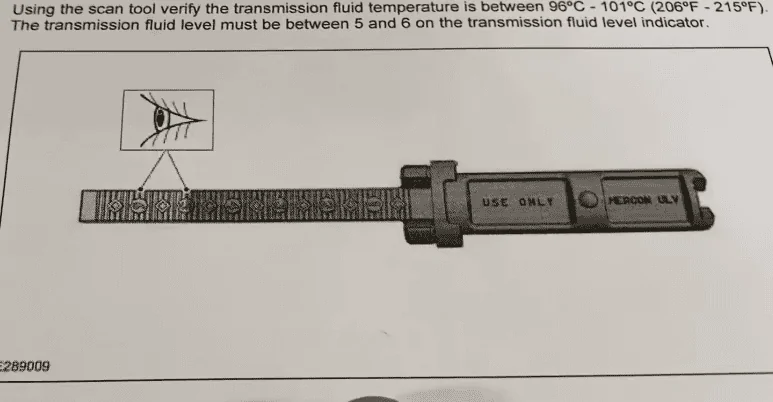
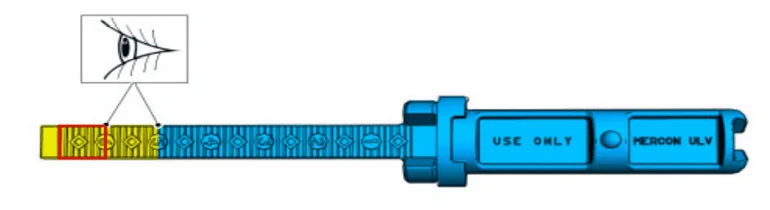
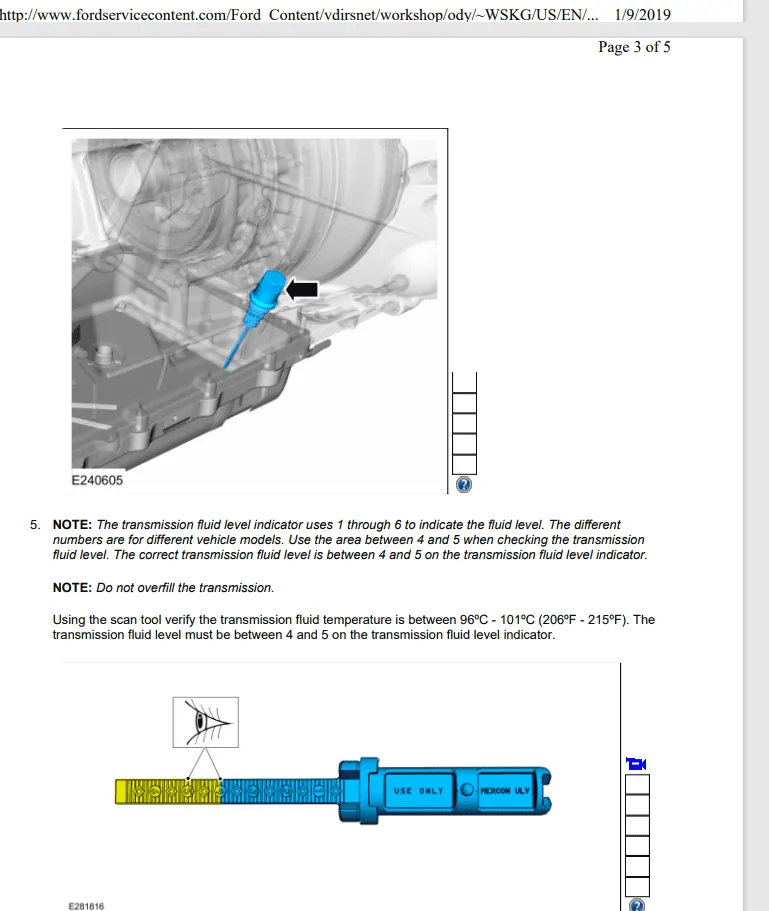
As you can see here, the #5 mark is basically "any oil on the dipstick at all" and the #4 mark is towards the lower of the flat section. The top mark is the "height reference" mark to align the two dipsticks.
I used a triangular file to make a small mark on the flat section of the B&M dipstick to reference the #4 position on the stock dipstick. When checking, as long as the fluid is anywhere on the dipstick up the that mark, I'll know it's in spec.
After all this, I checked the fluid according to the manual (getting the transmission up to full operating temperature, shifting through D-R, engine running) and I found my oil was about half a quart low from the factory.
In the future, this setup should greatly facilitate verifying oil levels after fluid flushes. I'll likely pair this with the aluminum oil pans with drain plug and start periodically flushing the oil.

Sponsored