Air Lift Company Releases New LoadLifter 5000 Series Kits For 2019 Ford Ranger

DavidR

Well-Known Member
First Name
David
Joined
Jul 22, 2019
Threads
4
Messages
388
Reaction score
323
Location
Eastern CA
Vehicle(s)
2019 Ranger XLT Supercab Saber FX4
Occupation
Engineer
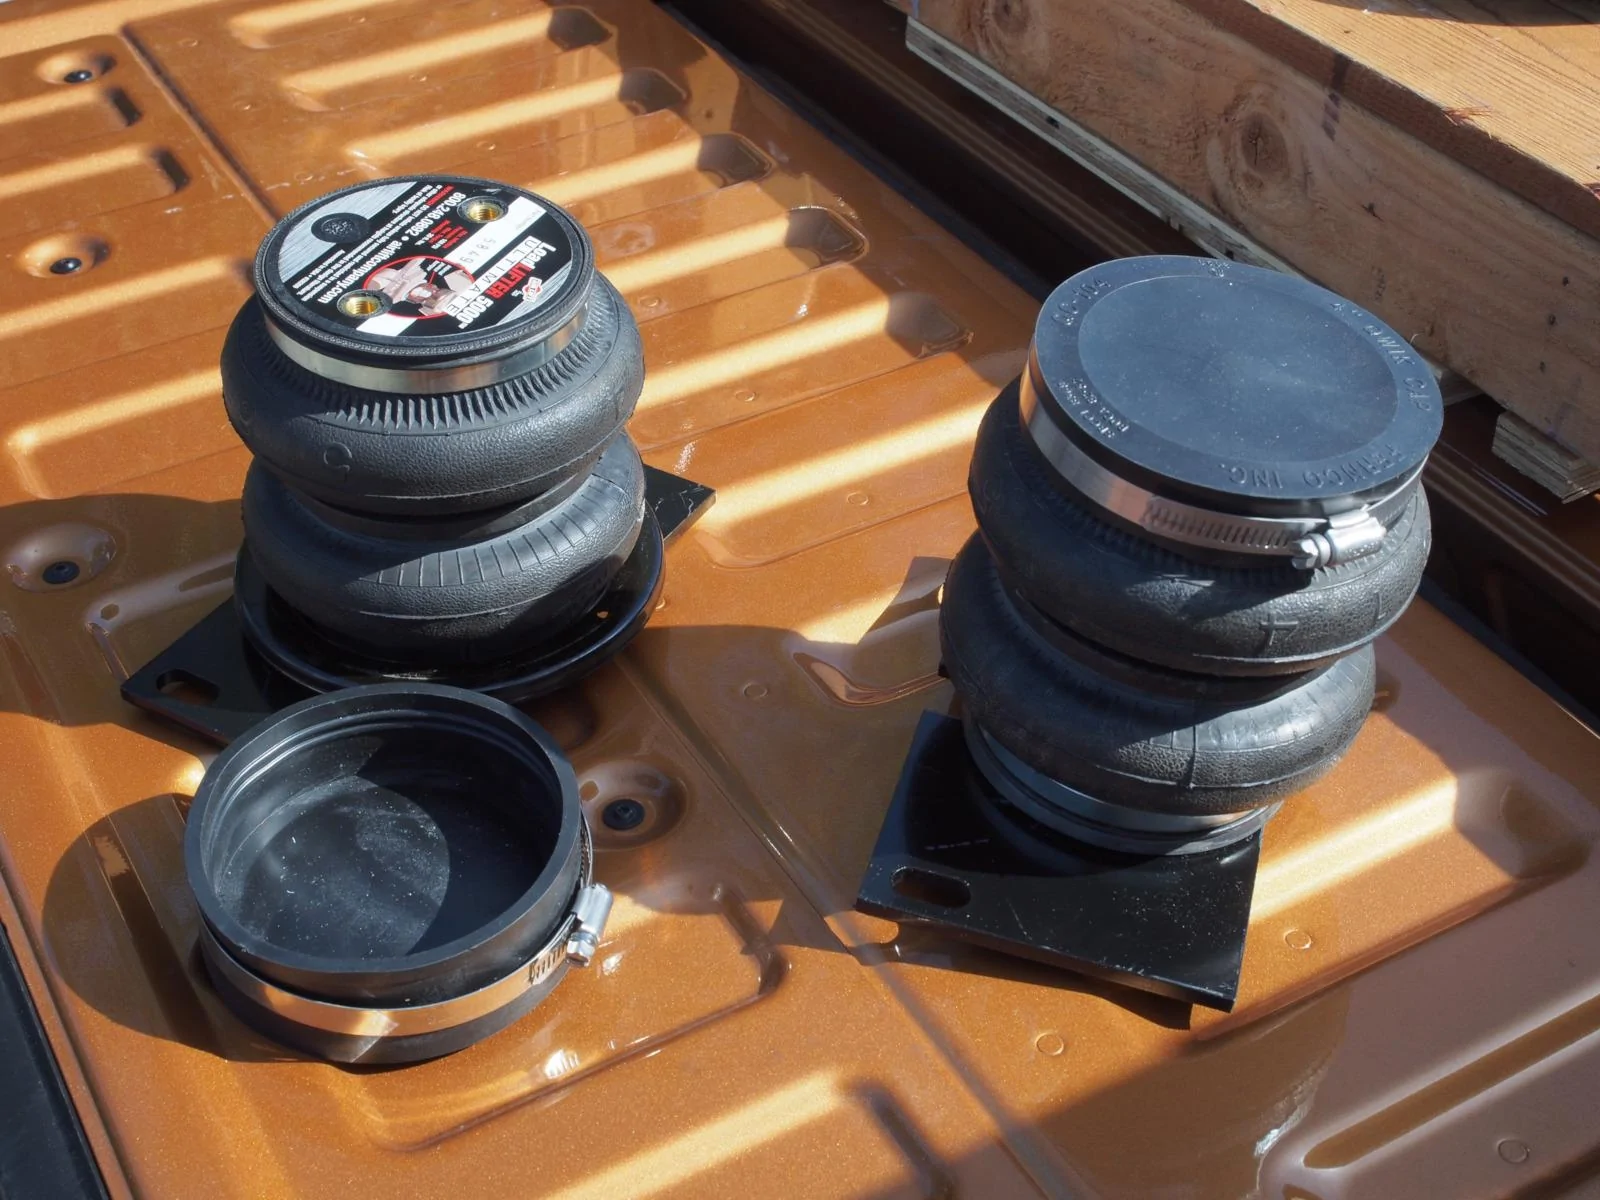
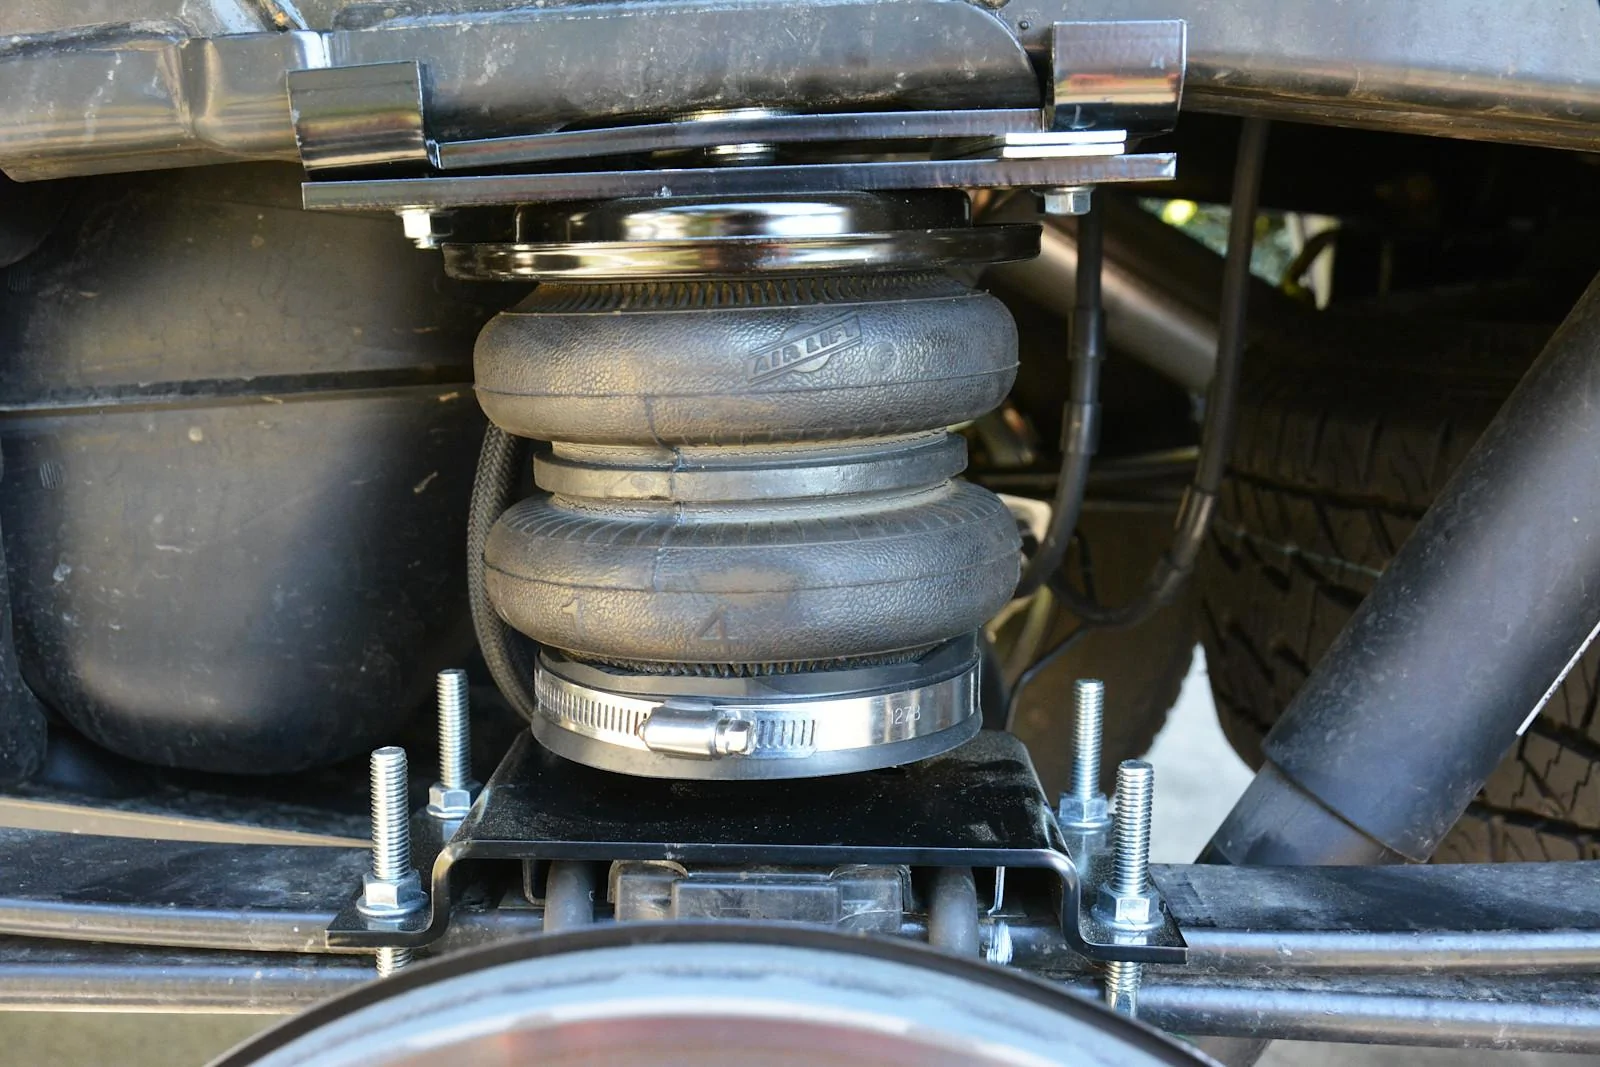
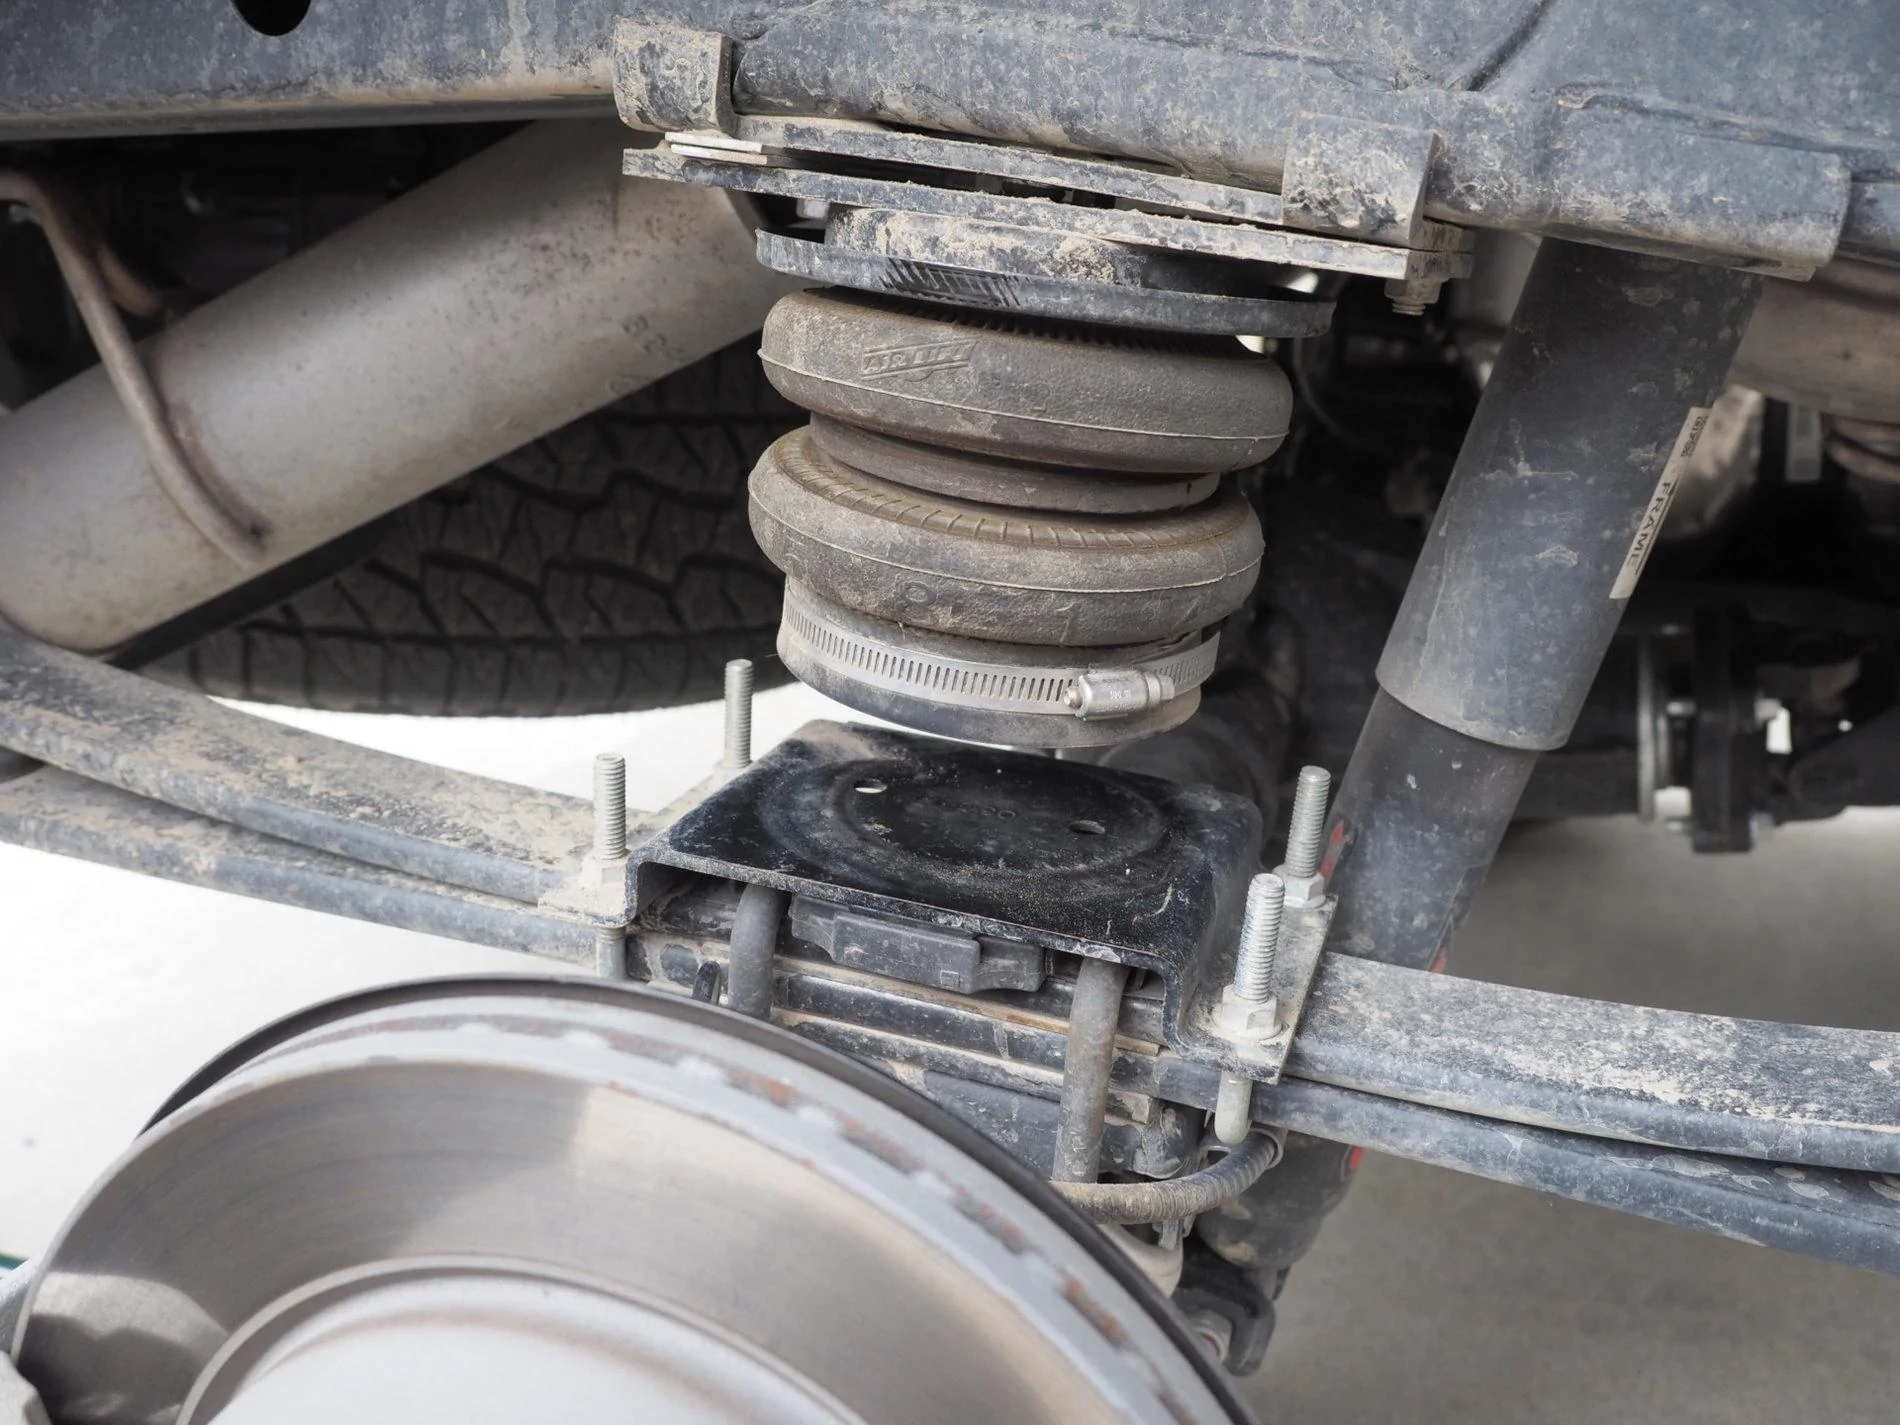
As a side note, and the video reminded me of this, as I've been asking people I know, most people that have an opinion recommended Firestone bags, probably because they are more well known, but they are slow in bringing out a 5g Ranger kit. From what I've read online though, the Air Lift bags are every bit as good.
Sponsored


DavidR

Well-Known Member
First Name
David
Joined
Jul 22, 2019
Threads
4
Messages
388
Reaction score
323
Location
Eastern CA
Vehicle(s)
2019 Ranger XLT Supercab Saber FX4
Occupation
Engineer
Finally got the air bags and the cradles in the mail. Will try to get around to installing this weekend. The cradles are around 3/4" thick - I"m wondering if that will have any significant effect on suspension travel or on the unloaded ride, or if it won't ever be noticeable.
 

DavidR

Well-Known Member
First Name
David
Joined
Jul 22, 2019
Threads
4
Messages
388
Reaction score
323
Location
Eastern CA
Vehicle(s)
2019 Ranger XLT Supercab Saber FX4
Occupation
Engineer
Also, did you countersink the hole you drilled for the Daystar and use a countersunk bolt instead of the carriage bolts they provide? I just took a quick look and it doesn't look like there will be enough room under the mounting place for a normal hex bolt head..
 

Mustang2Ranger

Well-Known Member
First Name
Garrett
Joined
Mar 20, 2019
Threads
7
Messages
595
Reaction score
926
Location
Southern California
Vehicle(s)
19 Ranger Lariat-FX4,4X4,White Platinum; 06 Escape
Finally got the air bags and the cradles in the mail. Will try to get around to installing this weekend. The cradles are around 3/4" thick - I"m wondering if that will have any significant effect on suspension travel or on the unloaded ride, or if it won't ever be noticeable.
I had wondered the same. Seems like any more and it would, basically at the limit right now I think. The only time I notice a difference is going over speed bumps

Also, did you countersink the hole you drilled for the Daystar and use a countersunk bolt instead of the carriage bolts they provide? I just took a quick look and it doesn't look like there will be enough room under the mounting place for a normal hex bolt head..
I did not countersink it, did not want to remove any material from the cradle since it is already plastic. I did not use the hardware provided either lol. Made it work though with some redneck engineering. Went to Home Depot and got a few carriage bolts and serrated flange nuts. Cut the carriage bolts to length, ground the square parts round, and filed the heads down enough to make it all fit and work. The challenge was to get a slim enough setup to make it all work but still be strong and hold tight. This setup uses no washers because of the serrated flange nut (3 in 1 - nut/washer/lock washer) and carriage bolt (flared enough to act as a washer, and sandwiched in between metal plates so it holds tight). The setup is working so far, only time will tell
 

HenryMac

Well-Known Member
First Name
John
Joined
Sep 14, 2019
Threads
65
Messages
2,757
Reaction score
5,266
Location
Colorado
Vehicle(s)
2019 SuperCab XL - FX4 - Magnetic - Rocksliders
Occupation
Mech. Engineer - Retired
Interesting thread. Question for you guys that are actually loading down your trucks, how much weight are you putting in your truck such that you then need these air bags? Thanks in advance guys.


DavidR

Well-Known Member
First Name
David
Joined
Jul 22, 2019
Threads
4
Messages
388
Reaction score
323
Location
Eastern CA
Vehicle(s)
2019 Ranger XLT Supercab Saber FX4
Occupation
Engineer
I had wondered the same. Seems like any more and it would, basically at the limit right now I think. The only time I notice a difference is going over speed bumps


I did not countersink it, did not want to remove any material from the cradle since it is already plastic. I did not use the hardware provided either lol. Made it work though with some redneck engineering. Went to Home Depot and got a few carriage bolts and serrated flange nuts. Cut the carriage bolts to length, ground the square parts round, and filed the heads down enough to make it all fit and work. The challenge was to get a slim enough setup to make it all work but still be strong and hold tight. This setup uses no washers because of the serrated flange nut (3 in 1 - nut/washer/lock washer) and carriage bolt (flared enough to act as a washer, and sandwiched in between metal plates so it holds tight). The setup is working so far, only time will tell
OK, thanks for the info. That sounds like a good solution. By countersinking, I actually didn't mean the cradle -- I think on the cradle side, the problem is solved by cutting the bolt to the exact right length as you did. I was referring to the underside of the steel bracket provided by AirLift. The bracket sits very close to the leaf spring mounting hardware and AirLift has countersunk the holes they provide for the normal mounting of the bags. It sounds like your solution works as well, though. I did buy a countersink bit yesterday at Home Depot in case I decide to try to do it that way instead, but I haven't bought the bolts yet.

I'll post back how things go.
 

DavidR

Well-Known Member
First Name
David
Joined
Jul 22, 2019
Threads
4
Messages
388
Reaction score
323
Location
Eastern CA
Vehicle(s)
2019 Ranger XLT Supercab Saber FX4
Occupation
Engineer
Interesting thread. Question for you guys that are actually loading down your trucks, how much weight are you putting in your truck such that you then need these air bags? Thanks in advance guys.
Hi John,

In our case, we have a 4WC slide-in pop-up camper with a dry weight of around 1000 lbs. With the water tank and propane tanks full, it's around 1200 lbs. plus any gear we throw in. Without any suspension mods, it causes the rear to sag about 2-2.5", with a corresponding reduction in suspension travel. It doesn't affect the driveability nearly as much as it did on our old Ranger, but it still affects it somewhat. None of this would be a big deal if you're just one-time hauling an equally heavy load, but on long trips it's nice to provide better support for the load and bring the suspension travel and driveability back to normal.

The other nice thing about being able to level it back up is not needing to adjust the headlights between having the camper on and off, especially since we do take it off whenever we're not using it.
 

HenryMac

Well-Known Member
First Name
John
Joined
Sep 14, 2019
Threads
65
Messages
2,757
Reaction score
5,266
Location
Colorado
Vehicle(s)
2019 SuperCab XL - FX4 - Magnetic - Rocksliders
Occupation
Mech. Engineer - Retired
Hi John,

In our case, we have a 4WC slide-in pop-up camper with a dry weight of around 1000 lbs. With the water tank and propane tanks full, it's around 1200 lbs. plus any gear we throw in. Without any suspension mods, it causes the rear to sag about 2-2.5", with a corresponding reduction in suspension travel. It doesn't affect the driveability nearly as much as it did on our old Ranger, but it still affects it somewhat. None of this would be a big deal if you're just one-time hauling an equally heavy load, but on long trips it's nice to provide better support for the load and bring the suspension travel and driveability back to normal.

The other nice thing about being able to level it back up is not needing to adjust the headlights between having the camper on and off, especially since we do take it off whenever we're not using it.
Thanks David... that's very helpful.
 

DavidR

Well-Known Member
First Name
David
Joined
Jul 22, 2019
Threads
4
Messages
388
Reaction score
323
Location
Eastern CA
Vehicle(s)
2019 Ranger XLT Supercab Saber FX4
Occupation
Engineer
Garrett,

Here's what I was referring to (see pic). I'm thinking of countersinking the new hole for the Daystars the same way they did here and then get countersunk-head bolts. It might depend on what bolts I can find, but there are pretty good hardware stores around here.

airliftplate.jpg
 

Mustang2Ranger

Well-Known Member
First Name
Garrett
Joined
Mar 20, 2019
Threads
7
Messages
595
Reaction score
926
Location
Southern California
Vehicle(s)
19 Ranger Lariat-FX4,4X4,White Platinum; 06 Escape
Interesting thread. Question for you guys that are actually loading down your trucks, how much weight are you putting in your truck such that you then need these air bags? Thanks in advance guys.
I have only weighed the truck dry, and have not had a chance to do so with my 4x4/camping gear in it yet. I would estimate it at around 400-500 pounds. From bottom of hitch, the truck sits at 18.25", and my typical load makes it sag 1".

Also, I have a 2.5" front level kit and adjusted my headlights accordingly. So as David said, it helps to not be "that guy" driving down the road with my headlights in the air

OK, thanks for the info. That sounds like a good solution. By countersinking, I actually didn't mean the cradle -- I think on the cradle side, the problem is solved by cutting the bolt to the exact right length as you did. I was referring to the underside of the steel bracket provided by AirLift. The bracket sits very close to the leaf spring mounting hardware and AirLift has countersunk the holes they provide for the normal mounting of the bags. It sounds like your solution works as well, though. I did buy a countersink bit yesterday at Home Depot in case I decide to try to do it that way instead, but I haven't bought the bolts yet. I'll post back how things go.
Garrett,

Here's what I was referring to (see pic). I'm thinking of countersinking the new hole for the Daystars the same way they did here and then get countersunk-head bolts. It might depend on what bolts I can find, but there are pretty good hardware stores around here.

airliftplate.jpg
I see what you mean now. So far it is working but sounds like yours will be just as good if not better. Interested to see how it turns out
 

DavidR

Well-Known Member
First Name
David
Joined
Jul 22, 2019
Threads
4
Messages
388
Reaction score
323
Location
Eastern CA
Vehicle(s)
2019 Ranger XLT Supercab Saber FX4
Occupation
Engineer
OK, so I went a completely different direction with this. I'm not sure yet if it will work. I ended up not using the cradles, but I'm keeping them for now in case this blows up in my face (hopefully not literally).

I was wandering around Home Depot looking for something completely different when I saw some strong rubber end-caps for 4" sch-40 ABS pipe. They looked very close to the right size to fit over the ends of the air bags, so I bought one to check it out. Turns out it fit perfectly. My thought was to use these as the interface between the air bag and the lower steel plate, instead of using the cradle. Here's what they look like separately and installed on the end of the airbag:

bags_endcaps.jpg


It was uncanny how perfectly they fit. I then installed the airbag similar to how you would install it with a cradle, except with the end-cap protecting the airbag instead of the cradle. The photo below is what it looks like installed. If you look closely, you'll see I installed some shims to make the airbag contact the bottom plate at much less of an angle. I was worried that this scheme might be more sensitive to the bag not landing flat on the plate. I could have used another shim, but was worried about running out of bolt length.

Basically, the idea is that it will behave like an air-filled Timbren, except that it will be in contact by default.

This may end up not working, so I'm keeping the cradles for now just in case. I don't plan to need more than 20-25 psi for my application. Most of the possible problems I can think of, like debris or stones getting between the bag and the plate, also apply to the cradle to some degree, although the cradle might be a bit better in that regard since it has grooves in it.

I'll be keeping a very close eye on it and will switch to the cradle if it starts looking like the bag starts getting damaged for some reason, but if it works, I've saved almost 3/4" of compression travel and avoided some extra work installing. I'll post back how well it works.

air_bag_installed.jpg
 

Mustang2Ranger

Well-Known Member
First Name
Garrett
Joined
Mar 20, 2019
Threads
7
Messages
595
Reaction score
926
Location
Southern California
Vehicle(s)
19 Ranger Lariat-FX4,4X4,White Platinum; 06 Escape
OK, so I went a completely different direction with this. I'm not sure yet if it will work. I ended up not using the cradles, but I'm keeping them for now in case this blows up in my face (hopefully not literally).

I was wandering around Home Depot looking for something completely different when I saw some strong rubber end-caps for 4" sch-40 ABS pipe. They looked very close to the right size to fit over the ends of the air bags, so I bought one to check it out. Turns out it fit perfectly. My thought was to use these as the interface between the air bag and the lower steel plate, instead of using the cradle. Here's what they look like separately and installed on the end of the airbag:

bags_endcaps.jpg


It was uncanny how perfectly they fit. I then installed the airbag similar to how you would install it with a cradle, except with the end-cap protecting the airbag instead of the cradle. The photo below is what it looks like installed. If you look closely, you'll see I installed some shims to make the airbag contact the bottom plate at much less of an angle. I was worried that this scheme might be more sensitive to the bag not landing flat on the plate. I could have used another shim, but was worried about running out of bolt length.

Basically, the idea is that it will behave like an air-filled Timbren, except that it will be in contact by default.

This may end up not working, so I'm keeping the cradles for now just in case. I don't plan to need more than 20-25 psi for my application. Most of the possible problems I can think of, like debris or stones getting between the bag and the plate, also apply to the cradle to some degree, although the cradle might be a bit better in that regard since it has grooves in it.

I'll be keeping a very close eye on it and will switch to the cradle if it starts looking like the bag starts getting damaged for some reason, but if it works, I've saved almost 3/4" of compression travel and avoided some extra work installing. I'll post back how well it works.

air_bag_installed.jpg
That is a very ingenious idea. Like the idea of saving the travel. Can you post an update in a month or so after you have gotten some use to see how well it is holding up? I might go that route if it holds up well
 

DavidR

Well-Known Member
First Name
David
Joined
Jul 22, 2019
Threads
4
Messages
388
Reaction score
323
Location
Eastern CA
Vehicle(s)
2019 Ranger XLT Supercab Saber FX4
Occupation
Engineer
That is a very ingenious idea. Like the idea of saving the travel. Can you post an update in a month or so after you have gotten some use to see how well it is holding up? I might go that route if it holds up well
I'll definitely post back here. I'm going to try to get some off-road miles on it during the next month or so. If there's problems, that's probably where they would show up. One good thing is that if the rubber end-caps begin tearing or wearing out over time, they're a no-brainer to replace, but it would still be a bit more maintenance than with cradles.

One thing that amazed me while installing them is just how much articulation you give up if you bolt them on both sides. I think I saw that someone makes a high-travel airbag, but they were like 4x the price.
 

DavidR

Well-Known Member
First Name
David
Joined
Jul 22, 2019
Threads
4
Messages
388
Reaction score
323
Location
Eastern CA
Vehicle(s)
2019 Ranger XLT Supercab Saber FX4
Occupation
Engineer
I rotated the tires today, which gave me a chance to get a good look at the Air Lift bags and see how they are holding up with the unusual install method I am using, so I thought I'd post an update. The truck has around 12,000 miles on it and the air bag setup has probably around 8,000 miles, mostly highway with the bags inflated when the camper is on and deflated when it is off. Around 100-150 miles are on dirt roads that vary from decent to pretty bad, rarely maintained and unmaintained roads. Here's what it looks like:

air_bag_recheck.jpg

Nothing has loosened up but there were a few tiny stones stuck on the bottom of the end cap on one side. I cleaned them off with a rag and there is no apparent damage to the rubber end caps. I'm sure the caps will wear over time and need to be replaced at some point, but they seem to be holding up okay for now. It's pretty easy to check them during tire rotations.
Sponsored


Top