Sponsored
Supercrew Rear Seat Delete w/Storage - Mission Accomplished

JACKSMYDOG
Well-Known Member
Nice job indeed!I bought my Ranger knowing I would be removing the rear seat. I have no need for it and a flat floor is much more useful for me. Storage along with it a bonus. Searched them internets, made a few calls and emails, no dice for anything pre made....yet. I don't hang my hat on "coming soon" or "pre-orders". So for about $300 in materials and about 24hrs labor, I solved this pesky problem....came out pretty good....in my opinion.

I am in the same boat, knowing I was removing the seat before I bought the truck. I have the seat out now, but haven't decided on the final lay-out yet.
Thanks for the inspiration!
SafetyDan
Well-Known Member
- First Name
- Dan
- Joined
- Apr 28, 2019
- Threads
- 36
- Messages
- 388
- Reaction score
- 473
- Location
- Oxnard, CA
- Vehicle(s)
- 2019 V2 - Ranger Lariat, FX4, 501A, Trailer Tow (Lightning Blue), V1- Lariat, FX4, 500A, Trailer Tow (Ingot Silver) <Epic Fail - Lemon>
- Vehicle Showcase
- 1
I am working on the same project. Lets share good and bad things of our plans.
sklnbnz
Well-Known Member
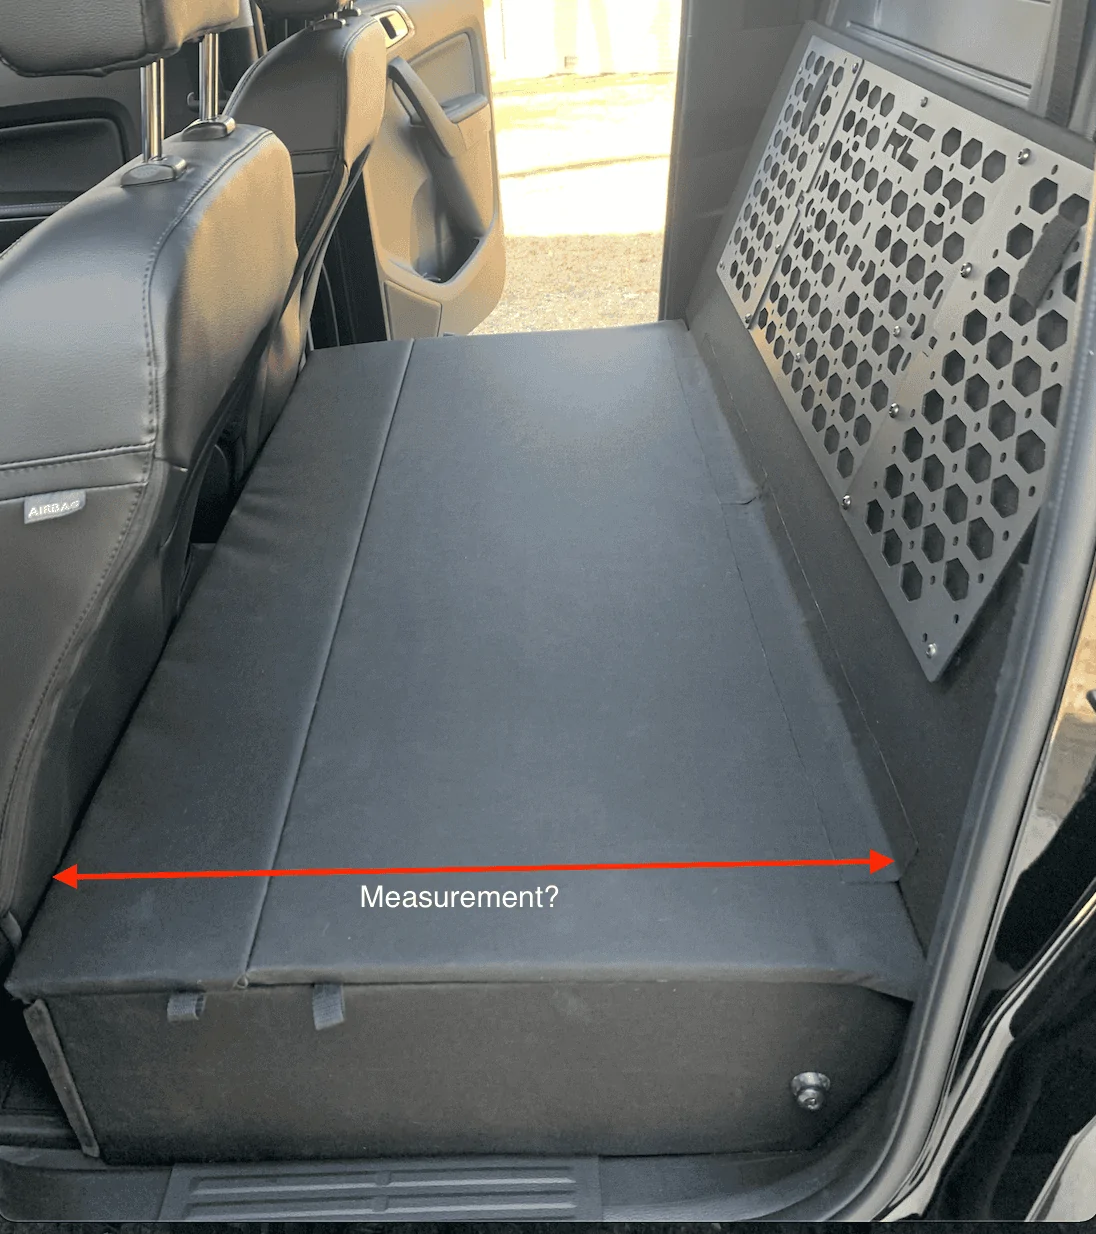
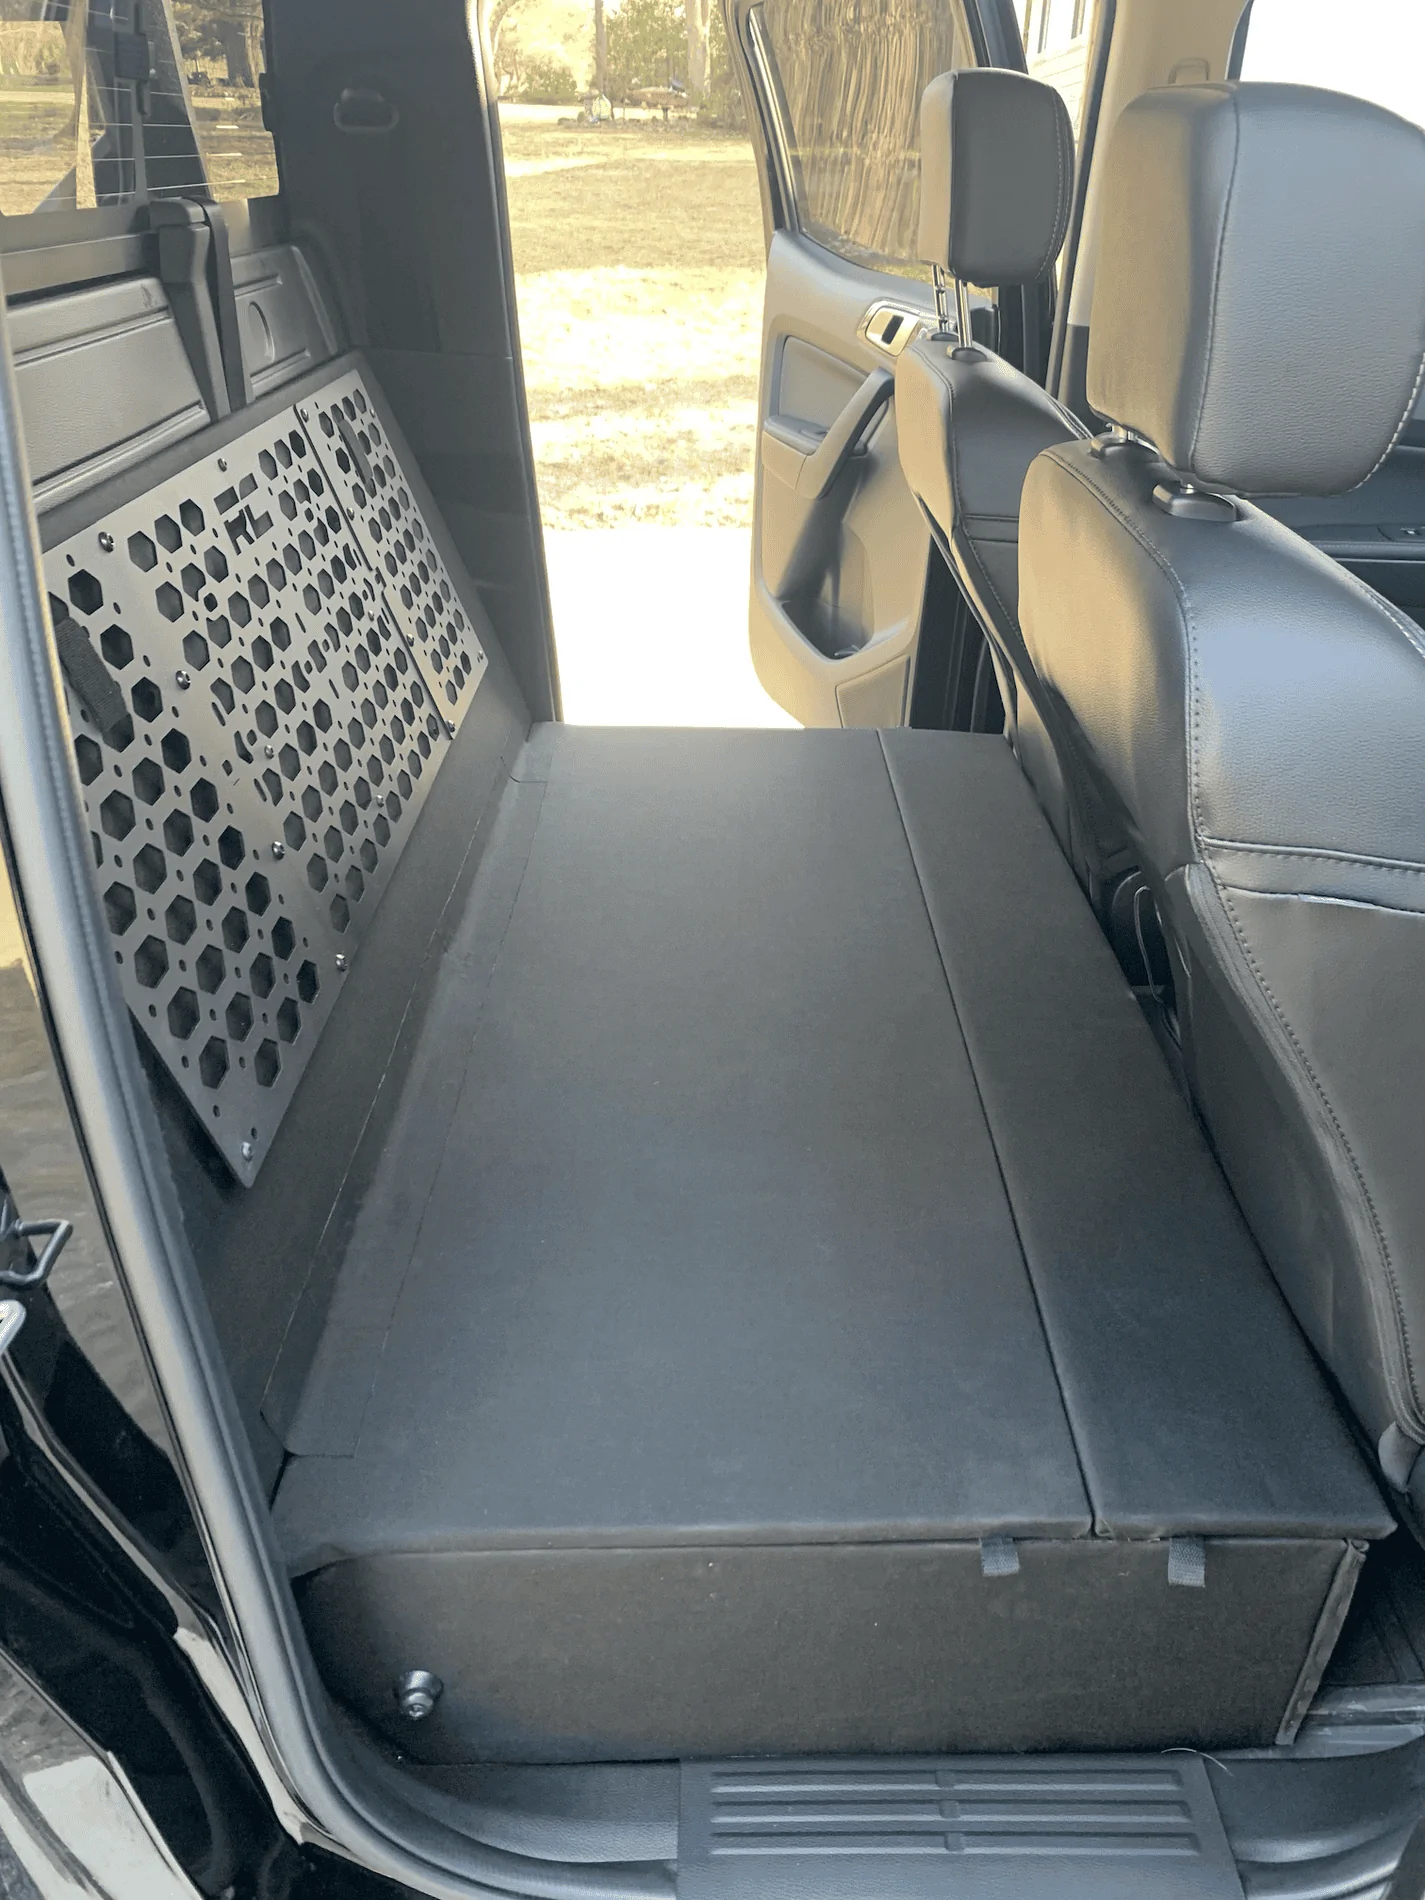
Love this! I am going to build something similar in the coming weeks. are you able to help me out and tell me what the final measurement is from the photo below? I want to sit my fridge there so that the wide portion is sitting right at the door and knowing that measurement would be great for planning!

DeerSlayer
Well-Known Member
- First Name
- David
- Joined
- Nov 29, 2023
- Threads
- 6
- Messages
- 82
- Reaction score
- 183
- Location
- Wolf Point, MT
- Vehicle(s)
- 2020 RangerXLT Crewcab
- Occupation
- Para Educator
- Vehicle Showcase
- 1
So basicaly you traded a nice cushion seat that you can throw crap on and a human once in while for a piece of painted plywood. okayyyy!
GTGallop
Well-Known Member
- First Name
- Greg
- Joined
- Mar 1, 2020
- Threads
- 49
- Messages
- 1,079
- Reaction score
- 3,157
- Location
- Anthem, AZ
- Website
- www.qrz.com
- Vehicle(s)
- 2019 Ranger XLT 4X4 SOLD - Now 2023 TRD Offroad
- Occupation
- Program Manager
Not really.....
He has more space an a lower height to load in and out of and if you have ever had something heavy sink into the seats then you know it can be hard to get it back out. He also has more private storage under the seats.
I see nothing but upside - especially if he doesn't want to have other people on the seats. Like - I don't like driving around with 4 people in my truck.
Gsd1976
Well-Known Member
TrollSo basicaly you traded a nice cushion seat that you can throw crap on and a human once in while for a piece of painted plywood. okayyyy!
Tom_C
Well-Known Member
- First Name
- Tom
- Joined
- Apr 17, 2021
- Threads
- 35
- Messages
- 1,972
- Reaction score
- 4,390
- Location
- Virginia, USA
- Vehicle(s)
- 2020 Ranger Lariat SuperCab FX4
- Occupation
- System Admin, Retired
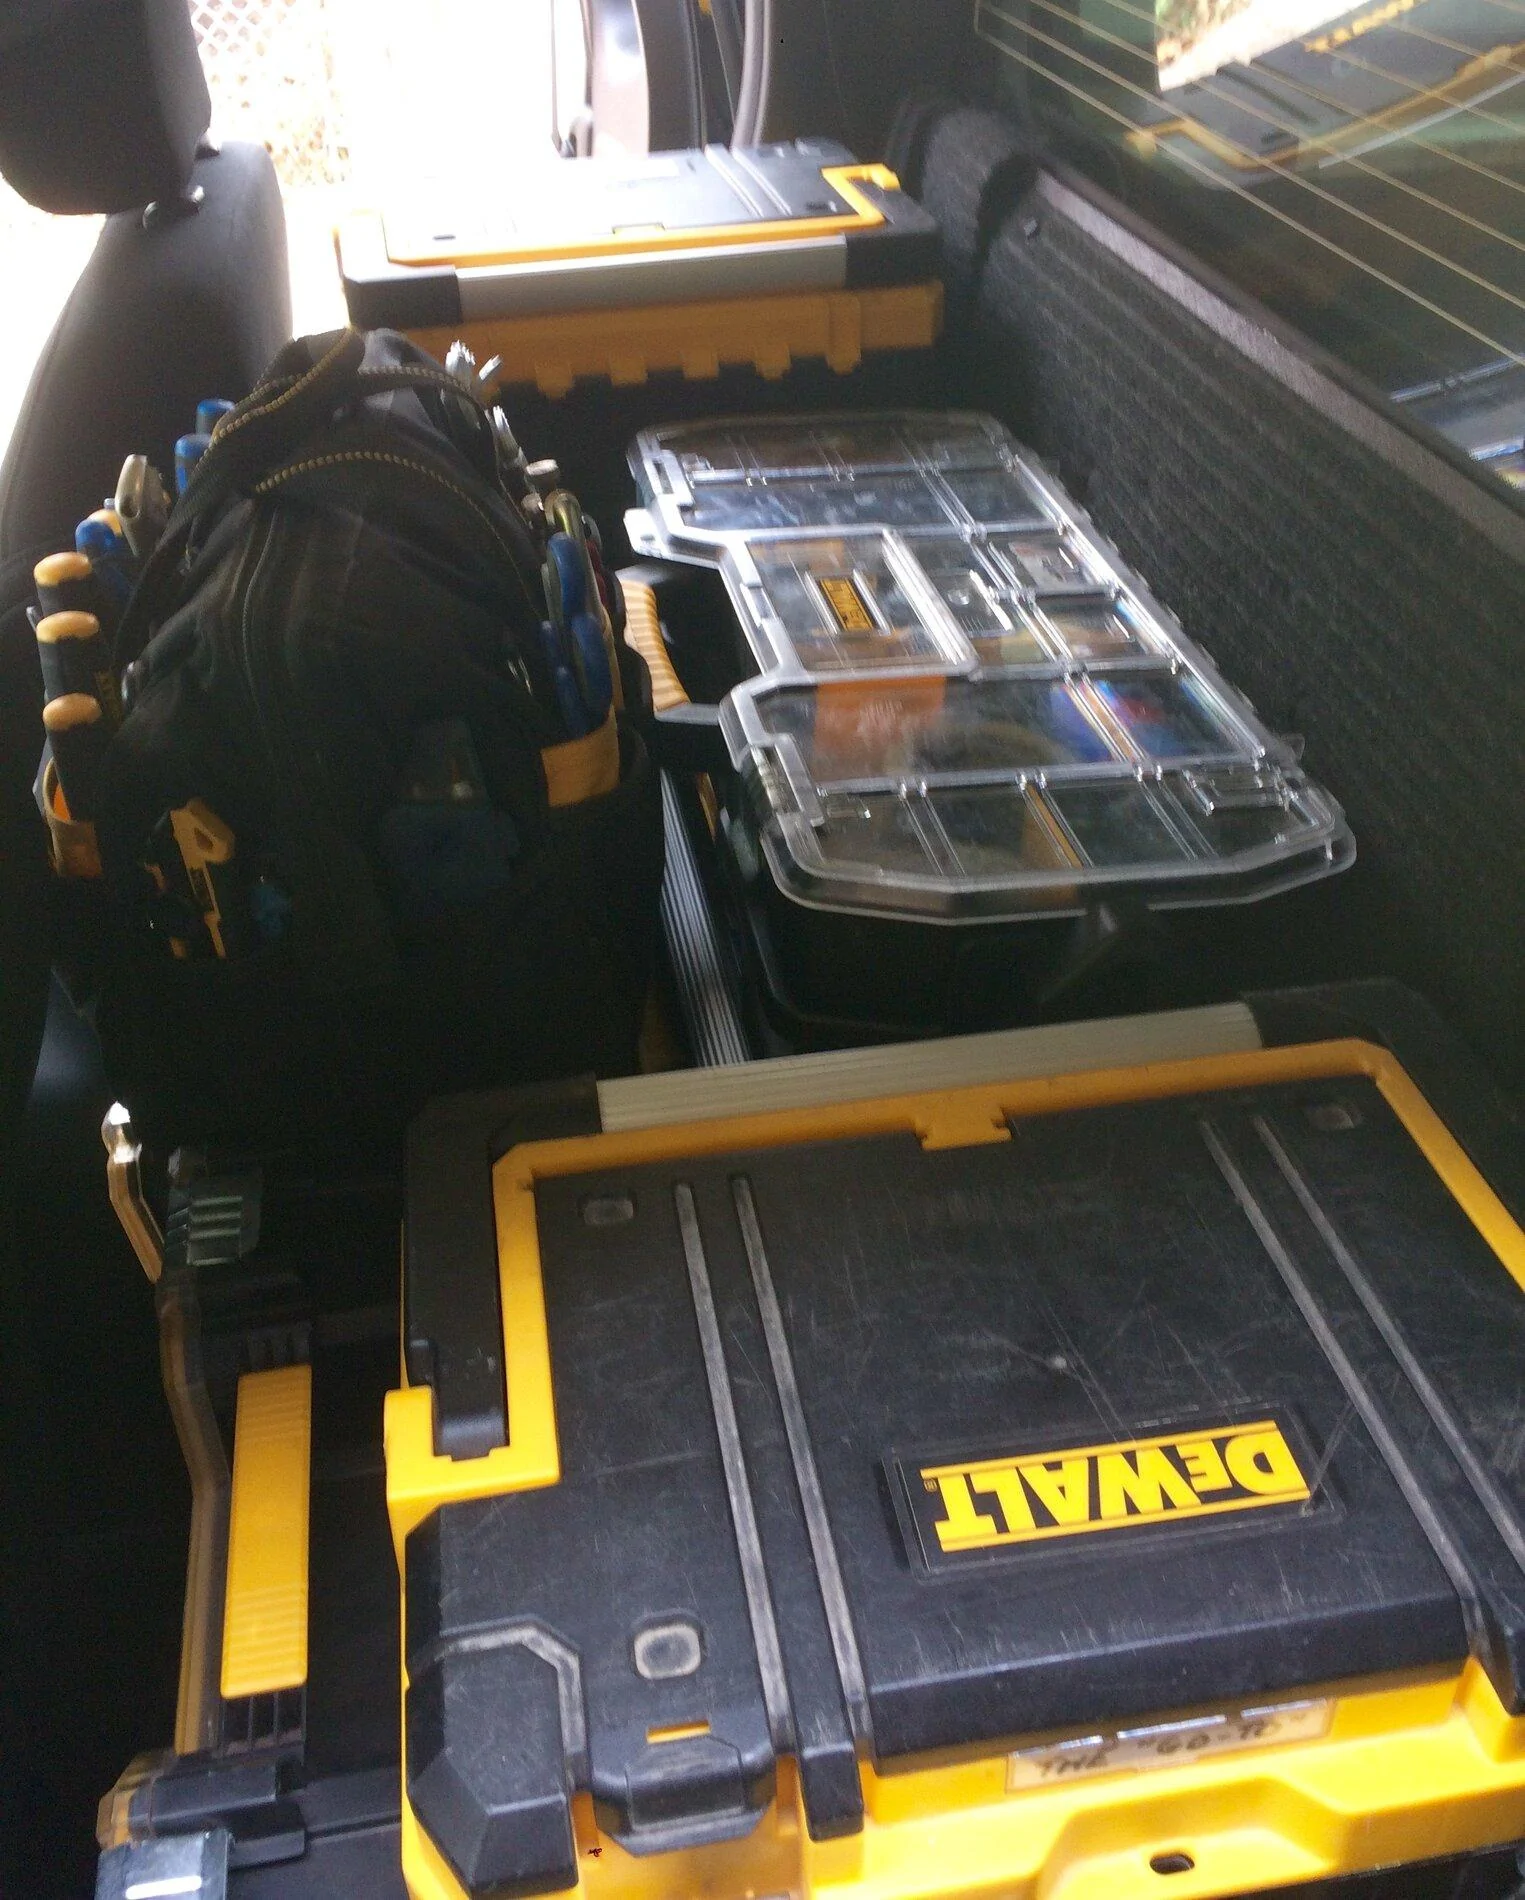
I saw this when originally posted, and I think I've seen either him or someone else who had the back loaded up with various tool boxes, and I can dig that. But, I just wonder why not get a scab and do the same thing, with the added bonus of a 6' bed.
I know, to each their own, and he can get the B&O. I'm still butt hurt about paying the same price and not getting it.")
I know, to each their own, and he can get the B&O. I'm still butt hurt about paying the same price and not getting it.
CoreyH
Member
thank you for the inspiration! I’m scrolling for ideas to do the same for my dog. The back seats are far too high for my girl to be safe back there, I had to slam on my breaks the other day and she went flying into the seats, it shook her up pretty good (pun intended).I bought my Ranger knowing I would be removing the rear seat. I have no need for it and a flat floor is much more useful for me. Storage along with it a bonus. Searched them internets, made a few calls and emails, no dice for anything pre made....yet. I don't hang my hat on "coming soon" or "pre-orders". So for about $300 in materials and about 24hrs labor, I solved this pesky problem....came out pretty good....in my opinion.
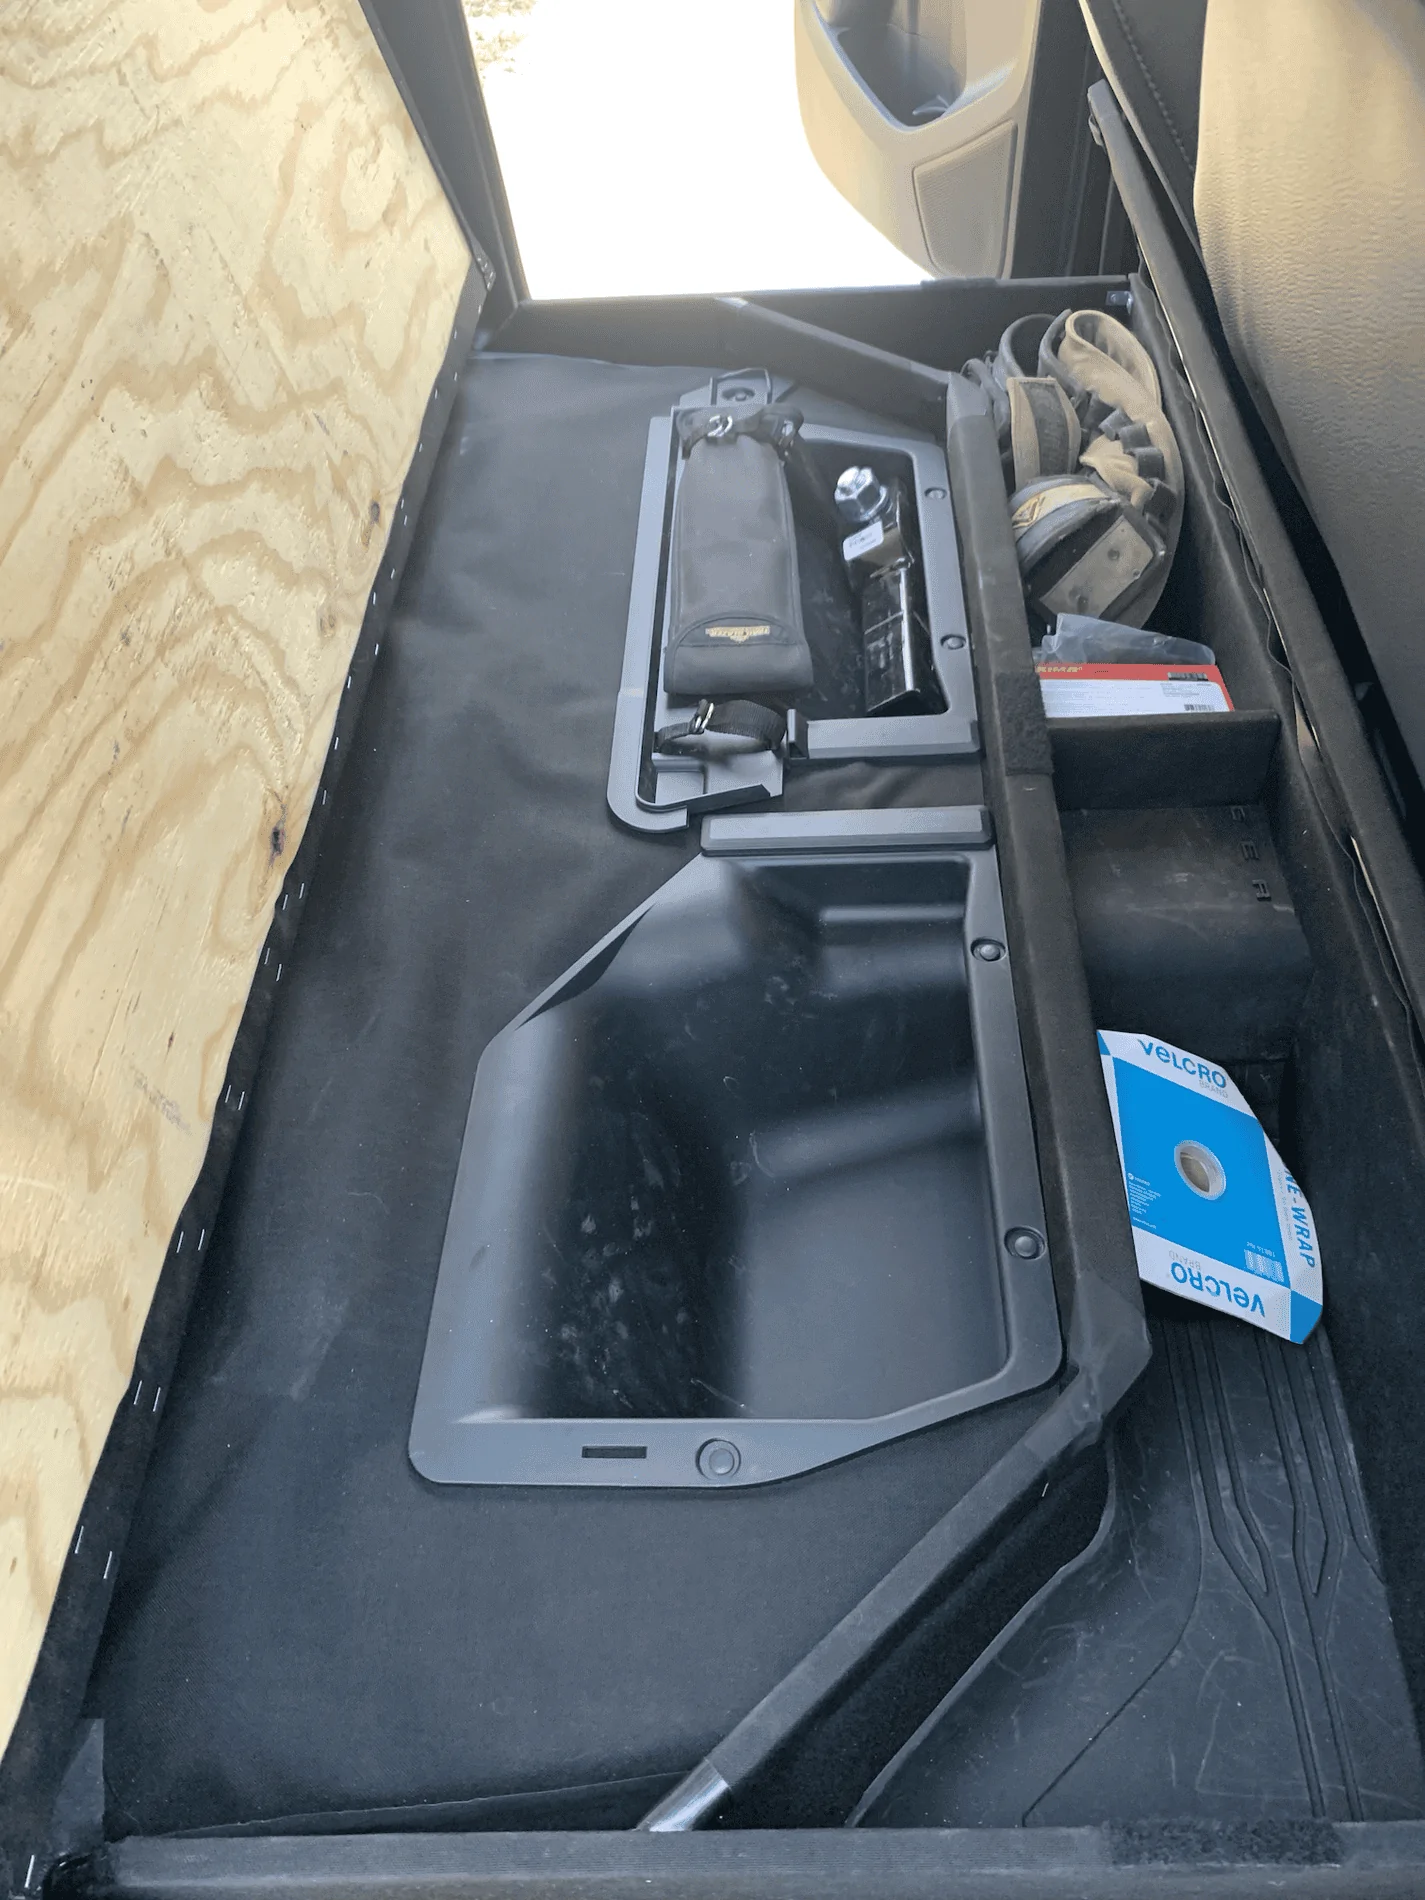
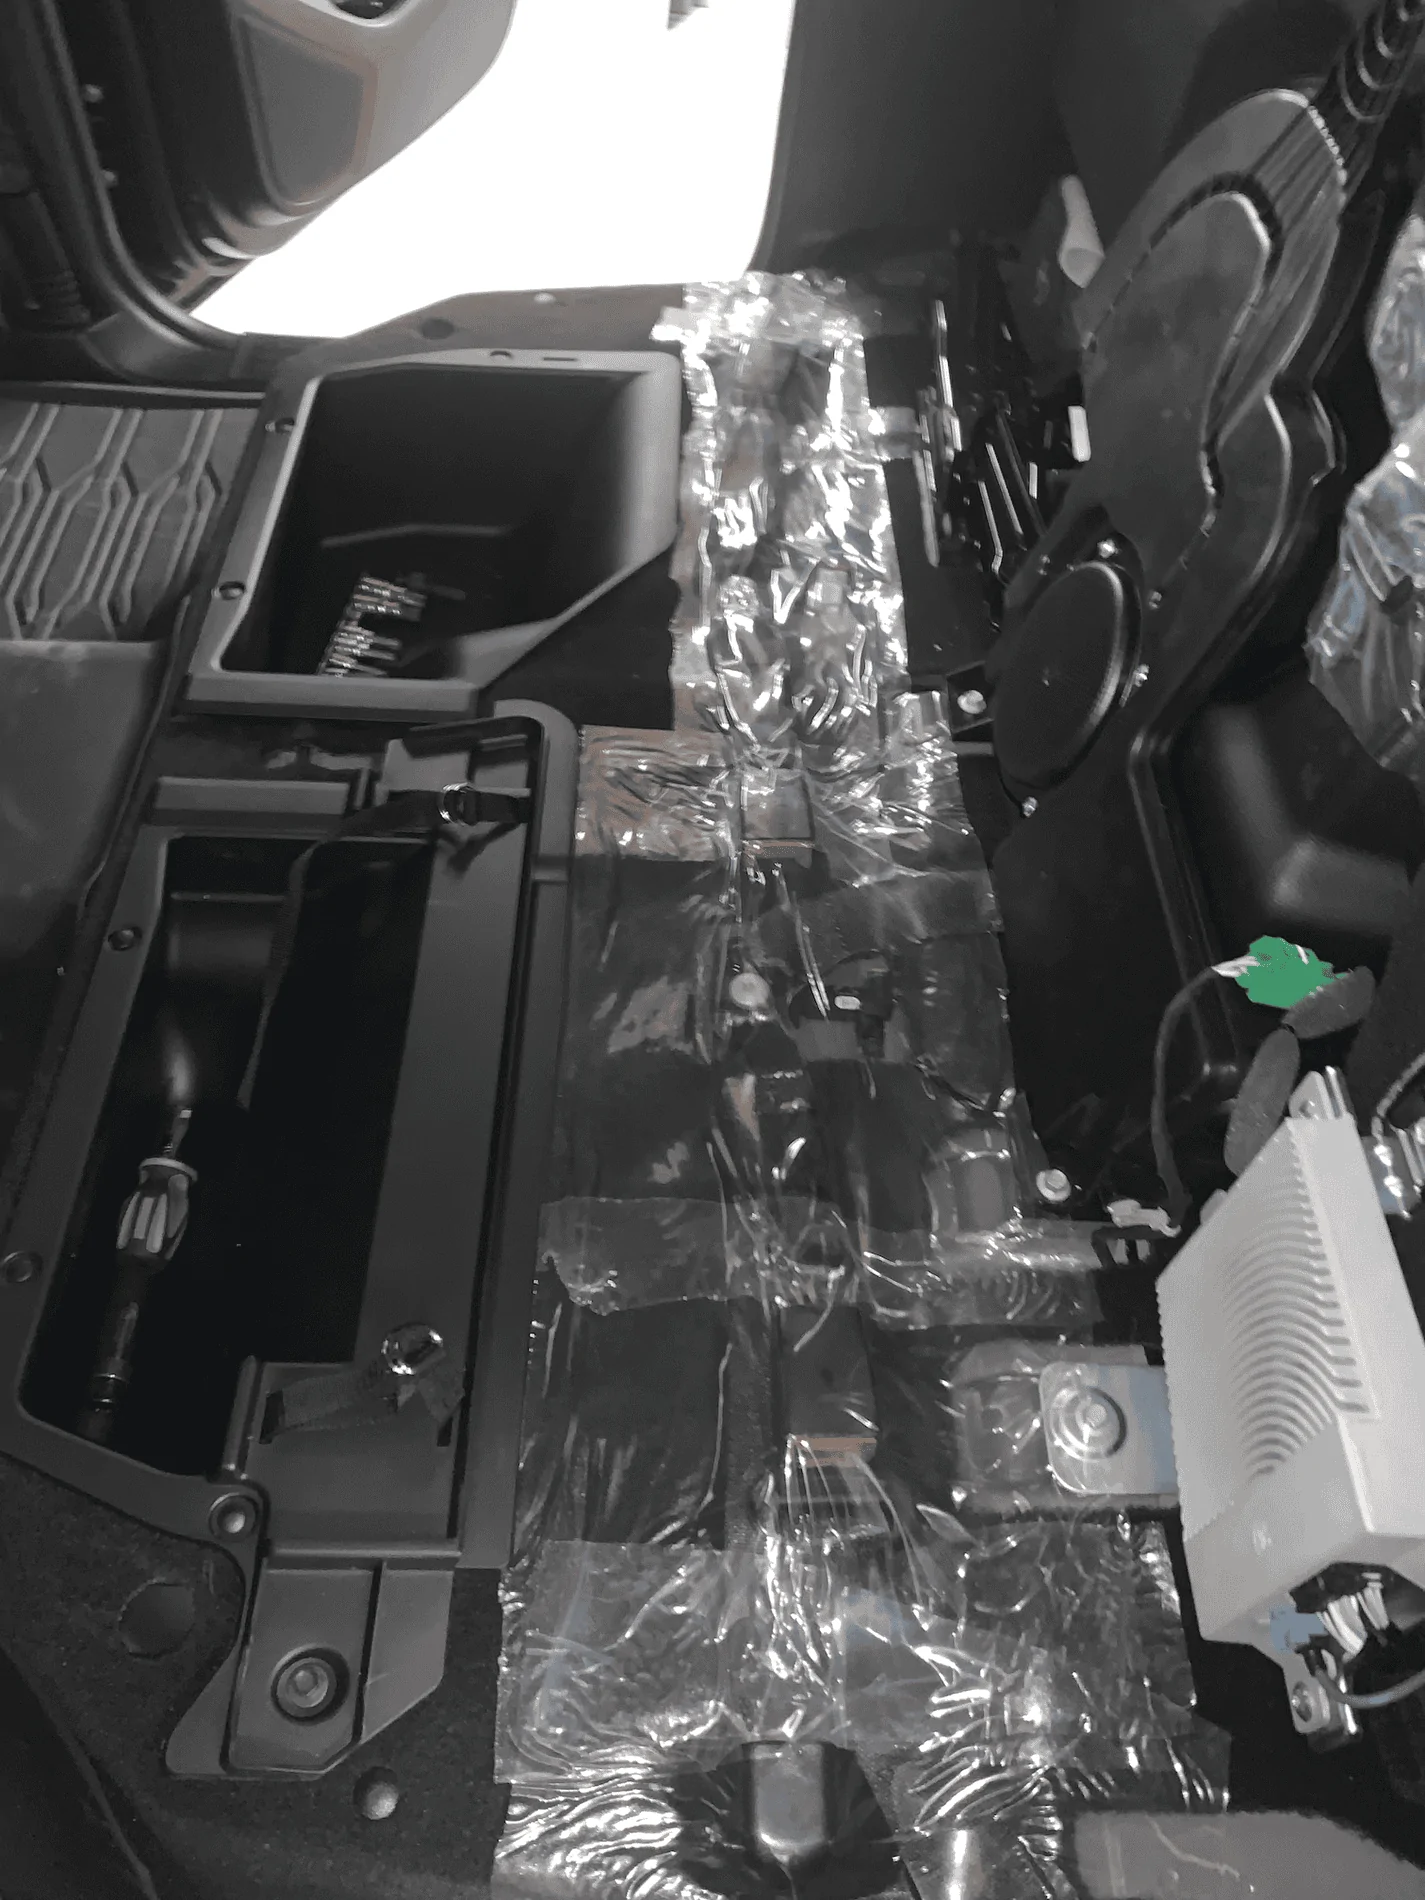
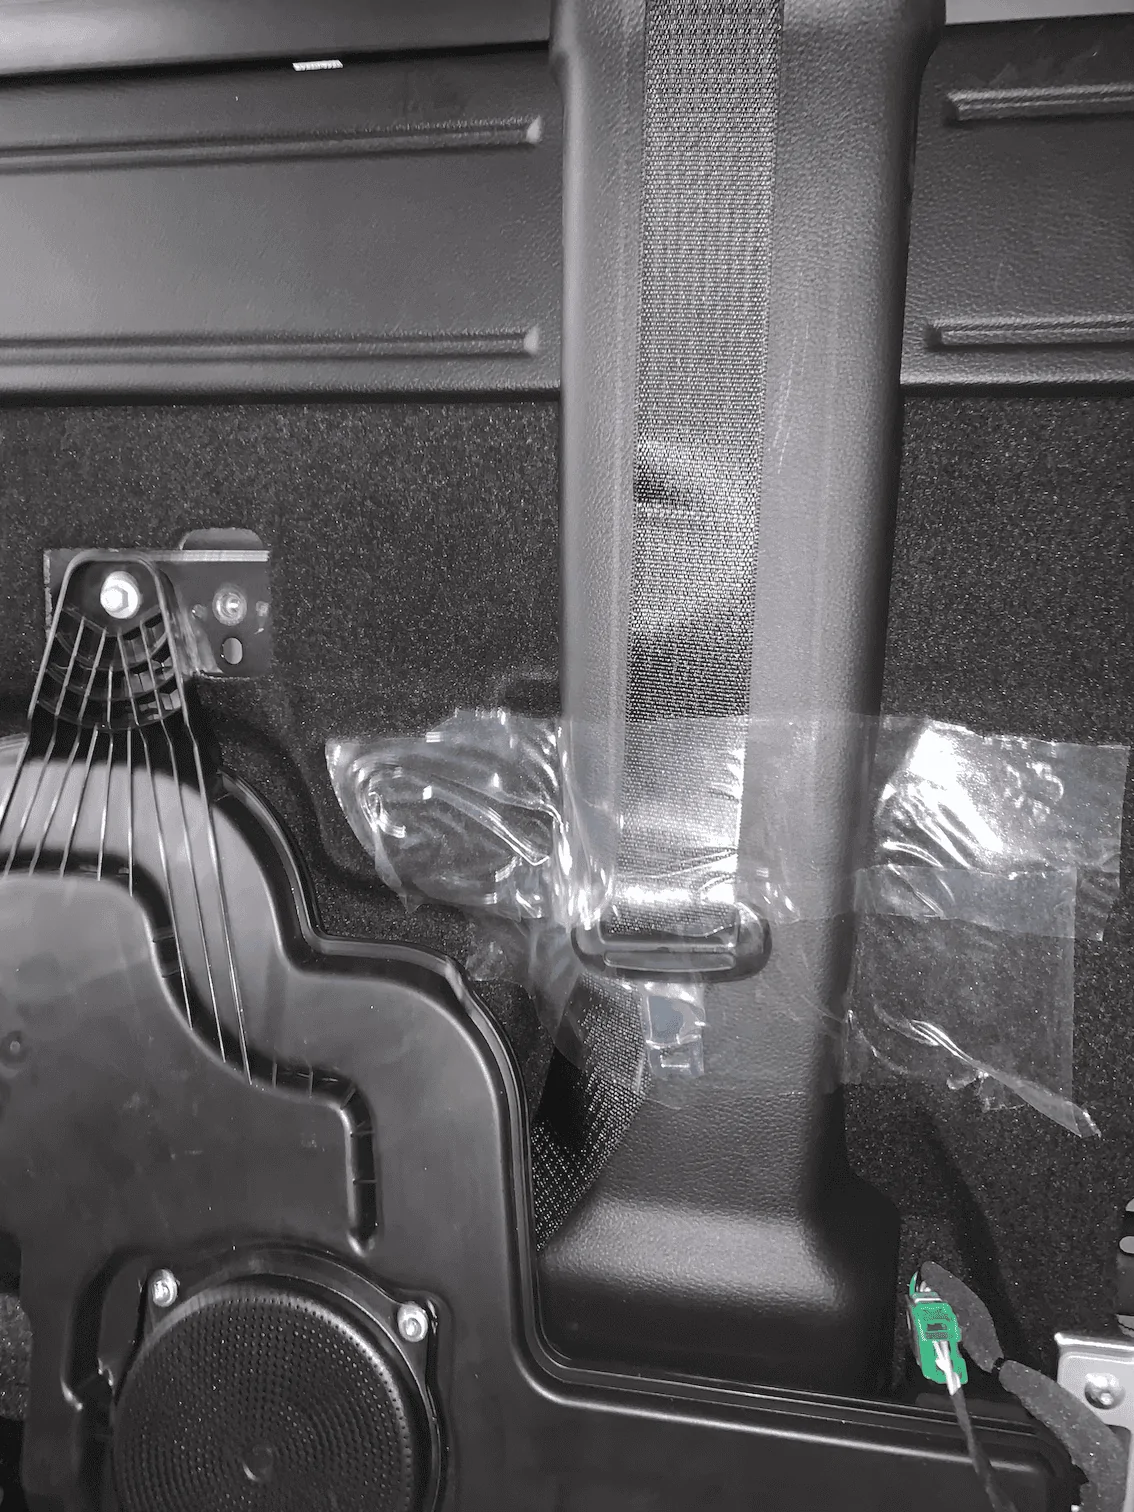
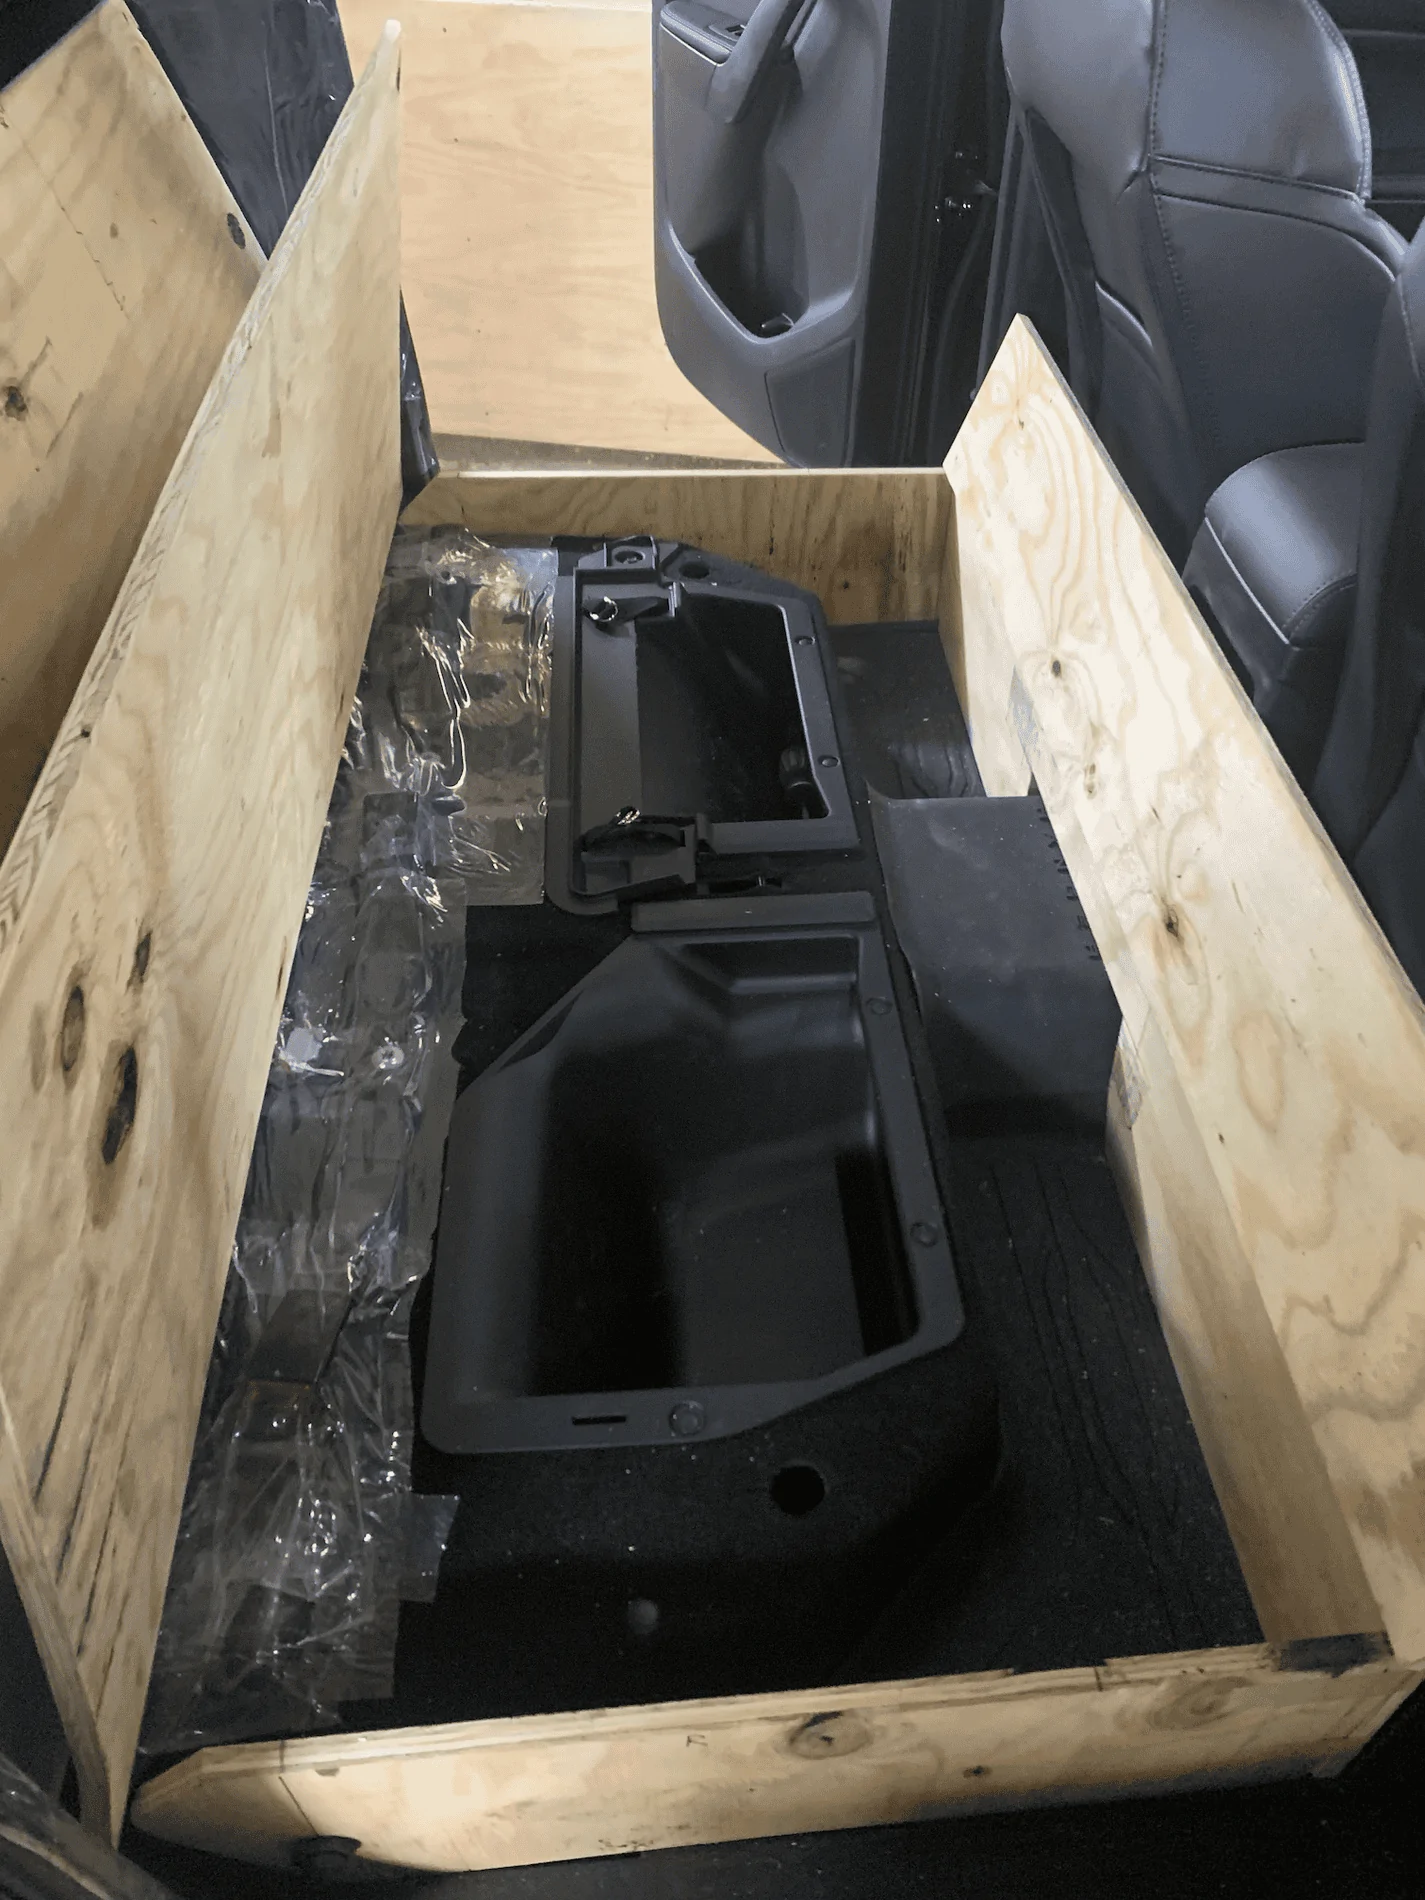
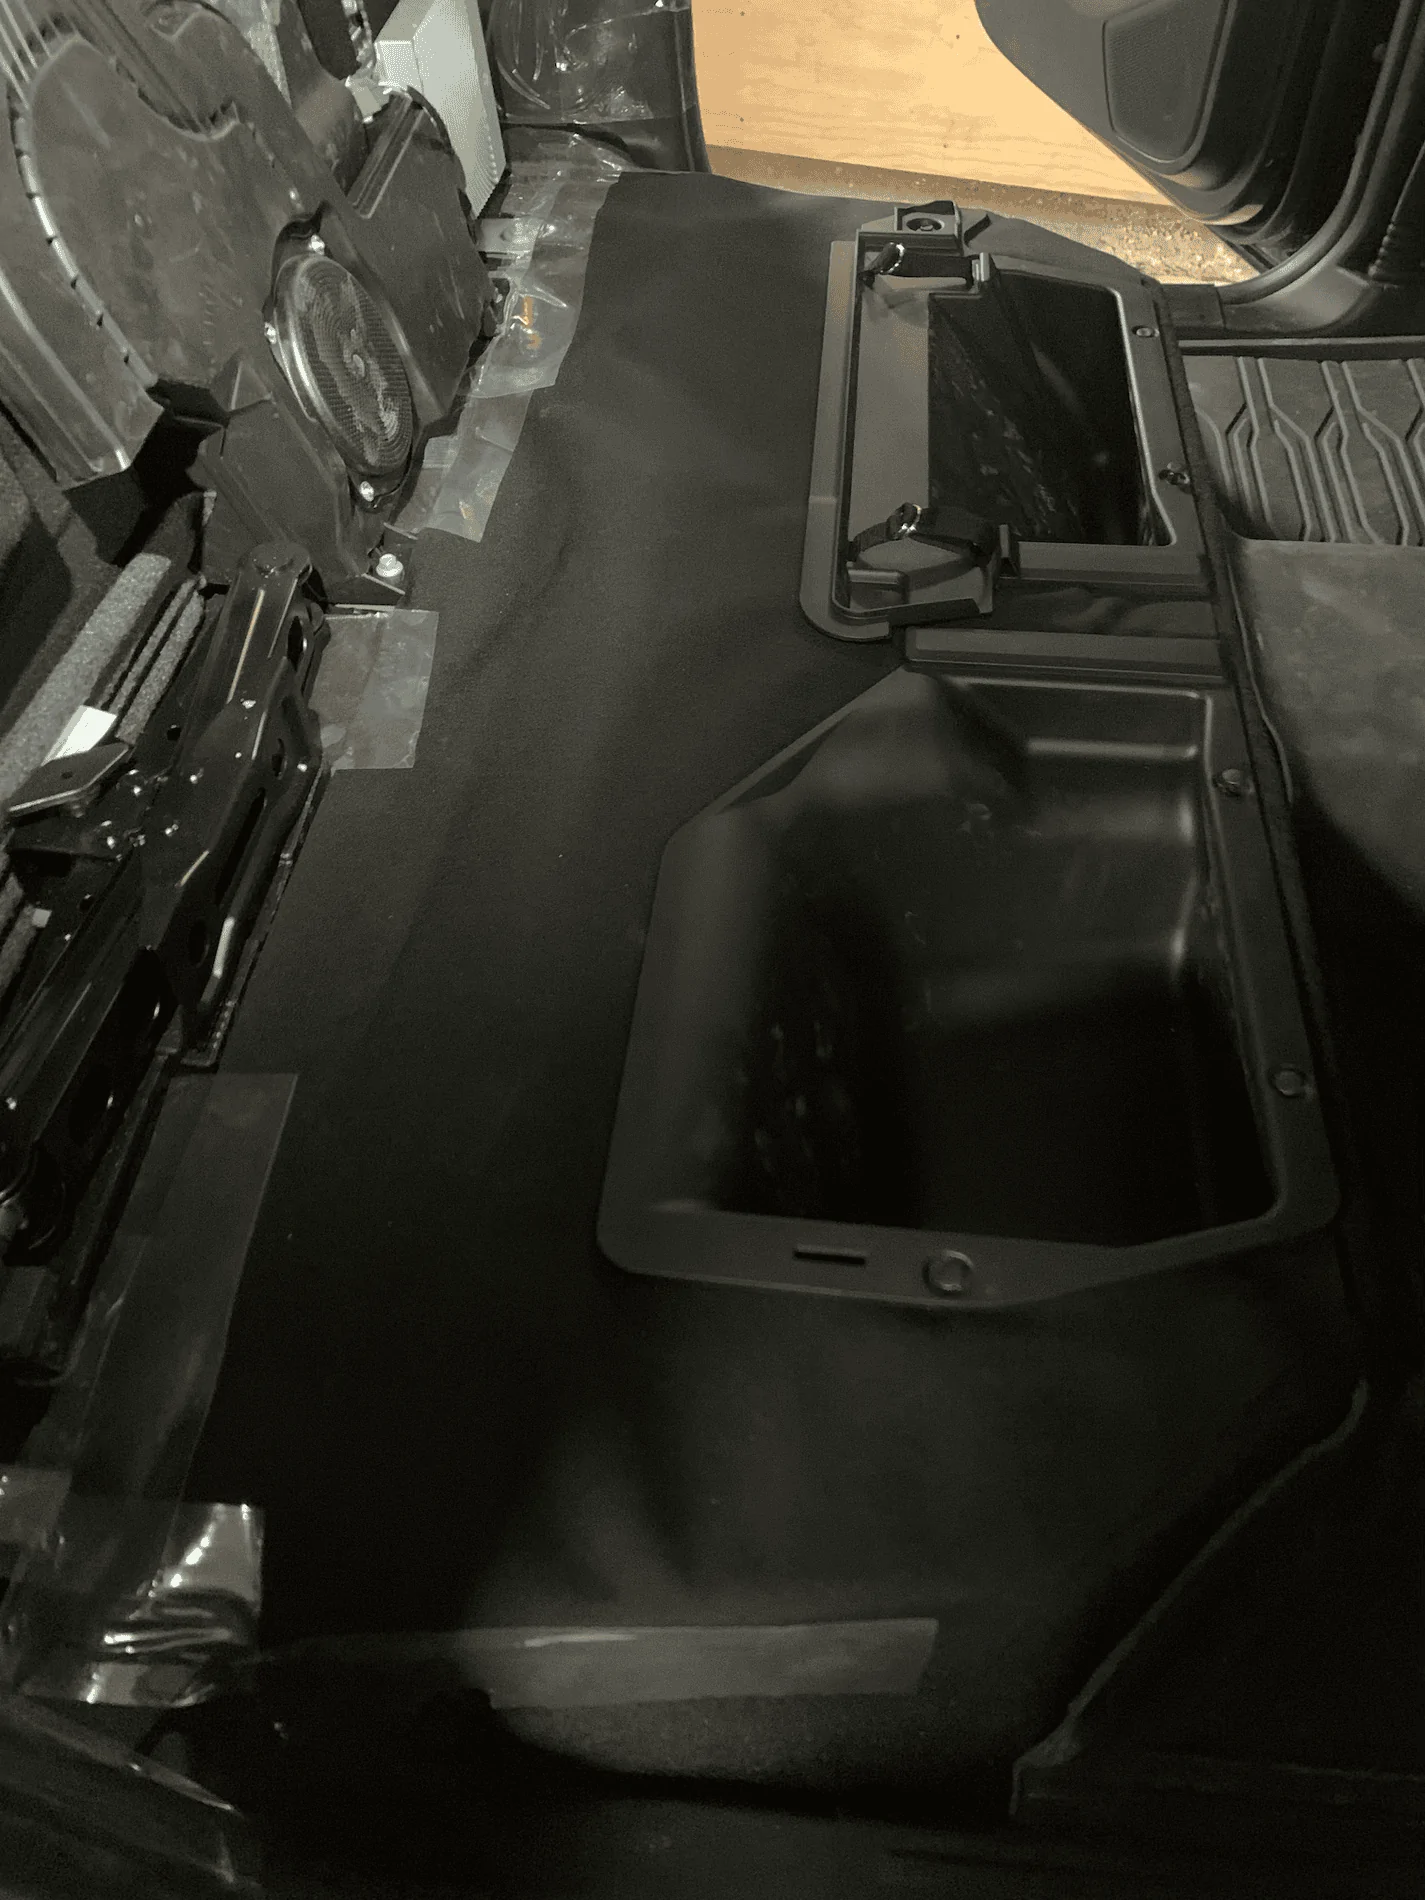
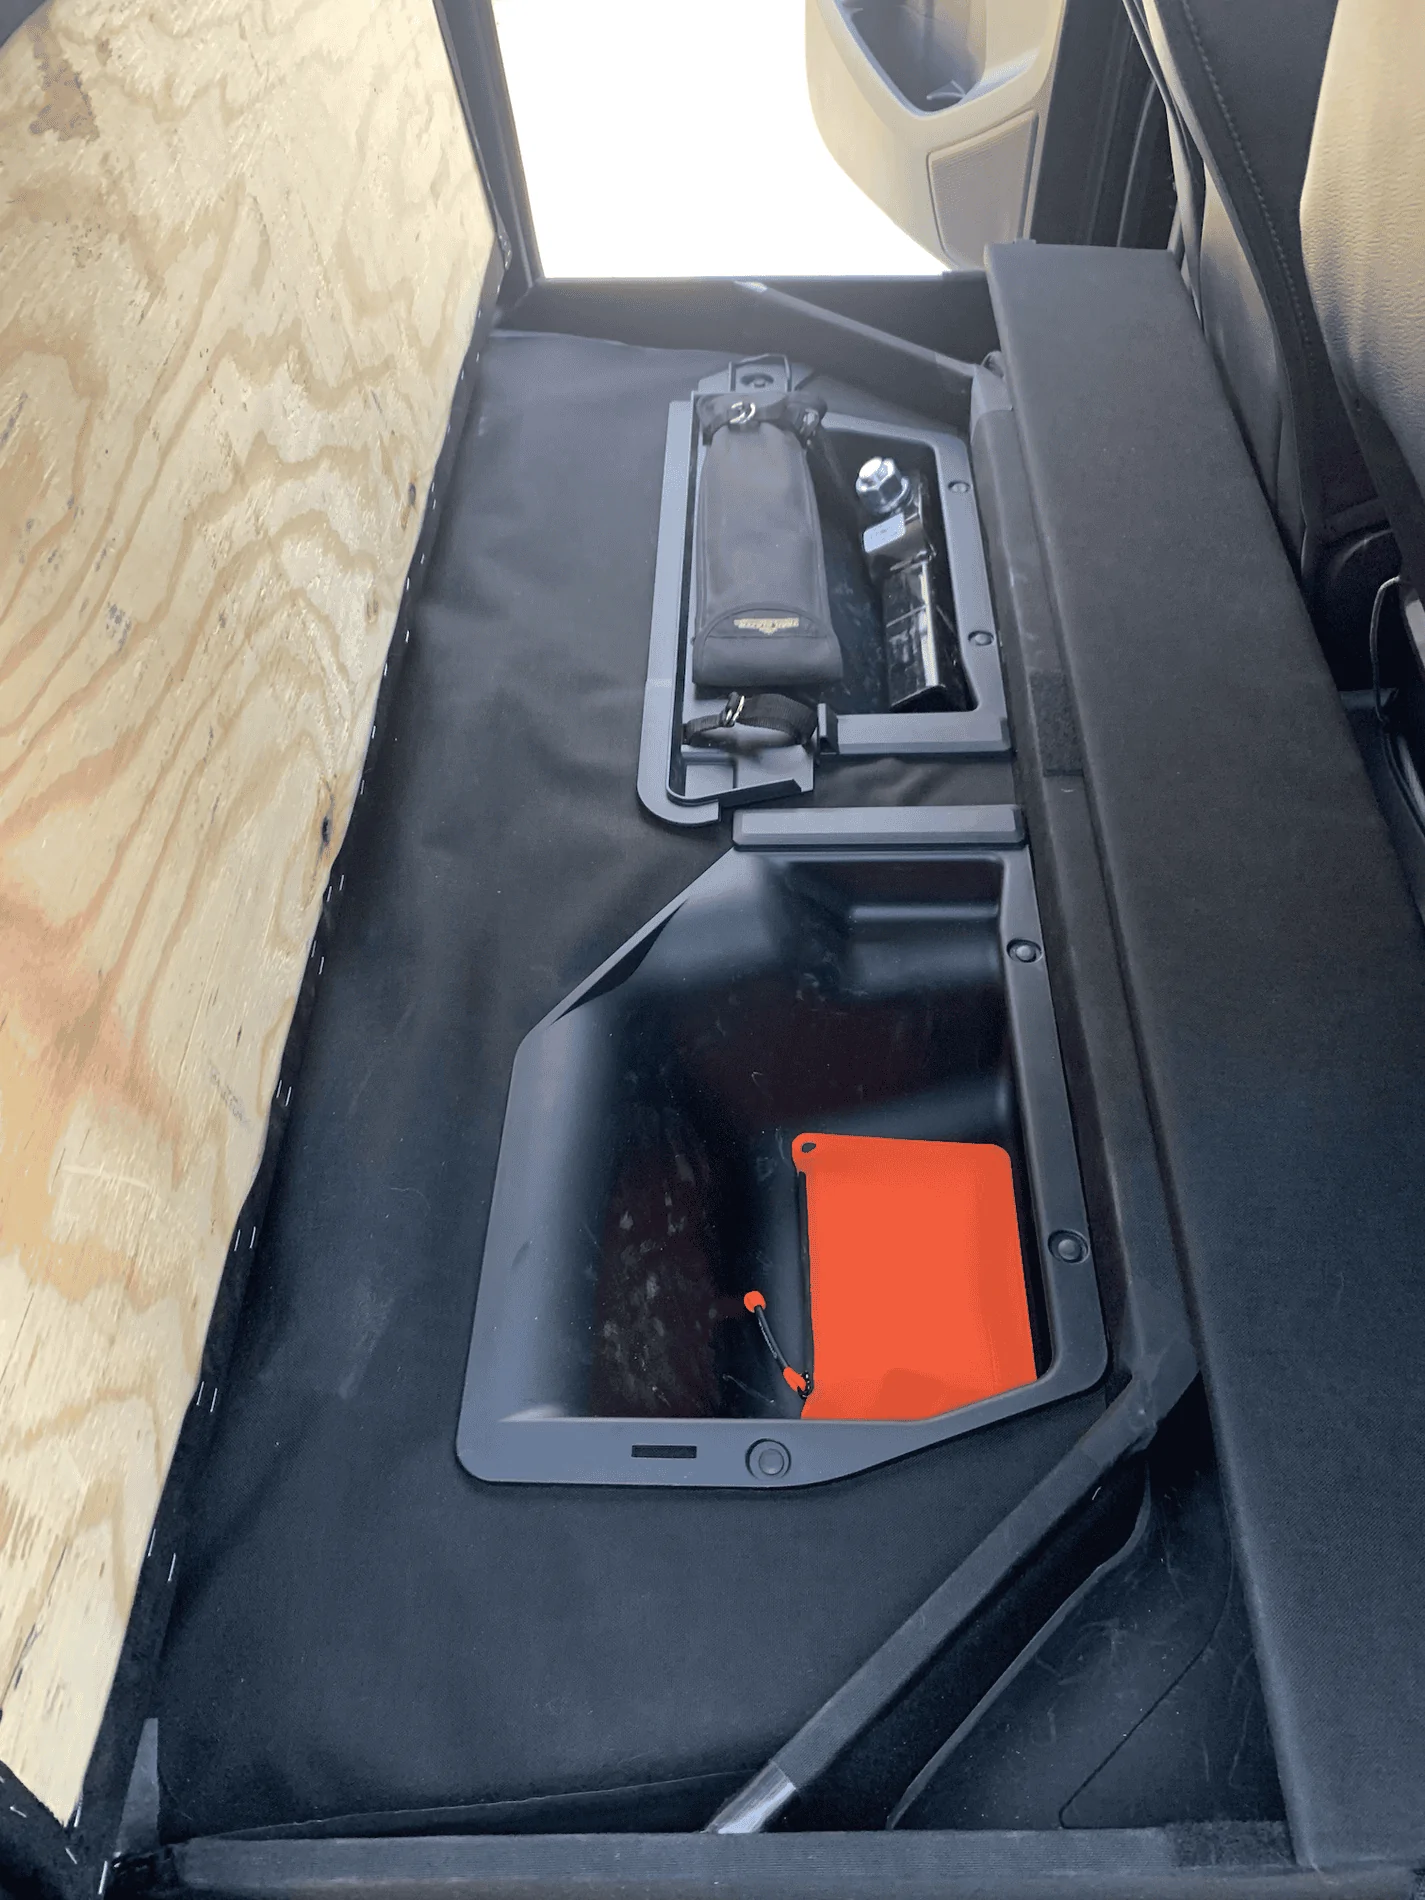
No physical modifications necessary. View attachment 76220 I wanted to be able to put the truck back to completely stock with no trace of modification. I used the lower seatbelt mounting bolts to secure the base and, the back is bolted to the threaded inserts where the seat back mounts were. The seatbelts were re-routed behind the trim panels. I didn't feel like re-wiring the seatbelt/airbag sensors so, I left them and worked around them. I used some of that sticky plastic protective sheeting to secure them. They now act as support for the floor. After I wrapped all of the panels I still had some fabric left so, I removed the cubbies, laid the fabric over the floor and reinstalled the cubbies. The center spine where the lids meet is secured to the sides of the base and also via brackets that use the push fasteners for the cubbies. The whole unit is super solid. The back has a hole cut for the subwoofer and folds forward for access to the jack and sub/amp, should I ever need to get at them. The front seats have full range of travel and recline. I also got a significant bump in sound deadening in the back. It's also already dog approved.
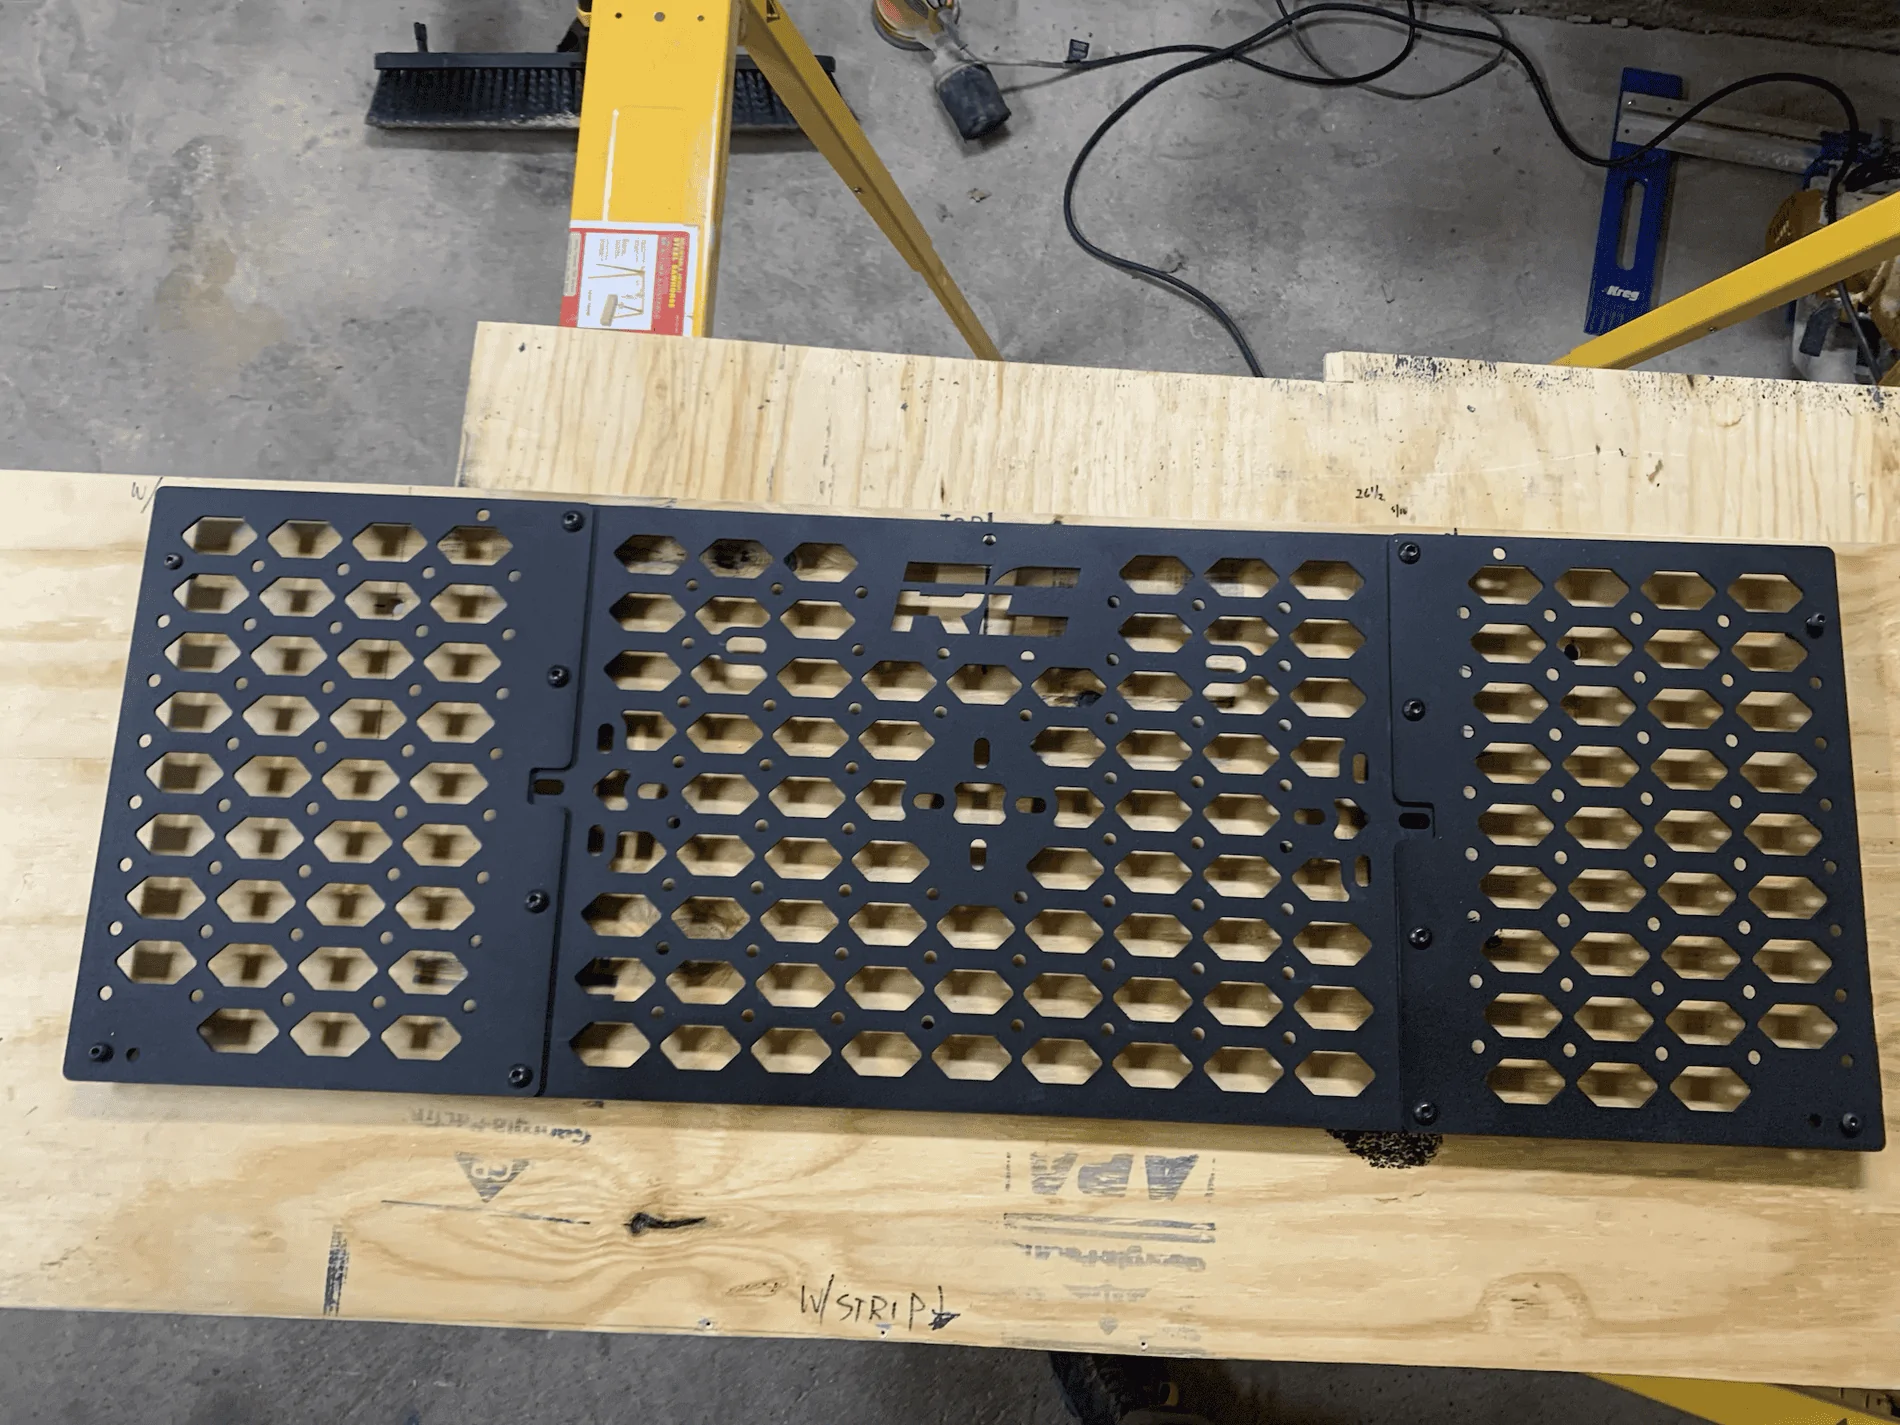
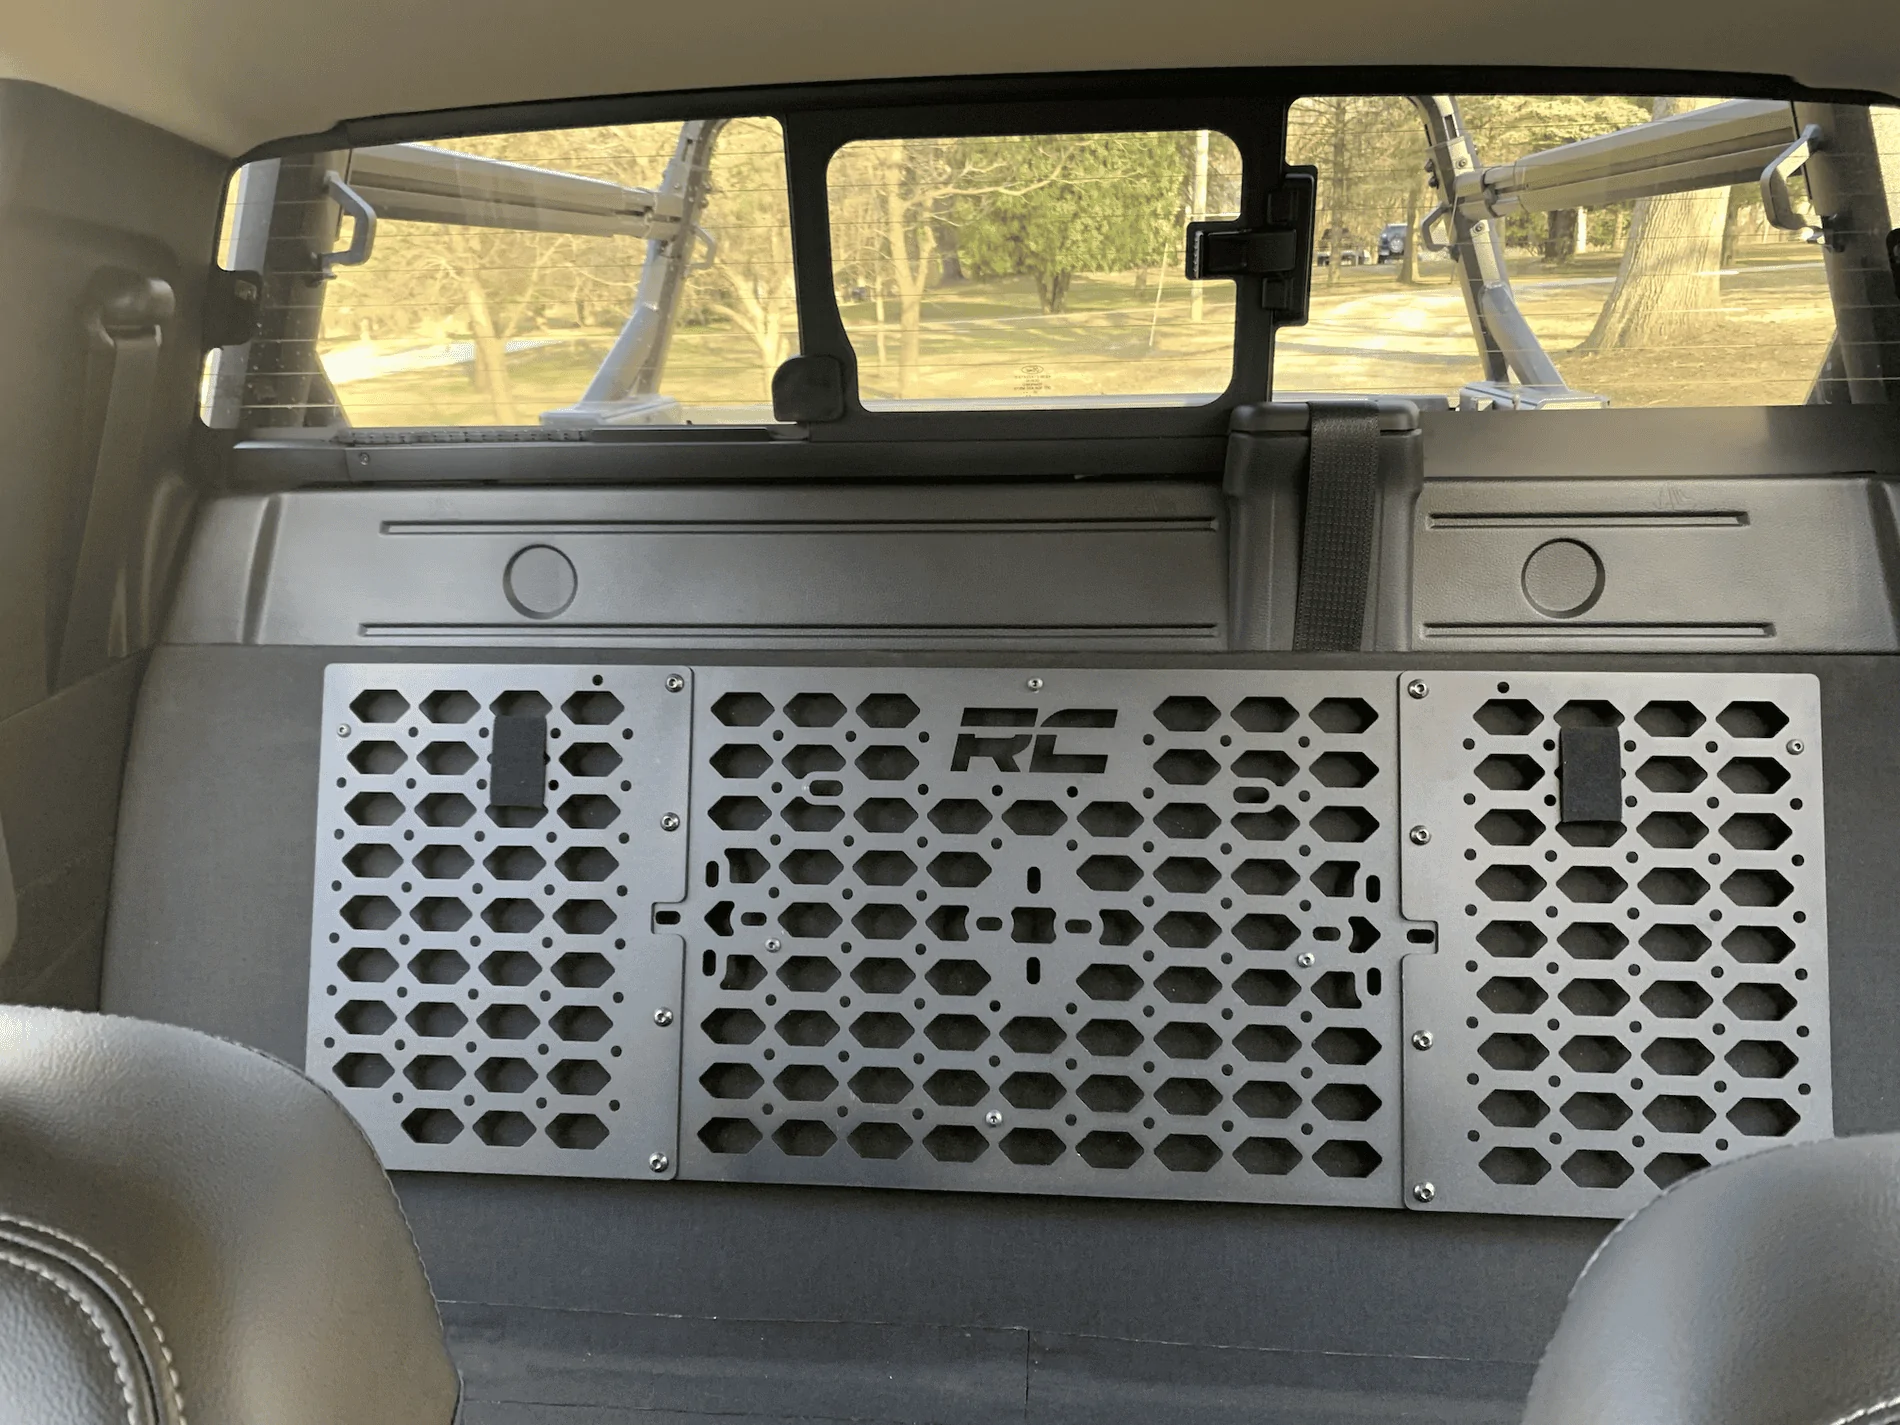
Materials used: (2) sheets of 5/8" plywood, (4) yards 1000D Cordura, (2) yards 1/8" closed cell foam (shelf liner), Rough Country molle bed rack for a Tacoma, and various assorted hardwares and adhesives. Most of the stuff I had in the garage from past projects. The rest was just ingenuity, trial and error, and a lot of experience in making something from nothing.

OP
OP
Snow3d
Well-Known Member
- Thread starter
- #41
thank you for the inspiration! I’m scrolling for ideas to do the same for my dog. The back seats are far too high for my girl to be safe back there, I had to slam on my breaks the other day and she went flying into the seats, it shook her up pretty good (pun intended).
There was another guy on here that had done a similar thing with the Super Cab. I opted for the Super Crew specifically for the extra interior space for weatherproof storage and dogs. The extra 6" of bed was going to do me no favors.I saw this when originally posted, and I think I've seen either him or someone else who had the back loaded up with various tool boxes, and I can dig that. But, I just wonder why not get a scab and do the same thing, with the added bonus of a 6' bed.
I know, to each their own, and he can get the B&O. I'm still butt hurt about paying the same price and not getting it.
Tom_C
Well-Known Member
- First Name
- Tom
- Joined
- Apr 17, 2021
- Threads
- 35
- Messages
- 1,972
- Reaction score
- 4,390
- Location
- Virginia, USA
- Vehicle(s)
- 2020 Ranger Lariat SuperCab FX4
- Occupation
- System Admin, Retired
I thought it was a foot, 5' vs 6', but either way probably similar. I've had mine loaded up pretty good, but I guess it's like a gas, it expands to fit it's container.The extra 6" of bed was going to do me no favors.
OP
OP
Snow3d
Well-Known Member
- Thread starter
- #43
To all who have shared interest and/or asked for measurements over the past few years. I do apologize for leaving anyone hanging. I'm not full time on any of the forums these days. I recently received a message regarding this project and resurrected this thread. I am posting this for any and all who come across this now and in the future.
I'm doing this all from memory at this point. As I no longer have the Ranger. I traded it for a Super Duty. So, Unfortunately I can't get any real measurements for you. I'm happy to help but, it's going to require some clever extrapolation on your part. If you look closely at all of the pictures I posted you can probably figure out the measurements you need. I had to do a bit of testing and trimming myself.
Things I can tell you that will help:
I made this out of 5/8" Plywood. Two 4'x8' sheets will get the job done. It requires about 4 yards of fabric to cover all panels. Other materials: thin upholstery foam/toolbox liner for the floor/back panel under the cover fabric. Gaffer tape or other sticky stuff to secure seatbelts. Nylon webbing. Velcro. Hinges. 90 degree brackets for the corners of the box for extra support. 1/2" Screws. Finish nailer or 1 1/2"-2" 4d finish nails to fasten the lower panels.
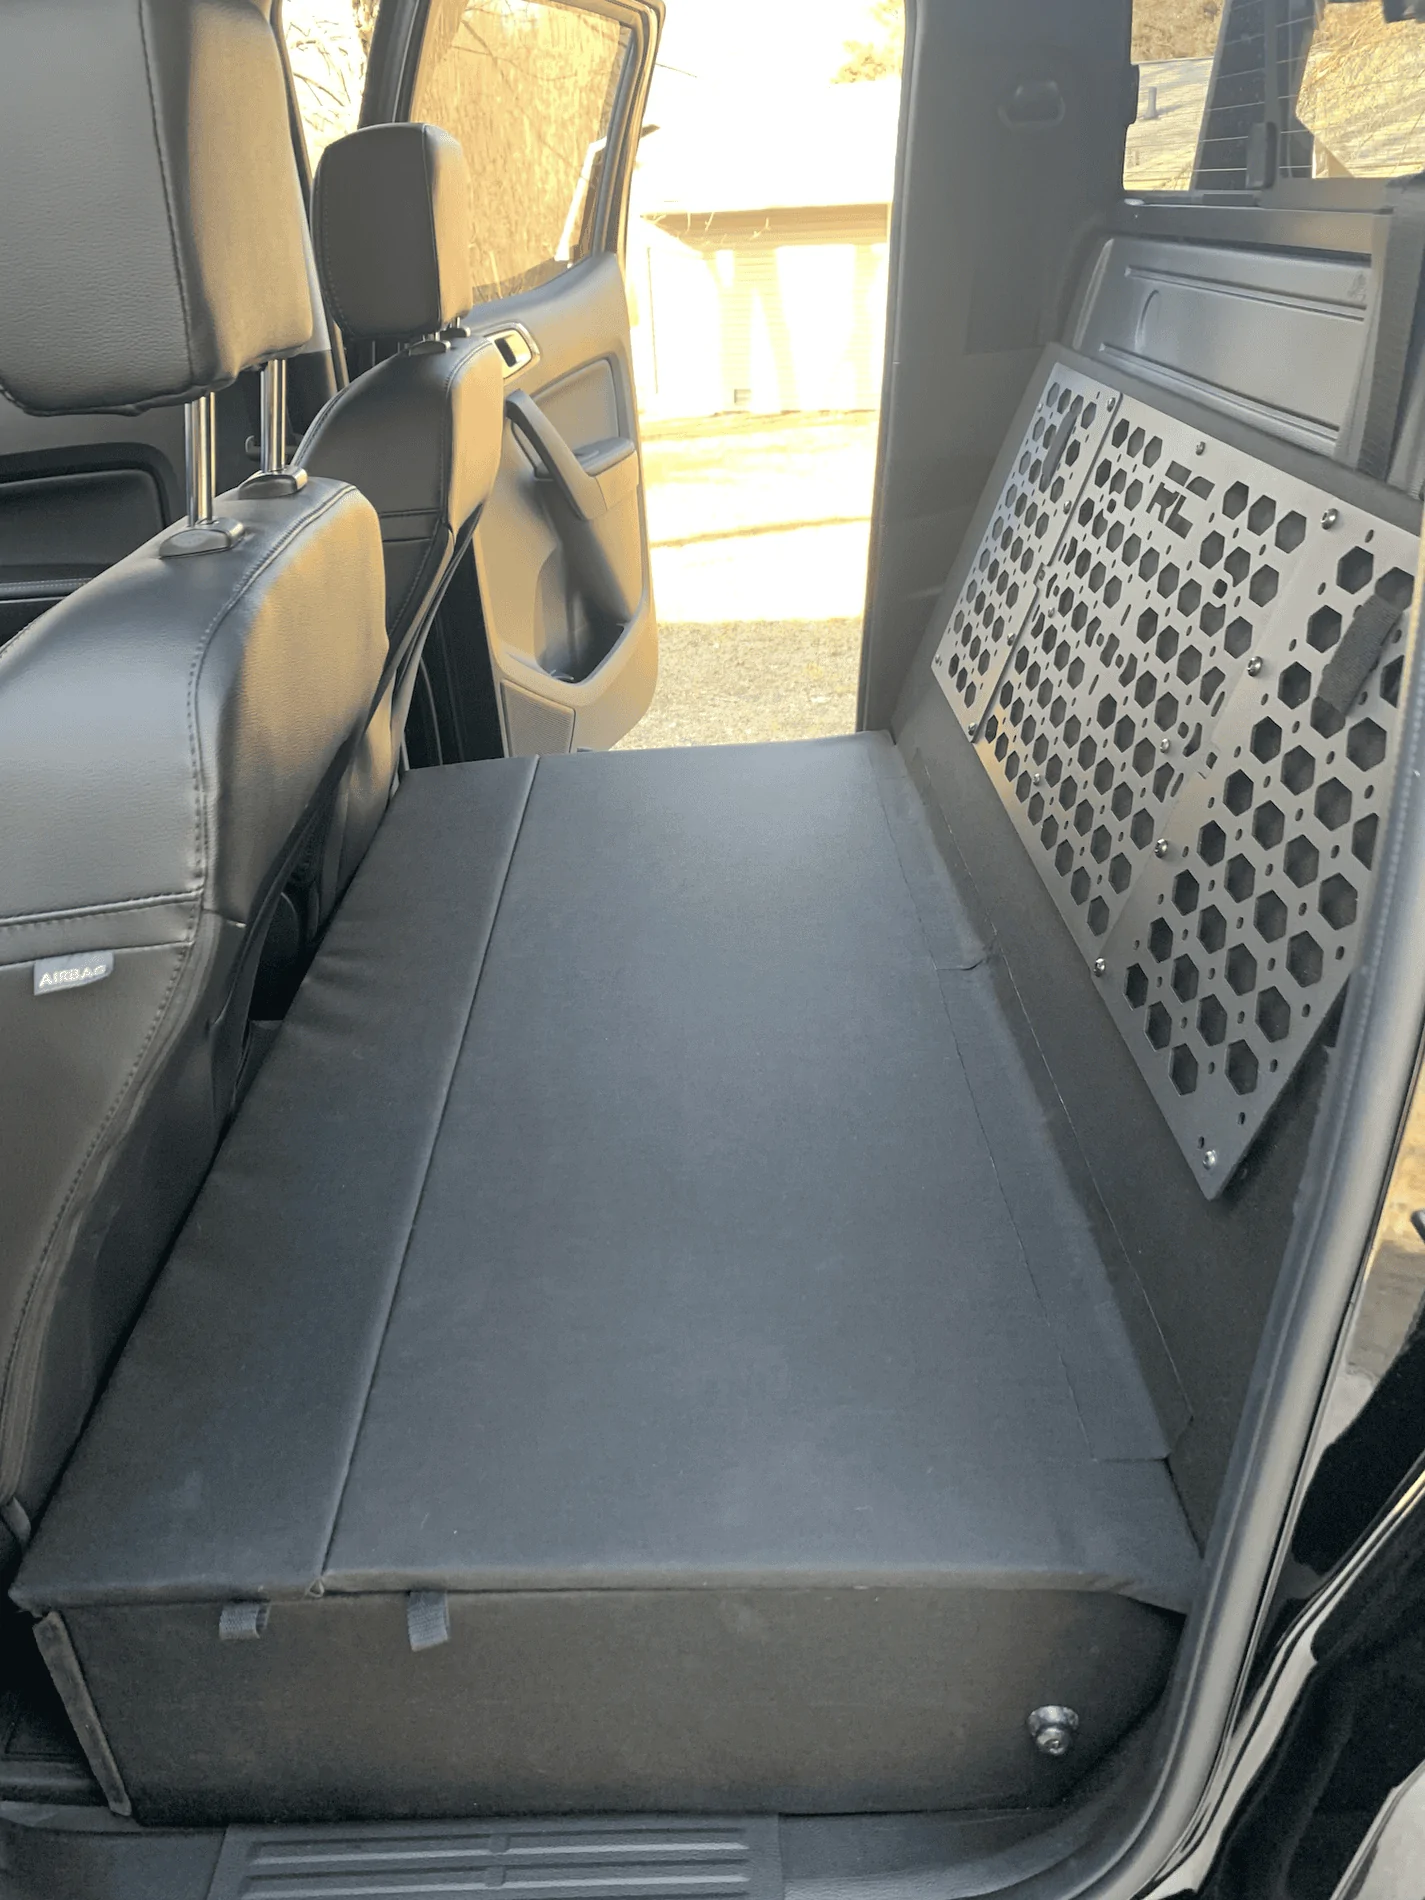
1) The front seats are all the way back and butt up to the floor.
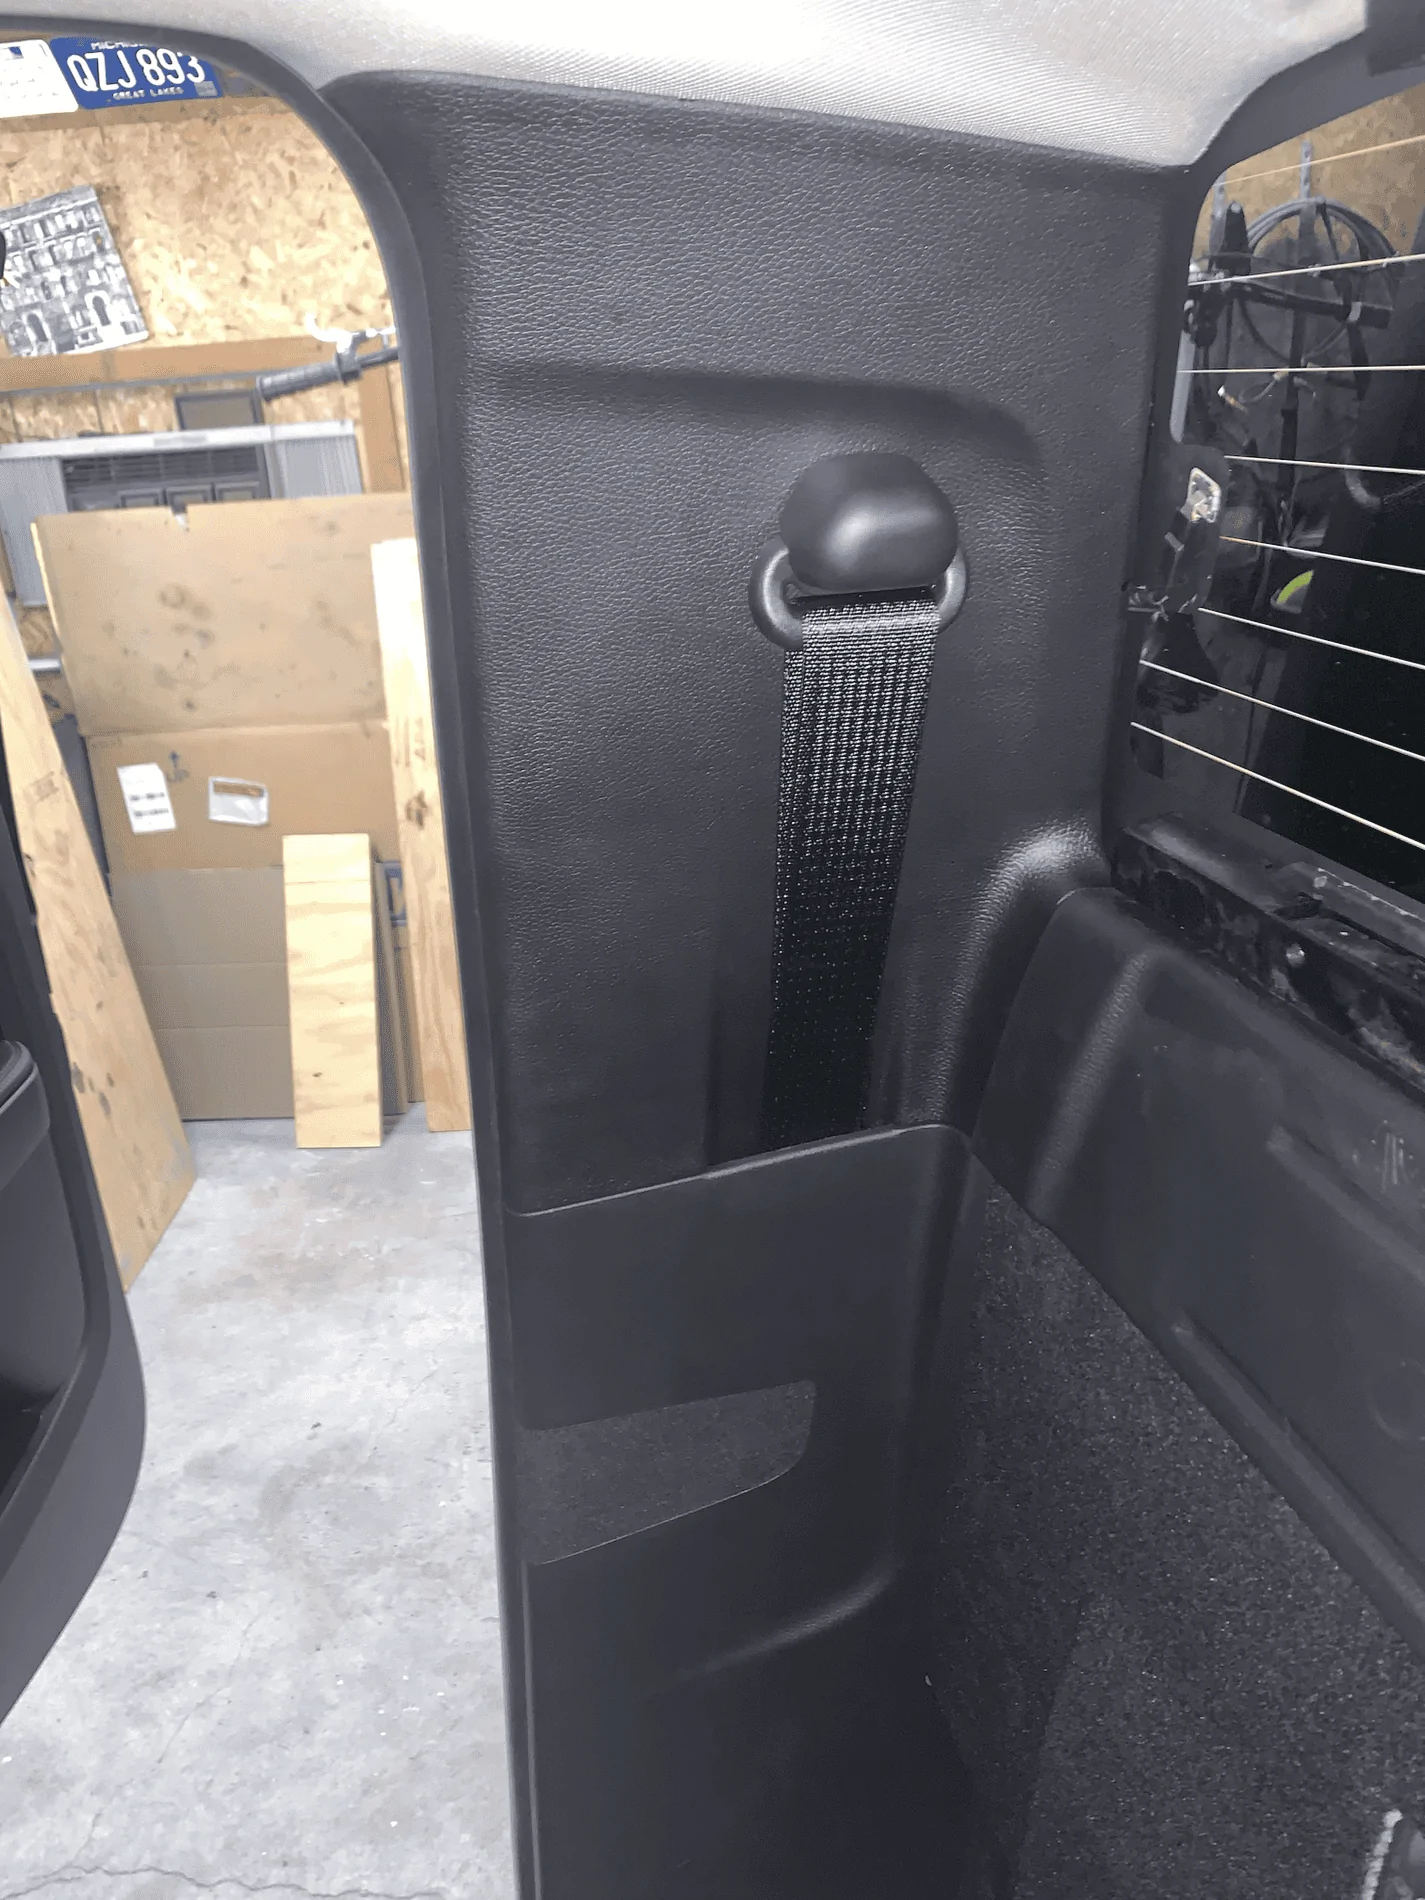
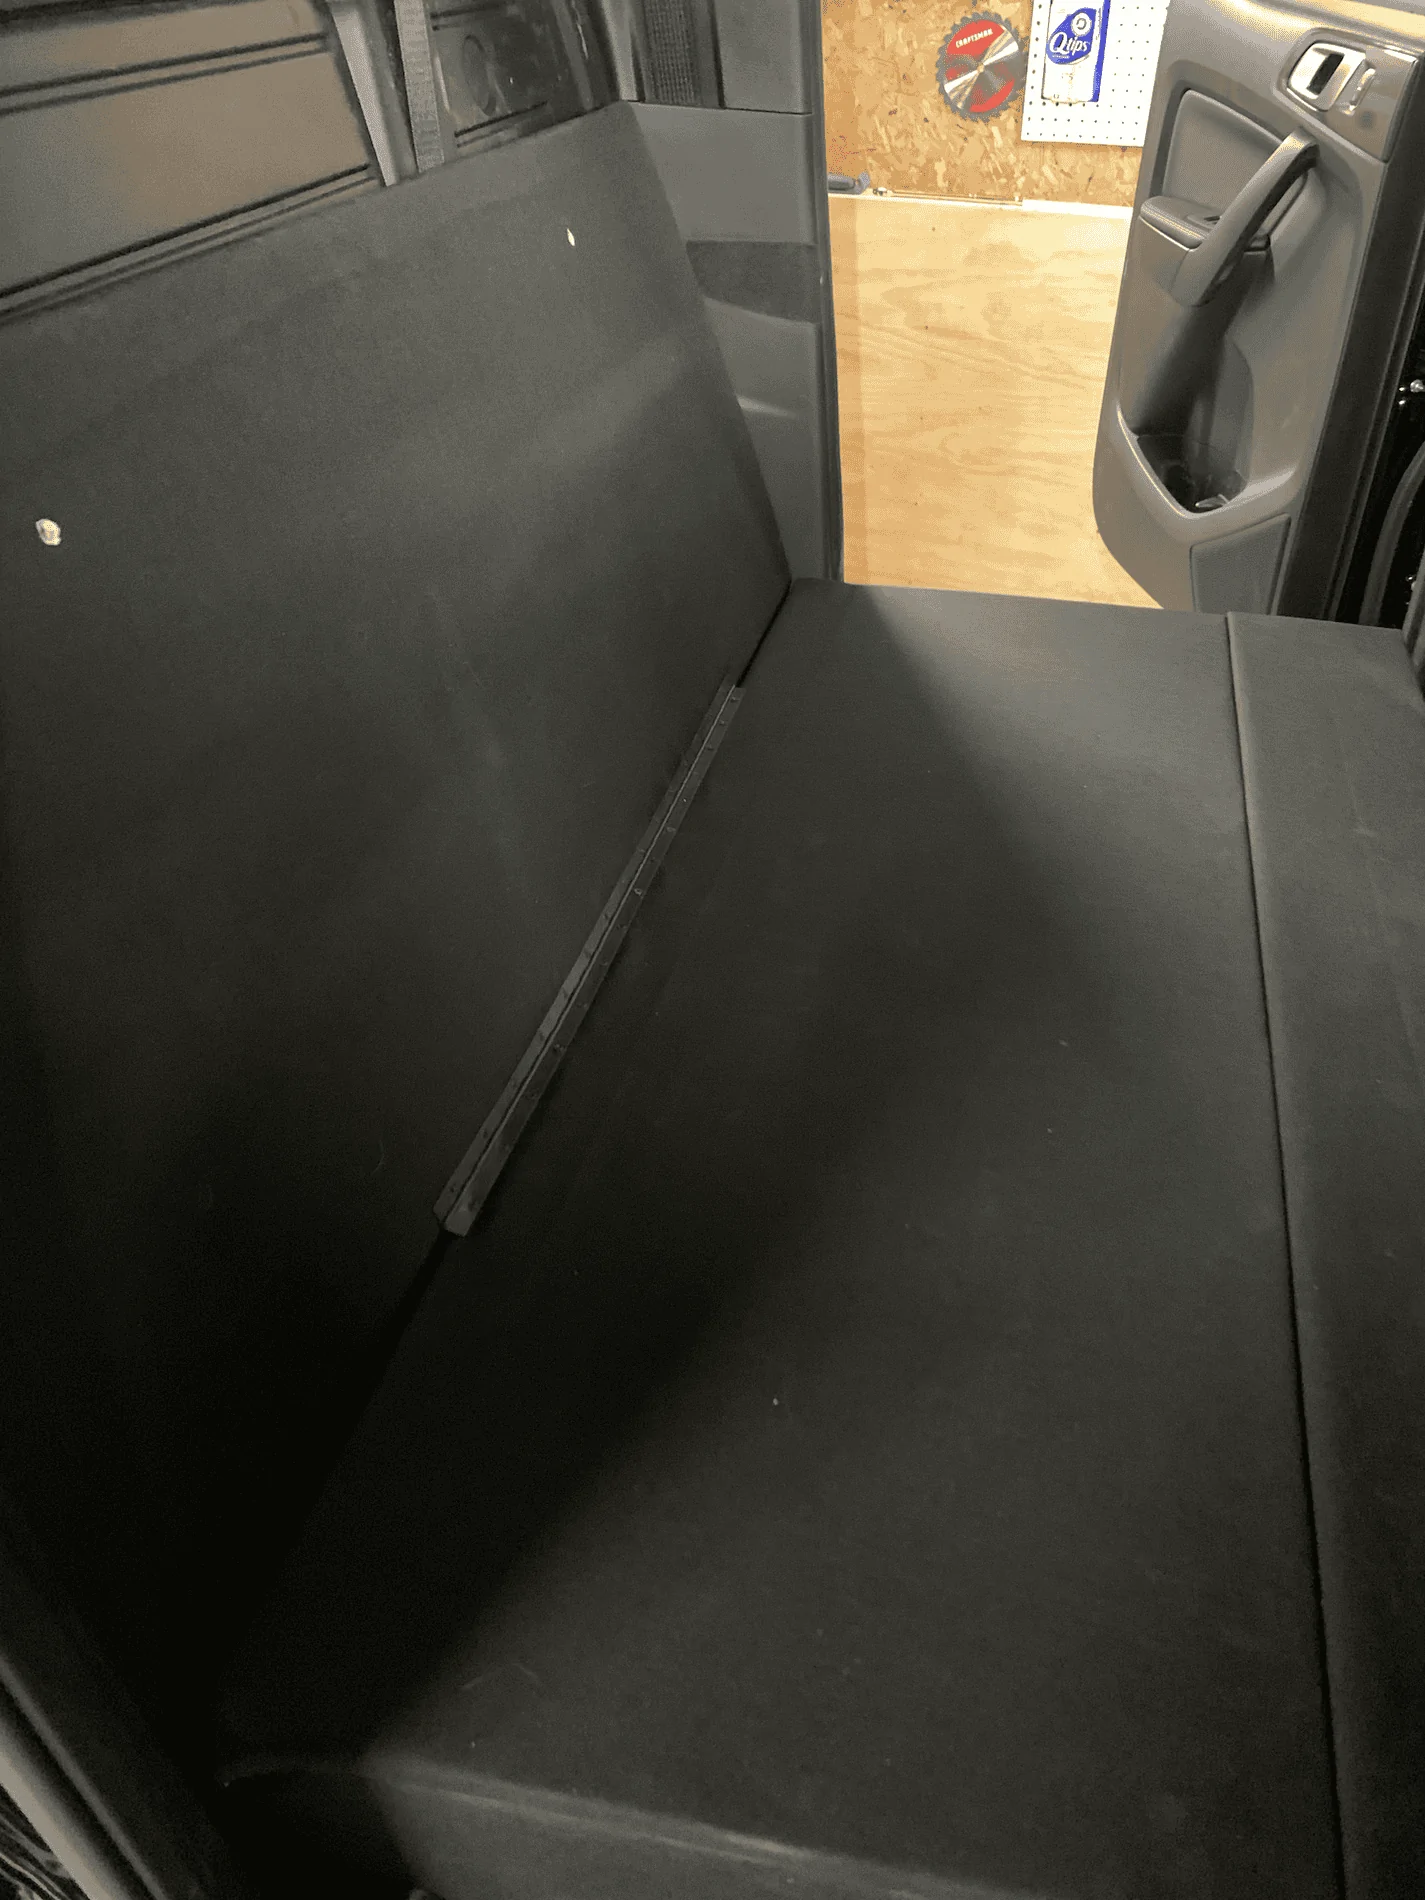
2) The top of the "seatback" is flush with the bottom of the plastic trim below the rear window. I also bolstered the top back edge of the panel with foam to stop rattles.
3) The seatback panel follows the angle of the subwoofer/amplifier and stuff behind the seat.
4) You will have to bolster the outside edges of the lower seatback panel between the panel and cab wall. I used some foam blocks cut on the same angle. The panel will want to pivot backwards when you open the floor lid without them.
5) There are two threaded inserts behind the seat M8x1.25 that I used to fasten the panel to the cab wall. The bolts will need to be about 6" long if I recall correctly.
6) You will need to remove the striker/latch plate from the cab wall behind the seat.
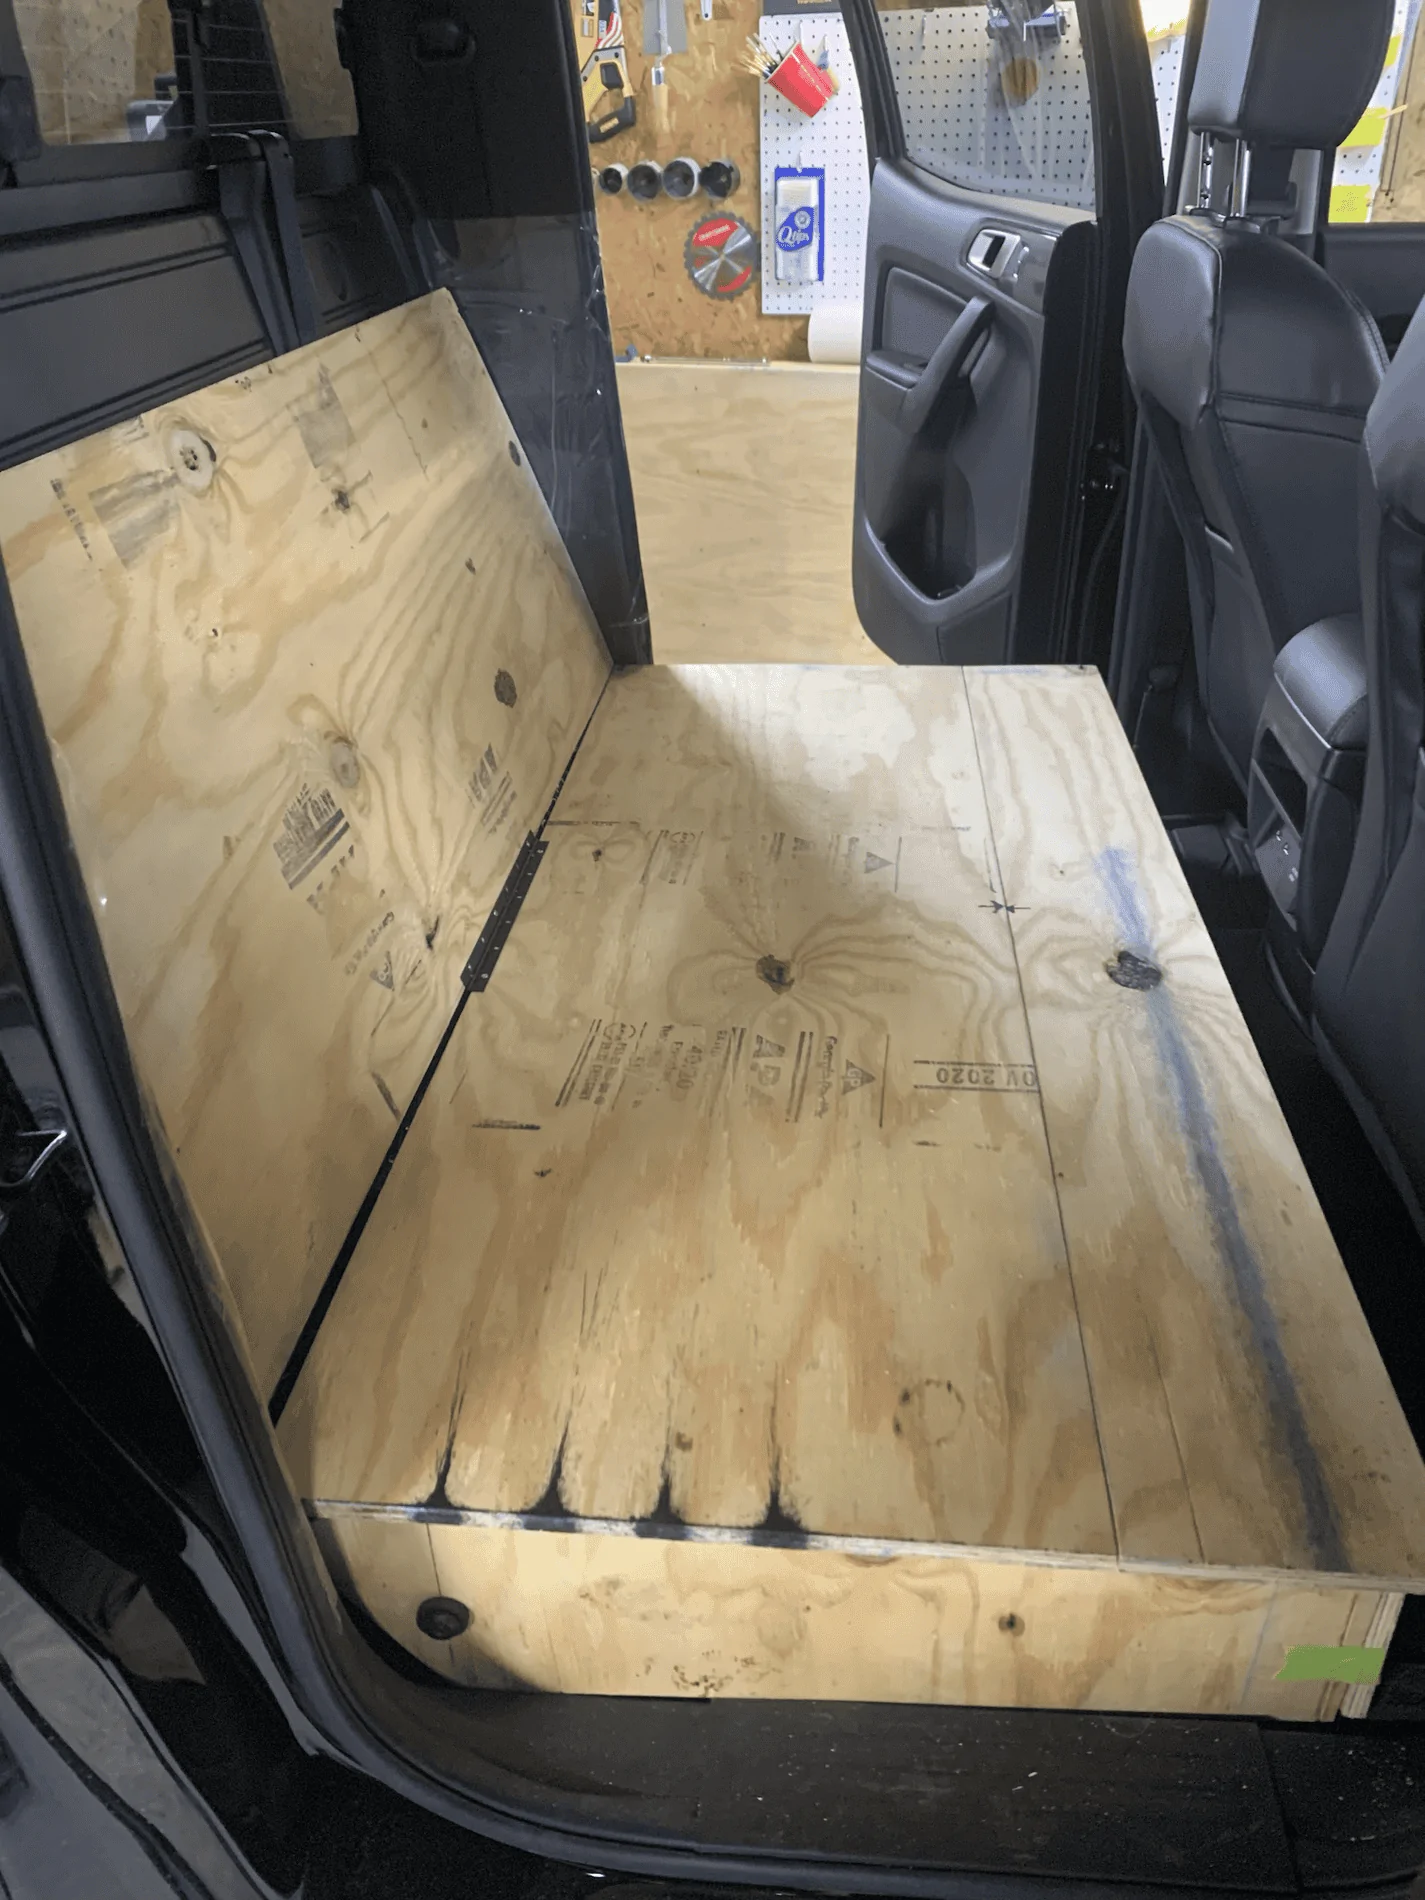
7) The hight of the walls that make the bottom box are about 7-8" - High enough to clear the cubbies and the seatbelts. You will have do a bit of trial and error here most likely.
8) The bi-fold bottom panel is a must. One full piece from back to front won't clear the front seats without moving them forward.
9) The left and right side panels are attached to the lower factory seatbelt mounting locations. You will need longer bolts than what anchor the seatbelts. Something like 2-2 1/2" You may need a spacer in between the panel and mounting points as well.
10) The only hard mounting points for the whole contraption are the two bolts in the seatback panel and the one on each side panel.
Hinges and covering are up to you. I used 1000D Cordura but it was a bit slippy. Carpet might be just as good for most, honestly. A rubber mat on top is a good idea as well.
Read my original post and look at the pics. If you have average contraption building skills, you can make this happen.
I'm doing this all from memory at this point. As I no longer have the Ranger. I traded it for a Super Duty. So, Unfortunately I can't get any real measurements for you. I'm happy to help but, it's going to require some clever extrapolation on your part. If you look closely at all of the pictures I posted you can probably figure out the measurements you need. I had to do a bit of testing and trimming myself.
Things I can tell you that will help:
I made this out of 5/8" Plywood. Two 4'x8' sheets will get the job done. It requires about 4 yards of fabric to cover all panels. Other materials: thin upholstery foam/toolbox liner for the floor/back panel under the cover fabric. Gaffer tape or other sticky stuff to secure seatbelts. Nylon webbing. Velcro. Hinges. 90 degree brackets for the corners of the box for extra support. 1/2" Screws. Finish nailer or 1 1/2"-2" 4d finish nails to fasten the lower panels.
1) The front seats are all the way back and butt up to the floor.
2) The top of the "seatback" is flush with the bottom of the plastic trim below the rear window. I also bolstered the top back edge of the panel with foam to stop rattles.
3) The seatback panel follows the angle of the subwoofer/amplifier and stuff behind the seat.
4) You will have to bolster the outside edges of the lower seatback panel between the panel and cab wall. I used some foam blocks cut on the same angle. The panel will want to pivot backwards when you open the floor lid without them.
5) There are two threaded inserts behind the seat M8x1.25 that I used to fasten the panel to the cab wall. The bolts will need to be about 6" long if I recall correctly.
6) You will need to remove the striker/latch plate from the cab wall behind the seat.
7) The hight of the walls that make the bottom box are about 7-8" - High enough to clear the cubbies and the seatbelts. You will have do a bit of trial and error here most likely.
8) The bi-fold bottom panel is a must. One full piece from back to front won't clear the front seats without moving them forward.
9) The left and right side panels are attached to the lower factory seatbelt mounting locations. You will need longer bolts than what anchor the seatbelts. Something like 2-2 1/2" You may need a spacer in between the panel and mounting points as well.
10) The only hard mounting points for the whole contraption are the two bolts in the seatback panel and the one on each side panel.
Hinges and covering are up to you. I used 1000D Cordura but it was a bit slippy. Carpet might be just as good for most, honestly. A rubber mat on top is a good idea as well.
Read my original post and look at the pics. If you have average contraption building skills, you can make this happen.
Arsenal741
Active Member
Very well executed. Thank you for sharing!
9zero1790
Well-Known Member
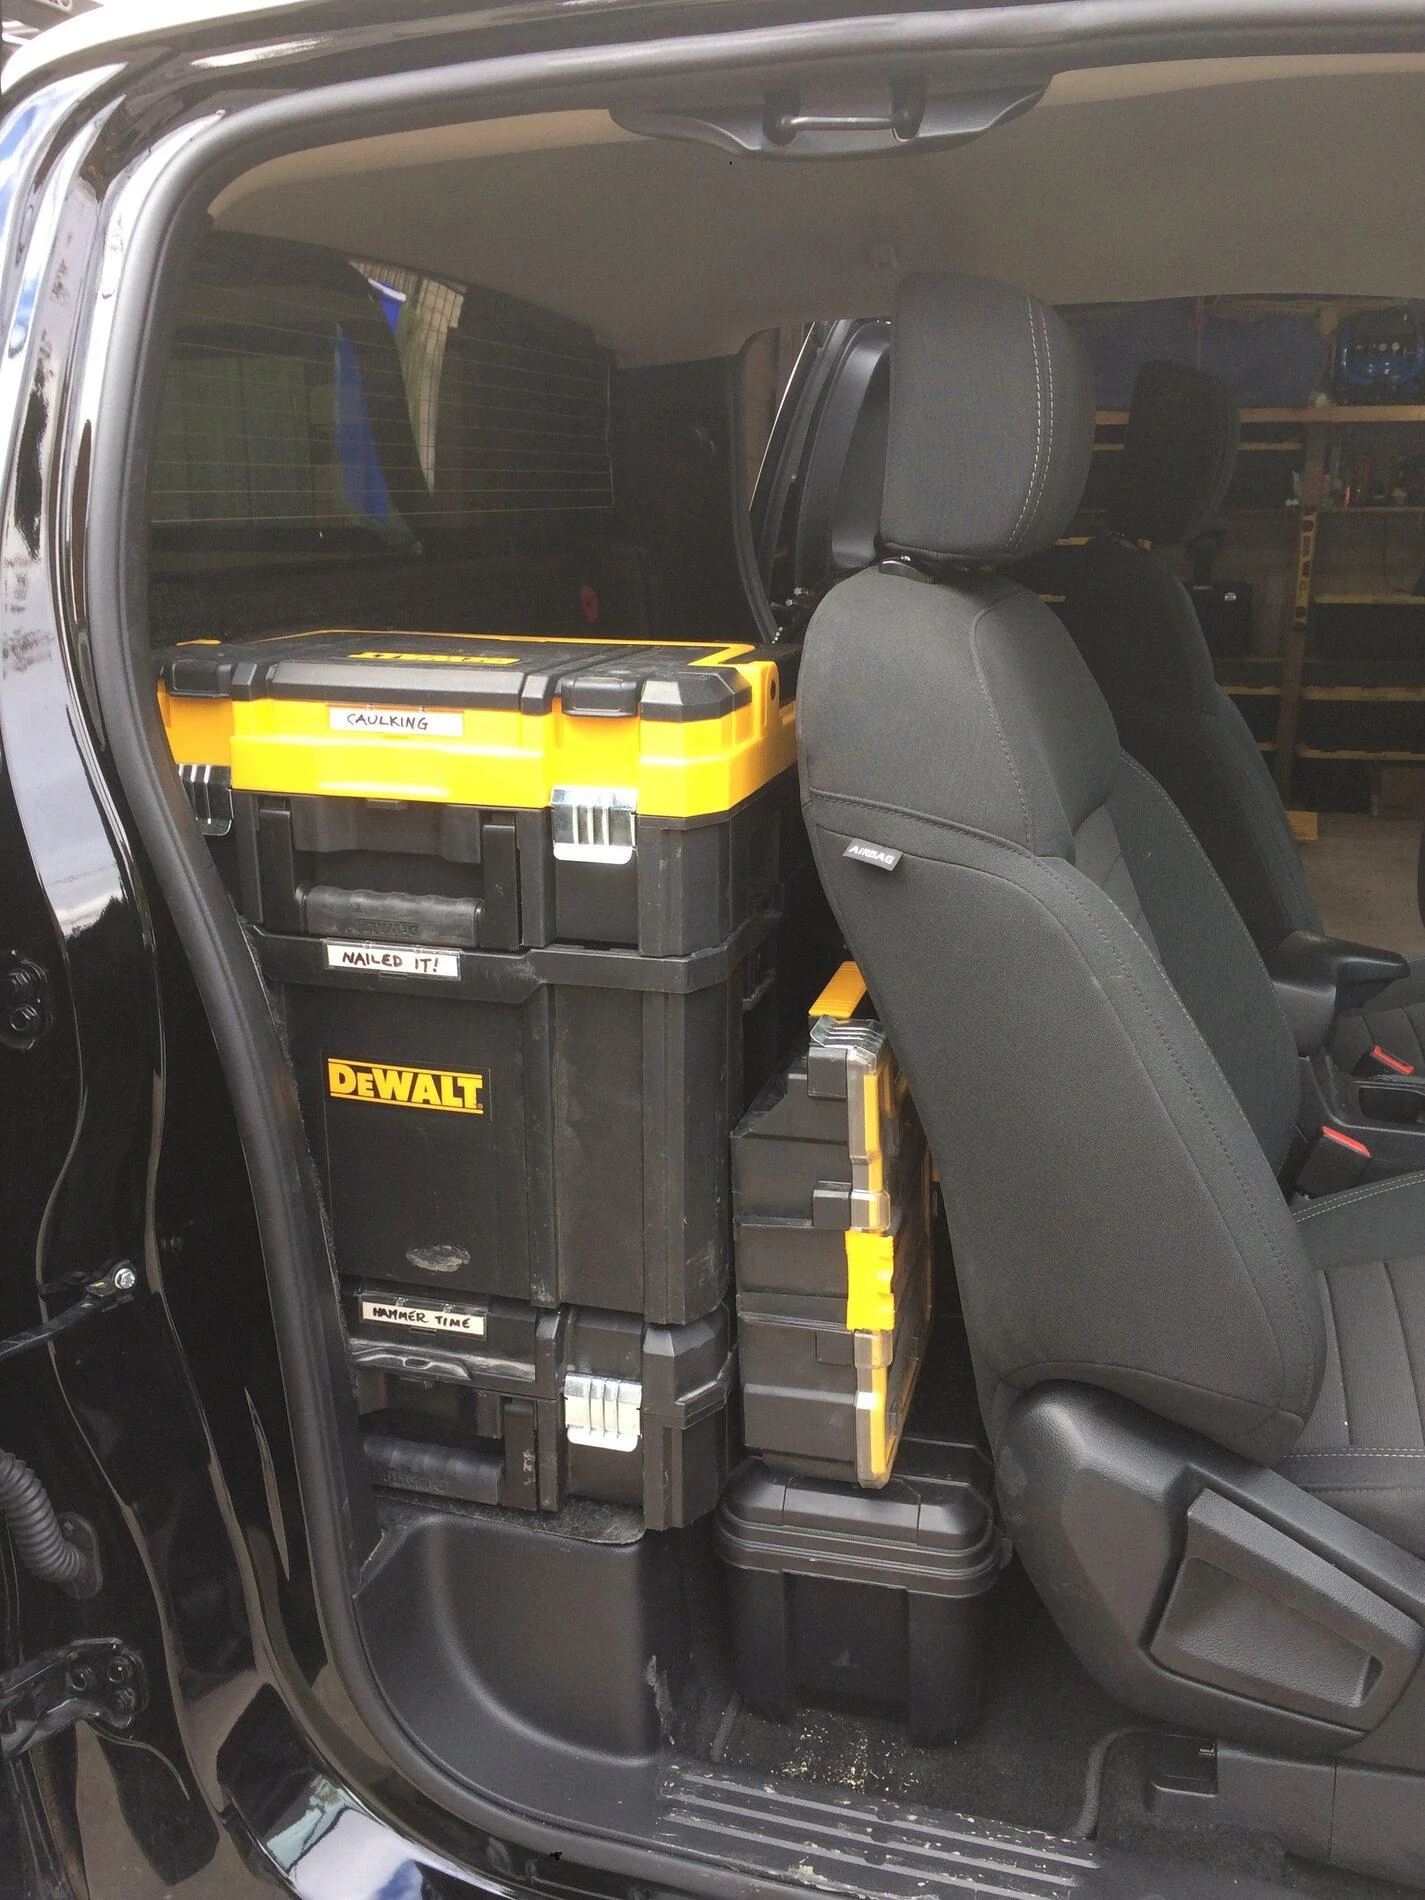
duke those lables are awesome lol.I totally get it...


Sponsored