E Monty
Well-Known Member
- Thread starter
- #1
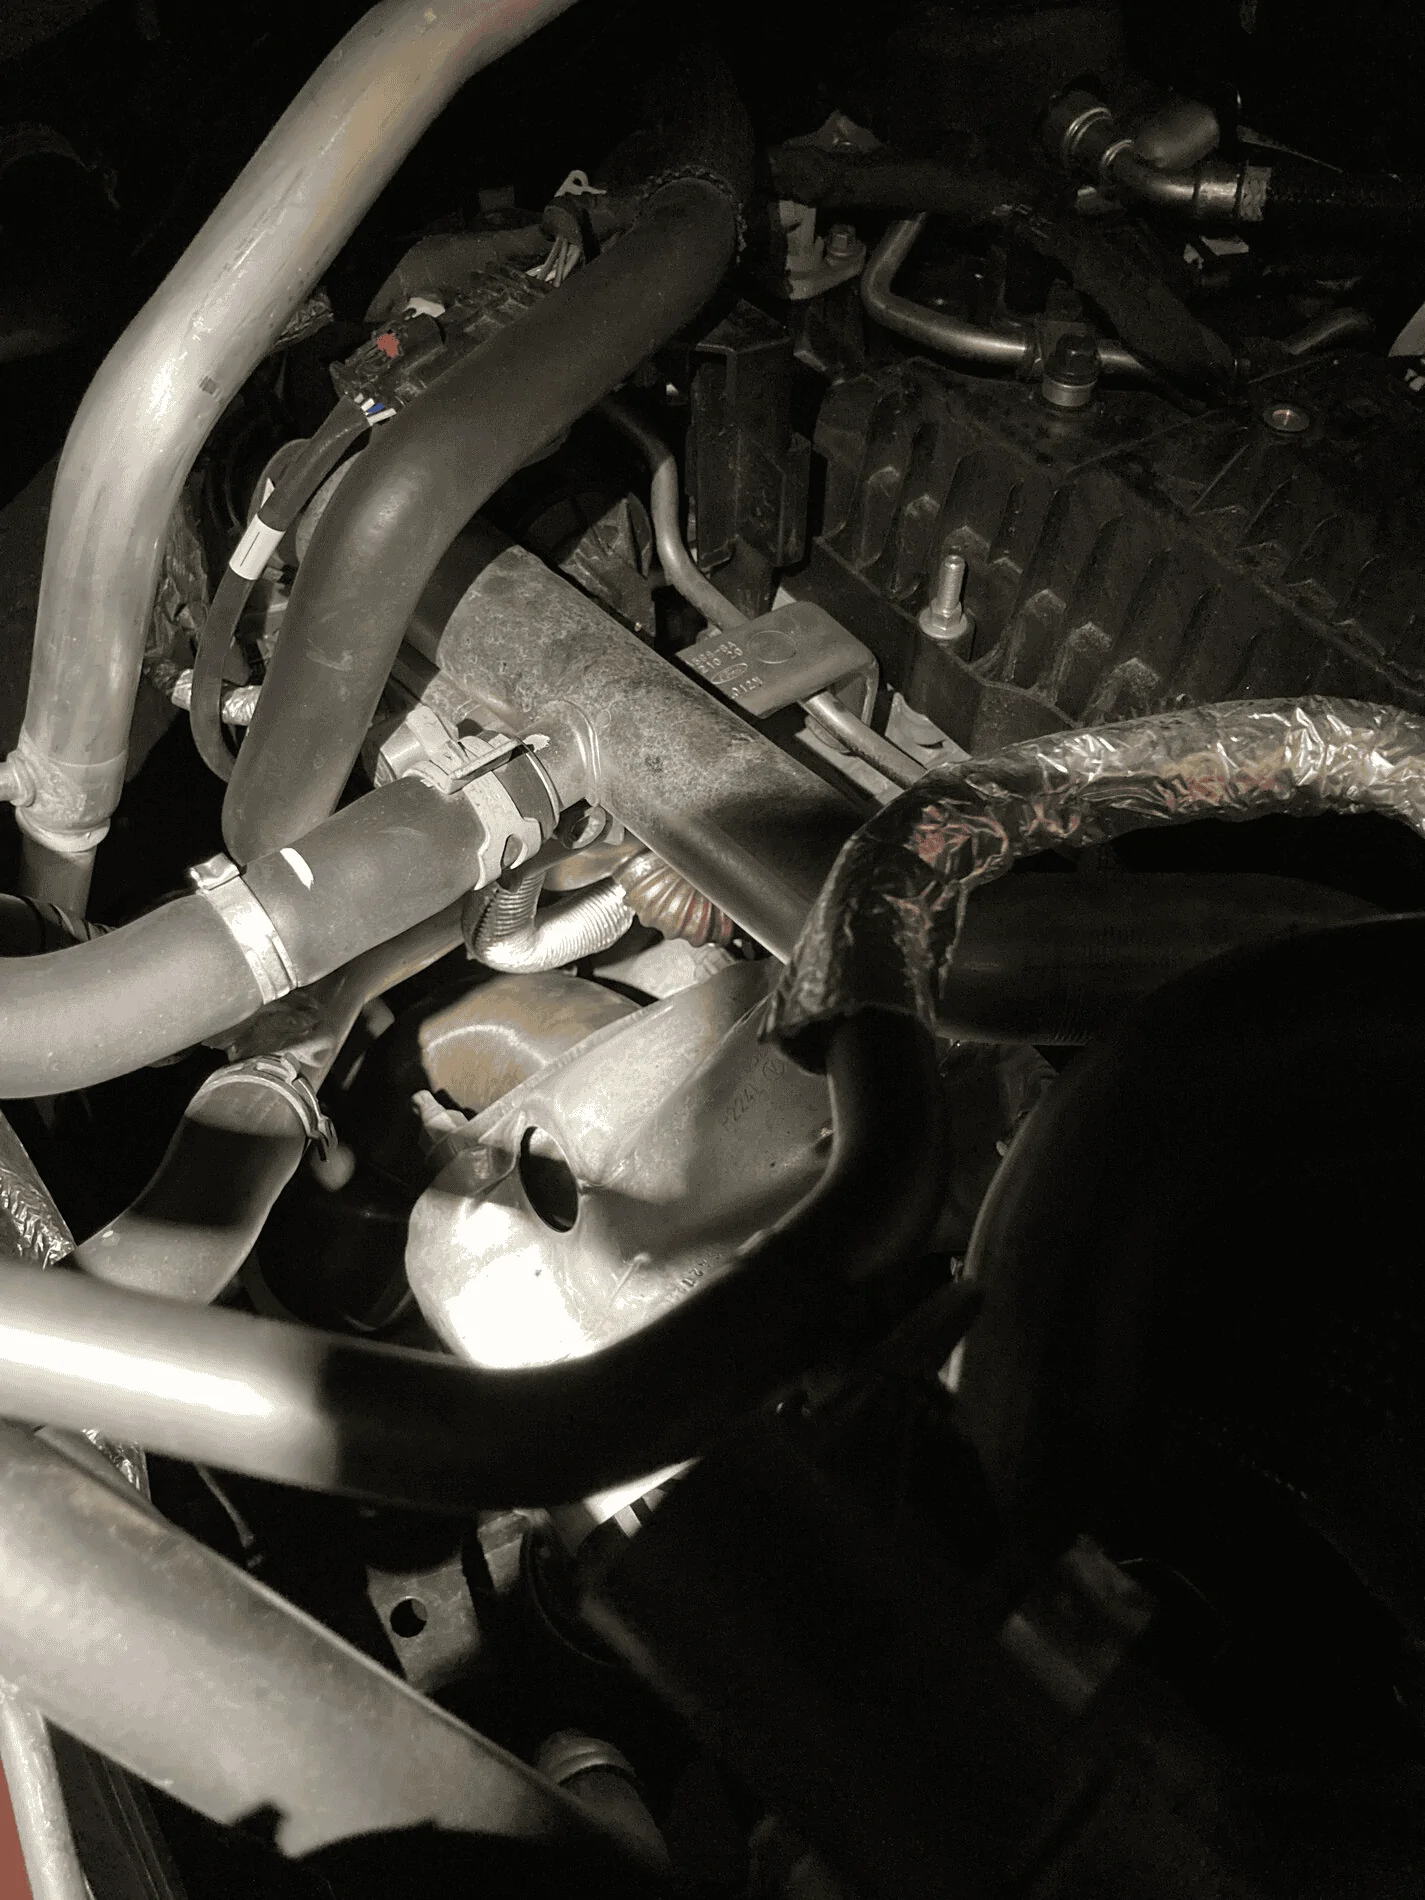
I recently volunteered to be a test mule for the CV Fabrication DP. I was sent a catless version without any installation instructions of any sort and here is what I found. The only difference I have over stock is an MBRP single side exit cat back exhaust. First off removal of the stock DP is bay FAR the worst part of the job breaking loose the hardware is not easy!! My general order of operations is
1. I sprayed penetrating fluid on all hardware before starting
2. Jack up the truck and place on stands
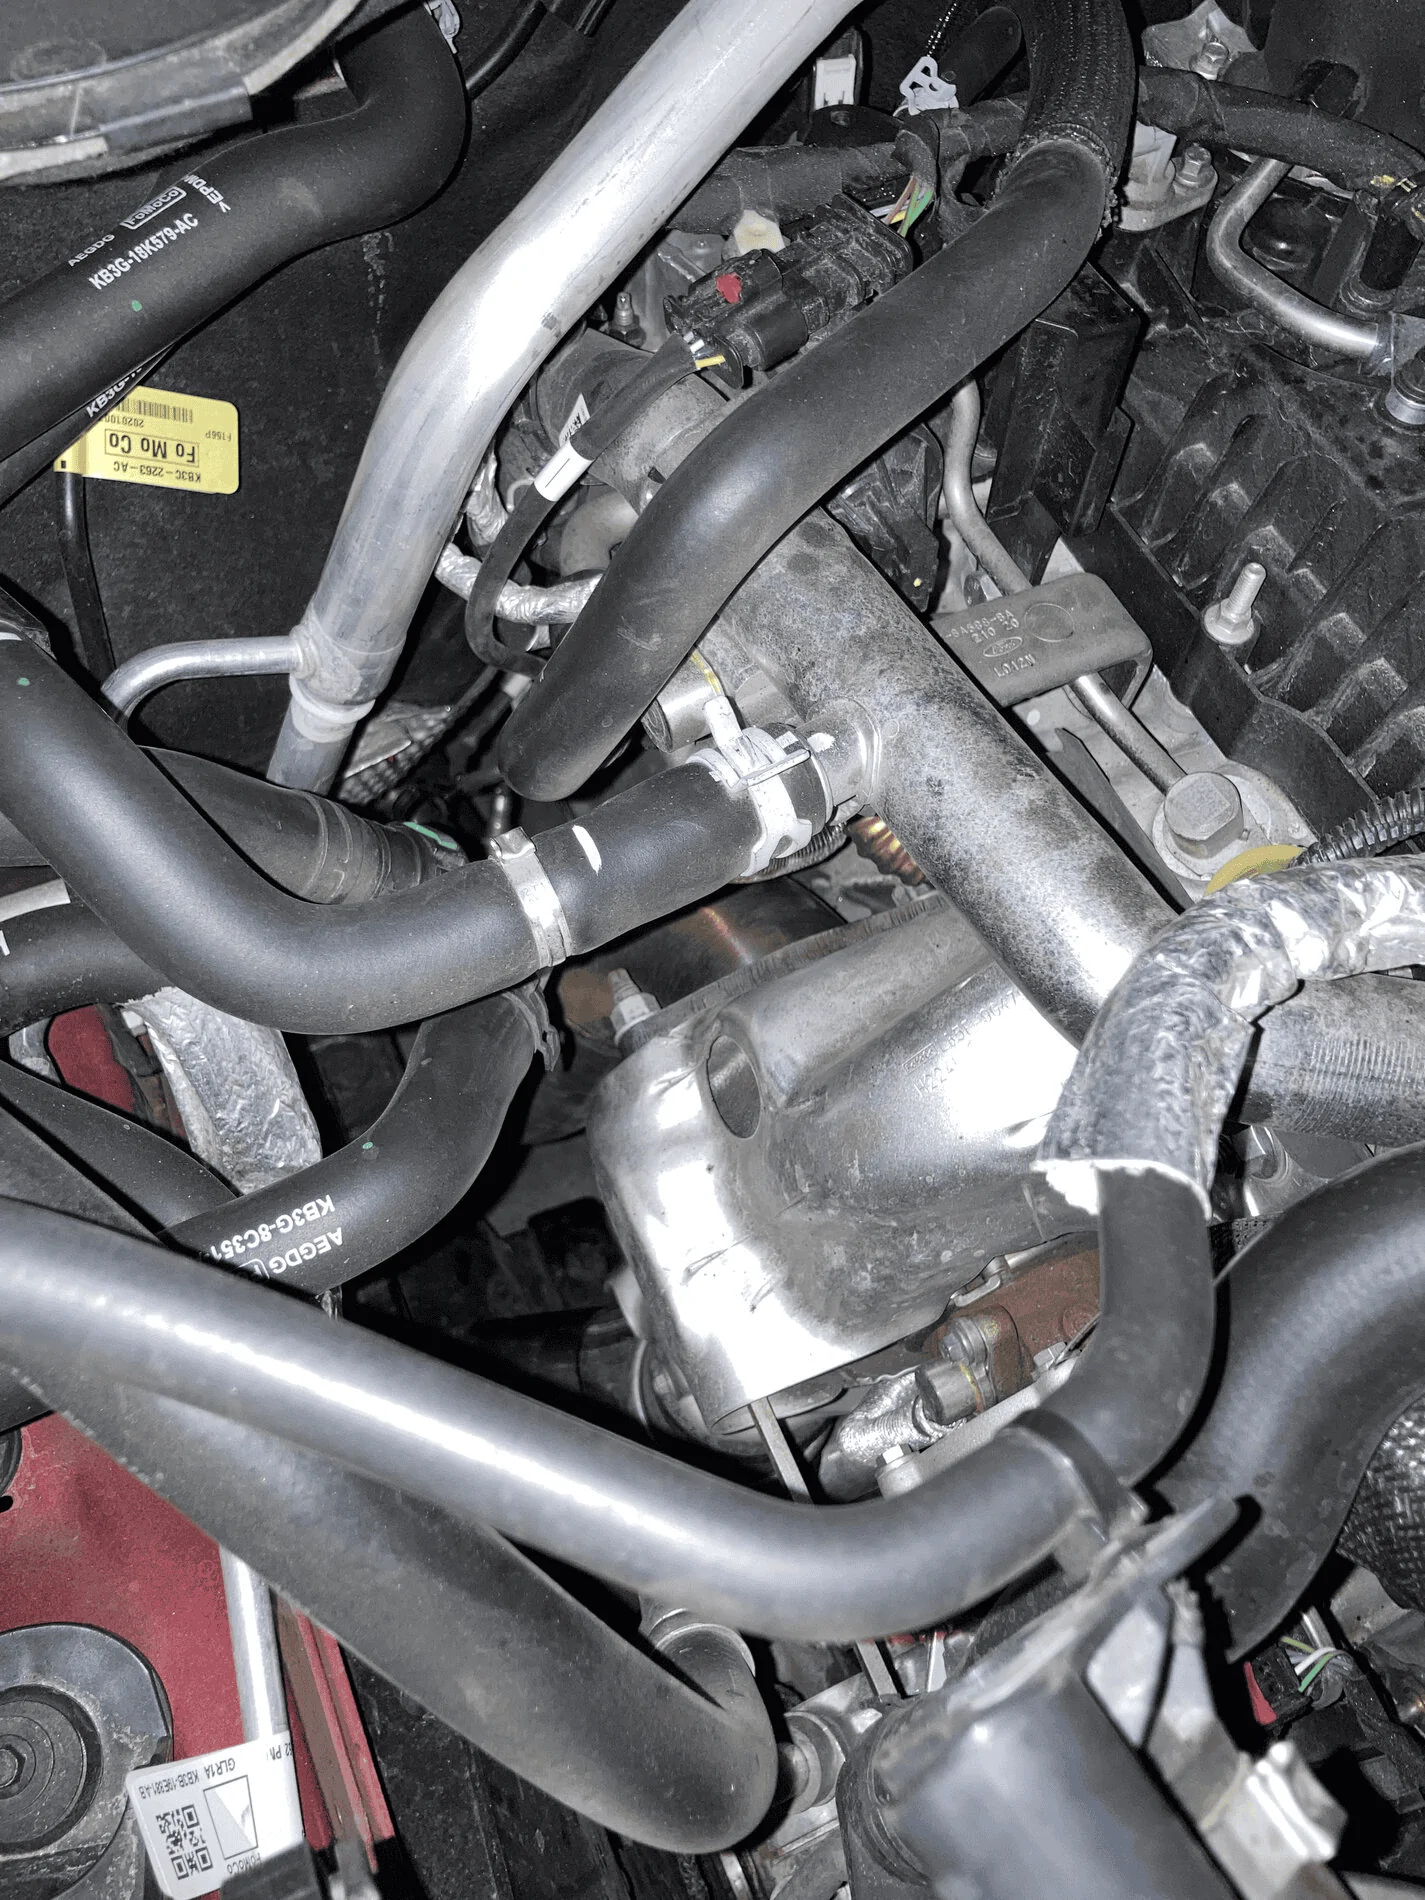
3. Remove exhaust to a point where you can have space between the DP and the straight pipe or the flex if you have stock. Some space is needed to remove the DP from the studs. 15MM deep well socket, 14MM socket, 13MM socket, I also used a 1" extension, swivel head wrench, 15mm open end/box end wrench, a 22mm open end/box end wrench and a phillips head screw driver.
4. Remove the lower nut from the underneath at the turbo
5. Remove the passenger side wheel
6. Remove the passenger side rubber flap leading to the engine bay
7. Both top nuts can be reached from the passenger side wheel well. My wonderful wife had to be my eyes and "steer" me from above to reach the inboard nut.
8. There are clips on both sensors that need to be removed from the adjacent lines they are attached to. There were 1 each on my truck
9. Remove the lower sensor wiring from the passenger side
10. Remove the upper sensor wiring from the top of the engine
11. The DP can be maneuvered slowly out the bottom being careful to not damage the sensor wiring
12. Remove the sensors making sure they go right back in the correct hole. 22mm wrench needed
13. Remove the metal gasket for reuse on the turbo side of the stock DP
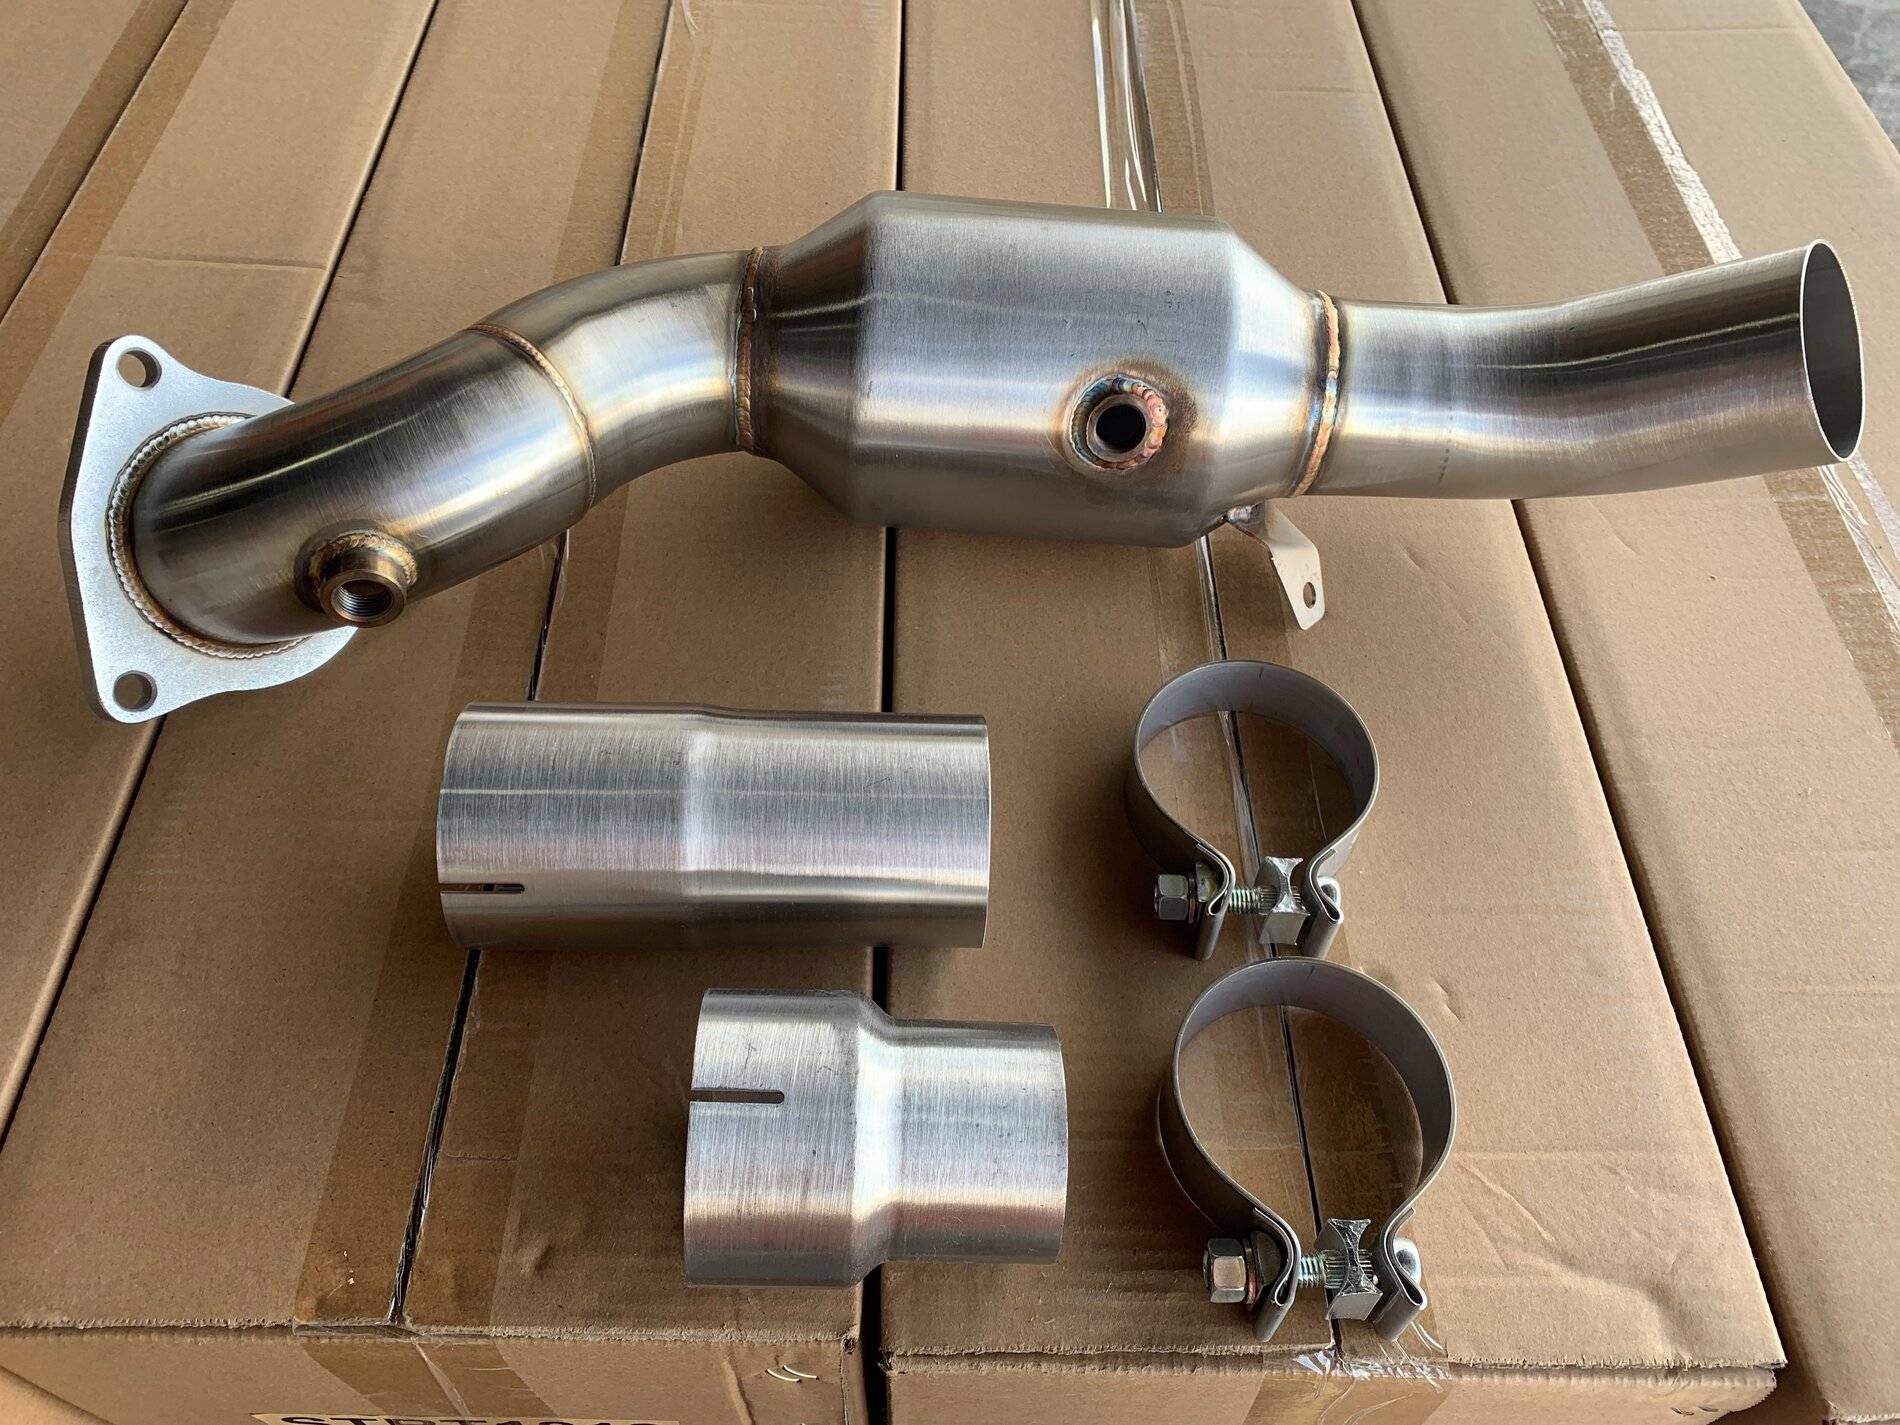
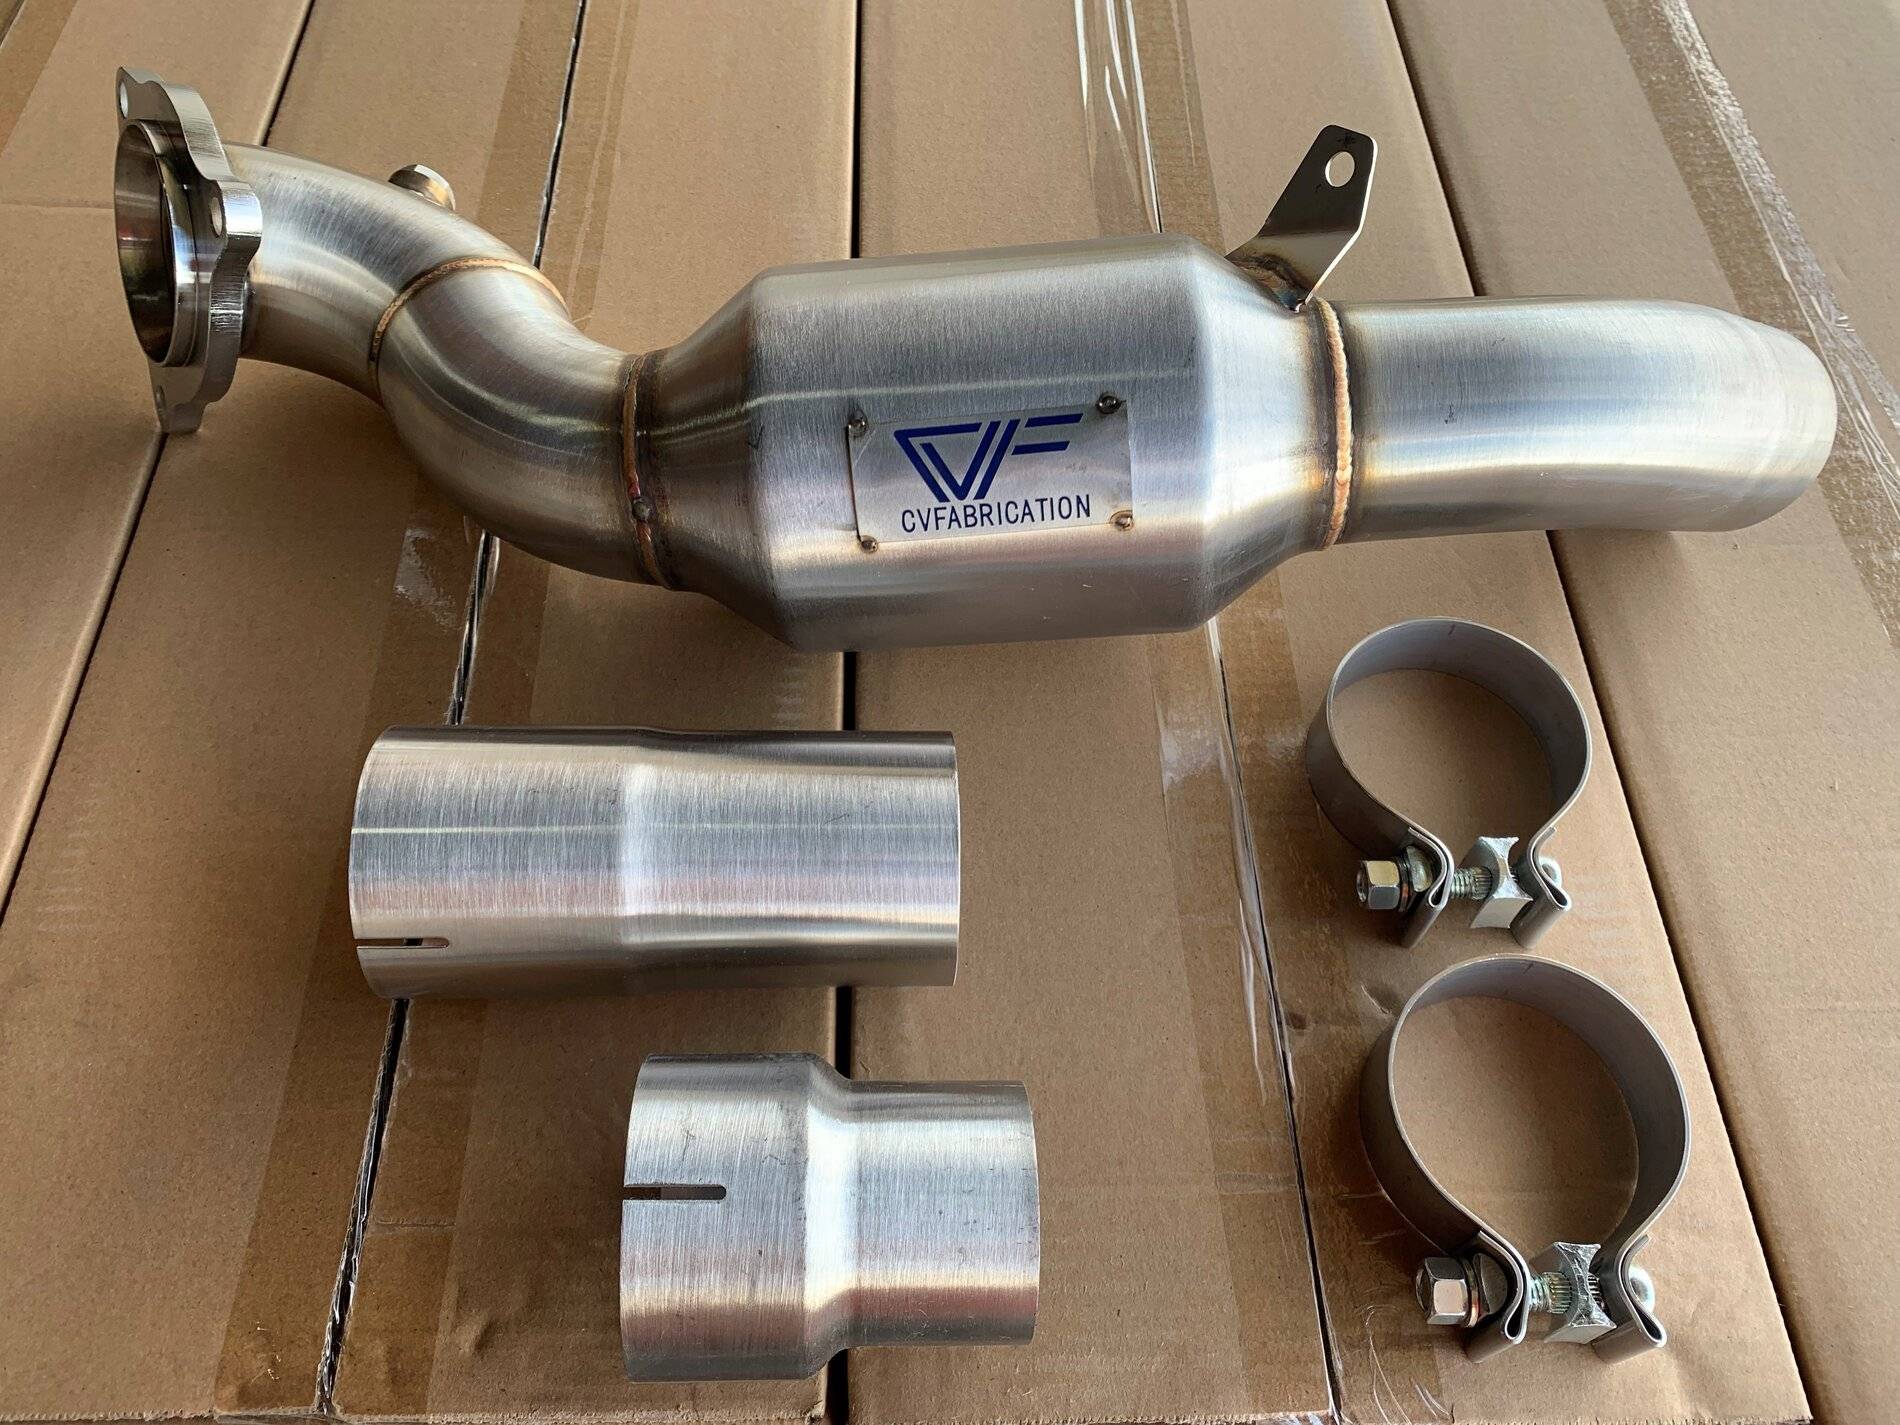
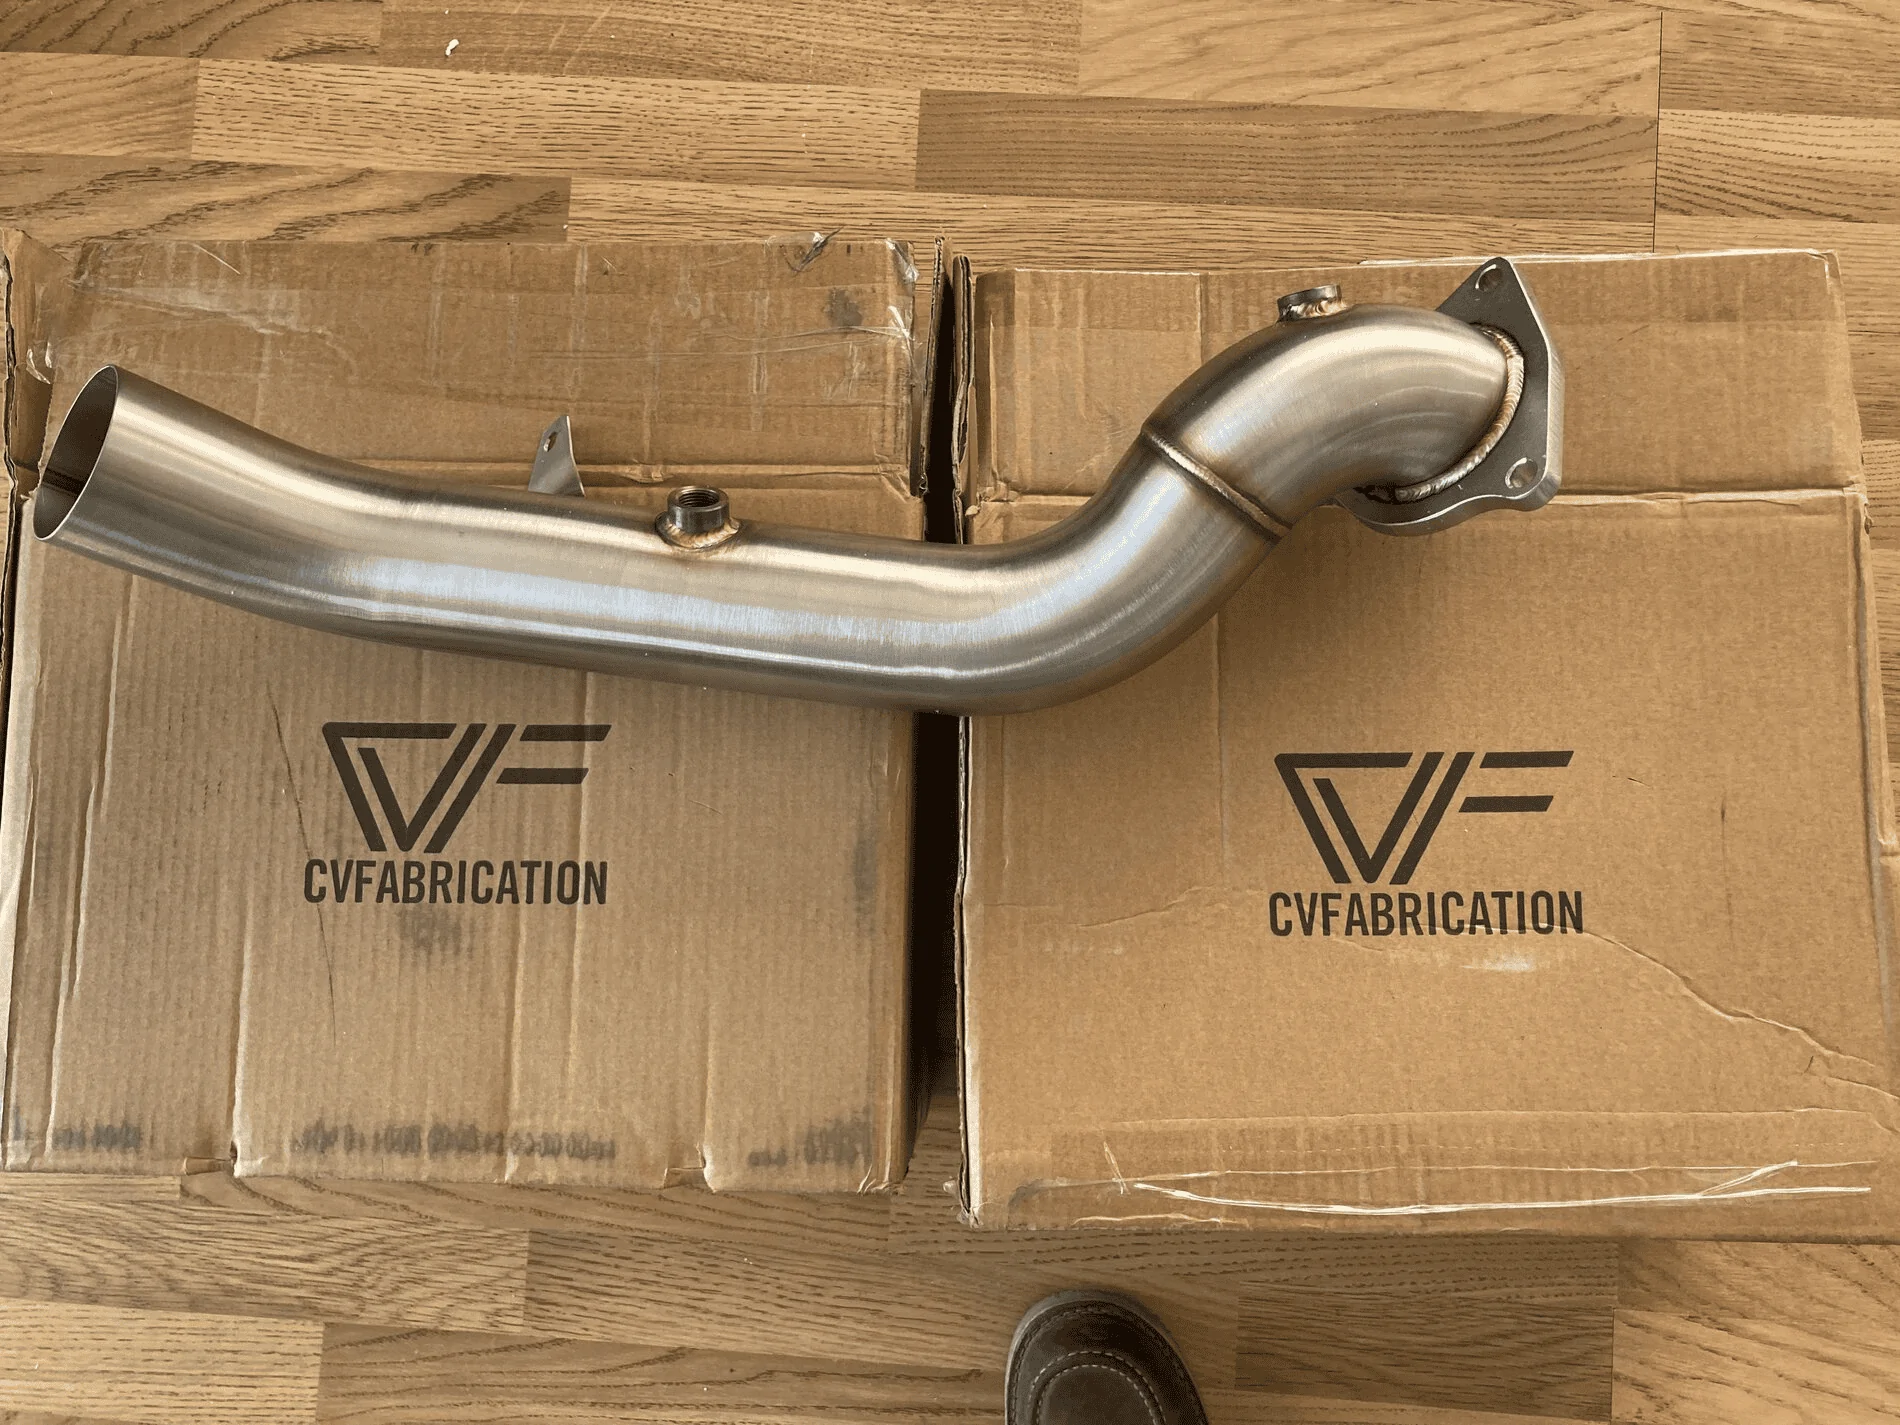
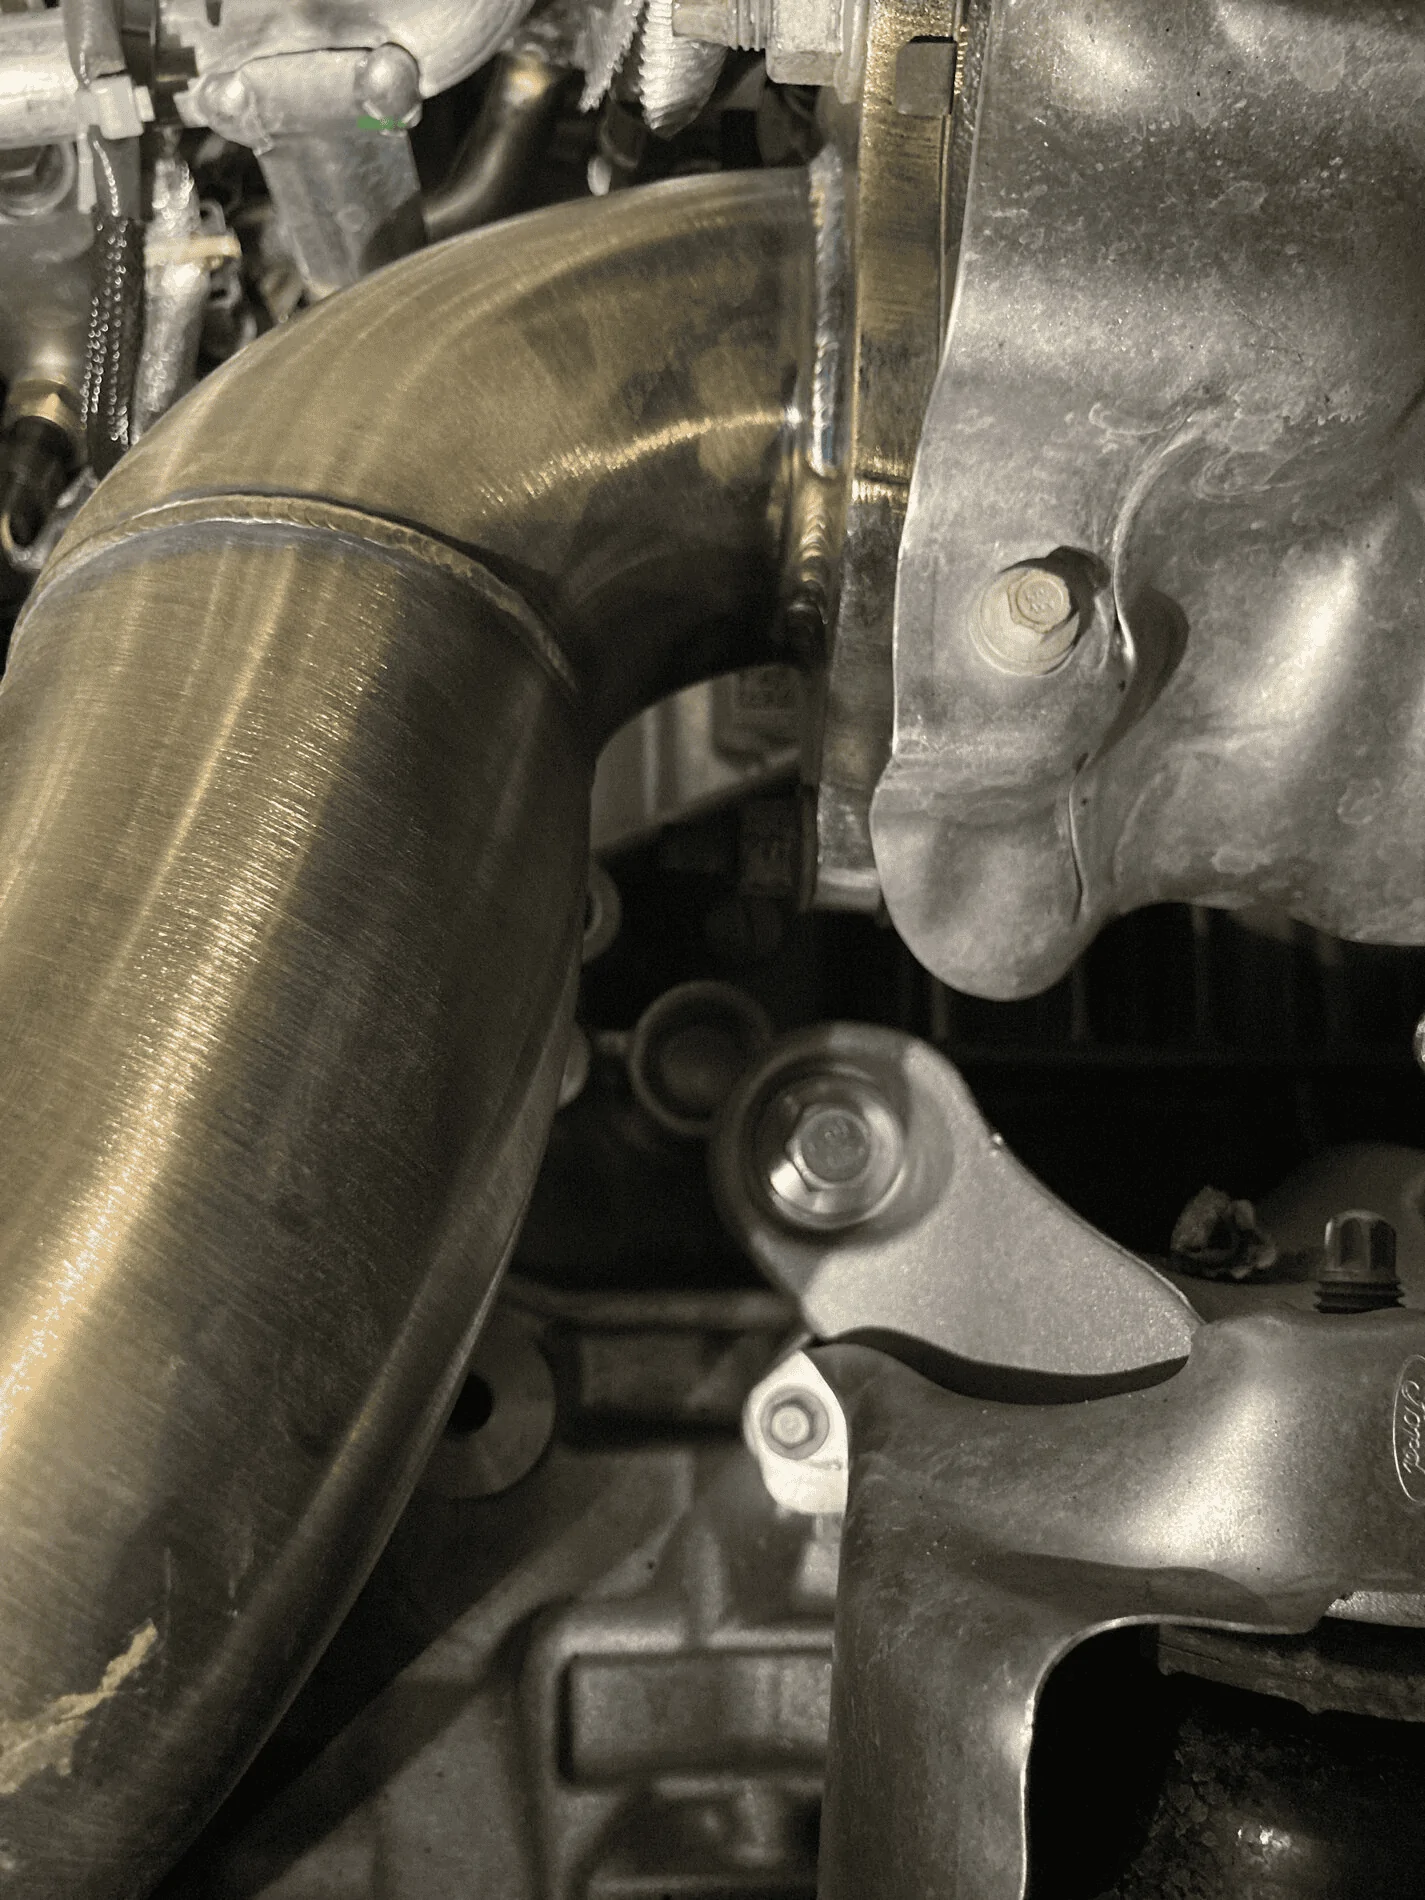
The remaining steps are 13 down to 1 in reverse. Regarding the installation it was very easy and didn't take nearly as long as the removal did. The stock DP was a very large, very heavy piece of metal and the CVF DP was much smaller allowing a ton of more room to maneuver. The entire oval section of pipe is full of catalyst. The test DP is a very nicely fabricated piece of work. I am a custom fabricator by trade and I can really appreciate the work that went into the CVF DP, they did very a nice job. There was not an issue 1 with how the DP fit and functioned. The holes lined up perfectly on all attachment points. The DP outlet lined up very well with my MBRP exhaust which is a rigid connection compared to the stock set up. Jason from CVF was very responsive for the entire process. He even thought ahead and had his technicians "on stand by" in the event I got totally stuck they were there to answer any questions. I am by no means a mechanic but I can do bolt on mods fairly easy and this mod was not bad. Once you get the stock DP removed you are home free. This took me about 2-1/2 hours but had nothing to go on other than trial and error. If any one has any questions please feel free to ask and I will answer as best I can.


1. I sprayed penetrating fluid on all hardware before starting
2. Jack up the truck and place on stands
3. Remove exhaust to a point where you can have space between the DP and the straight pipe or the flex if you have stock. Some space is needed to remove the DP from the studs. 15MM deep well socket, 14MM socket, 13MM socket, I also used a 1" extension, swivel head wrench, 15mm open end/box end wrench, a 22mm open end/box end wrench and a phillips head screw driver.
4. Remove the lower nut from the underneath at the turbo
5. Remove the passenger side wheel
6. Remove the passenger side rubber flap leading to the engine bay
7. Both top nuts can be reached from the passenger side wheel well. My wonderful wife had to be my eyes and "steer" me from above to reach the inboard nut.
8. There are clips on both sensors that need to be removed from the adjacent lines they are attached to. There were 1 each on my truck
9. Remove the lower sensor wiring from the passenger side
10. Remove the upper sensor wiring from the top of the engine
11. The DP can be maneuvered slowly out the bottom being careful to not damage the sensor wiring
12. Remove the sensors making sure they go right back in the correct hole. 22mm wrench needed
13. Remove the metal gasket for reuse on the turbo side of the stock DP
The remaining steps are 13 down to 1 in reverse. Regarding the installation it was very easy and didn't take nearly as long as the removal did. The stock DP was a very large, very heavy piece of metal and the CVF DP was much smaller allowing a ton of more room to maneuver. The entire oval section of pipe is full of catalyst. The test DP is a very nicely fabricated piece of work. I am a custom fabricator by trade and I can really appreciate the work that went into the CVF DP, they did very a nice job. There was not an issue 1 with how the DP fit and functioned. The holes lined up perfectly on all attachment points. The DP outlet lined up very well with my MBRP exhaust which is a rigid connection compared to the stock set up. Jason from CVF was very responsive for the entire process. He even thought ahead and had his technicians "on stand by" in the event I got totally stuck they were there to answer any questions. I am by no means a mechanic but I can do bolt on mods fairly easy and this mod was not bad. Once you get the stock DP removed you are home free. This took me about 2-1/2 hours but had nothing to go on other than trial and error. If any one has any questions please feel free to ask and I will answer as best I can.

Sponsored