Sponsored

Borne Off-Road Snorkel R&D Thread

Status
Not open for further replies.

Bexarwes

New Member
First Name
Wesley
Joined
Mar 6, 2022
Threads
0
Messages
2
Reaction score
10
Location
Texas
Vehicle(s)
2021 Ford Ranger XLT
Looks awesome! Is that vinyl wrap on your truck? Also, nice job on the car port and the cool down spout...?
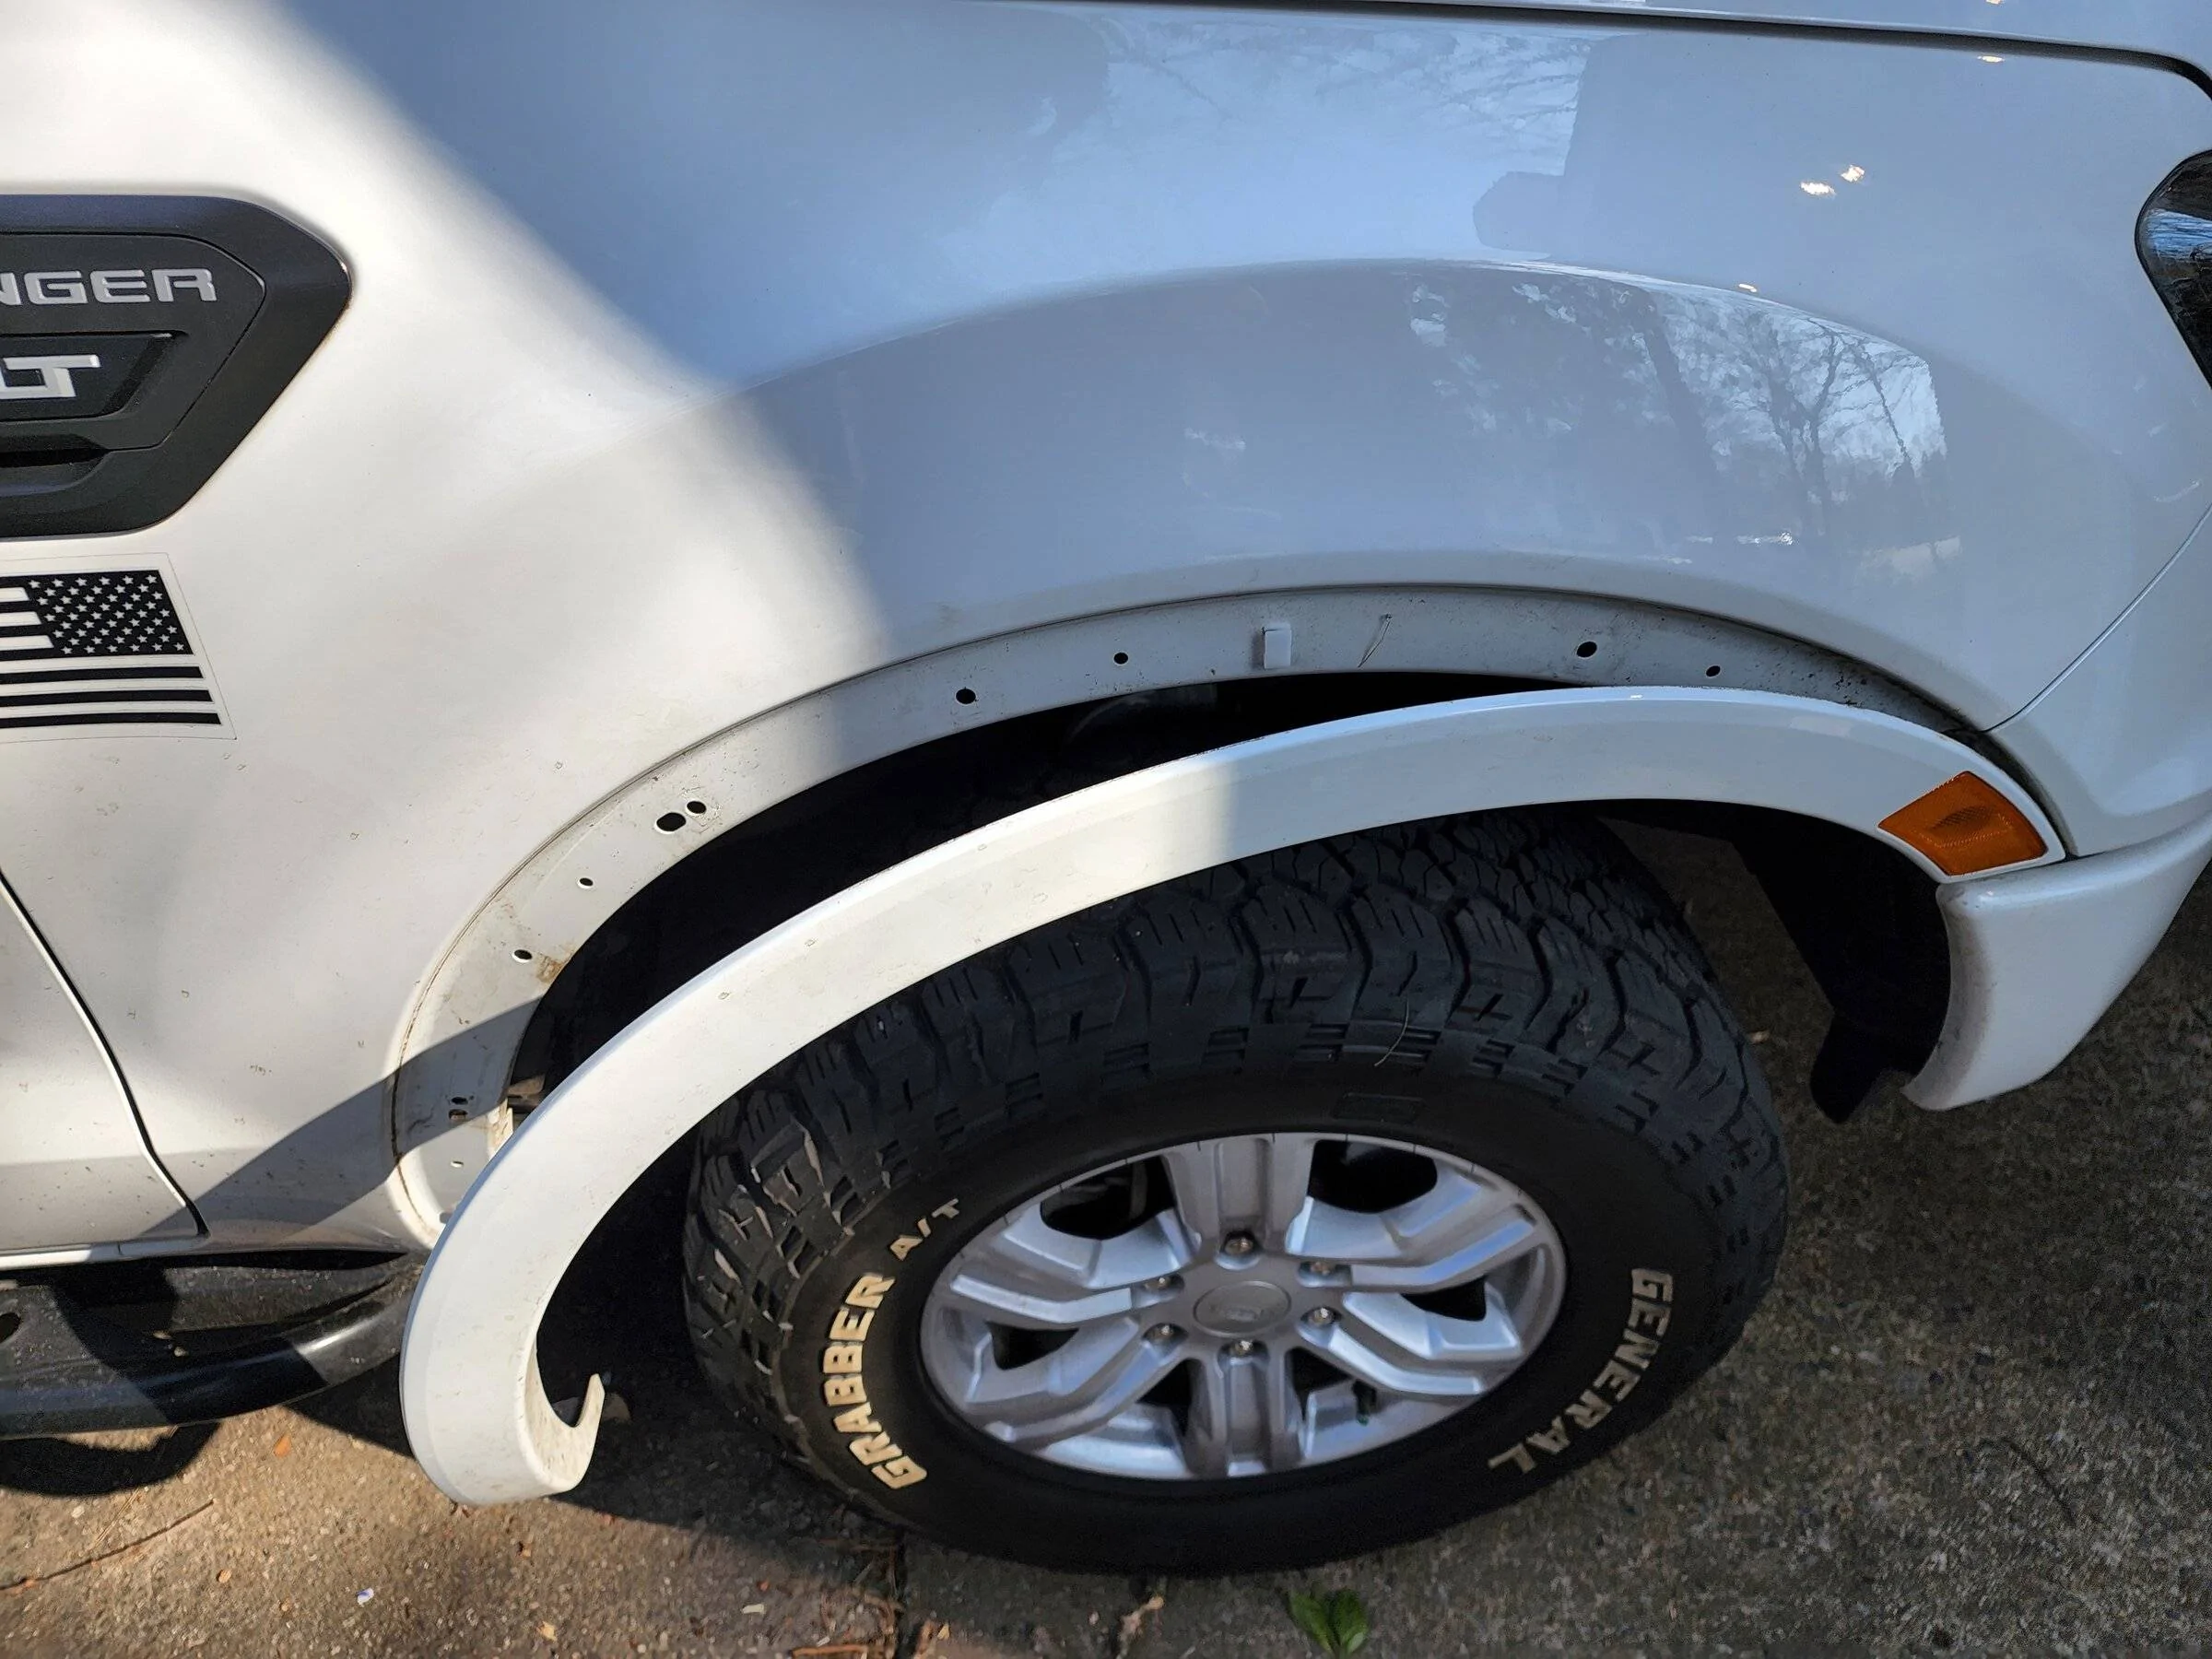
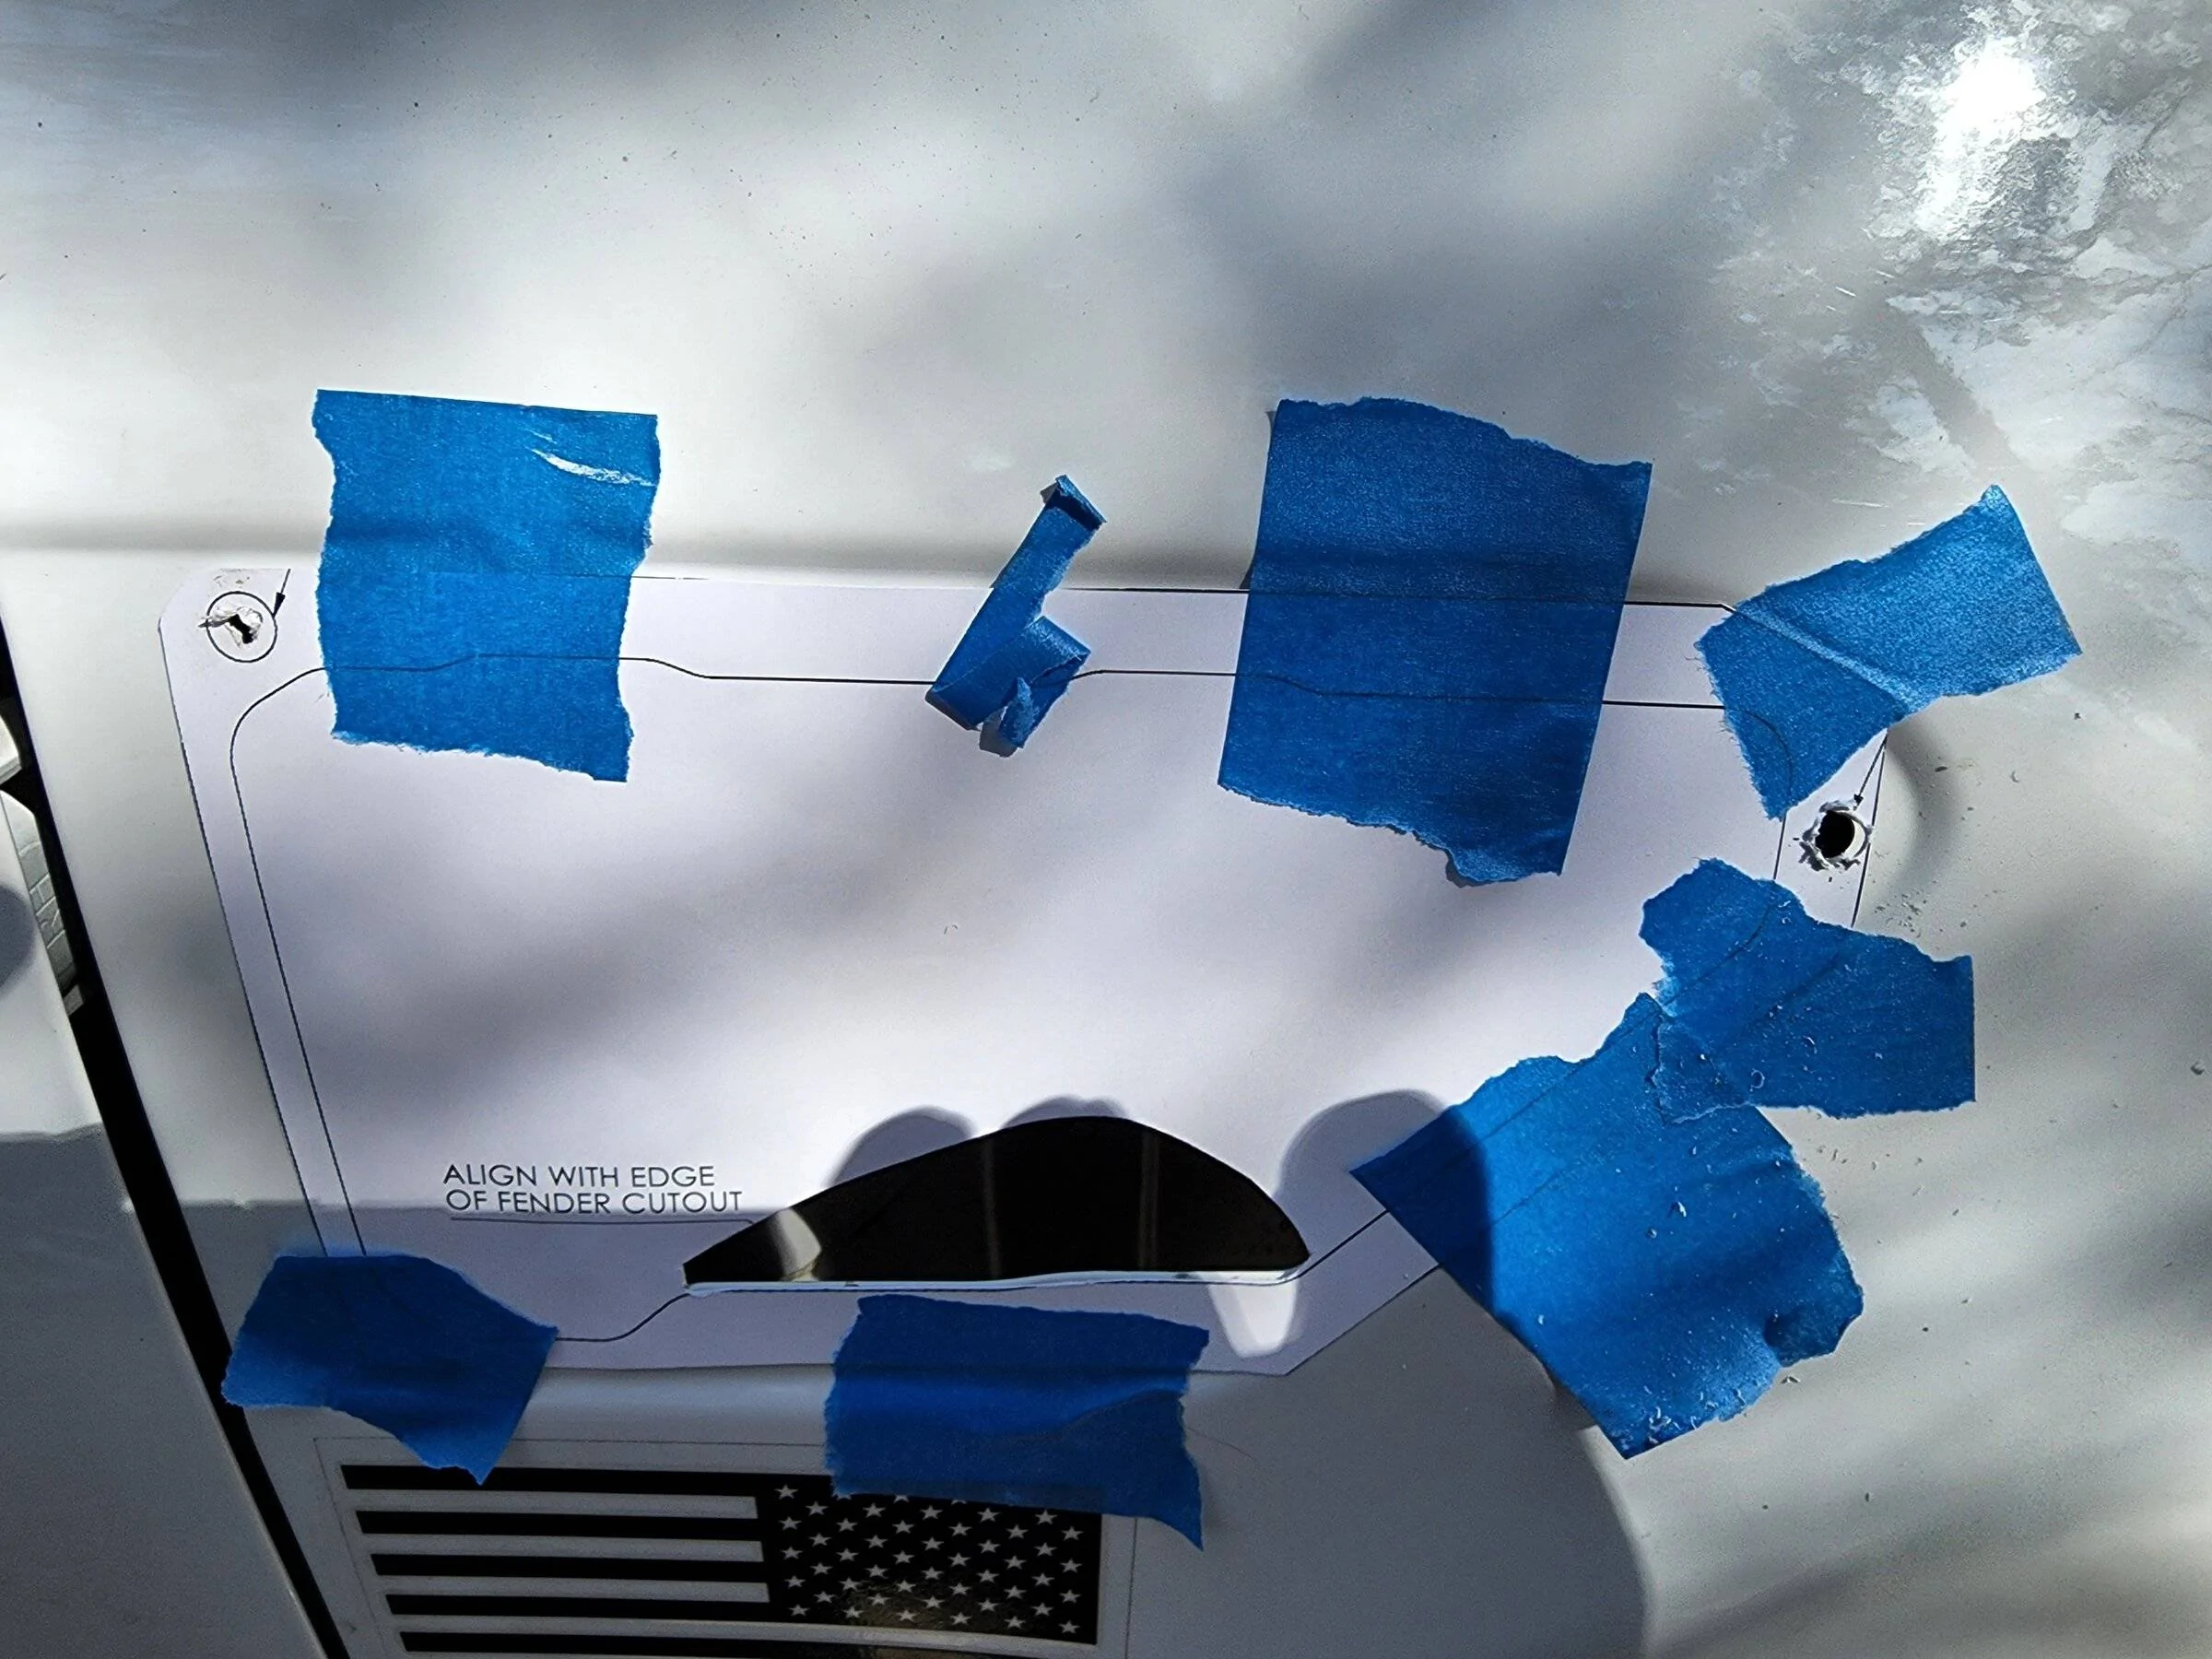
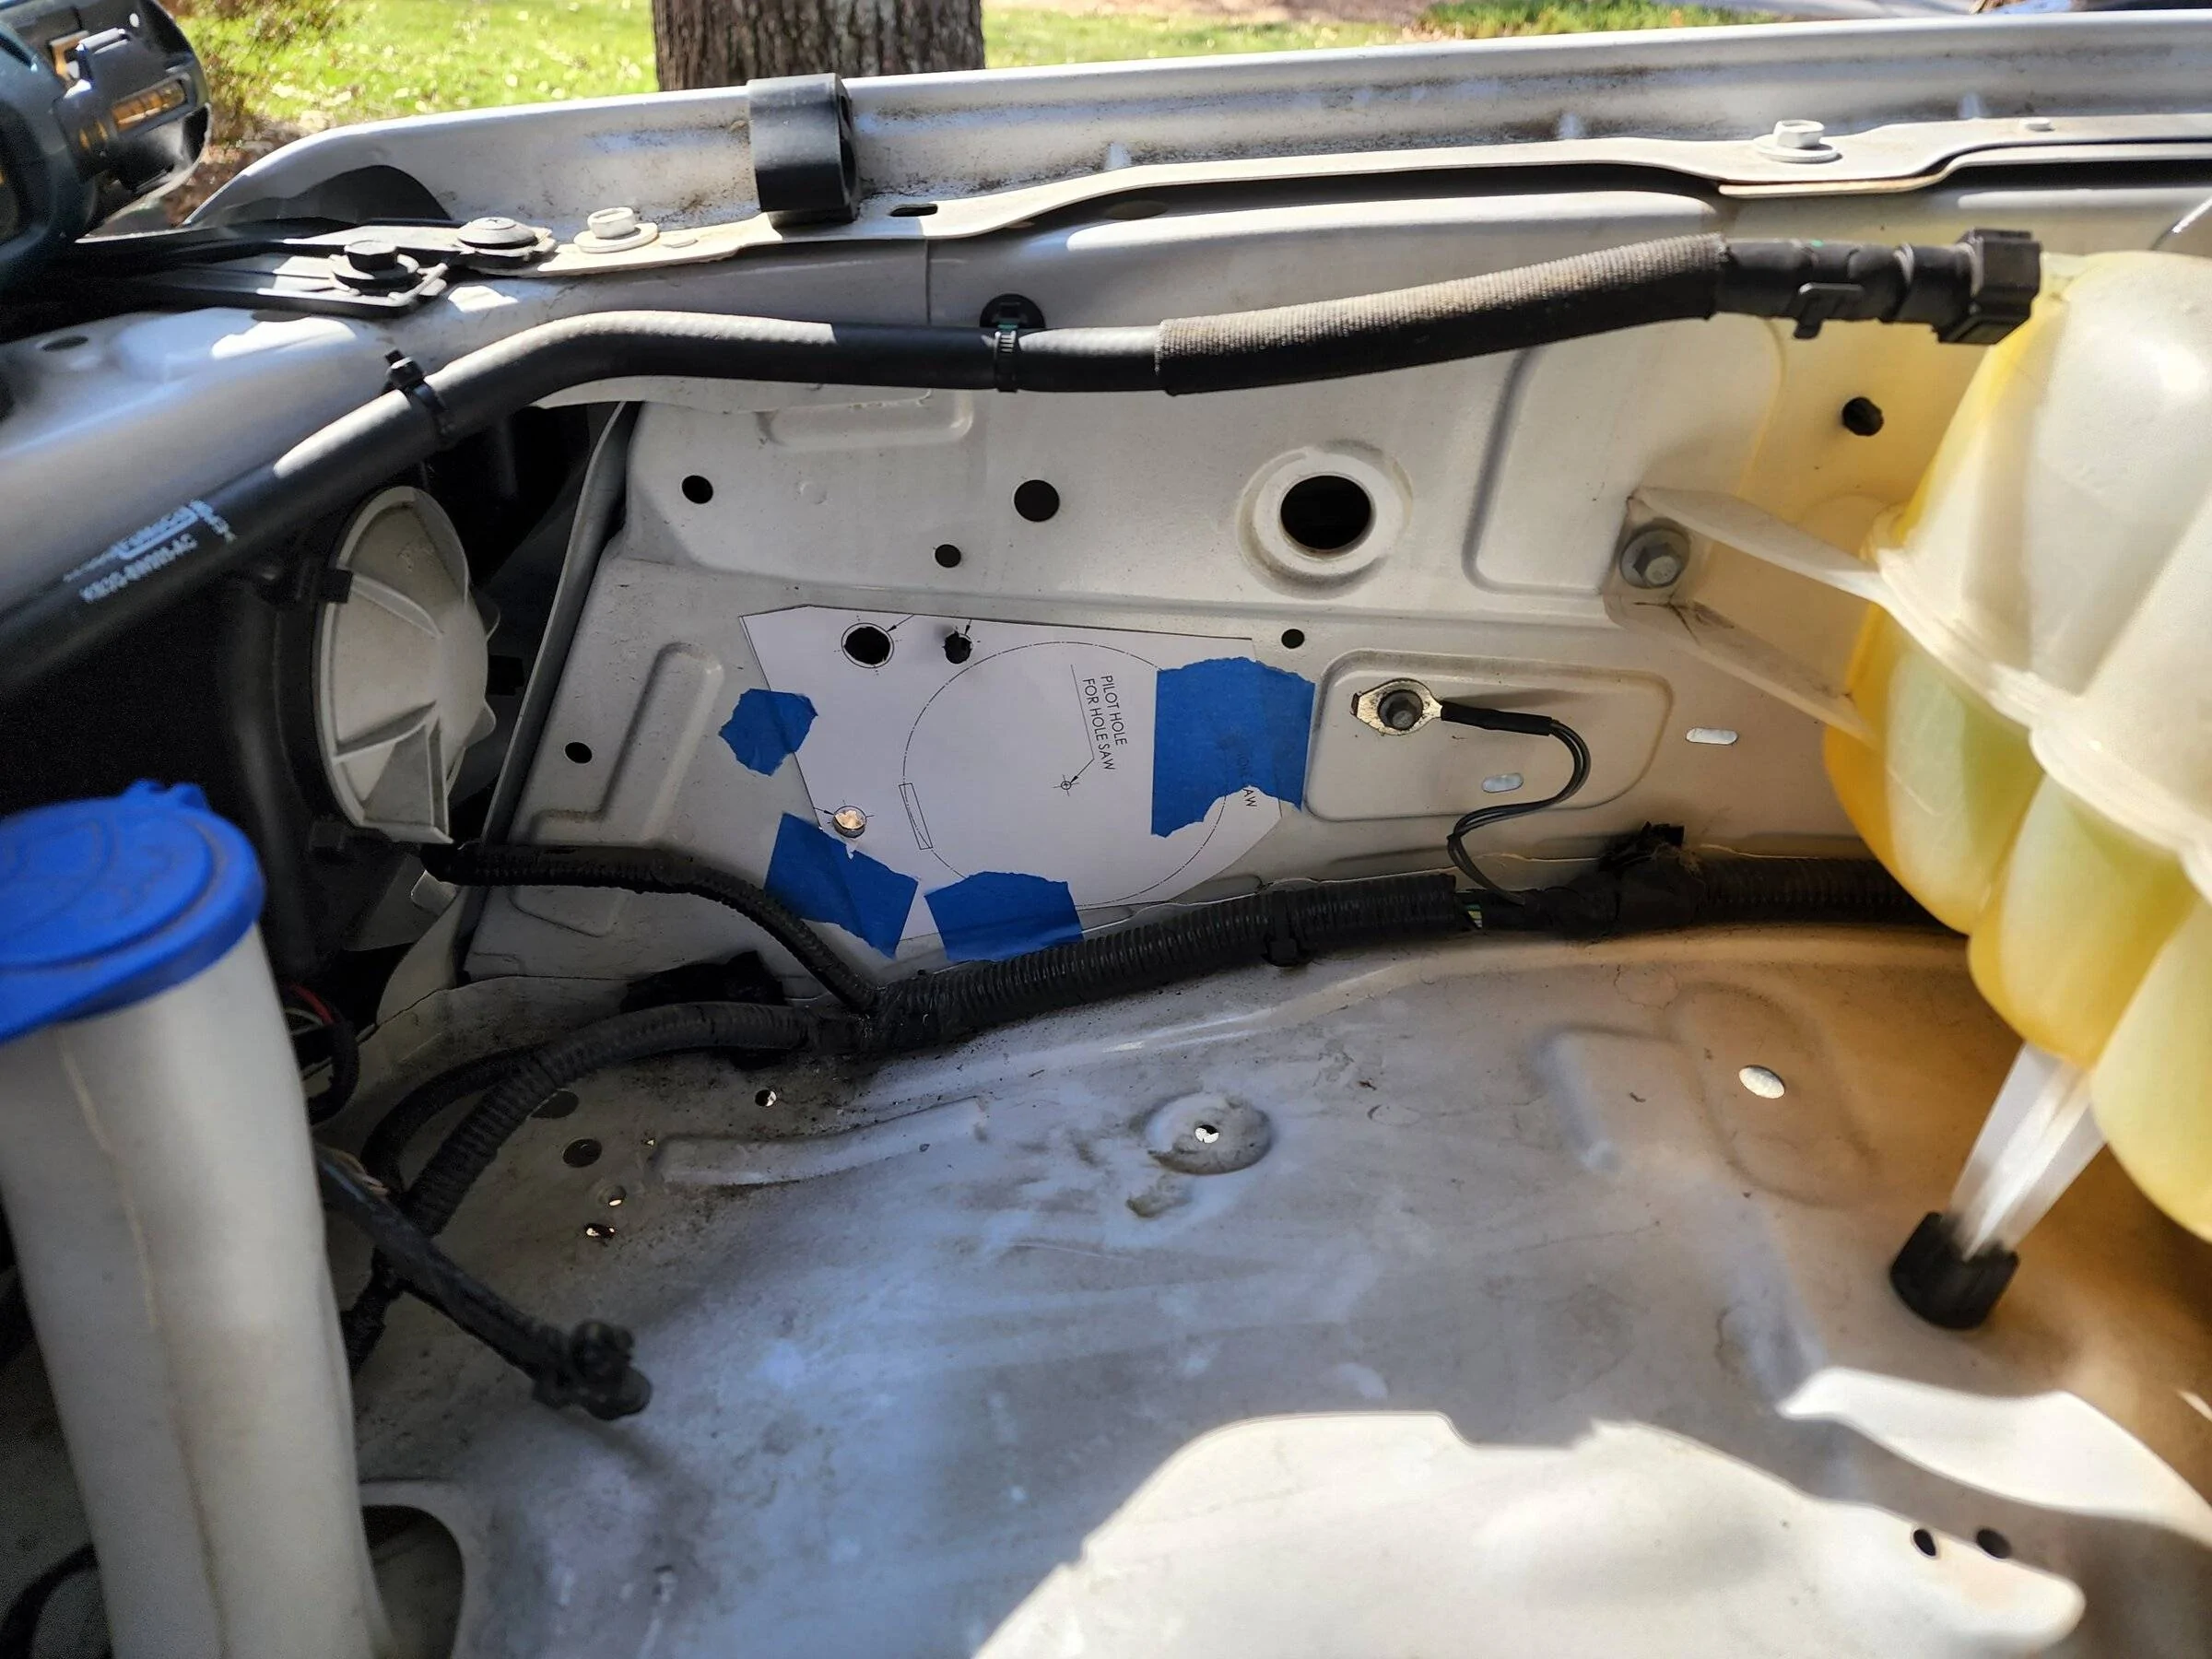
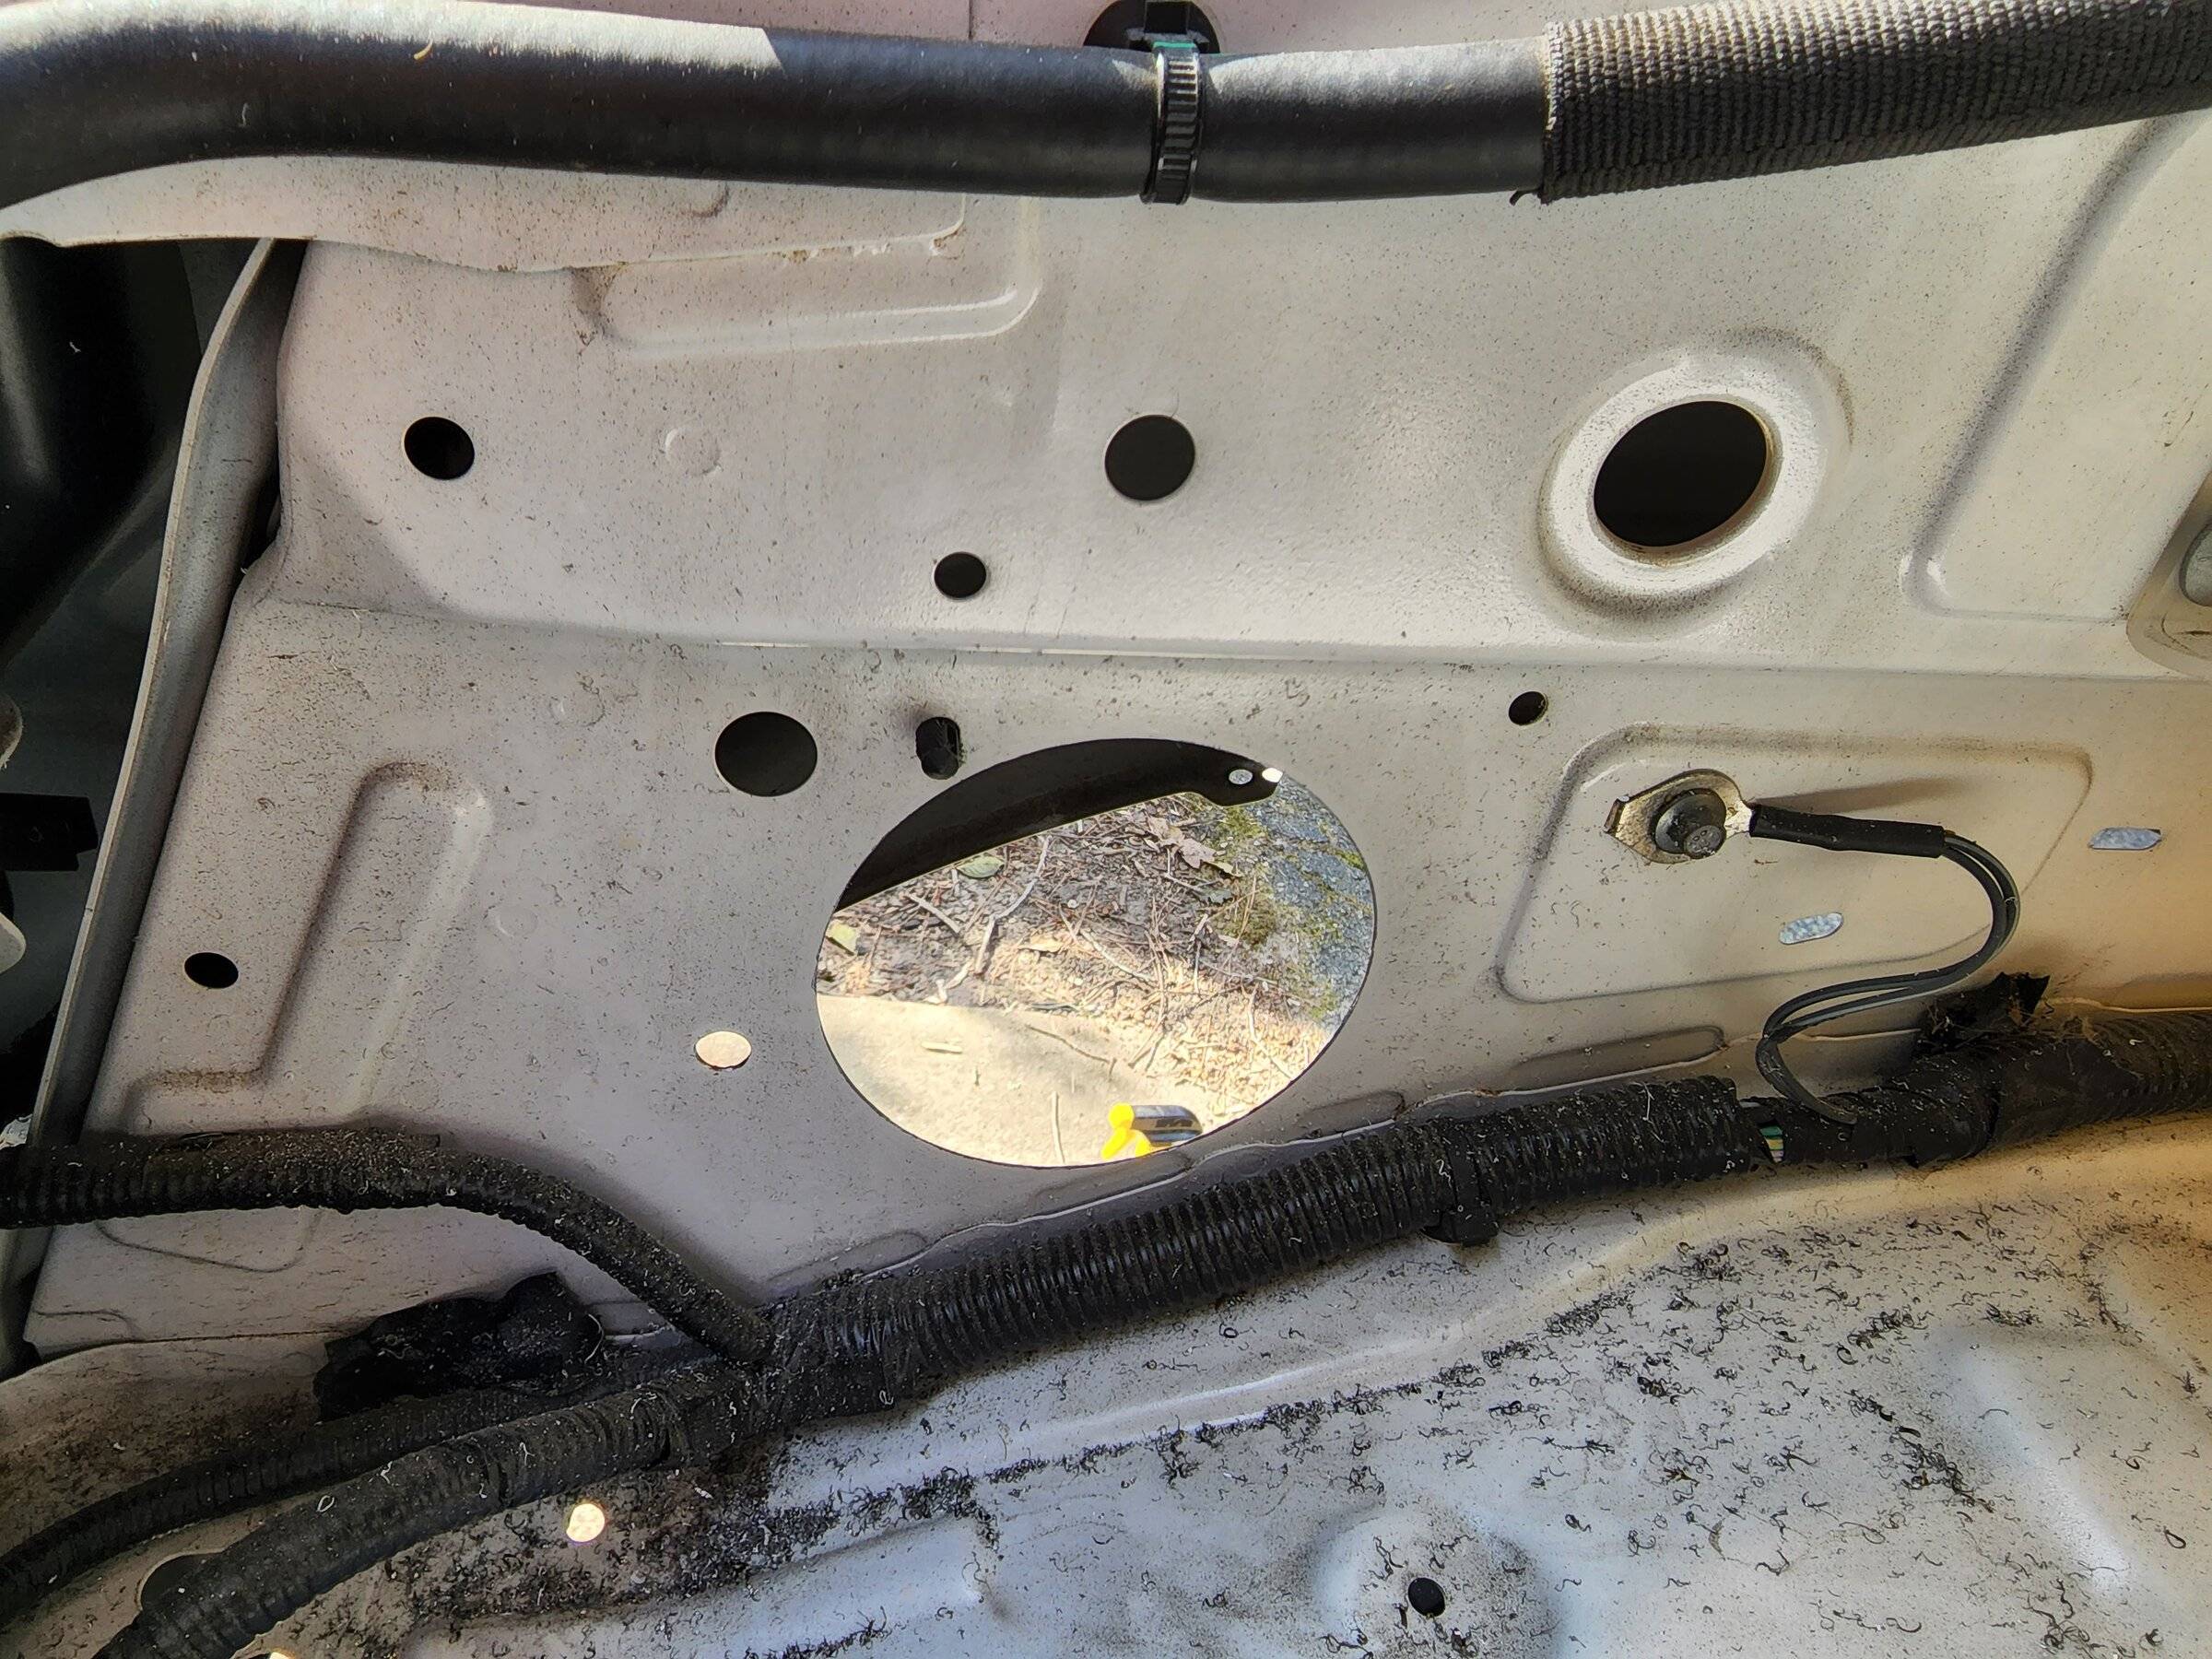
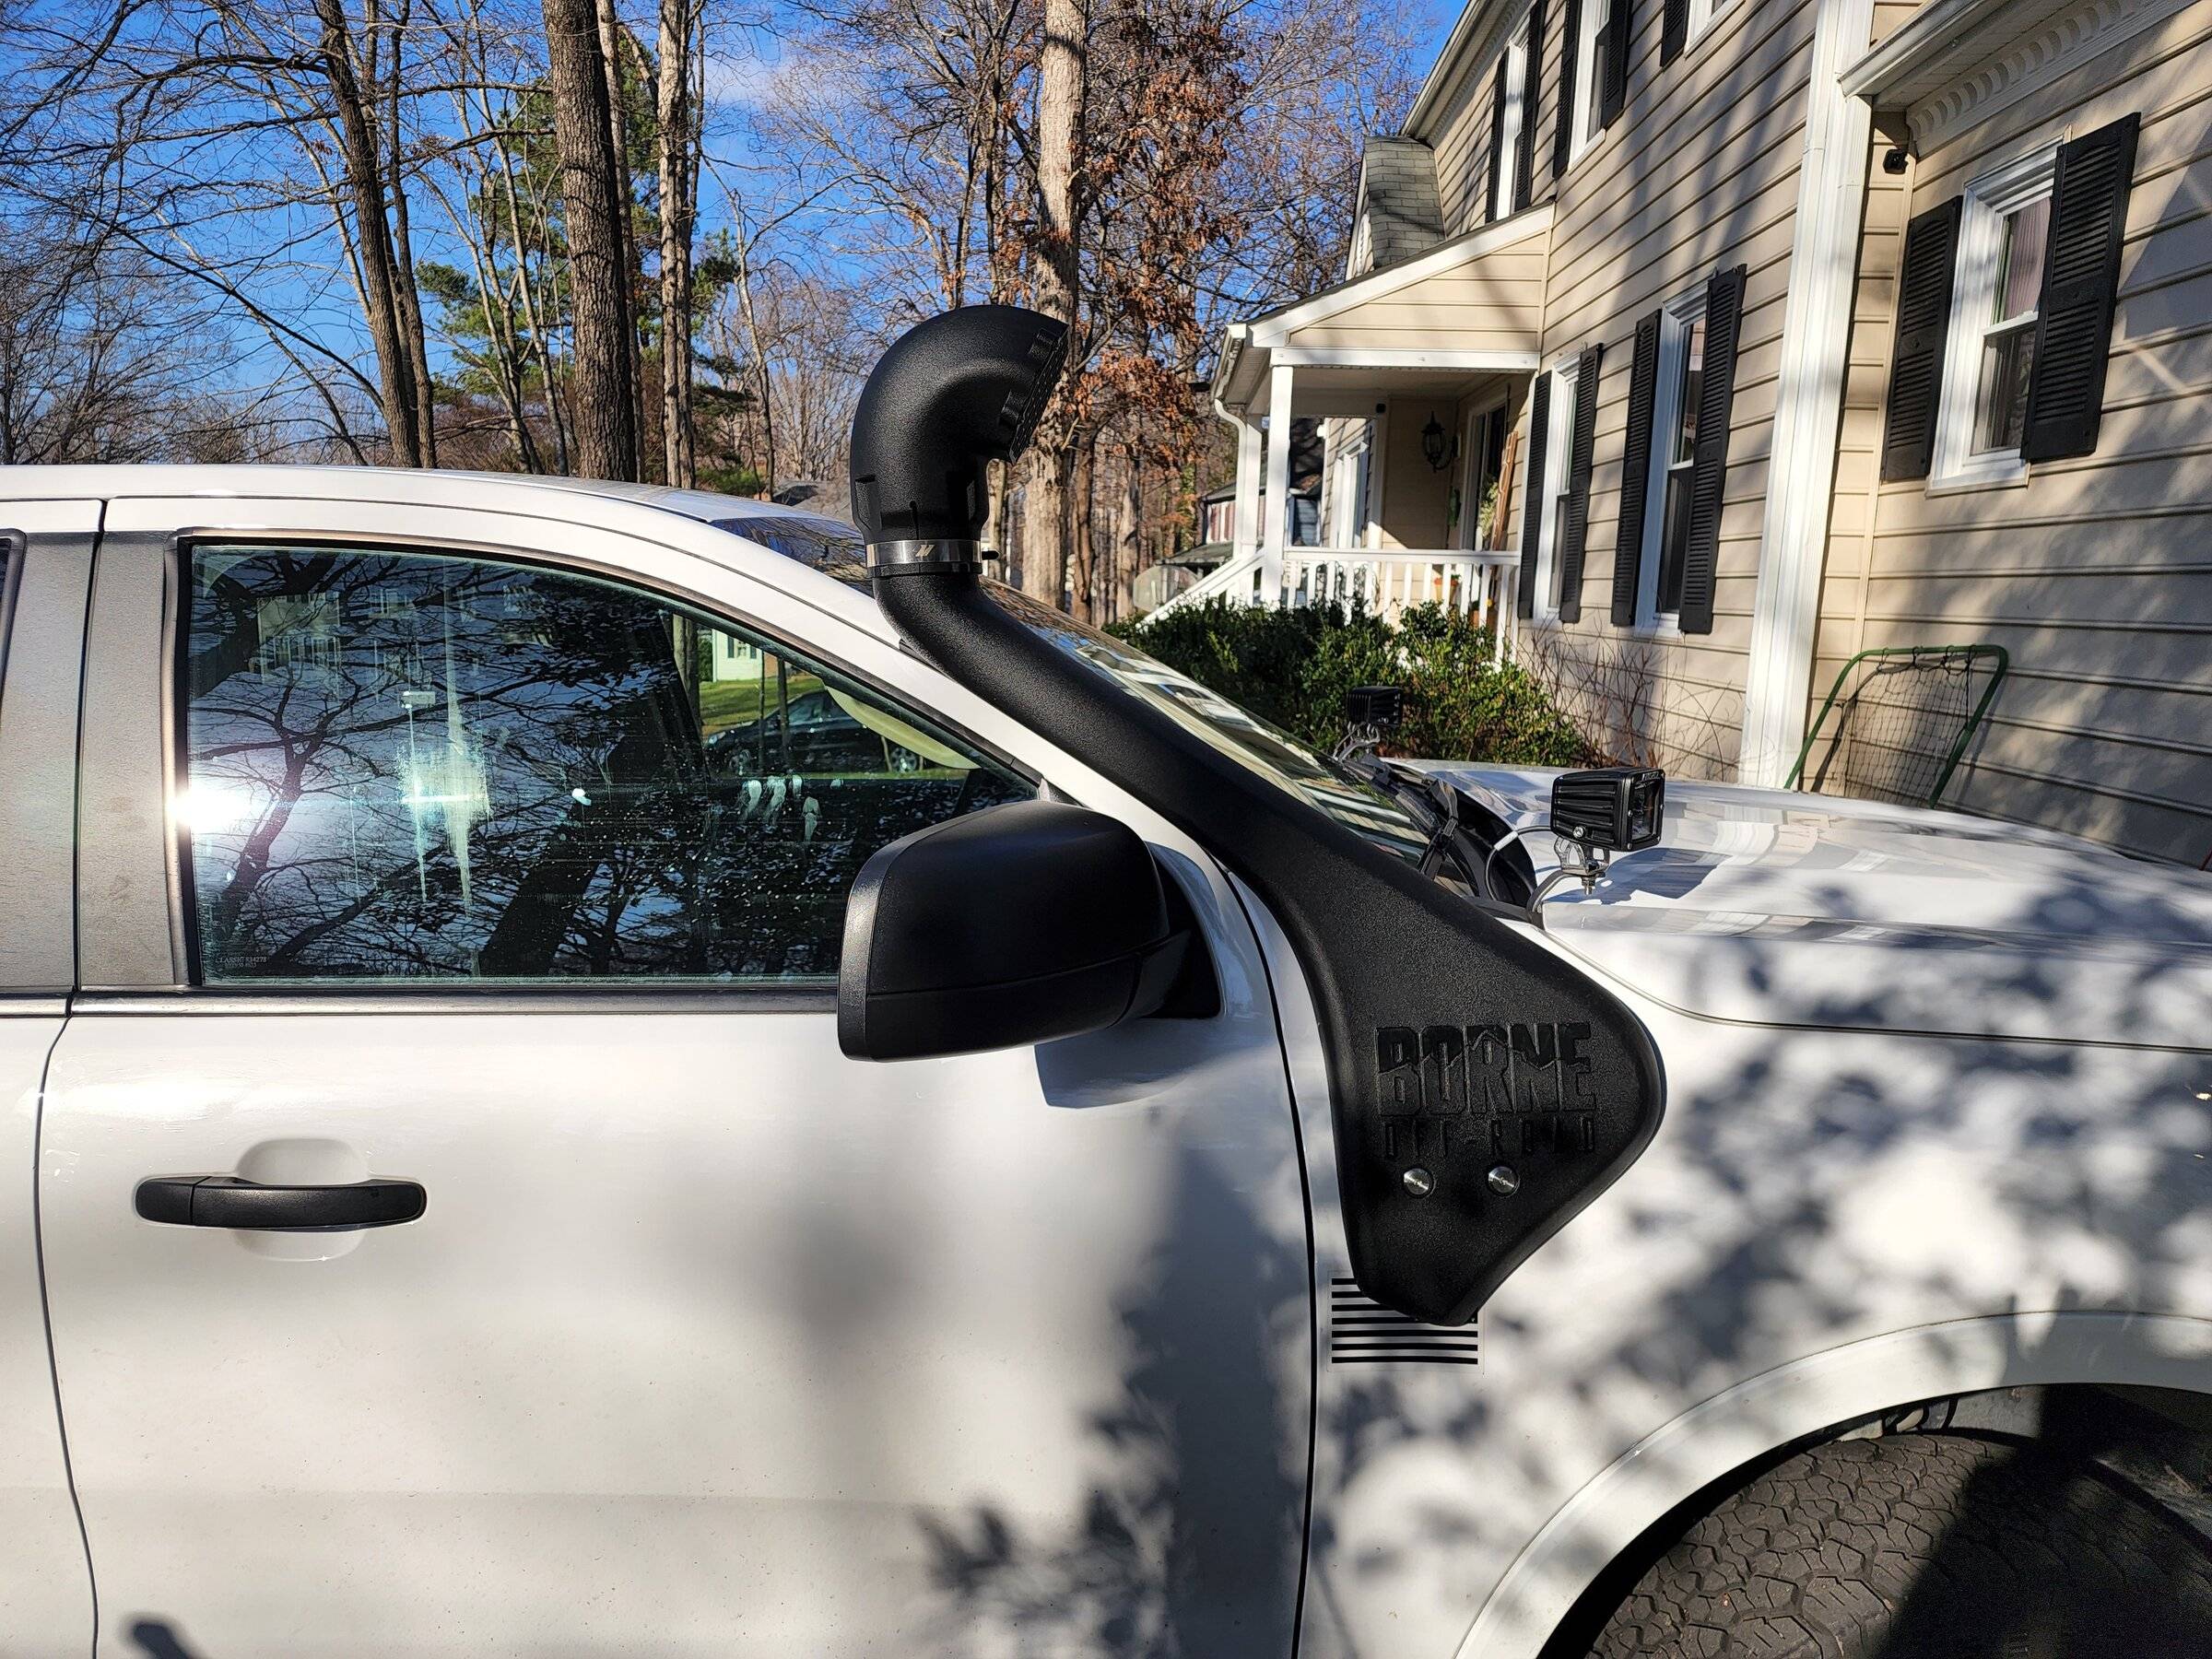
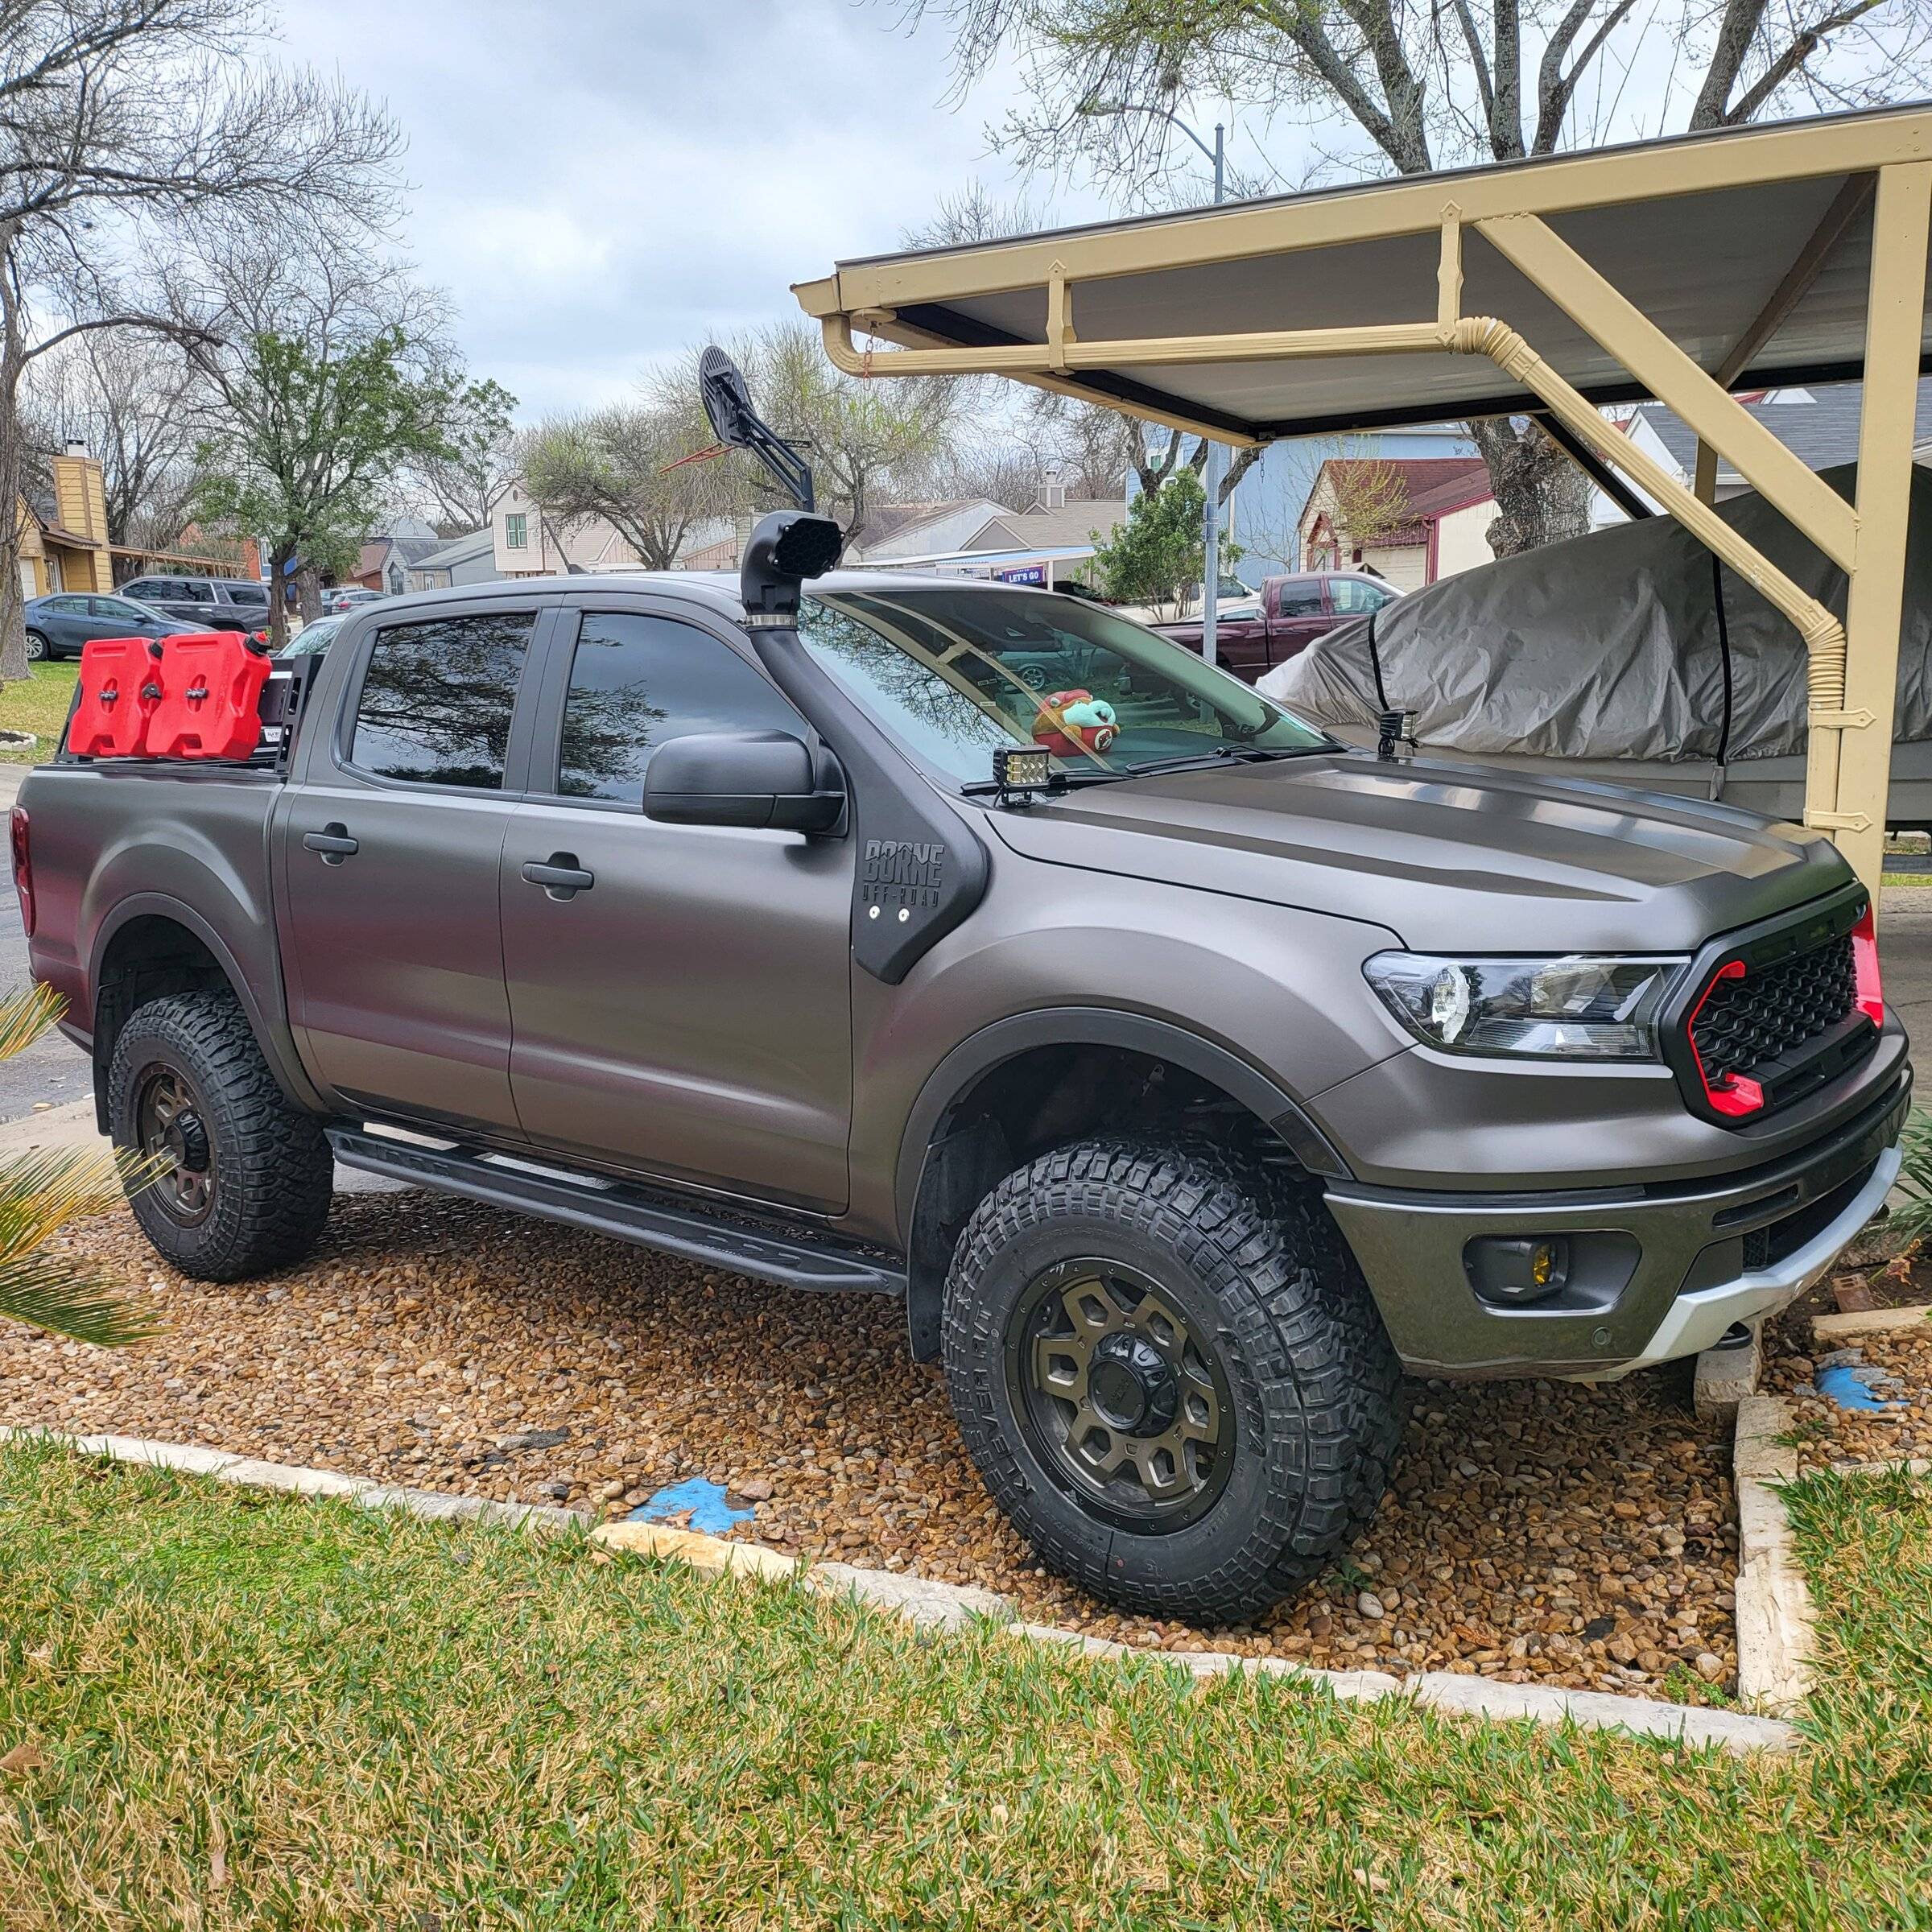
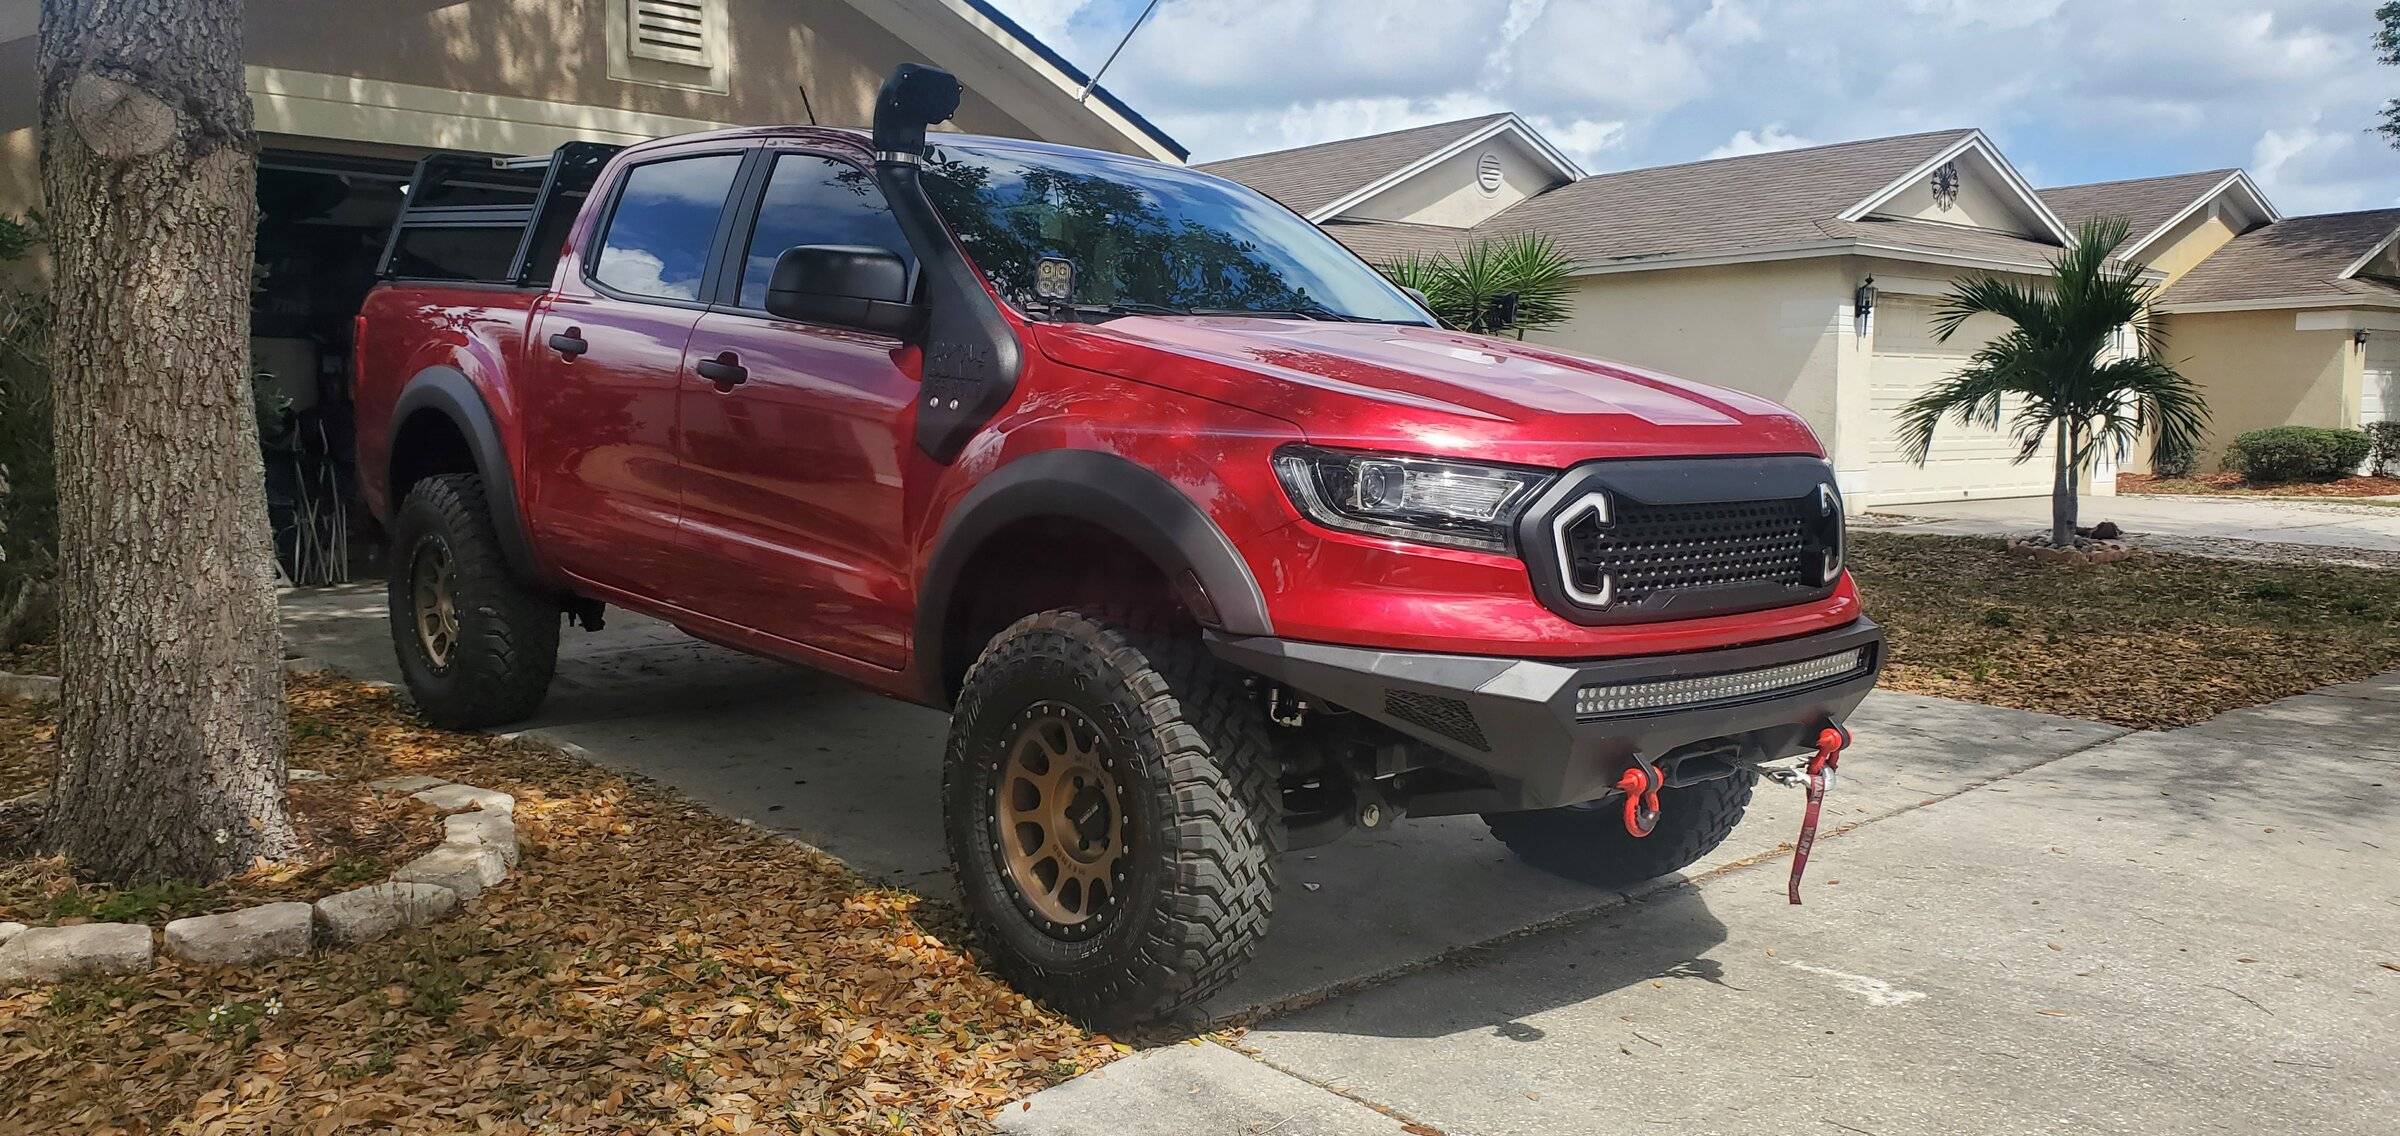
Yes it is. Avery Dennison Satin Dark Basalt wrap. Did it myself and it was only the second time I had wrapped a vehicle, so it is by no means perfect, but it went on the truck with less than 1000 miles to protect it from rock chips and scratches from offroading.

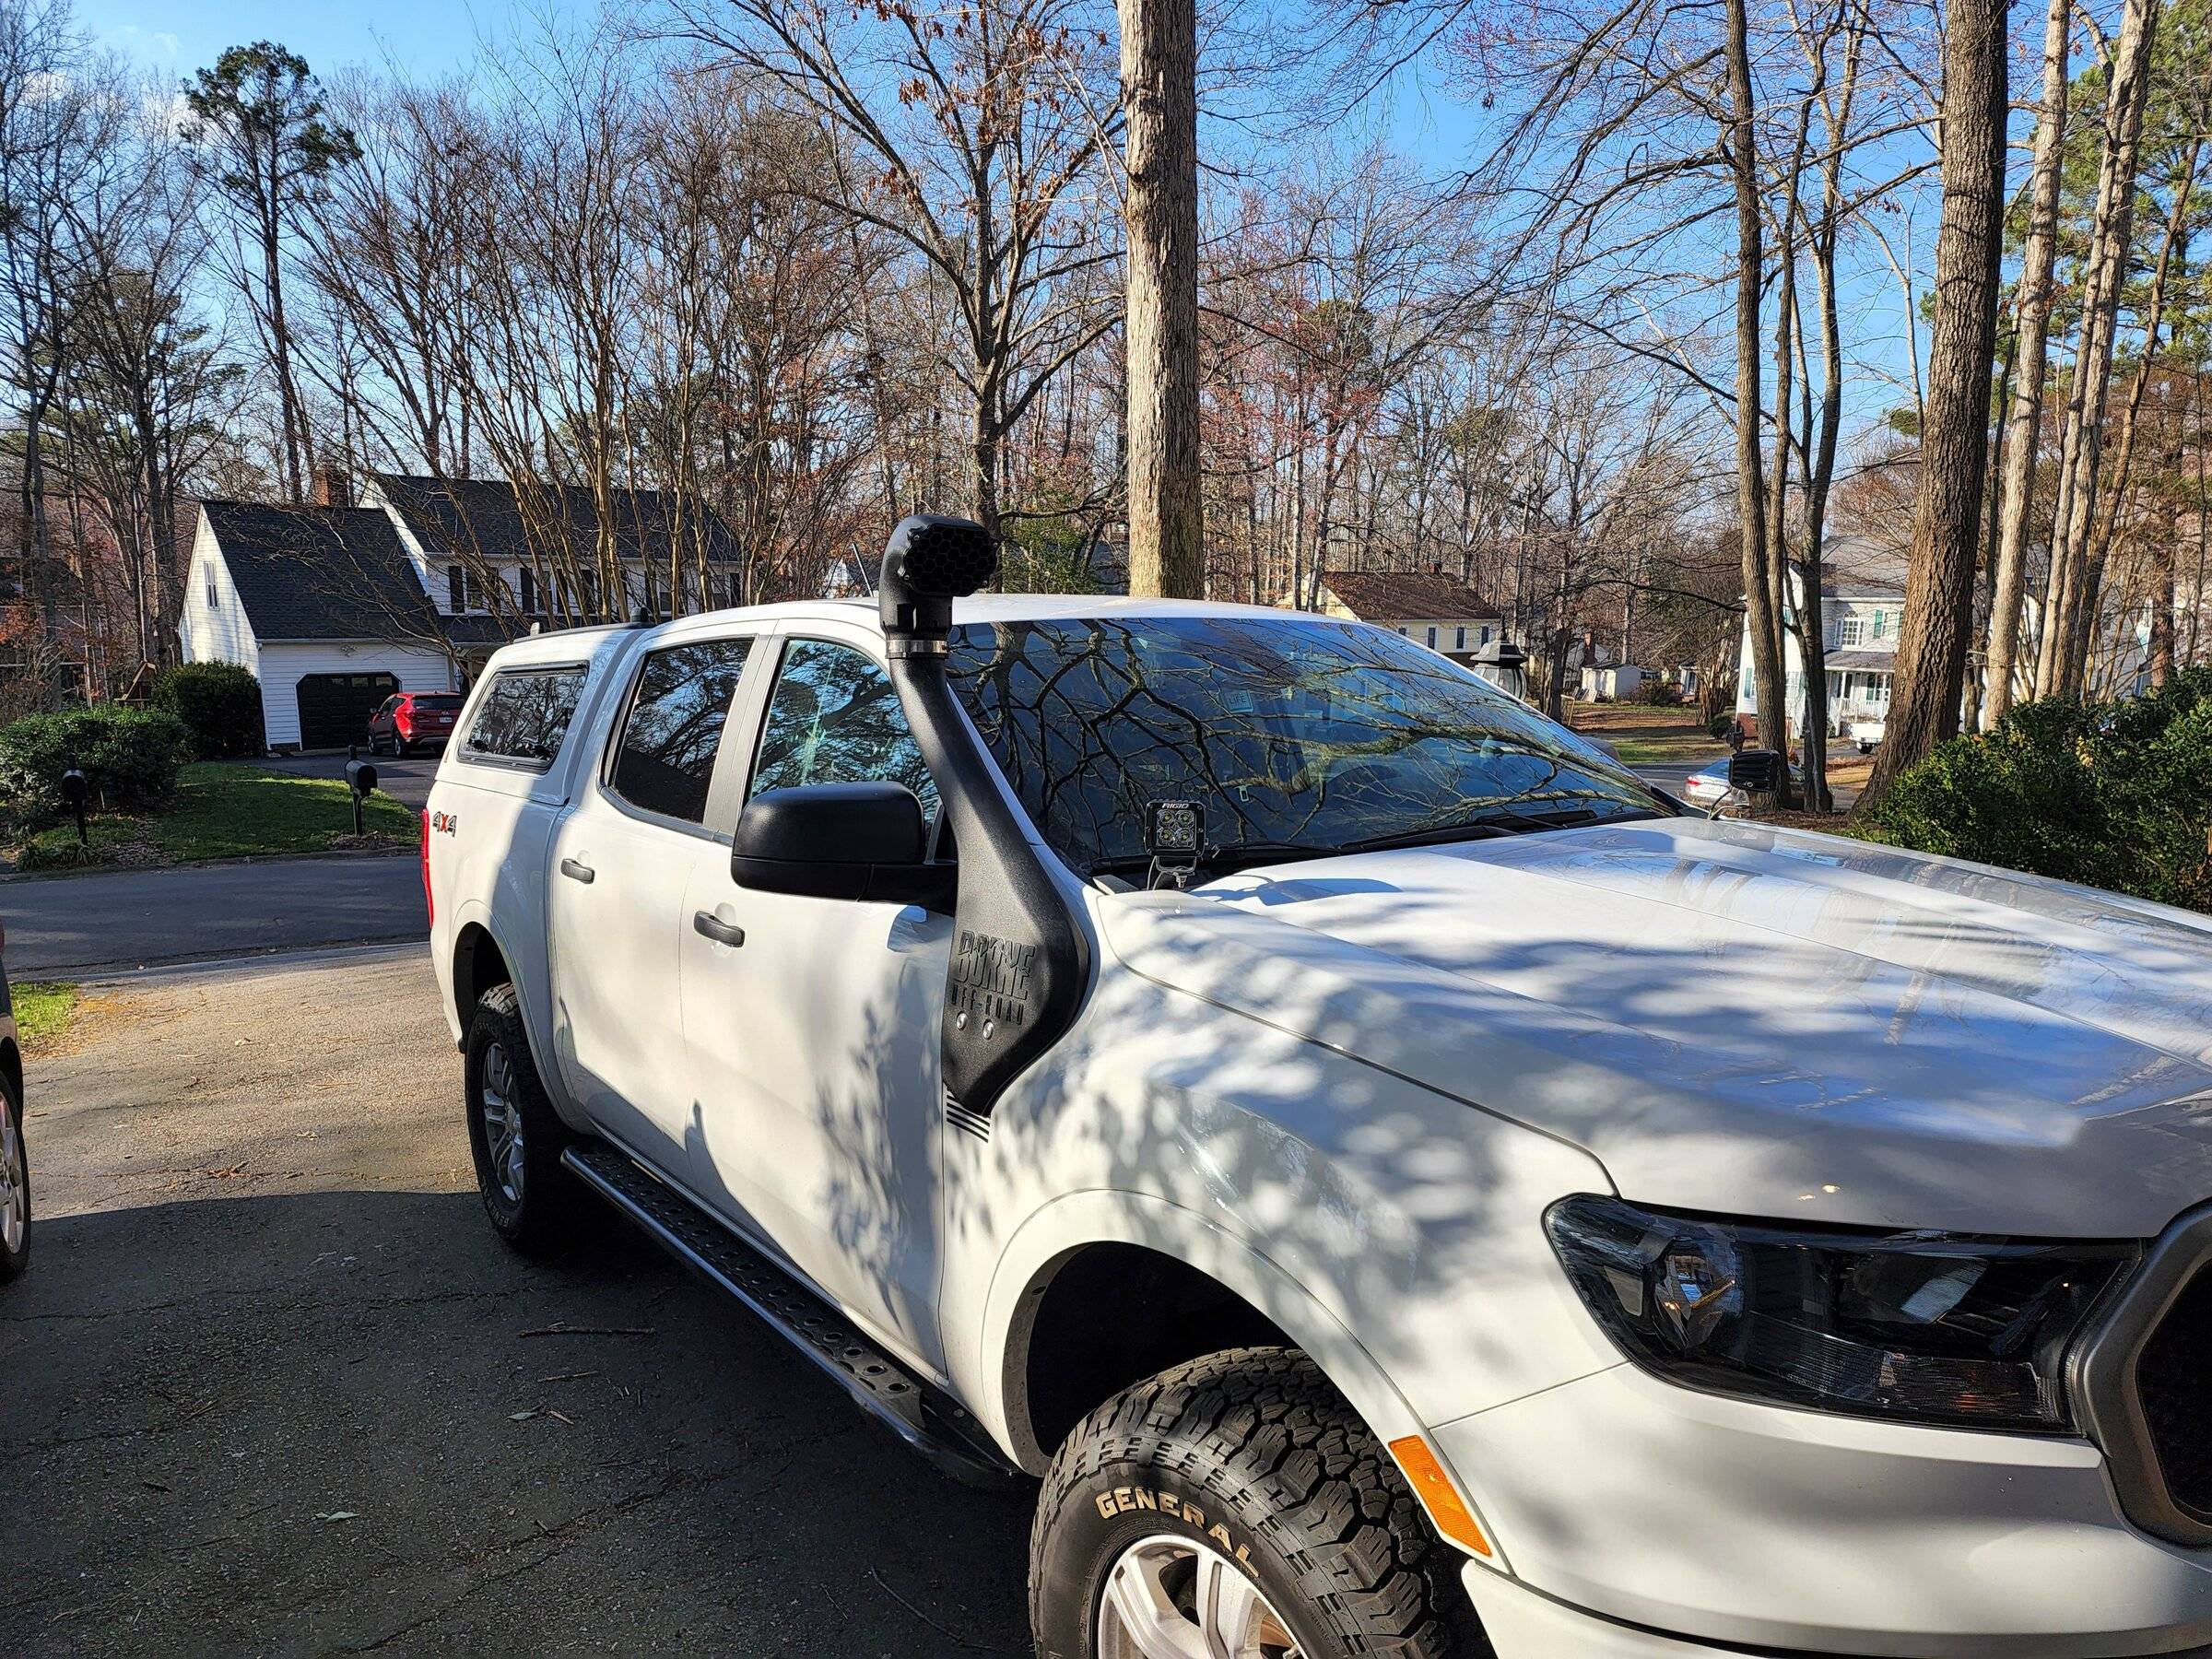
I just updated my sig with everything I could remember that is installed on it, didn't realize it was such a long list.

And thank you. It is a little excessive but it is either that or the water falls straight onto the back of the truck or car that would be oarked in the drive way.
Sponsored


Colo_Ranger

Well-Known Member
Joined
Apr 19, 2021
Threads
49
Messages
3,797
Reaction score
12,898
Location
Colorado
Vehicle(s)
2021 Ford Ranger XLT FX4
Vehicle Showcase
1
Alright, the job is done and since you are all crying for pics I guess I will do a small write up and post a pic or 2. I started it around 11 this morning and worked off and on till about 330. I ate lunch during that time and left for over an hour to get my daughter a new softball glove. All in all not a bad install. The instructions were good and got me through the job although I could not find one of the templates (fortunately it was for the airbox). Starting with the fender flares. Probably the hardest part if the entire job. Had to remove the fender to get the liner out. In the process broke several clips and/or the mounting points on the back of the flare. But got it off. The instructions for the fender light were not helpful. I had to wait till I removed all but the last bolt so I could release the clips on the back side.
20220305_102618.jpg
20220305_102623.jpg
20220305_102616.jpg

Once the flare was off, I was able to remove all retaining clips that hold the liner in and that just dropped out. Once the fender liner is dropped the real work begins. The next thing I did was remove the vent and apply the template to that spot so I would know where to drill. It took some time to remove the glue from the vent but glad I did it as that side is visible.
20220305_105425.jpg
20220305_113101.jpg

Should have cut the entire template out but had no issues. Only hole to drill on this side of the vehicle is on the right side of the template and would be covered by the vent if that was reapplied.
I then went into the engine bay and removed the airbox and set up the template in there to cut the big hole. This is where it gets interesting if you are new to making holes in a vehicle. Overall these steps were pretty easy. When removing the factory air intake i found it easiest to squeeze the top and bottom of the tube in the box and then tilt up and out. That released it pretty easy.
20220305_105907.jpg
20220305_113055.jpg
20220305_113453.jpg

Once the big hole is done all you have to do it follow the instructions and it goes pretty smooth. The biggest challenge at this point is getting the backing plate installed behind the vent area and some of the bolts up there that hold the snorkel in place. There is some foam insulation up there that I had to cut away to get the nuts and bolts in there. Overall a pretty easy install. I sealed the drain hole in the airbox and will have to do something where the stock air intake enters the airbox as it is not a watertight seal. but that will wait till I get the plug thing from @Mishimoto. I also had an issue with the supplied rivets as the rivet tool I have made it dofficult to break then off so I ended up wasting 2 of the 4 rivets so had to use other ones to do the final install of the snorkel on the pillar.
20220305_160121.jpg
20220305_160129.jpg
20220305_160137.jpg

Drove it around the block and got up to 60, no noticeable wind noise and no codes so I am happy. If you have any questions let me know. Rig is fully back together now so will be hard to get additional pics if needed but let me know.
Finished my install today. Definitely did not go as smoothly as @RVA Overland, which I want to attribute to user error and the Mishimoto Air Intake being so massive and all one piece.

The install was smooth until it came to attaching the air box to the snorkel. I could not get the aluminum tube to slot into the silicone coupler on the air box for the life of me. Found out by comparing the new 4in hole saw I had bought with one I had lying around that it was actually smaller by a bit, so I used the older one to widen the hole. That helped, but I still had trouble getting the tube in. The Mishi air box doesn't split in half like the stock one, so you have to try and maneuver the big box around in the slot and it is very difficult to try and push the inside of the box where the coupler is and the actual snorkel tube together because of the way the air box is designed. I had to ask for help for this and we still spent almost 2 hours just trying to get this finished.

Install took around 5 and a half hours total, but it was worth it. I am definitely getting more intake noise, but also a bit of wind noise, but that was going down the highway at around 80. To be fair, that wind noise could have just been the truck, I'm always listening to loud music when I drive anywhere so I've never really heard what it sounds like going down the highway.
20220306_133228.jpg
Well, this is for sure on my list of modifications coming soon. Dang it. I really like that.
 
OP
OP
Mishimoto

Mishimoto

Well-Known Member
First Name
Mishimoto
Joined
Jun 9, 2019
Threads
11
Messages
190
Reaction score
423
Location
Wilmington, DE
Vehicle(s)
2019 Ford Ranger Lariat
Looking, great guys! We're loving the installed photos!

Also, just to keep you guys posted on the airbox plugs, we're looking at having them in stock by the end of the month! I'll make sure to update you guys if anything changes!

-Nick


SteelWheelDeplorable

Well-Known Member
First Name
Anthony
Joined
Aug 11, 2021
Threads
4
Messages
95
Reaction score
116
Location
SoCal USA
Vehicle(s)
2020 Ranger XL
I made an account just to come here and confirm that a 5in orbital sander with a single 100 grit pad will take off the branding in about 5 minutes without thinning or much heating. I hit it with some bed liner to even out the finish. I will never post again.
PXL_20220305_211523808.jpg
WOW great work!!! Now I’m seriously interested in this snorkel again!!!
 

Sleepy_Hollow

Well-Known Member
First Name
Jon
Joined
Oct 29, 2021
Threads
3
Messages
88
Reaction score
236
Location
33579
Vehicle(s)
2021 Ford Ranger
Occupation
USN
What is the eta on these? Can't use my pre-filter until I get it.
Hey Guys!

Still loving the installed shots!

Also, I just wanted to give this thread another bump with the first look at our airbox plugs!

MM4619_1.jpg


-Nick
 

dr3w_mac

Member
First Name
Drew
Joined
Apr 3, 2021
Threads
3
Messages
23
Reaction score
90
Location
Tacoma
Vehicle(s)
19 ranger fx4
Occupation
Currier
Slapped mine on yesterday. Its kind of a fiddly job, but if you don't mind projects that take a little time then you'll be fine. I made a video of installing it, kinda. Its mostly just messing around in my shop

20220320_155831-01.jpeg
 
Last edited:

dr3w_mac

Member
First Name
Drew
Joined
Apr 3, 2021
Threads
3
Messages
23
Reaction score
90
Location
Tacoma
Vehicle(s)
19 ranger fx4
Occupation
Currier
Looks awesome! Can you define 'fiddly job'?
Thanks! Well, getting things lined up and bolts/nuts threaded that are behind the fender take some patience. Its definitely not a job for someone expecting instant gratification. If a fella, or lady, likes to tinker and hangout in the garage for a day then this is a perfect project.
 

Colo_Ranger

Well-Known Member
Joined
Apr 19, 2021
Threads
49
Messages
3,797
Reaction score
12,898
Location
Colorado
Vehicle(s)
2021 Ford Ranger XLT FX4
Vehicle Showcase
1
Thanks! Well, getting things lined up and bolts/nuts threaded that are behind the fender take some patience. Its definitely not a job for someone expecting instant gratification. If a fella, or lady, likes to tinker and hangout in the garage for a day then this is a perfect project.

that makes sense. Nothing with the kit itself, just the nature of the install.
Sponsored

 
Status
Not open for further replies.


Top