Trash Panda
Well-Known Member
- Thread starter
- #1
Greetings All,
Dropping another one of my write-ups. This time on our intake manifold MAPT (Manifold Absolute Pressure & Temperature) sensor.
When I was working on my bucking/surging issue by replacing the DPFE (Differential Pressure Feedback) sensor, I figured why not go ahead and change the MAPT sensor as well since it is located right beside the DPFE sensor.
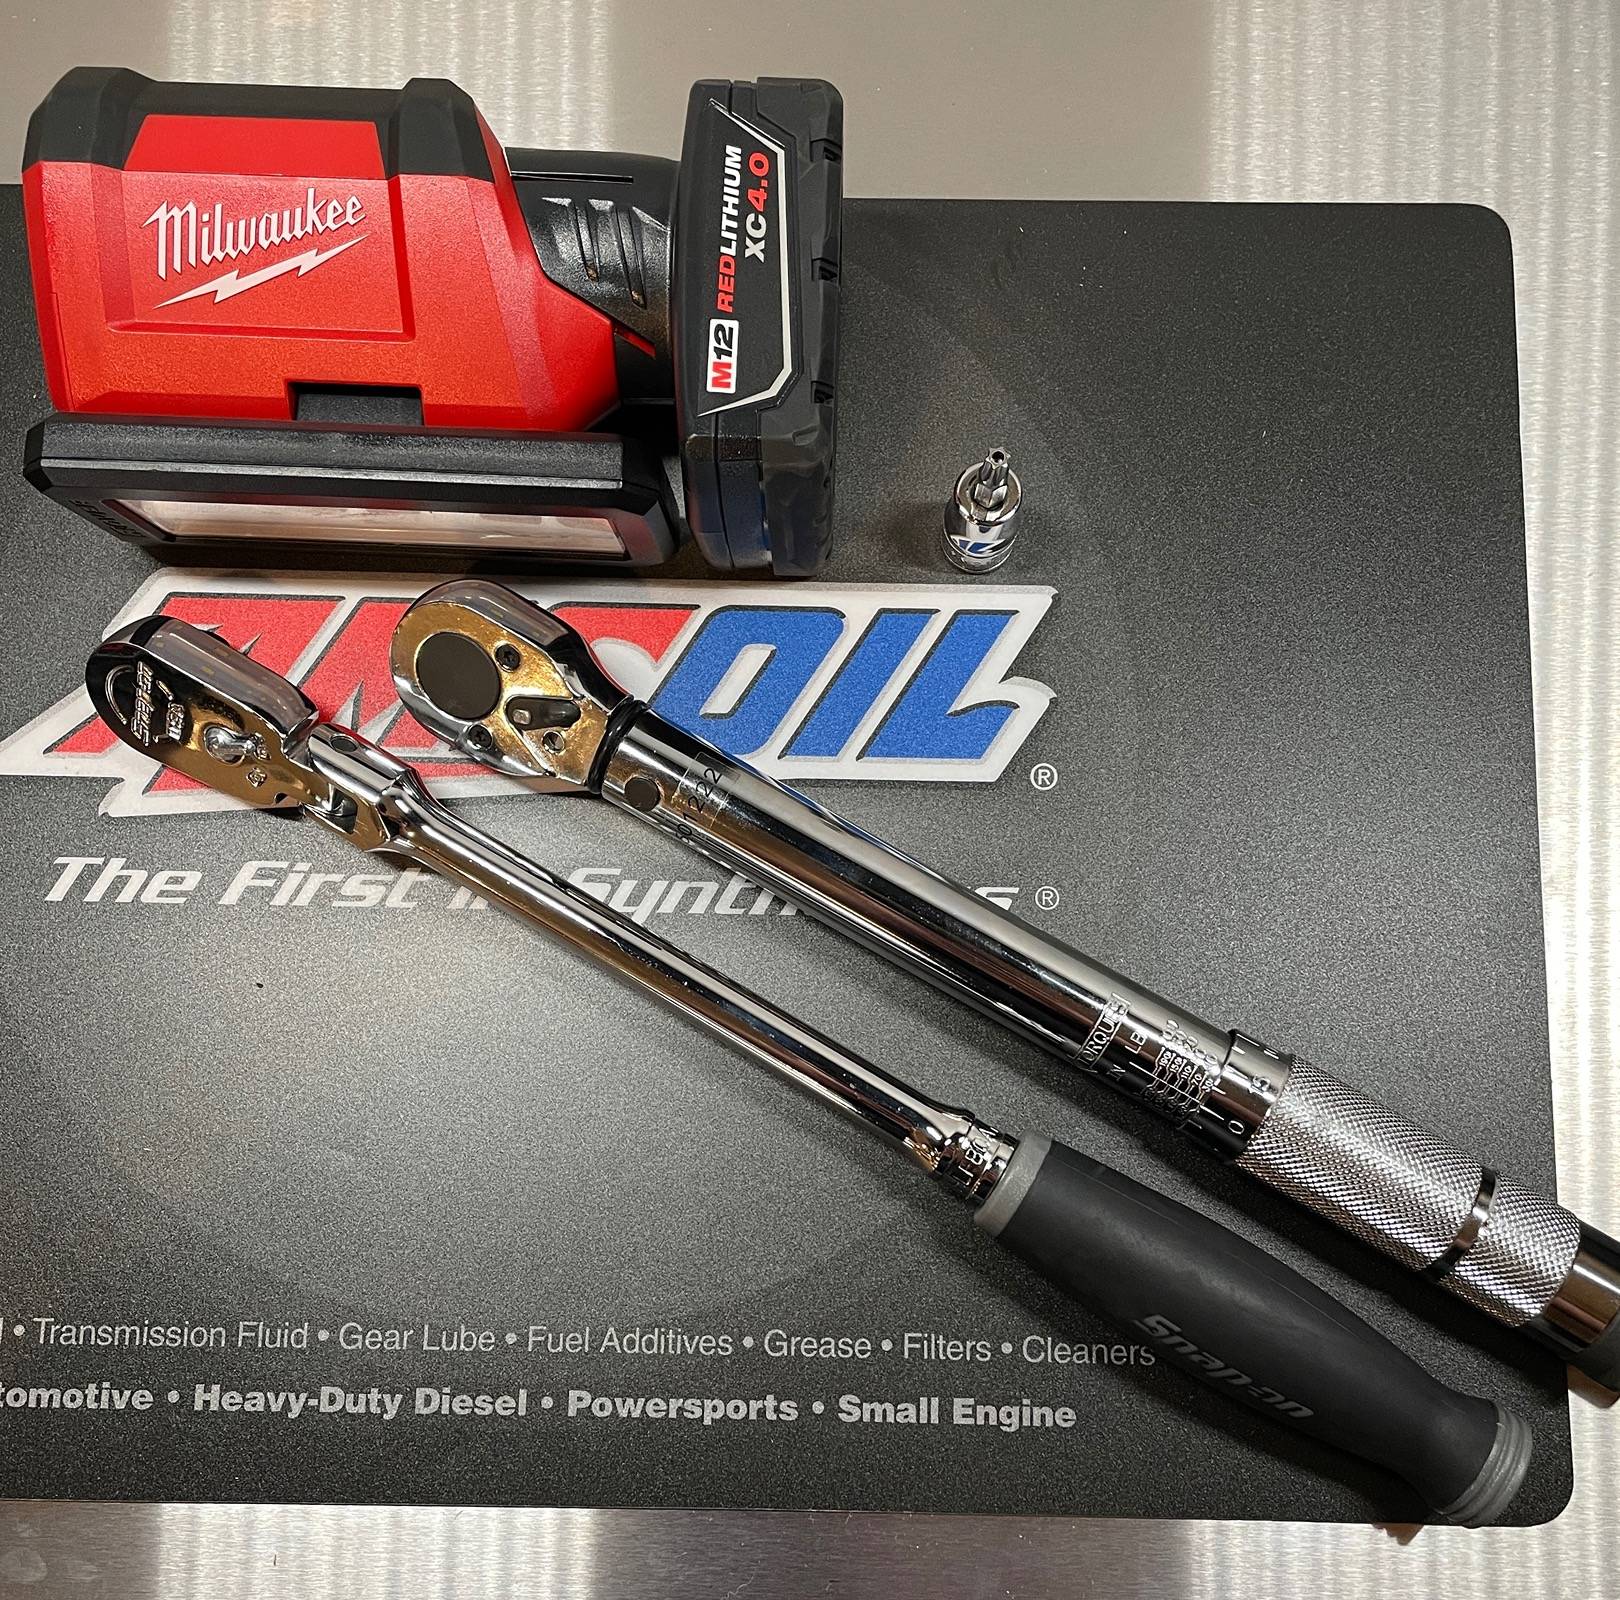
Supplies Needed :
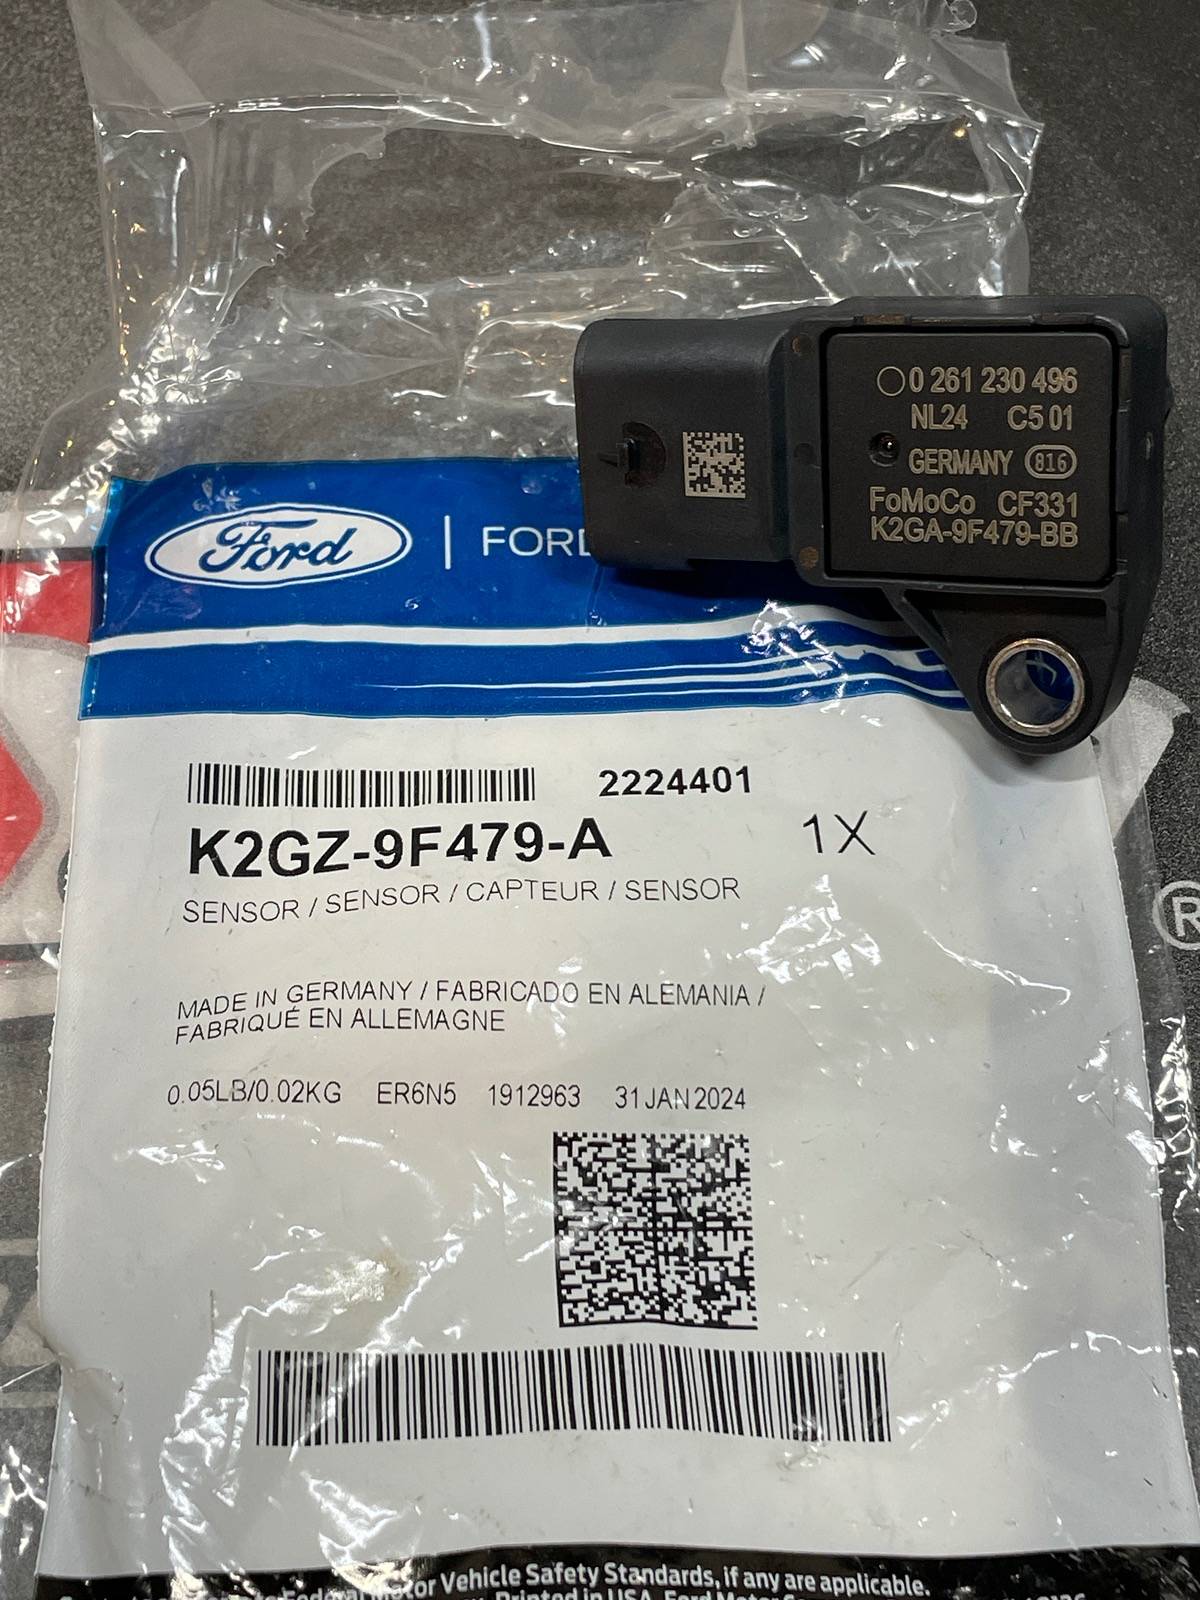
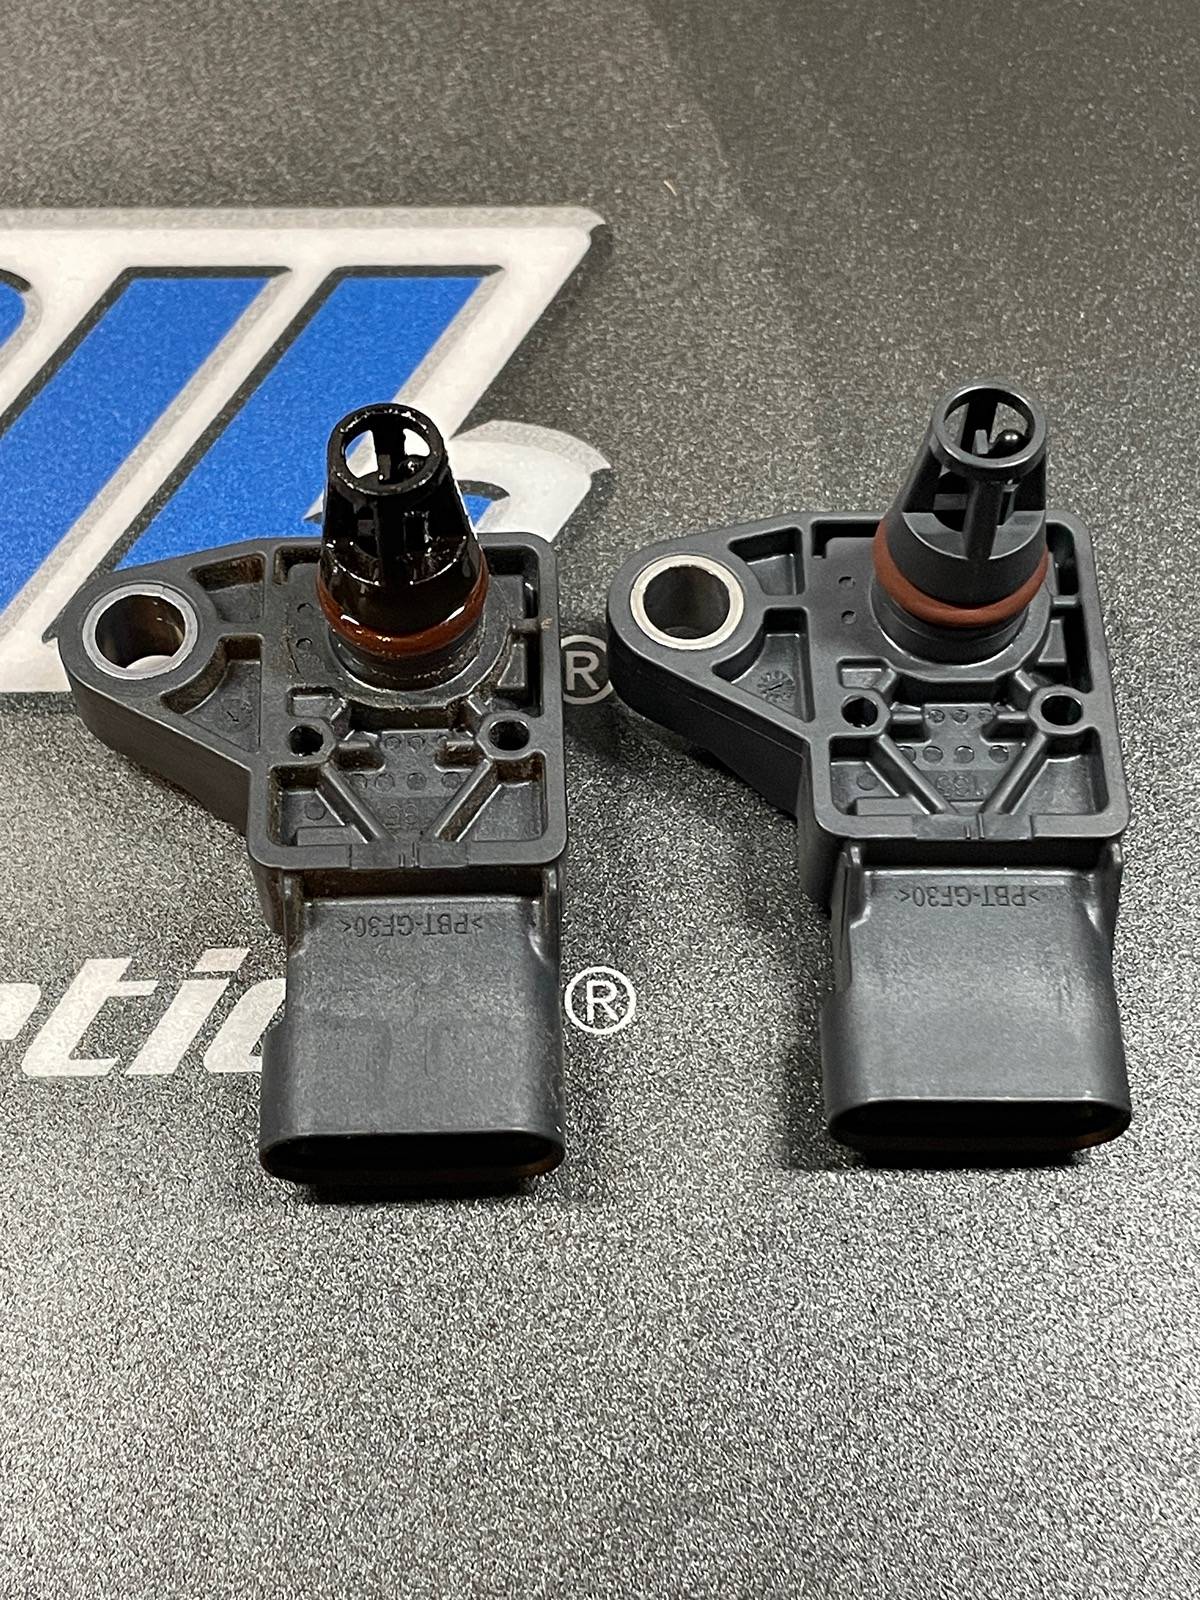
-MAPT Sensor (Ford K2GZ-9F479-A) ($43 on FordParts.com and delivered to my doorstep less than 24 hours after ordering)
-3/8" or 1/4" Ratchet (Cordless Ratchet can be beneficial)
-T30 Torx Socket or bit
-Torque Wrench set to 53 in.lbs (6 Nm)
-LIGHT (Headlamp, Milwaukee Rover, etc)
-Work Platform or Step Ladder


STEP ONE :
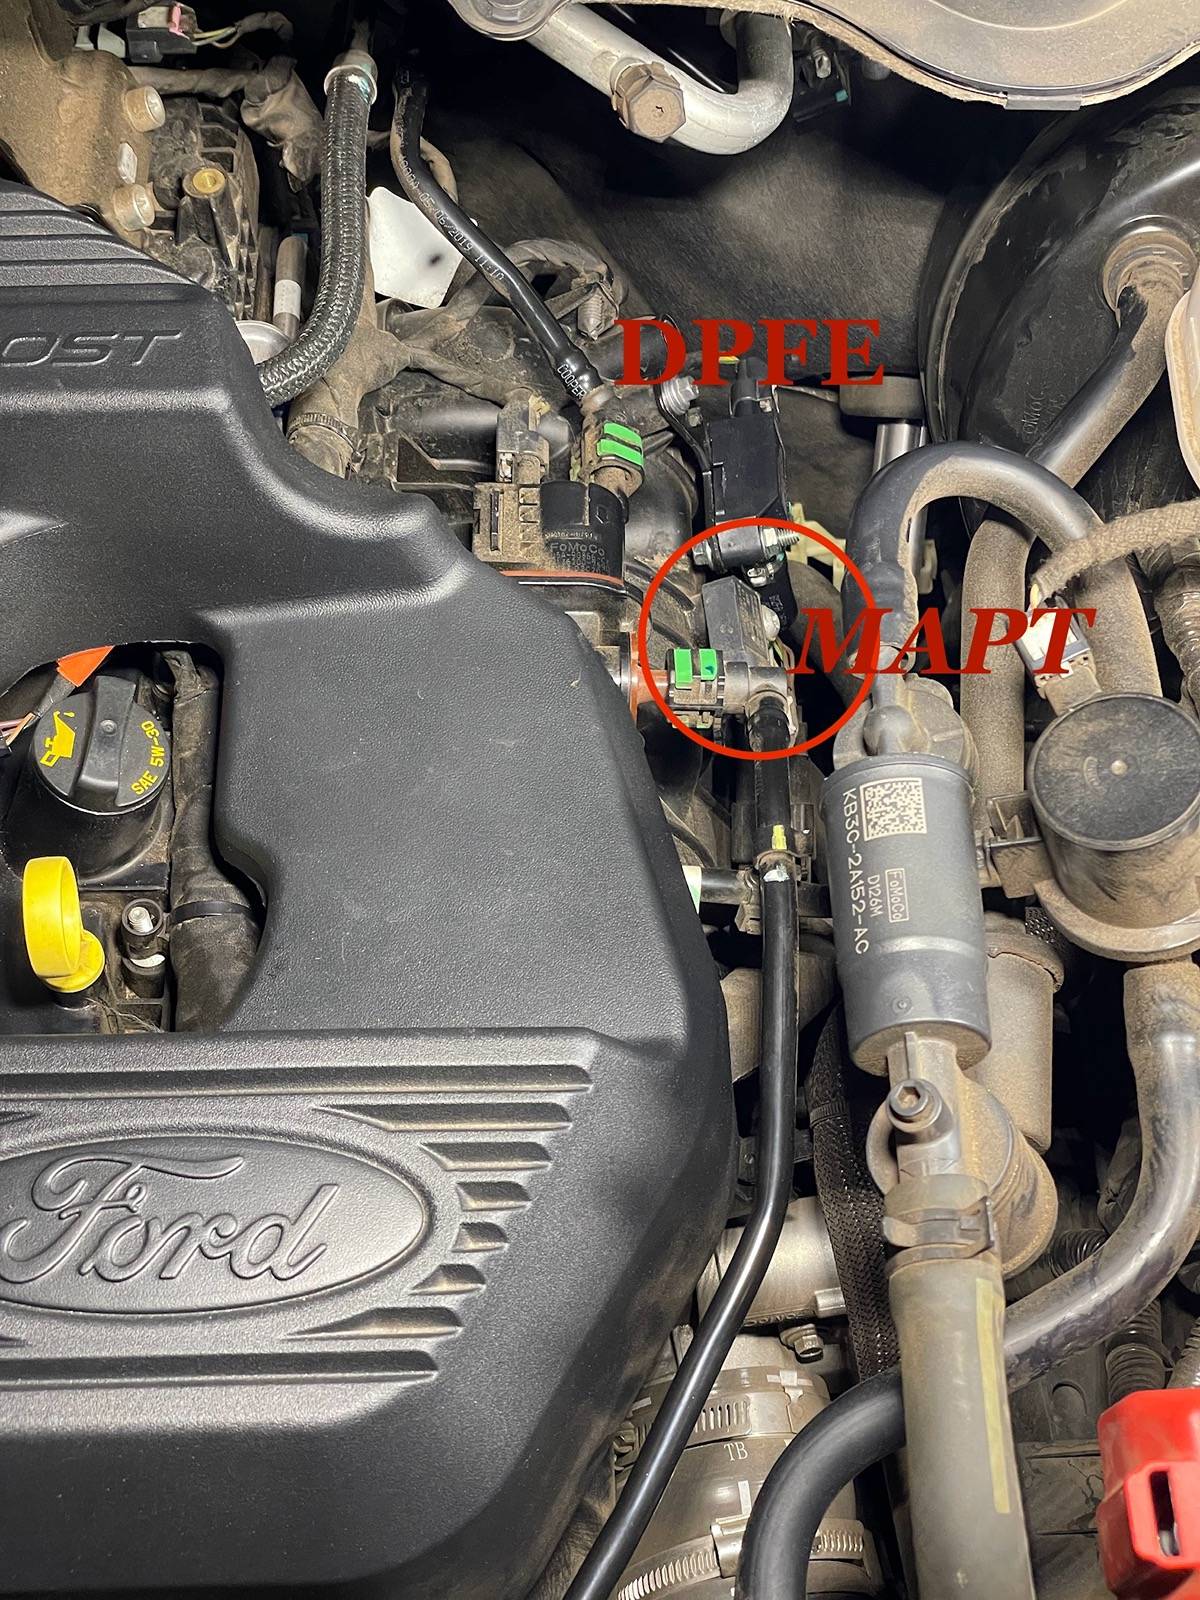
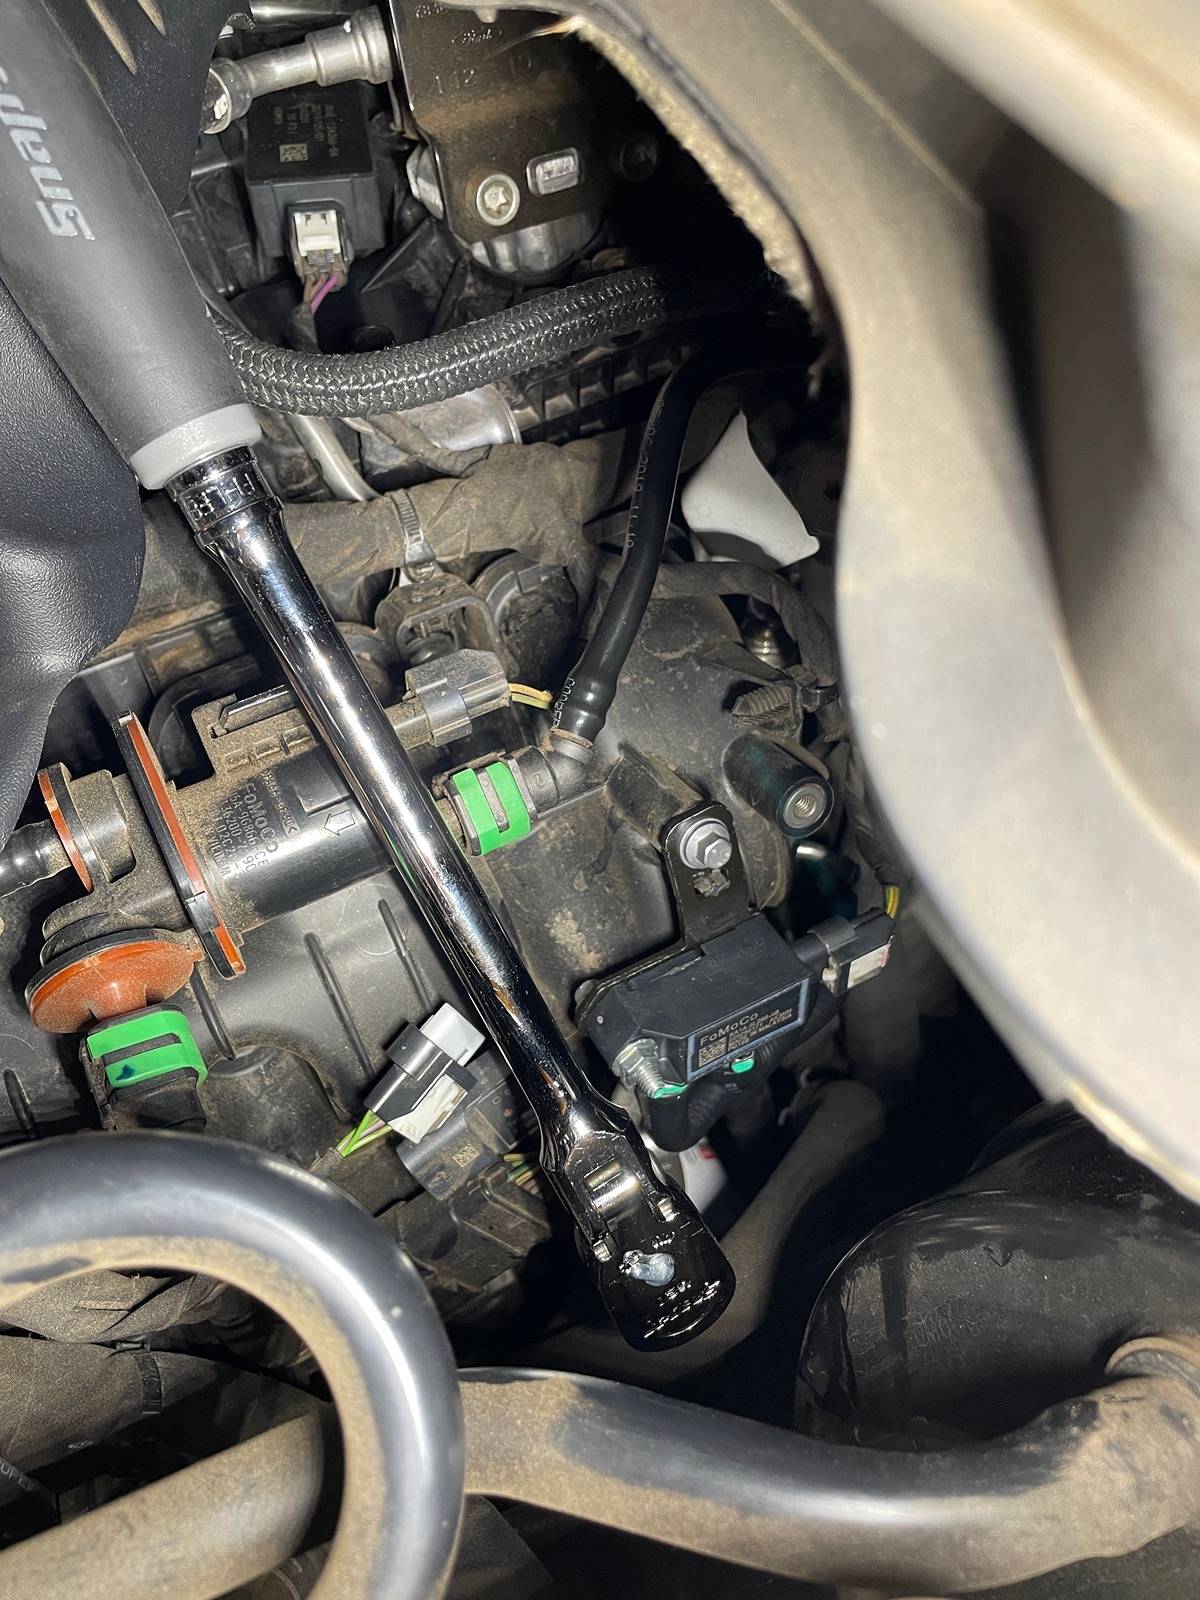
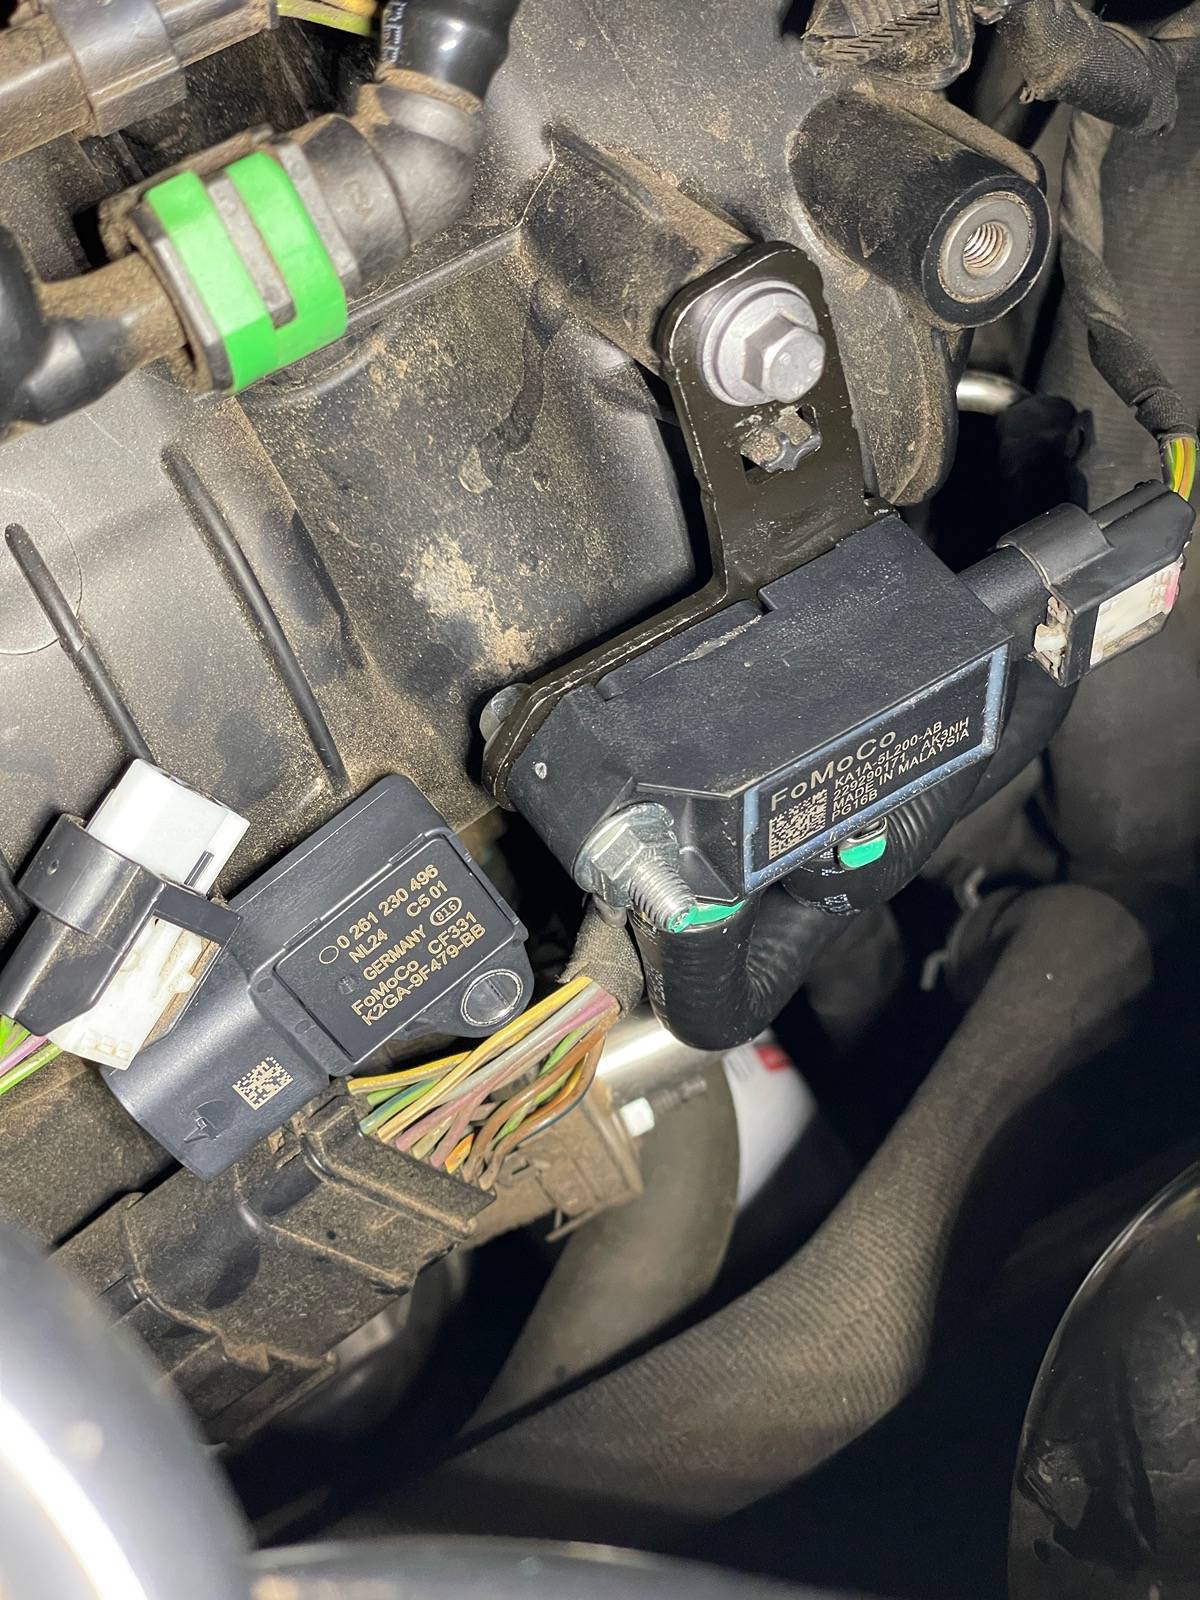
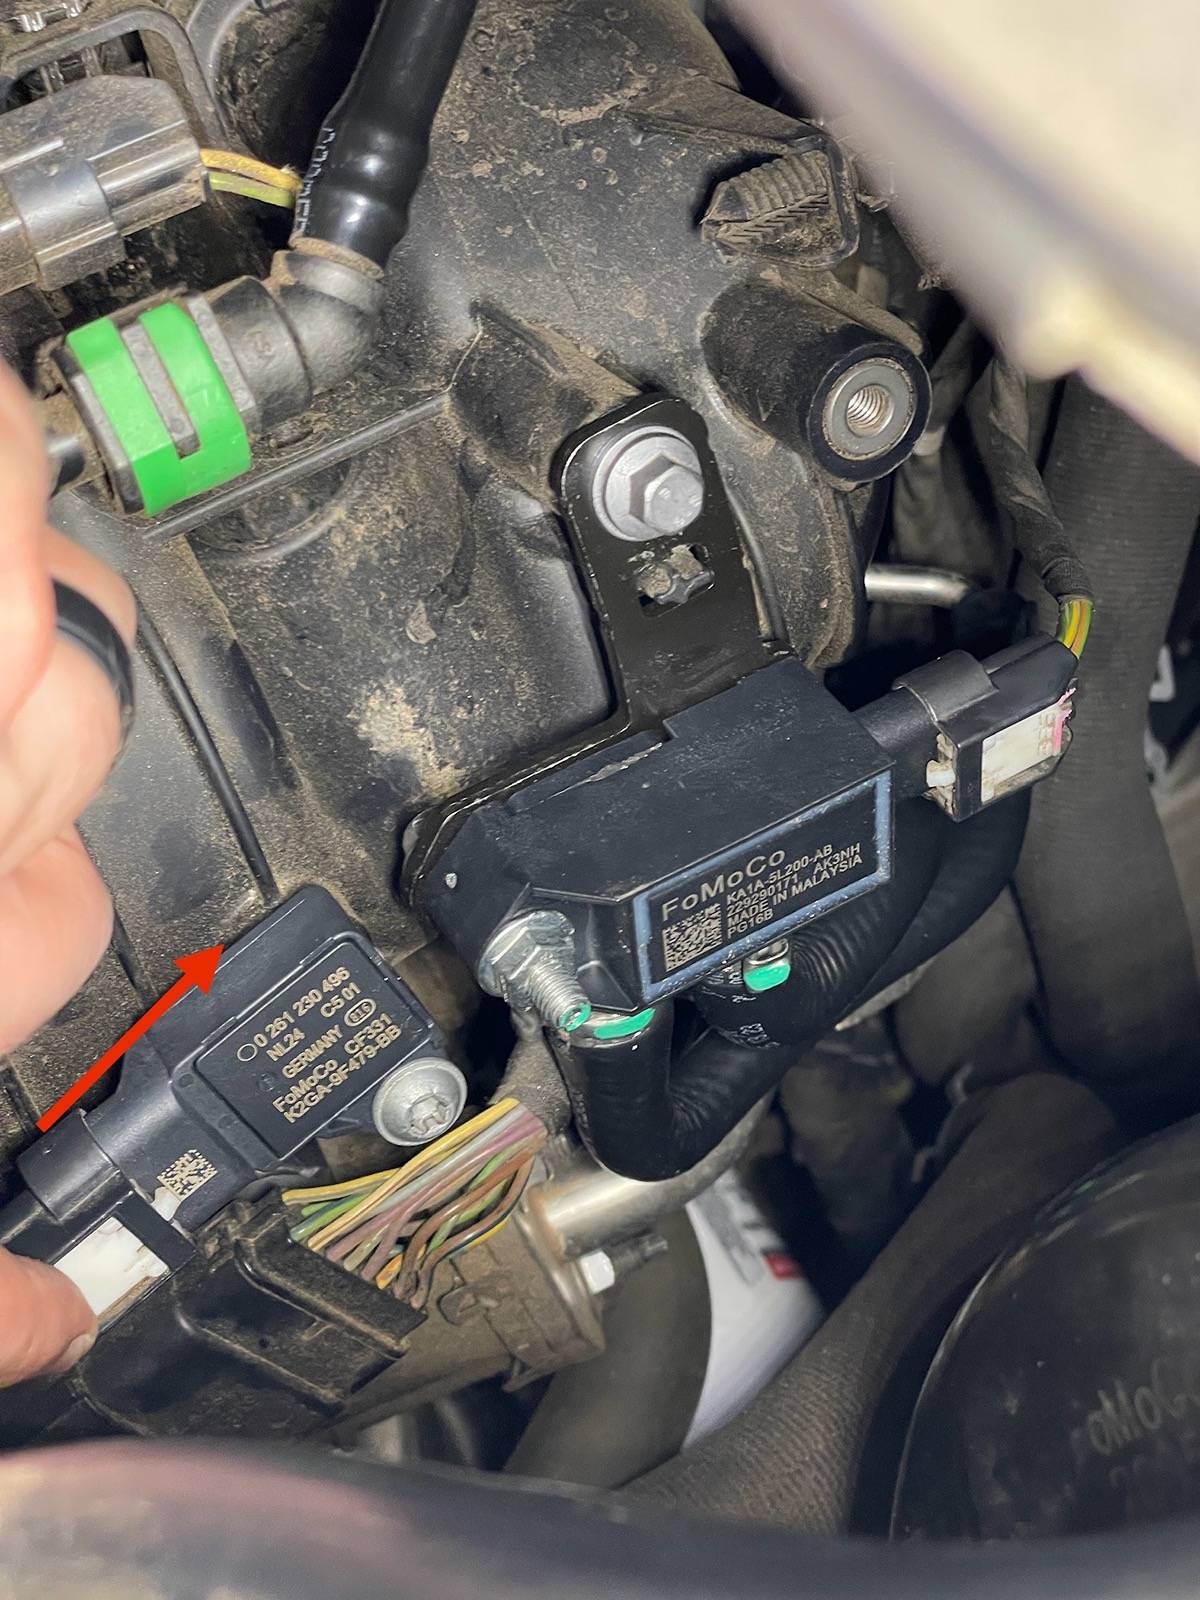
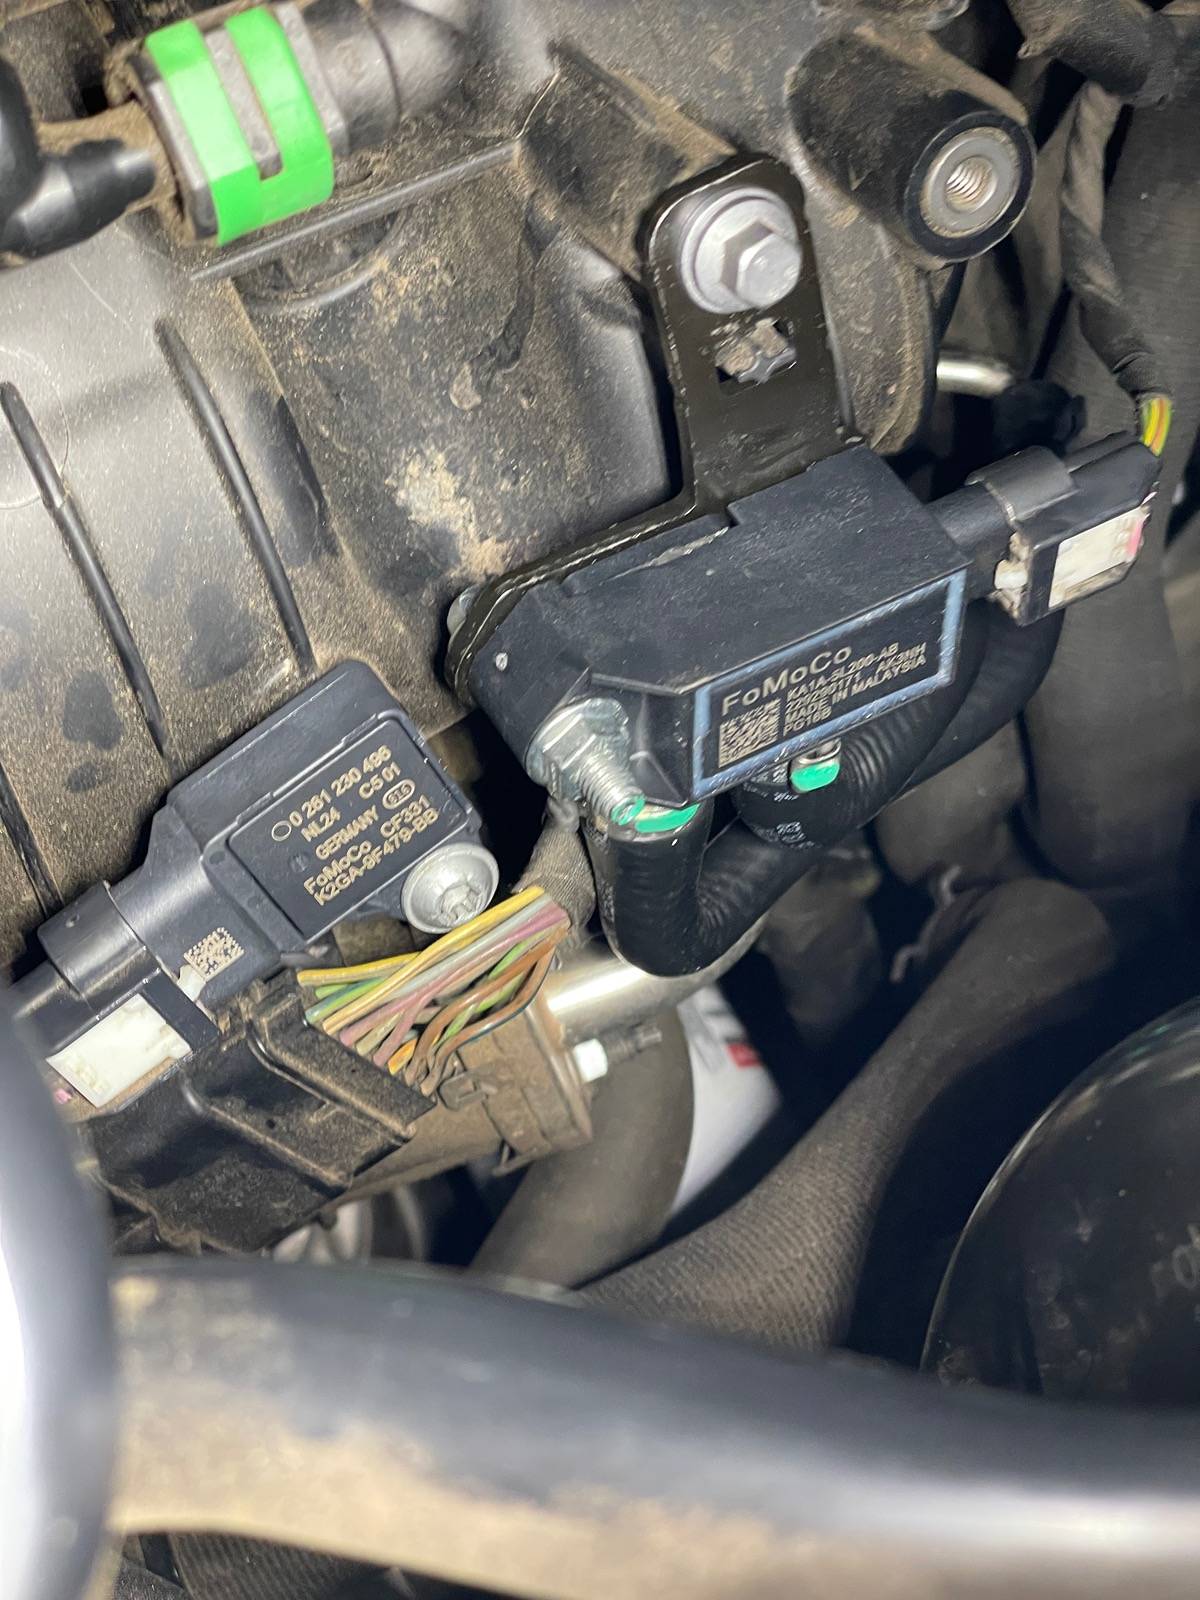
Pop the hood and locate the MAPT sensor. It is located next to the DPFE sensor on the driver's side of the engine protruding from the intake manifold.
STEP TWO :
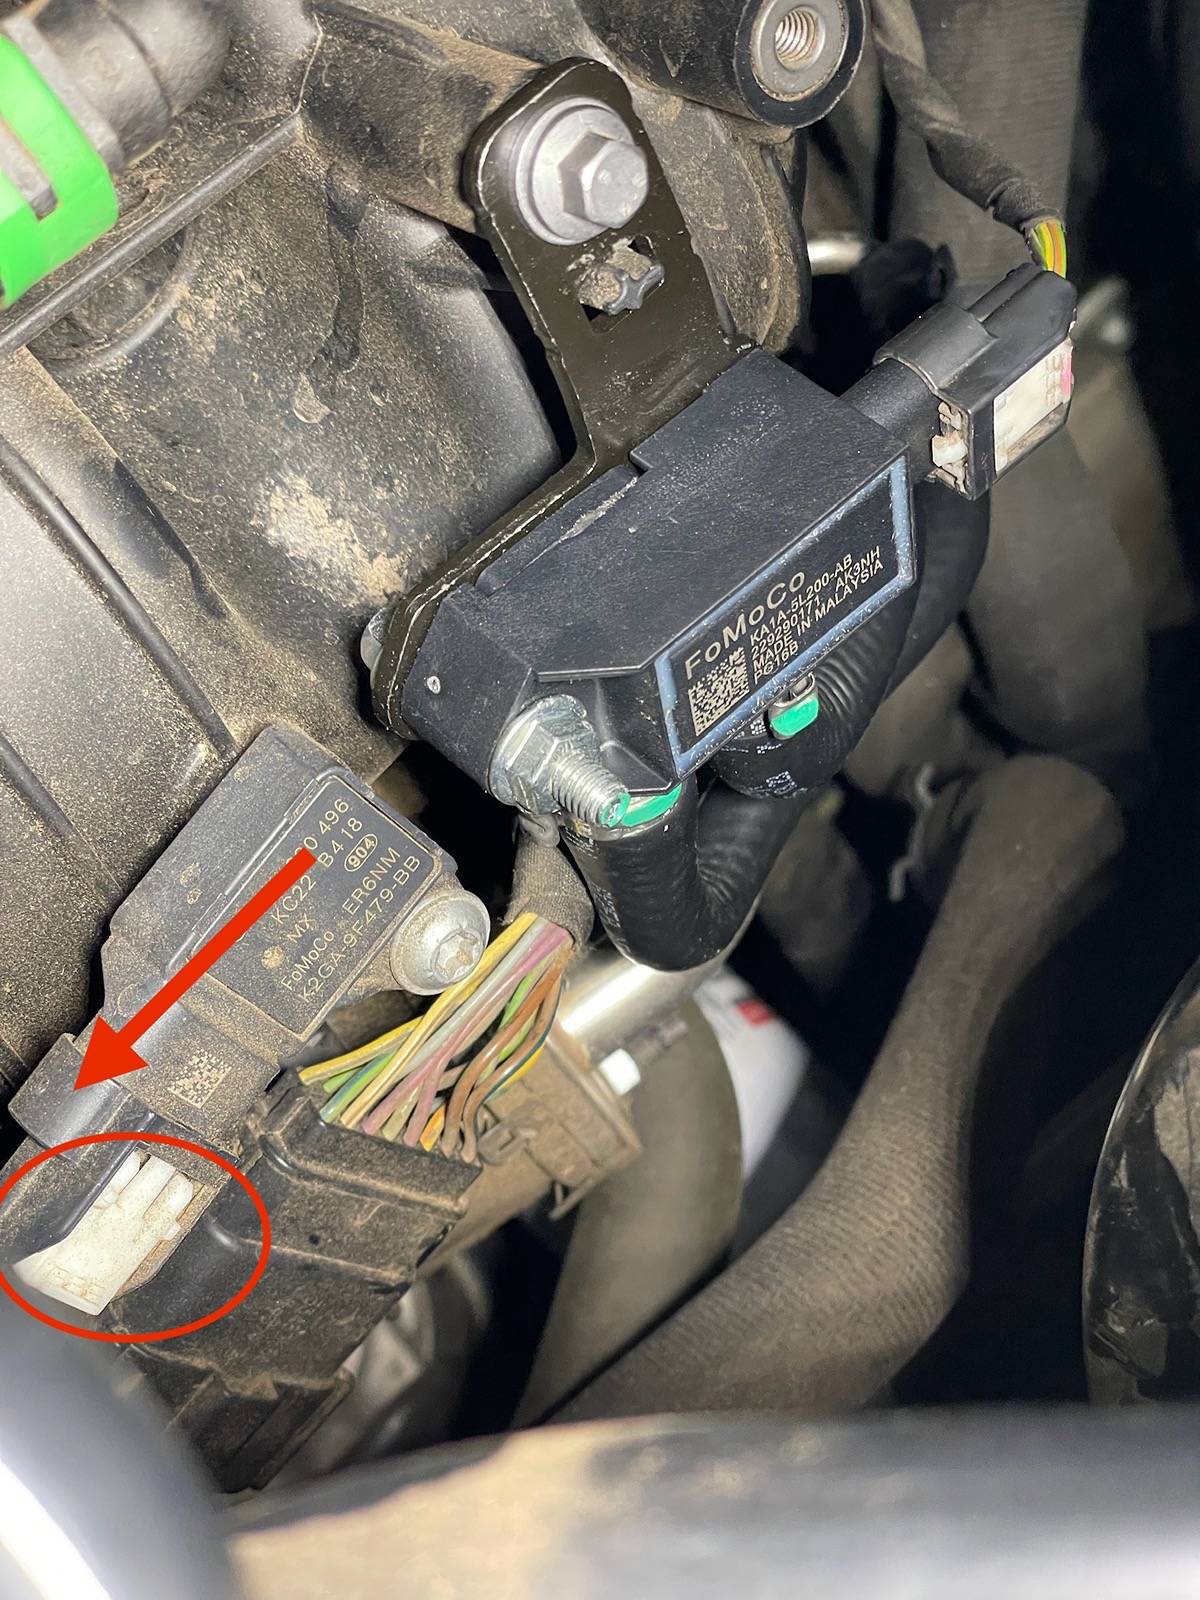
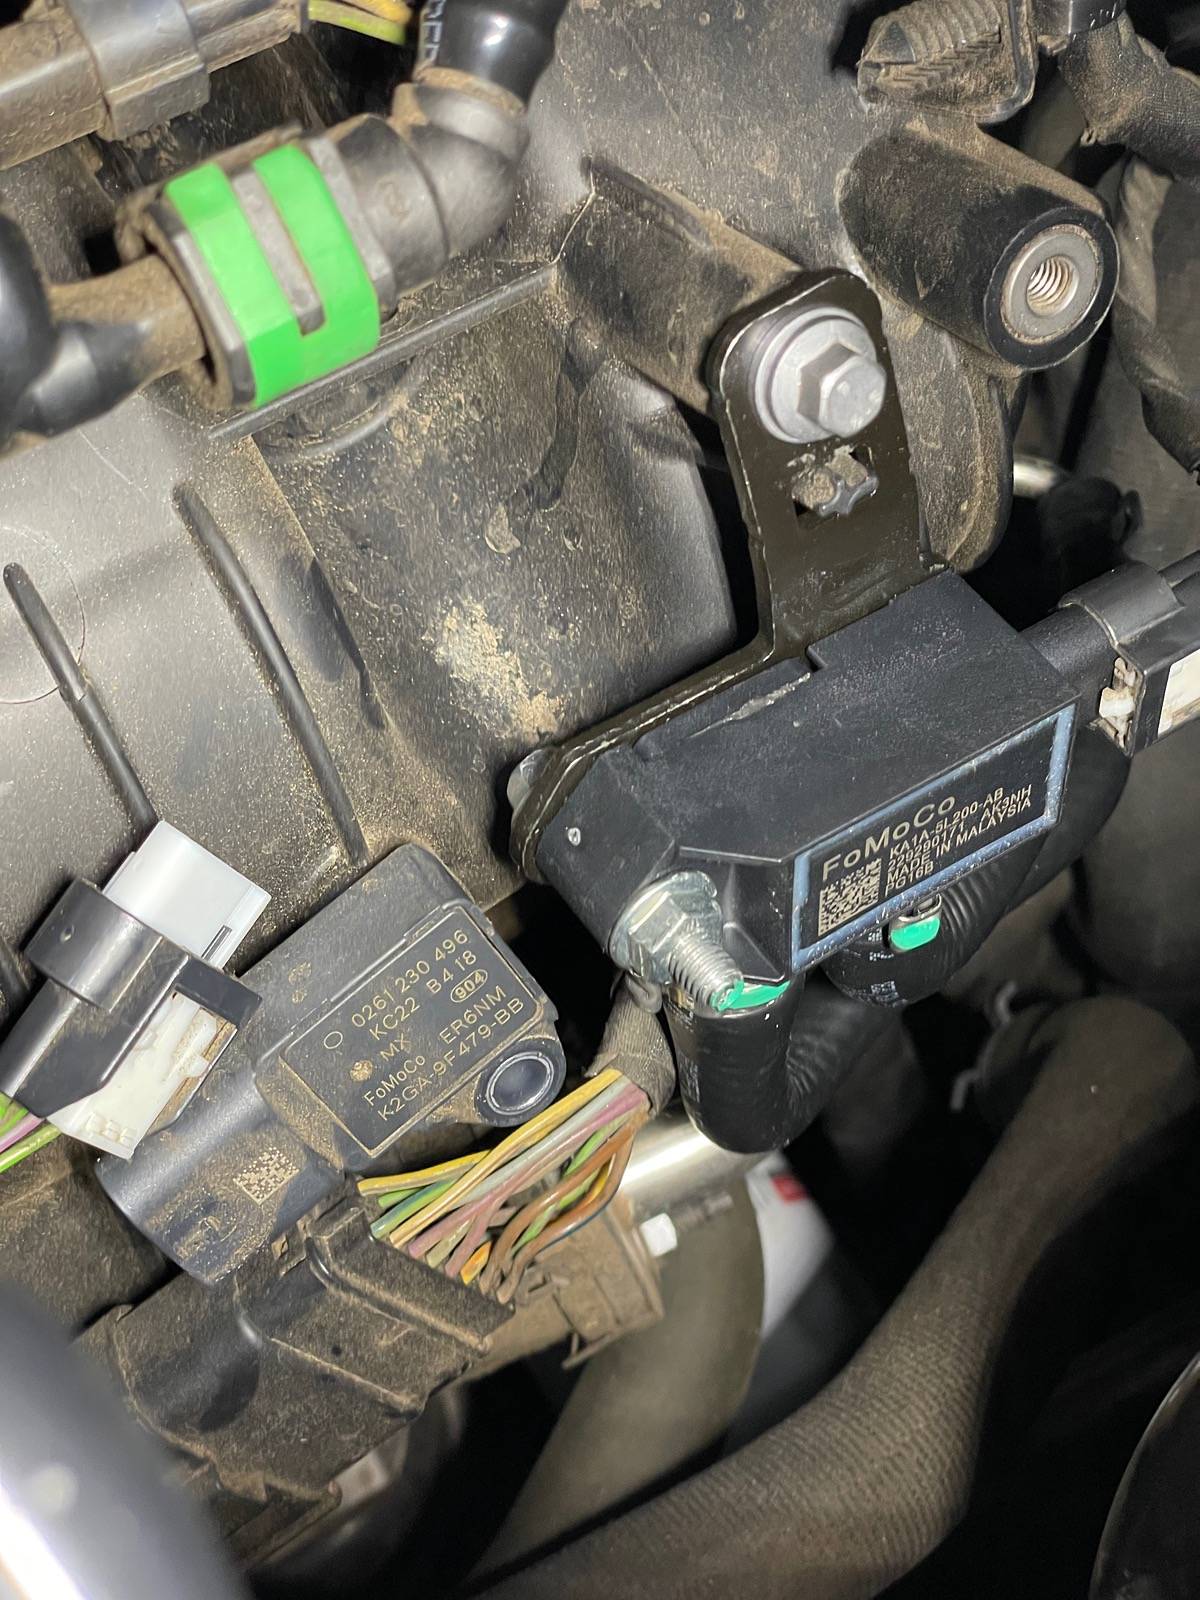
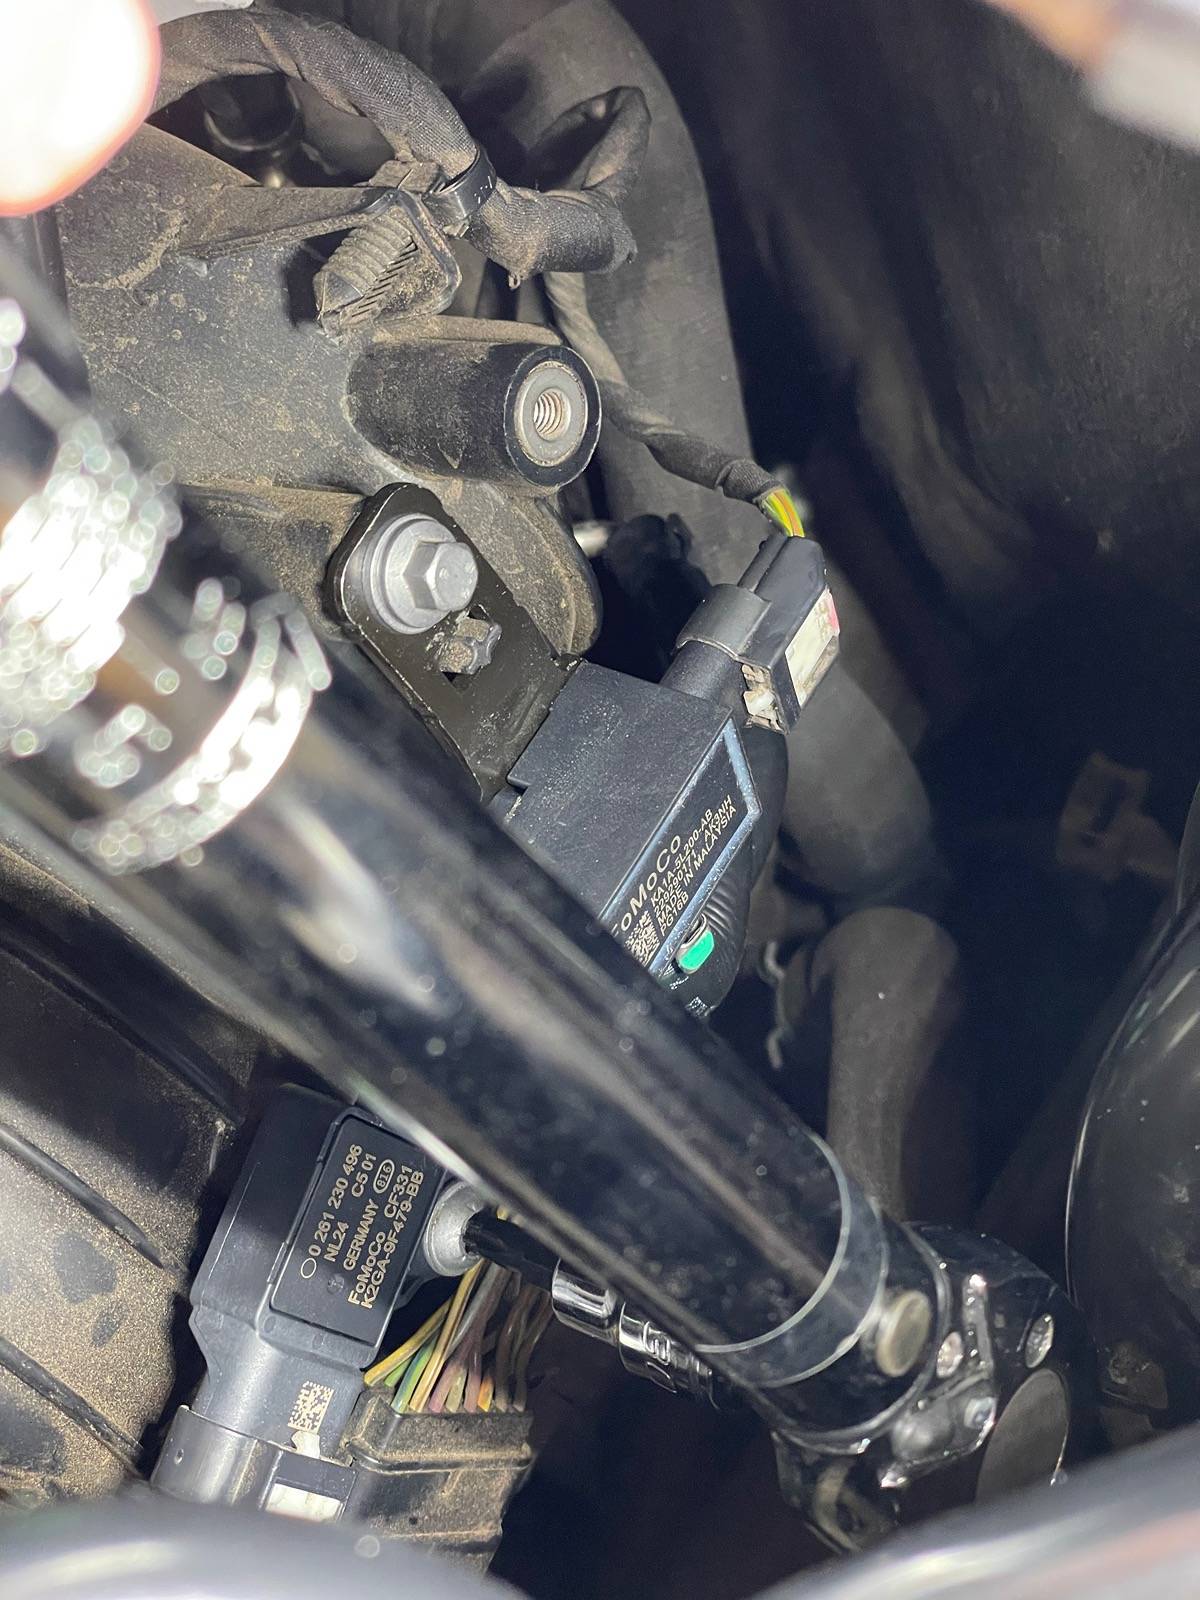
Remove the MAPT electrical connector. It works like every other connector on our truck; use your fingernail to slide the locking tab back (circled) and wiggle the connector off pulling towards you.
STEP THREE :
Use your 3/8" ratchet and T30 Torx Socket to remove the MAPT bolt. It is faster if you initially break the bolt with your ratchet and then remove it with a cordless ratchet. Be sure to either catch the bolt or finish unthreading it with your fingers to ensure it does not drop into the engine bay.
STEP FOUR :
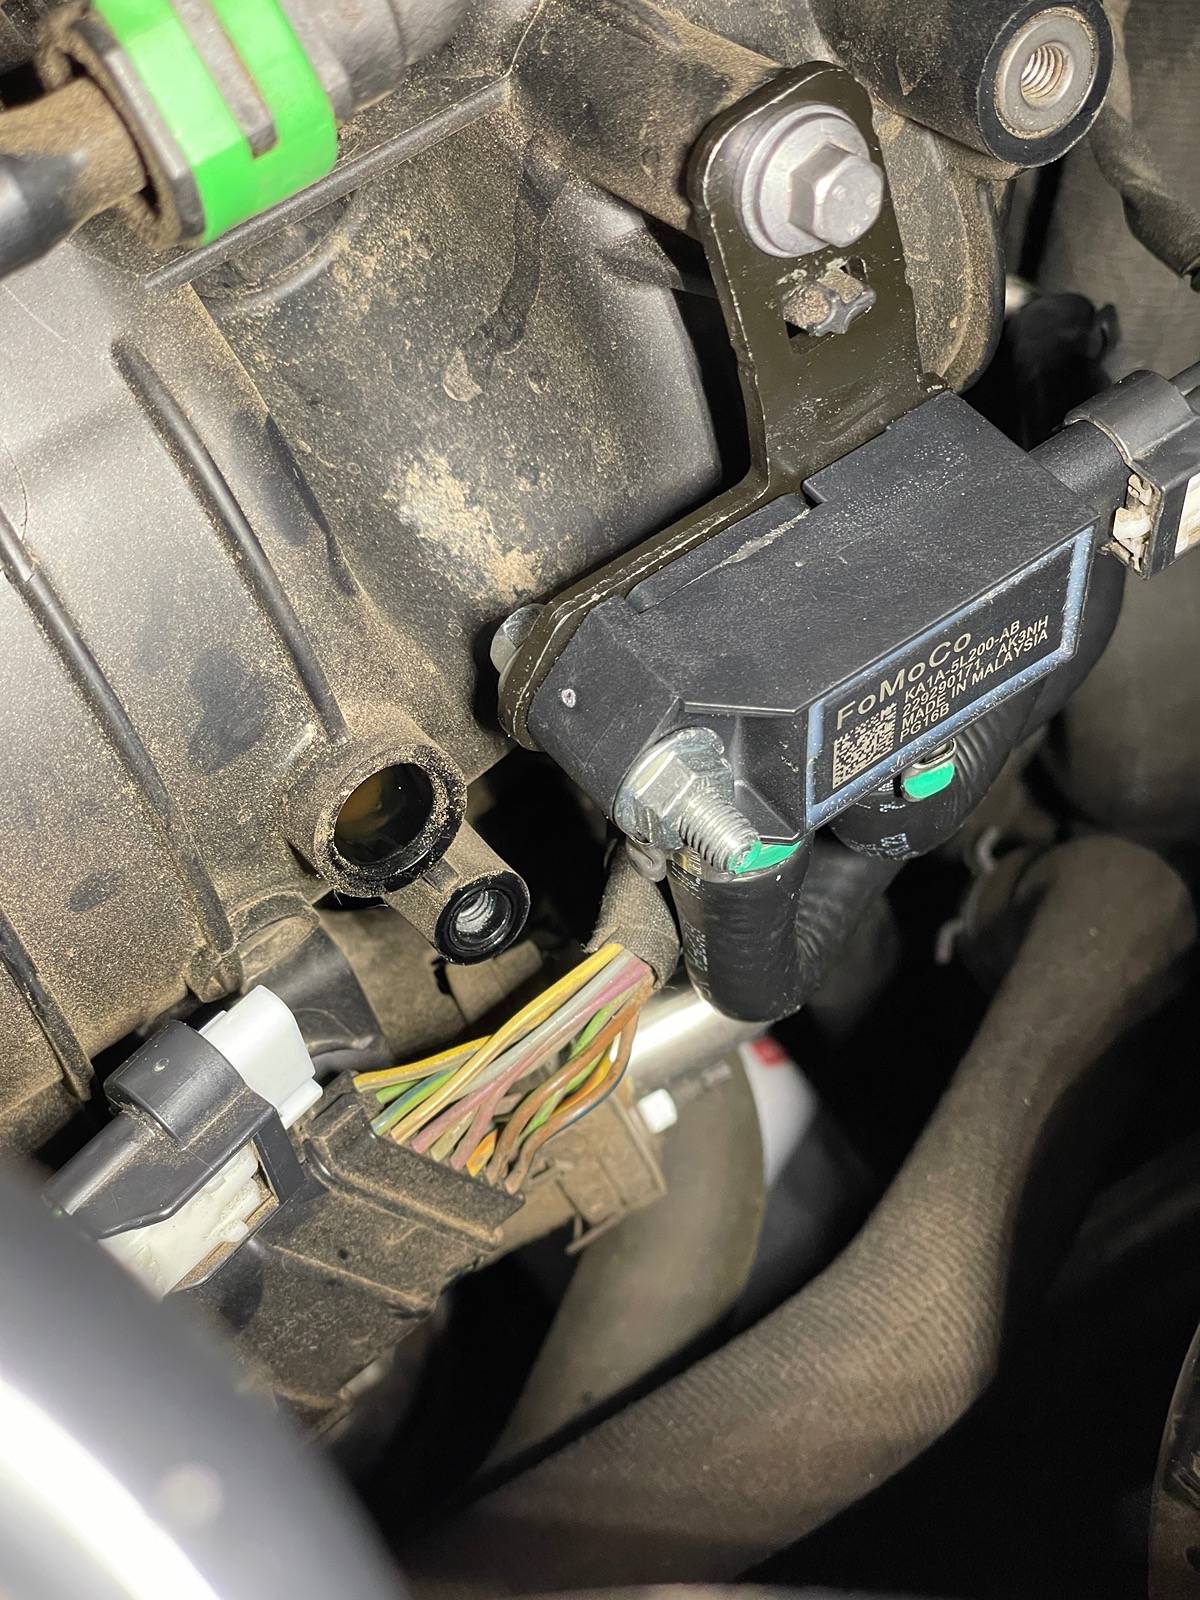
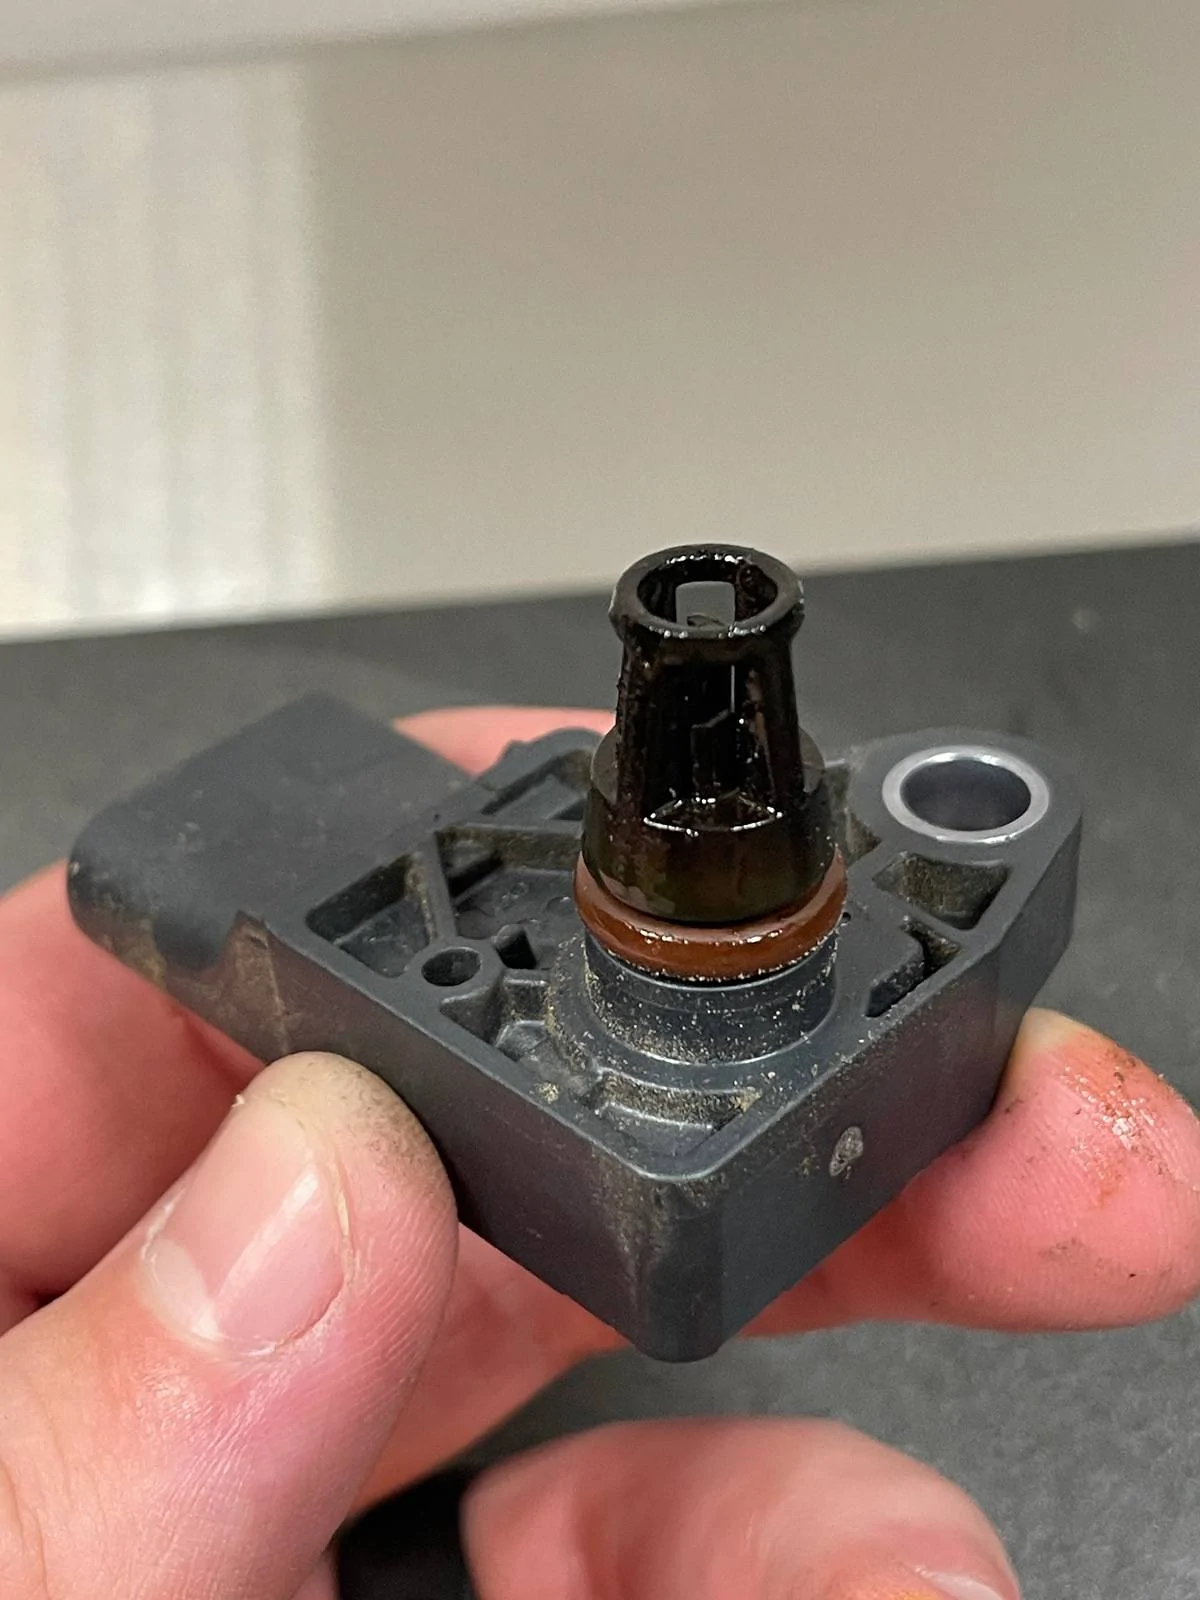
Wiggle the MAPT sensor a little bit and it should pull right out. Ensure the orange o-ring did not become dislodged in your intake. My MAPT sensor had a light coating of oil on it, so I opted to clean the mounting hole out with a shop towel the best I could. Might have to invest in an oil catch can eventually..
STEP FIVE :
Install your new MAPT sensor. All it takes is a little push and you can rotate the bolt mounting hole where it lines up on the intake. Interesting enough my OEM MAPT sensor was manufactured in Mexico (MX) and the new one was probably manufactured by Bosch in Germany. I trust German quality more any-day.
STEP SIX :
Hand thread the T30 Torx bolt through the mounting hole into the intake to prevent cross threading the best you can. Lighty snug with your ratchet.
Use your Torque Wrench set to 53 in.lbs (6Nm) to finish securing the T30 bolt. It does not take much force at all to hear the click.
STEP SEVEN :
Plug the connector back on to the new MAPT sensor until you hear a click. Use your fingernail to push the locking tab forward to engage.
STEP EIGHT :
Crank your Ranger to see if a check engine light or any error message appears. Take a test drive around the neighborhood if desired. It could be placebo effect but I noticed a slightly better drive overall.
At the end of the day I believe replacing the DPFE and MAPT sensor was a one-two punch approach to help resolve any surging/bucking my Ranger had. I have always considered MAF (MAPT in our Rangers) to be a every five year maintenance item depending on cost and I will add this into my Ranger's maintenance routine for peace of mind.
That's it! Grab a cold one and enjoy a job well done!

Dropping another one of my write-ups. This time on our intake manifold MAPT (Manifold Absolute Pressure & Temperature) sensor.
When I was working on my bucking/surging issue by replacing the DPFE (Differential Pressure Feedback) sensor, I figured why not go ahead and change the MAPT sensor as well since it is located right beside the DPFE sensor.
Supplies Needed :
-MAPT Sensor (Ford K2GZ-9F479-A) ($43 on FordParts.com and delivered to my doorstep less than 24 hours after ordering)
-3/8" or 1/4" Ratchet (Cordless Ratchet can be beneficial)
-T30 Torx Socket or bit
-Torque Wrench set to 53 in.lbs (6 Nm)
-LIGHT (Headlamp, Milwaukee Rover, etc)
-Work Platform or Step Ladder
STEP ONE :
Pop the hood and locate the MAPT sensor. It is located next to the DPFE sensor on the driver's side of the engine protruding from the intake manifold.
STEP TWO :
Remove the MAPT electrical connector. It works like every other connector on our truck; use your fingernail to slide the locking tab back (circled) and wiggle the connector off pulling towards you.
STEP THREE :
Use your 3/8" ratchet and T30 Torx Socket to remove the MAPT bolt. It is faster if you initially break the bolt with your ratchet and then remove it with a cordless ratchet. Be sure to either catch the bolt or finish unthreading it with your fingers to ensure it does not drop into the engine bay.
STEP FOUR :
Wiggle the MAPT sensor a little bit and it should pull right out. Ensure the orange o-ring did not become dislodged in your intake. My MAPT sensor had a light coating of oil on it, so I opted to clean the mounting hole out with a shop towel the best I could. Might have to invest in an oil catch can eventually..
STEP FIVE :
Install your new MAPT sensor. All it takes is a little push and you can rotate the bolt mounting hole where it lines up on the intake. Interesting enough my OEM MAPT sensor was manufactured in Mexico (MX) and the new one was probably manufactured by Bosch in Germany. I trust German quality more any-day.

STEP SIX :
Hand thread the T30 Torx bolt through the mounting hole into the intake to prevent cross threading the best you can. Lighty snug with your ratchet.
Use your Torque Wrench set to 53 in.lbs (6Nm) to finish securing the T30 bolt. It does not take much force at all to hear the click.
STEP SEVEN :
Plug the connector back on to the new MAPT sensor until you hear a click. Use your fingernail to push the locking tab forward to engage.
STEP EIGHT :
Crank your Ranger to see if a check engine light or any error message appears. Take a test drive around the neighborhood if desired. It could be placebo effect but I noticed a slightly better drive overall.
At the end of the day I believe replacing the DPFE and MAPT sensor was a one-two punch approach to help resolve any surging/bucking my Ranger had. I have always considered MAF (MAPT in our Rangers) to be a every five year maintenance item depending on cost and I will add this into my Ranger's maintenance routine for peace of mind.
That's it! Grab a cold one and enjoy a job well done!
Sponsored
Last edited:
