Trash Panda
Well-Known Member
- Thread starter
- #1
Greetings All,
Dropping another one of my write-ups. This time on our Intake Air Temperature (IAT) sensor. (Also known as a Air Charge Temperature Sensor)
When I was working on my bucking/surging issue by replacing the DPFE (Differential Pressure Feedback) sensor, I figured why not go ahead and change both the MAPT and IAT sensors to hit the big three sensors when it comes to engine efficiency.
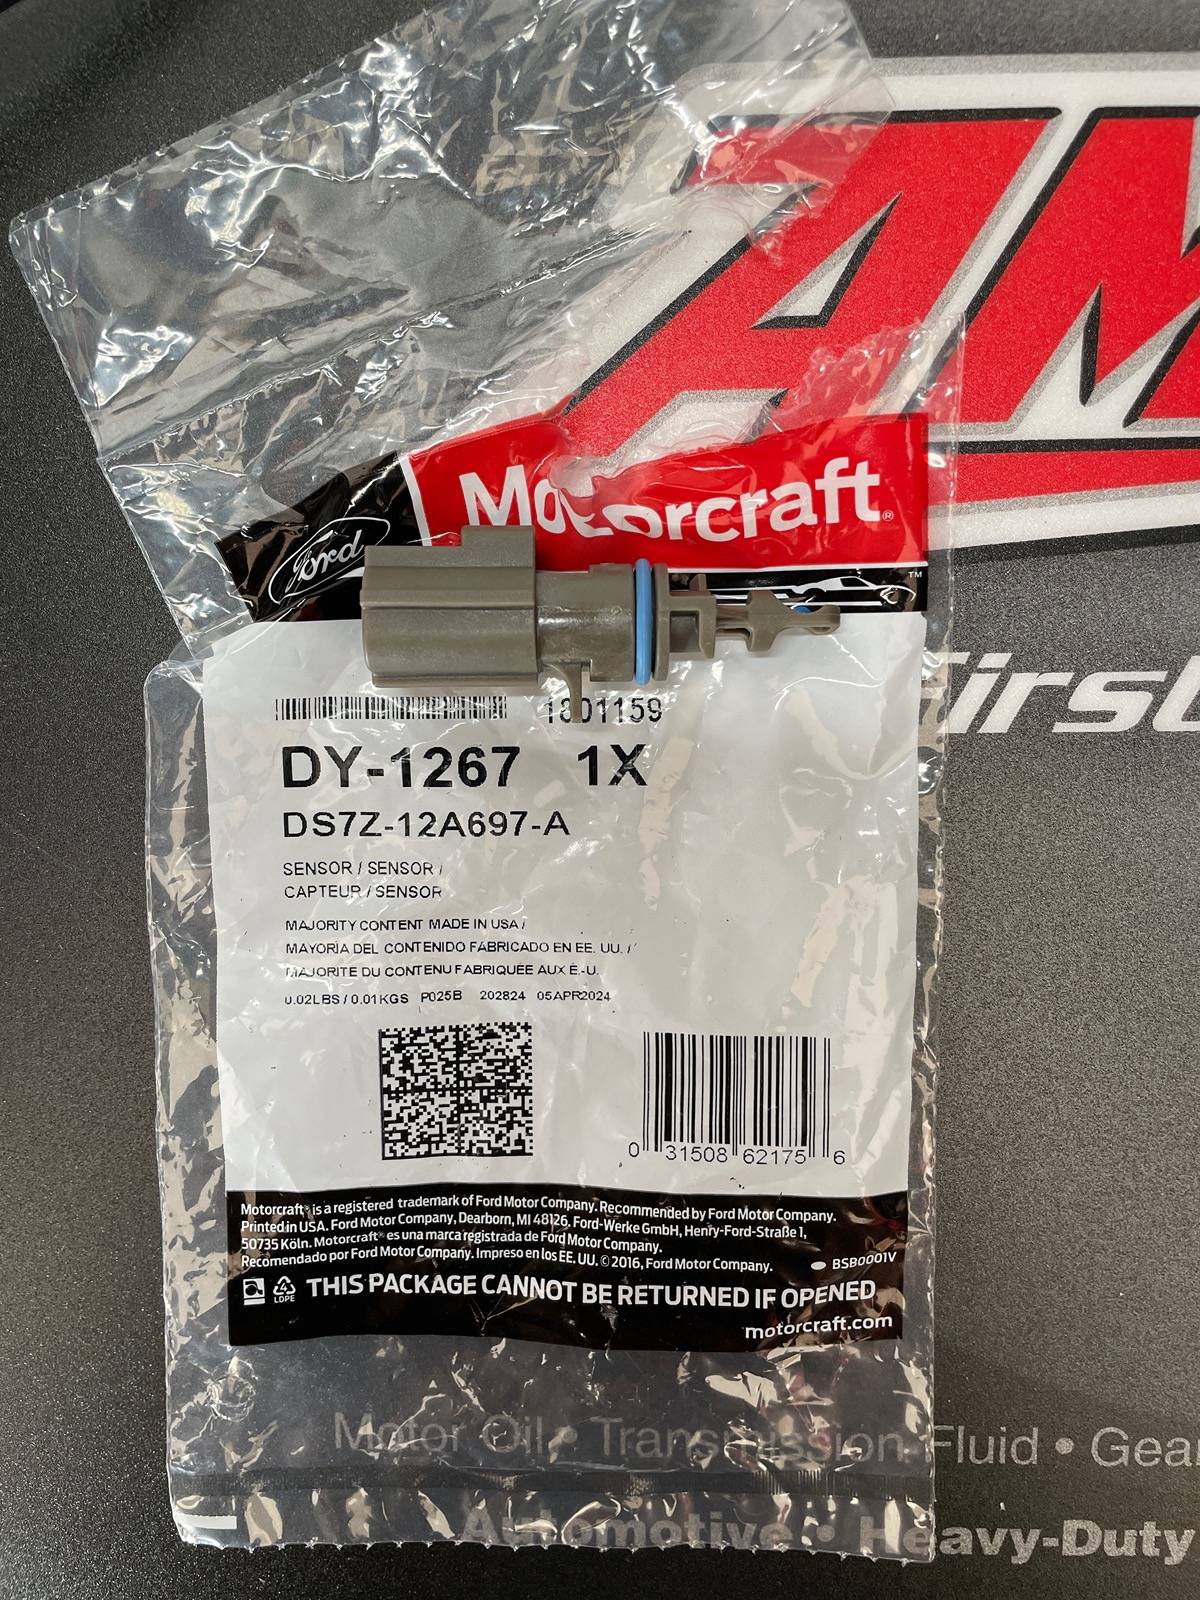
Supplies Needed :
-IAT Sensor (Ford DS7Z-12A697-A) ($17 on FordParts.com and delivered to my doorstep less than 24 hours after ordering)
-Small Flathead (or Slotted) screwdriver

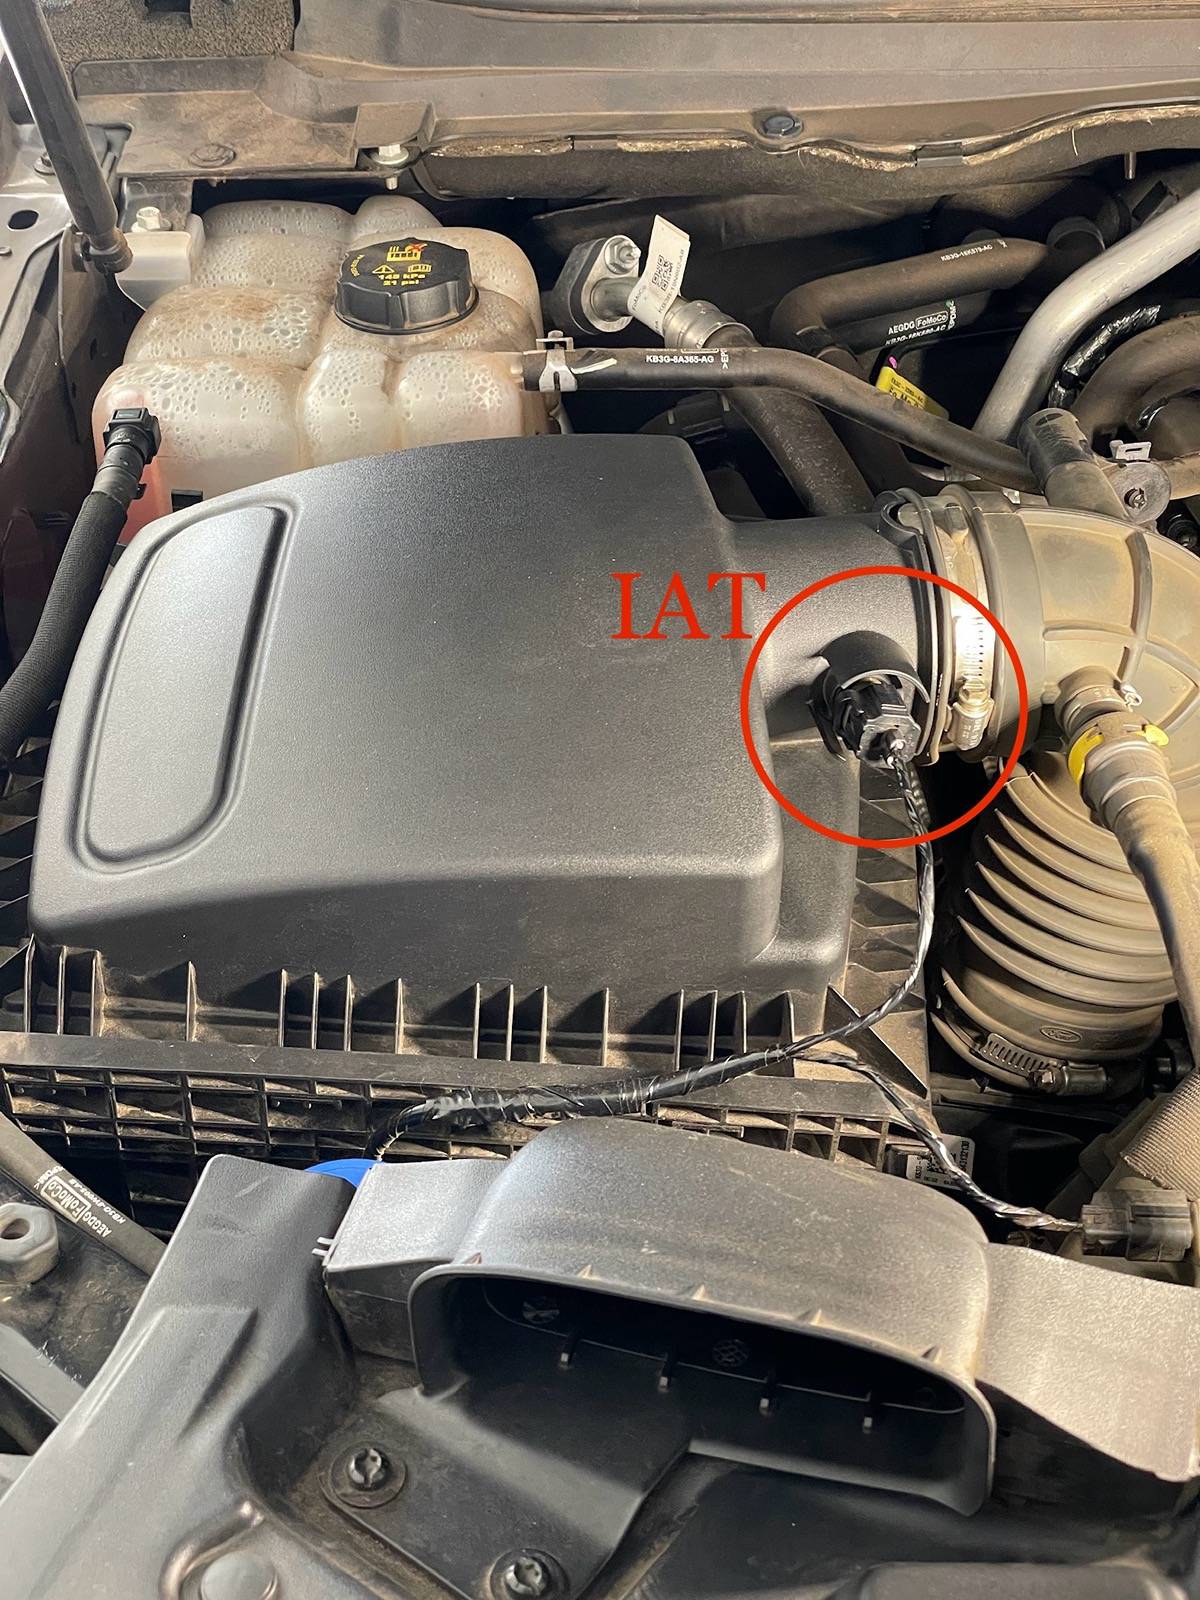
STEP ONE :
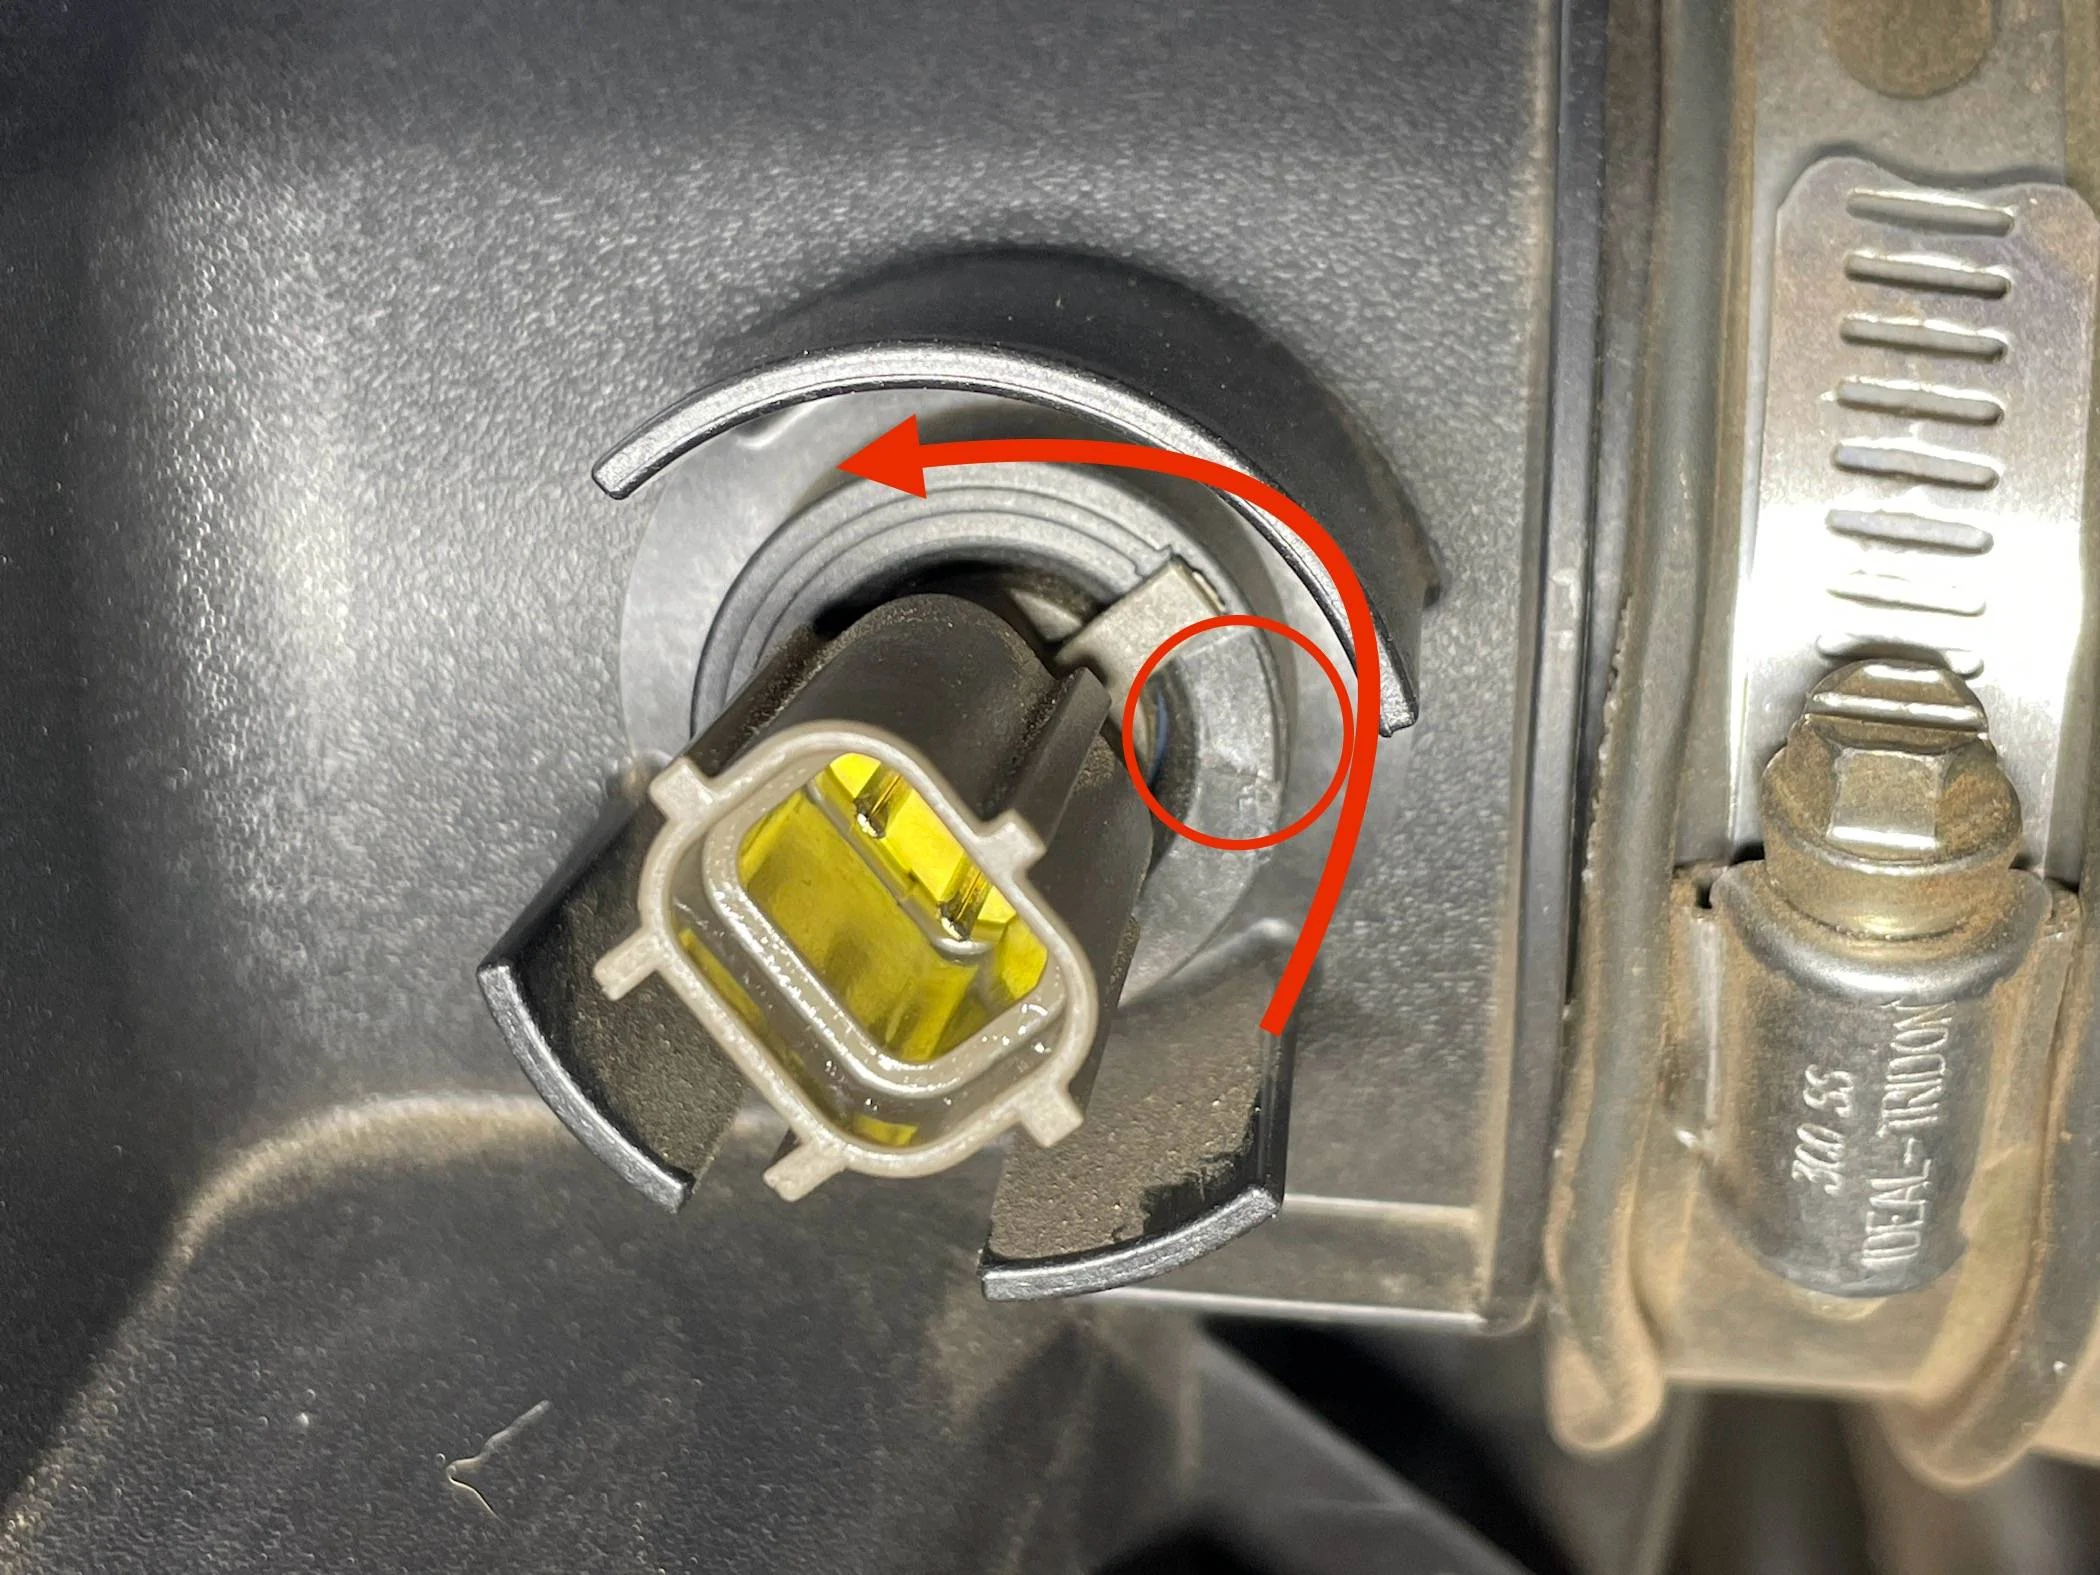
Pop the hood and locate the IAT sensor. It is located on the top of your Air Cleaner assembly on the passenger side of your Ranger. It faintly resembles what a MAF sensor would look like if we had one on our Rangers.
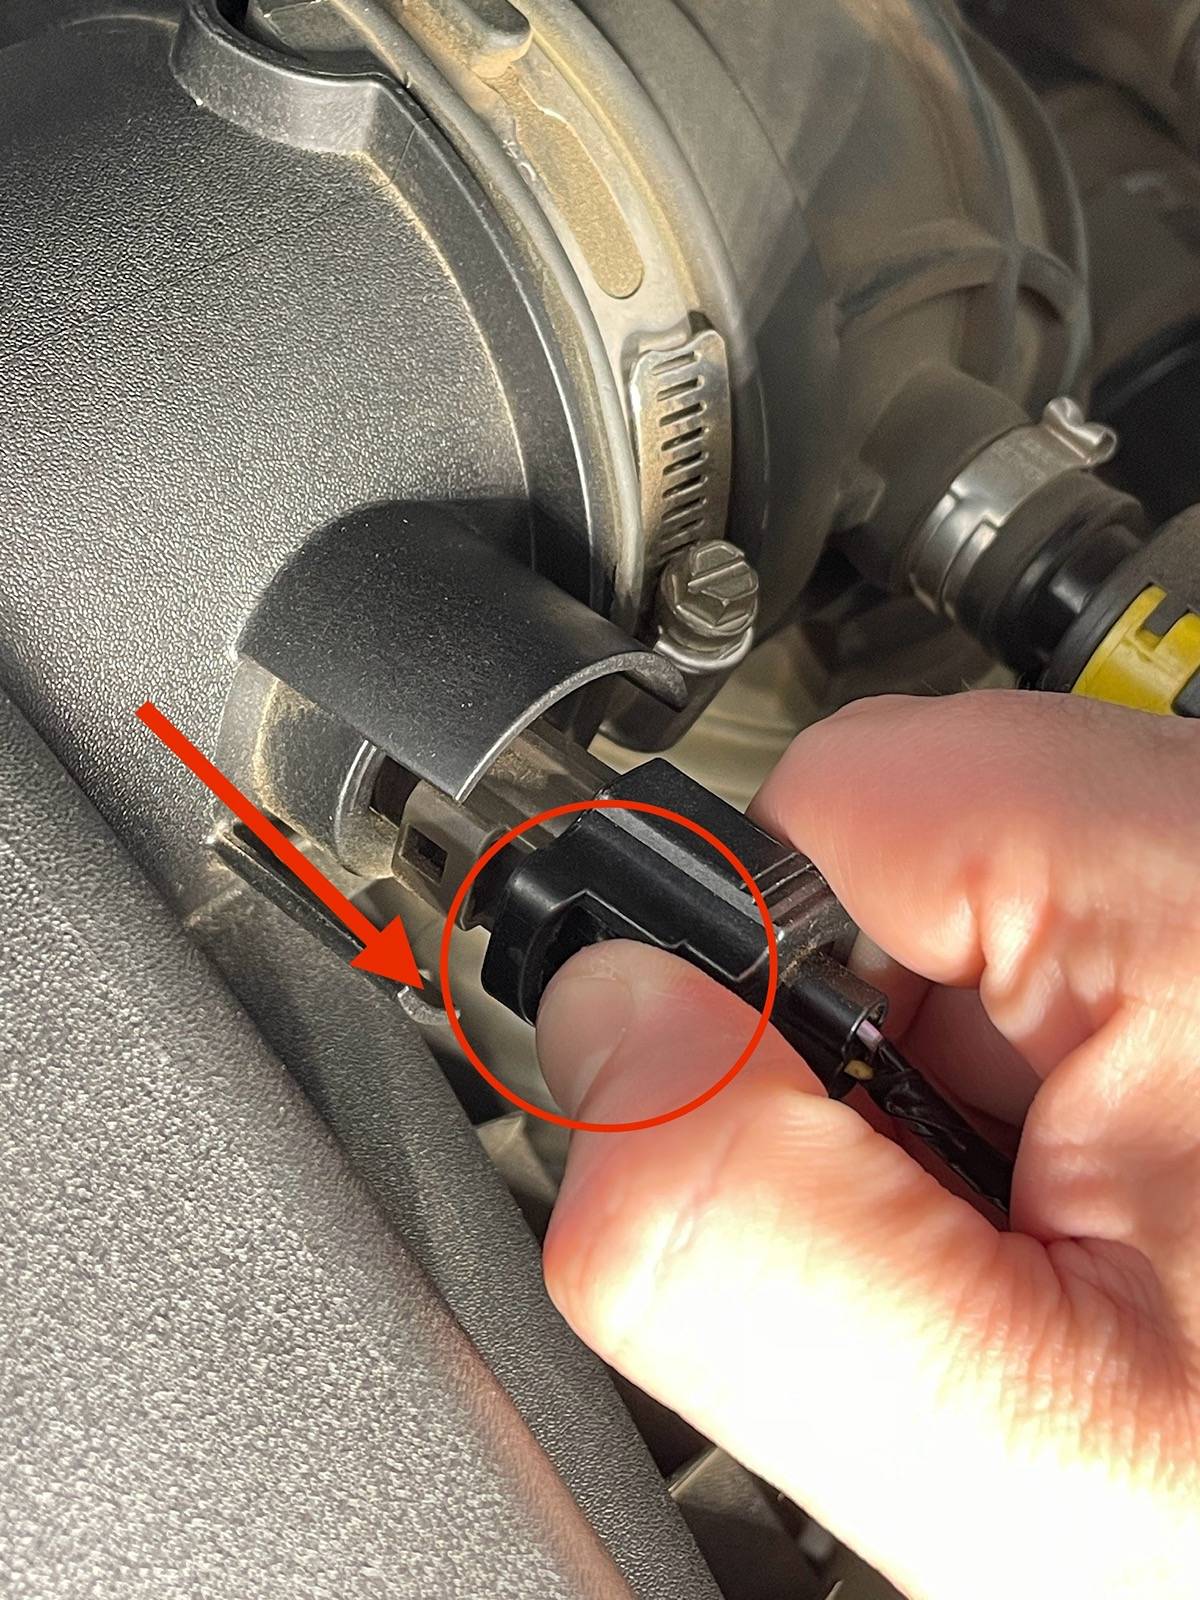
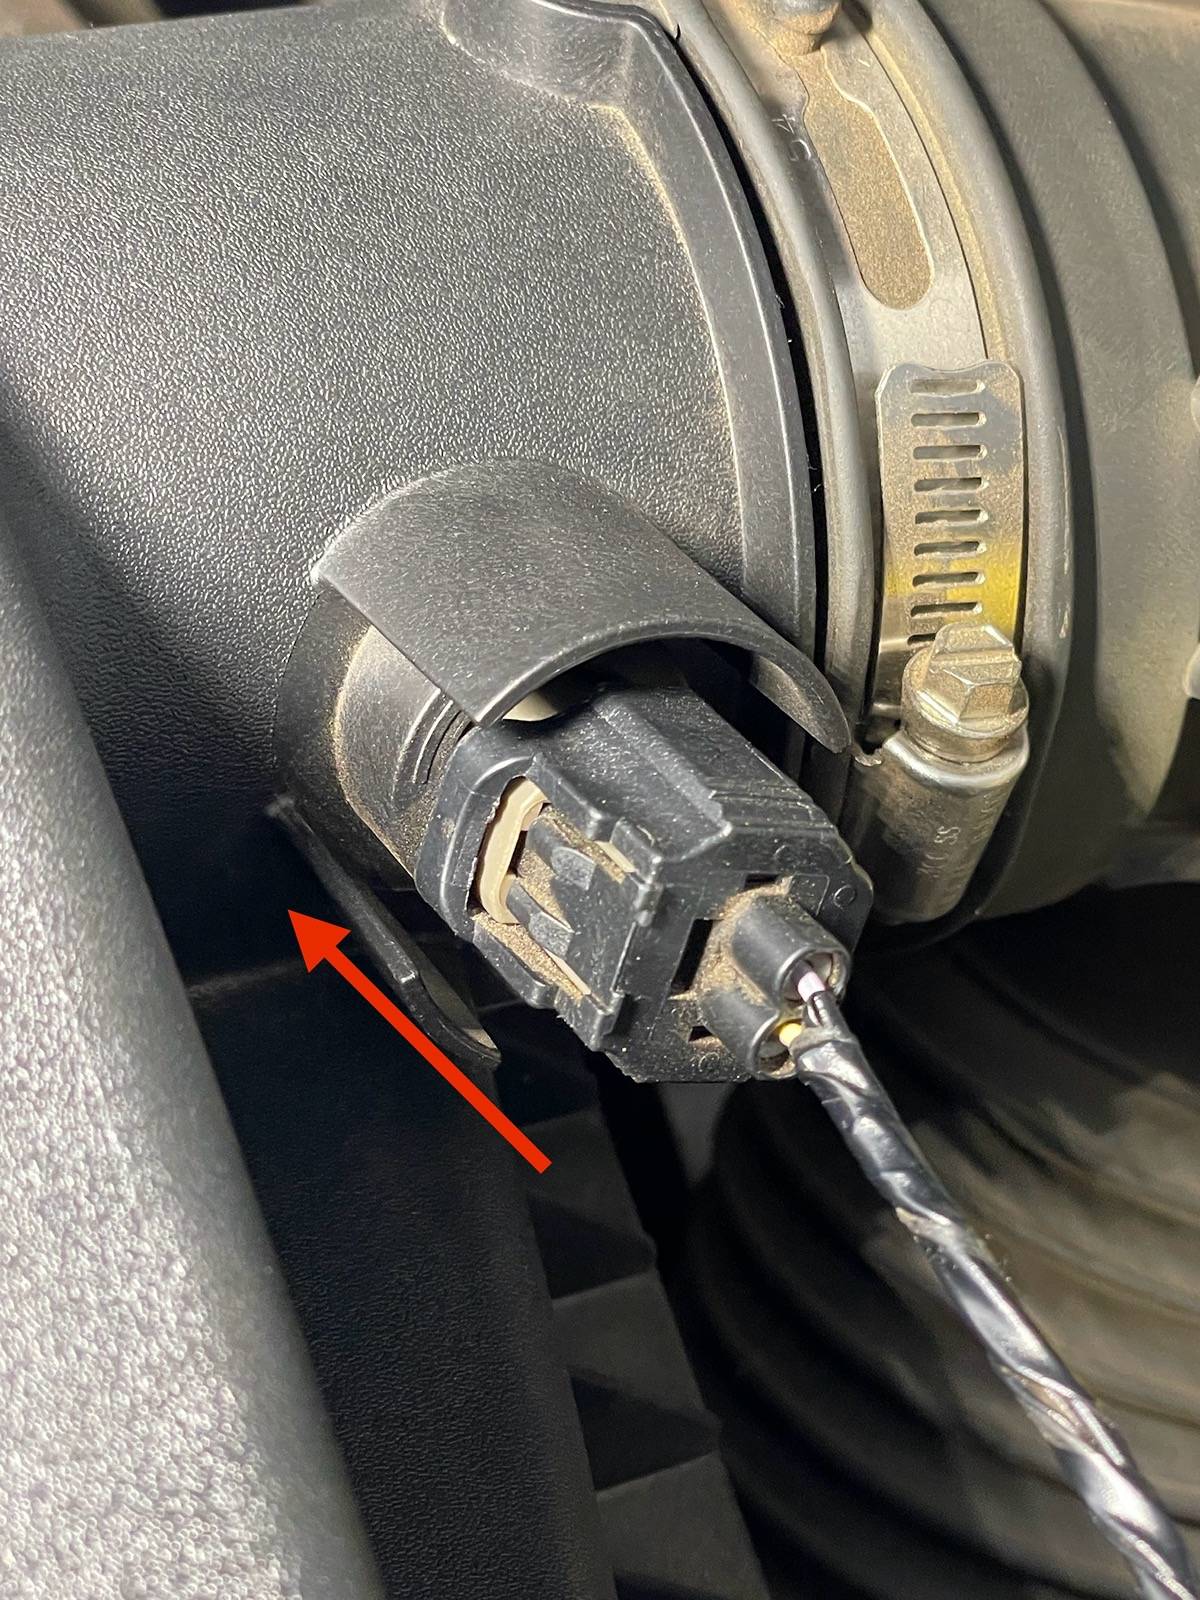
STEP TWO :
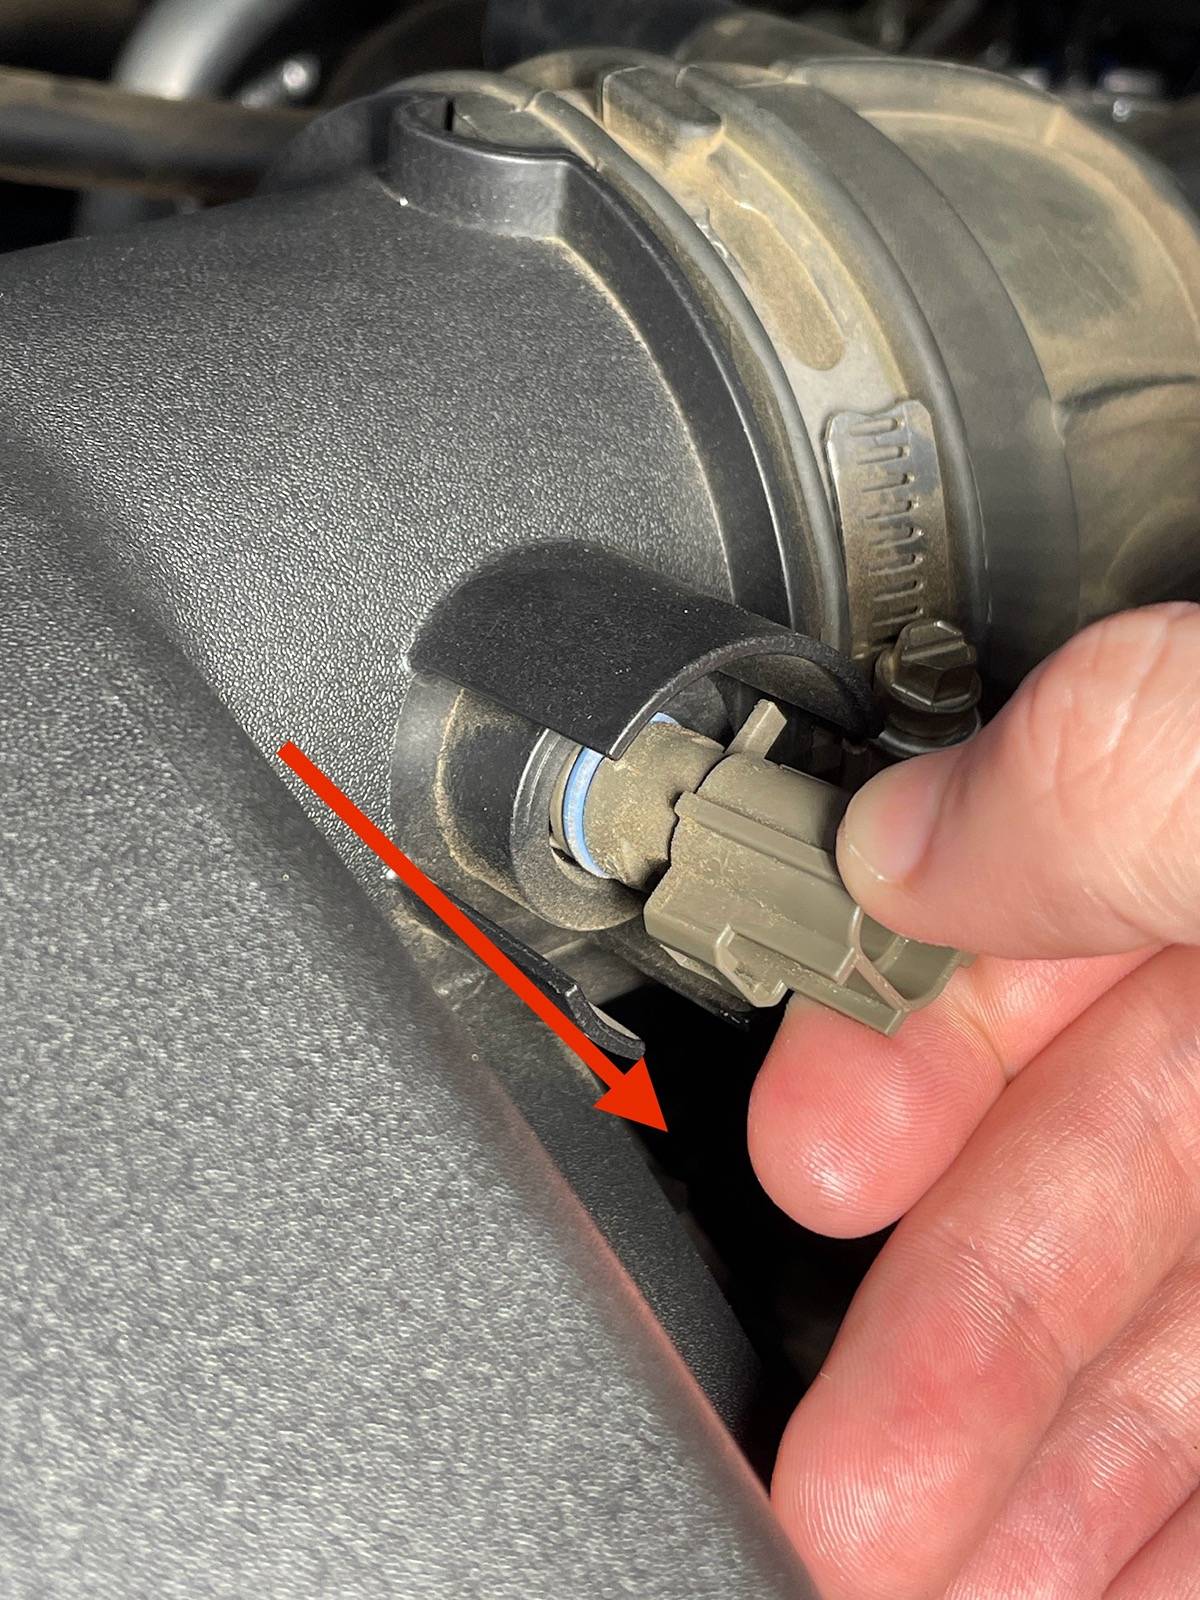
Disconnect the IAT electrical connector. Simply push down on the tab (circled) to release the locking tab and pull it towards you to remove.
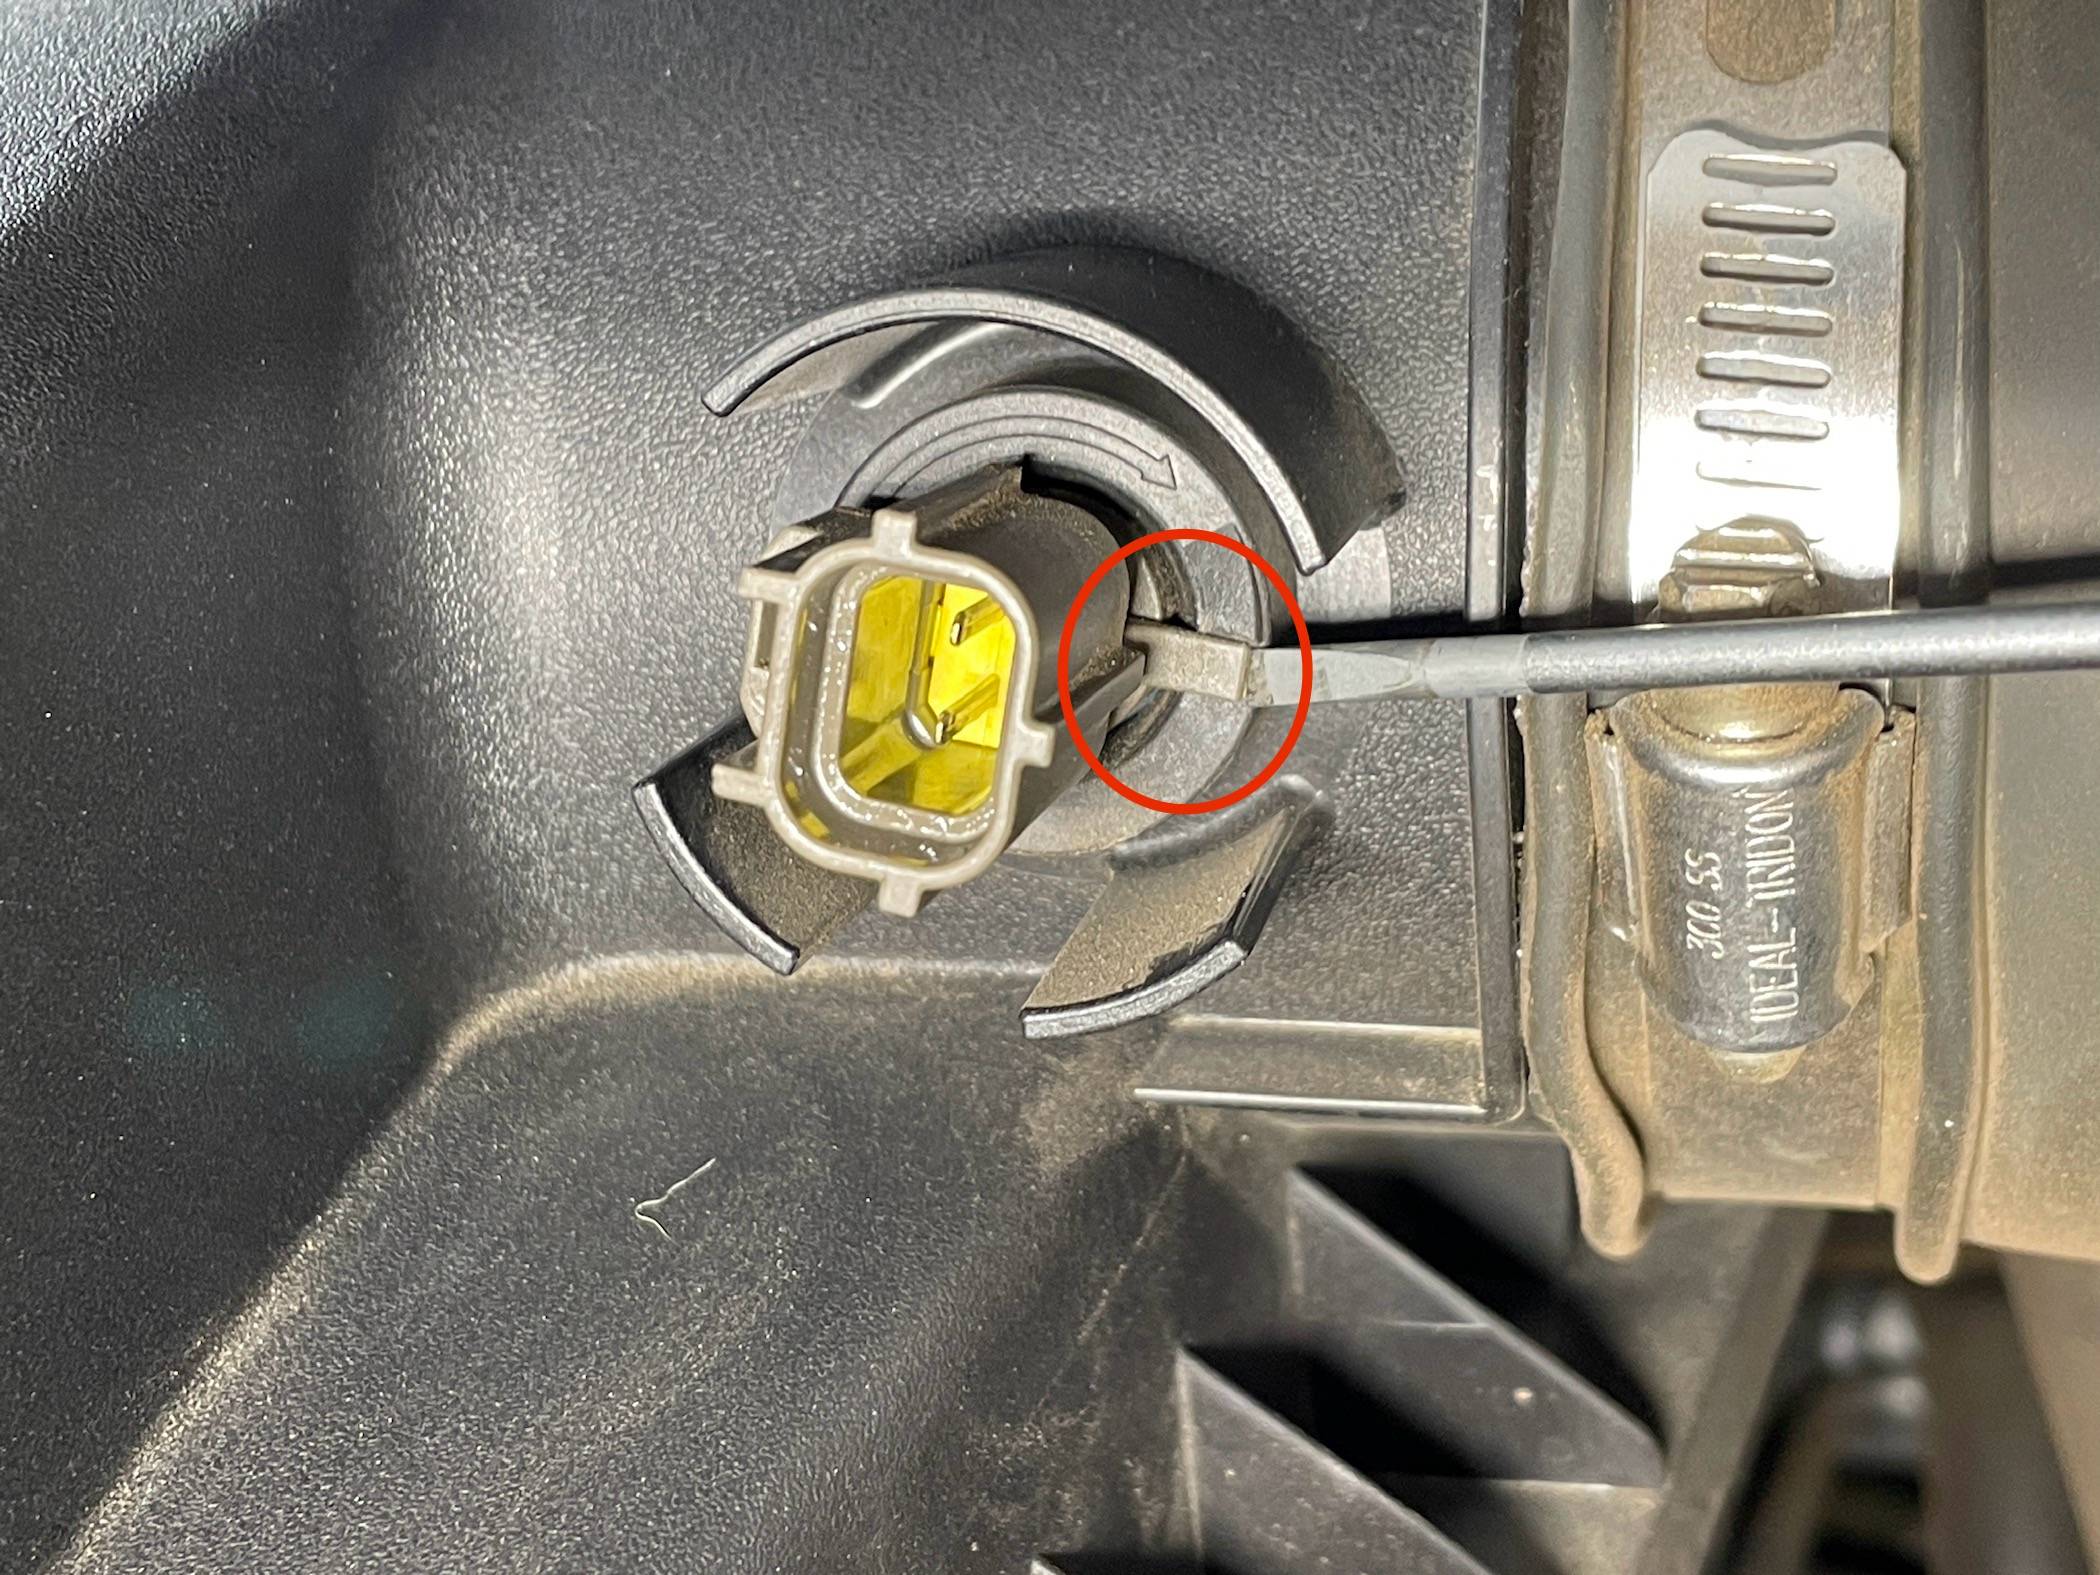
STEP THREE :
Use a small flathead screwdriver to gently pry the plastic tab on the bottom of the IAT upwards over the "hump" on the housing (circled). Once you have the tab pried upwards, turn the IAT counterclockwise to disengage it from the housing for removal.

STEP FOUR :
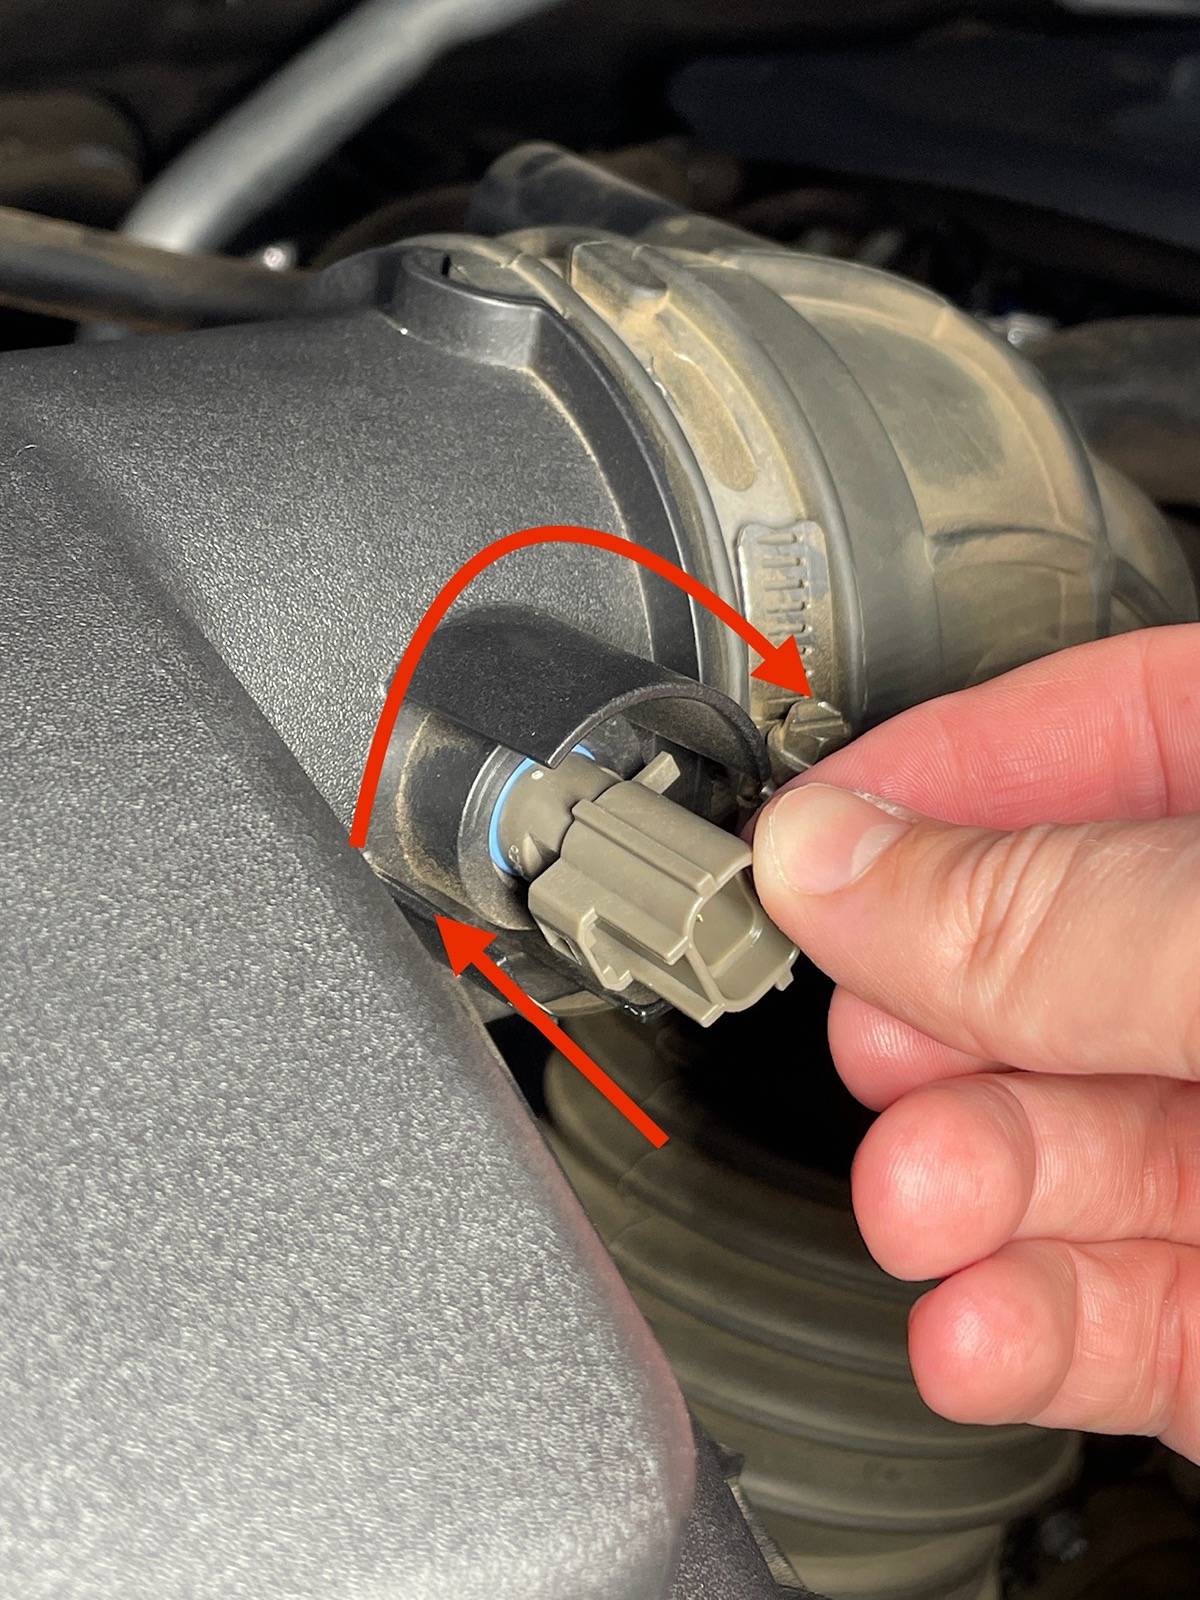
Once you have the tab over the hump and rotated about 45 degrees clockwise simply pull the IAT towards you to remove it from the housing.
STEP FIVE :
Reverse what you just did to install the new IAT. Line up the tabs on the IAT with the tabs you will be able to see inside the Air Cleaner assembly and insert the new IAT. When you insert the new IAT fully turn the IAT clockwise about 40-45 degrees until that plastic tab on the bottom locks in under the "hump" on the assembly.
STEP SIX :
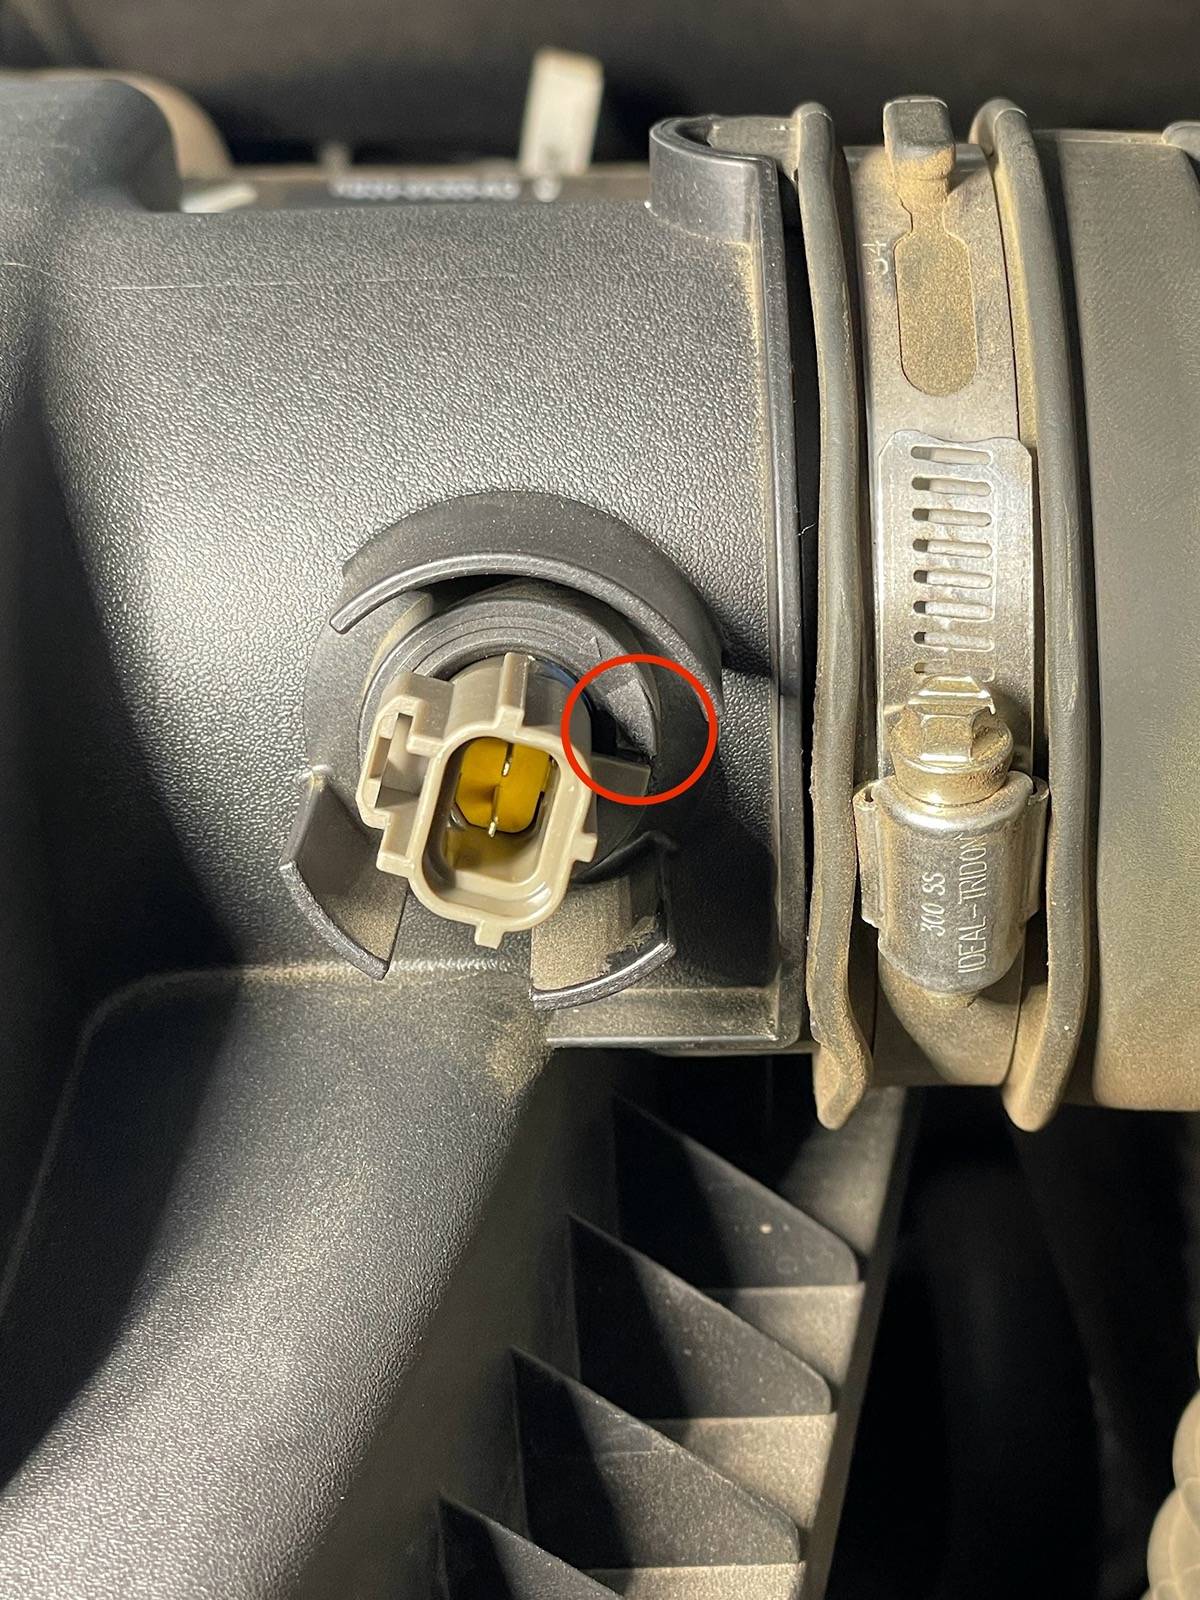
Plug the electrical connector back into the IAT until you hear a "click".
Crank your Ranger to see if a check engine light or any error message appears. Take a test drive around the neighborhood if desired.
That's it! Grab a cold one and enjoy a simple job well done!

Placebo probably, but after changing my DPFE, MAPT, and IAT sensors the truck has not driven this good since I bought it at 27k miles...Granted there's brand new spark plugs and filters in there too.
Dropping another one of my write-ups. This time on our Intake Air Temperature (IAT) sensor. (Also known as a Air Charge Temperature Sensor)
When I was working on my bucking/surging issue by replacing the DPFE (Differential Pressure Feedback) sensor, I figured why not go ahead and change both the MAPT and IAT sensors to hit the big three sensors when it comes to engine efficiency.
Supplies Needed :
-IAT Sensor (Ford DS7Z-12A697-A) ($17 on FordParts.com and delivered to my doorstep less than 24 hours after ordering)
-Small Flathead (or Slotted) screwdriver
STEP ONE :
Pop the hood and locate the IAT sensor. It is located on the top of your Air Cleaner assembly on the passenger side of your Ranger. It faintly resembles what a MAF sensor would look like if we had one on our Rangers.
STEP TWO :
Disconnect the IAT electrical connector. Simply push down on the tab (circled) to release the locking tab and pull it towards you to remove.
STEP THREE :
Use a small flathead screwdriver to gently pry the plastic tab on the bottom of the IAT upwards over the "hump" on the housing (circled). Once you have the tab pried upwards, turn the IAT counterclockwise to disengage it from the housing for removal.
STEP FOUR :
Once you have the tab over the hump and rotated about 45 degrees clockwise simply pull the IAT towards you to remove it from the housing.
STEP FIVE :
Reverse what you just did to install the new IAT. Line up the tabs on the IAT with the tabs you will be able to see inside the Air Cleaner assembly and insert the new IAT. When you insert the new IAT fully turn the IAT clockwise about 40-45 degrees until that plastic tab on the bottom locks in under the "hump" on the assembly.
STEP SIX :
Plug the electrical connector back into the IAT until you hear a "click".
Crank your Ranger to see if a check engine light or any error message appears. Take a test drive around the neighborhood if desired.
That's it! Grab a cold one and enjoy a simple job well done!
Placebo probably, but after changing my DPFE, MAPT, and IAT sensors the truck has not driven this good since I bought it at 27k miles...Granted there's brand new spark plugs and filters in there too.
Sponsored
 It did fix what I thought was the transmission going out for now..