Sponsored

Ford performance oil separator issue

JimJ

Well-Known Member
First Name
Jim
Joined
Aug 26, 2021
Threads
1
Messages
228
Reaction score
372
Location
Twisp Washington
Vehicle(s)
07 FX4. Level2. 2022 SC FX4 on order
Occupation
Retired
Thanks for the reminder to check. 1500 miles and this is what just poured out. Milky, reeking if fuel.

IMG_5515.webp

IMG_5516.webp
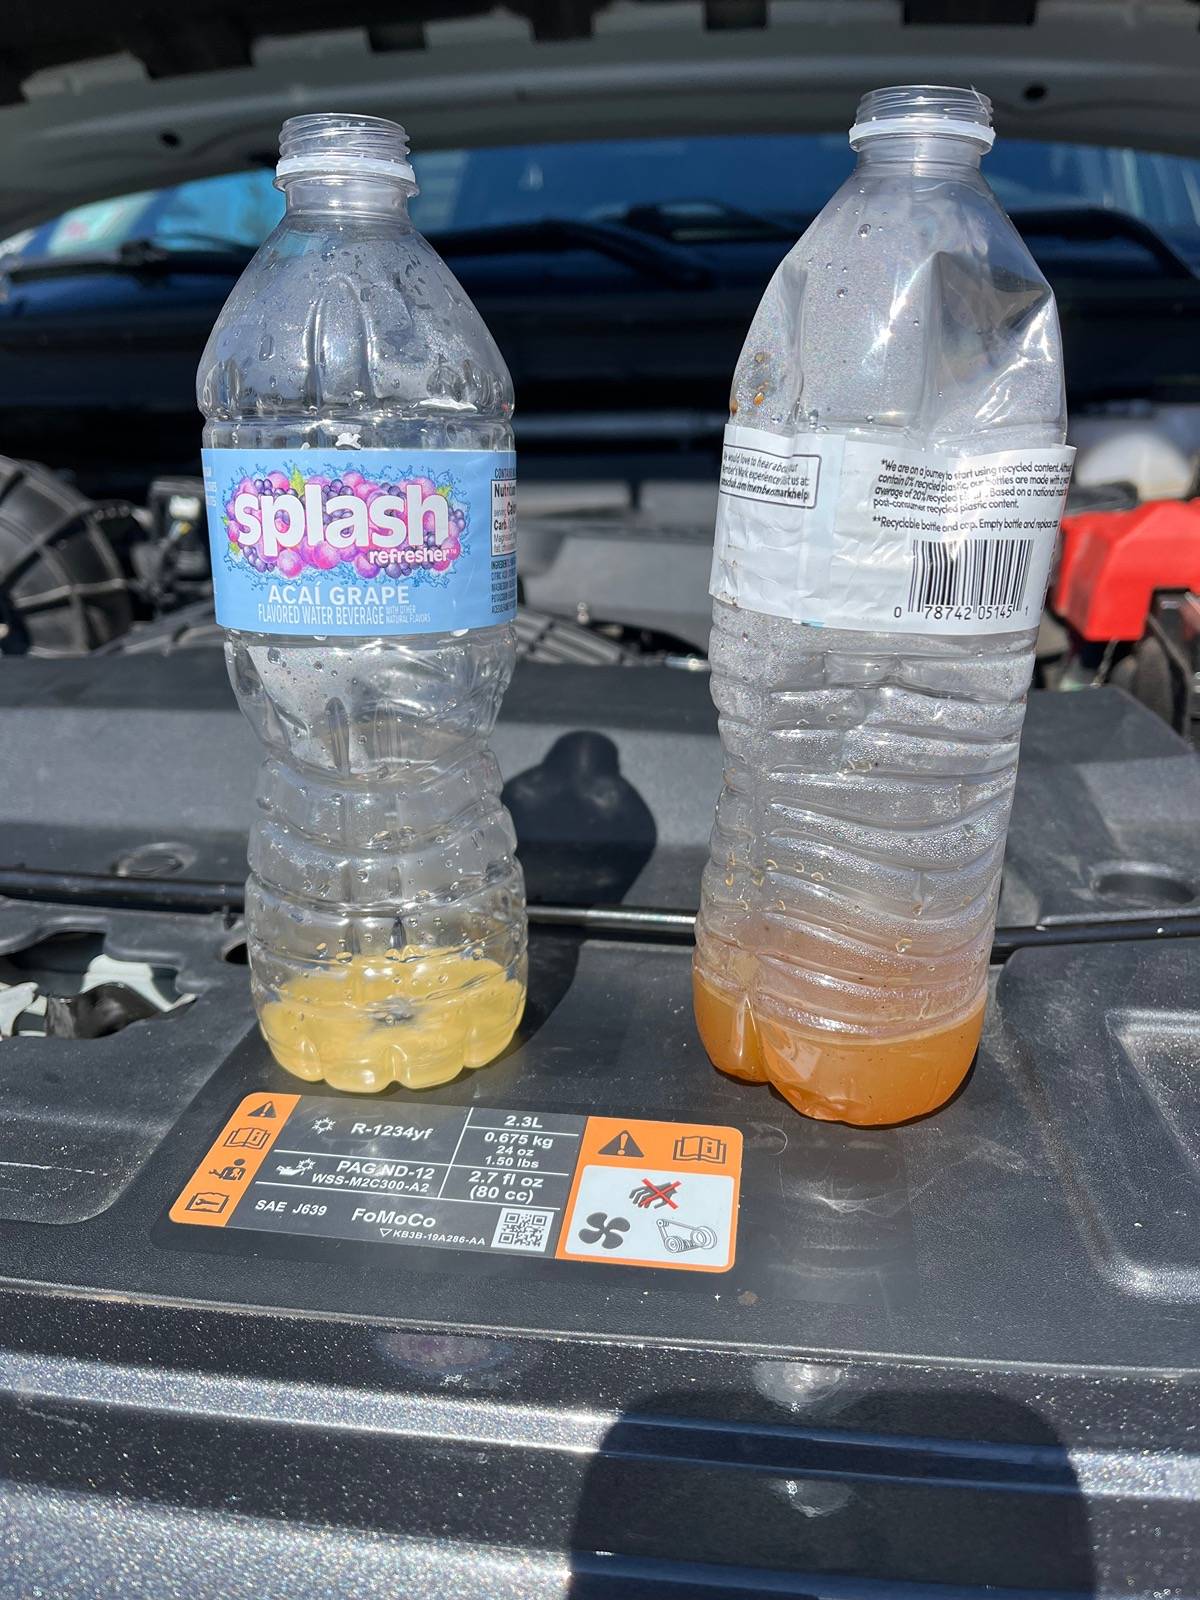
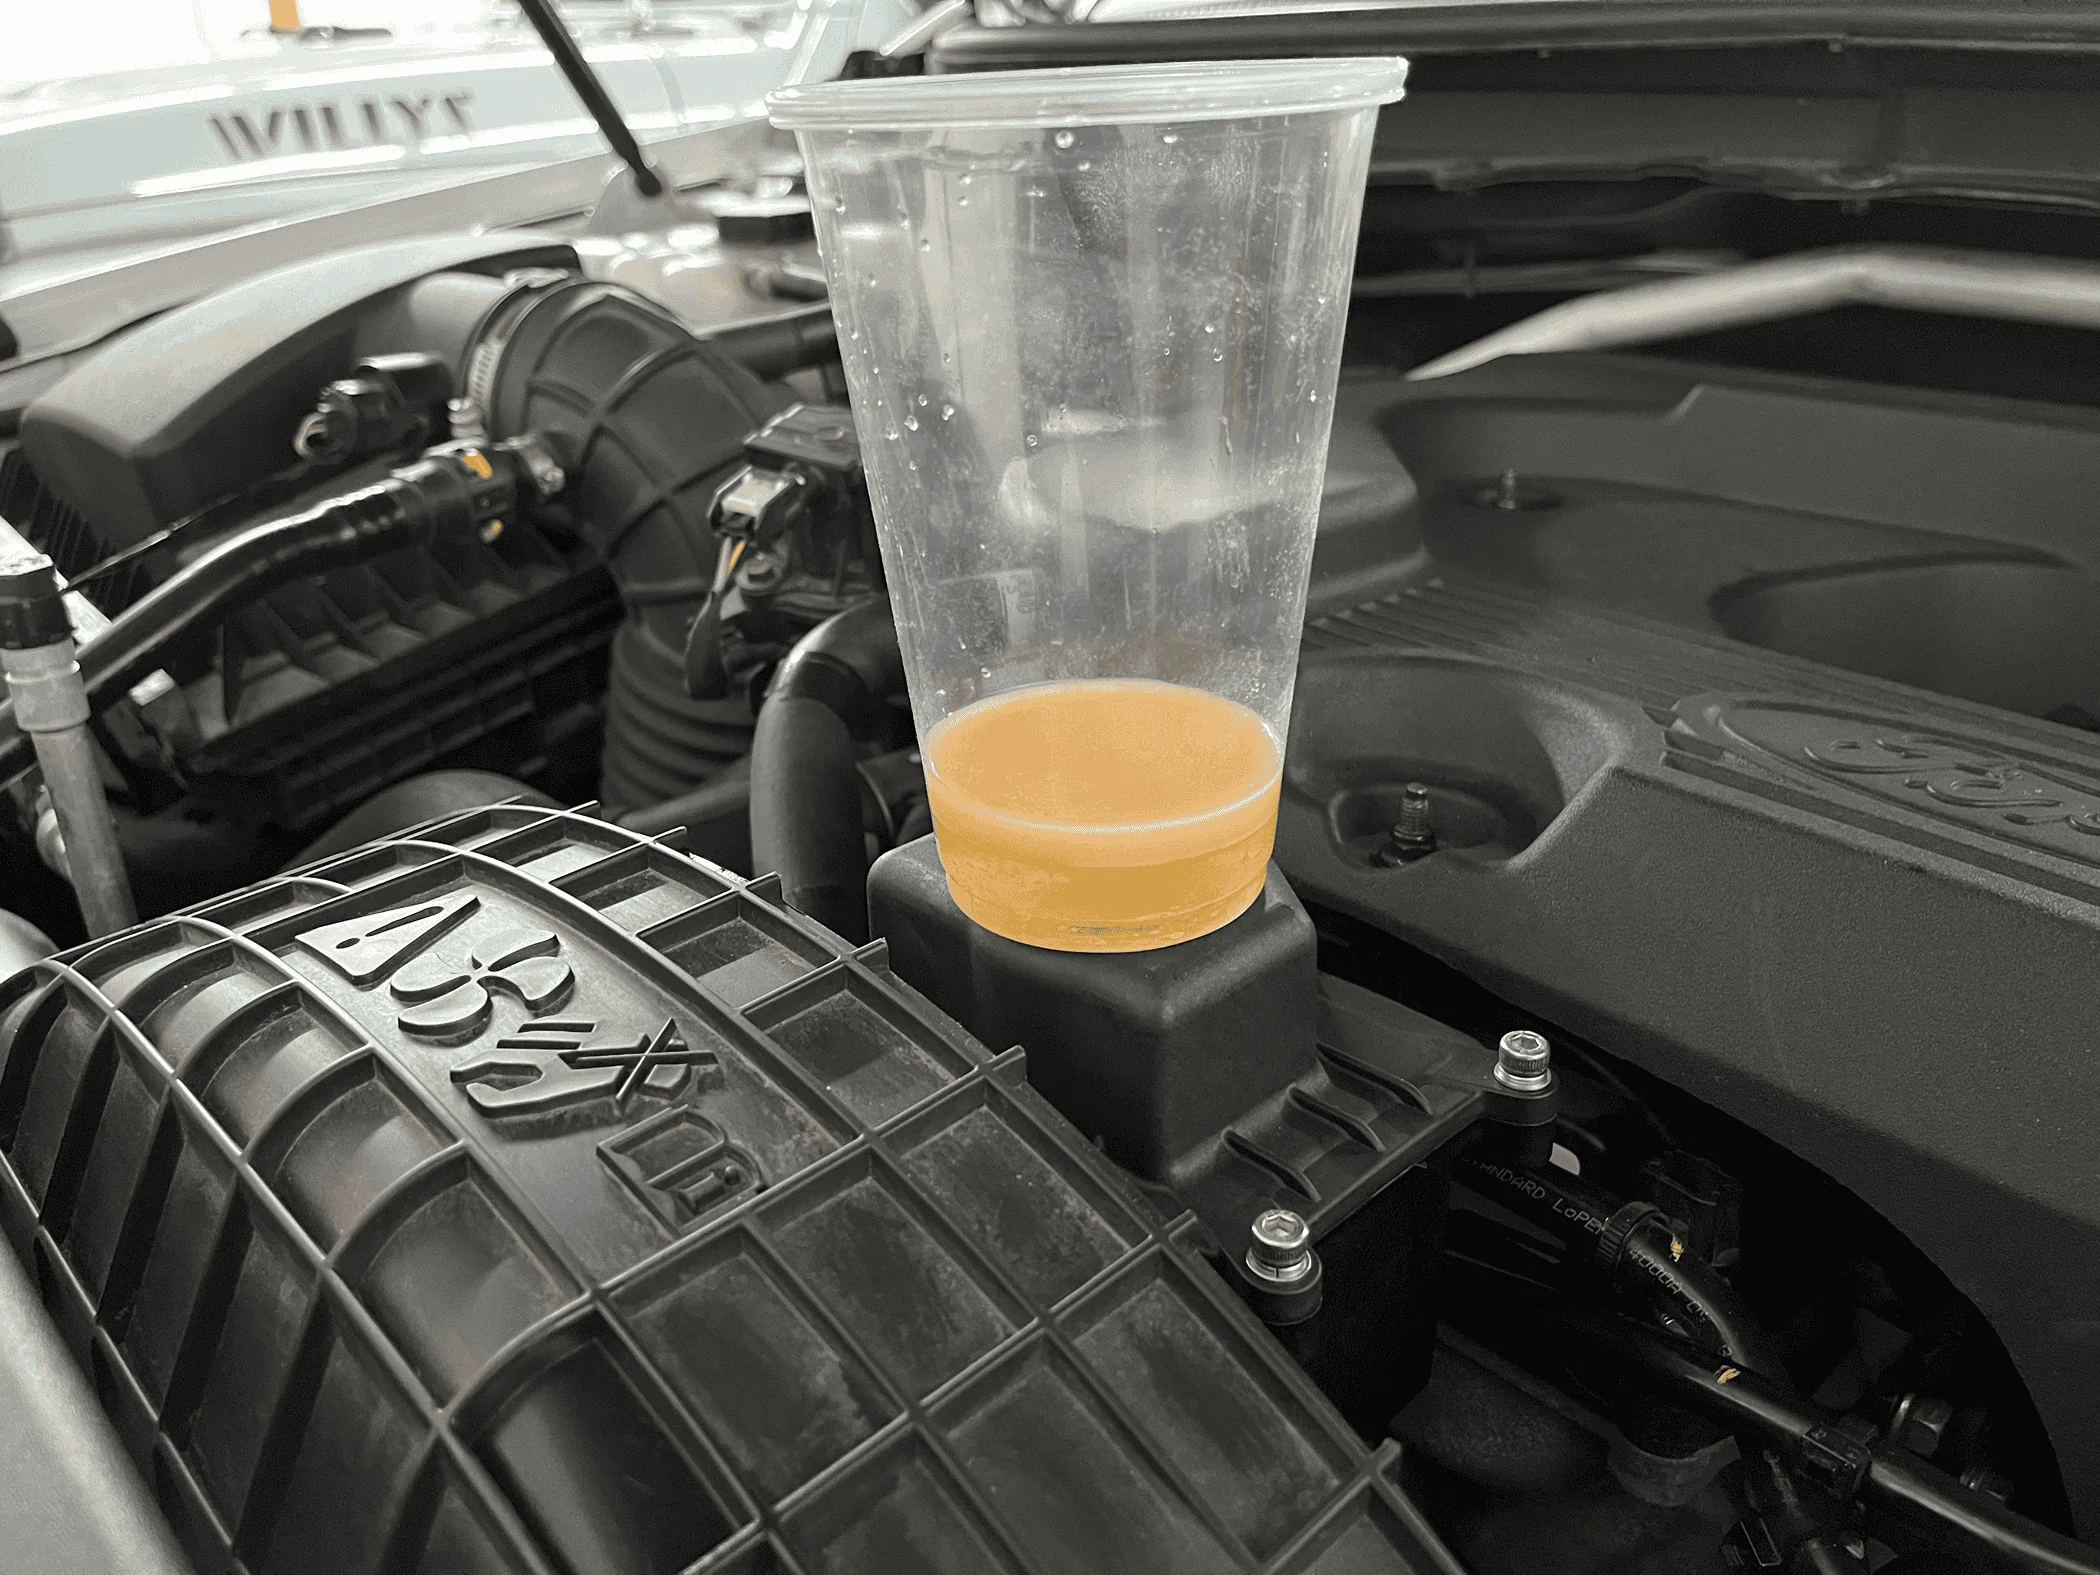
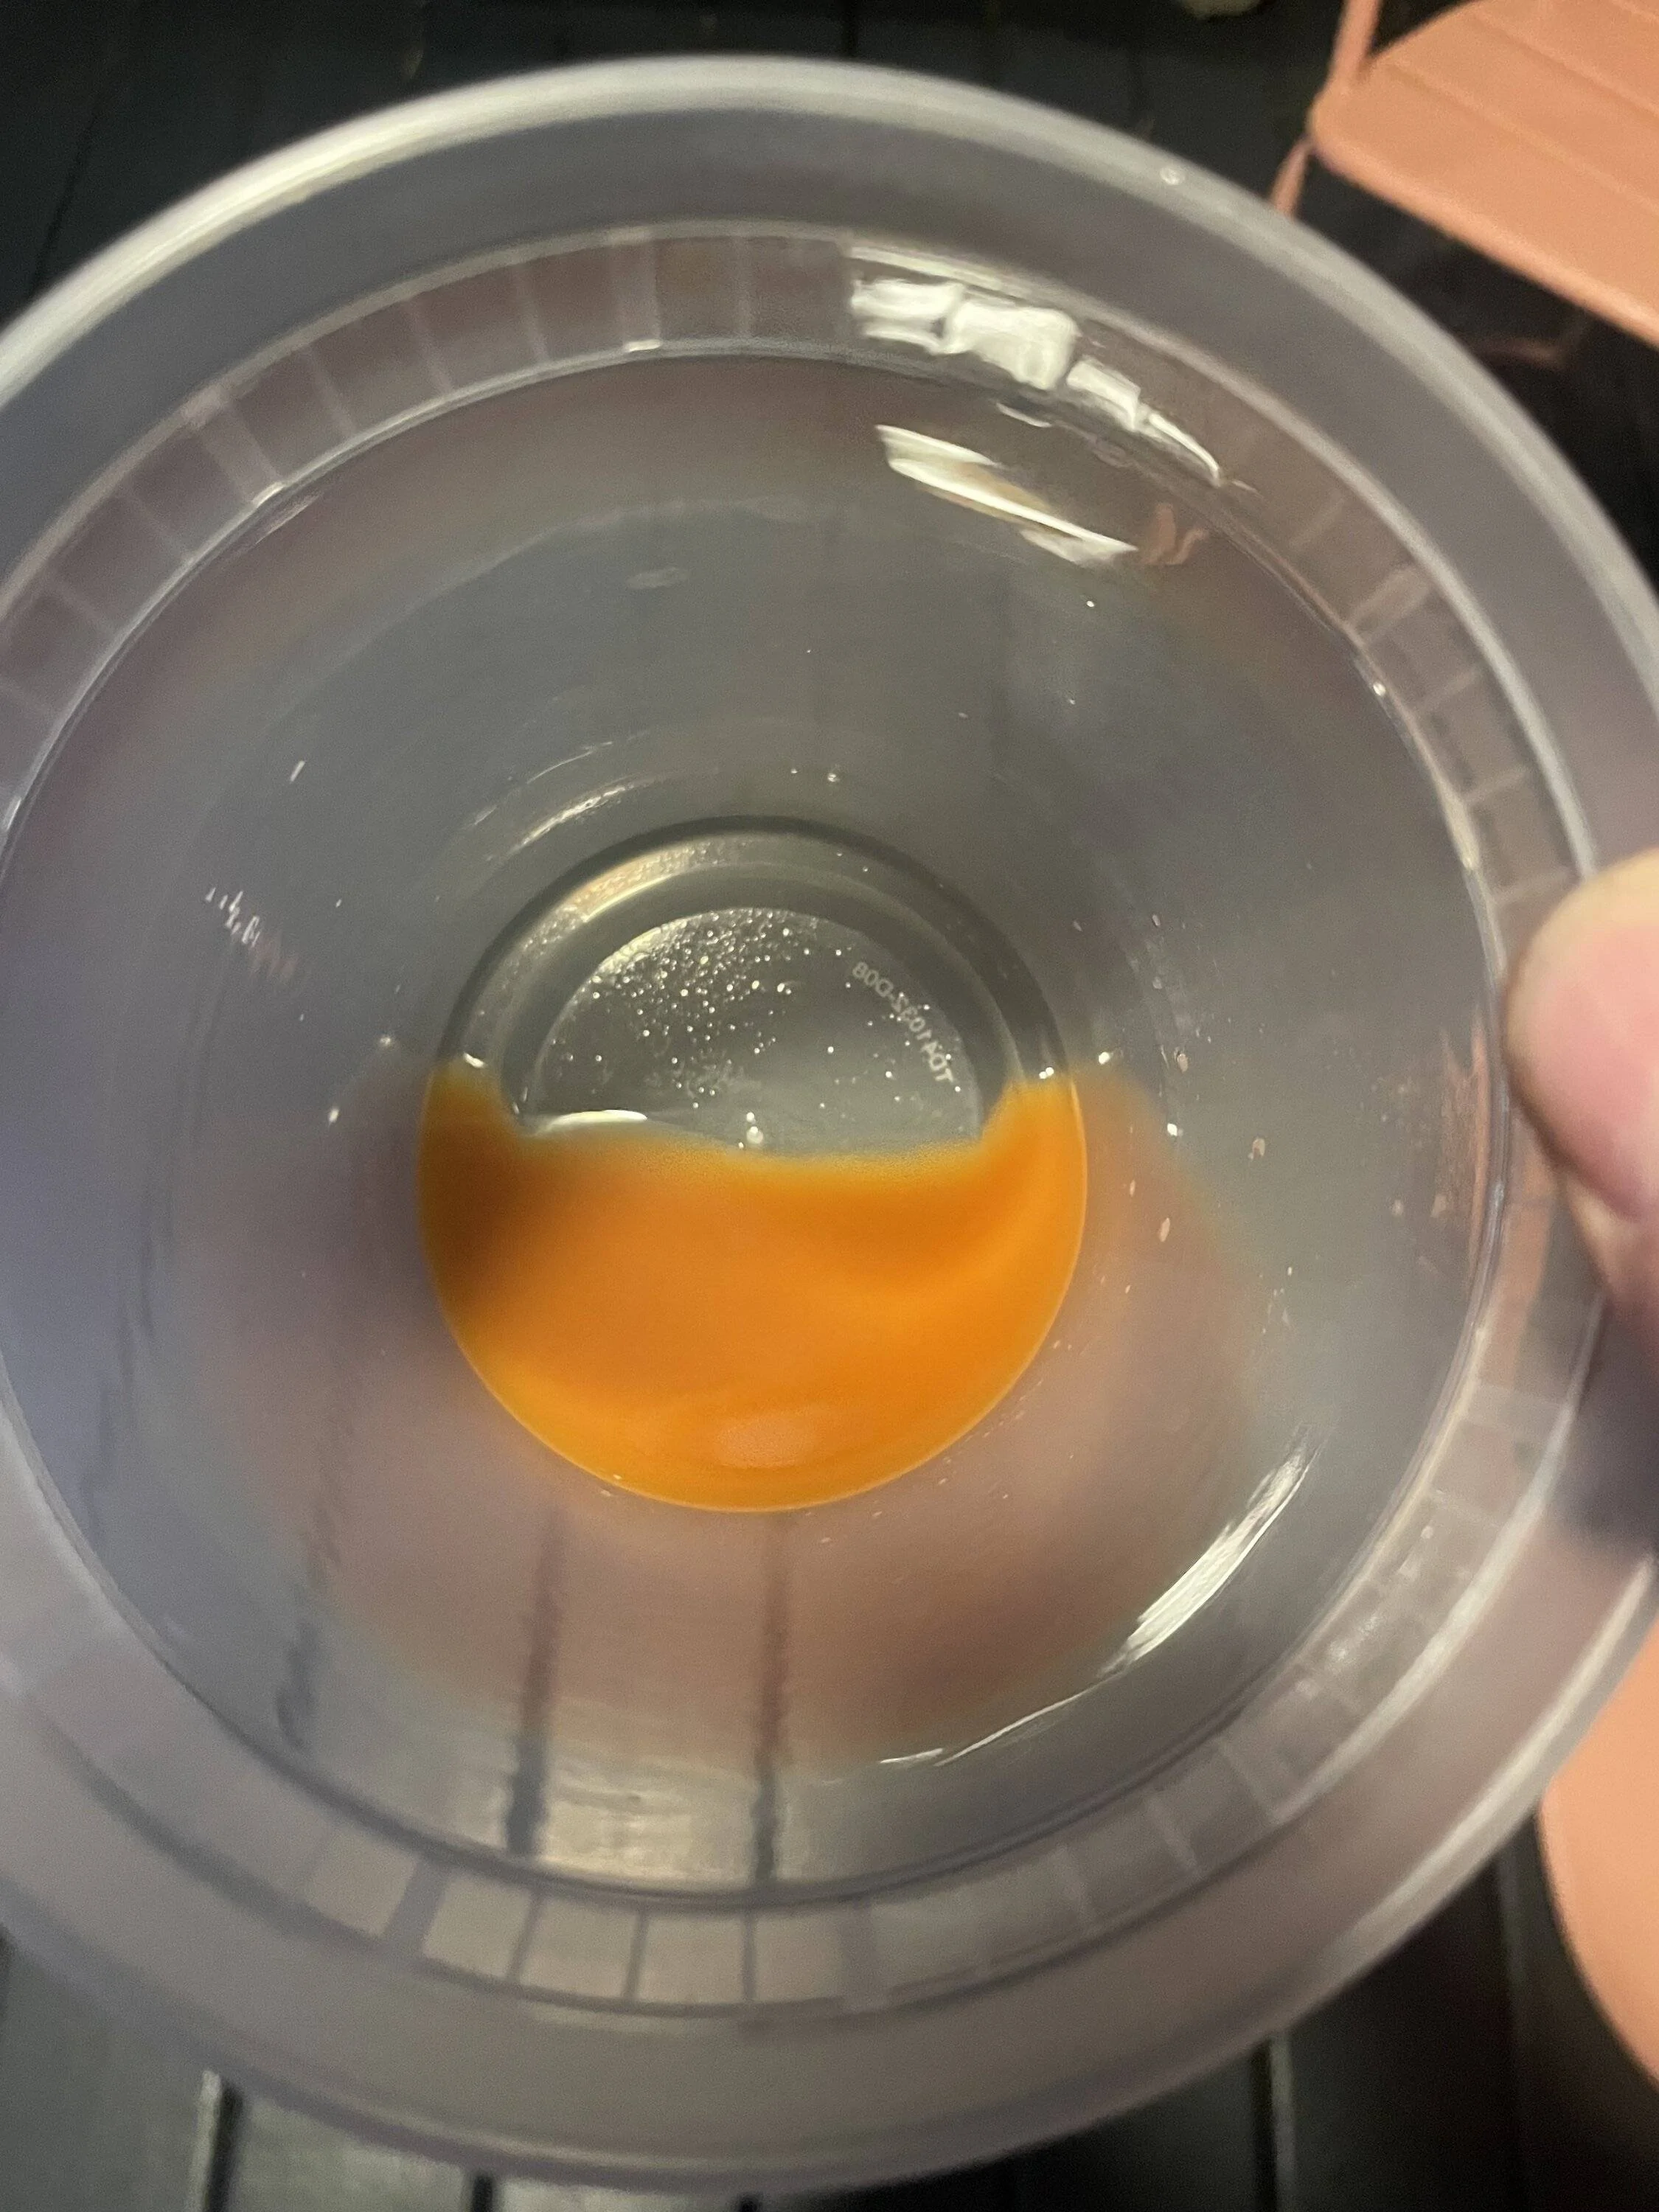
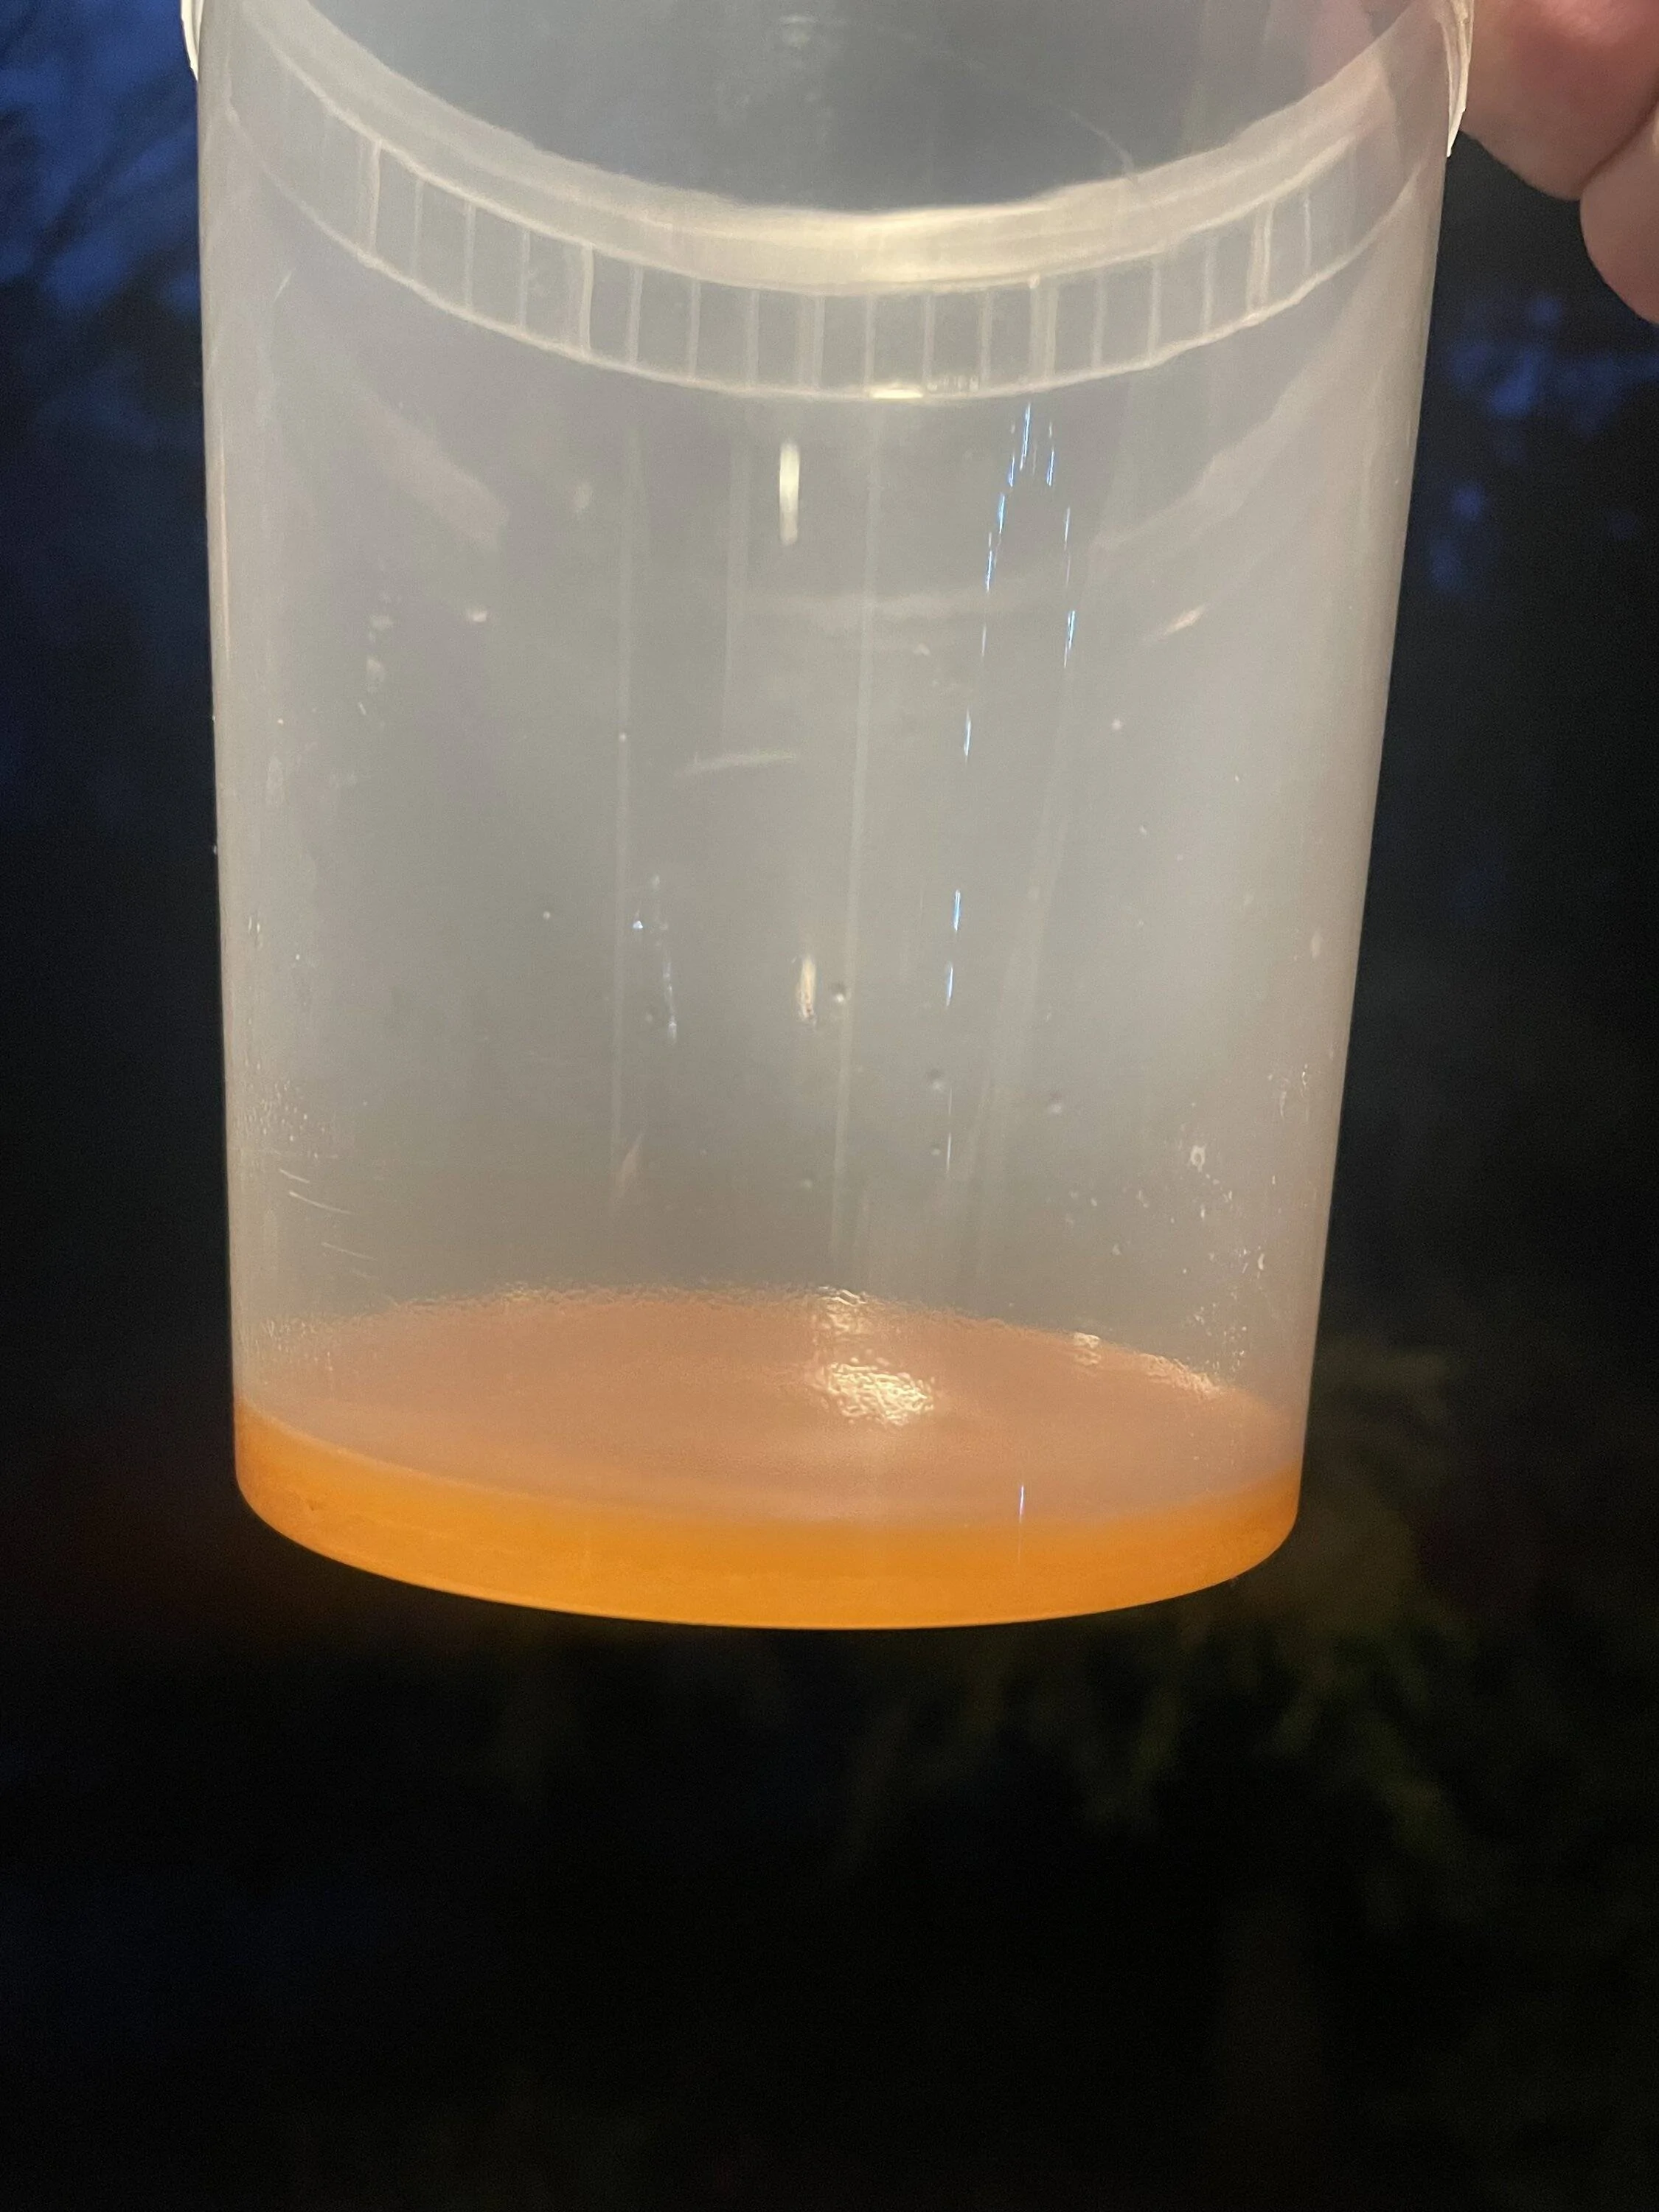
Mine was a little milky and hardly any fuel smell. And had almost a 1/3 cup in it.
Sponsored


DRVMN

Well-Known Member
First Name
David
Joined
Apr 12, 2021
Threads
14
Messages
206
Reaction score
644
Location
Saint Cloud, Minnesota
Vehicle(s)
2021 Ford Ranger XLT FX4 Off Road
Occupation
High School Mathematics Instructor
Okay, I received the parts today and installed this morning. It was a pain in the butt getting the lower connector off as was mentioned. I used a right angle pick as Nacho-business mentioned and a small screwdriver to crack the plastic. As for fitment the lower hose had to be flexed to make the connection where as the top hose fit perfectly.

Now if you were to remove some of the hoses(the small ones,not the radiater hose) that block easy access to the lower connection this would make the job easier. I didn't do that and so I struggled getting access but then again I'm almost 69 so everything is a struggle these days.

The good news its installed so hopefully it will do its job.
I just installed the Ford Performance Air Oil Separator, and as others have said, removing the lower hose was definitely painful to the hand and arm! I used a pruning shears to cut the plastic tube, and it made rotating the tube to access the orange clip that needs to be cut much easier. I used a right-angle pick to break the orange clip, and slowly but surely it worked, and the lower hose released. My hand and arm looks like they were in a battle zone - no pain, no gain! I would have taken a video, but all you would hear are “bleeps” from me saying naughty words!!! The new tubes snapped right on, and installation was super easy. On a side note, I had to remove my engine cover, which allowed me to wash it up and make it all pretty again. Now - with a clean engine cover, the engine idles smoother, gas mileage went up by 0.001%, I feel good about myself, and the tailgate damper has never worked better!!!

By the way, I purchased my kit from Levittown Ford out of New York. Took about 10 days for it to arrive here in Minnesota. They had a competitive price. Looks like Stage 3 Motorsports had a similar price point as well. What I like about purchasing a Genuine Ford product, is it should keep my warranty in tact. I shouldn't have to worry about "Your rear differential bearings are faulty, but we can't fix them under warranty because you installed an Air and Oil Separator - Sorry!".

I will update on how often the can needs to be emptied. I live in Minnesota, so we get all kinds of weather from 30 degrees below zero to 100 degrees above zero and humidity.

IMG_4679.jpeg


IMG_4680.jpeg


IMG_4681.jpeg
 
Last edited:

Stevedbvik1

Well-Known Member
First Name
Steve
Joined
Oct 4, 2021
Threads
38
Messages
2,706
Reaction score
8,019
Location
Michigan
Vehicle(s)
2022 Ranger Tremor XLT
Occupation
Retired
I’m starting a new science project with mine. Just installed the FP separator and reinstalling my single catch can. Will run it ( in Michigan) for December and January with mostly short trips . Then it will sit for February and March while we are down south. Will check them both in April when we get back when doing a planned 5k oil change. It won’t accumulate very many miles in January-February but it will be “worst case” scenarios with cold starts and short drives.
Update: Science project completed. Here’s what came out of my catch can and Ford Performance oil separator. This was from driving very low mileage ( a few hundred miles)in December and January. All short stop and go trips. Yellow ish stuff is from the catch can on the line from oil separator down on the block to the intake manifold. The clearer looking stuff came out of the Ford Performance oil separator on the line from valve cover to turbo inlet tube from air cleaner. Pretty minimal but again only a few hundred miles.

IMG_9371.jpeg
 

dtech

Well-Known Member
Joined
May 10, 2020
Threads
37
Messages
3,135
Reaction score
7,574
Location
colorado
Vehicle(s)
Ranger Lariat FX4, chromed and forever damperless
Like that orange color reminds of the tango bottled screwdrivers I used to drink in high school. Wonder if tango is still made.
 

Josebd

Well-Known Member
First Name
Joe
Joined
Jul 11, 2021
Threads
30
Messages
229
Reaction score
281
Location
Texas
Vehicle(s)
2021 Ford ranger xlt
Occupation
Road maintenance county
Where is the lower hose that is a pain to take off?


DRVMN

Well-Known Member
First Name
David
Joined
Apr 12, 2021
Threads
14
Messages
206
Reaction score
644
Location
Saint Cloud, Minnesota
Vehicle(s)
2021 Ford Ranger XLT FX4 Off Road
Occupation
High School Mathematics Instructor
I drained this after about a month of driving in Minnesota's ever-changing climate!

1712499452583-4f.webp
 

DRVMN

Well-Known Member
First Name
David
Joined
Apr 12, 2021
Threads
14
Messages
206
Reaction score
644
Location
Saint Cloud, Minnesota
Vehicle(s)
2021 Ford Ranger XLT FX4 Off Road
Occupation
High School Mathematics Instructor
Where is the lower hose that is a pain to take off?
Follow the hose from the valve cover - it is between the front of the engine and radiator on the passenger side. The tamper-proof connectors are what make removal difficult. They have to be broken (I used a 90 degree pick tool). The PCV hose is plastic, so after I removed the upper connector at the valve cover, I cut the hose with a pruning sheer about six inches above the lower connector. That allowed me to rotate the hose so I could better see the orange part of the tamper-proof connector that needs to be broken. The instruction sheet says to use a screwdriver, but I found the pick tool to work better.
 
Last edited:

DRVMN

Well-Known Member
First Name
David
Joined
Apr 12, 2021
Threads
14
Messages
206
Reaction score
644
Location
Saint Cloud, Minnesota
Vehicle(s)
2021 Ford Ranger XLT FX4 Off Road
Occupation
High School Mathematics Instructor
Lubricate the connector and o-ring with oil (per instructions) and it makes sliding/snapping the new hose on much easier. The new hoses have a quick disconnect tab so they can be removed without breaking anything (e.g. when emptying the container). I separated the bowl from the unit, using the four Allen screws at the top. Careful - there is a screen at the top of the bowl.
 

Josebd

Well-Known Member
First Name
Joe
Joined
Jul 11, 2021
Threads
30
Messages
229
Reaction score
281
Location
Texas
Vehicle(s)
2021 Ford ranger xlt
Occupation
Road maintenance county
Follow the hose from the valve cover - it is between the front of the engine and radiator on the passenger side. The tamper-proof connectors are what make removal difficult. They have to be broken (I used a 90 degree pick tool). The PCV hose is plastic, so after I removed the upper connector at the valve cover, I cut the hose with a pruning sheer about six inches above the lower connector. That allowed me to rotate the hose so I could better see the orange part of the tamper-proof connector that needs to be broken. The instruction sheet says to use a screwdriver, but I found the pick tool to work better.
Mine is on the way,my neighbor is a mechanic,all I need help with is the bottom connection on that hose,will this catch can stop the oil rising on the dip stick in the winter months?
 

DRVMN

Well-Known Member
First Name
David
Joined
Apr 12, 2021
Threads
14
Messages
206
Reaction score
644
Location
Saint Cloud, Minnesota
Vehicle(s)
2021 Ford Ranger XLT FX4 Off Road
Occupation
High School Mathematics Instructor
Mine is on the way,my neighbor is a mechanic,all I need help with is the bottom connection on that hose,will this catch can stop the oil rising on the dip stick in the winter months?
I'm not sure if the two issues are related or not . . . the Air/Oil separator "removes" oil exiting the crankcase and prevents it from re-entering the fuel system via the intake, which is causing carbon buildup on the intake valves. I've seen threads regarding rising oil levels, but I cannot remember what the reason for that was. I thought it was fuel that was entering the crankcase and messing with oil levels as the complaint was oil that smelled like fuel. I could be completely wrong though, so don't quote me on that.

When removing the lower connector, I cut the PCV hose off about six inches above the lower connector. This allowed me to "rotate" the hose, which made it much easier to see the orange tamper-proof connector. Maybe you'll be the lucky one that doesn't have the orange connector and you can just remove the hose using the quick-disconnect. A few have had that happen. Guess it all depends on year of production, etc. What makes it difficult is the location and that it's hard to reach with two hands. Most of the cuts on my hands came from some of the various zip ties in the area. Maybe a pair of mechanics gloves would have helped.

Once the orange tamper-proof connectors have been broken, the PCV hose is done anyway, so I wasn't worried about cutting it, as I would not be able to reuse it anyway.

Good Luck!
Sponsored


Top