NvrFinished
Well-Known Member
- Thread starter
- #1
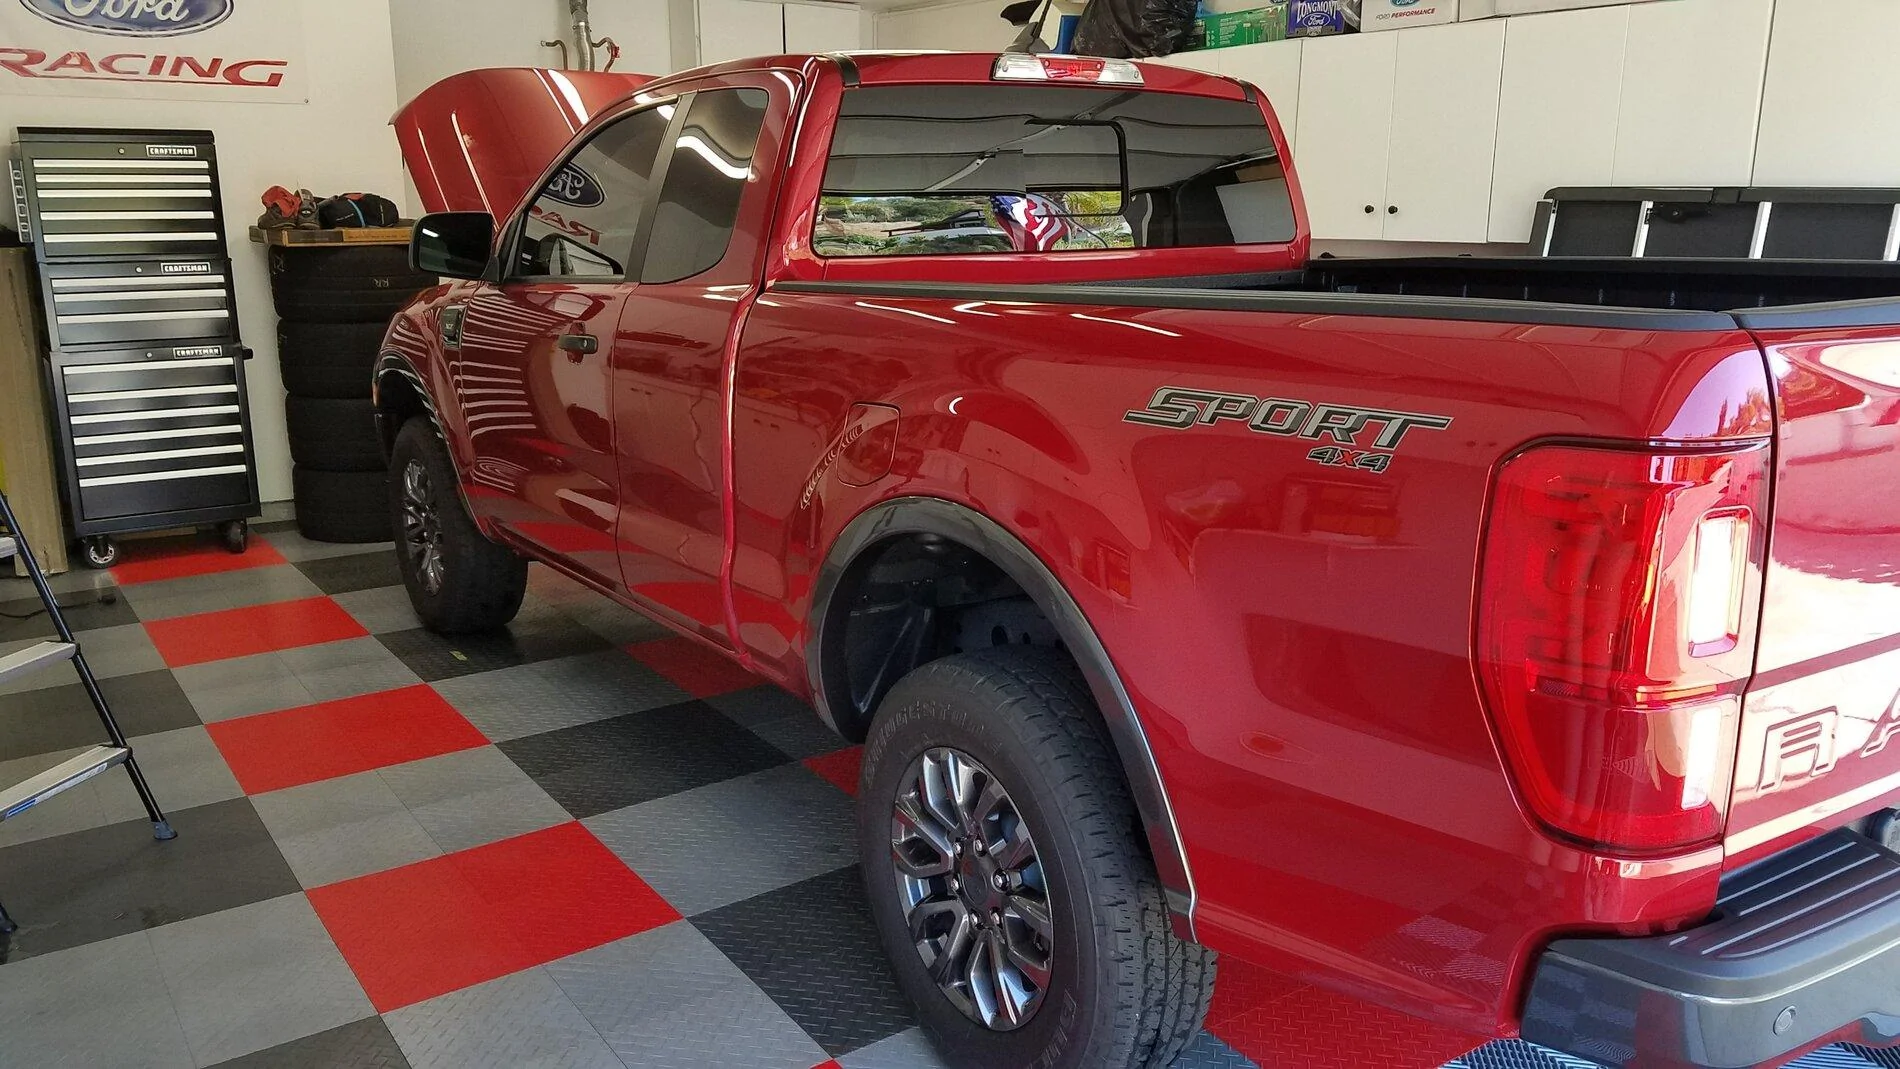
Let me start by saying that I never thought I would tackle something like this. I like to keep my vehicles clean, but I don't necessarily enjoy detailing like some people do. For me, it's a necessary evil. And because my Ranger would have to stay outside, I had decided that it would get a ceramic coating before I purchased it.
Why? Being a red truck, I wanted something that would protect against the harsh U.V. rays and paint fade. But more importantly, I wanted something that was going to be easy to clean and still look nice after multiple washes without having to apply a coat of wax every 6 months. I have a modified 2016 Mustang GT that I had a Cquartz ceramic coating applied by a high-end detailer in my area when I first took it home and I must say, I've been fairly impressed with the performance. Though the car stays in the garage, I take it to a variety of road courses to track in California, so it's seen some abuse. Yes, the paint has some chips as a result, but man, the paint still shines and it's extremely easy to keep clean. Most of the time it gets a waterless wash. As a result, I'm sold on ceramic coatings.

The one thing that bugged me though is that good detailers in my area want $1500 - $2000 (and up!) to ceramic coat. Part of the reason is that it's very labor intensive to do correctly without skipping steps. I kept thinking that that I could put that money into a good suspension and some tires if I did it myself.
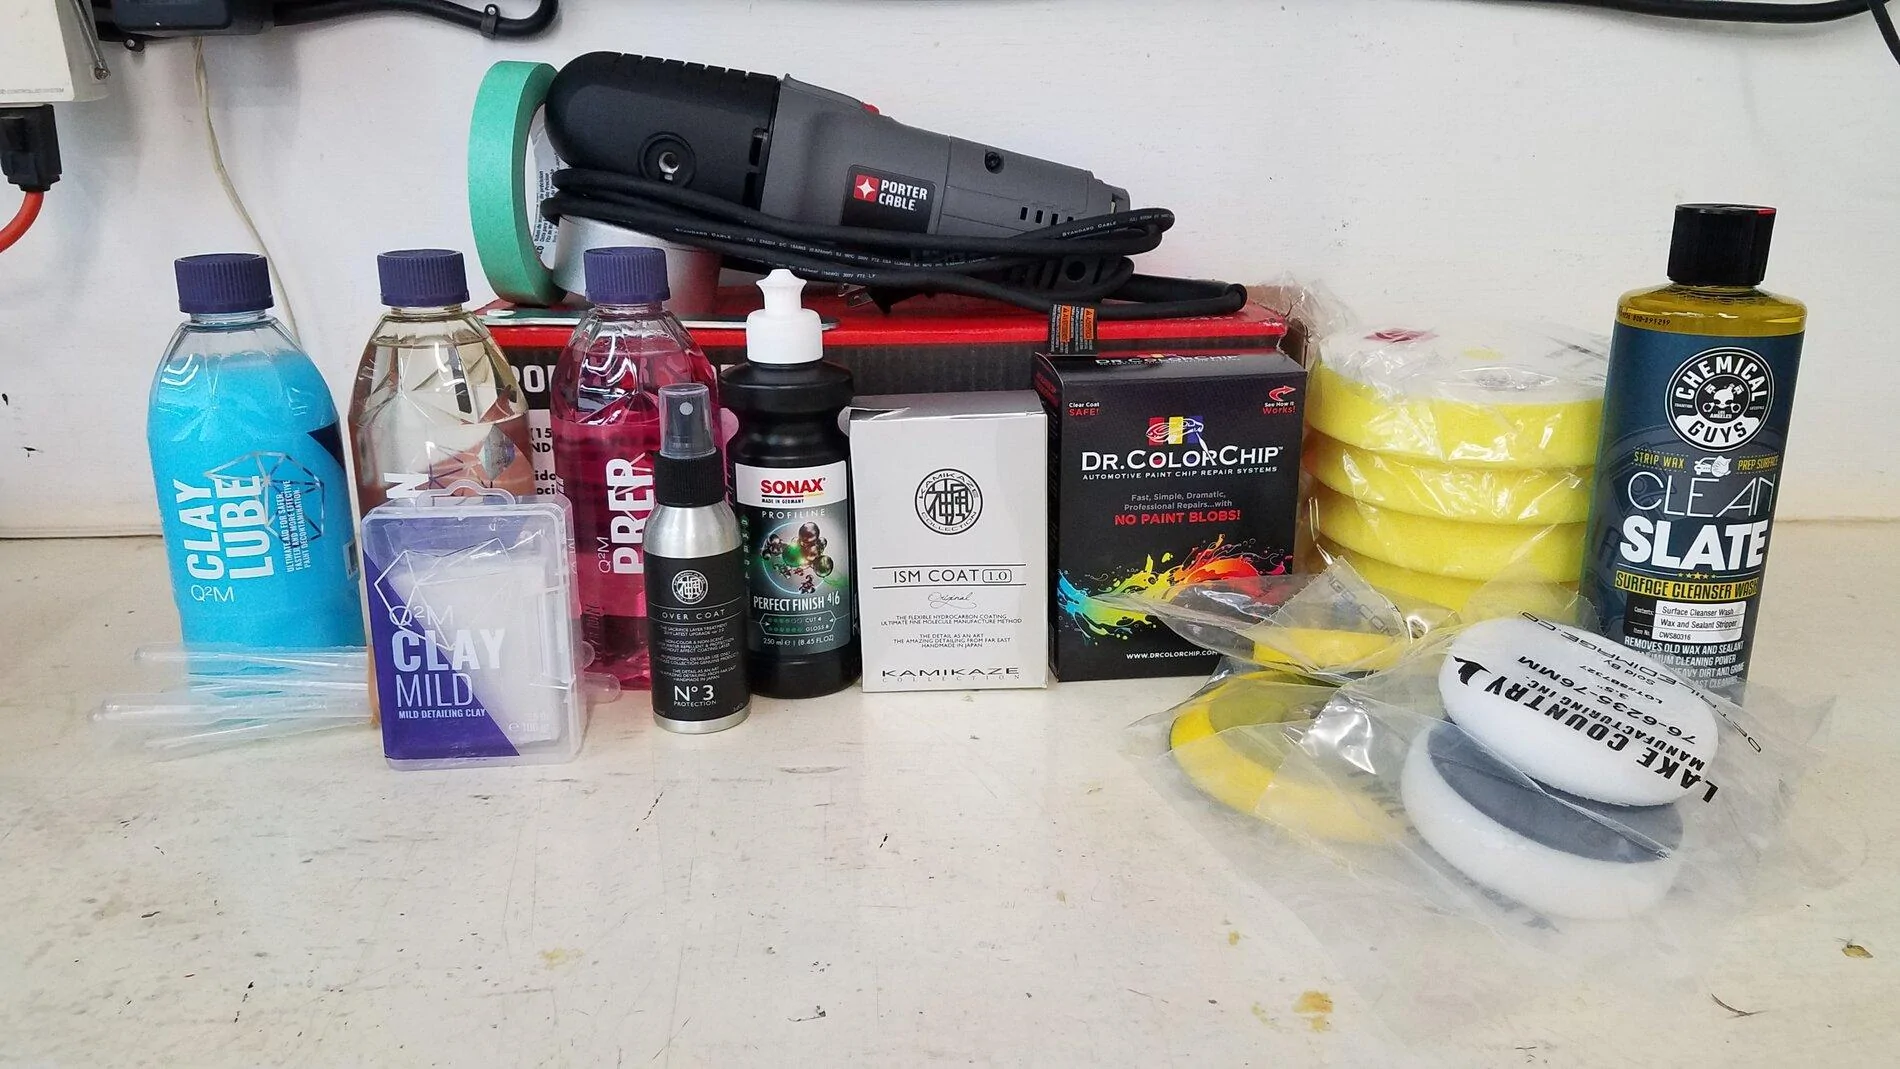
So, after watching a lot of Youtube videos and asking questions here and other places, I finally decided to give it a go. I purchased myself a Porter Cable DA polisher, a 5" and 3" backing plate, and a bunch of supplies. It was approximately a $400 hit to the wallet. The entire process took me two days with some breaks in between.

I decided to use a ceramic coating called Kamikaze ISM 1.0. I stumbled across it in my research and was hard pressed to find anything bad about it. What really caught my attention though, is that detailers who had a lot of experience with various coatings stated that it was one of the easiest ceramic coatings they have ever applied. It's available from Esoteric Car Care. I found their videos extremely helpful as well as their customer service when I had a couple of questions.
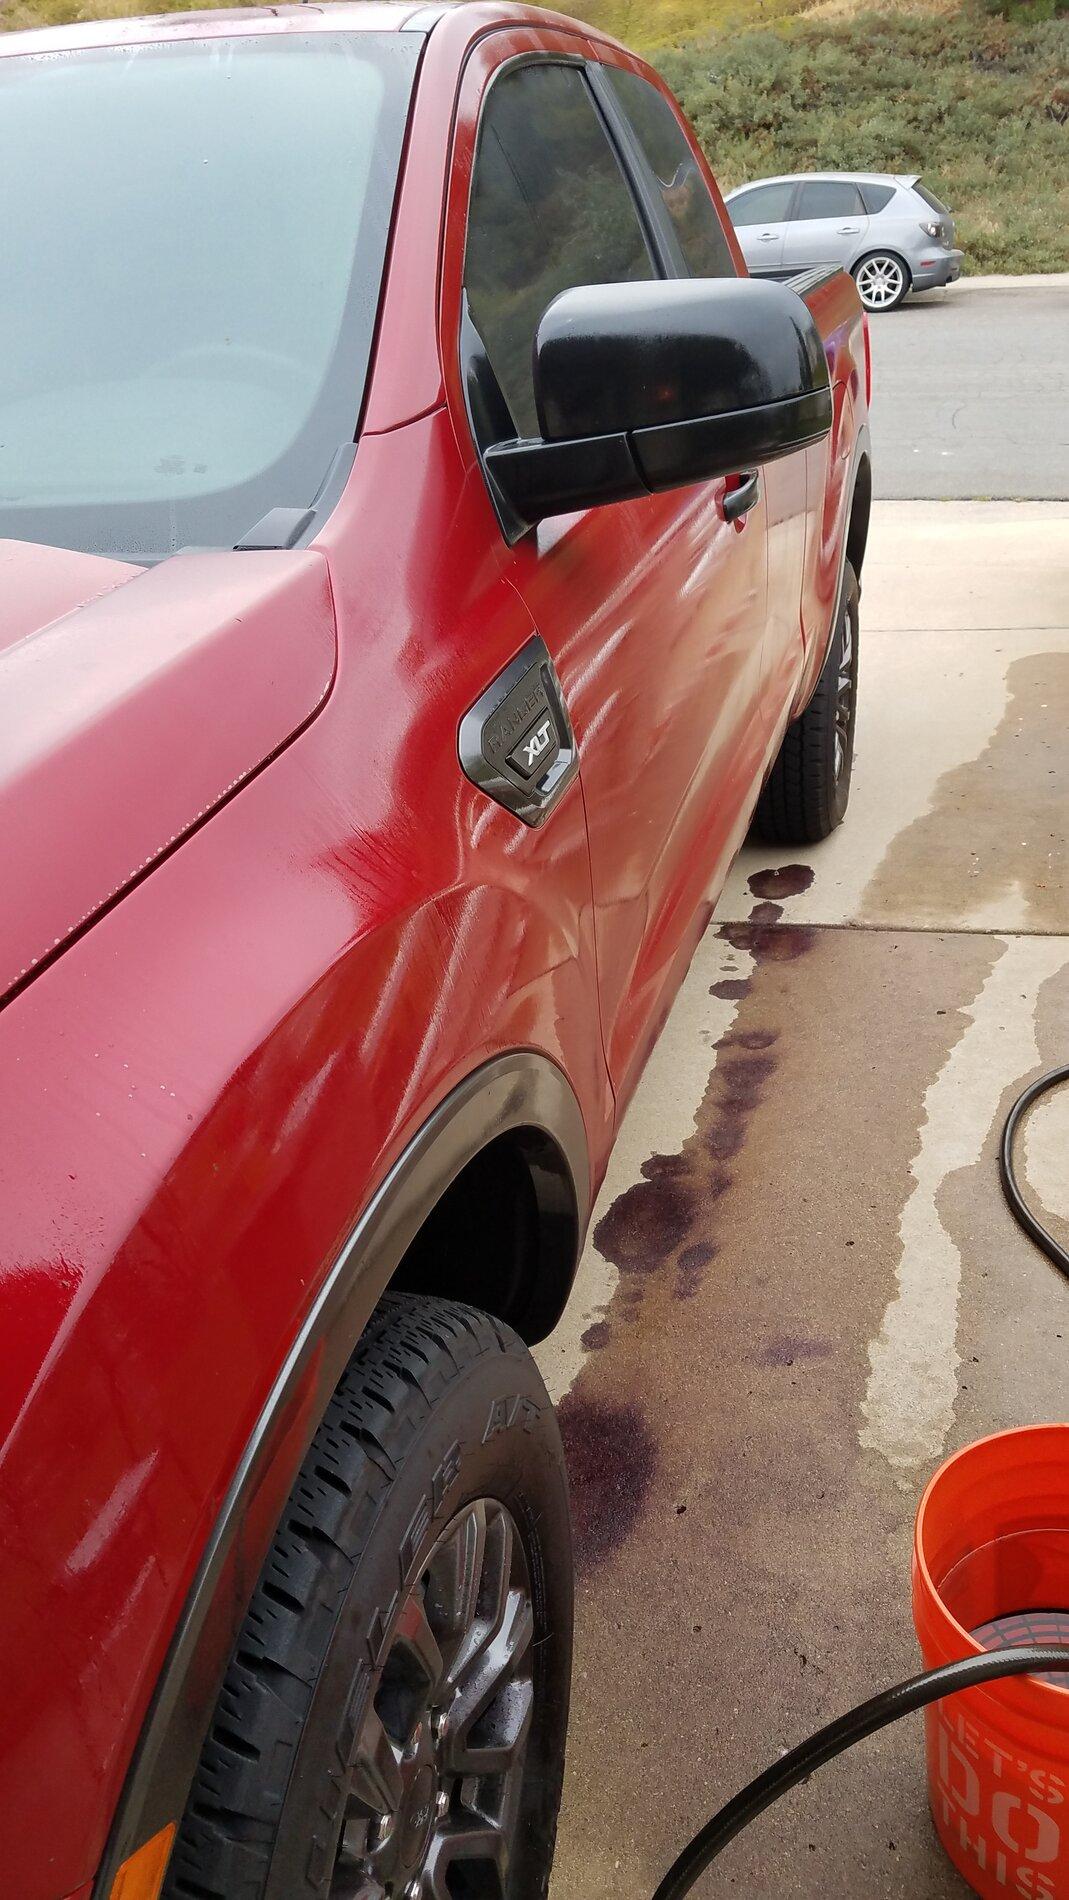
I started by applying Gyeon Q2M Iron Remover to help remove iron rail dust and other contaminants. I had thought that this was applied after the initial wash, but in one of my two calls to Esoteric they said to use it first, even if the vehicle is dirty - so I did! The truck used the entire bottle. It turns purple when it reacts to contaminants. You can see it on the concrete in the pictures below. Like others have said, this stuff has a sulfur like stink to it. I could still smell it in the garage for two days after the wash.

Next, I thoroughly washed it with Chemical Guys Clean Slate in order to strip it of any sealants or waxes. Unlike using Dawn soap, products like these are not supposed to dry out rubber and plastic trim. I hadn't put anything on the paint prior to this point, but I didn't know what the dealer may have done.
The sun started poking out by this point so I pulled it into the garage to dry. I used an air hose at this point to blow out all the excess water that collects and drip after drying. Rear quarter windows are the worst for this.
I then got out the clay bar. I used Gyeon Q2M Fine Clay and their corresponding clay lube. Before I started I ran the plastic baggy test and was amazed at how rough the paint felt, even after the iron decontamination. This didn't surprise me much since this truck was a Dec, 2019 build and it sat on the dealers lot until I purchased it on April 30th.
The clay bar was easy to use. Just use lots of lube as you go. It took me about 40 minutes to do the entire truck. It was fascinating how much of a difference this made.
The next step was to polish. I admit that this was one of the steps that had me the most nervous. The last thing I wanted to do was ruin the paint. However, after learning how DA polishers work and watching a few videos, I was fairly confident that I could tackle this. I ultimately decided to use Sonax Perfect Finish with Rupes 5" yellow foam polishing pads and Lake Country 3" white pads. I had initially decided I was going to use Menzeerna 3500, but I felt that I would get just as much shine, but more cut with Sonax.
Before I started though, I removed the EcoBoost emblem from the tail gate and the Sport 4x4 decals. I plan on adding something else later.
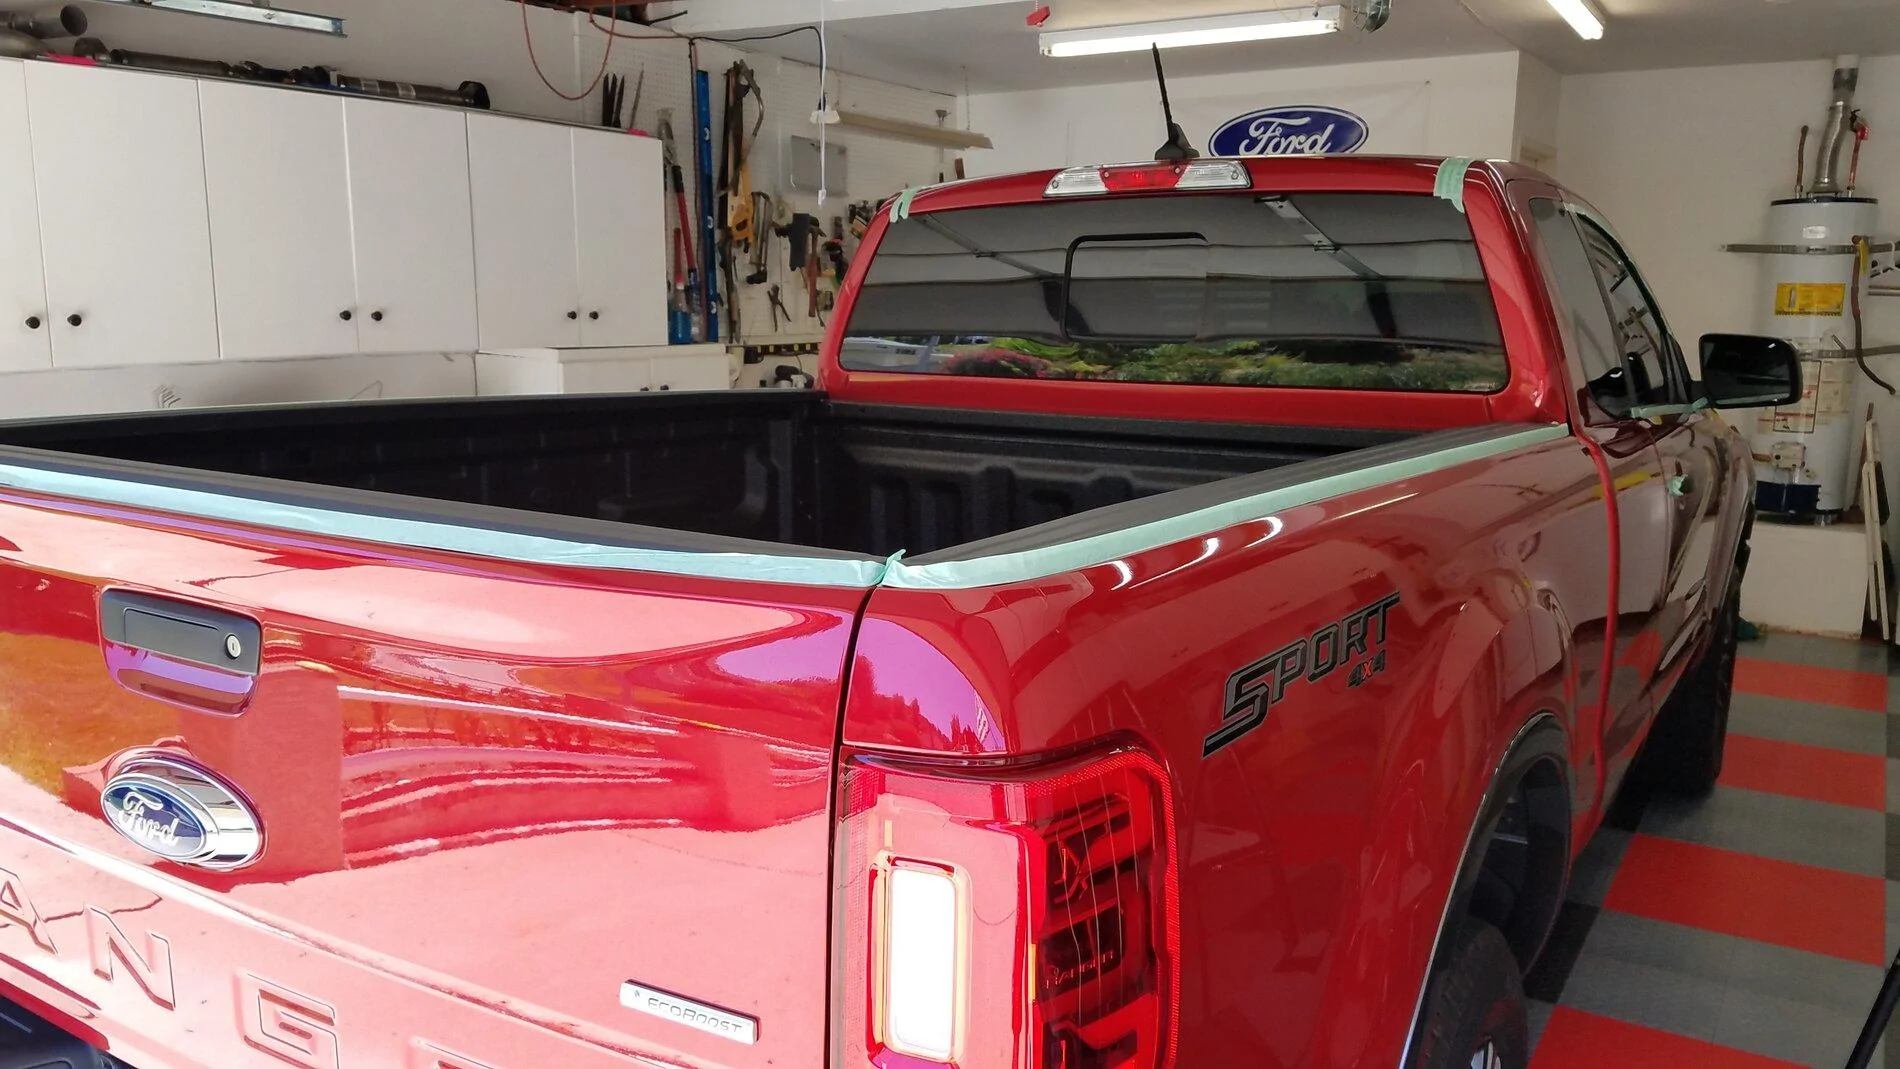
I had asked a question here about taping the vehicle and I believe most said they did not bother. The issue for me though is that once I get into something, the OCD side won't let me half-ass the smaller details such as not bringing the polishing pad close to edges and / or skipping some spots because they were too small. As a result, I purchased some 3/4" 3M detailing tape and I am glad I did. The tape is much different than regular painters tape. It is thinner so that the pad won't pull it up and it is easy to conform around the trim. It only took me about 20 minutes to tape things off.
Even after clay barring, I was surprised upon inspection under a detailers light that it was hard to find paint swirls in the clear. Especially for being on a dealers lot for 4 months. However, the clear coat did have some issues that couldn't be fixed (at least by me) with polishing. Most were on the roof though. One spot looked like it was a small bubble that had popped and didn't fill in level. There were also a couple of spots where something got caught in the clear and formed a sharp little point. There was some slight orange peel on one panel on the driver's side of the truck as well, but you had to get up close and look at an angle to see it.
I then went to work with the polishing as I had learned from the videos by Esoteric. I started on the roof, went to the hood, and then worked my way around the sides. I even did the bumpers. The taped off areas made things easy and I used the smaller pads for tight areas. It was fairly easy though time consuming. You would have to add an extra day for polishing if a stronger cutting pad and polish was required first before the final polish. Needless to say, I was glad that was not necessary.
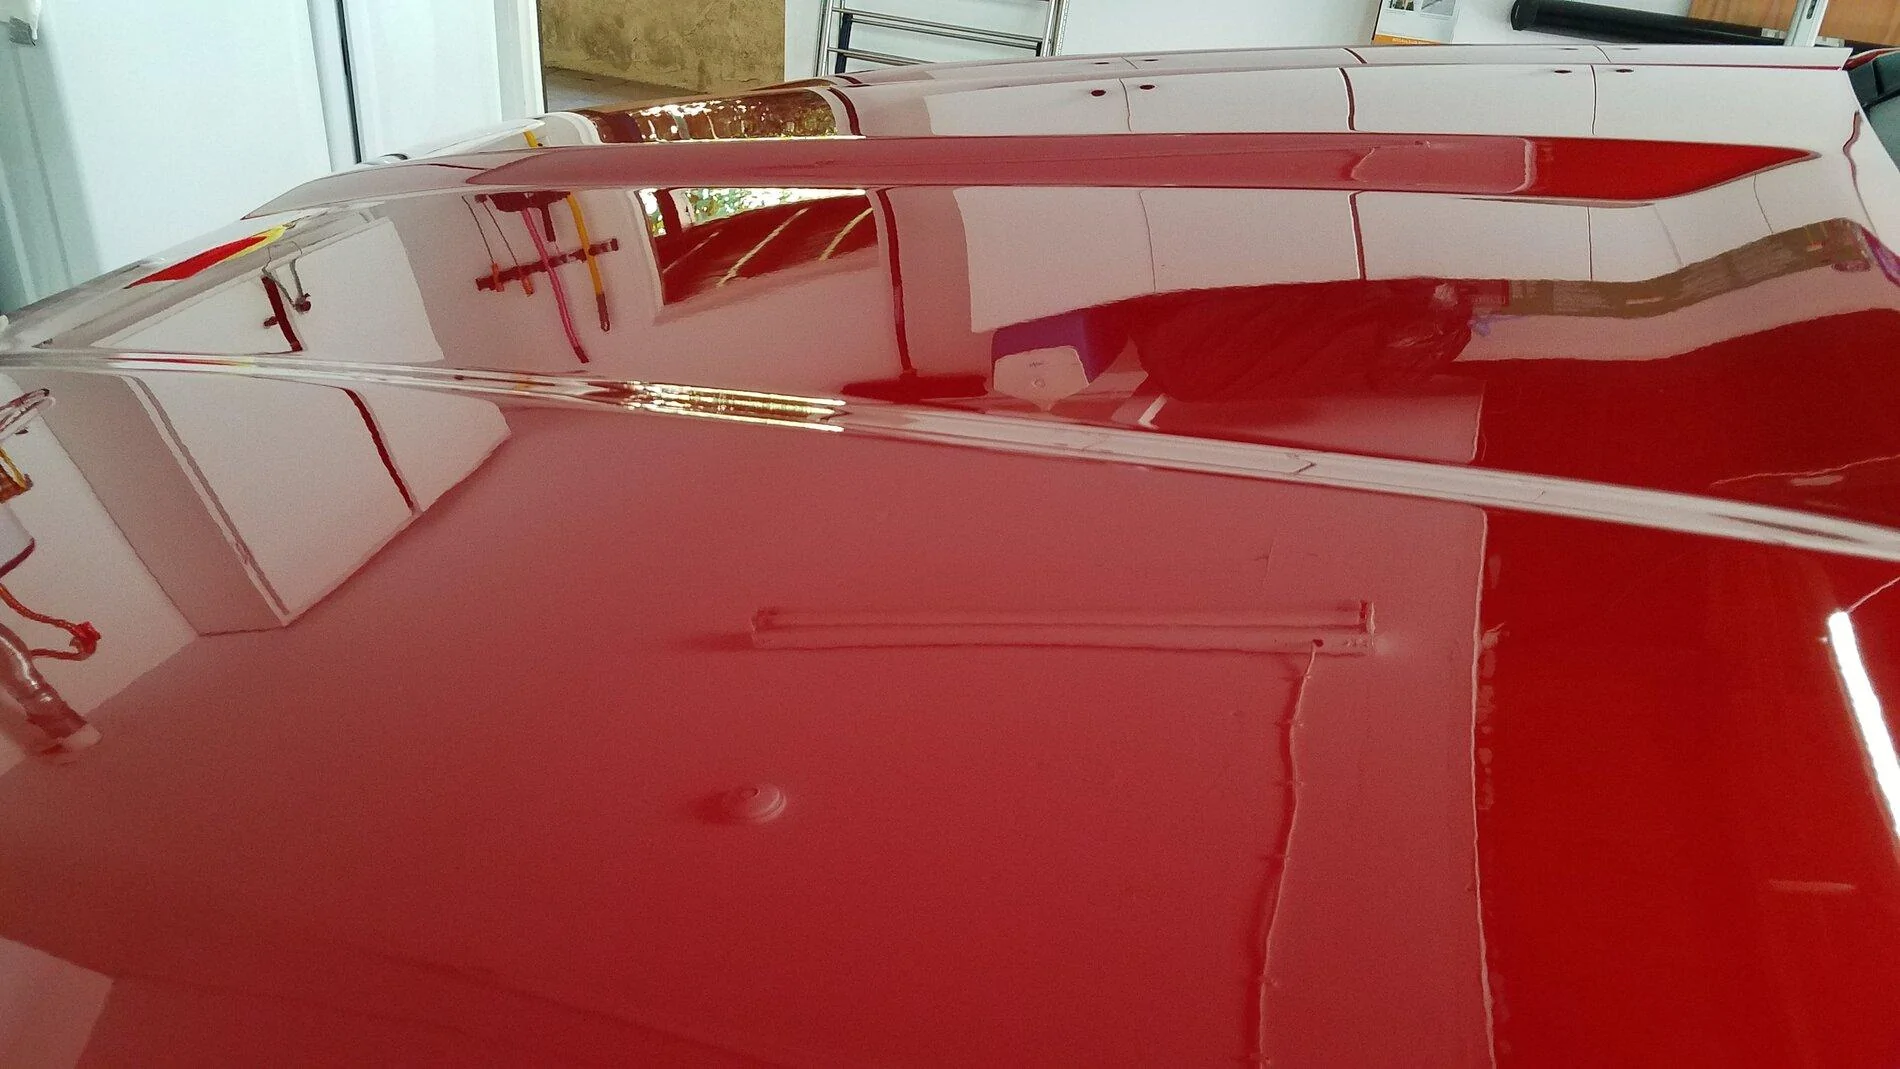
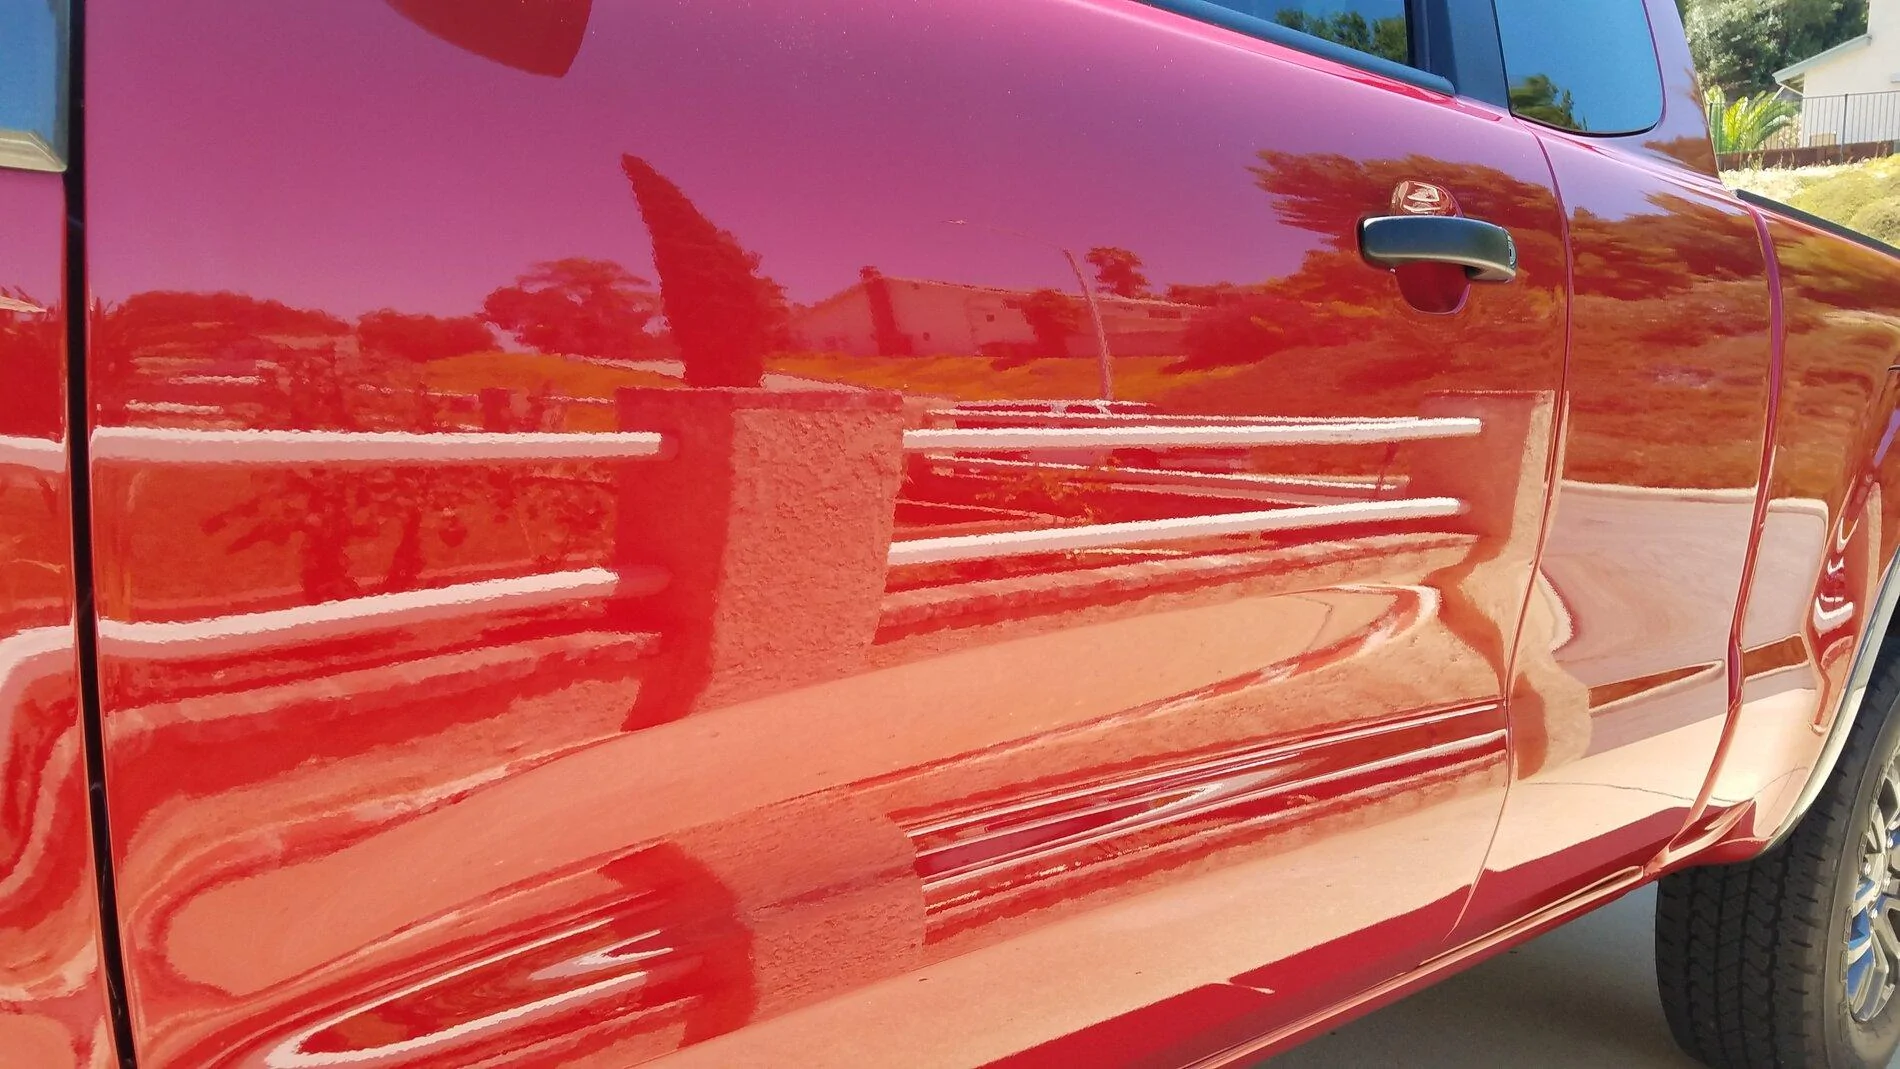
Overall, the Sonax worked well and was easy to remove. It did dust up a bit, but it was easy to clean up later with the final prep before the ceramic coat. I posted two images below of the hood after polishing.
Now it was time to do a chemical wipe to clean the paint of polish dust and any sealers the polish may have left behind in order for the ceramic coating to adhere well. I know some people make their own Isopropyl alcohol solutions on the cheap, but I decided to use Gyeon Prep solution. It was not that expensive and I felt better knowing that it would work like it should.
I then got out the Kamikaze ceramic coating. I tell you, the bottle this stuff comes in is small! I thought for sure that I would run out, but I only used a little more than half of it as I was told I would. I started on the roof and followed along as I had with the polishing.
I was a bit intimidated and nervous at first. However, I soon got the hang of it. I learned that the first couple applications to the pad need to be a bit heavy in order for the pad to load up. What was nice about Kamikaze ISM is that you can do large sections in one shot. I did one half of the roof at a time. Same with the hood. Once it has been on for approximately 1-3 minutes you can begin to buff it off. There is no need to wait for it to flash or anything like that. All it takes is one microfiber cloth to lightly buff the majority of it off and then a second to lightly buff the rest.
Another great benefit to Kamikaze is that it can be used on the rubber moldings, plastic trim pieces, headlights and tail lights. I hit all those as well as the bed rails, rear bumper step guards, and windshield wiper arms.
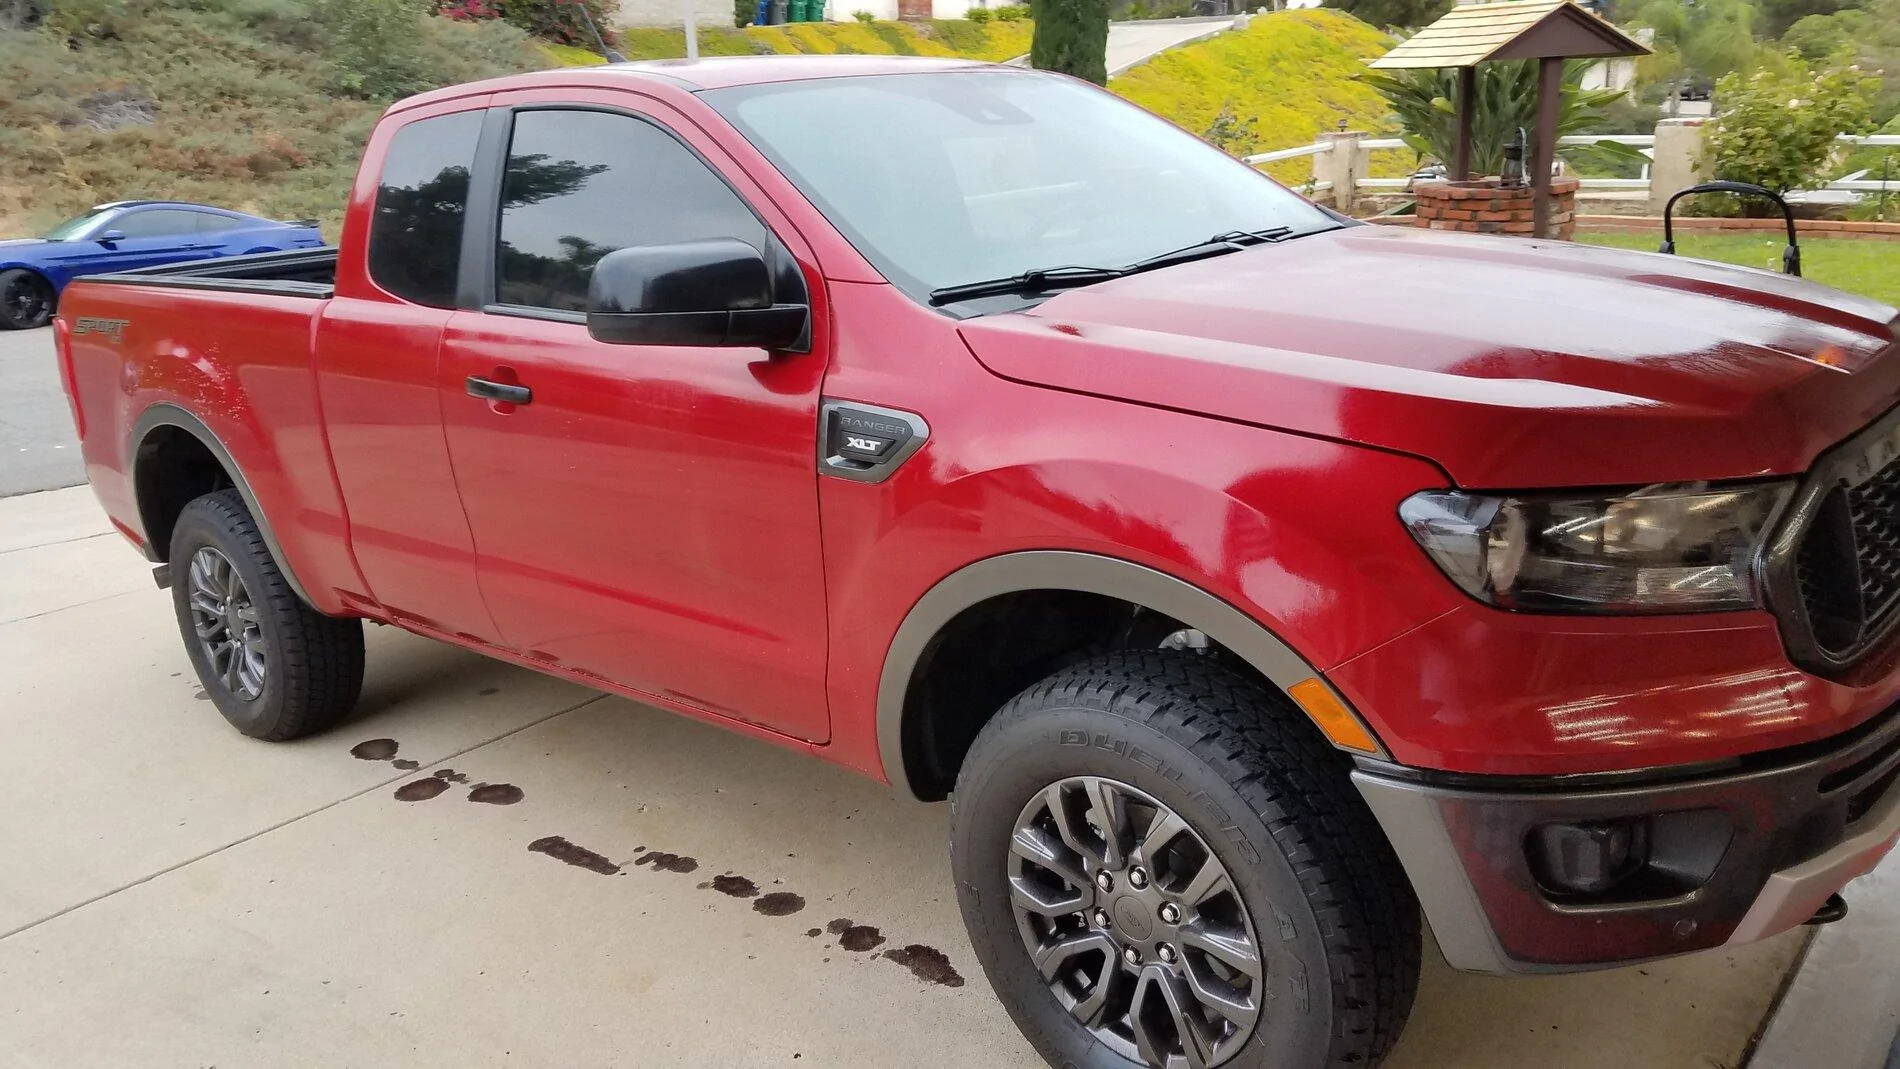
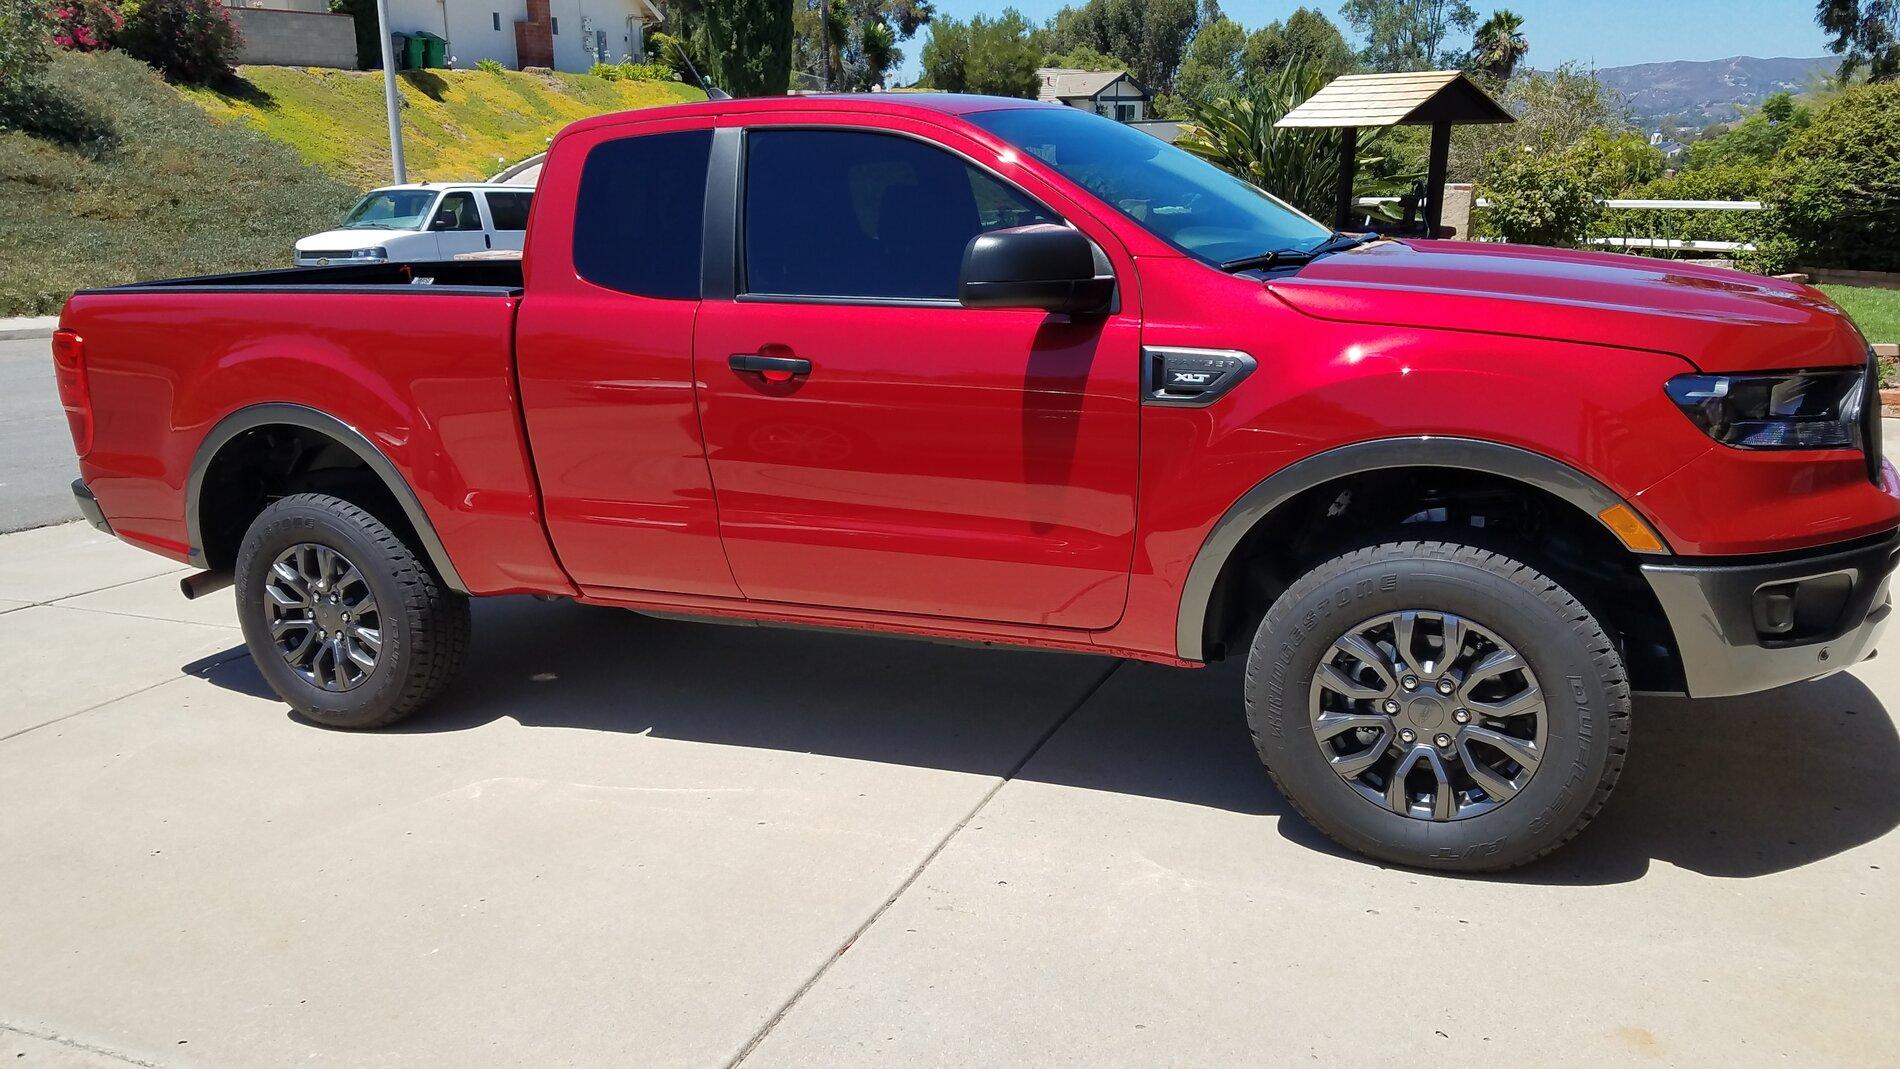
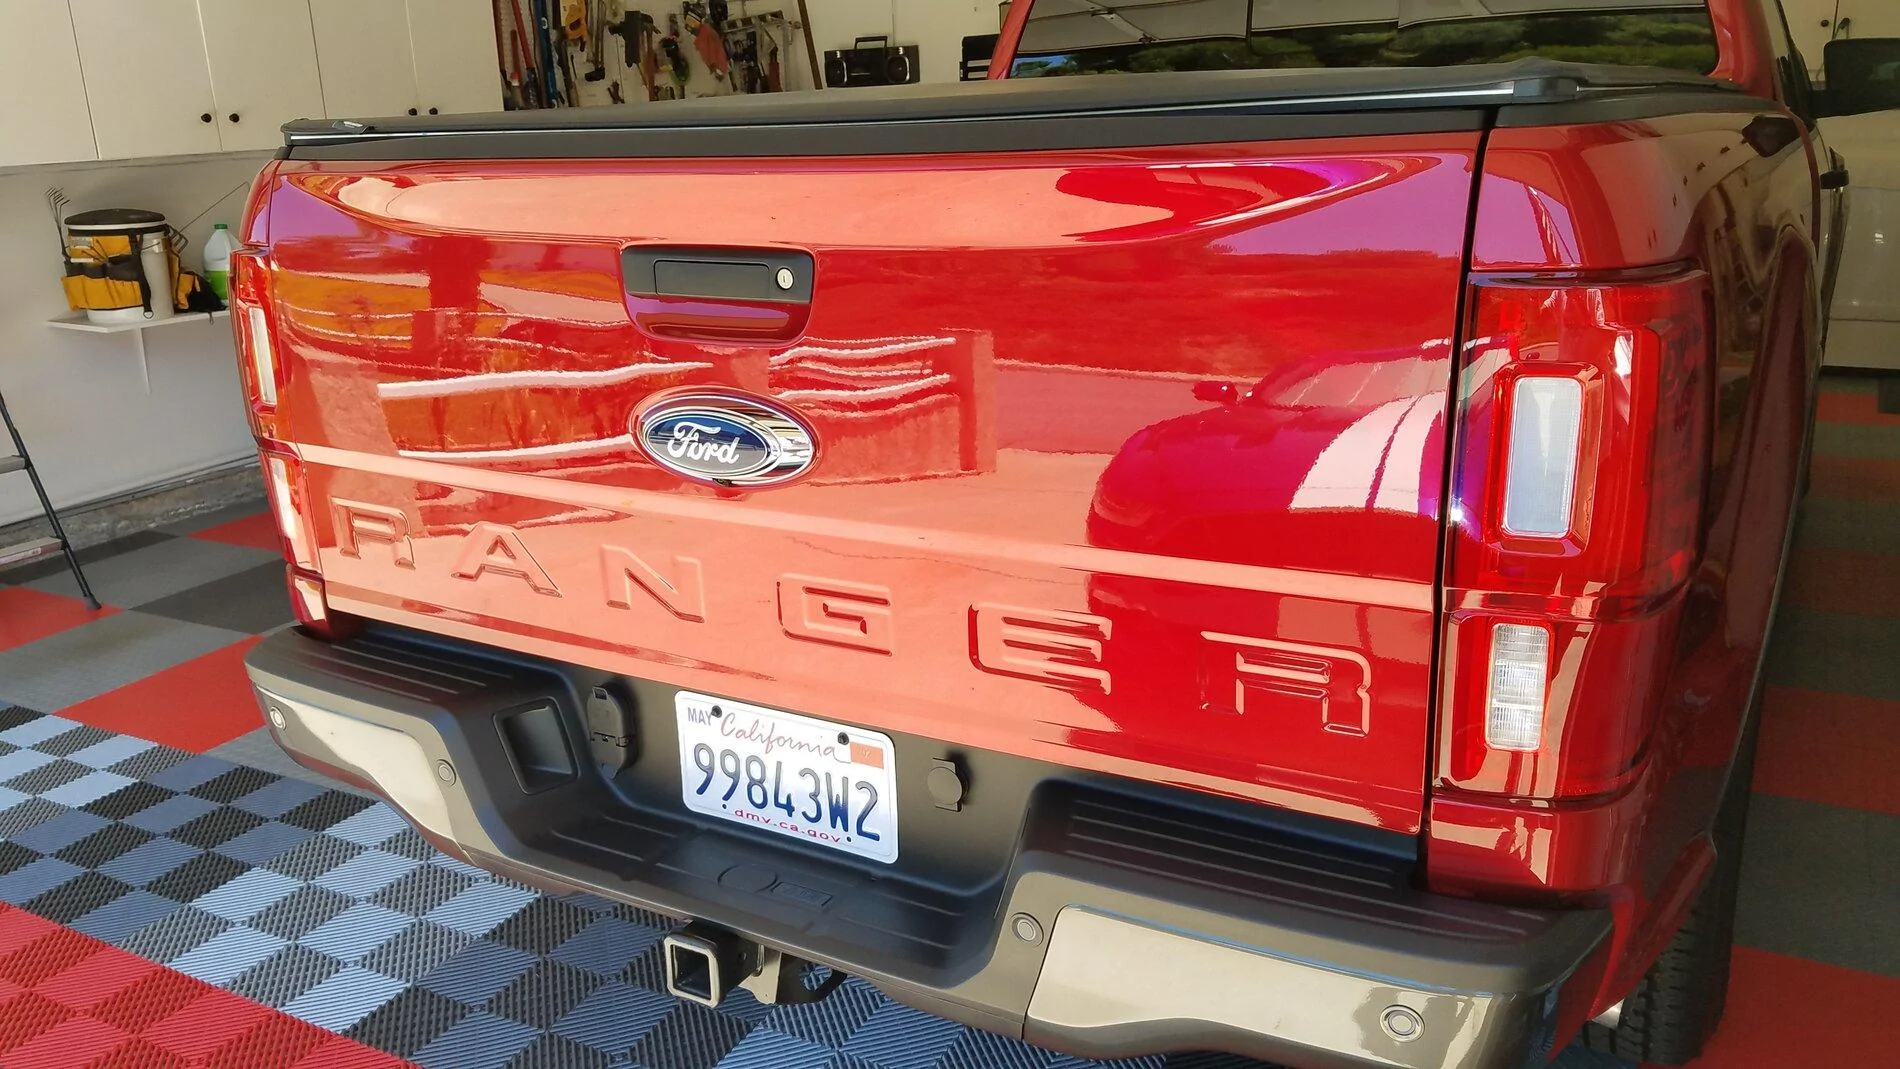
Once I was done, I waited 24 hours and applied Kamikaze Overcoat. You spritz a microfiber towel once or twice, wipe it on, and then wipe off with a different towel. Easy peasy. Overcoat acts as sacrificial layer to help protect the ceramic coat and it also displays some amazing hydrophobic properties. It can also be lightly sprayed on after a wash while the paint is still wet while drying. They say to use once every couple of months. This is how it looked after I was done.
Overall, I am really pleased with myself and extremely glad I went through with it. It was not that hard to do, it just took attention to detail and time to research how to do things. Is it perfect? I seriously doubt it and I'm sure professionals could find things wrong that I didn't see. However, I figure I probably saved myself at least $1500 counting supplies. It sits right now in the garage curing while the Mustang sits outside.
One thing I forgot to mention is that somewhere on my drive home from Colorado where I purchased the truck, I got a small paint chip just below the XLT badge on the side. After reading some great reviews, I purchased Dr. Color Chip in the D4 Rapid Red paint code. I was let down by this product. For some reason the paint does not match. It's too dark. It almost looks like Ruby Red to me. However, it's much less noticeable now that you can't see the white primer coat that was exposed beforehand.
Why? Being a red truck, I wanted something that would protect against the harsh U.V. rays and paint fade. But more importantly, I wanted something that was going to be easy to clean and still look nice after multiple washes without having to apply a coat of wax every 6 months. I have a modified 2016 Mustang GT that I had a Cquartz ceramic coating applied by a high-end detailer in my area when I first took it home and I must say, I've been fairly impressed with the performance. Though the car stays in the garage, I take it to a variety of road courses to track in California, so it's seen some abuse. Yes, the paint has some chips as a result, but man, the paint still shines and it's extremely easy to keep clean. Most of the time it gets a waterless wash. As a result, I'm sold on ceramic coatings.

The one thing that bugged me though is that good detailers in my area want $1500 - $2000 (and up!) to ceramic coat. Part of the reason is that it's very labor intensive to do correctly without skipping steps. I kept thinking that that I could put that money into a good suspension and some tires if I did it myself.
So, after watching a lot of Youtube videos and asking questions here and other places, I finally decided to give it a go. I purchased myself a Porter Cable DA polisher, a 5" and 3" backing plate, and a bunch of supplies. It was approximately a $400 hit to the wallet. The entire process took me two days with some breaks in between.
I decided to use a ceramic coating called Kamikaze ISM 1.0. I stumbled across it in my research and was hard pressed to find anything bad about it. What really caught my attention though, is that detailers who had a lot of experience with various coatings stated that it was one of the easiest ceramic coatings they have ever applied. It's available from Esoteric Car Care. I found their videos extremely helpful as well as their customer service when I had a couple of questions.
I started by applying Gyeon Q2M Iron Remover to help remove iron rail dust and other contaminants. I had thought that this was applied after the initial wash, but in one of my two calls to Esoteric they said to use it first, even if the vehicle is dirty - so I did! The truck used the entire bottle. It turns purple when it reacts to contaminants. You can see it on the concrete in the pictures below. Like others have said, this stuff has a sulfur like stink to it. I could still smell it in the garage for two days after the wash.
Next, I thoroughly washed it with Chemical Guys Clean Slate in order to strip it of any sealants or waxes. Unlike using Dawn soap, products like these are not supposed to dry out rubber and plastic trim. I hadn't put anything on the paint prior to this point, but I didn't know what the dealer may have done.
The sun started poking out by this point so I pulled it into the garage to dry. I used an air hose at this point to blow out all the excess water that collects and drip after drying. Rear quarter windows are the worst for this.
I then got out the clay bar. I used Gyeon Q2M Fine Clay and their corresponding clay lube. Before I started I ran the plastic baggy test and was amazed at how rough the paint felt, even after the iron decontamination. This didn't surprise me much since this truck was a Dec, 2019 build and it sat on the dealers lot until I purchased it on April 30th.
The clay bar was easy to use. Just use lots of lube as you go. It took me about 40 minutes to do the entire truck. It was fascinating how much of a difference this made.
The next step was to polish. I admit that this was one of the steps that had me the most nervous. The last thing I wanted to do was ruin the paint. However, after learning how DA polishers work and watching a few videos, I was fairly confident that I could tackle this. I ultimately decided to use Sonax Perfect Finish with Rupes 5" yellow foam polishing pads and Lake Country 3" white pads. I had initially decided I was going to use Menzeerna 3500, but I felt that I would get just as much shine, but more cut with Sonax.
Before I started though, I removed the EcoBoost emblem from the tail gate and the Sport 4x4 decals. I plan on adding something else later.
I had asked a question here about taping the vehicle and I believe most said they did not bother. The issue for me though is that once I get into something, the OCD side won't let me half-ass the smaller details such as not bringing the polishing pad close to edges and / or skipping some spots because they were too small. As a result, I purchased some 3/4" 3M detailing tape and I am glad I did. The tape is much different than regular painters tape. It is thinner so that the pad won't pull it up and it is easy to conform around the trim. It only took me about 20 minutes to tape things off.

Even after clay barring, I was surprised upon inspection under a detailers light that it was hard to find paint swirls in the clear. Especially for being on a dealers lot for 4 months. However, the clear coat did have some issues that couldn't be fixed (at least by me) with polishing. Most were on the roof though. One spot looked like it was a small bubble that had popped and didn't fill in level. There were also a couple of spots where something got caught in the clear and formed a sharp little point. There was some slight orange peel on one panel on the driver's side of the truck as well, but you had to get up close and look at an angle to see it.
I then went to work with the polishing as I had learned from the videos by Esoteric. I started on the roof, went to the hood, and then worked my way around the sides. I even did the bumpers. The taped off areas made things easy and I used the smaller pads for tight areas. It was fairly easy though time consuming. You would have to add an extra day for polishing if a stronger cutting pad and polish was required first before the final polish. Needless to say, I was glad that was not necessary.
Overall, the Sonax worked well and was easy to remove. It did dust up a bit, but it was easy to clean up later with the final prep before the ceramic coat. I posted two images below of the hood after polishing.

Now it was time to do a chemical wipe to clean the paint of polish dust and any sealers the polish may have left behind in order for the ceramic coating to adhere well. I know some people make their own Isopropyl alcohol solutions on the cheap, but I decided to use Gyeon Prep solution. It was not that expensive and I felt better knowing that it would work like it should.
I then got out the Kamikaze ceramic coating. I tell you, the bottle this stuff comes in is small! I thought for sure that I would run out, but I only used a little more than half of it as I was told I would. I started on the roof and followed along as I had with the polishing.
I was a bit intimidated and nervous at first. However, I soon got the hang of it. I learned that the first couple applications to the pad need to be a bit heavy in order for the pad to load up. What was nice about Kamikaze ISM is that you can do large sections in one shot. I did one half of the roof at a time. Same with the hood. Once it has been on for approximately 1-3 minutes you can begin to buff it off. There is no need to wait for it to flash or anything like that. All it takes is one microfiber cloth to lightly buff the majority of it off and then a second to lightly buff the rest.
Another great benefit to Kamikaze is that it can be used on the rubber moldings, plastic trim pieces, headlights and tail lights. I hit all those as well as the bed rails, rear bumper step guards, and windshield wiper arms.
Once I was done, I waited 24 hours and applied Kamikaze Overcoat. You spritz a microfiber towel once or twice, wipe it on, and then wipe off with a different towel. Easy peasy. Overcoat acts as sacrificial layer to help protect the ceramic coat and it also displays some amazing hydrophobic properties. It can also be lightly sprayed on after a wash while the paint is still wet while drying. They say to use once every couple of months. This is how it looked after I was done.
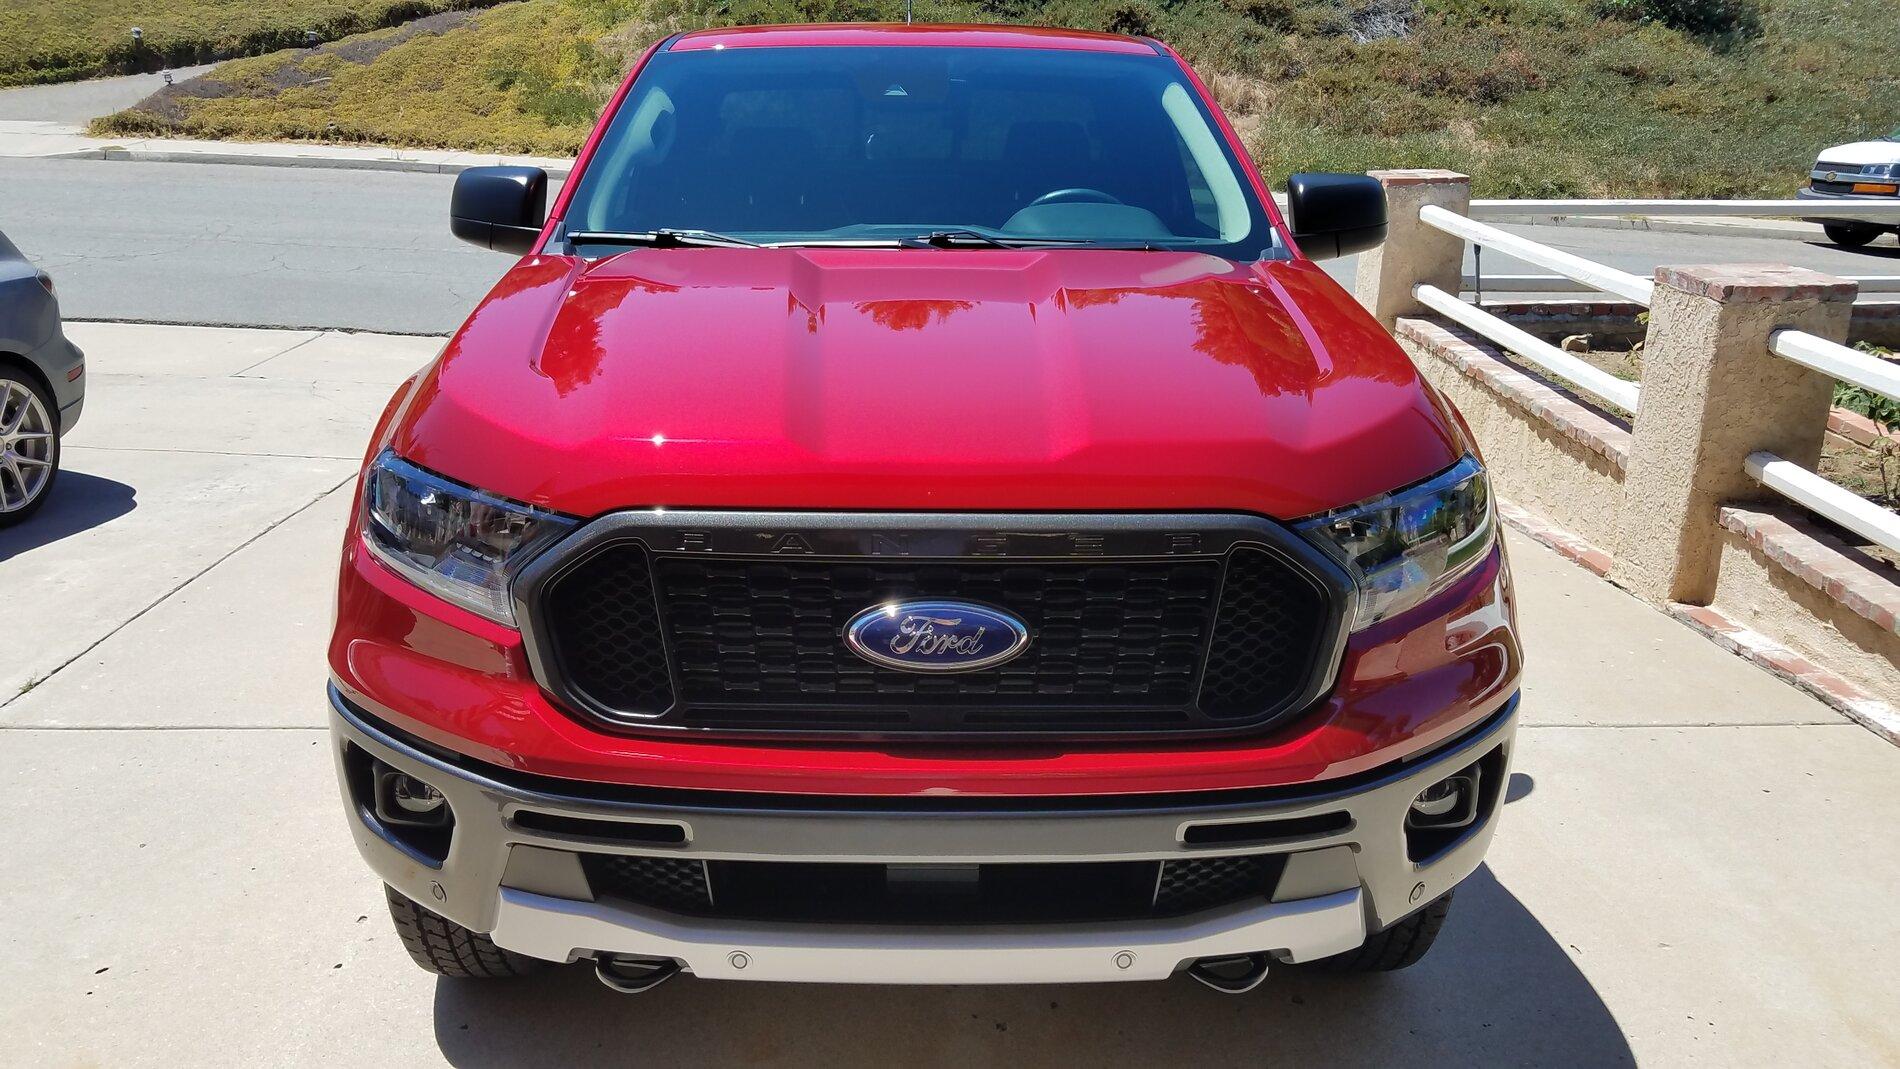

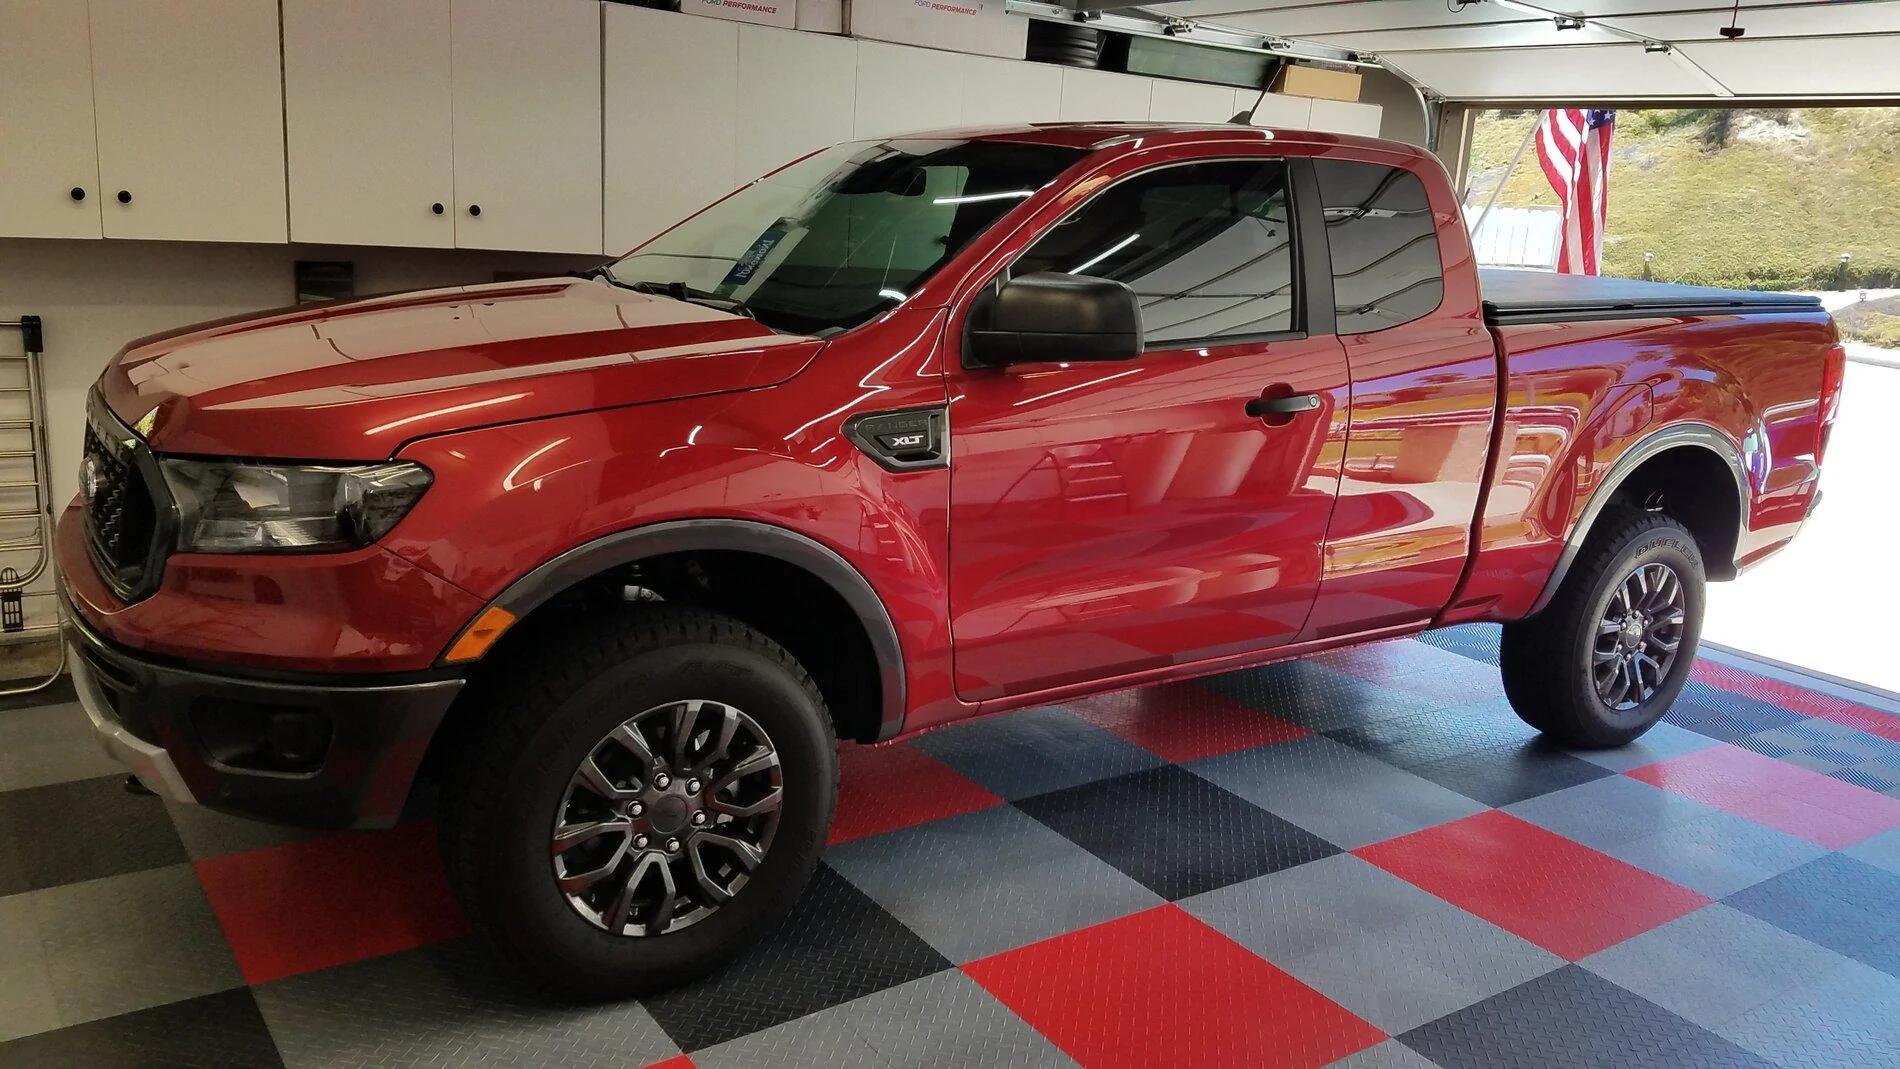
Overall, I am really pleased with myself and extremely glad I went through with it. It was not that hard to do, it just took attention to detail and time to research how to do things. Is it perfect? I seriously doubt it and I'm sure professionals could find things wrong that I didn't see. However, I figure I probably saved myself at least $1500 counting supplies. It sits right now in the garage curing while the Mustang sits outside.
One thing I forgot to mention is that somewhere on my drive home from Colorado where I purchased the truck, I got a small paint chip just below the XLT badge on the side. After reading some great reviews, I purchased Dr. Color Chip in the D4 Rapid Red paint code. I was let down by this product. For some reason the paint does not match. It's too dark. It almost looks like Ruby Red to me. However, it's much less noticeable now that you can't see the white primer coat that was exposed beforehand.
Sponsored

")