Sponsored

?

Rick - Saber

Well-Known Member
First Name
Rick
Joined
Apr 18, 2019
Threads
4
Messages
303
Reaction score
377
Location
NC
Vehicle(s)
Sport Ranger 4x4
This looks really nice @DukeCanBuildit . Are you still happy with this mod? I am tempted to try it sometime.

Added, How about you @armoredpig are you happy with your mod of this as well?
Sponsored
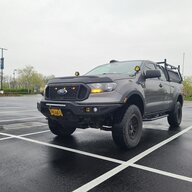
 

armoredpig

Well-Known Member
First Name
Joseph
Joined
Mar 7, 2020
Threads
26
Messages
375
Reaction score
1,165
Location
VA
Vehicle(s)
2019 Ford Ranger STX
Occupation
Nurse
Thanks Rick. Yes, I’m very happy with it and still take the time to point it out to others. I recently removed it to swap my tow hooks out for shackles and it was great to see that the top side of the modified air dam and the skid plate were both spotless. So, it’s doing the job I was hoping it would do.
Hi Rick, I was super happy with my air dam mod! But a week later, I swapped to an aftermarket bumper and did away with the stock setup altogether.

If I didn't find a smoking deal on a bumper, I'd still be happily sporting the modded airdam.
 

codestp202

Well-Known Member
Joined
Nov 10, 2020
Threads
9
Messages
209
Reaction score
308
Location
USA
Vehicle(s)
Ranger
Just did this mod today, took about 45 minutes. Well worth it! Thanks for the write up
 

MrNeutral

Member
First Name
Derek
Joined
Apr 21, 2021
Threads
0
Messages
5
Reaction score
9
Location
Tennessee
Vehicle(s)
2021 Ford Ranger XLT 4x4
I just did this. Followed your instructions and it took me about 45 min. Had a dremmel multitool so that helps with the cuts. You sir are a genius. I hated the air dam and when I took it off, I hated the "gap" just as much. Thank you for posting this.


evoaire

Well-Known Member
Joined
Jul 19, 2020
Threads
5
Messages
82
Reaction score
119
Location
VA
Vehicle(s)
9.5” Redwing
My ranger is ordered. And I’m a big fan. I’ve read all 35 post in this here thread. And I was wondering, could I have a tee?
 

Rockhound

Well-Known Member
First Name
Albert
Joined
Oct 12, 2021
Threads
5
Messages
106
Reaction score
247
Location
SoCal
Vehicle(s)
2020 Ford Ranger 4x4 XLT
Occupation
Cabinet Installer
Brilliant engineering!
This is why you don't throw parts away that you remove for modifications.
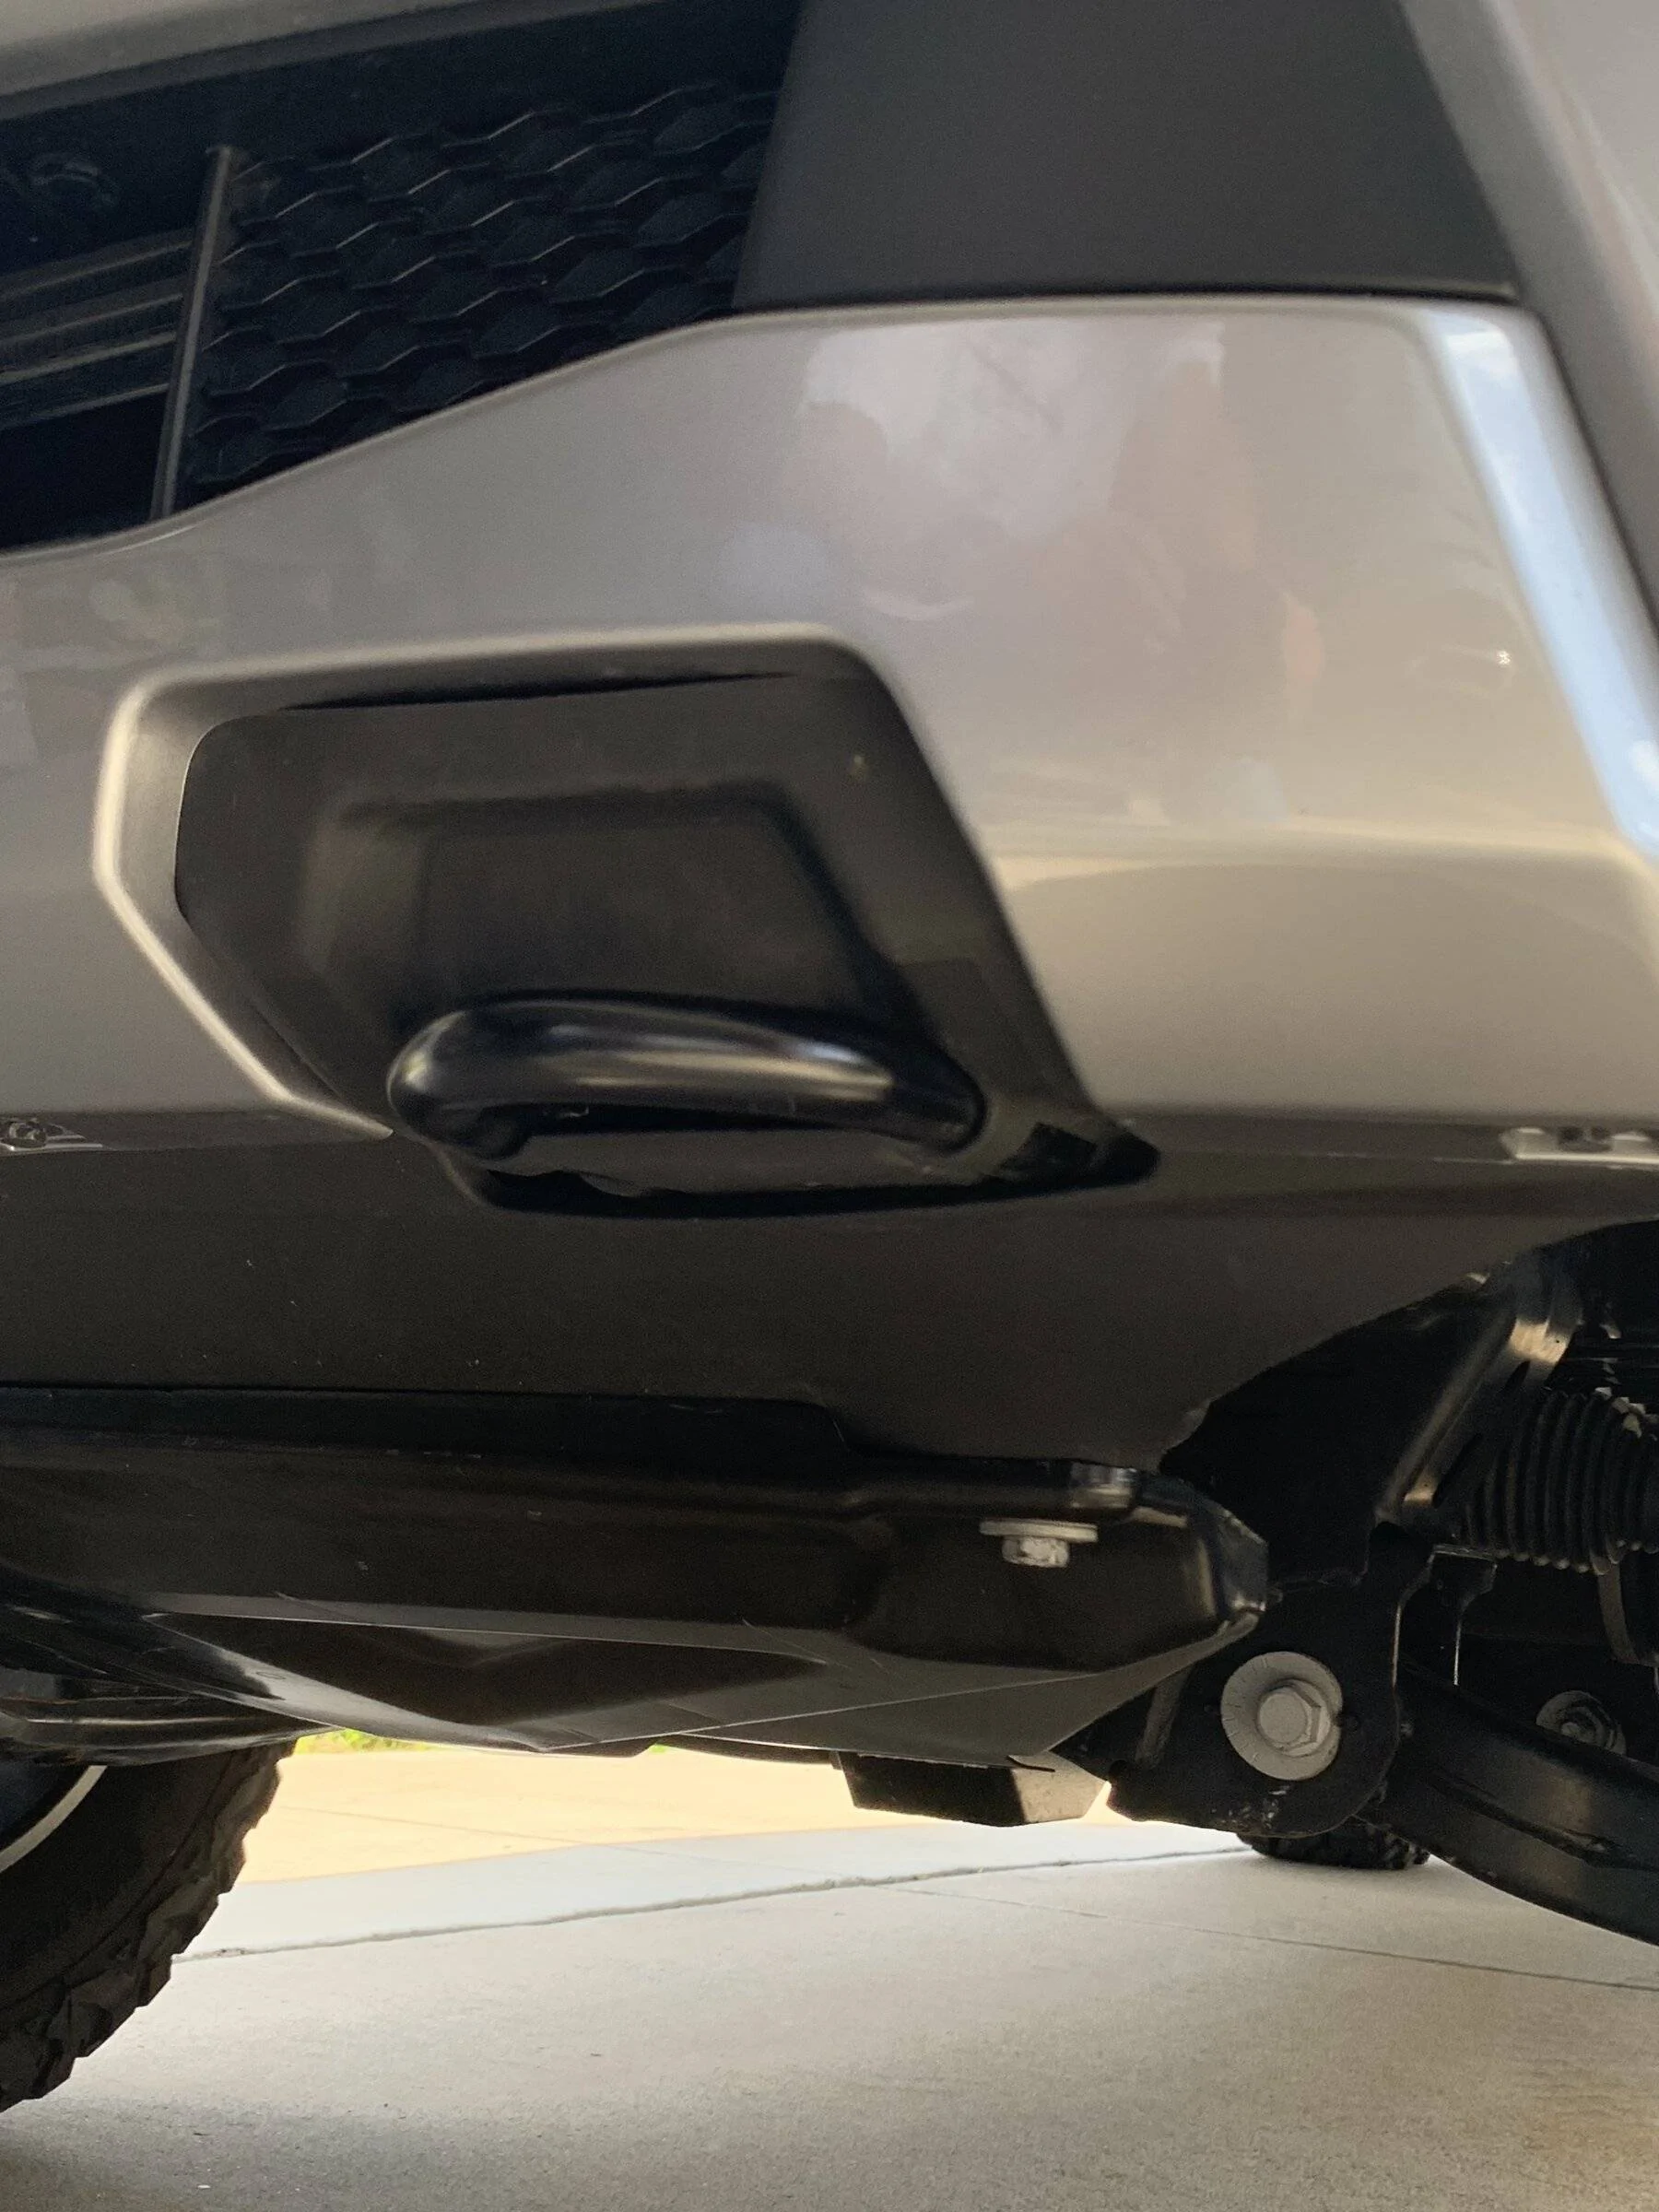
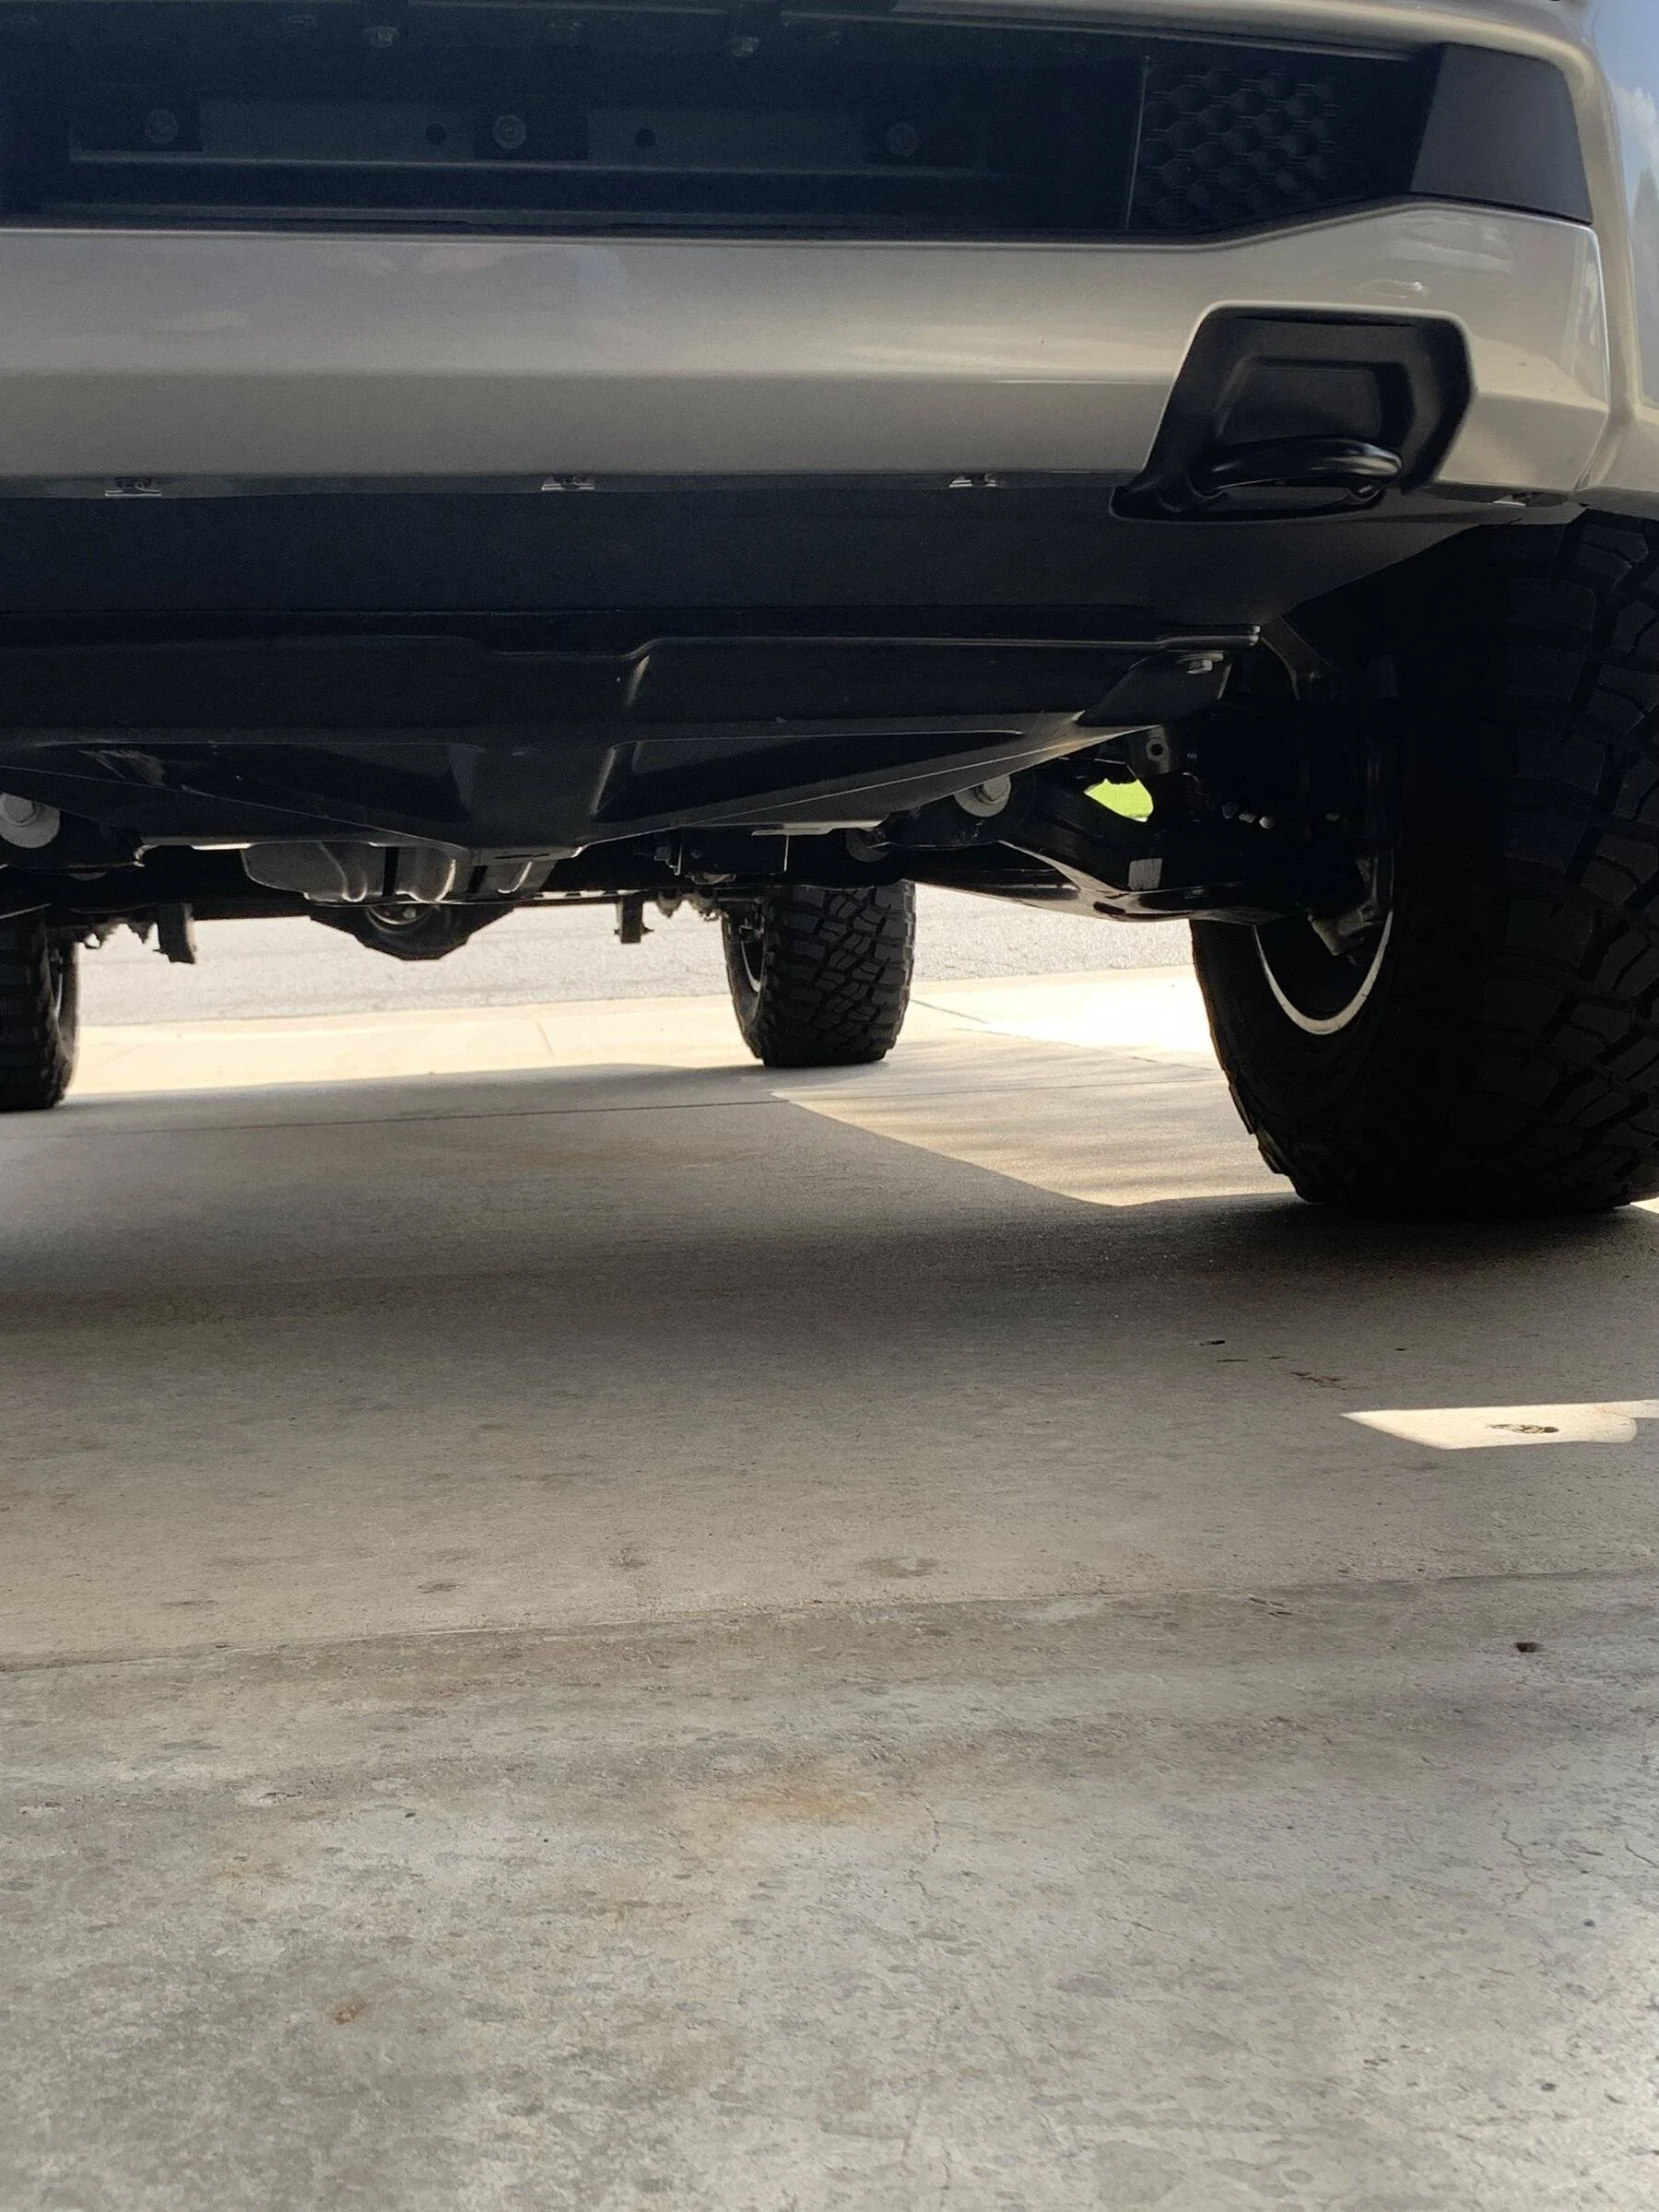
First mod I made was to pull the dam. I ran the skid pate for a while but hated the gap and couldn't come up with a fix. So I pulled the skid plate. That looked better but exposed the crossmember to danger on the trail.
I ran across this post yesterday and did the mod today.
It eliminates the air dam, retains the skid plate and blends the gap from bumper to top of skid plate beautifully, and costs nothing!
Thanks for working this out and posting with great instructions.

IMG_2402.webp


IMG_2401.webp
 

CaptainVonAwesome

New Member
First Name
Captain
Joined
Jun 9, 2021
Threads
0
Messages
4
Reaction score
2
Location
Modesto
Vehicle(s)
2021 Ranger
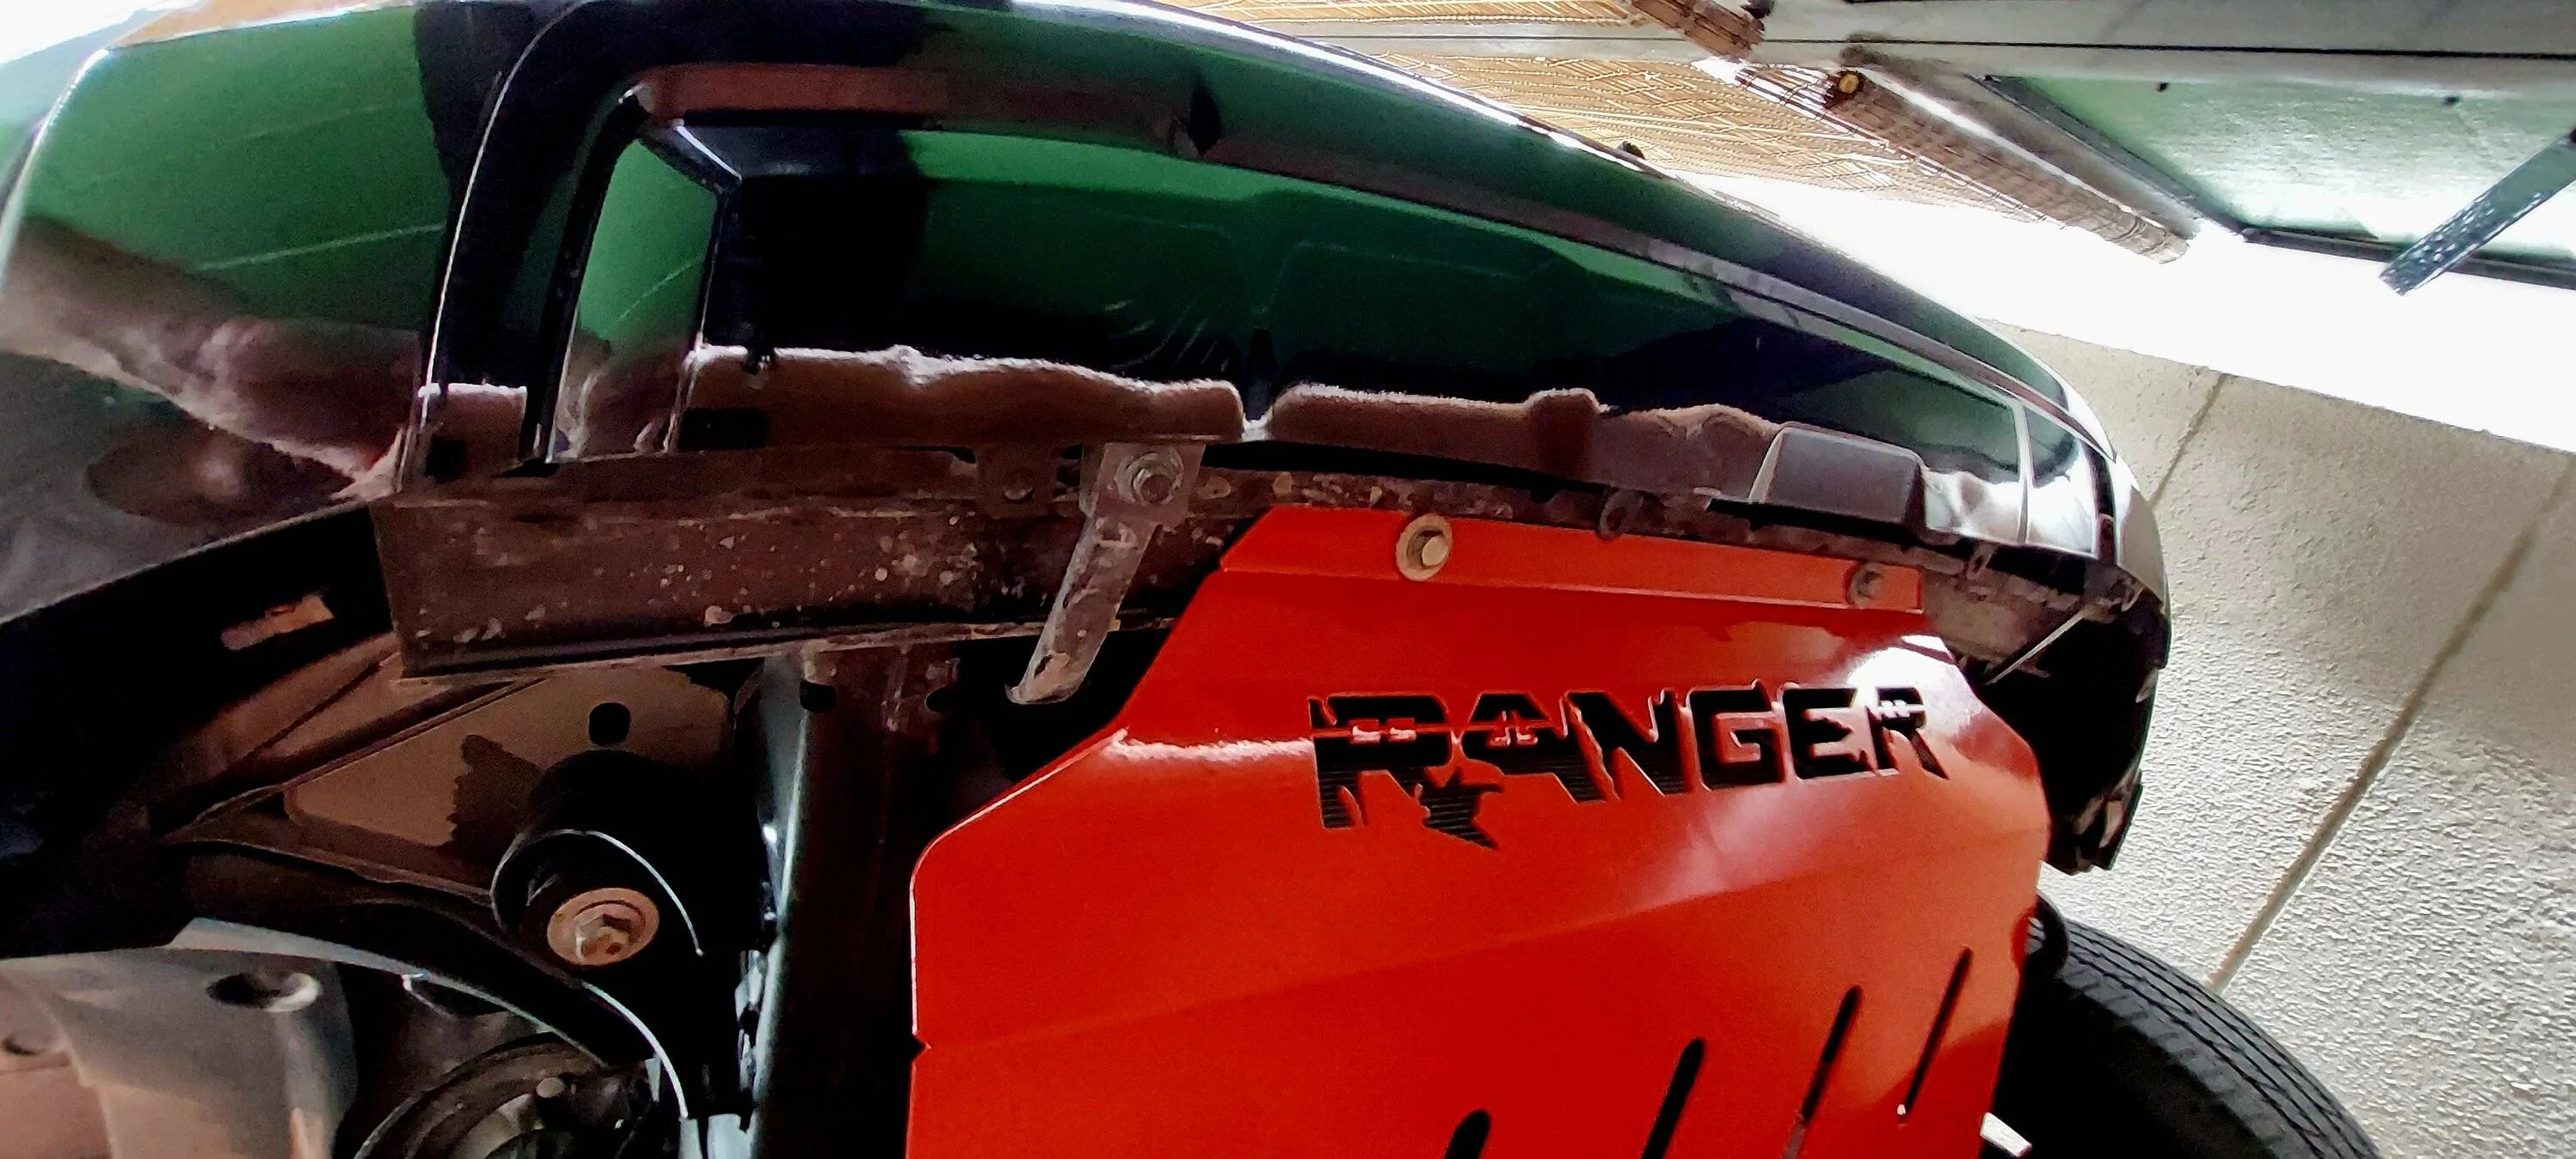
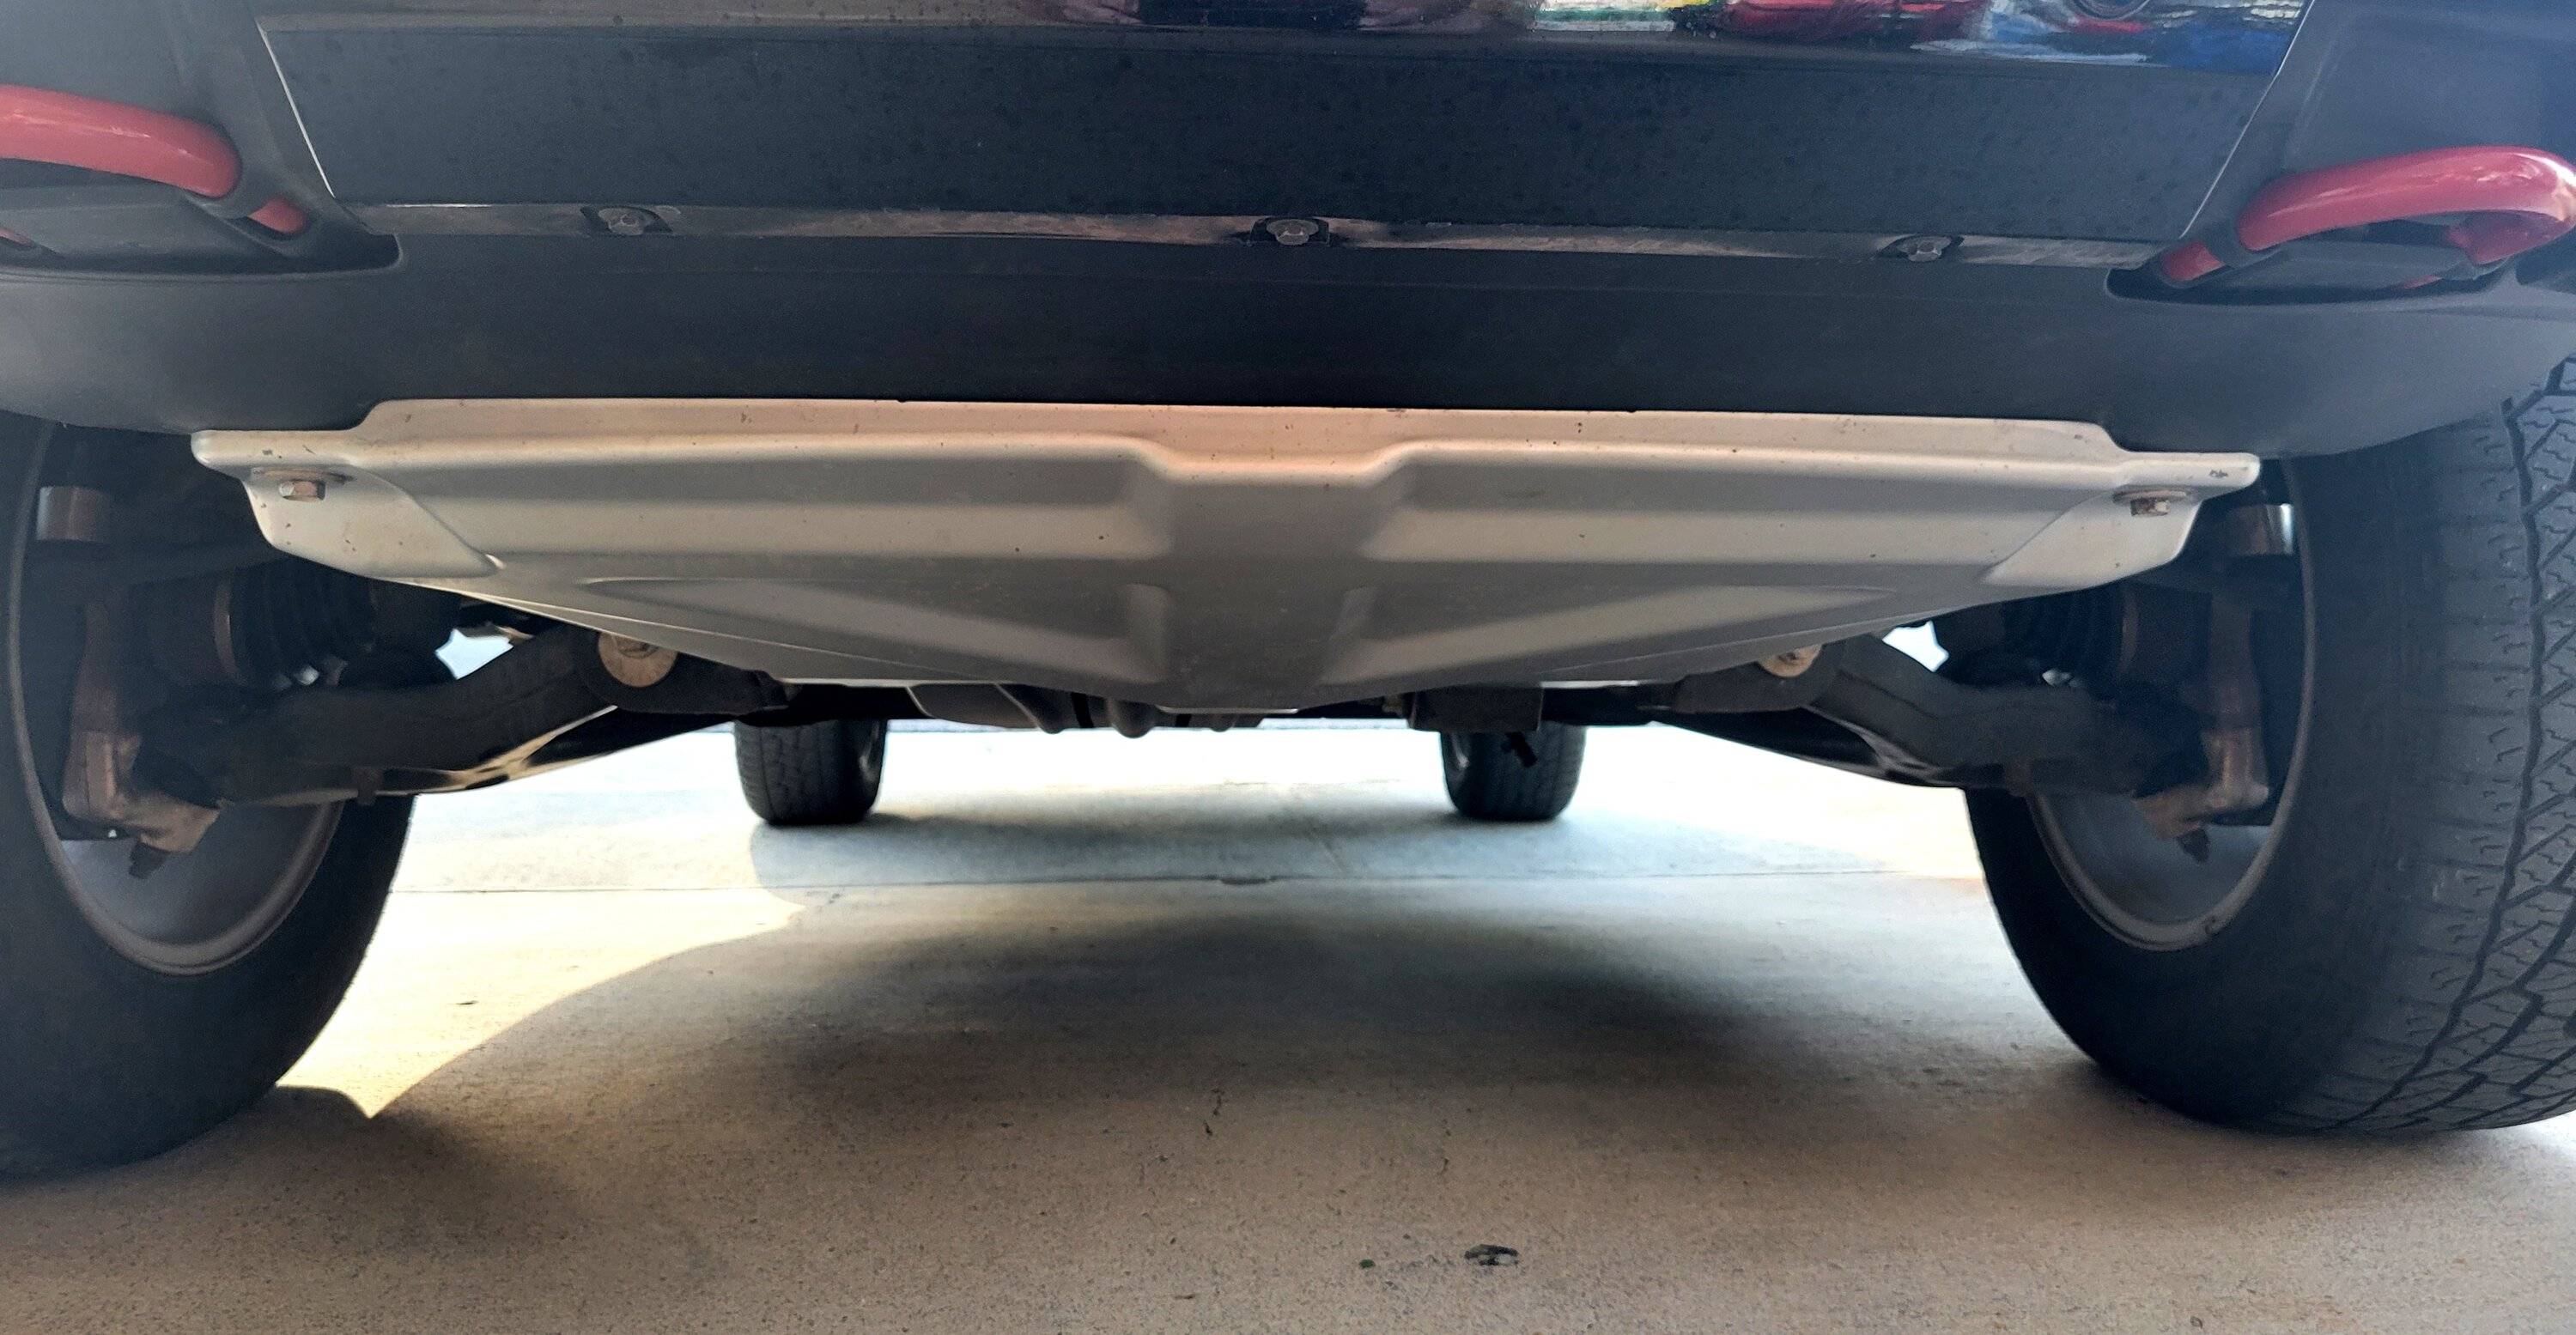
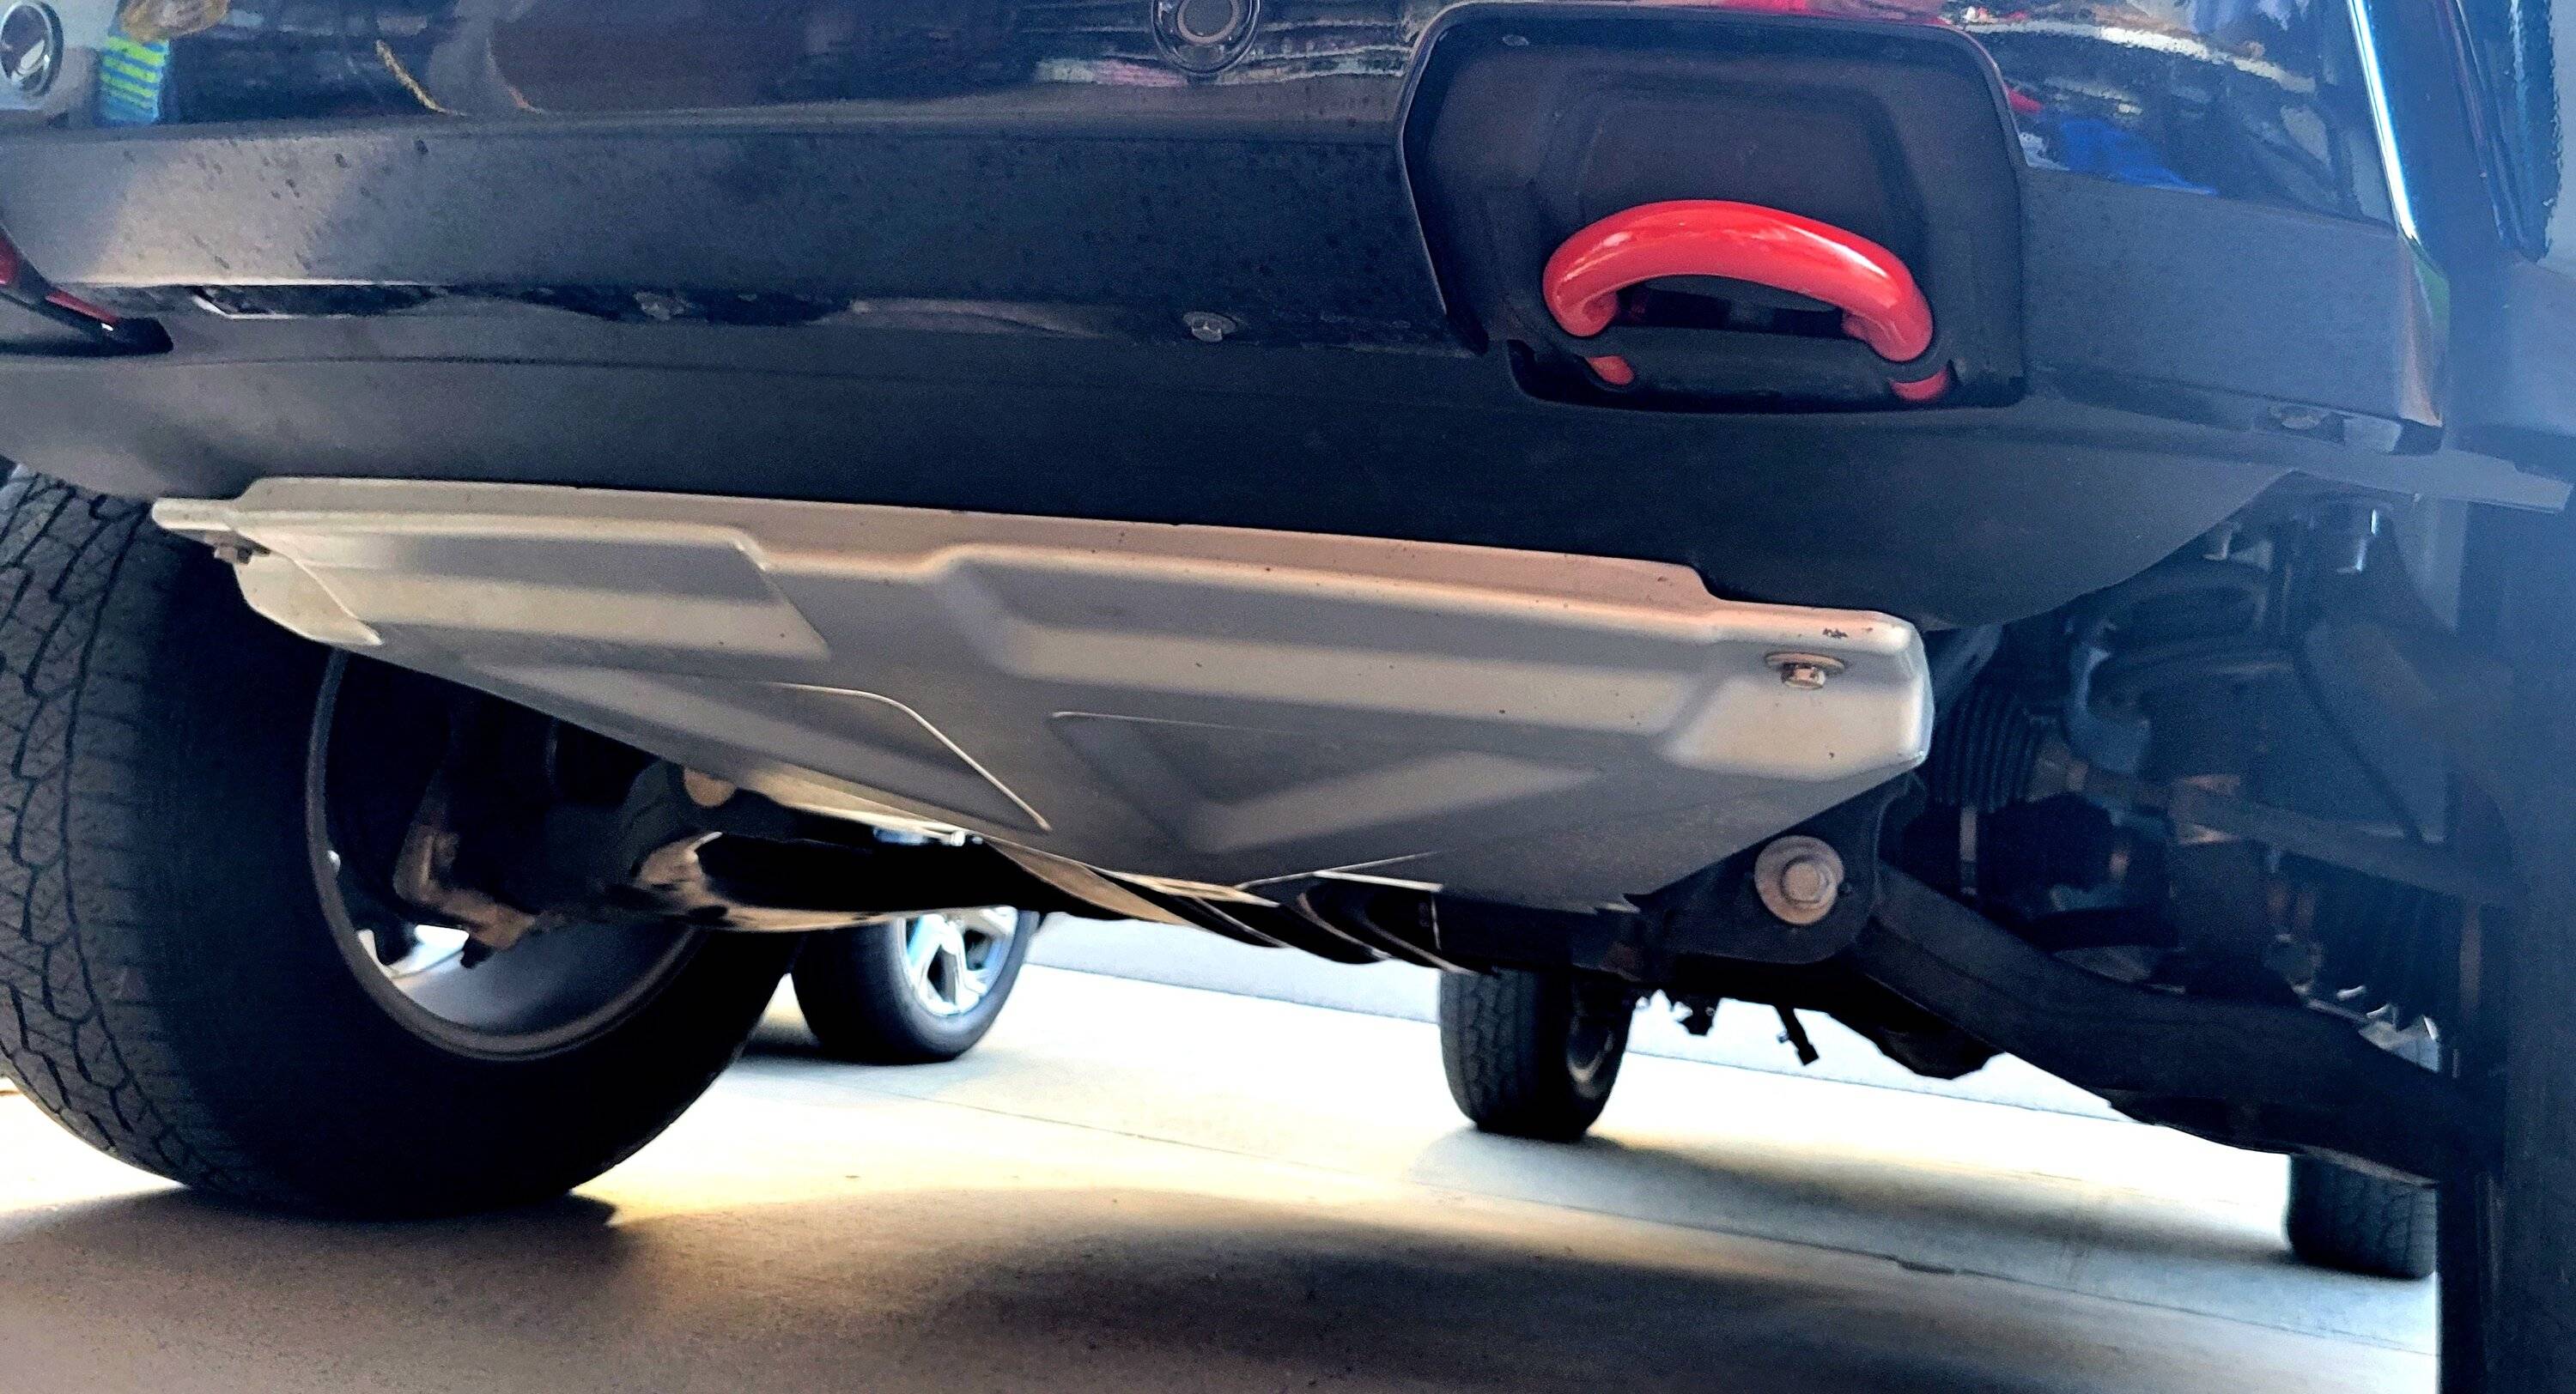
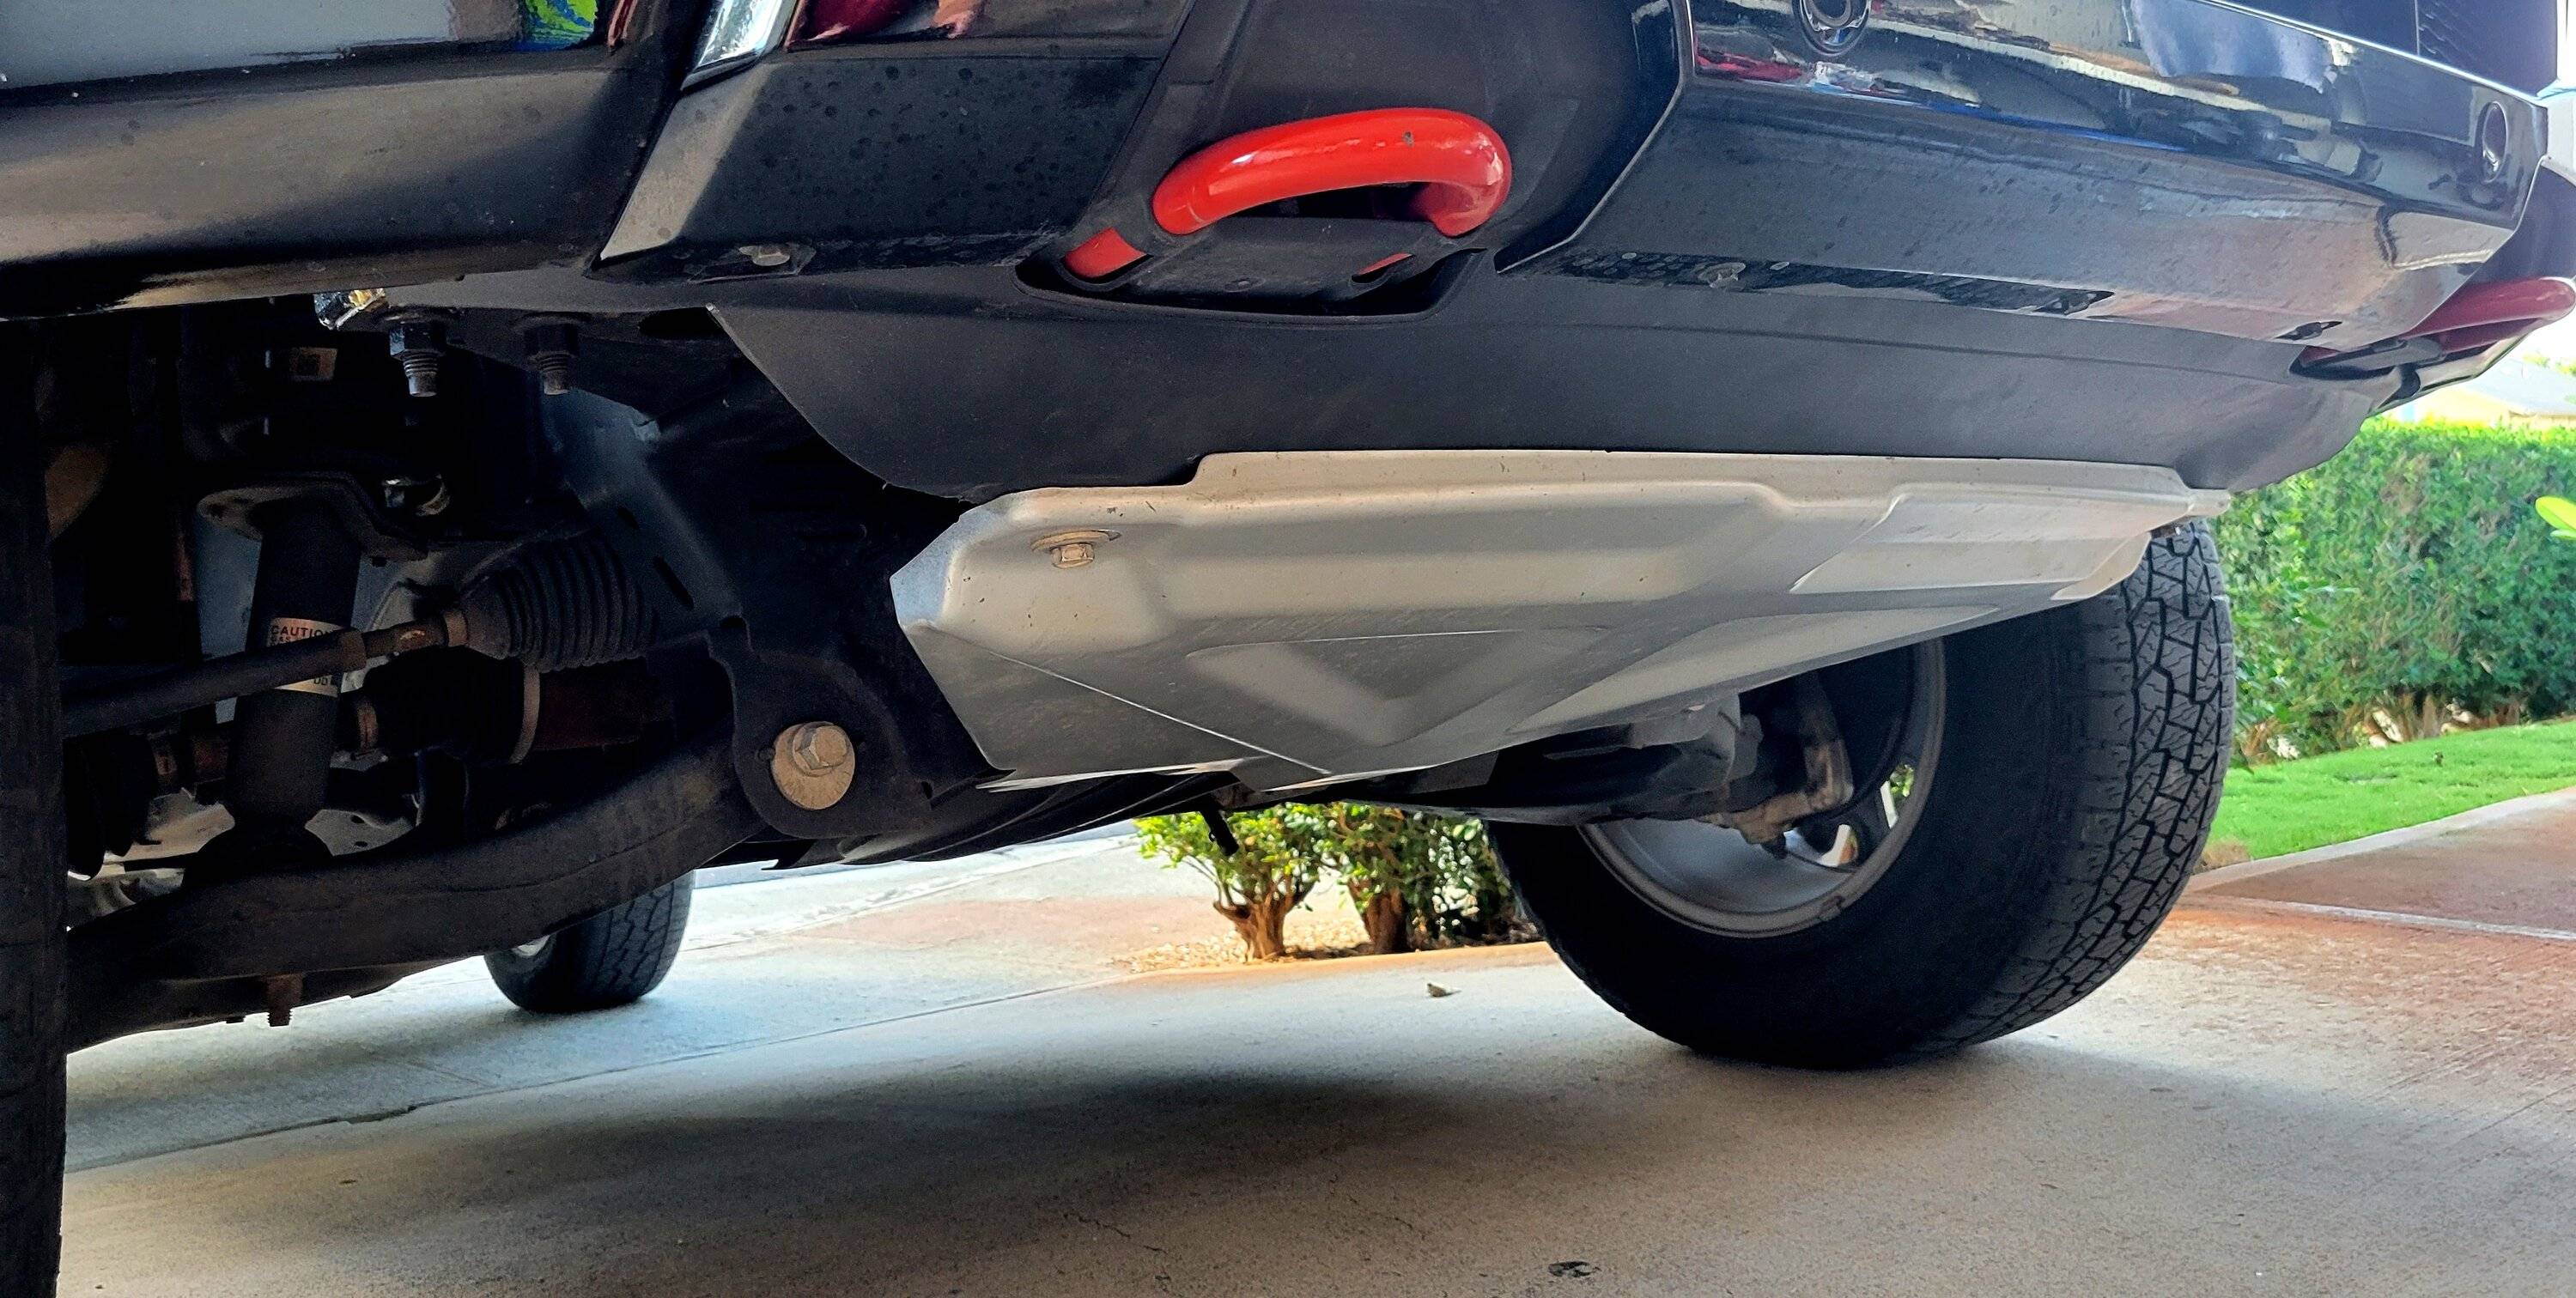
I removed the air dam on my XLT and, like many others who have done the same, I didn't like the gap between the bumper and the existing skid plate. It just looked odd and I could see it scooping up mud, snow, etc.. Solution: buy a factory skid plate or modify your old air dam to fill the gap.

You'll need a drill or 1/4" impact driver (contractor kind, not mechanic kind), 1/4" hex to 3/8" drive adapter), 10mm socket (long), 15mm socket (long), razor knife, tire crayon, 3/16" drill bit. (Don't freak out - you're not drilling into your Ranger).

If your air dam is off, you'll need to partially mount it to make the mod. Using the 10mm socket, mount the middle (short one) of the three outer mounting tabs in its original mounting spot, while leaving the other two long tabs on the outside of the bumper ( will be easily understood when you're doing it. Repeat for other side. This makes it way easier to re-install the middle tabs and to mark up your air dam for cutting.

Remove the three bumper skin bolt from the bottom of the bumper, push the bumper skin away and install the three middle air dam bolts in their original mounting position using the 10mm socket. Do not re-attach the bumper skin at this point.

Remove the two forward skid plate bolts using the 15mm socket. The skid plate should sag - if not, loosen the next set of bolts toward the rear of the skid plate but do not remove them. Tuck the air dam above the skid plate and secure one side with a 15mm bolt to hold in place. Wrestle the dam in place and secure the other side. You don't need to fully tighten the bolts but they need to be snug enough to hold things in place while you figure out where you need to cut. Ignore how poorly the dam fits at the outer tab - we'll be fixing that by cutting off the tab and drilling a new mounting slot in the air dam.

Use the tire crayon to mark where you need to cut - the outside edge of the skid plate should be your guide.

Remove the air dam to make the final markups and cut the air dam. Starting from the outside edge of the middle tab, draw a line straight down to the bend, follow along the bend for a few inches, then arch toward the line you traced along the outer edge of the skid plate. Mark a 1" line about 1-1/2" to the inside of where the skid plate will end - this will be a relief cut to allow the air dam to suck up against the skid plate mounting point See photo. Repeat for the other side.

Make sure your razor knife has a new blade. Carefully score where you need to make your cuts. Score again. Score again until you cut through - slow and steady wins the race here! The large outer piece should be completely cut away at this point. Cut off the two outer tabs, flush to the air dam. Make your relief cut. Repeat for the other side.

Using the 3/16" drill bit, make a slot on the outer end of the air dam by drilling two holes very close together and about 3/16" from the end of the air dam. Use the drill to "router" the slot - it doesn't have to be perfect, only functional. Repeat for the other side.

Now, re-install the dam, starting at the outside, now the other side, finishing with the three bolts under the bumper skin. The fit at the outside edges should be much better. Do not fasten bumper skin yet.

Snug the air dam under the skid plate and loosely fasten one side of the skid plate, then the other. Now tighten both skid plate bolts - you should be able see how the relief cuts were helpful. Tighten the rear bolts if you loosened them.

If everything looks good, install the three bumper skin bolts using the 10mm socket.

View attachment 53434

View attachment 53435

View attachment 53437

View attachment 53478

View attachment 53482

View attachment 53483

View attachment 53484

View attachment 53485
 

Beez

Well-Known Member
First Name
Wayne
Joined
Dec 14, 2022
Threads
3
Messages
104
Reaction score
181
Location
Hawaii
Vehicle(s)
'19 Lariat, DIY BOV, 2.5 Leveler, MBRP 3" Exhaust
Occupation
Just another incredibly super average dude
I removed the air dam on my XLT and, like many others who have done the same, I didn't like the gap between the bumper and the existing skid plate. It just looked odd and I could see it scooping up mud, snow, etc.. Solution: buy a factory skid plate or modify your old air dam to fill the gap.

You'll need a drill or 1/4" impact driver (contractor kind, not mechanic kind), 1/4" hex to 3/8" drive adapter), 10mm socket (long), 15mm socket (long), razor knife, tire crayon, 3/16" drill bit. (Don't freak out - you're not drilling into your Ranger).

If your air dam is off, you'll need to partially mount it to make the mod. Using the 10mm socket, mount the middle (short one) of the three outer mounting tabs in its original mounting spot, while leaving the other two long tabs on the outside of the bumper ( will be easily understood when you're doing it. Repeat for other side. This makes it way easier to re-install the middle tabs and to mark up your air dam for cutting.

Remove the three bumper skin bolt from the bottom of the bumper, push the bumper skin away and install the three middle air dam bolts in their original mounting position using the 10mm socket. Do not re-attach the bumper skin at this point.

Remove the two forward skid plate bolts using the 15mm socket. The skid plate should sag - if not, loosen the next set of bolts toward the rear of the skid plate but do not remove them. Tuck the air dam above the skid plate and secure one side with a 15mm bolt to hold in place. Wrestle the dam in place and secure the other side. You don't need to fully tighten the bolts but they need to be snug enough to hold things in place while you figure out where you need to cut. Ignore how poorly the dam fits at the outer tab - we'll be fixing that by cutting off the tab and drilling a new mounting slot in the air dam.

Use the tire crayon to mark where you need to cut - the outside edge of the skid plate should be your guide.

Remove the air dam to make the final markups and cut the air dam. Starting from the outside edge of the middle tab, draw a line straight down to the bend, follow along the bend for a few inches, then arch toward the line you traced along the outer edge of the skid plate. Mark a 1" line about 1-1/2" to the inside of where the skid plate will end - this will be a relief cut to allow the air dam to suck up against the skid plate mounting point See photo. Repeat for the other side.

Make sure your razor knife has a new blade. Carefully score where you need to make your cuts. Score again. Score again until you cut through - slow and steady wins the race here! The large outer piece should be completely cut away at this point. Cut off the two outer tabs, flush to the air dam. Make your relief cut. Repeat for the other side.

Using the 3/16" drill bit, make a slot on the outer end of the air dam by drilling two holes very close together and about 3/16" from the end of the air dam. Use the drill to "router" the slot - it doesn't have to be perfect, only functional. Repeat for the other side.

Now, re-install the dam, starting at the outside, now the other side, finishing with the three bolts under the bumper skin. The fit at the outside edges should be much better. Do not fasten bumper skin yet.

Snug the air dam under the skid plate and loosely fasten one side of the skid plate, then the other. Now tighten both skid plate bolts - you should be able see how the relief cuts were helpful. Tighten the rear bolts if you loosened them.

If everything looks good, install the three bumper skin bolts using the 10mm socket.

View attachment 53434

View attachment 53435

View attachment 53437

View attachment 53478

View attachment 53482

View attachment 53483

View attachment 53484

View attachment 53485
Duke... Seriously... Your vision and craftsmanship are to be highly commended. I love this DIY mod and am looking forward to doing this with my Ranger. Sure glad I didn't chuck my air dam in the recycling bin when I removed it to paint my skid plate. Thanks for posting!
 

canyonslicker

Well-Known Member
First Name
Andy
Joined
Jun 13, 2021
Threads
43
Messages
1,438
Reaction score
5,293
Location
California
Vehicle(s)
2021 Ranger Lariat
Occupation
65 YO Juvenile Delinquent
Ok I’m curious, any before and after pictures? I apologize if I missed them.
 

1pt21gw

Well-Known Member
First Name
Jason
Joined
Nov 25, 2020
Threads
17
Messages
648
Reaction score
2,111
Location
West Coast
Vehicle(s)
'20 IS XLT SC / '22 OW BBB 2Dr
Occupation
Ye' Ole Traveler
I took mine off and then added ARB skids, have about an inch of opening as ARB wants you to get their bumper. But this is a cool option. Nice work @DukeCanBuildit!
 

Synfulz

Well-Known Member
First Name
Richard
Joined
Oct 22, 2021
Threads
112
Messages
1,615
Reaction score
7,855
Location
Philippines
Vehicle(s)
2020 Ranger FX4 Diesel :)
Occupation
Retired Powerplant Operator
Vehicle Showcase
1
Just went out and looked at my truck. As I had recently removed my air dam, thought this would be great. But I don't have that gap like that. My skid plate bolts into the gap.

20221226_083254.webp
 

Dereku

Well-Known Member
First Name
Derek
Joined
May 18, 2022
Threads
32
Messages
2,864
Reaction score
7,072
Location
Chicagoland Area
Vehicle(s)
2021 Ford Ranger
Occupation
Project Manager
It looks awesome. Even when I level mine ill keep it. Chasing all MPGs I can. Will even get skinnier all terrains to keep the weight down lol.
 

Beez

Well-Known Member
First Name
Wayne
Joined
Dec 14, 2022
Threads
3
Messages
104
Reaction score
181
Location
Hawaii
Vehicle(s)
'19 Lariat, DIY BOV, 2.5 Leveler, MBRP 3" Exhaust
Occupation
Just another incredibly super average dude
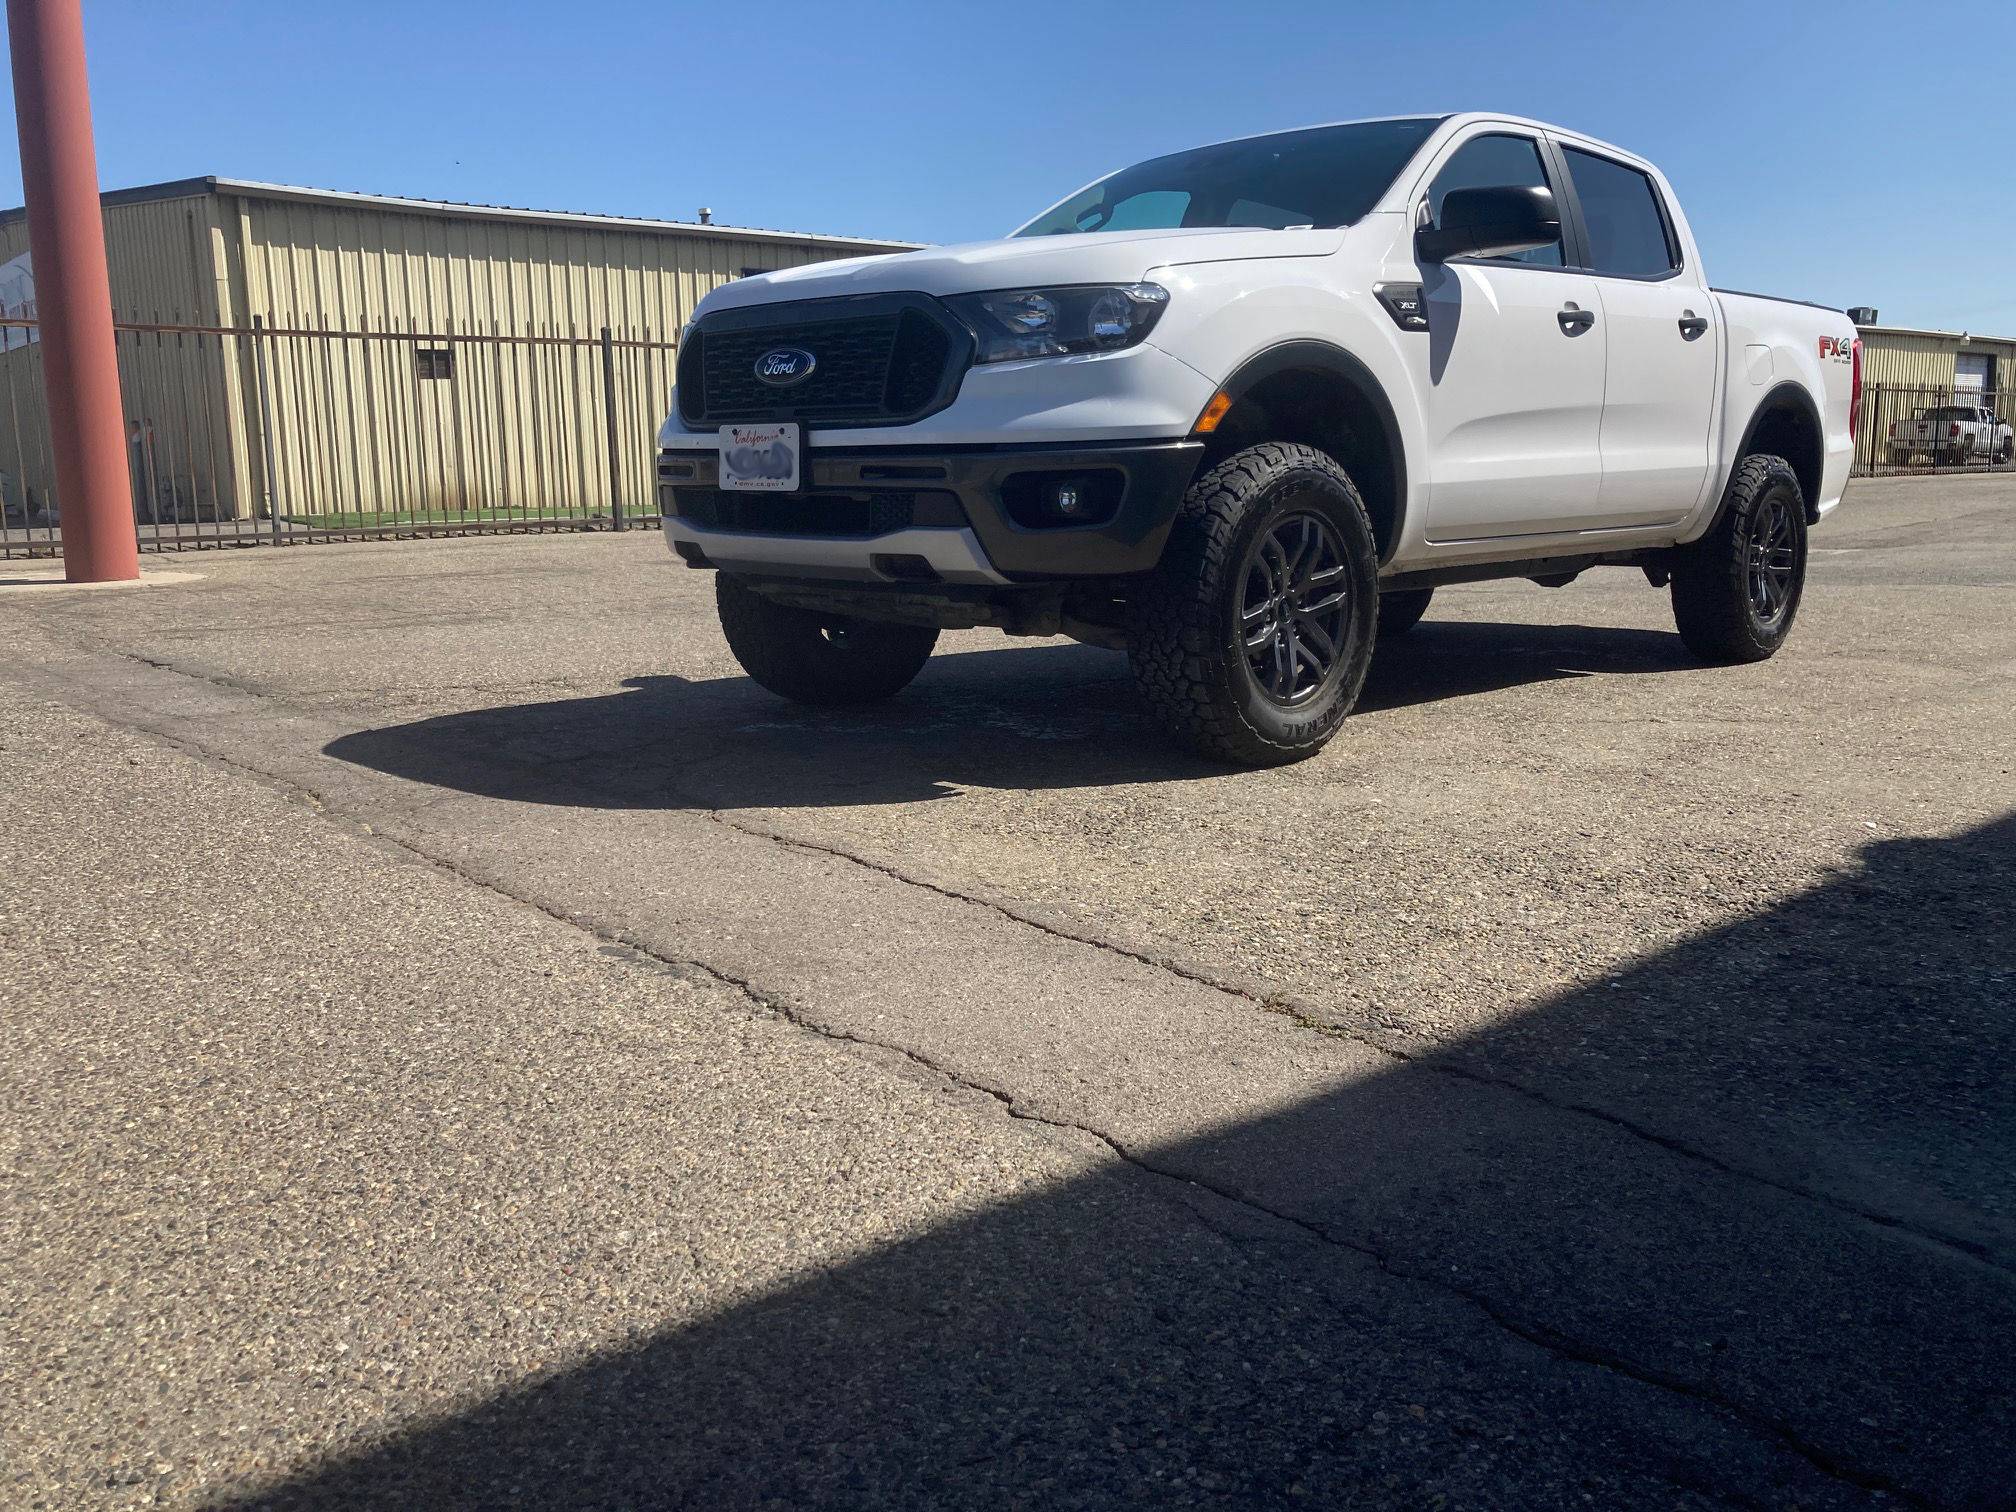
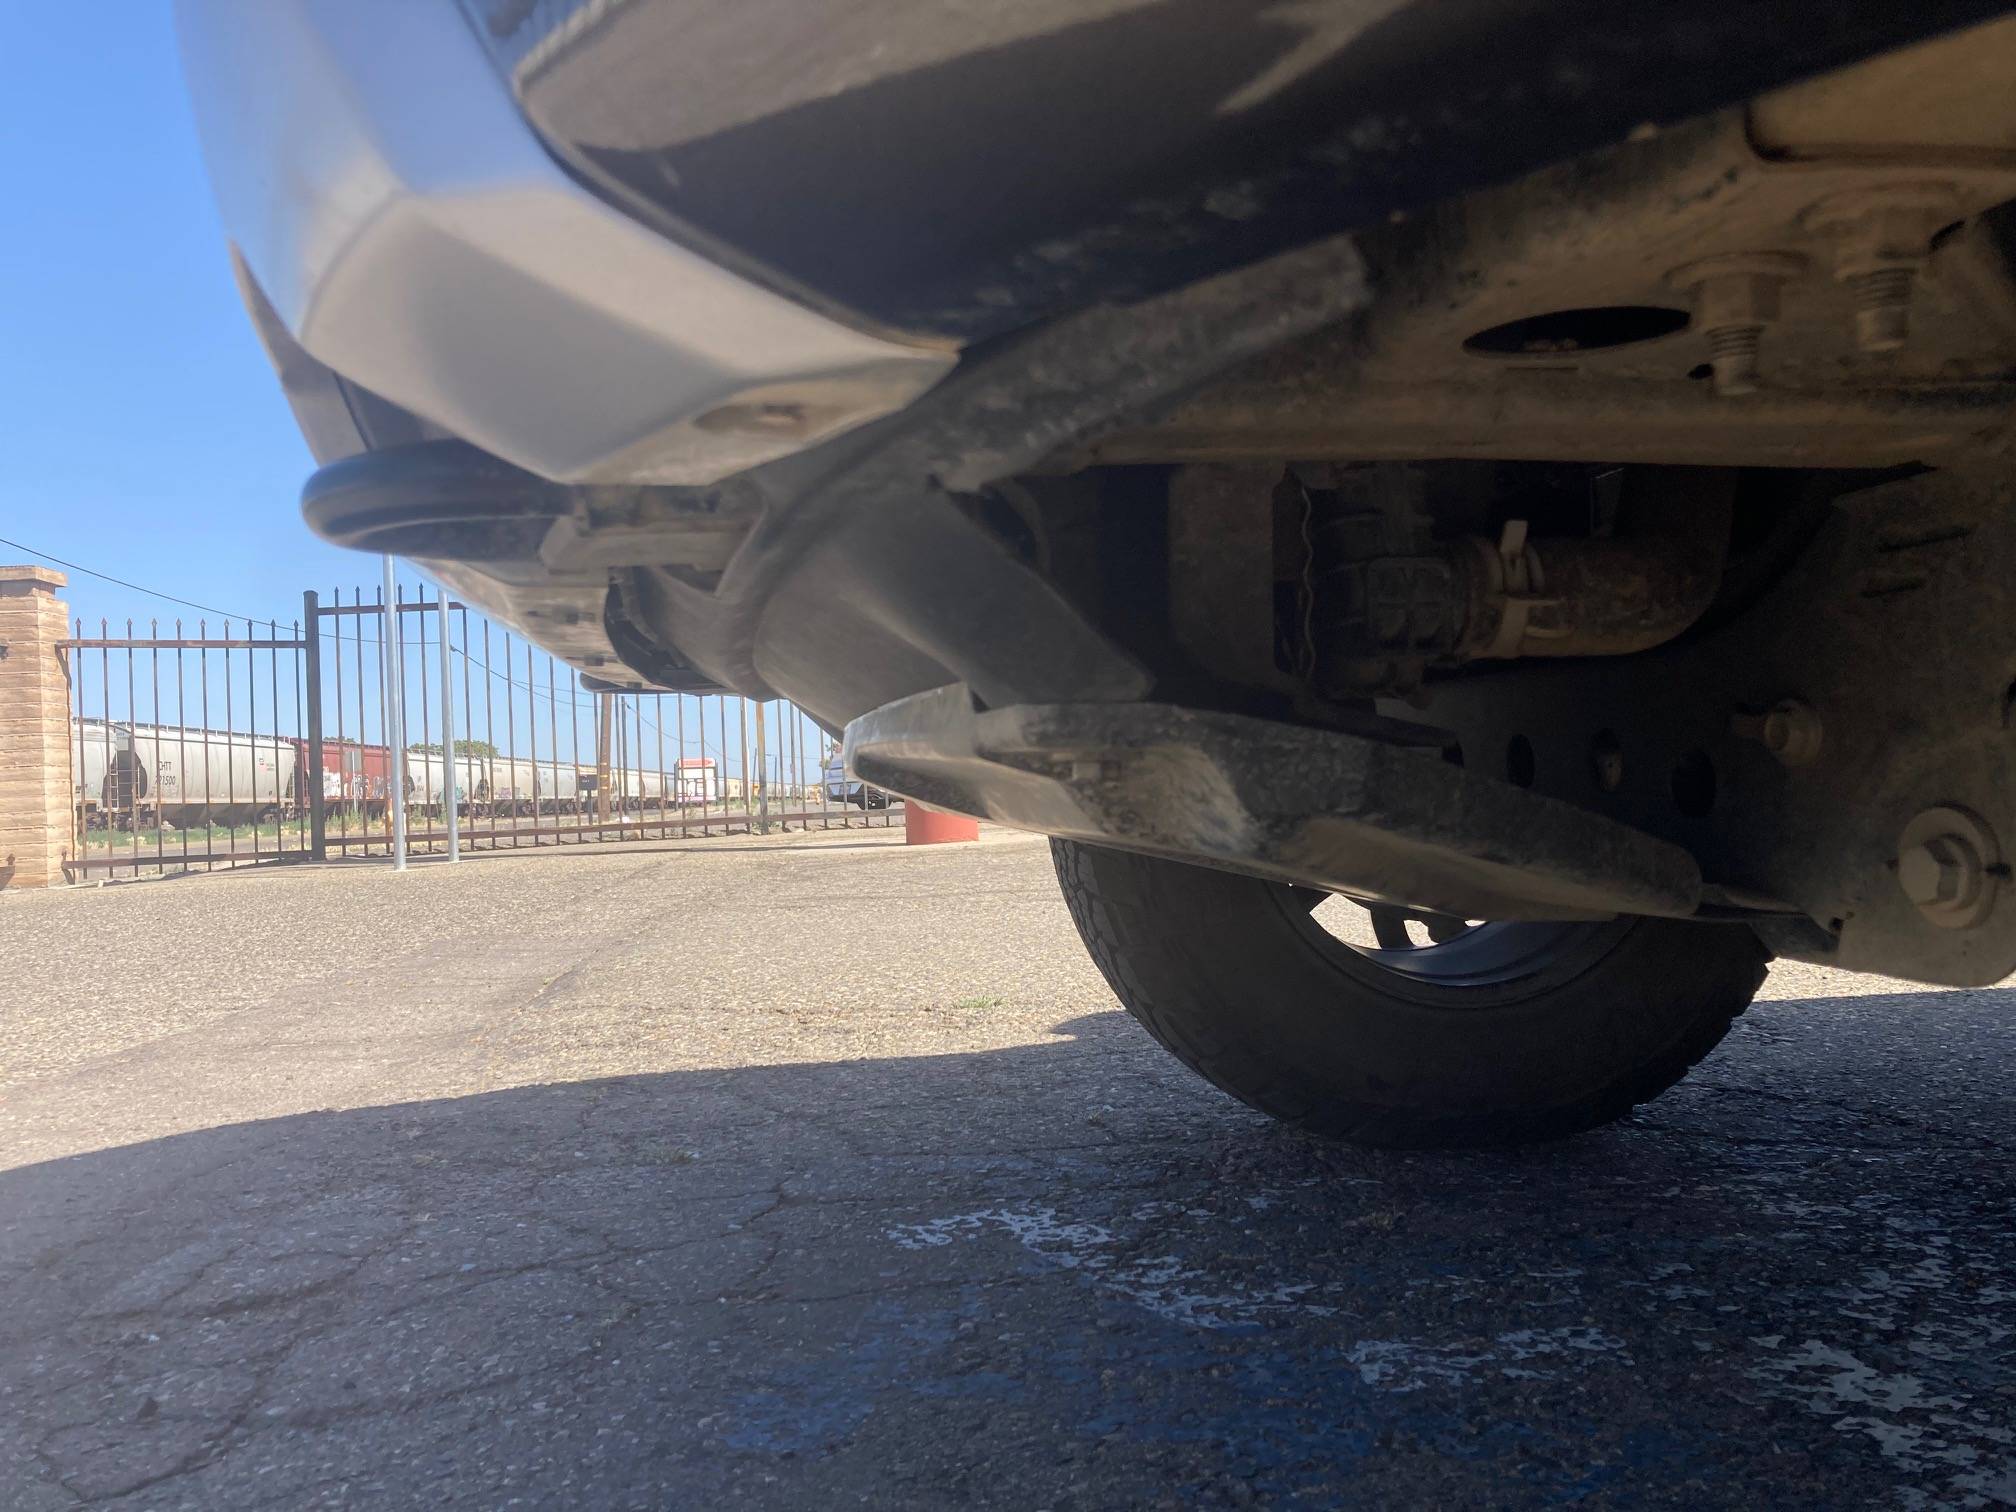
Well Boys, I got'r done. I might add, doing this mod would have been so much easier, had I decided to do it before removing the air dam to store in my frig'n attic. Trying to wrestle it back on and lining up the bolt holes for prep and tracing was a real challenge to my Christianity.. Not gunna lie. I had a bit of a time with it, rolling around on the garage floor... Words were said, tempers flared, I think I may have overheard Duke and Dave's name being used in vein once or twice?.. It put up a good fight, but in the end, clean living prevailed.

Mine is about an inch wider than intended. Having a firm grasp on my limited capabilities, I was worried about fitment, so I kept a little extra on the width. I figuring I could always trim it down further later on, if necessary. - All in all, (a side from feeling like I've been repeatedly kicked in the ribs) I'm super happy with it.

Thanks again fellas!

Shirt Size: Extra Manly

Dukes Air Dam Mod 1.jpg


Dukes Air Dam Mod 2.jpg


Dukes Air Dam Mod 3.jpg
Sponsored


Top