jojeeka
Member
- Thread starter
- #1
My son bought a used 2021 Ford Ranger with the 4" screen and he wanted carplay in it. So i researched it for him because i've done maybe a handful of personal installs over the last couple decades and he has not done one before. Since he lives in another state i wrote up some instructions for the install so i could send it to him. I decided to post the instructions on here for two reasons, one is to help others that may want to do a similar install and two, if anyone sees anything incorrect or not good they can correct it. I did send him some of the wiring harness parts dash kit. I'm the one who suggested kenwood because that's what i installed in my vehicles in the past because they had garmin nav. I know that doesn't mean as much now but that's what i was used to installing for myself and didn't have any real problems.
Even though some of this is specific to a kenwood install, i think there is a lot there for anyone doing another brand. I have not sent these instructions to him yet, i wanted to get feedback first...
Tools
----------------------------------
1. trim panel removal tools (plastic thin to pry interior panels off)
2. 7mm nut driver
3. torx screwdriver / bits - sizes T6 and T8
tools you may need...
1. phillips screwdriver
Parts
----------------------------------
Connection overview
------------------------------
NOTE - the steps in this document do not correspond to the steps below. the steps in this document are just for the harness setup. also note that some revisions of the ford idatalink harnesses come with backup cam cable coming from the 24pin connector and some (older ?) have the backup cam cable coming from the 54pin which is not indicated in this diagram but any feedback on if the 24pin backup cam cable works would be appeciated...
https://images.idatalink.com/corpor...R-FOR/ADS-RR(SR)-FOR2CH-DS-IG-EN_20221118.pdf
Installation...
1. Flash the RR (or RR2)
----------------------------
this step will program the RR to have functionality for your specific vehicle.
https://www.idatalinkmaestro.com/en/support/videos-help
and scroll to Installation for more info.
a) create a weblink account if you don't have one
https://www.idatalink.com/weblink/
b) download the desktop app here
https://www.weblinkupdater.com/weblinkdesktop
c) connect the RR to your laptop on a usb port like so...
https://images.idatalink.com/conten...iew/web-connlaptop-400x300-png/2qZn02wzMV.png
d) run the app downloaded and follow instructions which will ask details about your vehicle.
Note: you should know the features on your vehicle before flashing e.g. know that the advanced camera features means when you back up the lines turn with the steering. if you select the correct values when flashing you won't have *available* buttons on the screen that do nothing when pressed.
2. set up the wiring harness
---------------------------------
a) maestro RR connections
NOTE: "top" means holding the RR in front of you with the word "maestro" in front of you the correct way (not upside down), you will see plugs on "top" of the box and plugs on bottom of the box
b) if you are using the HRN-HRR-FO2 instead of the HRN-RR-FO2, then add the ACC-HU-KEN2 to the HRN-HRR-FO2; otherwise, you will have to solder the bare wires from the HRN-RR-FO2 to the harness that came with your head unit.
3. Remove dash panels
-----------------------------
NOTE - you may want to google search to see if there is a safe way to move the shifter out of of the way so you can get the dash panels off easier.
NOTE - youtube allows for clipping videos up to 1 minute each clip so many of these clips should just be 5 or 6 minute clips but that is not possible so you will have to watch 1 minute at a time.
removing dash part 1
https://youtube.com/clip/UgkxSPpAPK7v24l69hEWnFUfItoVM4kKfGfl
removing dash part 2
https://youtube.com/clip/UgkxXQZVIUfhbXU03krTUOXgfEAZ8DOqDIP6
removing dash part 3
https://youtube.com/clip/UgkxxMECePM-OtmzU7pjkspM82w98L47vCrj
removing dash part 4
https://youtube.com/clip/UgkxW-6o34SzYEkpkX_kcuNxwIFf0KD2c9kk
better view of taking off the clips to the power adapters...
https://youtube.com/clip/Ugkxe5CMvaBP4N8yK2vC2cMrLtZm3p36x_t1
removing dash part 5
https://youtube.com/clip/UgkxlorM7dPcJqqGMsg4bYiJu-WYmdYdmi9D
better view of screws under bezel...
https://youtube.com/clip/UgkxcbkSpUSEQib7BvsKBZUyz3FR8Uu_OTTQ
4. Remove old 4" screen, radio and factory usb plugs
------------------------------------------------------
a) remove the 4.2" radio screen and factory radio (metal colored) unit
b) removing factory usb plugs
https://youtube.com/clip/UgkxE68C7A7k8xAoQEcsKfkrgAdvFnFzTSF9
5. Add new radio and related components to the vehicle
------------------------------------------------------------
a) plug in the 2 connections that went into the factory radio box into your new harness.
b) then plug in the metra 40-EU10 (radio antenna) into the factory antenna connector that WAS in the factory radio box and the other end of the 40-EU10 into the back of the kenwood radio - antenna connector. NOTE - if this cable is too short to have room for working on the rest then remember to do it later.
the 3 connectors from a) & b) shown here...
https://www.ranger5g.com/forum/attachments/img_5446-jpg.5446/
this is the big metal box in the middle of this pic...
https://www.ranger5g.com/forum/attachments/img_5445-jpg.5445/
c) this step is one thing i'm not 100% sure about, not sure where this plug comes from in the ranger haness... if the connector in this image fits into the HRN-HRR-FO2 harness then plug it in...
https://www.ranger5g.com/forum/attachments/img_0283-jpg.66001/
d) plug in the connector (54 pin) that was behind the 4" screen (that has the swivel lock on it) into the CAM-FD21 and the yellow RCA on the other end of the CAM-FD21 into the reverse cam / backup cam plug in your head unit.
https://www.ranger5g.com/forum/attachments/img_0361-jpg.66697/
the black bare wire on the CAM-FD21 needs to go to ground. the best way is to crimp a U end on it and connect it to any bolt with no paint on it connected to the body.
example: https://www.ranger5g.com/forum/attachments/img_0363-jpg.66698/
e) plug in the idatalink data connector wire to your RR (bottom right plug) and the other end into the back of your kenwood where it is labeled idatalink. then connect the idatalink audio connector wire to your RR (bottom left plug) and the other end into your head unit probably right next to the idatalink plug in your head unit.
f) plug the ODBII (ODB2) connector wire into the RR and the other end into the ODBII connector in your ranger. it is usually under the steering wheel area or somewhere around the driver knee area.
g) FOR NOW, just pull the USB connector on the back of the kenwood through the "hole" where the factory usb connectors were. i am working on a way to connect the kenwood usb to the ford factory usb connector plate that was there.
h) connect microphone that came with the head unit to the head unit and find a way to snake it throuugh the dash and be positioned so that it picks up your voice clearly.
checklist...
if everything fits so far...
TEST out the install by turning on the vehicle (put in park if not) and test features
6. Prepare the new dash kit you chose above
---------------------------------------------------
NOTE - both dash kits will be assembled the same way, they just look different.
on the ranger you need to use the lower half of the bezel you pulled out that contained the face around the radio and the a/c controls.
fascia prep doc for reference...
https://files.bbystatic.com/xmbs3bHcp58DsaJXn3vNSw==/7db2eec2-c2c8-49e3-b2e0-4c5680ea561c
fascia prep vids for more detail...
preparing fascia part 1
https://youtube.com/clip/Ugkx97tTJCy39uSP1VUaf6yhmqqpFaa1aosT
preparing fascia part 2
https://youtube.com/clip/UgkxkAg09rnztFNzhRob9DWw_B0k6eiuOiKq
preparing fascia part 3
https://youtube.com/clip/Ugkx1ZothnX6KWgANZK000nNnAX6FB642HzA
preparing fascia part 4
https://youtube.com/clip/UgkxF7lwUu3wNJ14MCiMCDFVNYA7FfbNKd9G
preparing fascia - another guy's vid on it if needed
youtu.be/tZ1hi-b9Ec8?t=1227
7. Reassemble dash panels
-------------------------------------
Note - to this only if everything appears to work or giving up and going back to the old.
reverse the dash panel disassembly using the disassembly video above, pressing in the panels so all the clips snap back in.
don't forget when reassembling...
8. FInal tests
-----------------------
Test out...
Even though some of this is specific to a kenwood install, i think there is a lot there for anyone doing another brand. I have not sent these instructions to him yet, i wanted to get feedback first...
Tools
----------------------------------
1. trim panel removal tools (plastic thin to pry interior panels off)
2. 7mm nut driver
3. torx screwdriver / bits - sizes T6 and T8
tools you may need...
1. phillips screwdriver
Parts
----------------------------------
- idatalink maestro RR (ADS-MRR) ... the brains of the conversion
- one of the following combination of wiring harness parts...
- no soldering: HRN-HRR-FO2 with an idatalink head unit specific harness e.g. ACC-HU-KEN2
- ... OR...
- soldering: HRN-RR-FO2 soldered to your head unit's wiring harness that it came with
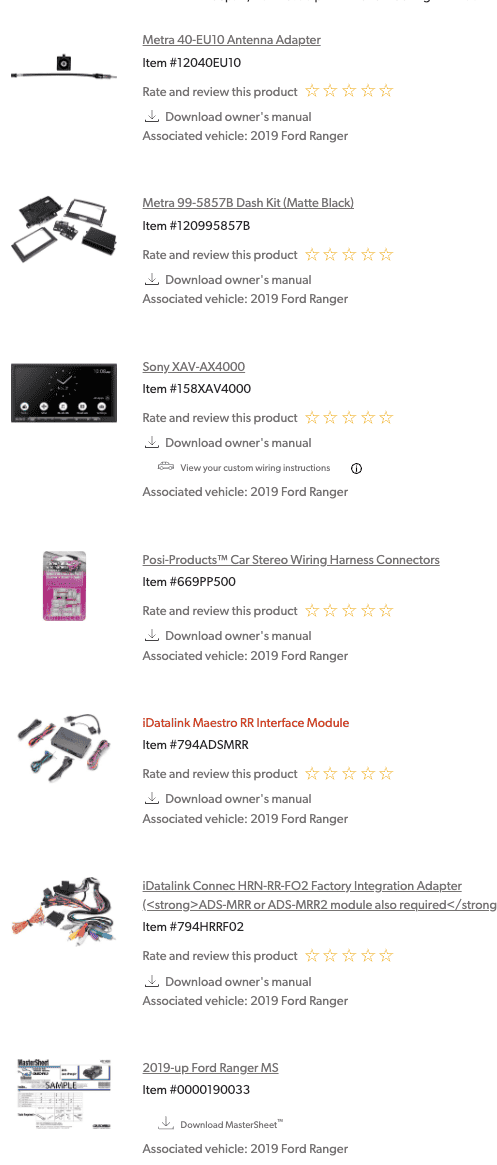
- metra 40-EU10 antenna adaptor
- backup camera retention choose ONE of
- PAC brand CAM-FD21
- you'll need u-type connector to crimp on neutral wire and connect to ground
- can find on ebay, amazon, etc.
- ...OR..
- search ebay for: Ford 54-Pin SYNC rearview
- you'll need a male to male or male to female RCA cable with this depending on your head unit r-cam connector
- PAC brand CAM-FD21
- one of the following dash kits...
- Scosche FDSA6218DDB
- pro: looks more like the 8" ranger factory radio dash
- con: appears to allow for a less deep radio (than the metra below)
- con: people have said the silver reflects the sun more
- how it looks: https://www.ranger5g.com/forum/attachments/20200828_171757-jpg.53195
- ...OR...
- Metra 99-5857B
- pro: appears to allow for deeper radios (depth of the radio into the dash)
- pro: no glare around your radio from the bezel because it is black not silver
- con: not as factory looking as the Scosche
- how it looks: https://www.ranger5g.com/forum/atta...a9cc4f-69d1-45bd-8664-3240c6d91d6e-png.65996/ & https://i.ebayimg.com/images/g/hO4AAOSw9ghjj5Kh/s-l500.jpg
- Scosche FDSA6218DDB
- idatalink compatible head unit e.g. kenwood , sony, pioneer, etc. ... it has to have an idatalink connector in the back.
- optionally, if you have wireless carplay or wireless android auto then you should add the gps antenna to your head unit. verify if it comes with your head unit before buying. from what i read, the wireless phone integraton software use it. (i was wondering why the non-nav head unit had a gps antenna connection in the back.)
Connection overview
------------------------------
NOTE - the steps in this document do not correspond to the steps below. the steps in this document are just for the harness setup. also note that some revisions of the ford idatalink harnesses come with backup cam cable coming from the 24pin connector and some (older ?) have the backup cam cable coming from the 54pin which is not indicated in this diagram but any feedback on if the 24pin backup cam cable works would be appeciated...
https://images.idatalink.com/corpor...R-FOR/ADS-RR(SR)-FOR2CH-DS-IG-EN_20221118.pdf
Installation...
1. Flash the RR (or RR2)
----------------------------
this step will program the RR to have functionality for your specific vehicle.
https://www.idatalinkmaestro.com/en/support/videos-help
and scroll to Installation for more info.
a) create a weblink account if you don't have one
https://www.idatalink.com/weblink/
b) download the desktop app here
https://www.weblinkupdater.com/weblinkdesktop
c) connect the RR to your laptop on a usb port like so...
https://images.idatalink.com/conten...iew/web-connlaptop-400x300-png/2qZn02wzMV.png
d) run the app downloaded and follow instructions which will ask details about your vehicle.
Note: you should know the features on your vehicle before flashing e.g. know that the advanced camera features means when you back up the lines turn with the steering. if you select the correct values when flashing you won't have *available* buttons on the screen that do nothing when pressed.
2. set up the wiring harness
---------------------------------
a) maestro RR connections
NOTE: "top" means holding the RR in front of you with the word "maestro" in front of you the correct way (not upside down), you will see plugs on "top" of the box and plugs on bottom of the box
- 4 of the HRN-HRR-FO2 harness connectors go into the RR
- 10 pin & 18 pin into the top plugs of the RR
- 3 pin & 10 pin (green) into the bottom plugs of the RR
- 2 connections from the head unit into the RR (probably want to wait until the unit is in to do these connections)
- idatalink data cable - bottom right of RR
- idatalink audio cable - bottom left of RR
- see the "connection overview" above
b) if you are using the HRN-HRR-FO2 instead of the HRN-RR-FO2, then add the ACC-HU-KEN2 to the HRN-HRR-FO2; otherwise, you will have to solder the bare wires from the HRN-RR-FO2 to the harness that came with your head unit.
3. Remove dash panels
-----------------------------
NOTE - you may want to google search to see if there is a safe way to move the shifter out of of the way so you can get the dash panels off easier.
NOTE - youtube allows for clipping videos up to 1 minute each clip so many of these clips should just be 5 or 6 minute clips but that is not possible so you will have to watch 1 minute at a time.
removing dash part 1
https://youtube.com/clip/UgkxSPpAPK7v24l69hEWnFUfItoVM4kKfGfl
removing dash part 2
https://youtube.com/clip/UgkxXQZVIUfhbXU03krTUOXgfEAZ8DOqDIP6
removing dash part 3
https://youtube.com/clip/UgkxxMECePM-OtmzU7pjkspM82w98L47vCrj
removing dash part 4
https://youtube.com/clip/UgkxW-6o34SzYEkpkX_kcuNxwIFf0KD2c9kk
better view of taking off the clips to the power adapters...
https://youtube.com/clip/Ugkxe5CMvaBP4N8yK2vC2cMrLtZm3p36x_t1
removing dash part 5
https://youtube.com/clip/UgkxlorM7dPcJqqGMsg4bYiJu-WYmdYdmi9D
better view of screws under bezel...
https://youtube.com/clip/UgkxcbkSpUSEQib7BvsKBZUyz3FR8Uu_OTTQ
4. Remove old 4" screen, radio and factory usb plugs
------------------------------------------------------
a) remove the 4.2" radio screen and factory radio (metal colored) unit
- https://youtube.com/clip/Ugkx57Rpre2J3tMVsvEzcY0AUT7Sr82Ws8X9
- https://youtube.com/clip/UgkxPdbZ_o-tT4Vtdf9CHrHNwGkEnUr9o6TM
- https://youtube.com/clip/UgkxPeSlP1ALKBKaEJIOzRUgWDzZzJU2Xw-1
b) removing factory usb plugs
https://youtube.com/clip/UgkxE68C7A7k8xAoQEcsKfkrgAdvFnFzTSF9
5. Add new radio and related components to the vehicle
------------------------------------------------------------
a) plug in the 2 connections that went into the factory radio box into your new harness.
b) then plug in the metra 40-EU10 (radio antenna) into the factory antenna connector that WAS in the factory radio box and the other end of the 40-EU10 into the back of the kenwood radio - antenna connector. NOTE - if this cable is too short to have room for working on the rest then remember to do it later.
the 3 connectors from a) & b) shown here...
https://www.ranger5g.com/forum/attachments/img_5446-jpg.5446/
this is the big metal box in the middle of this pic...
https://www.ranger5g.com/forum/attachments/img_5445-jpg.5445/
c) this step is one thing i'm not 100% sure about, not sure where this plug comes from in the ranger haness... if the connector in this image fits into the HRN-HRR-FO2 harness then plug it in...
https://www.ranger5g.com/forum/attachments/img_0283-jpg.66001/
d) plug in the connector (54 pin) that was behind the 4" screen (that has the swivel lock on it) into the CAM-FD21 and the yellow RCA on the other end of the CAM-FD21 into the reverse cam / backup cam plug in your head unit.
https://www.ranger5g.com/forum/attachments/img_0361-jpg.66697/
the black bare wire on the CAM-FD21 needs to go to ground. the best way is to crimp a U end on it and connect it to any bolt with no paint on it connected to the body.
example: https://www.ranger5g.com/forum/attachments/img_0363-jpg.66698/
e) plug in the idatalink data connector wire to your RR (bottom right plug) and the other end into the back of your kenwood where it is labeled idatalink. then connect the idatalink audio connector wire to your RR (bottom left plug) and the other end into your head unit probably right next to the idatalink plug in your head unit.
f) plug the ODBII (ODB2) connector wire into the RR and the other end into the ODBII connector in your ranger. it is usually under the steering wheel area or somewhere around the driver knee area.
g) FOR NOW, just pull the USB connector on the back of the kenwood through the "hole" where the factory usb connectors were. i am working on a way to connect the kenwood usb to the ford factory usb connector plate that was there.
h) connect microphone that came with the head unit to the head unit and find a way to snake it throuugh the dash and be positioned so that it picks up your voice clearly.
checklist...
| Desc | From | To | Extra Info |
|---|---|---|---|
| ACC-HU-KEN2 | HRN-HRR-FO2 | head unit (new radio) | this is optional if you don't want to solder wires from HRN-*-FO2 to head unit harness |
| 26pin labeled "A" ?? | HRN-*-FO2 | Ranger harness 26pin | |
| 24pin | HRN-*-FO2 | Ranger harness 24pin | |
| 16pin ODBII (ODB2) | HRN-*-FO2 | Ranger ODBII | under steering wheel |
| 18pin black | HRN-*-FO2 | Maestro RR | opposite side of green & blue connectors |
| 10pin black | HRN-*-FO2 | Maestro RR | opposite side of green & blue connectors |
| 10pin green connector | HRN-*-FO2 | Maestro RR | only green connector |
| 3pin black | HRN-*-FO2 | Maestro RR | same side as green & blue connectors |
| idatalink data cable | head unit (new radio) | Maestro RR | same side as green & blue connectors |
| idatalink audio cable | head unit (new radio) | Maestro RR | same side as green & blue connectors |
| 12pin label "B" ??? | HRN-*-FO2 | Ranger harness 12pin | this one not sure about |
| 40-EU10 | head unit (new radio) | Ranger antenna plug | radio antenna |
| CAM-FD21 (RCA cable) | head unit R-CAM plug | Ranger 54pin harness | |
| CAM-FD21 (bare wire) | ground bolt | Ranger 54pin harness | crimp u-connector |
| microphone | head unit (new radio) | outside of dash | head unit should have a connector marke mic. find a place on your dash you can run the listening end so that it will pick up your voice while driving |
| USB | head unit (new radio) | stick out of old USB area | for now |
| HDMI | head unit (new radio) | stick out of old USB area | optional, must purchase. but will be able to display more things on radio screen like mirroring |
| gps antenna | head unit | on the dash | optional, if you have wireless carplay / android auto or you have nav |
if everything fits so far...
TEST out the install by turning on the vehicle (put in park if not) and test features
- test the radio antenna is installed right by playing local radio
- test the rear backup camera by going into reverse and seeing if it is on the kenwood screen
- test USB that comes out of the head unit by plugging your phone in it
- test carplay after that
- test microphone when running carplay
- test anything else you can think of
6. Prepare the new dash kit you chose above
---------------------------------------------------
NOTE - both dash kits will be assembled the same way, they just look different.
on the ranger you need to use the lower half of the bezel you pulled out that contained the face around the radio and the a/c controls.
fascia prep doc for reference...
https://files.bbystatic.com/xmbs3bHcp58DsaJXn3vNSw==/7db2eec2-c2c8-49e3-b2e0-4c5680ea561c
fascia prep vids for more detail...
preparing fascia part 1
https://youtube.com/clip/Ugkx97tTJCy39uSP1VUaf6yhmqqpFaa1aosT
preparing fascia part 2
https://youtube.com/clip/UgkxkAg09rnztFNzhRob9DWw_B0k6eiuOiKq
preparing fascia part 3
https://youtube.com/clip/Ugkx1ZothnX6KWgANZK000nNnAX6FB642HzA
preparing fascia part 4
https://youtube.com/clip/UgkxF7lwUu3wNJ14MCiMCDFVNYA7FfbNKd9G
preparing fascia - another guy's vid on it if needed
youtu.be/tZ1hi-b9Ec8?t=1227
7. Reassemble dash panels
-------------------------------------
Note - to this only if everything appears to work or giving up and going back to the old.
reverse the dash panel disassembly using the disassembly video above, pressing in the panels so all the clips snap back in.
don't forget when reassembling...
| Desc | From | To | Exra info |
|---|---|---|---|
| Climate control | dash panel | Ranger harness | https://youtube.com/clip/UgkxLumnEZKU8gZXCV0kf7qPpPOLqsbpnHTT |
| 12v power plugs | dash panel | Ranger harness | https://youtube.com/clip/UgkxWW3-3piMph663i1UZfRrOVAC1_FTZtiM |
8. FInal tests
-----------------------
Test out...
- everything mentioned at the end of step 5 to verify nothing broke during reassembly
- climate control
- power supplies below climate control
Sponsored
Last edited:
")