Overlanding setup for the uncivilized/stealth camper

charwest

Well-Known Member
First Name
char & tony
Joined
Apr 26, 2020
Threads
42
Messages
335
Reaction score
727
Location
On the road
Vehicle(s)
2019 Ranger XL FX4 Supercab
Occupation
Healthcare
IMG_9144.jpg


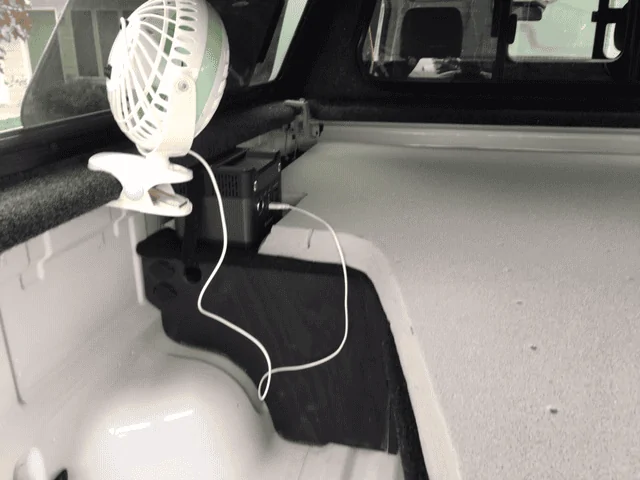
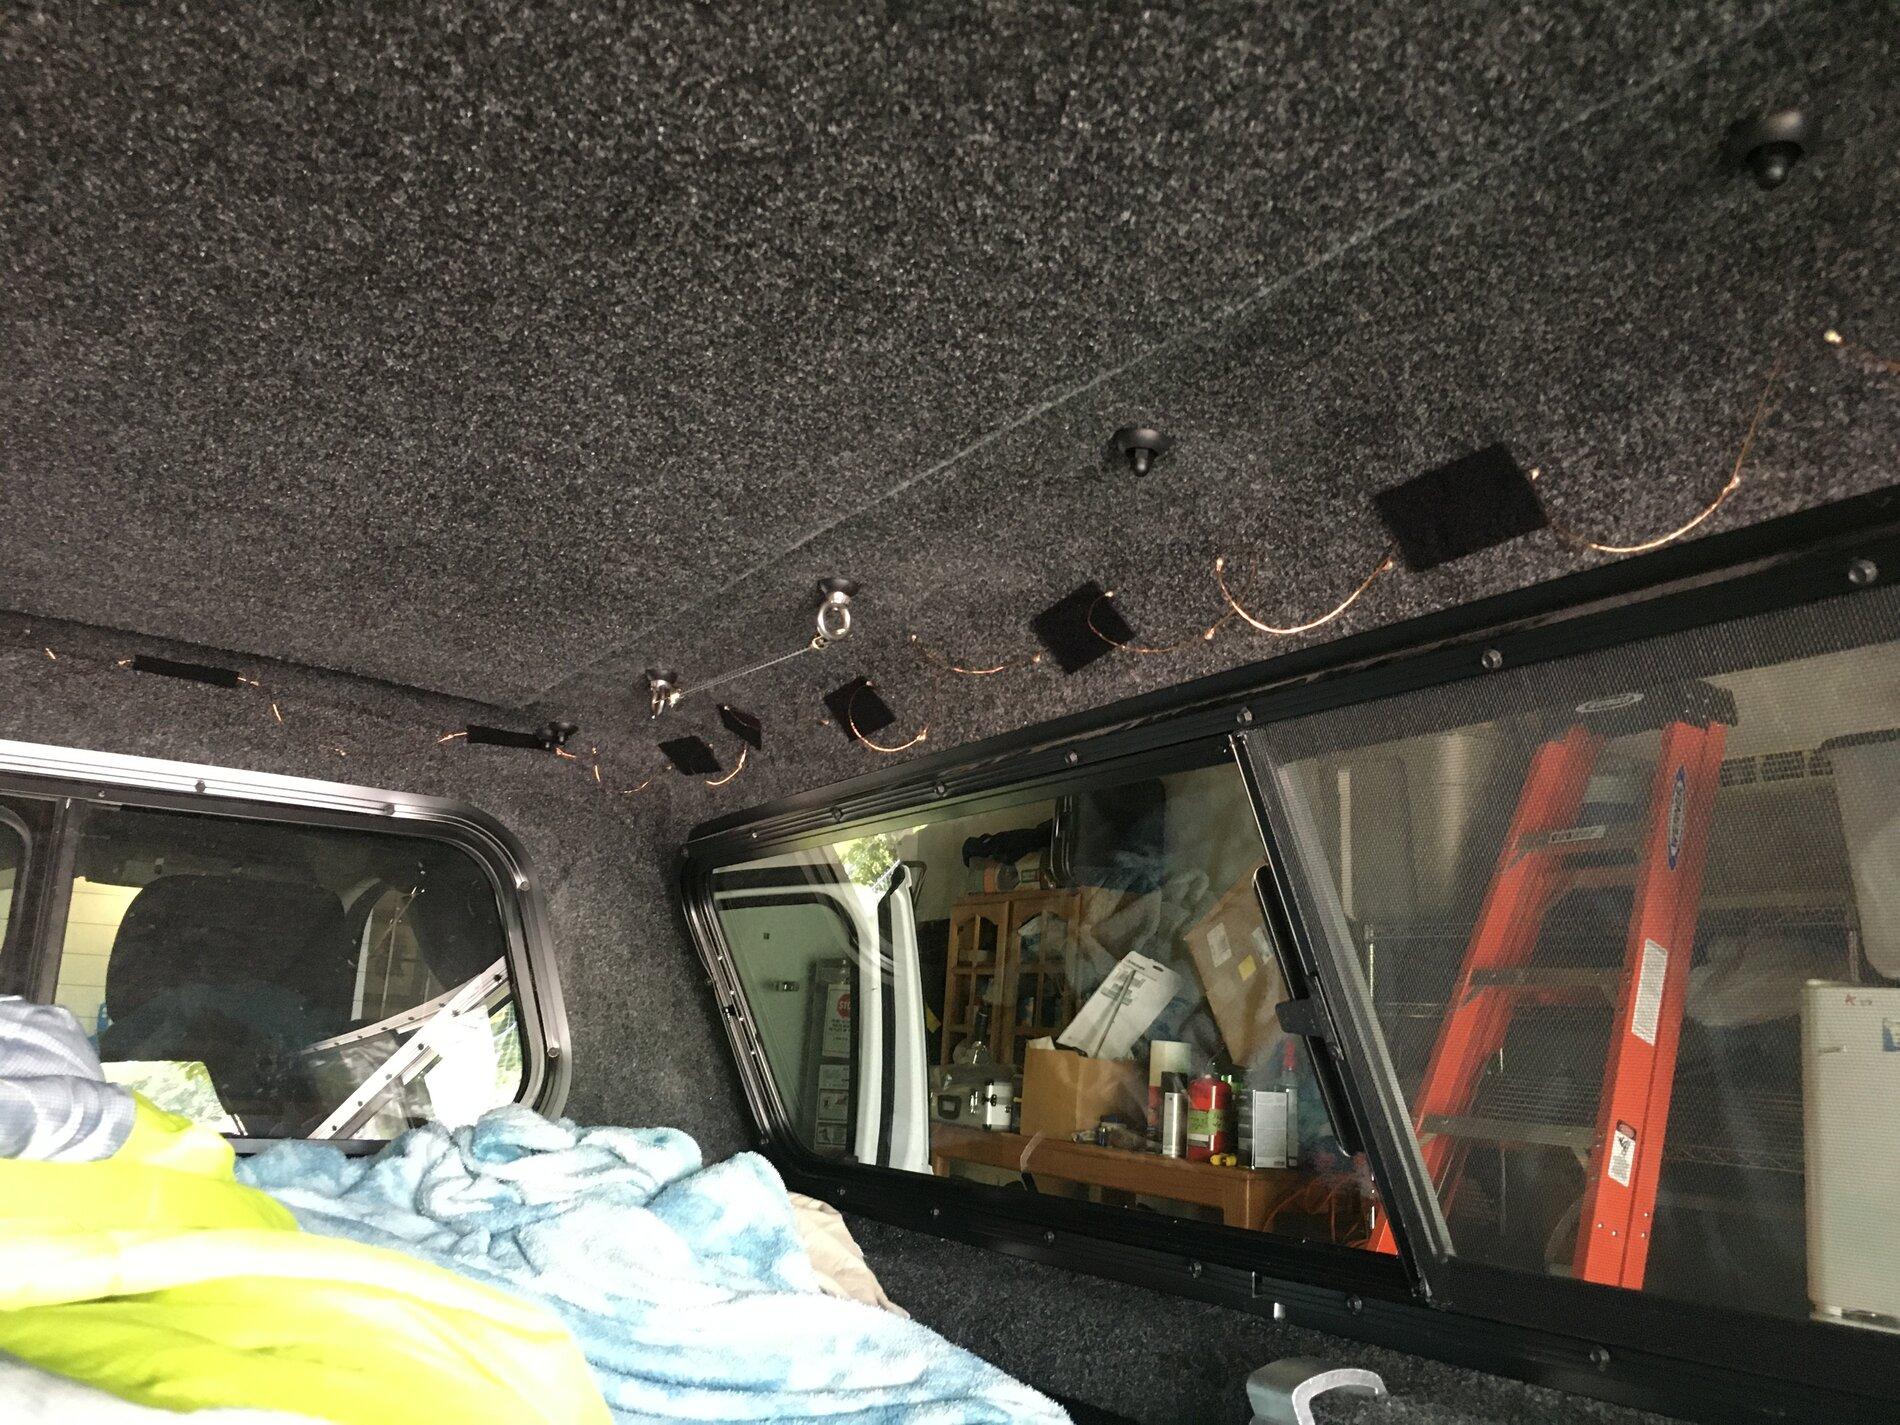
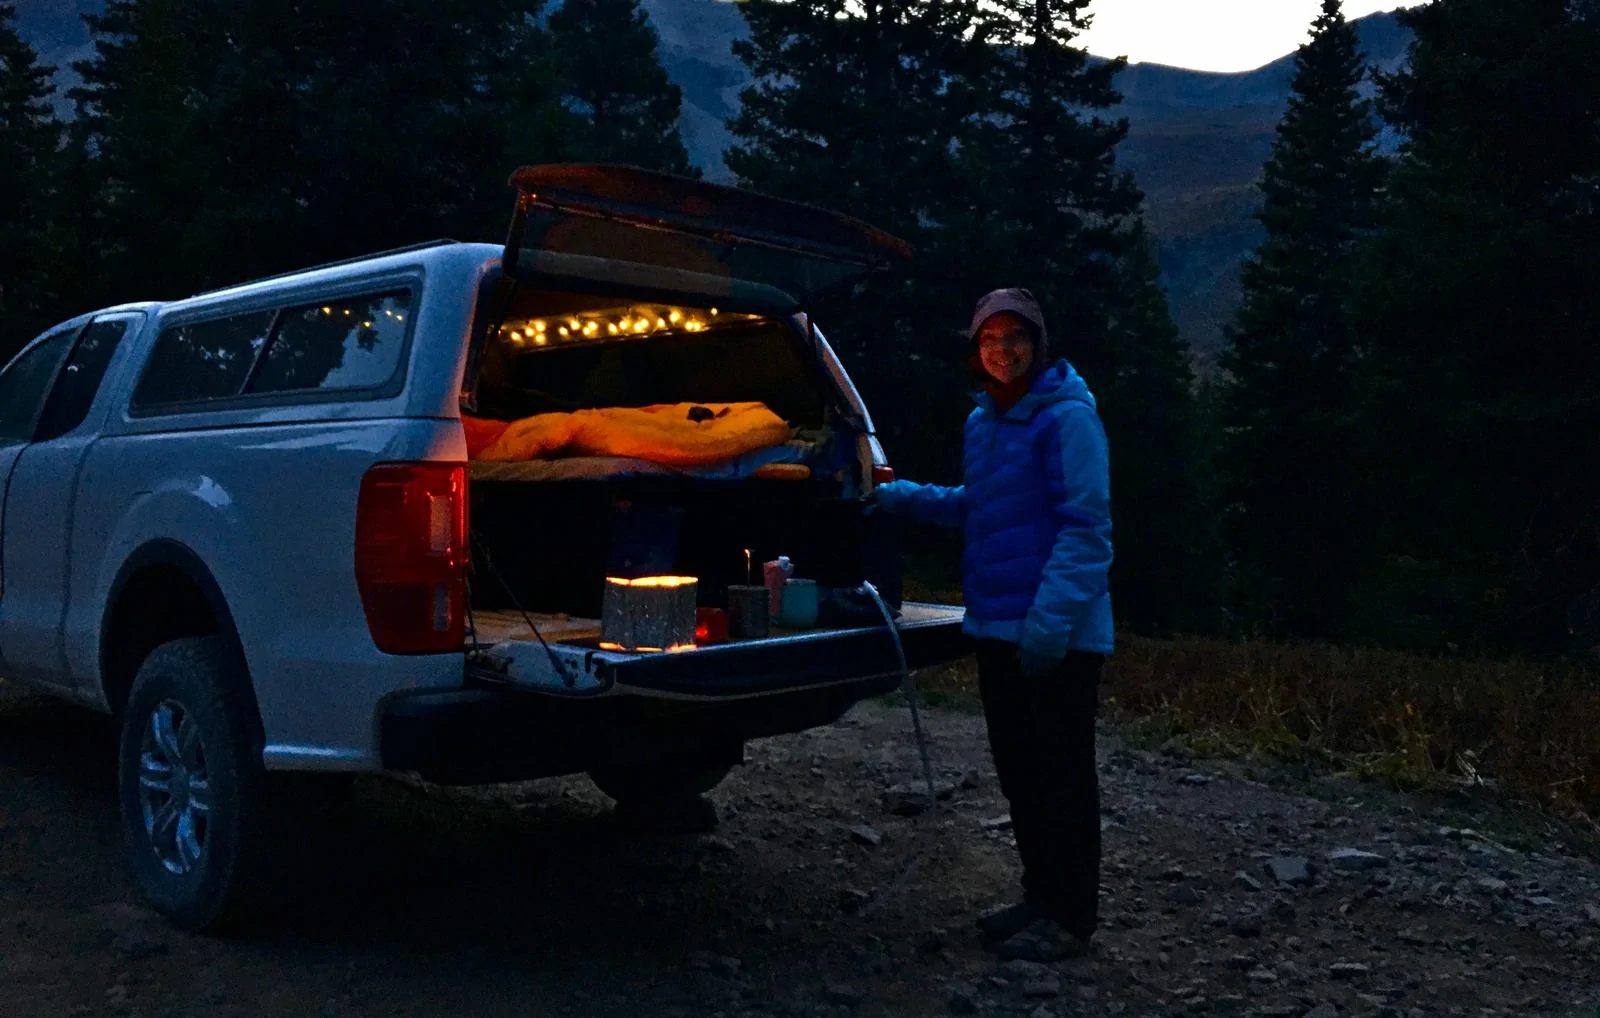
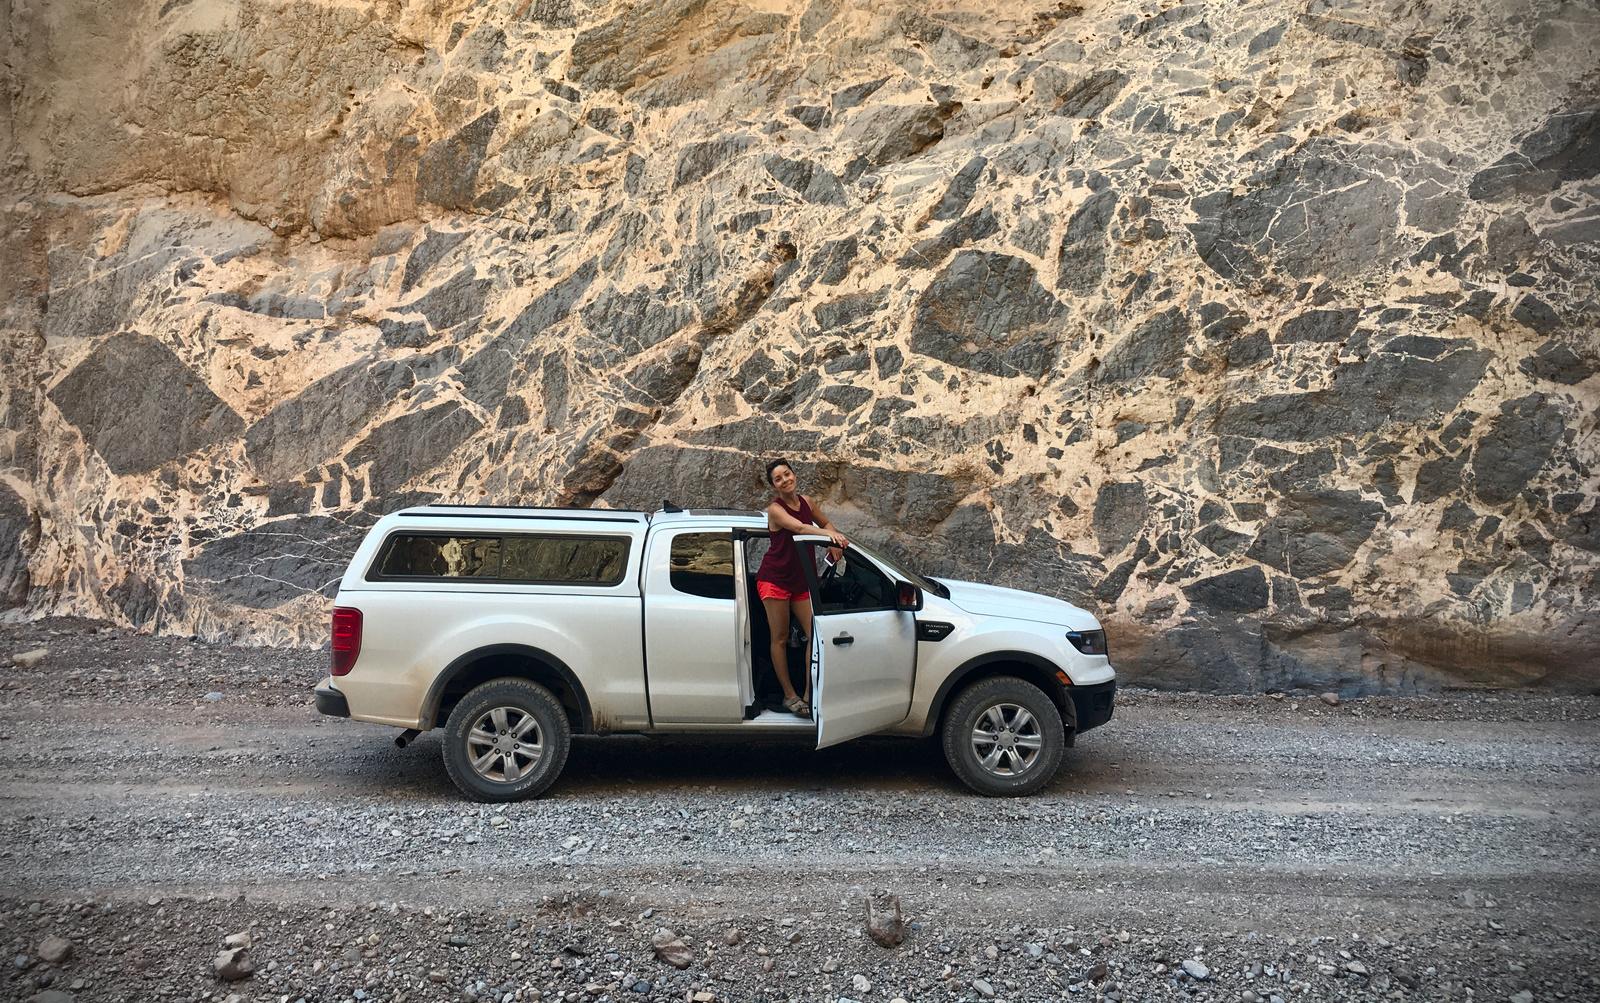
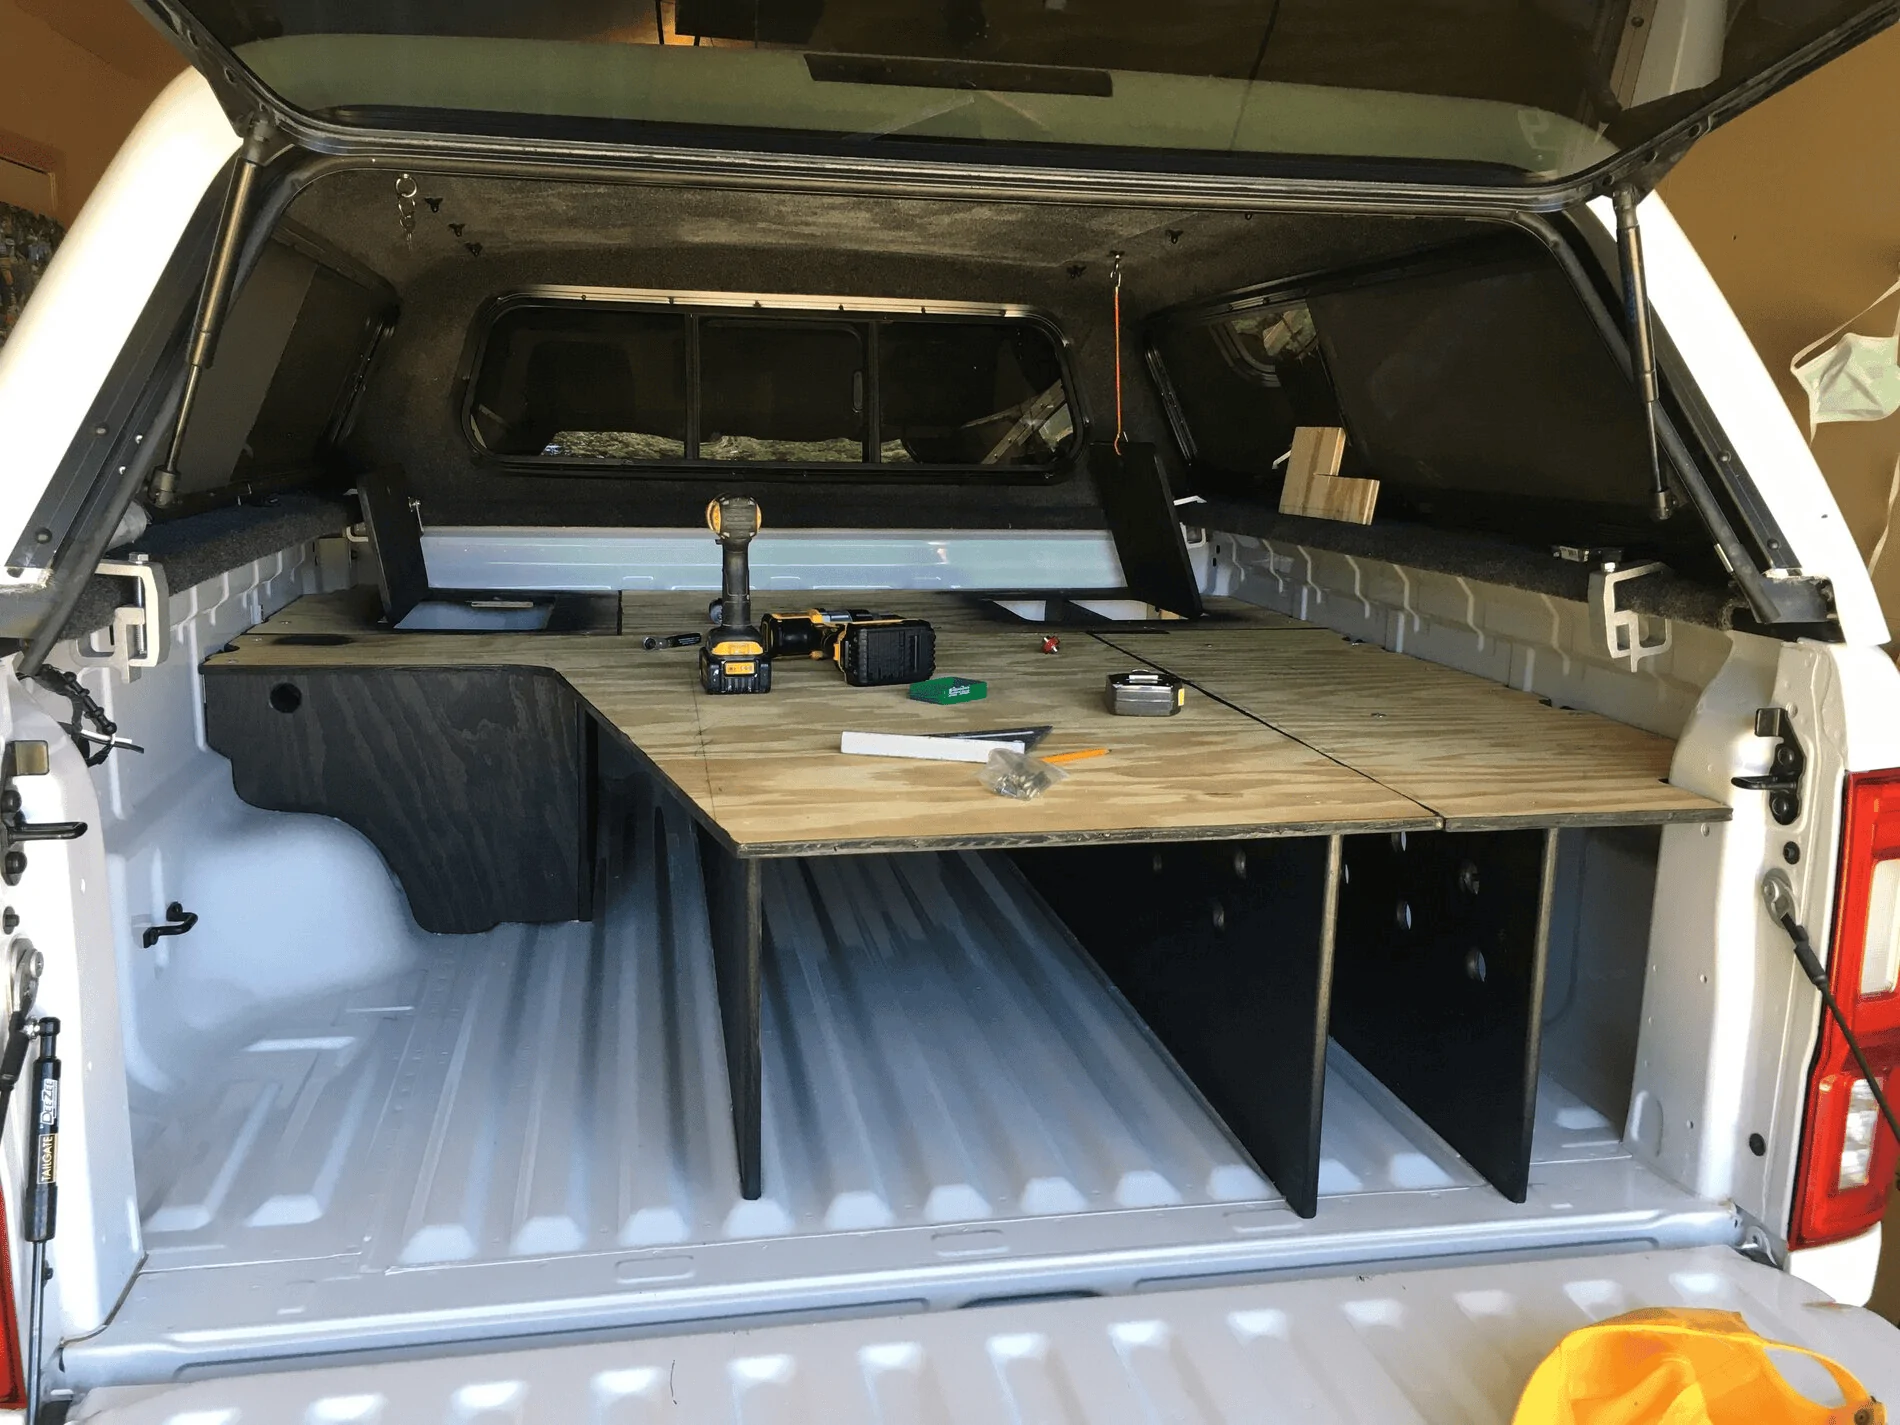
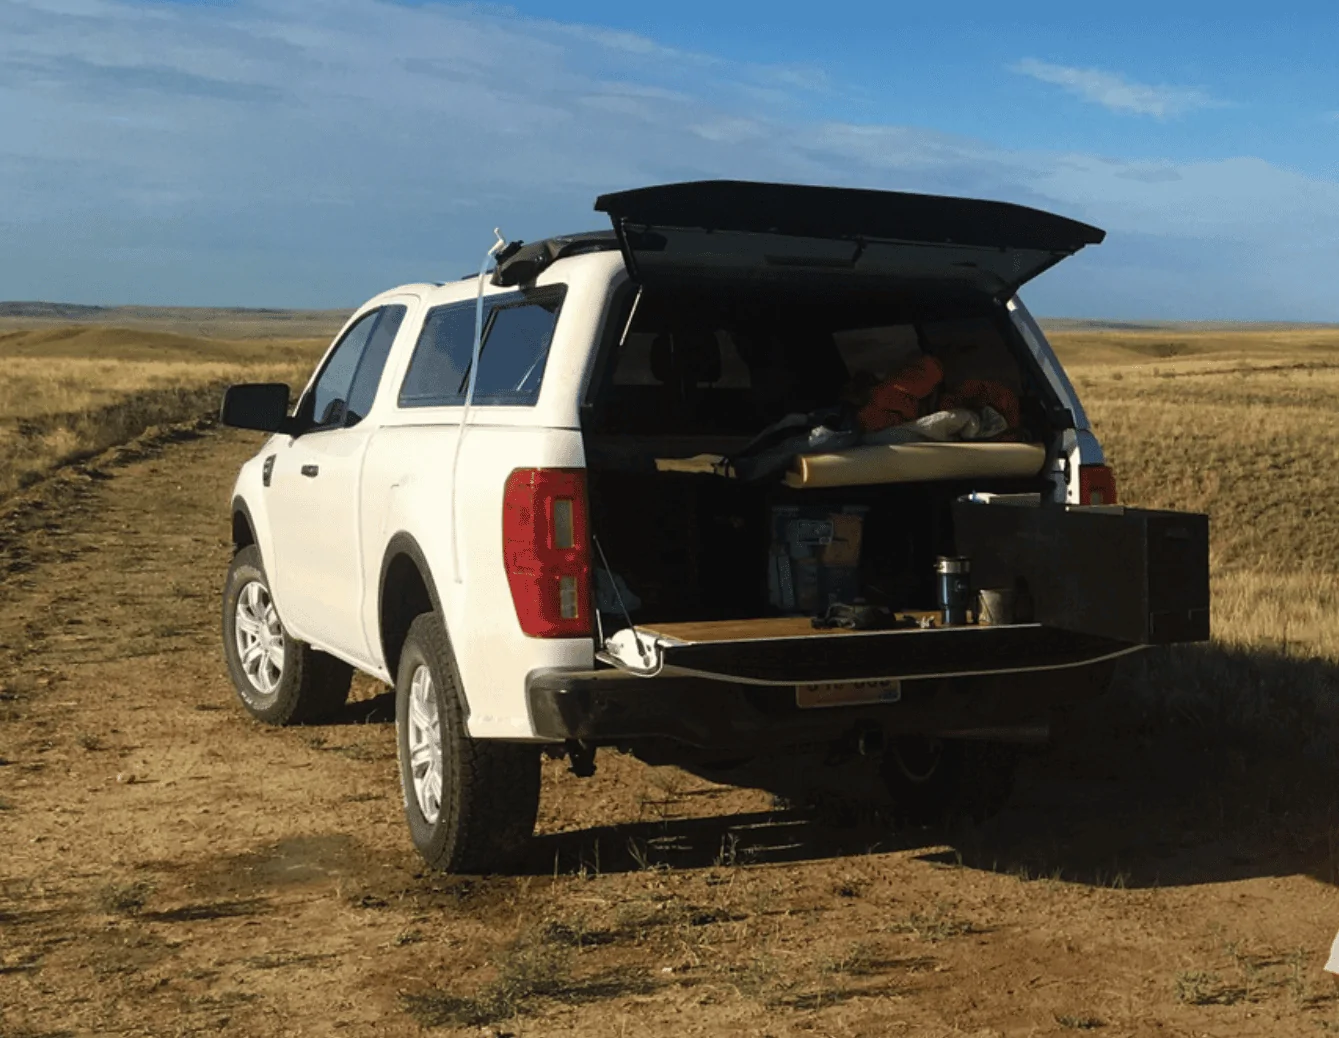
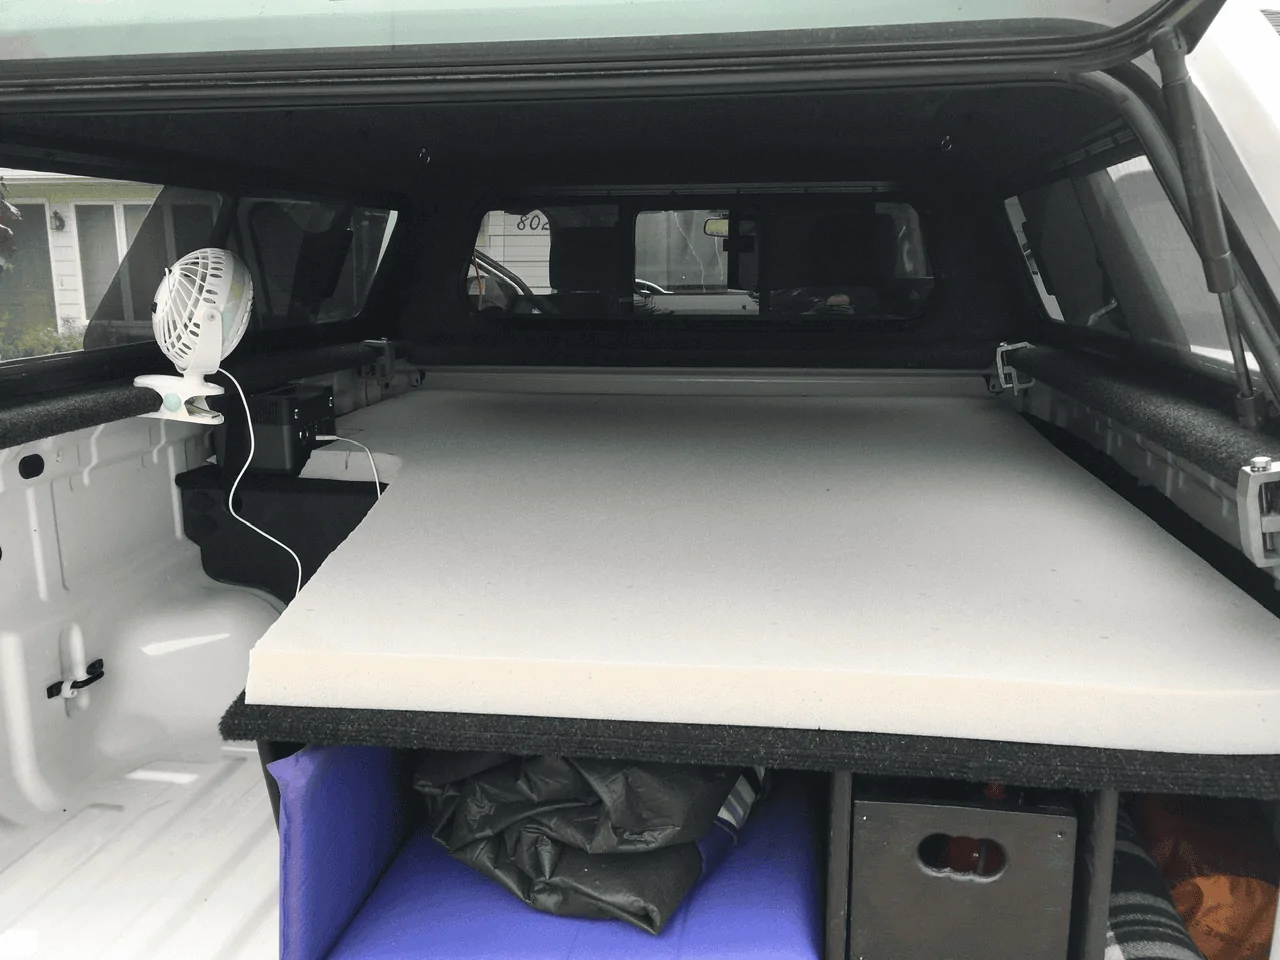
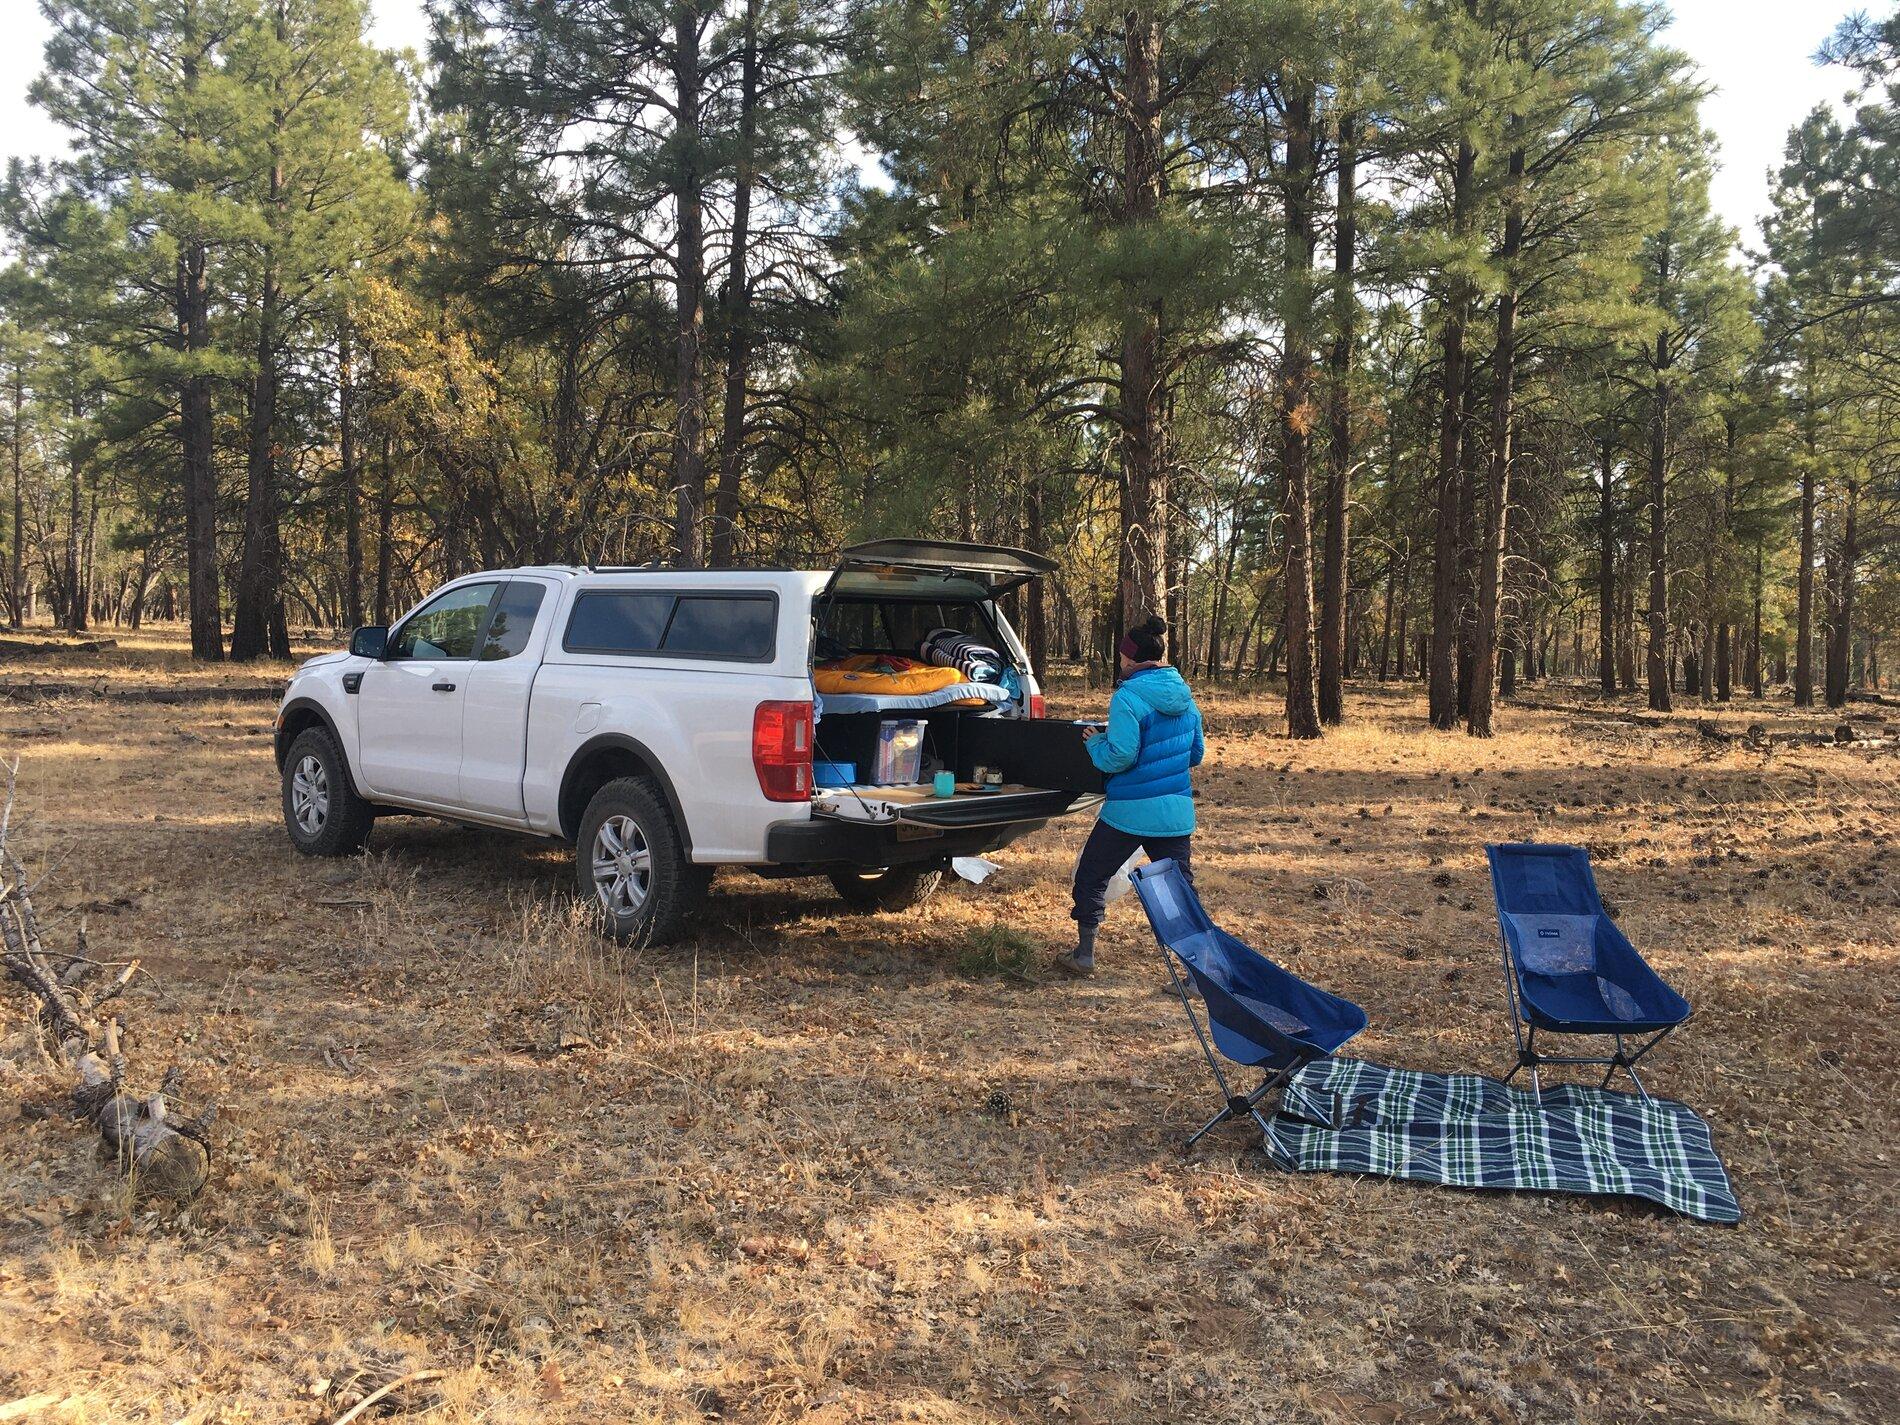
This isn't really a build thread, in the typical sense. We have a stock truck, and it looks 100% generic on the surface. But over the last six months our 2019 XL supercab has matured into a fully functional offroad/overland rig, best suited for folks like us who

1) also use it as a daily driver, and still care about MPG and a generic look on the outside
2) aren't interested in an expensive investment
3) need to be able to deal with rugged terrain, but don't need to look cool in a parking lot

IMG_9154.jpg

When I started this project I spent some time looking for pickup-based options and didn't find much, and almost nothing in the new Ranger, so I am putting this together here as a potential resource for similarly-minded adventurers.

Folks I think will be most likely to gravitate to this sort of project are the myriad rockclimbers, ski-bums, and perhaps the occasional digital nomad or transient employee who want the incredible functional shell of a ranger, without the various downsides of living this lifestyle out of a van/VW bus/SUV/etc.

Folks who will think this is ridiculous make up the other 99% of the population. Endless advice on best lift kit and maxtrax racks are well represented in other threads to satisfy those more typical needs.

Some of the things we did will be described here, some that are detailed in other posts and threads will have links. This 'build thread' will serve as a place to keep it all accessible from one place.

Happy trails..
Sponsored

 
OP
OP
charwest

charwest

Well-Known Member
First Name
char & tony
Joined
Apr 26, 2020
Threads
42
Messages
335
Reaction score
727
Location
On the road
Vehicle(s)
2019 Ranger XL FX4 Supercab
Occupation
Healthcare
First: the truck.

We have a 2019 XL Ranger FX4 supercab. The basis of this project is that you can sleep IN the bed. So the supercab is the only model that could work, because the short bed of the supercrew would allow only children to sleep- even diagonally.

IMG_9176.jpg


If you are considering the in-bed approach to truck camping, instead of a tent or roof tent, consider this first. I am 5'9" and a bit. I sleep comfortably in the bed but only on a full diagonal lie. The camper shell and the bedrail take up a lot of the 6', and anyone taller than me is going to be frustrated. And anyone claustrophobic or inflexible is going to get similarly tired of this approach.

IMG_9158.jpg


Fortunately, my wife and I (who both live out of this truck on the road and on the trail) do well in small spaces and appreciate the advantages of a vehicle with nothing on the outside.

1) no rails, racks, or attachments to make wind noise or reduce your MPG

2) nothing suggests in a parking lot that we are living inside, or that the truck is full of interesting toys instead of just parked at a trailhead while someone goes hiking.

3) my wife is very sensitive to noise at night, and sleeping in the bed with a shell is very quiet. no wind noise, no tent flapping, less rain noise, and if there are people around with the windows closed far quieter than in a tent with conversations or generators in the distance.
 
Last edited:
OP
OP
charwest

charwest

Well-Known Member
First Name
char & tony
Joined
Apr 26, 2020
Threads
42
Messages
335
Reaction score
727
Location
On the road
Vehicle(s)
2019 Ranger XL FX4 Supercab
Occupation
Healthcare
The truck bed is the core of the build, which I detailed here:

https://www.ranger5g.com/forum/threads/truck-bed-cap-camping-storage-build.8358/

This above thread discusses the bed architecture.

1605735839283.png


The general layout is that there is a plywood raised bed that is basically a sleeping surface and nothing else. I sleep diagonally with my head front driver and feet rear passenger. my wife sleeps straight on the passenger side. neither of us can come even close to sitting up, but we tend to spend our time outside and have comfy camp chairs. for wet days where we want to spend time reading, we will migrate to the cab where our bucket seats do a fine job.

there is a cut out in the platform that has been important in improving the function of this set up. this cut out in the rear driver side gives us a lot of flexibility.

it allows me to bungee in our cooler or another large bin to the two OEM load points, but usually the cooler lives in the cab and we keep this area open. in use, this area is used to get in and out of the sleeping platform comfortably, to be able to fully sit up and stretch out more if we are locked in the bed on a rainy day, and provides an easy throw-stuff-in-a-pile option for tossing camp chairs in if we are coming back to camp later, or dirty shoes, or whatever.

all told, it took three sheets of light plywood, a couple 2x4s, fifty bucks of various fasteners, and five holes drilled into the bed for additional support.

everything is painted or deck-sealed to reduce moisture incursion into the wood.

it is NOT a system which we can just take in and out of the bed. the ranger bed is not conducive to a slide-in complicated system, which i am ok with. it is held together with some decking screws, a few metal angles, and a few t-nut/bolt fasteners (use blue loctite, these tended to rattle their way loose while offroading until i did). Making it even more difficult to dismantle i ran beads of silicone along all of the joints and the bed floor to reinforce it for the heavy offroading we have been doing intermittently. a razor blade and a screwdriver could remove everything from the bed in a half hour, but it woudln't be pretty and might be partially destructive.

from driver to passenger, the storage chambers under the sleeping platform are:

1) locking plywood chamber (access door on top, under mattress). for valuable stuff, stuff that needs to be locked by law, and hides the solar panel wiring.

2) 5" slot for four maxtrax. these slide in and are held in place with a bungee.

3) primary storage chamber. this was sized to fit two large heavy-duty walmart brand plastic tubs (26.5" x 11.5" x 18") easily, plus a clear rear food box (12" x 13" x 16") and 20L of water in reservoirs. In practice, we found that the next size up walmart bin (25" x 13.25" tall x 18" wide) just barely fits and we upgraded to two of those for a little less wasted room.

the first large storage bin slides in and has a p-cord leash on it that drags behind it. the second large storage bin fits behind it and is easy to reach in and pull out. then the clear storage bin and two 10L water reservoirs take up almost all of the rest of the space.

To get the deepest bin out (we reserve that for long term storage, things we won't access on the road/trail) i reach into the depths with our ice scraper to grab the p-cord leash, and use that to pull it out. saves some very uncivilized looking spelunking.

4) the pull-out drawer. this is a pull out drawer that takes up the entire bed, made of 1/4" plywood with some 1/2" plywood dividers and face. It is glued and screwed and can cantilever far off the liftgate as long as any of the drawer is still tucked under the sleeping platform. In practice the front few feet hold longterm/nonperishable food. The middle holds food and utensils. The rear (first to access while pulling out) holds the most commonly used items, plus our camping stove and pots/plates/cups.

it is painted black to reduce moisture incursion, and has felt pads front and back to avoid slamming against the bulkhead of the liftgate while bumping around or sliding in and out. it slides but requiring some effort on the bed surface, even though it does not have a rough bedliner covering. i chose not to put any rails, wheels, etc to preserve as much storage space as possible. i chose not to lubricate the interface or use a nonstick interface as it slides easily enough and the friction makes it not bounce around on its own while driving.

5) misc outdoor stuff in a narrow chamber on the far passenger side. in the front is 100' of dyneema rope, our air compressor, and a 4T come-along wrapped in a moving blanket, and a hammock. there is a small trapdoor in the front over this area otherwise those items would never be able to be accessed without a real struggle.

in the rear of this chamber and easily accessible from the outside is where we keep a 2 person tent (initially we thought we would be camping in the tent, and using the truck for cold or windy/wet nights.. then we realized the truck is just too easy and the tent is there as a backup in case it is both hot and buggy) plus two folding camp chairs, two picnic blankets (one small, one large), our ultralong ice scraper/snow brush, a shower mat, and the ripstop nylon tarp/awning.

truck.png
 
Last edited:
OP
OP
charwest

charwest

Well-Known Member
First Name
char & tony
Joined
Apr 26, 2020
Threads
42
Messages
335
Reaction score
727
Location
On the road
Vehicle(s)
2019 Ranger XL FX4 Supercab
Occupation
Healthcare
Sleeping:

We have a caveman's version of the sleep-number bed. Under the driver side of the sleeping platform is my wife's yoga mat and my thin camping inflatable mattress. On the passenger/wife side of the platform is my wife's thick inflatable camping pad. On top of this, covering the entire platform (including the trapdoor access to the front storage chambers) is a 2" thick true memory foam mattress. basically, my wife gets an especially thick squishy bed and mine is a little lower and firmer, as we prefer.

We chose the 'lucid' brand 2 inch charcoal version on amazon. $63. the 'full' size is the smallest one that completely covers the ranger bed, and that ended up being perfect. the portions that needed trimming off were all used for other portions of the build, specifically sealing dust gaps and padding the storage chamber where we keep the laptops, etc.

1605740491093.png


note that cutting this foam is surprisingly difficult. it dulls razor blades extremely quickly, so cutting out the curve used ten blades or so to keep the lines sharp and avoid making it look junky.

on this foam mattress, we put a full sheet, tucked under the memory foam. and on this a Big Agnes cabin creek 15 degree synthetic two-person sleeping bag. I made a dual person cotton travel sheet that fits two that slips into the sleeping bag so its more comfortable and we can wash it easily instead of washing the sleeping bag.

We have three real pillows. its cozy and works well across the typical temperature we travel in. none of the bedding sticks up into the rear view so we have unrestricted vision out the back while driving.

IMG_0843.JPG


We have a thin zip-together light summer bag combo we can add in for brutal cold temps, and a large fleece blanket that lives in the cab. But if you close the bed up it stays warm down into the 10deg F range with that setup.

The Topper has a front window and we tend to crack or open that depending on what airflow we want. It doesnt seem to let any significant water in even when it's raining which has been nice. If we lived in really rainy places I bet I would end up taping or gluing a little rainshield over the center of the gap between cab and bed so it could pour and still leave this window open. the side windows let rain in freely as does the liftgate so those have to stay closed if its raining.

the rails on the topper (to mount a roof rack, if we want one in the future) are held in with M6 bolts that go through the topper. the exposed threads inside the bed space have been capped with plastic acorn nuts for protection in this tight space, except for five which have a female M6 stainless eyebolt on them. two on each side near our shoulders, with a small bungee between them. these we use to hang our glasses, headlamps, warm hats etc on while sleeping. and one more by the driver rear to clip the car keys to while we are in camp so i dont lock them in the cab.

IMG_1414.JPG
 
Last edited:

Rviator

Well-Known Member
First Name
Doug
Joined
Apr 30, 2019
Threads
20
Messages
447
Reaction score
868
Location
FLA
Vehicle(s)
A 2019 Ford Ranger of course, and a 2015 Yamaha YZF-R3
Occupation
retired aerospace engineer
Vehicle Showcase
1
Nice setup, I did something similar, though more primitive, in my '88 Ranger (it had a longer, 7ft? bed). I used a cot, a 110/12v thermoelectric cooler, a set of prefab cardboard storage drawers and a 110v power strip for a fan etc for when a campsite had electricity. Many tent sites that could be driven to had water and electricity. For prolonged stays I'd pitch a tent for storage but slept in the truck bed. My old camper topper had sliding windows with screens that provided sufficient airflow.


OP
OP
charwest

charwest

Well-Known Member
First Name
char & tony
Joined
Apr 26, 2020
Threads
42
Messages
335
Reaction score
727
Location
On the road
Vehicle(s)
2019 Ranger XL FX4 Supercab
Occupation
Healthcare
Nice setup, I did something similar, though more primitive, in my '88 Ranger (it had a longer, 7ft? bed). I used a cot, a 110/12v thermoelectric cooler, a set of prefab cardboard storage drawers and a 110v power strip for a fan etc for when a campsite had electricity. Many tent sites that could be driven to had water and electricity. For prolonged stays I'd pitch a tent for storage but slept in the truck bed. My old camper topper had sliding windows with screens that provided sufficient airflow.
7' bed would be super cush. I'd have to get a couple dogs to take up the extra room;)
 

painter1

Well-Known Member
First Name
Ali
Joined
Oct 21, 2020
Threads
2
Messages
72
Reaction score
139
Location
SW BC, Canada
Vehicle(s)
Ford ZX2, F350
That's brilliant to add the eye nuts to the roof track fasteners. I've thought if I had a high rise canopy I'd maybe suspend a cargo net to create a "loft" or whatever they call it. Now I know to pick up the roof rack mounts. ?

Nice to see a well thought out and executed set up. Low key and under the radar, I like it !
 
OP
OP
charwest

charwest

Well-Known Member
First Name
char & tony
Joined
Apr 26, 2020
Threads
42
Messages
335
Reaction score
727
Location
On the road
Vehicle(s)
2019 Ranger XL FX4 Supercab
Occupation
Healthcare
That's brilliant to add the eye nuts to the roof track fasteners. I've thought if I had a high rise canopy I'd maybe suspend a cargo net to create a "loft" or whatever they call it. Now I know to pick up the roof rack mounts. ?

Nice to see a well thought out and executed set up. Low key and under the radar, I like it !
thanks!
one note on the eye nuts. (good call. 'eye nuts' is more accurate than 'female eye bolts'!)

i am not sure how the roof tracks are installed, but it looks like the bolt comes from the outside in, and goes throguh track, then a rubber sealing gasket, then fiberglass shell, then on the inside there is a plastic shaped structure that functions like a washer, and inset into that is a small m6 nut. these are what ARE does from the factory anyways.

that said, it seems that overtightening (or undertightening) the bolts on the tracks could make the system more prone to leaks, gasket failure, or breaking the plastic washer. someone who installs these might be able to comment.

but with that theoretical concern in mind, i was uncomfortable cinching the eye nuts on tight, as the plastic washer prevents them from seating against the m6 nut and i was worried i would either break the washer or turn the bolt (thereby unthreading it from within) or cause some other problem.

so i threaded the eye nuts on gently until they were barely touching the plastic, or just short of it. in practice, this has not been a problem for me. they are on more than three threads so i wont strip anything, and the bungee that acts as our 'bedside table' stops them from rotating in either direction under the vibration of driving around. the one that holds my keys while in camp has vibrated off once while driving, as it has no directional bungee. it hasnt happened but once however.

if i were to mount something heavy to these bolts like a load bearing cargo net or a formal loft structure i would consider replacing the plastic washers with metal washers (which wouldnt hide the nut and wouldn't look at nice inside) or perhaps a better idea would be talking to someone familiar with the track install to see whether any of my concerns above are of any merit in the first place.
 
OP
OP
charwest

charwest

Well-Known Member
First Name
char & tony
Joined
Apr 26, 2020
Threads
42
Messages
335
Reaction score
727
Location
On the road
Vehicle(s)
2019 Ranger XL FX4 Supercab
Occupation
Healthcare
Power and bed lighting:

This is also fleshed out somewhat in a previous thread. To go to the discussion on our solar setup and primary-battery-to-bed wiring is here:

https://www.ranger5g.com/forum/threads/truck-bed-cap-camping-storage-build.8358/post-162527

Notes on that, now that we have put many thousands of miles in.

1) my initial thought to set up the powerbank so that it faces into the bed didn't work out (see photos in above thread). This particular model has some soft orange LED lights that are on permanently as long as any of the outputs are activated. I don't like seeing lights in the bed. Even worse, was that plugging charger and lighting cords into the outputs mean the wires stick a few inches further into the bed space. Based on my initial napkin drawings I hadn't expected this to be a problem, but in practice it was because I was sleeping corner to corner in the bed and ended up bumping into the cords at night.

1605757583541.png


So to fix this, I turned the powerbank so that it faces rear. This is far more ergonomic, as the cords just go out into space over the bay area. The LED lights that are on all night while a phone or laptop is charging are faced away from our faces and aren't bright enough otherwise to call a problem.

The only problem with making this change is that the slots, holes, and strap I made initially to hold the powerbank in place are not in a less than ideal spot and it tends to wiggle around during rough terrain, and the strap tends to get in the way of some of the outputs. This would not have been a problem had I oriented the strap in the orthagonal direction with a better initial design.

The downside is that when you are in bed-mode you can't see which button to push to turn power outputs off, but in practice I can feel the cords and push the correlating button without problems.


2) this powerbank fits with no play under the bedrail. this is nice because it takes up some of that lost space, and doesn't have room to bounce upwards while offroading. but since its a tight fit, if anyone wants to replicate a similar set up, they will need to do some very careful measuring and math to make sure it gets under there.

3) while we have yet to use it, the powerbank comes with a 12V cigarette lighter socket to input cable, which I could use to charge the powerbank off the primary battery or alternator, from the plugs right next to the powerbank that were wired in.

---

Primary battery tie-in:

When the ARE dealer installed the topper it came with a dome light tied in to the primary battery. For twenty bucks he agreed to use 12g wire instead of 18g and I used this as a secondary power option.

His wiring ties directly into the battery terminals with an in-line fuse, then lives in a thermoplastic sheath that runs down, out the bottom of the engine bay, along the underside of the truck, up the driver side empty space between the bed and the outer panels, and into one of the rear bed holes that came open from the factory. Then it is spliced to the dome light. I ran 12g extension back through the wall (zip-tied and secured to the inside so it doesn’t bounce around) to the bed plug hole that opens into my driver side locked cabinet, where it is spliced into two cigarette lighter sockets mounted in the front panel, with rubber caps.

The idea was that I would have a PowerPoint in the bed that I could use off the primary battery. Plus a second one in case I want to use one and charge the power bank off the other one. Essentially harnessing the alternator as a emergency generator.

If I were to do this again I would ditch the useless dome light, run similar cable from battery terminals to bulkhead entry (where my solar panel cables enter) for less cable run, less floppy wire, etc.

Wiring directly to the battery terminal might be considered a liability, but I like it as it has two advantages.

1) not slave to the PowerPoint time-out set by Ford (or forscan) that you would have if you used the built-in bed power accessory tie-in. (See this thread https://www.ranger5g.com/forum/threads/diy-adding-the-12v-power-outlet-option-in-the-bed.2239/page-2), or needing to leave the key in to keep the PowerPoint on last the time-out interval.

2) if I drain the primary battery in a place with poor jump start options (ie: everywhere we go) I can unplug my solar panel from the power bank and plug it into the bed primary battery PowerPoint which is right there and slowly charge my primary battery with no ripping things apart or long extension cords.

---

Bed lighting: we went with warm white LEDs. In a previous incarnation of a live-in driving set up we had some WWRBG strip LEDs but I ended up hating it. The color selection was less than ideal, I couldn't get a real yellow like I wanted (as a relatively bug-free color), and they are blocky looking and "not cute" according to my better half.

So this time I chose some very delicate warm (low kelvin) fairy lights on coated copper wire. They are simple, the controller allows me to dim them in 10% increments from faint light to relatively bright, and they are very elegant to look at compared to the chunky LED strip.

There are a lot of options out there, but I found this one ideal because it runs off a 12V adapter.

https://www.amazon.com/gp/product/B00PQDP2FO/ref=ppx_yo_dt_b_asin_title_o01_s01?ie=UTF8&psc=1

I chose the 33' version (14$). I am very happy with it, and it gives more than ample light to light the bed and to an extent the tailgate while we are cooking at night. 33' wraps once around the circumference of the roof if you leave a coil in the wire for a decorate look, with tripled lights along the rear for a little extra light washing over the tailgate.

It is not super bright however. If you like a lot of light, I would spring for a strip light, or go with the 66' version and double your light output.

I stuck the controller to the lined topper shelf that sits on the bedrail, at the rear of the driver side. To keep it in place, I used a piece of self adhesive hook velcro on the bottom of the controller box to the topper liner, which has worked with no movement.

To power the controller, I used a male-male 12V 3' cable which is the right length from the powerbank to the controller. (6$)

https://www.amazon.com/gp/product/B06W2L1P2F/ref=ppx_yo_dt_b_asin_title_o09_s03?ie=UTF8&psc=1

The lights are held to the topper using pieces of hook velcro which sticks to the topper lining. They have loop velcro on the side facing in, for a nicer look. These have not peeled up in thousands of rough miles. I used black, because that's what I had, but I can't help but mention that grey velcro is out there for a more subtle look. The coiled LED lights stick a couple inches into the headspace, but we have never felt like they are taking up any room because our heads never get into the corners where they are secured.

IMG_9071.JPG


The LED controller is activated with a small IR transmitter, which I put a piece of self adhesive velcro on to hold it in place on top of the powerbank. In practice, I keep it plugged into one of the 12V outputs. I turn the lights on and off with the powerbank which has an on/off button for those outputs. When turned on, they activate at the last brightness setting, which is nice. If i want to dim it for movie night, or turn it up for cooking I push the button on top of the powerbank to change the brightness settings, or turn it off in the rare times I have anything else in the 12V powerbank outputs.

IMG_9877.jpg
 
Last edited:
OP
OP
charwest

charwest

Well-Known Member
First Name
char & tony
Joined
Apr 26, 2020
Threads
42
Messages
335
Reaction score
727
Location
On the road
Vehicle(s)
2019 Ranger XL FX4 Supercab
Occupation
Healthcare
The topper / camper shell / cap whatever you call it.

Well, we would have preferred an SUV but the ones that could do the stuff we wanted to do were too expensive and got junk gas mileage. Or a minivan, but the offroad capabilities were inadequate. So how do you live in the bed of a pickup? With a cap of course.

FWIW, I will never get used to the annoyance of having a wall in between the cab and the bed, and sorely miss the MPG/quiet/not-having-to-go-outside-in-the-rain-to-drive-away/more space of our previous minivan, but so it goes.

IMG_9176.jpg


We did our research and settled on ARE brand, which we were convinced at the time was the better reputation version. In retrospect, I would not have bought this one again. For endless concerns and final results of the topper saga, see this thread here:

https://www.ranger5g.com/forum/thre...d-today-is-this-right.7913/page-2#post-141456

The short story is that it works, and looks nice enough, but I am generally unimpressed with both the factory quality and the post-factory service, as well as how little effort went into the design at least at the liftgate.

We chose the ARE CX series with a front sliding window, side screen windows, liner, and a dome light. Perhaps a different model would be better. The front slider window is critical to fresh air while sleeping. It would be miserable without it most nights. I did not fully appreciate this until we started living in the bed- open windows near your knees, or an open lift gate just don’t generate significant airflow near your face and it feels stuffy without the front window.

The liner is important to muffle sound, allow velcro attachments to the liner anywhere you want for LED light mounting or decoration, and to stop condensation on cold humid days from dripping on your face while you are sleeping. It probably provides a little insulation as well.

The dome light is mounted center rear by the lift gate hinge. Next time I would go without a dome light. Admittedly I always knew I wasn’t likely to use it bc our LED setup is so much better, but the dome light ensured that the dealer would install wiring from the primary battery to the bed which I wanted as a feature. In practice the dome light is super annoying to me- it’s a tiny cold white LED that gives only enough light to survive, but not enough to work or play. And it’s right where our heads go when we wriggle in and out of the bed so I turned it on brushing against it a couple times. This is a liability bc it is wired directly to the primary battery excluding the Ford battery mgmnt system so presumably would run the battery dead if left on for a while (although admittedly this would probably take a week or so). So in the end I have the switch taped over to avoid inadvertently turning it on and it sits there being useless.

The side windows I don't like: to open and close them you need to get into the bed of the truck, so when we drive away I have to crawl back into the bed just to close them. If the latch opened midway to front, instead of midway to back I could open and close them from the tailgate. And another advantage of this would be that the screen portion (which is fairly fragile on this model and unable to be replaced without taking the whole window off the cap) would be by our heads while sleeping for better airflow. And a third advantage of the screen by our heads is we would be less likely to kick the screen while asleep. If i were to do it again with this model I would spring for the gullwing version with the screen inset, to have a more open airflow option and a screen option depending on the temps and bug situation. Or I would buy another brand if they hadn't improved the liftgate seal and service..

The c-clamps that came with the cap were bulky. angled, and stuck into the bedspace more than I liked. I picked these ones out as a small improvement (31$):

1605761722500.png


https://www.amazon.com/gp/product/B01LXI13JW/ref=ppx_yo_dt_b_asin_title_o09_s00?ie=UTF8&psc=1

The advantage is that they are smaller (less intrusion into the bed), rounded (less corners to knock our knees on), and the bolt head goes down instead of up, so the upper face presents a smooth surface that doesn't catch on things as we go in and out of our tight little hotel. Another advantage is that this set came with six, which makes me more comfortable given the bouncy roads we are on, especially if we ever put a roof rack or a tent on top.

The disadvantage is that they are probably just a few mm too small, and don't fit as neatly as the originals. In fact, I couldn't even get the front driver one on and had to use five plus an original larger clamp.

I couldn't seem to find a better option, although perhaps they are out there.
 
Last edited:
OP
OP
charwest

charwest

Well-Known Member
First Name
char & tony
Joined
Apr 26, 2020
Threads
42
Messages
335
Reaction score
727
Location
On the road
Vehicle(s)
2019 Ranger XL FX4 Supercab
Occupation
Healthcare
Be careful, they can end up taking up more space than you think. haha This summer when we had 3 dogs and 2 humans in our little teardrop, it was a tight squeeze and not the best sleep I've had. haha
I am definitely NOT going to show my wife that picture, lest she get any ideas. She would happily trade me in for two or three dogs, now that the truck is built.
 

Rviator

Well-Known Member
First Name
Doug
Joined
Apr 30, 2019
Threads
20
Messages
447
Reaction score
868
Location
FLA
Vehicle(s)
A 2019 Ford Ranger of course, and a 2015 Yamaha YZF-R3
Occupation
retired aerospace engineer
Vehicle Showcase
1
The one thing I now notice on these camper top builds, is they don't appear to have any privacy/light blocking curtains. I added them on my old Ranger camper top by cutting up a solid color vinyl shower curtain and hanging it with heavy gauge wire attached to the existing side window fasteners. At the rear lift gate window I fastened the curtains with velcro. Just some FYI on how I did it some 30 years ago.
 
OP
OP
charwest

charwest

Well-Known Member
First Name
char & tony
Joined
Apr 26, 2020
Threads
42
Messages
335
Reaction score
727
Location
On the road
Vehicle(s)
2019 Ranger XL FX4 Supercab
Occupation
Healthcare
The one thing I now notice on these camper top builds, is they don't appear to have any privacy/light blocking curtains. I added them on my old Ranger camper top by cutting up a solid color vinyl shower curtain and hanging it with heavy gauge wire attached to the existing side window fasteners. At the rear lift gate window I fastened the curtains with velcro. Just some FYI on how I did it some 30 years ago.
yeah. thankfully we basically never camp where anyone can see us these days, so it hasnt been an issue.

if i was doing it, i would probably cut black black-out cloth to size, and sew a strip of hook velcro to the edges. then put adhesive loop velcro on the glass casing. this would allow a tight seal, nothing hanging down into the bed, and complete privacy/light blocking which is key if you're into stealth urban camping.

from a prior incarnation, white colored black-out fabric was a bad idea because from the outside you can more easily tell the "camper" has curtains up. black fabrics tend to look like the windows are tinted or you can't see in.

example: fabric like this..

https://www.amazon.com/Eroica-Black...=black+blackout+fabric&qid=1605828589&sr=8-10
 
OP
OP
charwest

charwest

Well-Known Member
First Name
char & tony
Joined
Apr 26, 2020
Threads
42
Messages
335
Reaction score
727
Location
On the road
Vehicle(s)
2019 Ranger XL FX4 Supercab
Occupation
Healthcare
The cab electronics:

Nothing exciting here, but we did make a few small changes.

1) Weboost 'drive reach' cell booster. this was a pricey upgrade but we find it markedly improved our signal driving across the country, in the boonies, and camping. This is occasionally helpful for entertainment and more importantly takes the edge off the separation anxiety with work related communication.

1605832573332.png


the manual and online reviews note that the boost signal works best if the in-cab transmitter is as far away from the receiver antenna as possible. and the magnet mounted receiver doesnt stick to the fiberglass cap. the booster does come with a adhesive sticker to mount it to a non ferromagnetic panel. initially i had wanted to keep the cap clear in case of future roof-rack/tent decisions.

so i stuck the roof antenna to the far driver rear side of the cab, and the transmitter in the passenger footwell just beside the shifter. this seems to work well. the transmitter wire has a lot of slack which is bundled under the passenger seat with the booster, which is stuck to the floor liner with velcro. then the receiver antenna wire slack is bundled down there as well, and then tracks under the seat, along the center floor in the rear cab, up between where the rear seats used to be, and then through the driver side vent in the rear wall.

the booster is powered by a 12V cig lighter plug which we put into the right powerpoint in the dash.

all the wire is secured to the floor liner with 1.5" black single-strap velcro so the hook side sticks it down to the liner, and the loop side is up which matches the liner/carpet, protecting and hiding the entire length of wire.

The wire is thin, but even this thin wire prevented the thin rubber vent flaps from closing, so i cut a slot in one flap which the wire sits in so it doesn't pin it open. then the wire tracks up the back wall of the cab where it is secured with zipties to adhesive fasteners to the panels and finally to the antenna.

the transmitter has a very minimal range, basically needing to be within a foot or two of the cell device. so this setup doesnt help us if we want it in the truck bed. however the transmitter is held to the plastic fascia with a piece of velcro, and it only takes a minute to unstick it and unwind the cord and put it through the cab rear window into the bed. i have only done this once, as once in camp we have typically done all the comms we need for the day.

1610756950018.png


the antenna magnet is great. we drove some ridiculous 50mph gusting crosswinds and plenty of offroad with no movement.

1610757043352.png


2) we switched out one of the dash powerpoints for a combination USB/voltmeter. this was to increased the number and charging amperage of our dash points (the XL only has one), and so that I could keep an eye on the voltage. the booster sucks a reasonable amount of power and given the powerpoints used to stay on for a while after the key was out i was worried about a significant drain (we just leave the booster plugged in all the time). further, we got low voltage warnings from the car only a half hour or so into a drive in movie, which got me wondering.

1605832542266.png


that install and pictures are here:

https://www.ranger5g.com/forum/threads/cig-lighter-usb-voltmeter-install.9915/

3) the rear USB ports are key in an XL when you only have one port up front, but are annoying to use while storing stuff in the rear, as the cord sticks out and tends to get bumped around or crimped. we found that a right-angle USB cord fixed this nicely and tracks along the passenger console to the front. a small rubber piece holds the cord. no adhesive works to the fascia in the summer heat, so a single small wood screw was placed and looks nice to hold everything together.

https://www.amazon.com/gp/product/B075K5B8R4/ref=ppx_yo_dt_b_asin_title_o04_s00?ie=UTF8&psc=1
Sponsored

 
Last edited:


Top