mURmECH
Well-Known Member
How did you manage to get it back in? Remember if you go bigger tires than the crash bar needs to get cut and that too is a PITA, just more manual labor
Sponsored
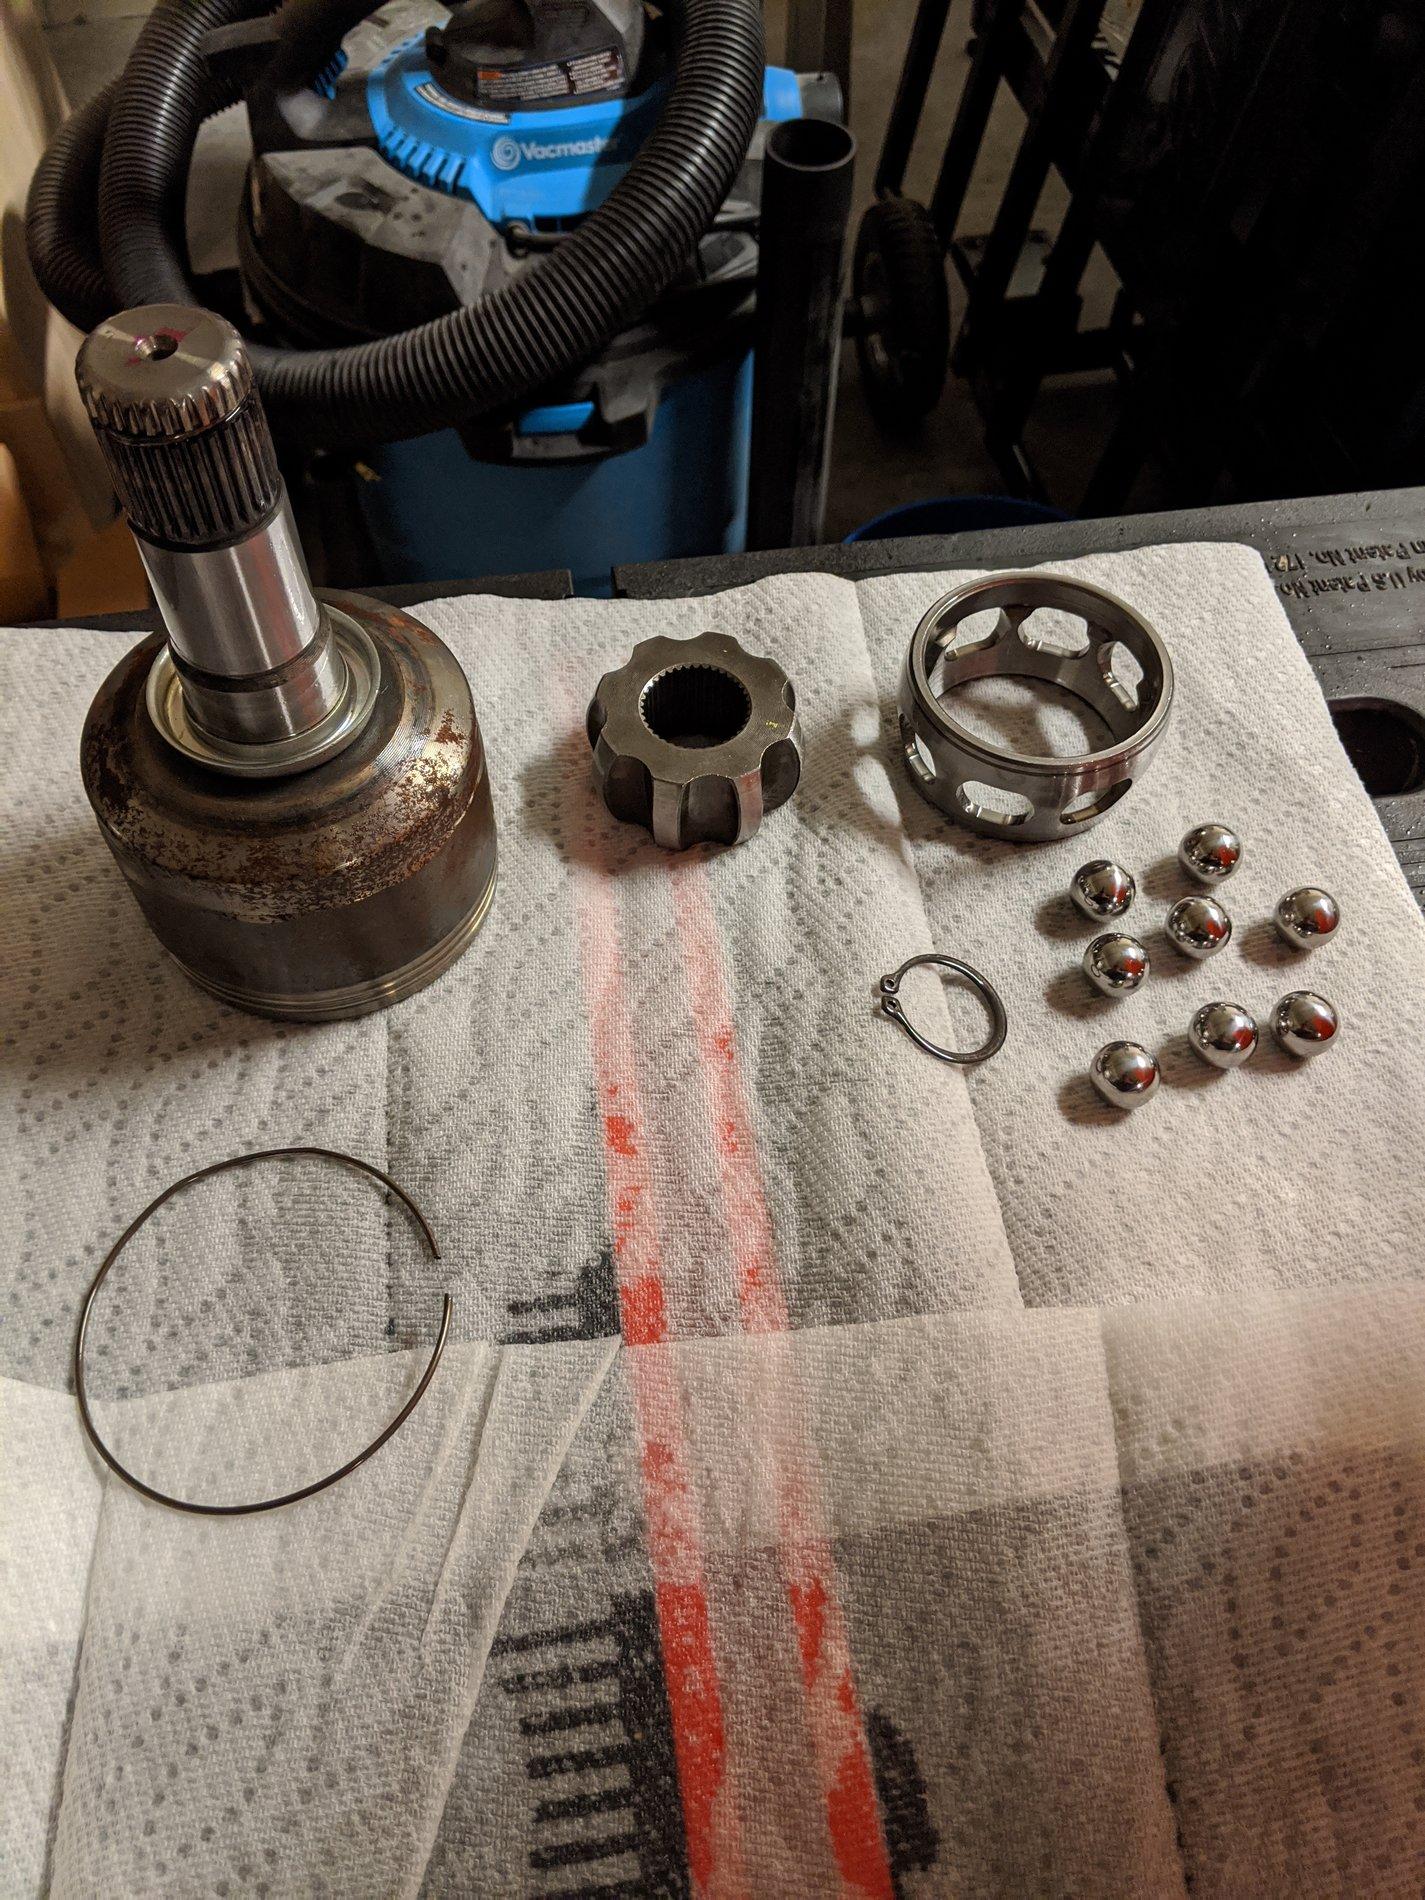
So I did a similar thing just now but with my inner CV joint. Being a dummy, I forgot to remove the axle nut when installing one of my front coilovers. I took apart the CV joint by cutting the outer metal clip very carefully with a dremel and then use some small hand wire cutters to finish the job so as not to damage the boot too much.TL;DR - I ended up basically rebuilding my outer CV joint. To explain...
After repeated attempts to reseat the axle in the CV joint, I wasn't able to get it to stay in place. With the boot still intact, I wasn't able to see what was going on inside and why the axle wasn't seating.
So eventually, I relented and opened it up. When I did, I found that the snap retainer ring had completely separated from the axle and was floating on its own in the grease inside the boot.
I also found that my repeated attempts to reseat the axle (somewhat forcefully) had damaged the splines at the end of the axle, which was preventing it from re-entering the inner race. I was able to repair those with a cutoff wheel, but given the axle's state, I thought it best to thoroughly inspect the rest of the joint.
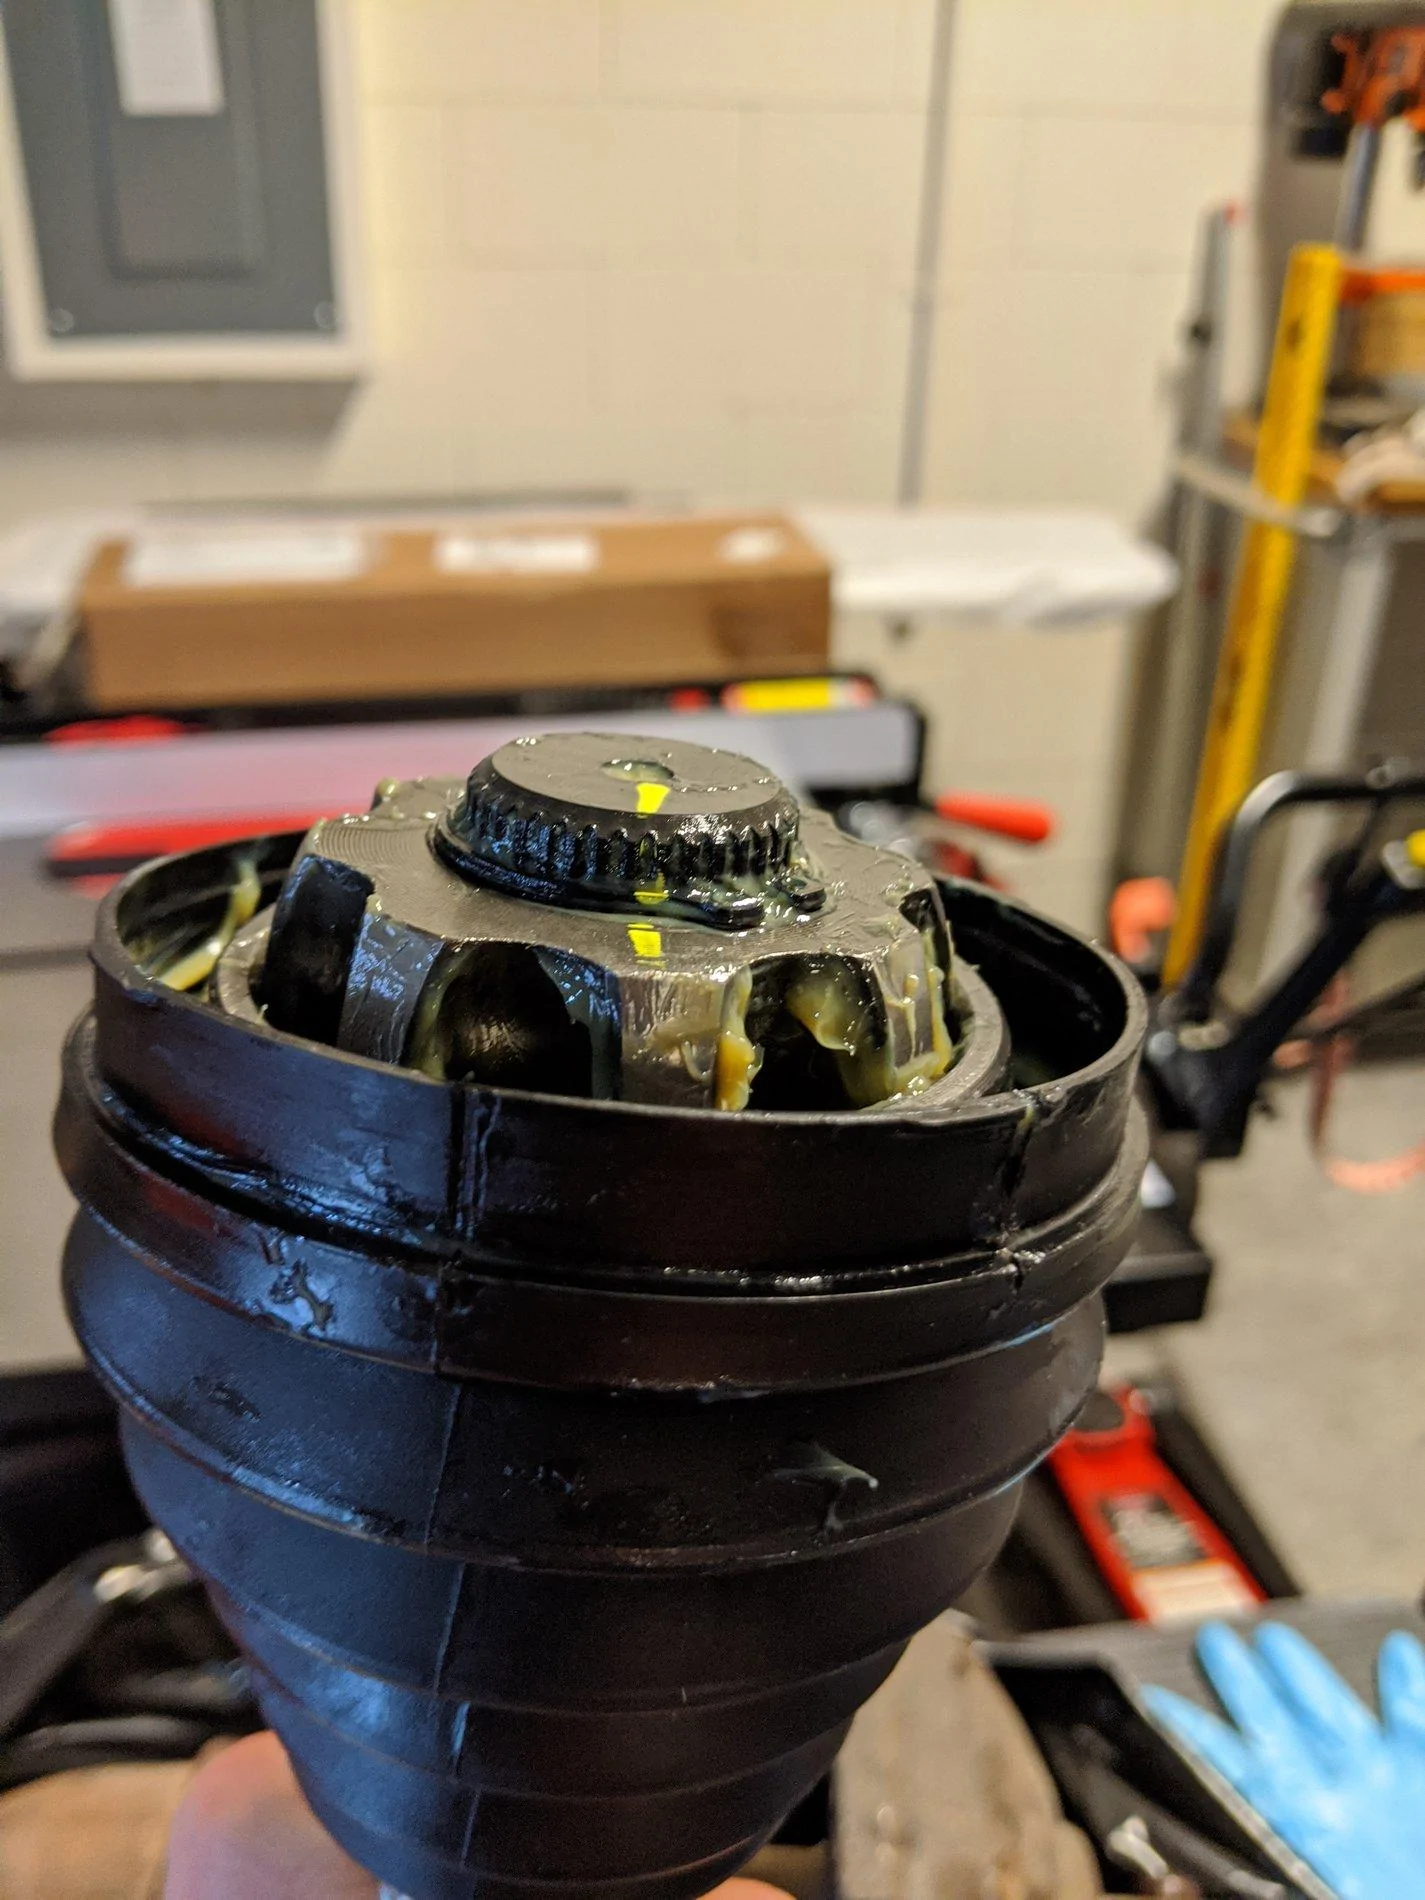
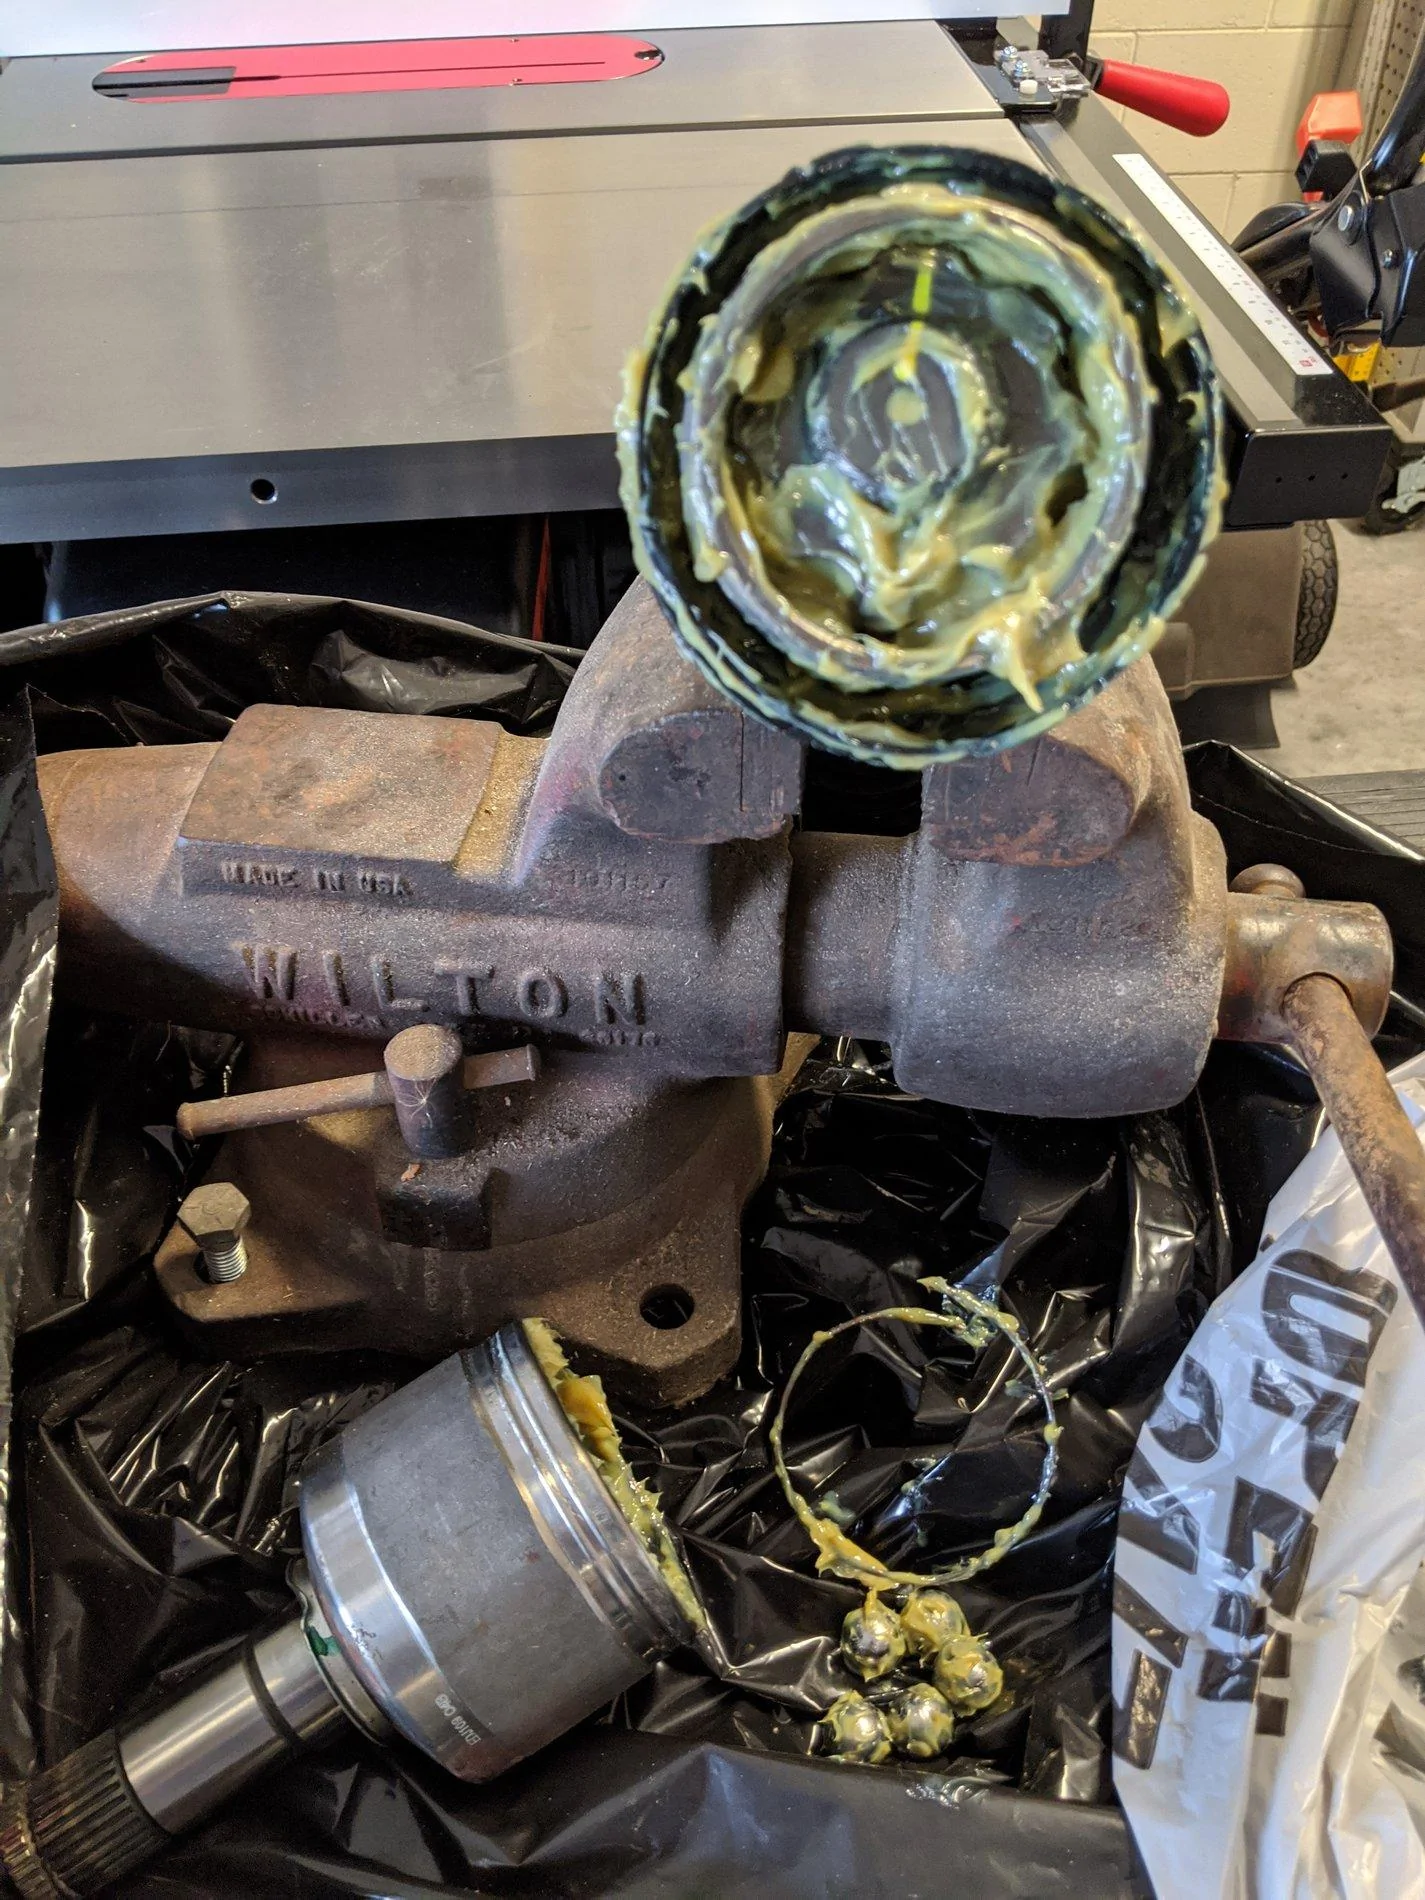
So, I pulled everything out of the chalice, inspected (all good), replaced, and repacked with CV grease. See awesome vid below for reference. And if you ever find yourself doing this, make sure you place bearings in the 2 bigger holes last. Scratched my head on this one for a while. Also, the side of the inner race with tapered splines should be facing up (toward the "mouth" of the chalice) and the cage should form a noticeable lip above the face of the inner race. You can see what I'm talking about pretty clearly in the vid.
All that done, I was able to get the axle back into the joint, with a satisfying "click" as the retaining ring set on the other side of the inner race. And since the Autozone-special universal boot clamps I bought were chintzy as can be, I actually ended up re-using the factory clamp. When I took it off, I did so very carefully (just in case), so I was able to just spread the crimp with ring pliers, reset it, and recrimp it with clamp crimps. Flame me if you must, but it's solid. I wound't have left it otherwise.
After that, I replaced it on the vehicle and buttoned everything back up. Good to go!
So yea, unless you feel like risking doing all of the above, don't pull on the steering knuckle! At least until Ford has parts!
And if you're ever in this predicament, I hope this insight helps.

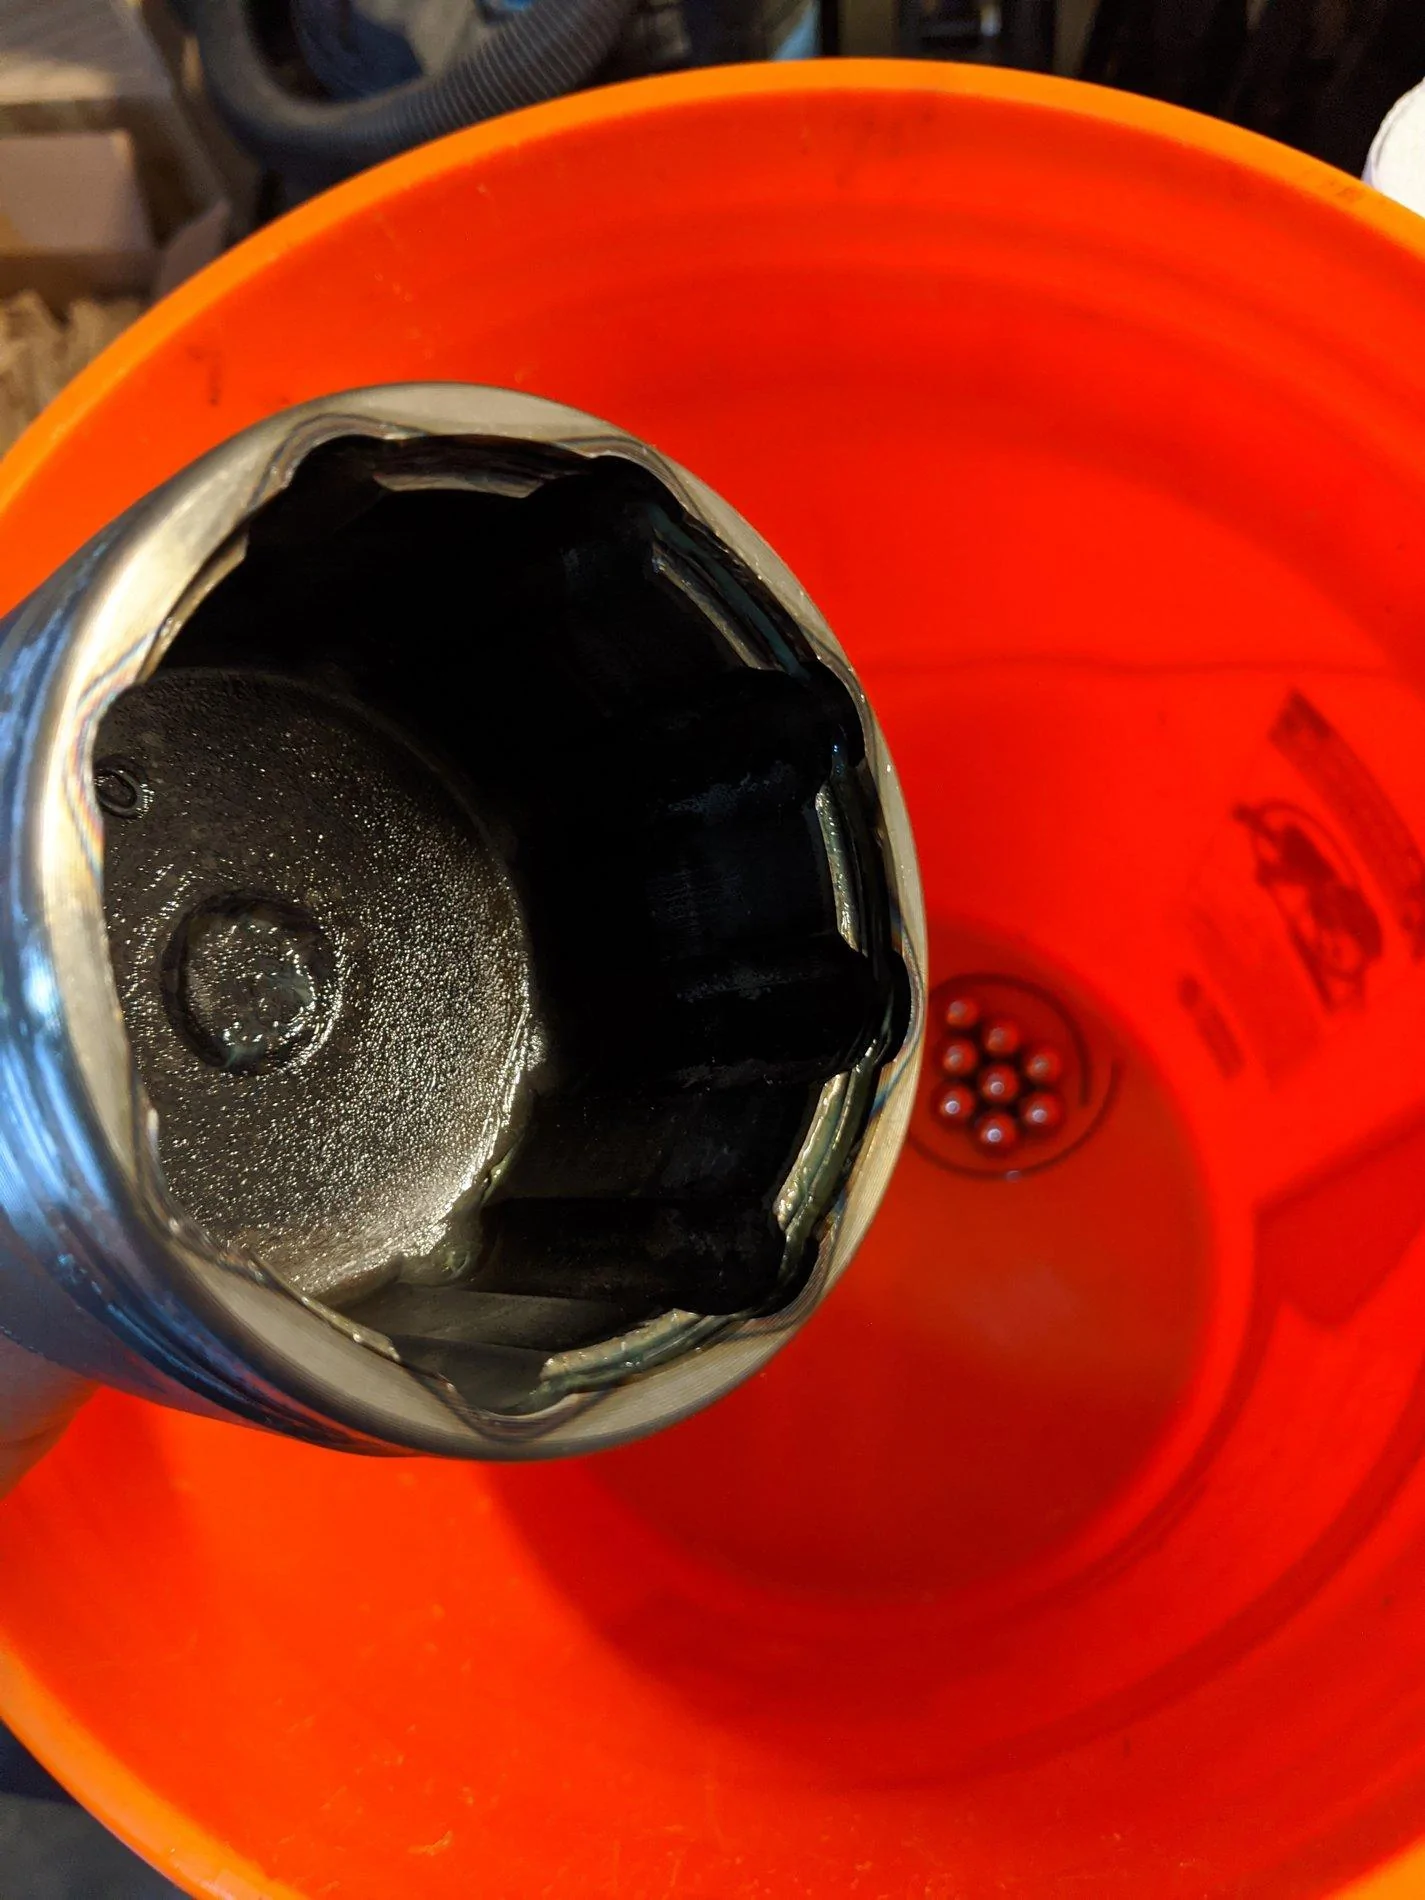
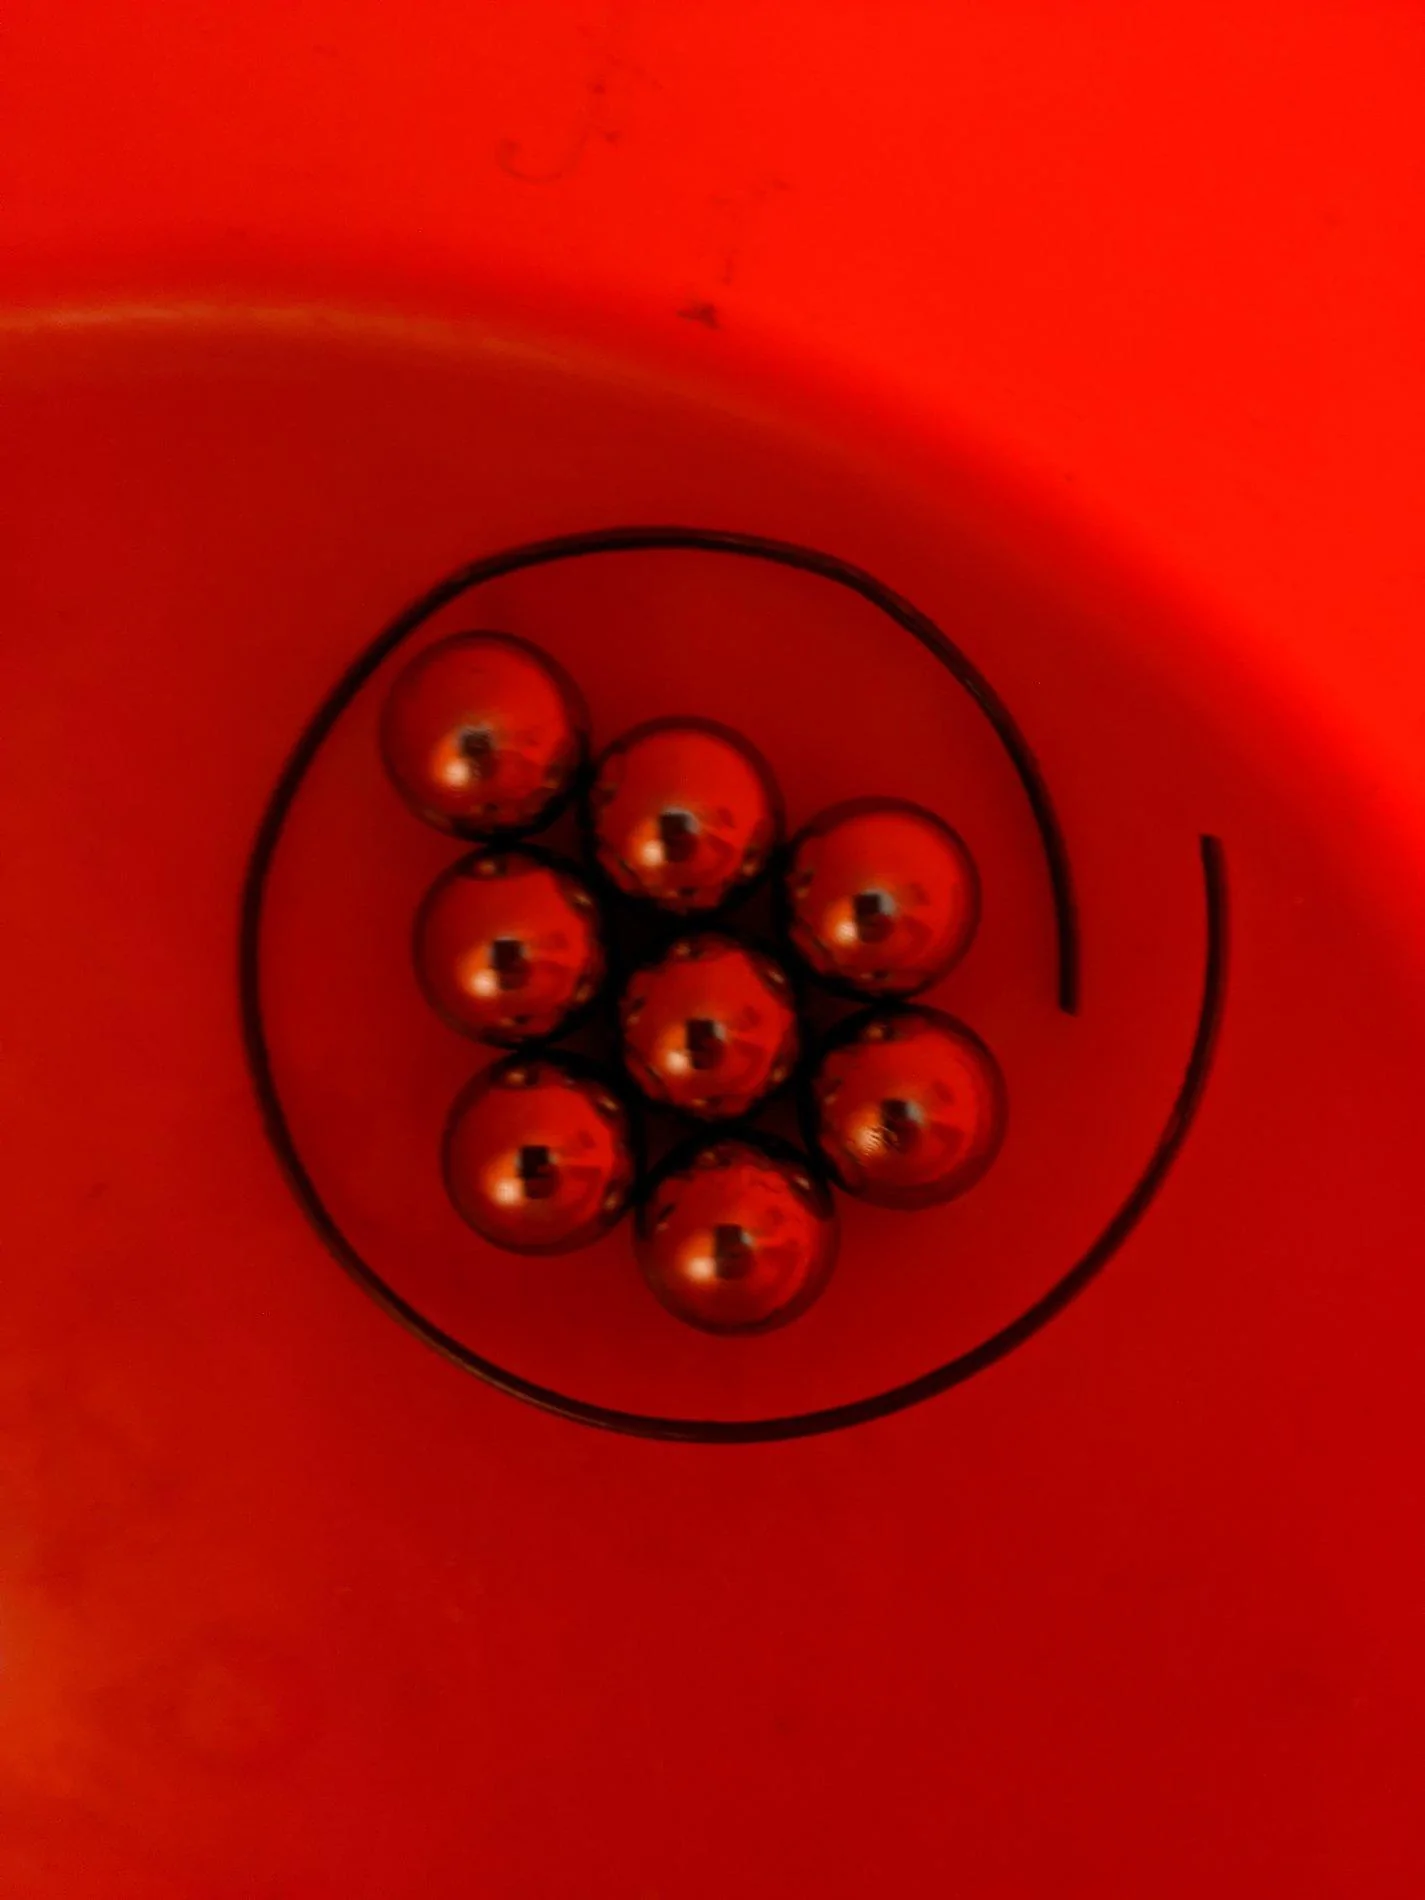
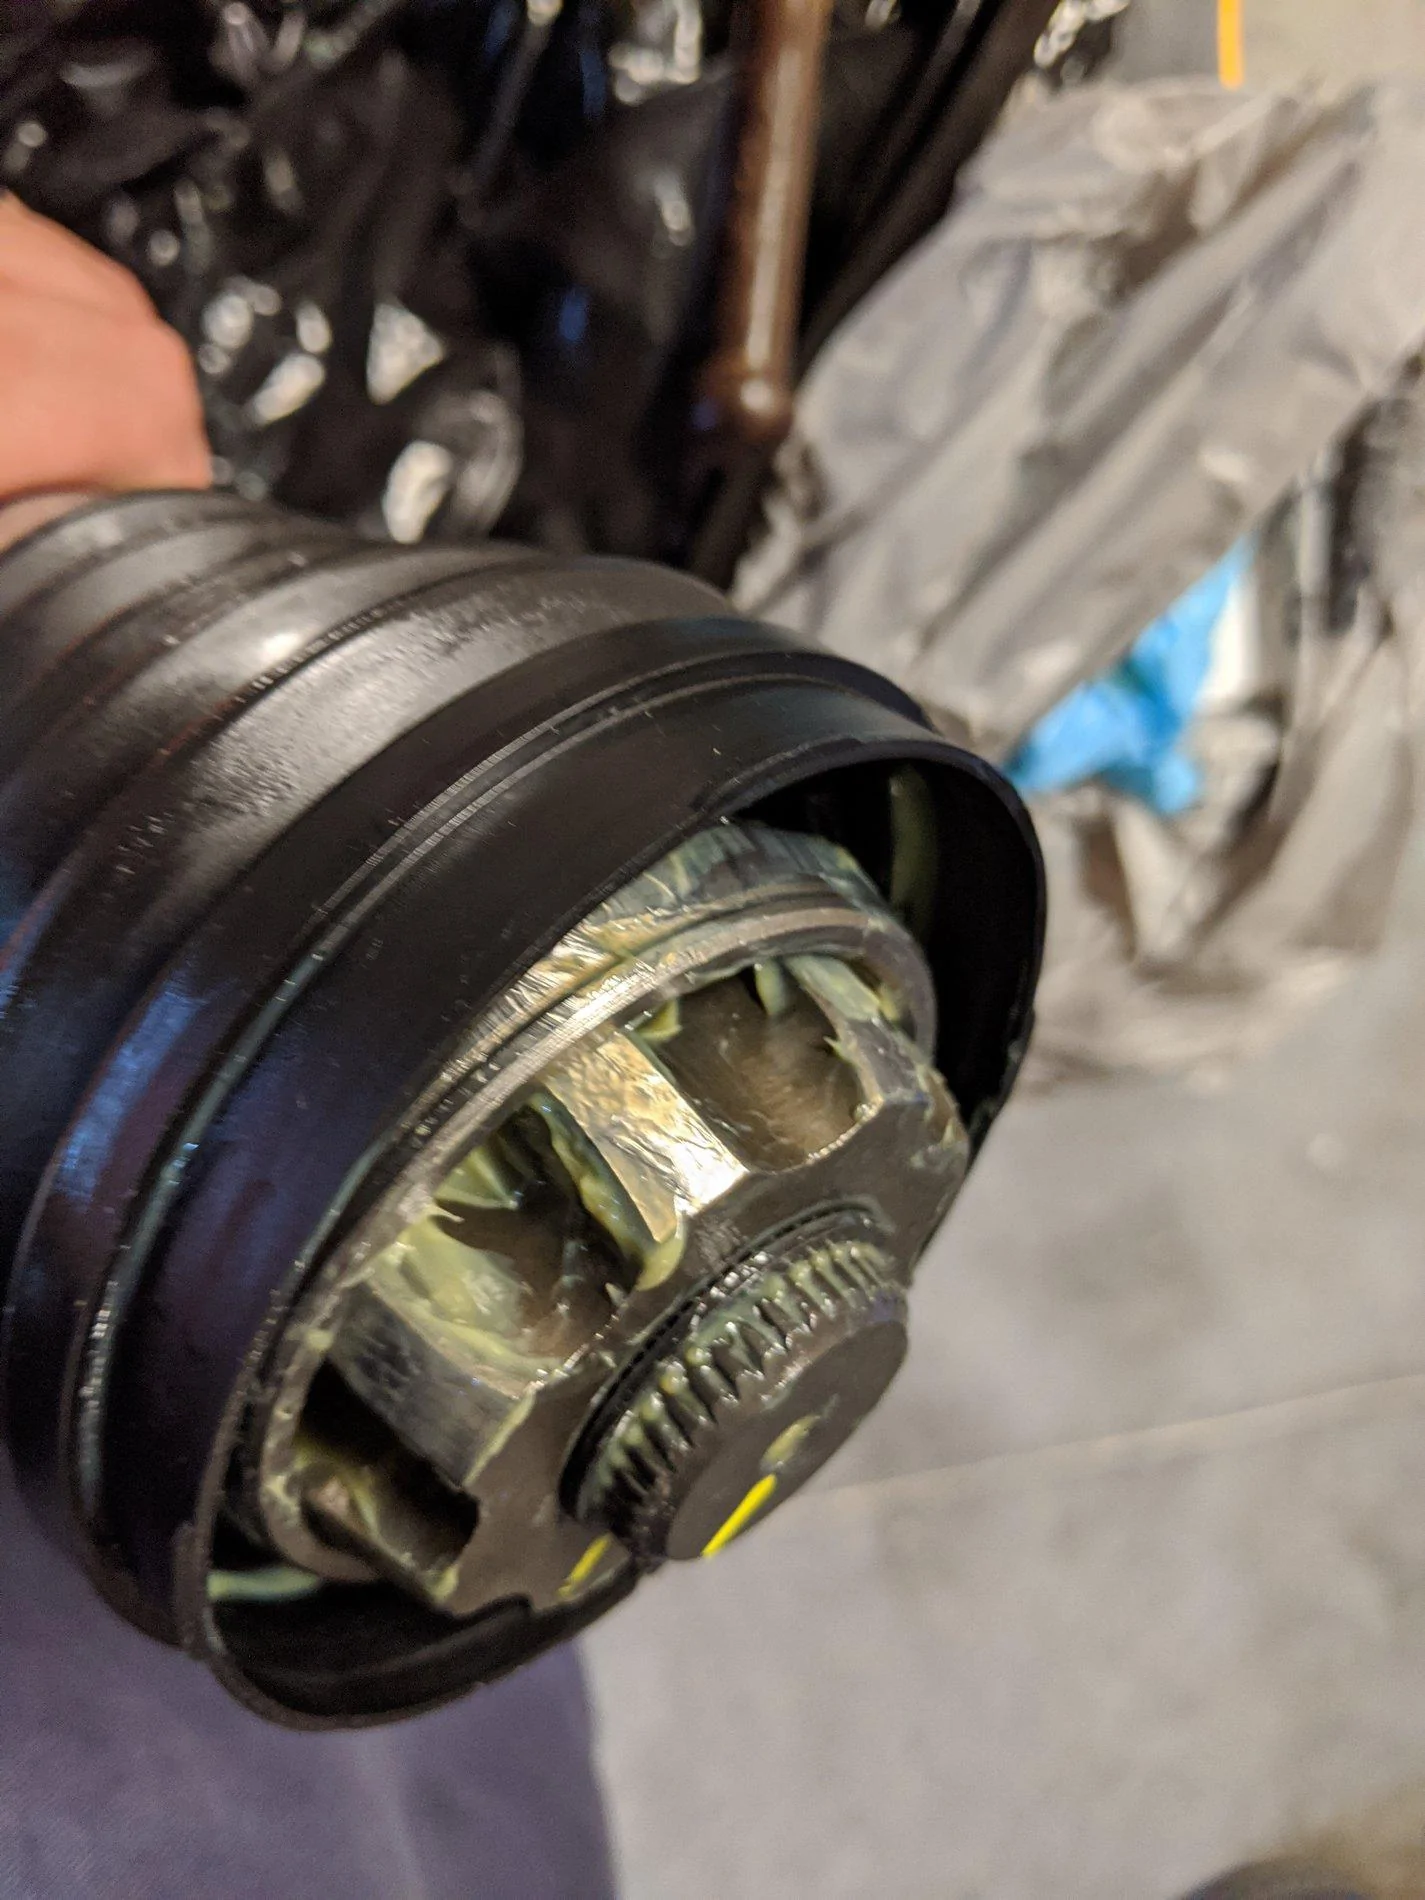
Is that in inner joint? Like the one that only moves in and out and closest to the transfer case?More pics. As you can see the retainer ring is f'd up. I'm going to have to bend that into position once I figure out where it goes. Also, there were about 4 bearings just floating around in the grease too. Could be because it appears that the upper cap has grooves which keep those bearings in place.

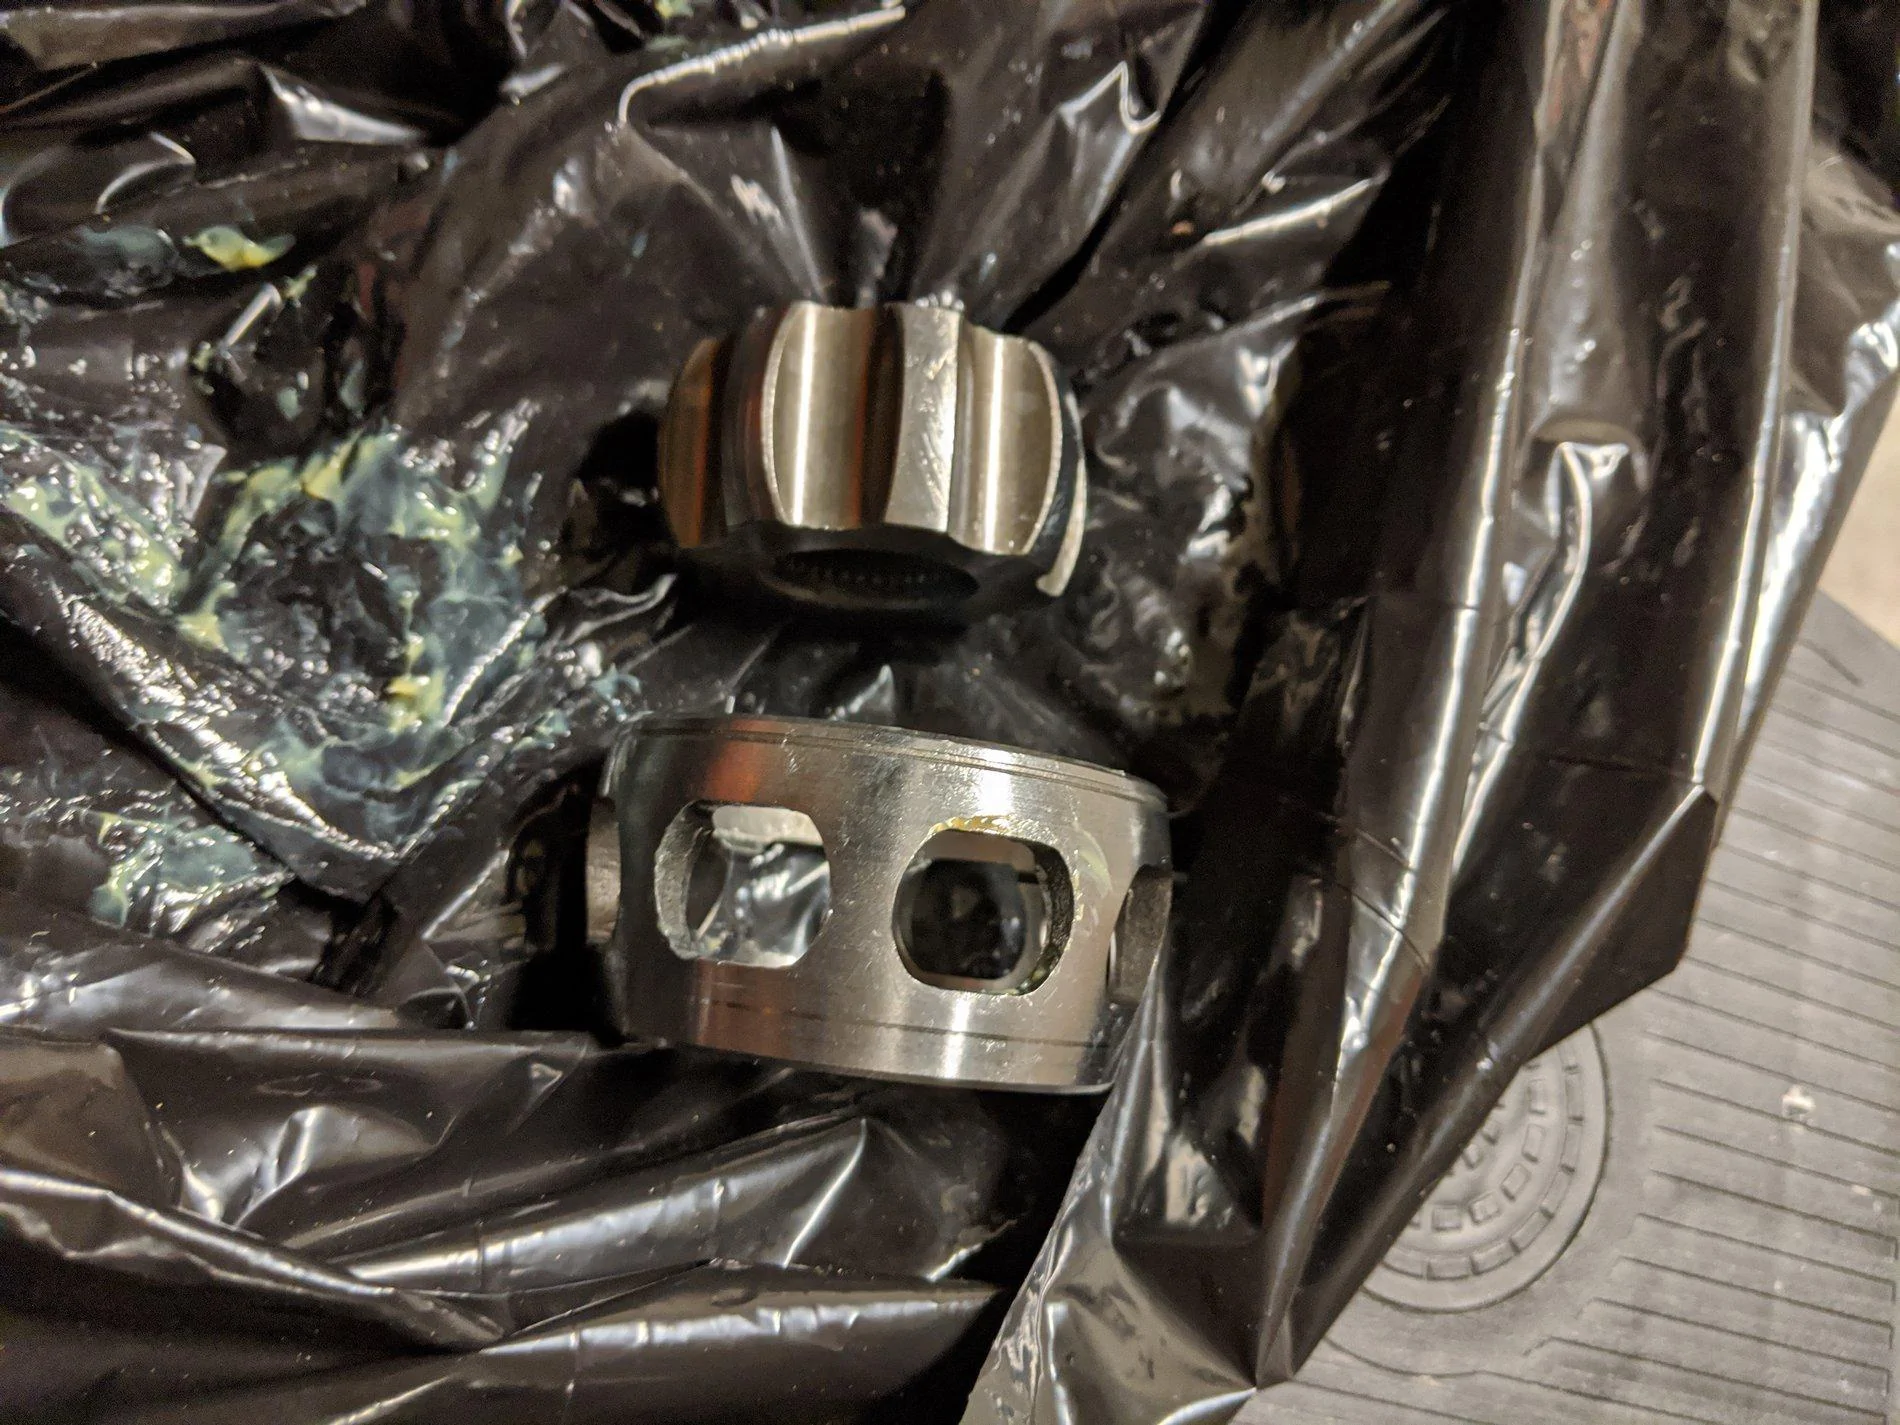
Yeah, it's the inner CV joint. I think I figured out where that inner retaining ring goes once I get it bent back into shape. It goes in the groove of the outer cup. See my first picture in the additional photos comment i made (the one with the cup and the orange bucket as the background). I just have to figure out how to take the boot off without damaging it (I've got the clips off) so that I can actually re-seat all of the bearings.Is that in inner joint? Like the one that only moves in and out and closest to the transfer case?
The videos are for the rzeppa type outer joint of the axle nearest the knuckle and hub. They won’t apply to that inner joint I’m afraid. Completely different type of joint.
I’ve not personally had the inner joint apart, so can’t comment much on that ring and the state of the joint.
Hopefully, someone on here can advise you better than I.
Thank you for your quick response.Nothing. The grooves of the shaft from the axle were nice and lubricated, but nothing came out of the differential. Not even any drops on the floor and it's been open for about 5 hours now.
")

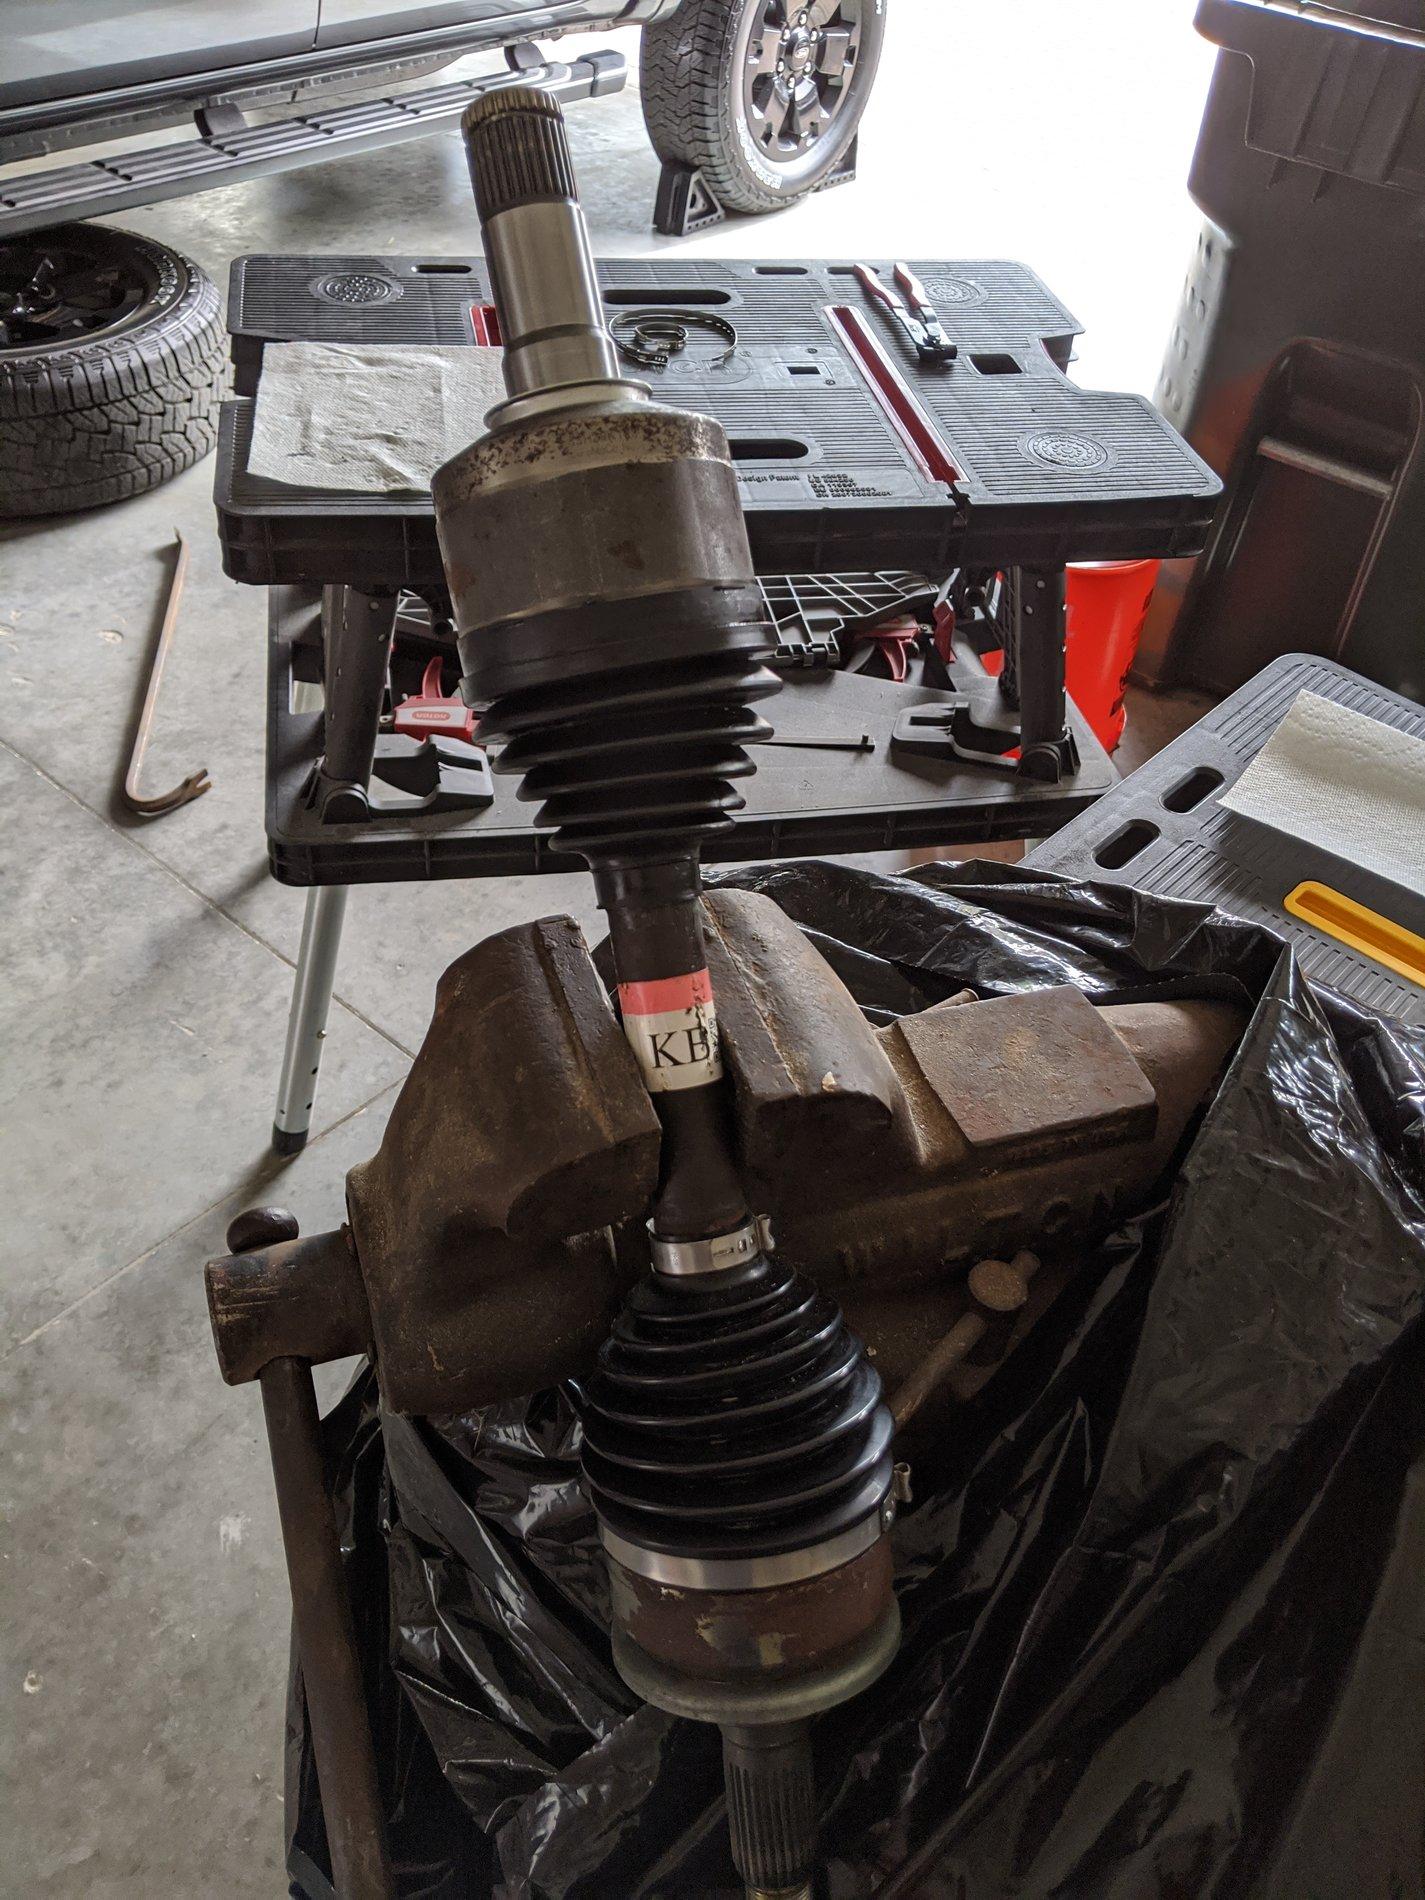
Hi AC,One final note, I used hose clamps to secure the boot. They were just a shade wide, but I was able to get them in tightly enough that I couldn't hear air when moving the joint. I also offset the screw head of each clamp by 180" so that it helps with balance. Not sure if that even matters.
I tried to use the actual Oetiker ear-style pinch clamps, but of the five auto part stores in my area, my selection was extremely limited. They ended up being too thin (OEM are 3/8" and the ones I got were 1/4") as well as too short. I actually bent the hook trying to get them to latch meaning they were also probably low quality.
I'm thinking of going to Amazon to get the right size universally adjustable clamps (I have the appropriate crimper tool) or get the band style clamps (which I don't have that tool).
Has anyone else used hose clamps to do this?
Am I thinking about this way too much? (The good news is I don't have to take the axle off to simply replace the clamps.)
I think one of these "Shaft - Front Axle" would work. I don't think you can buy individual components of the axle.Did anyone find a part number from Ford for a replacement CV axle?
