JDowns
Well-Known Member
- First Name
- Jeff
- Joined
- Dec 3, 2021
- Threads
- 18
- Messages
- 448
- Reaction score
- 1,658
- Location
- Coeur D'Alene
- Vehicle(s)
- 2021 Ranger XLT Tremor
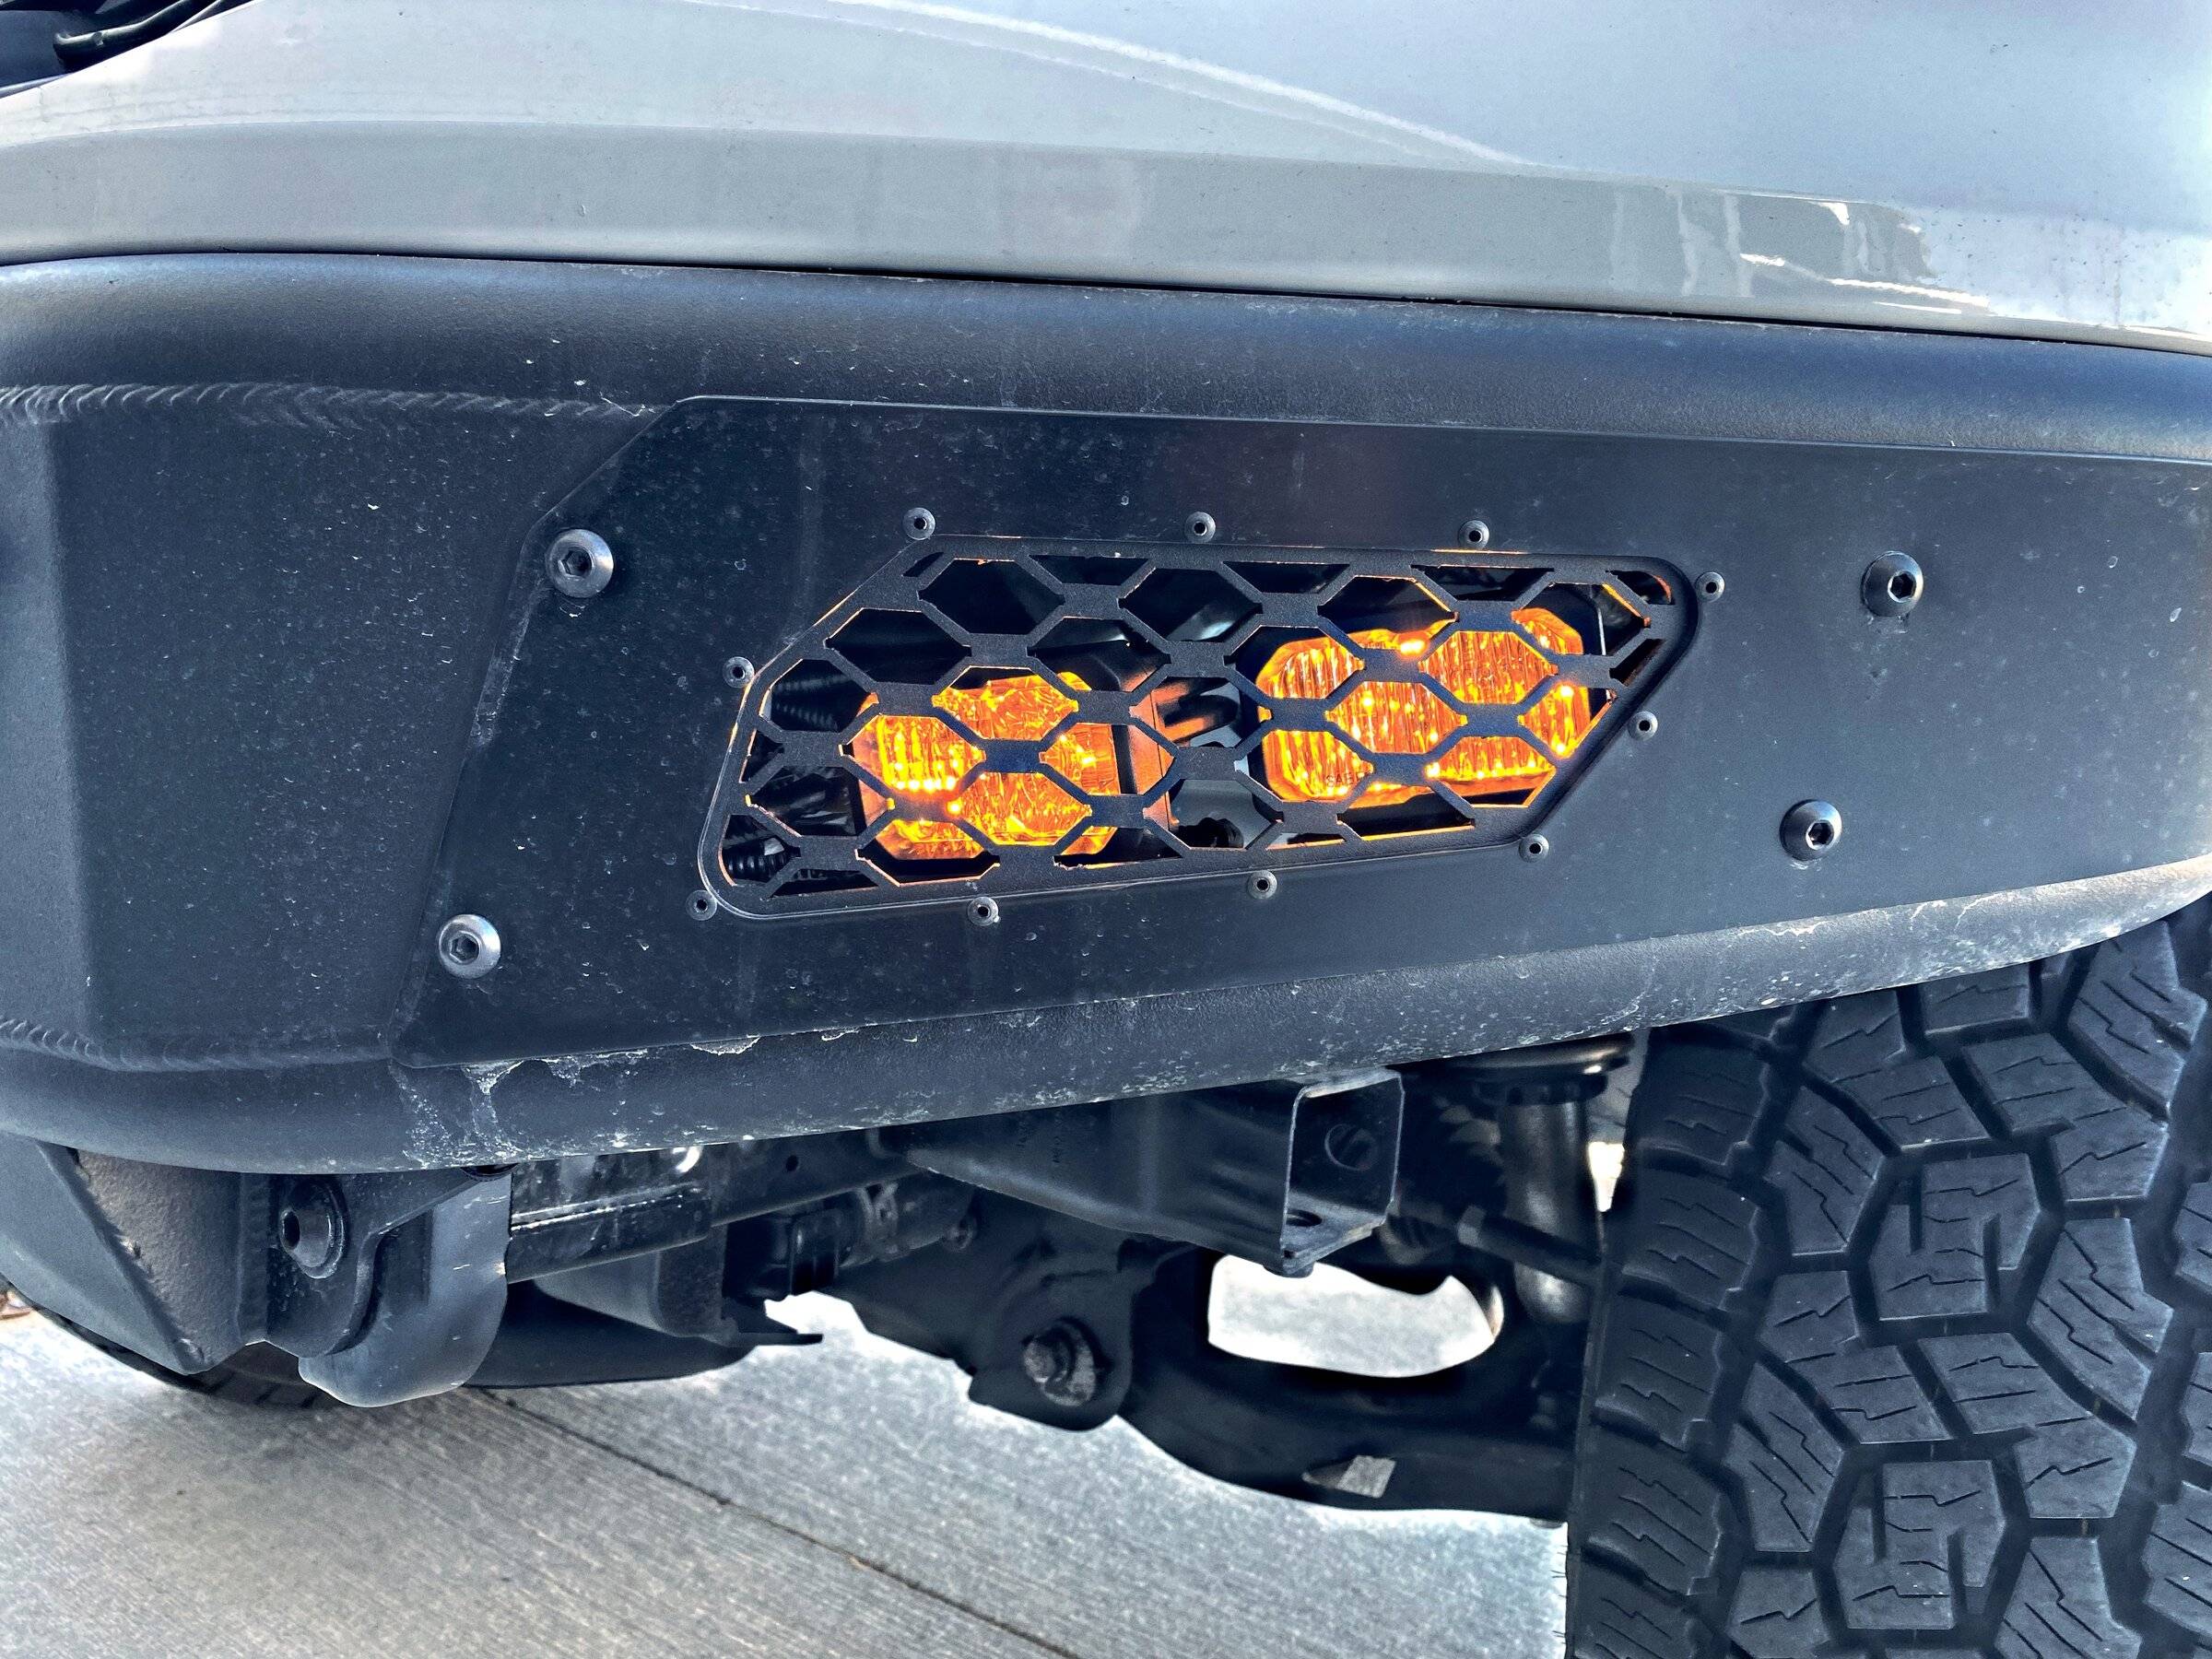
I didn't find any need for spacers, maybe for trucks with a lift or more rake. But on the stock Tremor no need. There is a gap between the housing and the pods allowing for a degree of up and down movement. I found alignment to be fairly simple. Tighten the screws just tight enough that the light is not easy to move. Mount the light with only two screws (diagonal). Align light and tighten one side. Remove and tighten the other side and reinstall. Pretty straight forward.
To remove and install all I did was:
Removed Skid Plate.
Removed 8mm screw holding air dam to bracket.
Removed 10mm screw closest to center of vehicle holding air dam to bumper.
Pushed the air dam towards the wheel allowing the bracket to hold it out of the way.
Removed bulb from housing.
Pushed wiring aside.
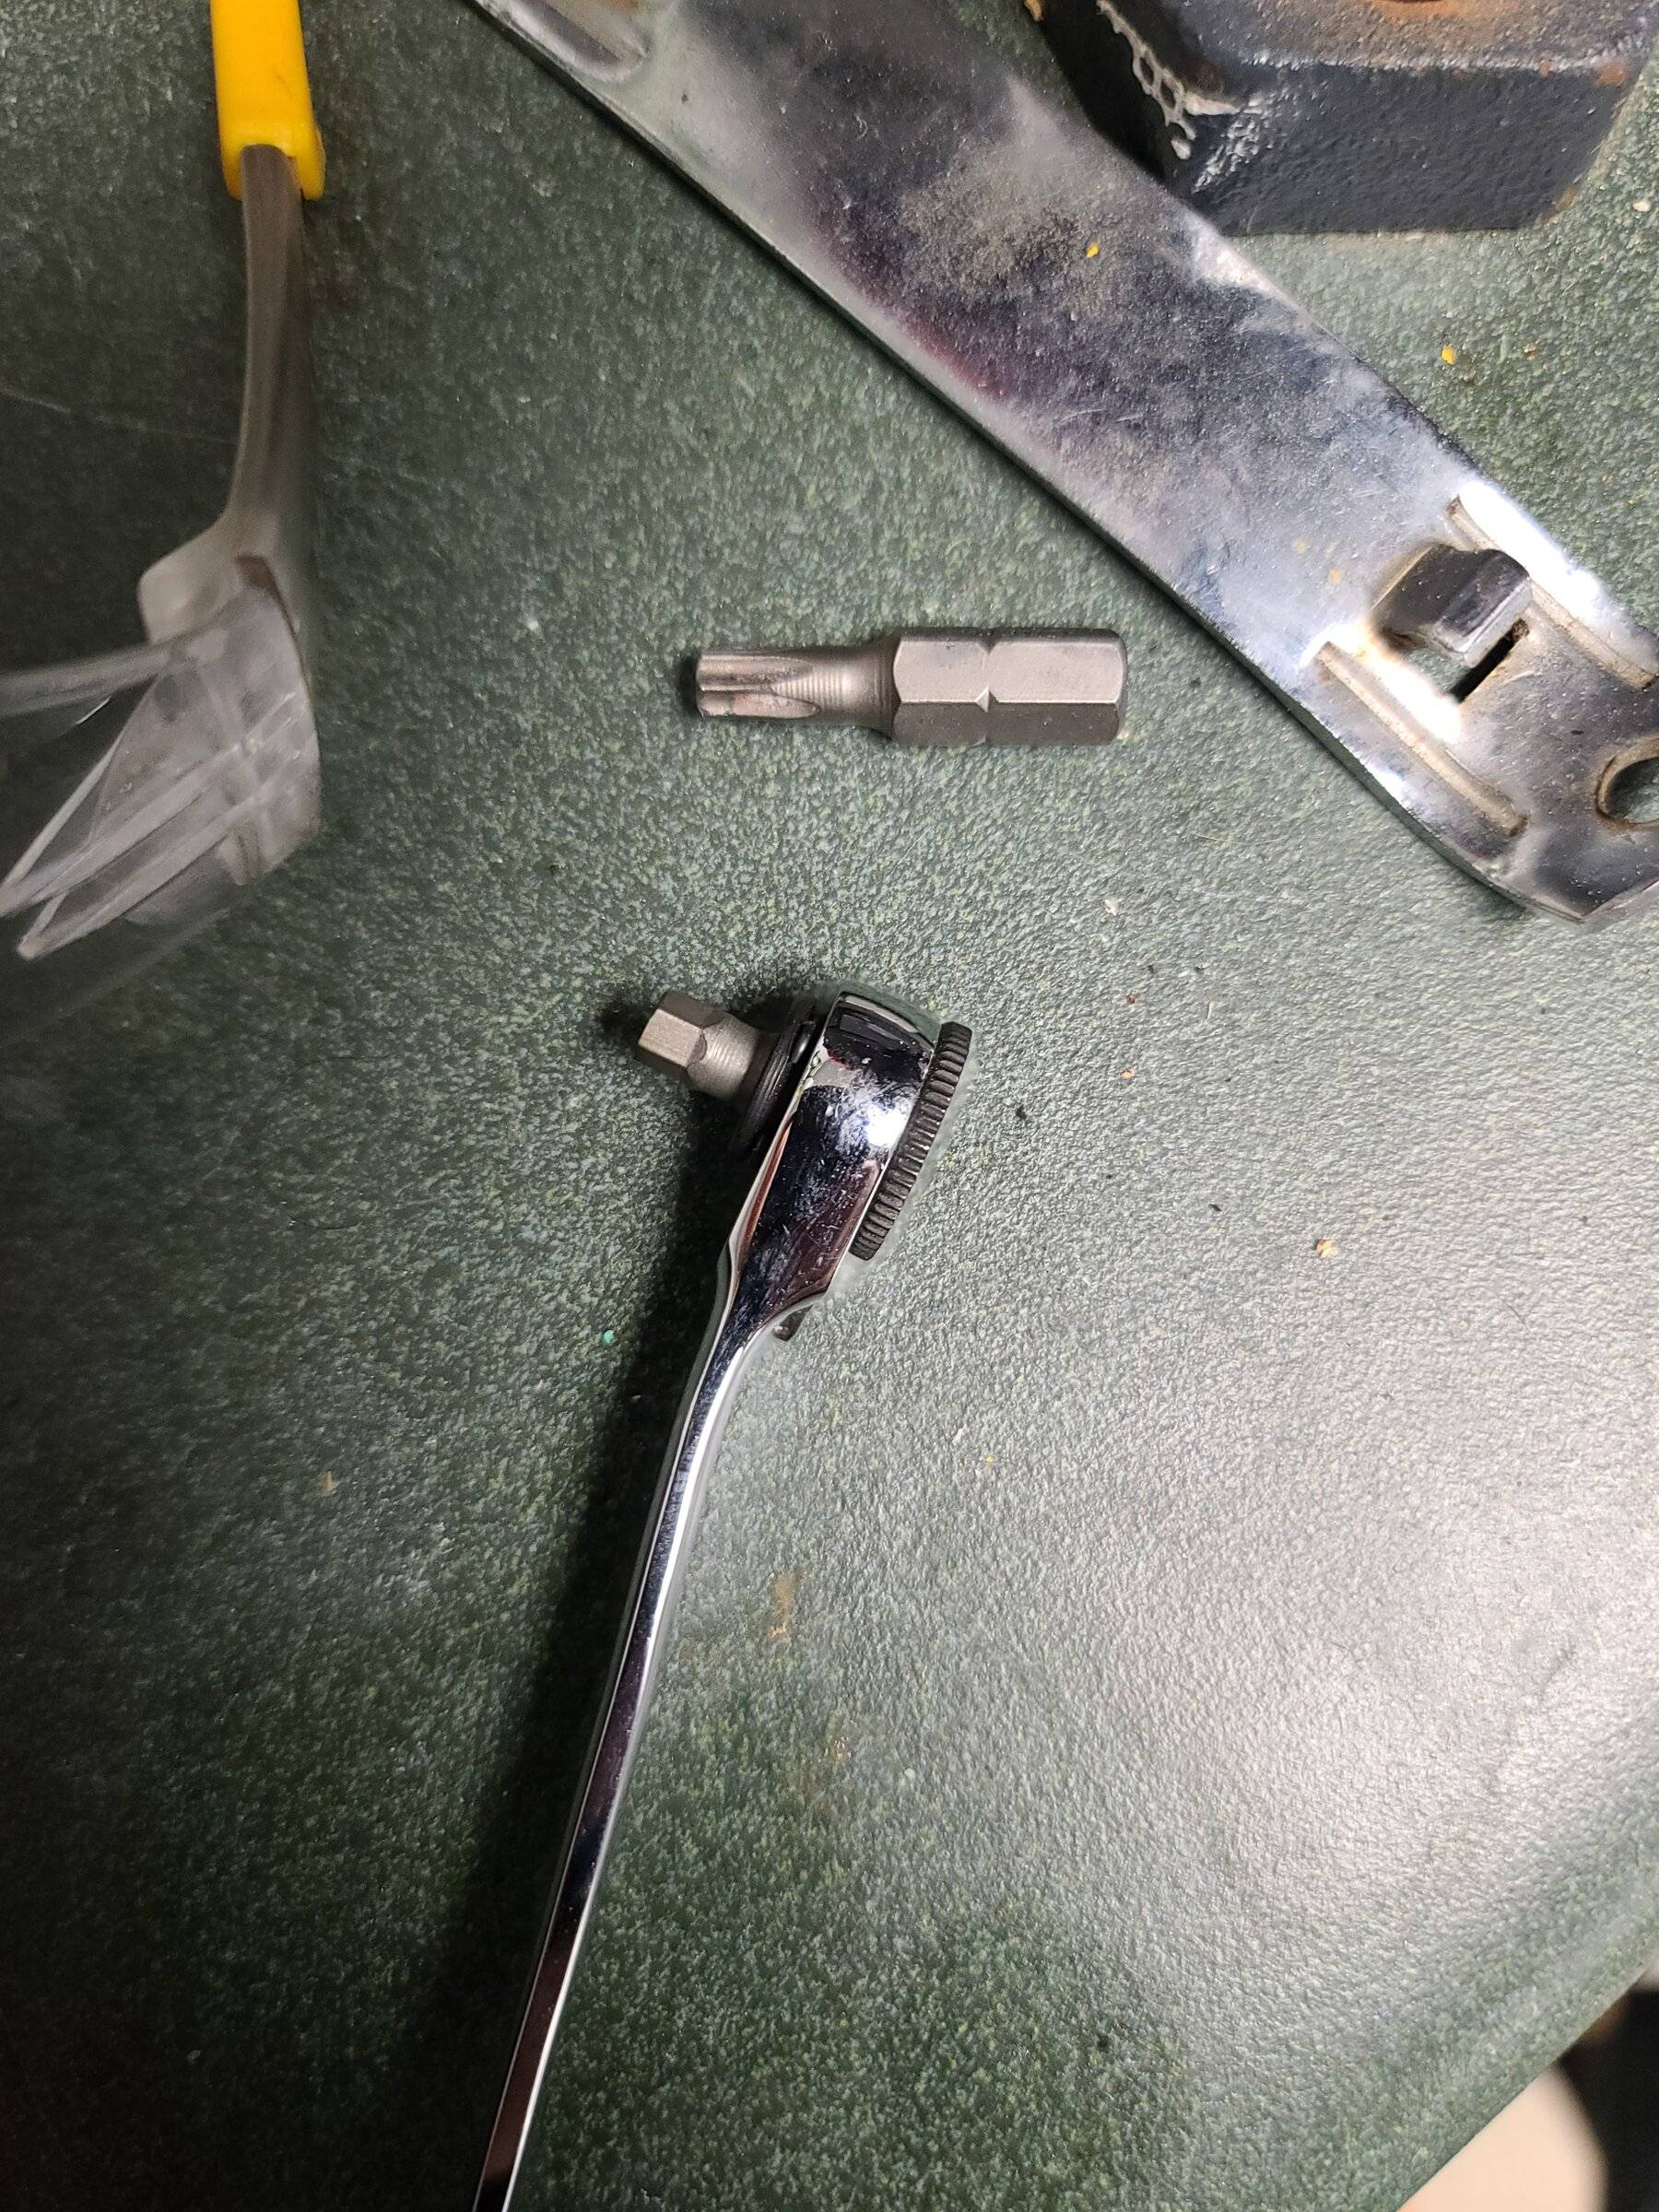
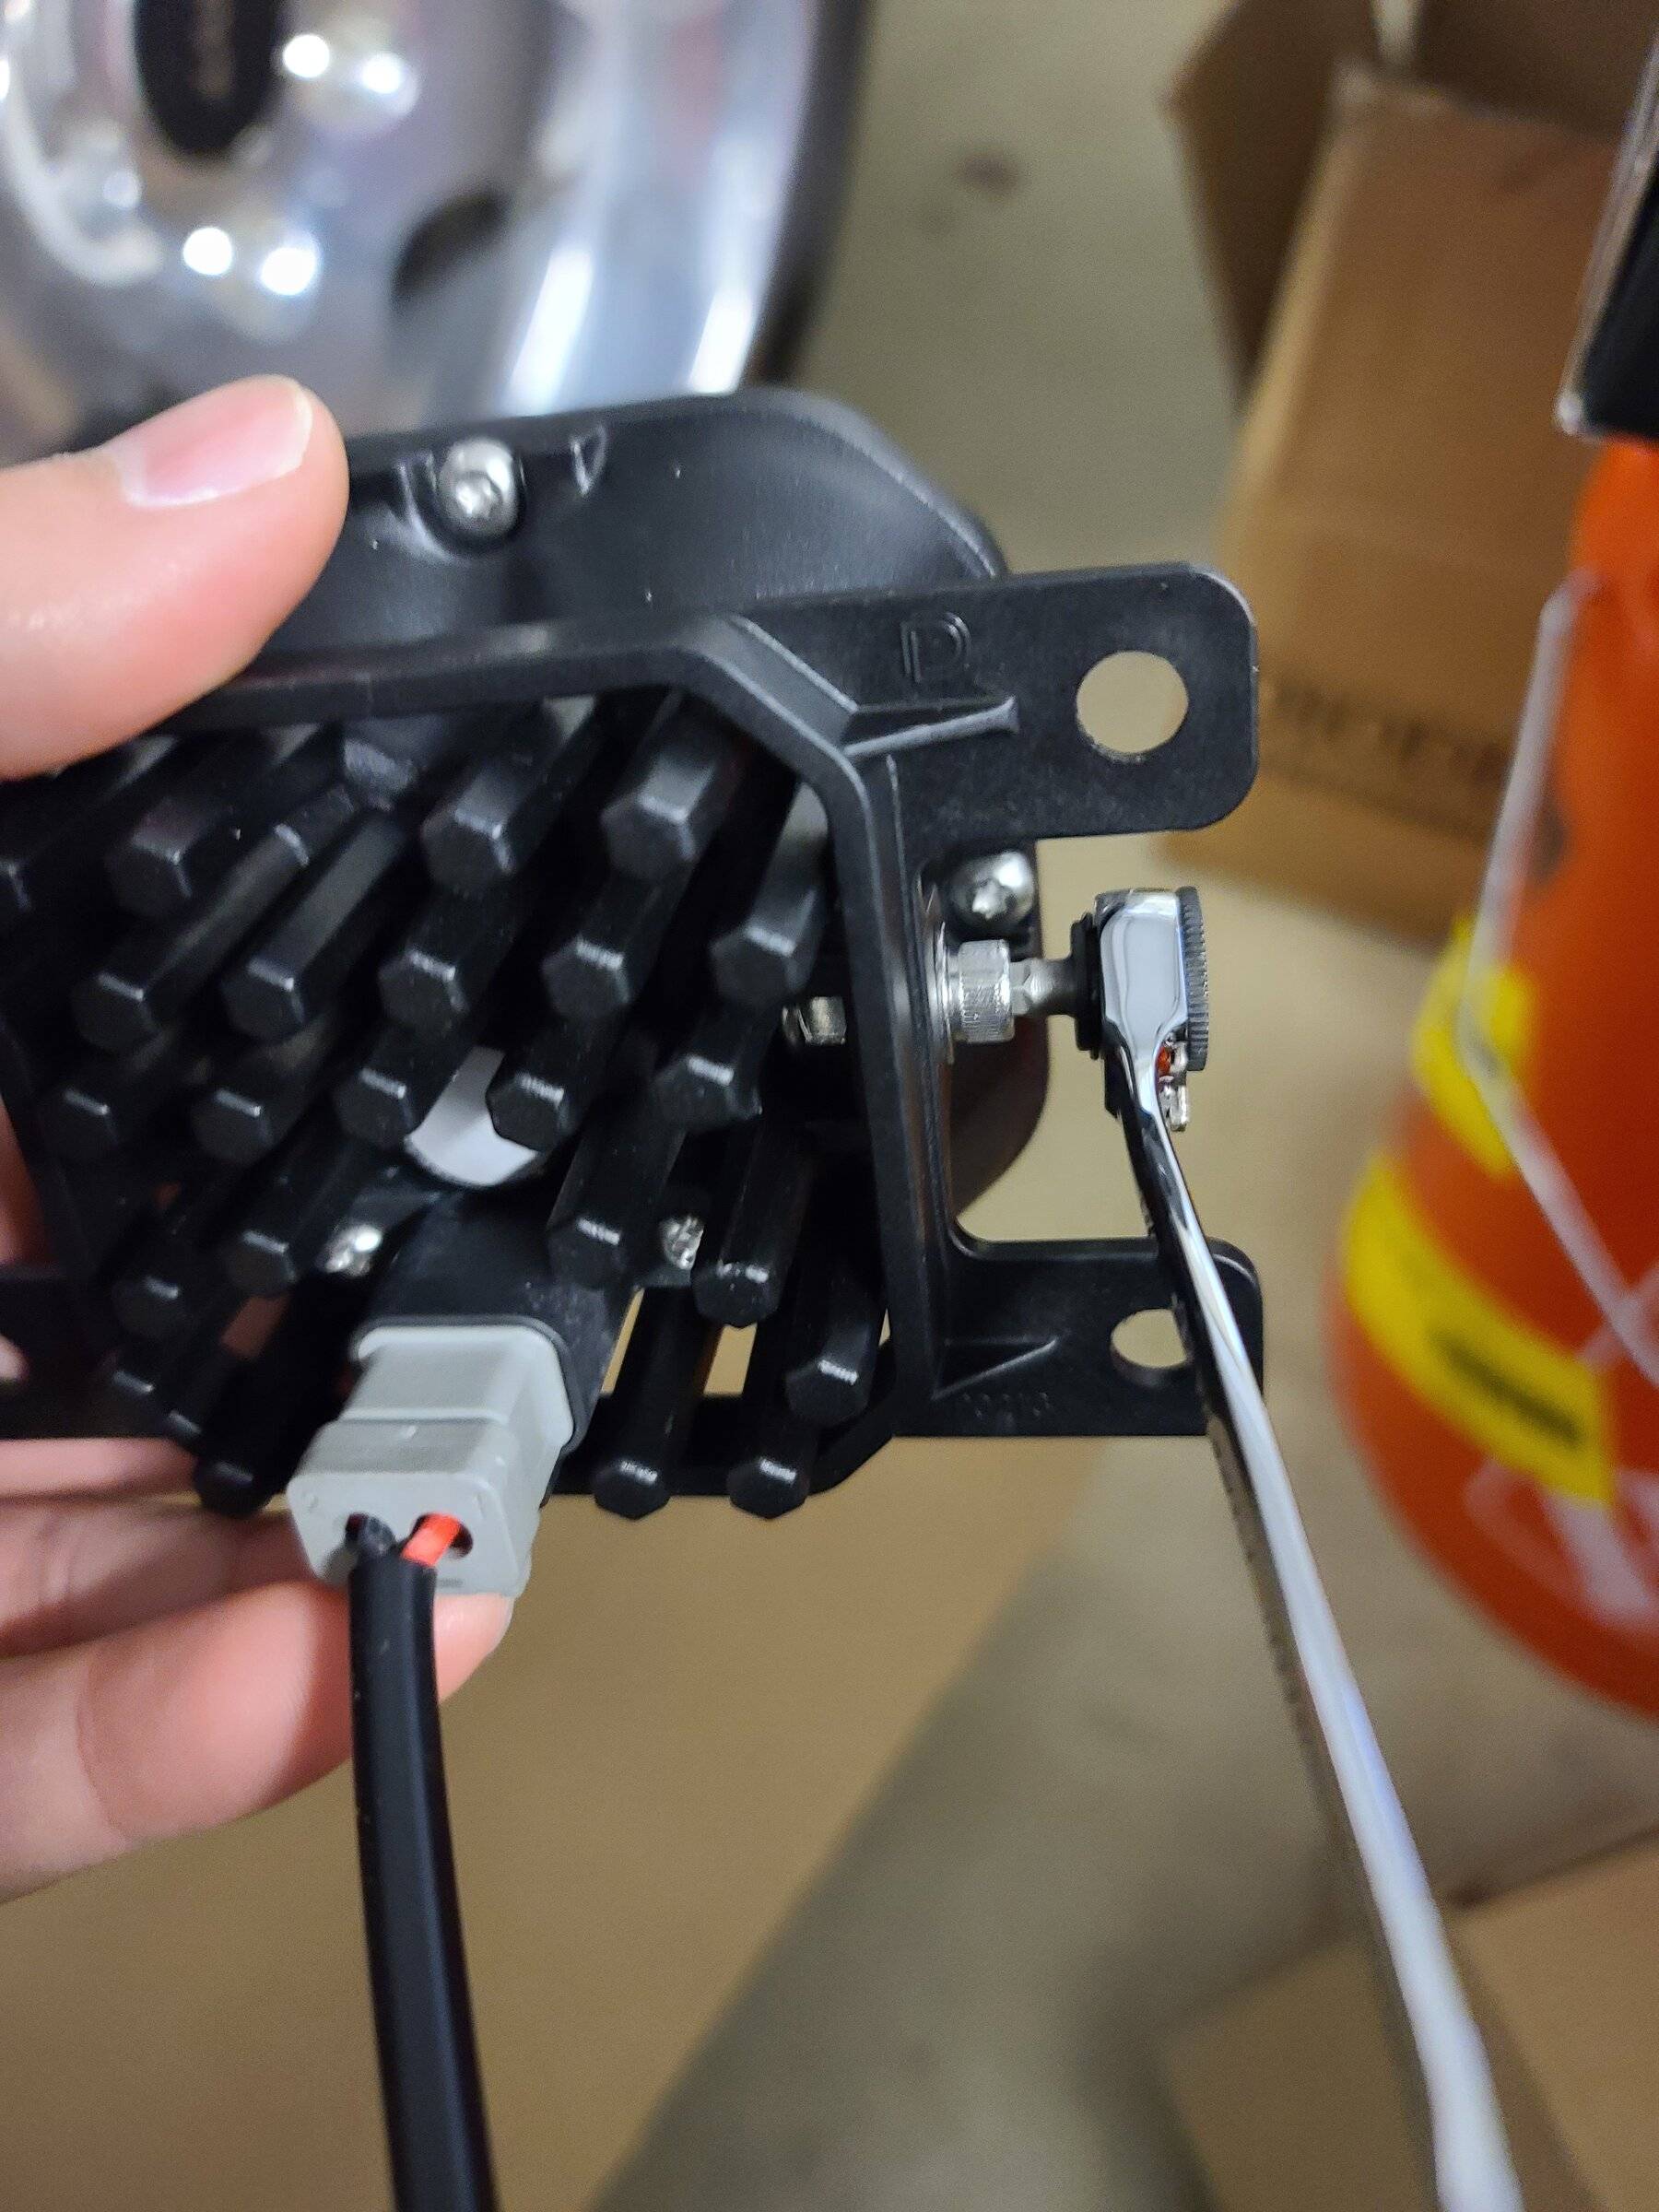
Removed the (4) torx screws with a 1/4" socket wrench.
Tip: Use a 1/4" socket wrench with a short extension with a 1/4" socket. Use a small dot of plumbers putty in the socket to hold your torx driver so it never falls out.
Install in reverse. Was a pretty quick job overall. After you do one side the other side is much quicker. If I had to do it again its less than a 30 minute job.
To remove and install all I did was:
Removed Skid Plate.
Removed 8mm screw holding air dam to bracket.
Removed 10mm screw closest to center of vehicle holding air dam to bumper.
Pushed the air dam towards the wheel allowing the bracket to hold it out of the way.
Removed bulb from housing.
Pushed wiring aside.
Removed the (4) torx screws with a 1/4" socket wrench.
Tip: Use a 1/4" socket wrench with a short extension with a 1/4" socket. Use a small dot of plumbers putty in the socket to hold your torx driver so it never falls out.
Install in reverse. Was a pretty quick job overall. After you do one side the other side is much quicker. If I had to do it again its less than a 30 minute job.
Sponsored