Fawnbuster
Well-Known Member
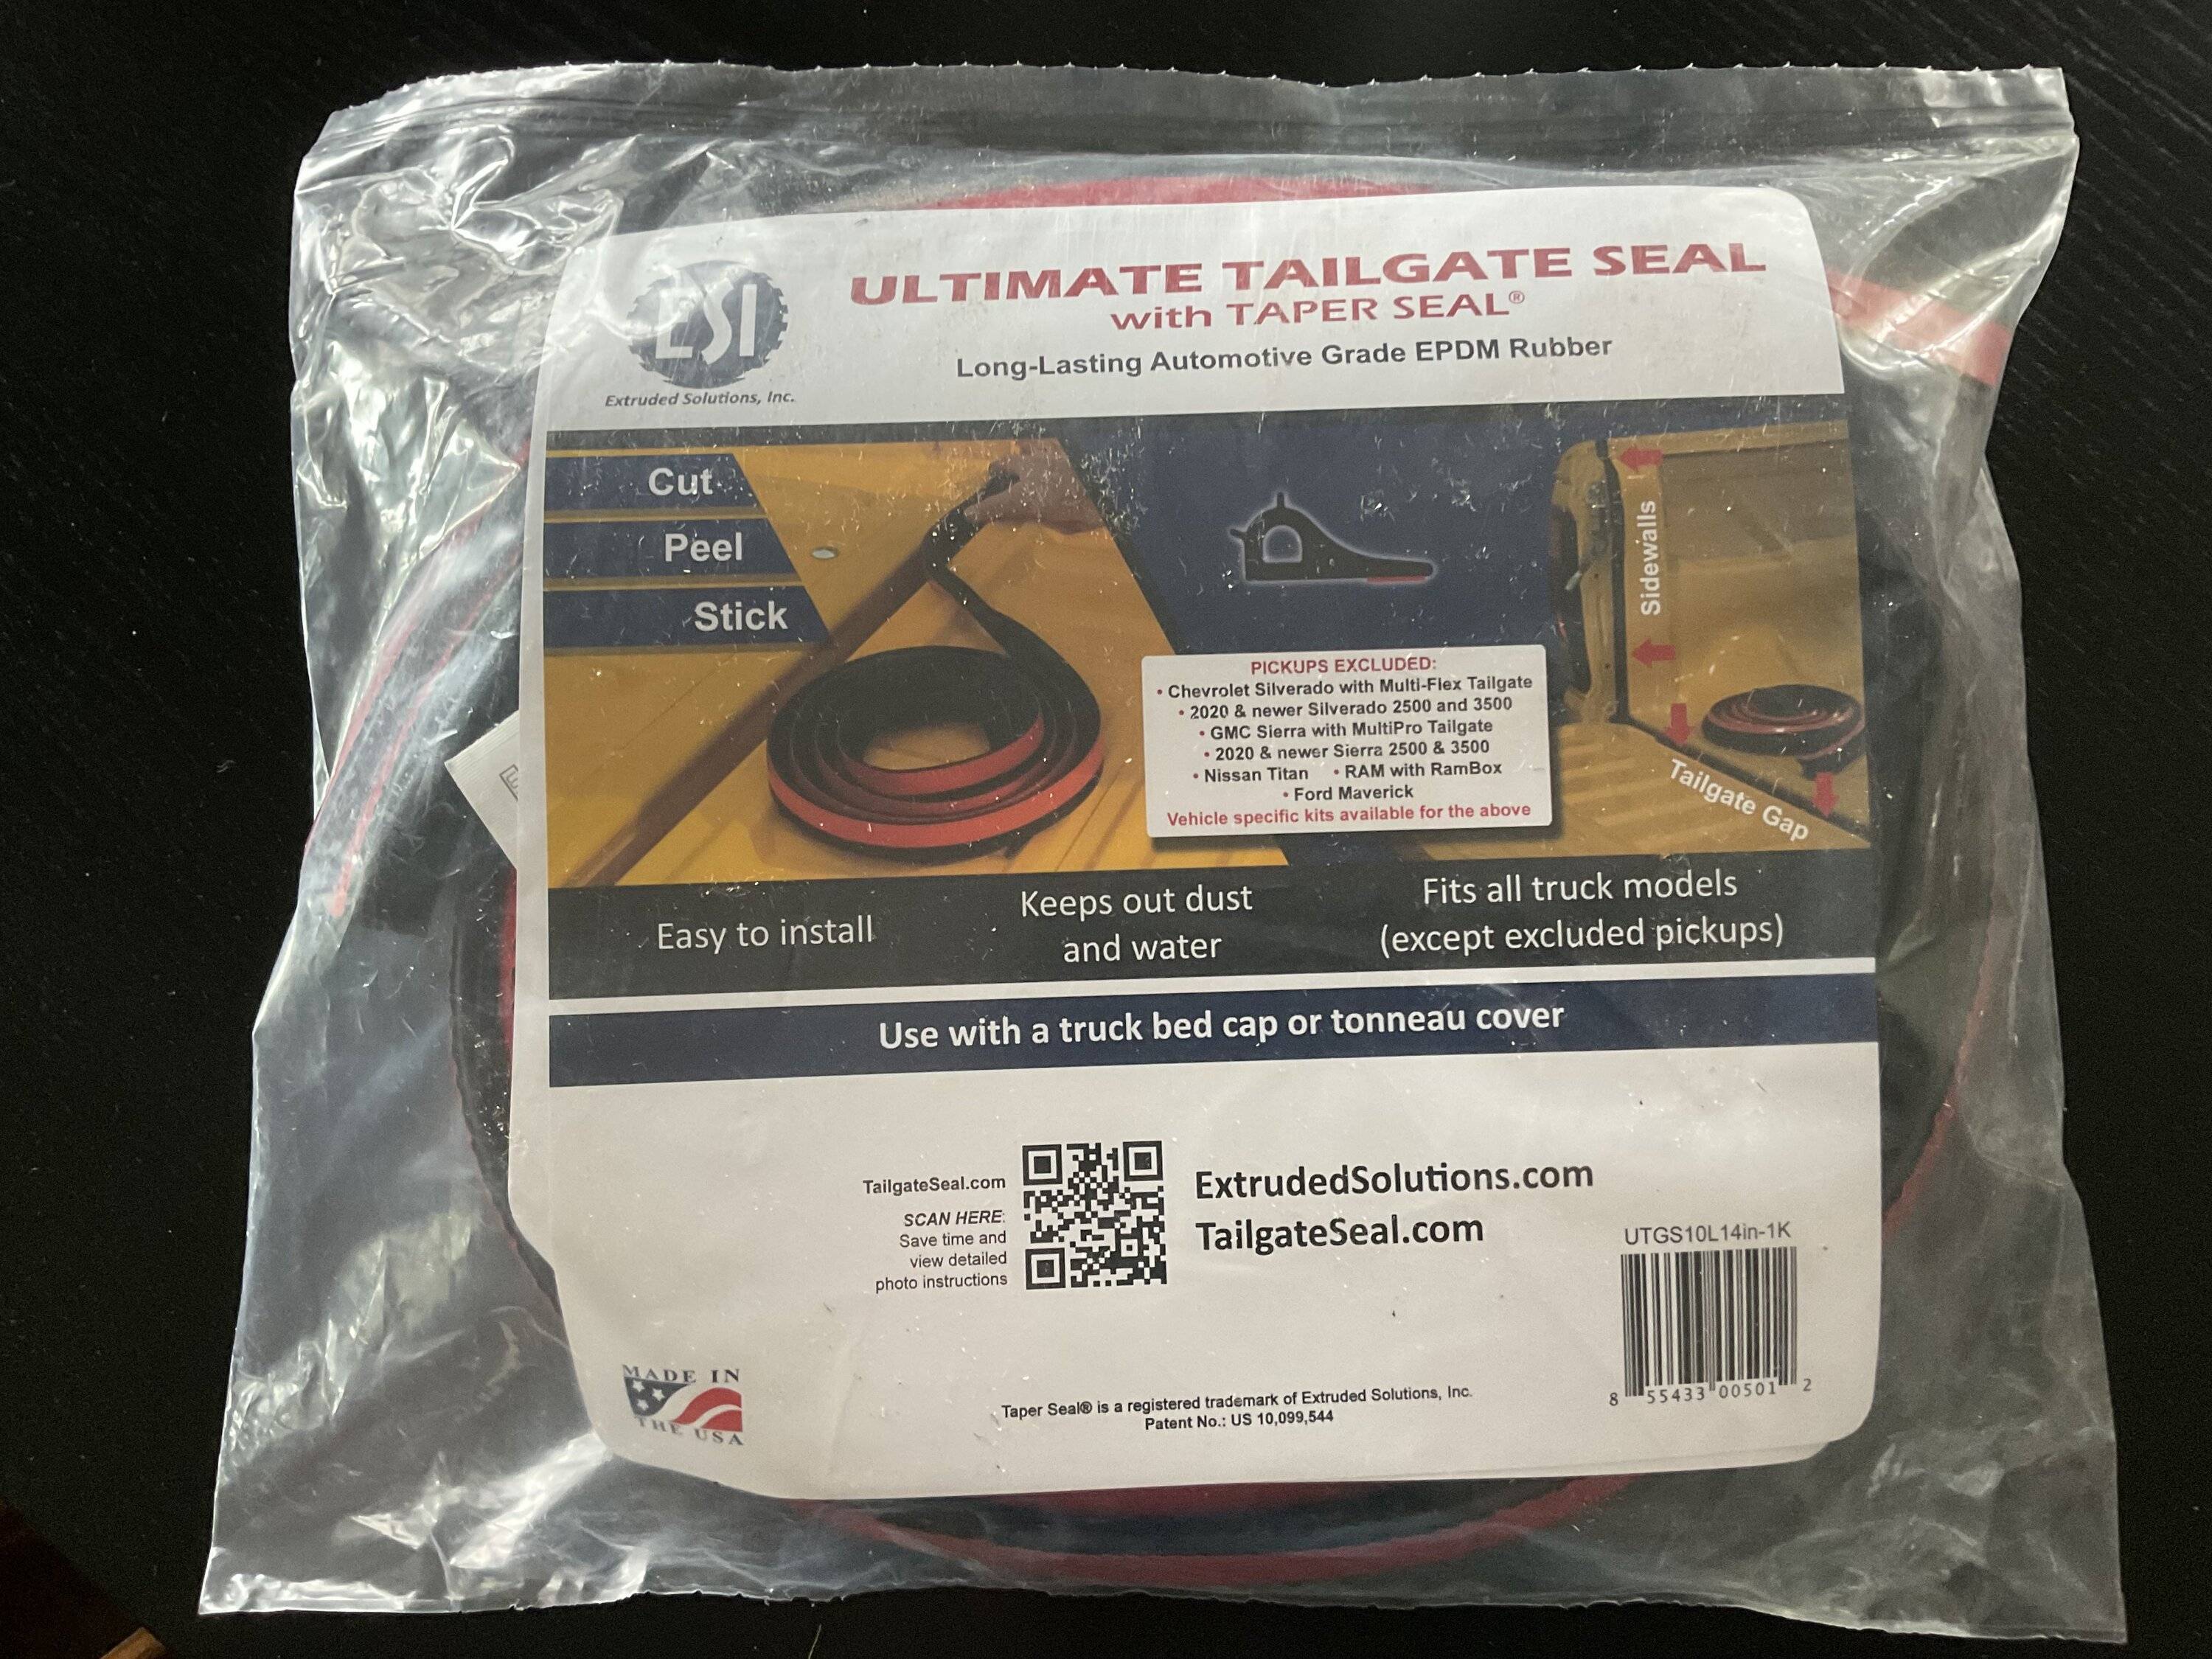
Just curious what did the seal cost? The website just sent me to the directionsImportant Note: DROP-IN BEDLINER INSTALL WITH TAILGATE COVER
I don’t have issues with water getting in the back of my Ranger or much dust (I get it dirtier inside), but the light coming through the side gaps of my tailgate irritated me so I ordered a tailgate seal kit.

I didn’t like the instructions on: https://tailgateseal.com/FordRanger2019.html and a bit of dry-fitting led me to a different/better solution. I could install the adhesive flap under the protective tailgate cover, following the lines of the cover, and get a good seal on the sides and bottom. It also seemed like I could do it without using the two thicker pieces from the kit. So, that was my approach.
First Step: With a T20 Torx screwdriver, remove the cover to clean the surface of the tailgate. Isopropyl alcohol wipes come with the kit. I cleaned it with hydrogen peroxide wipes first (love those things!), then the supplied wipes.
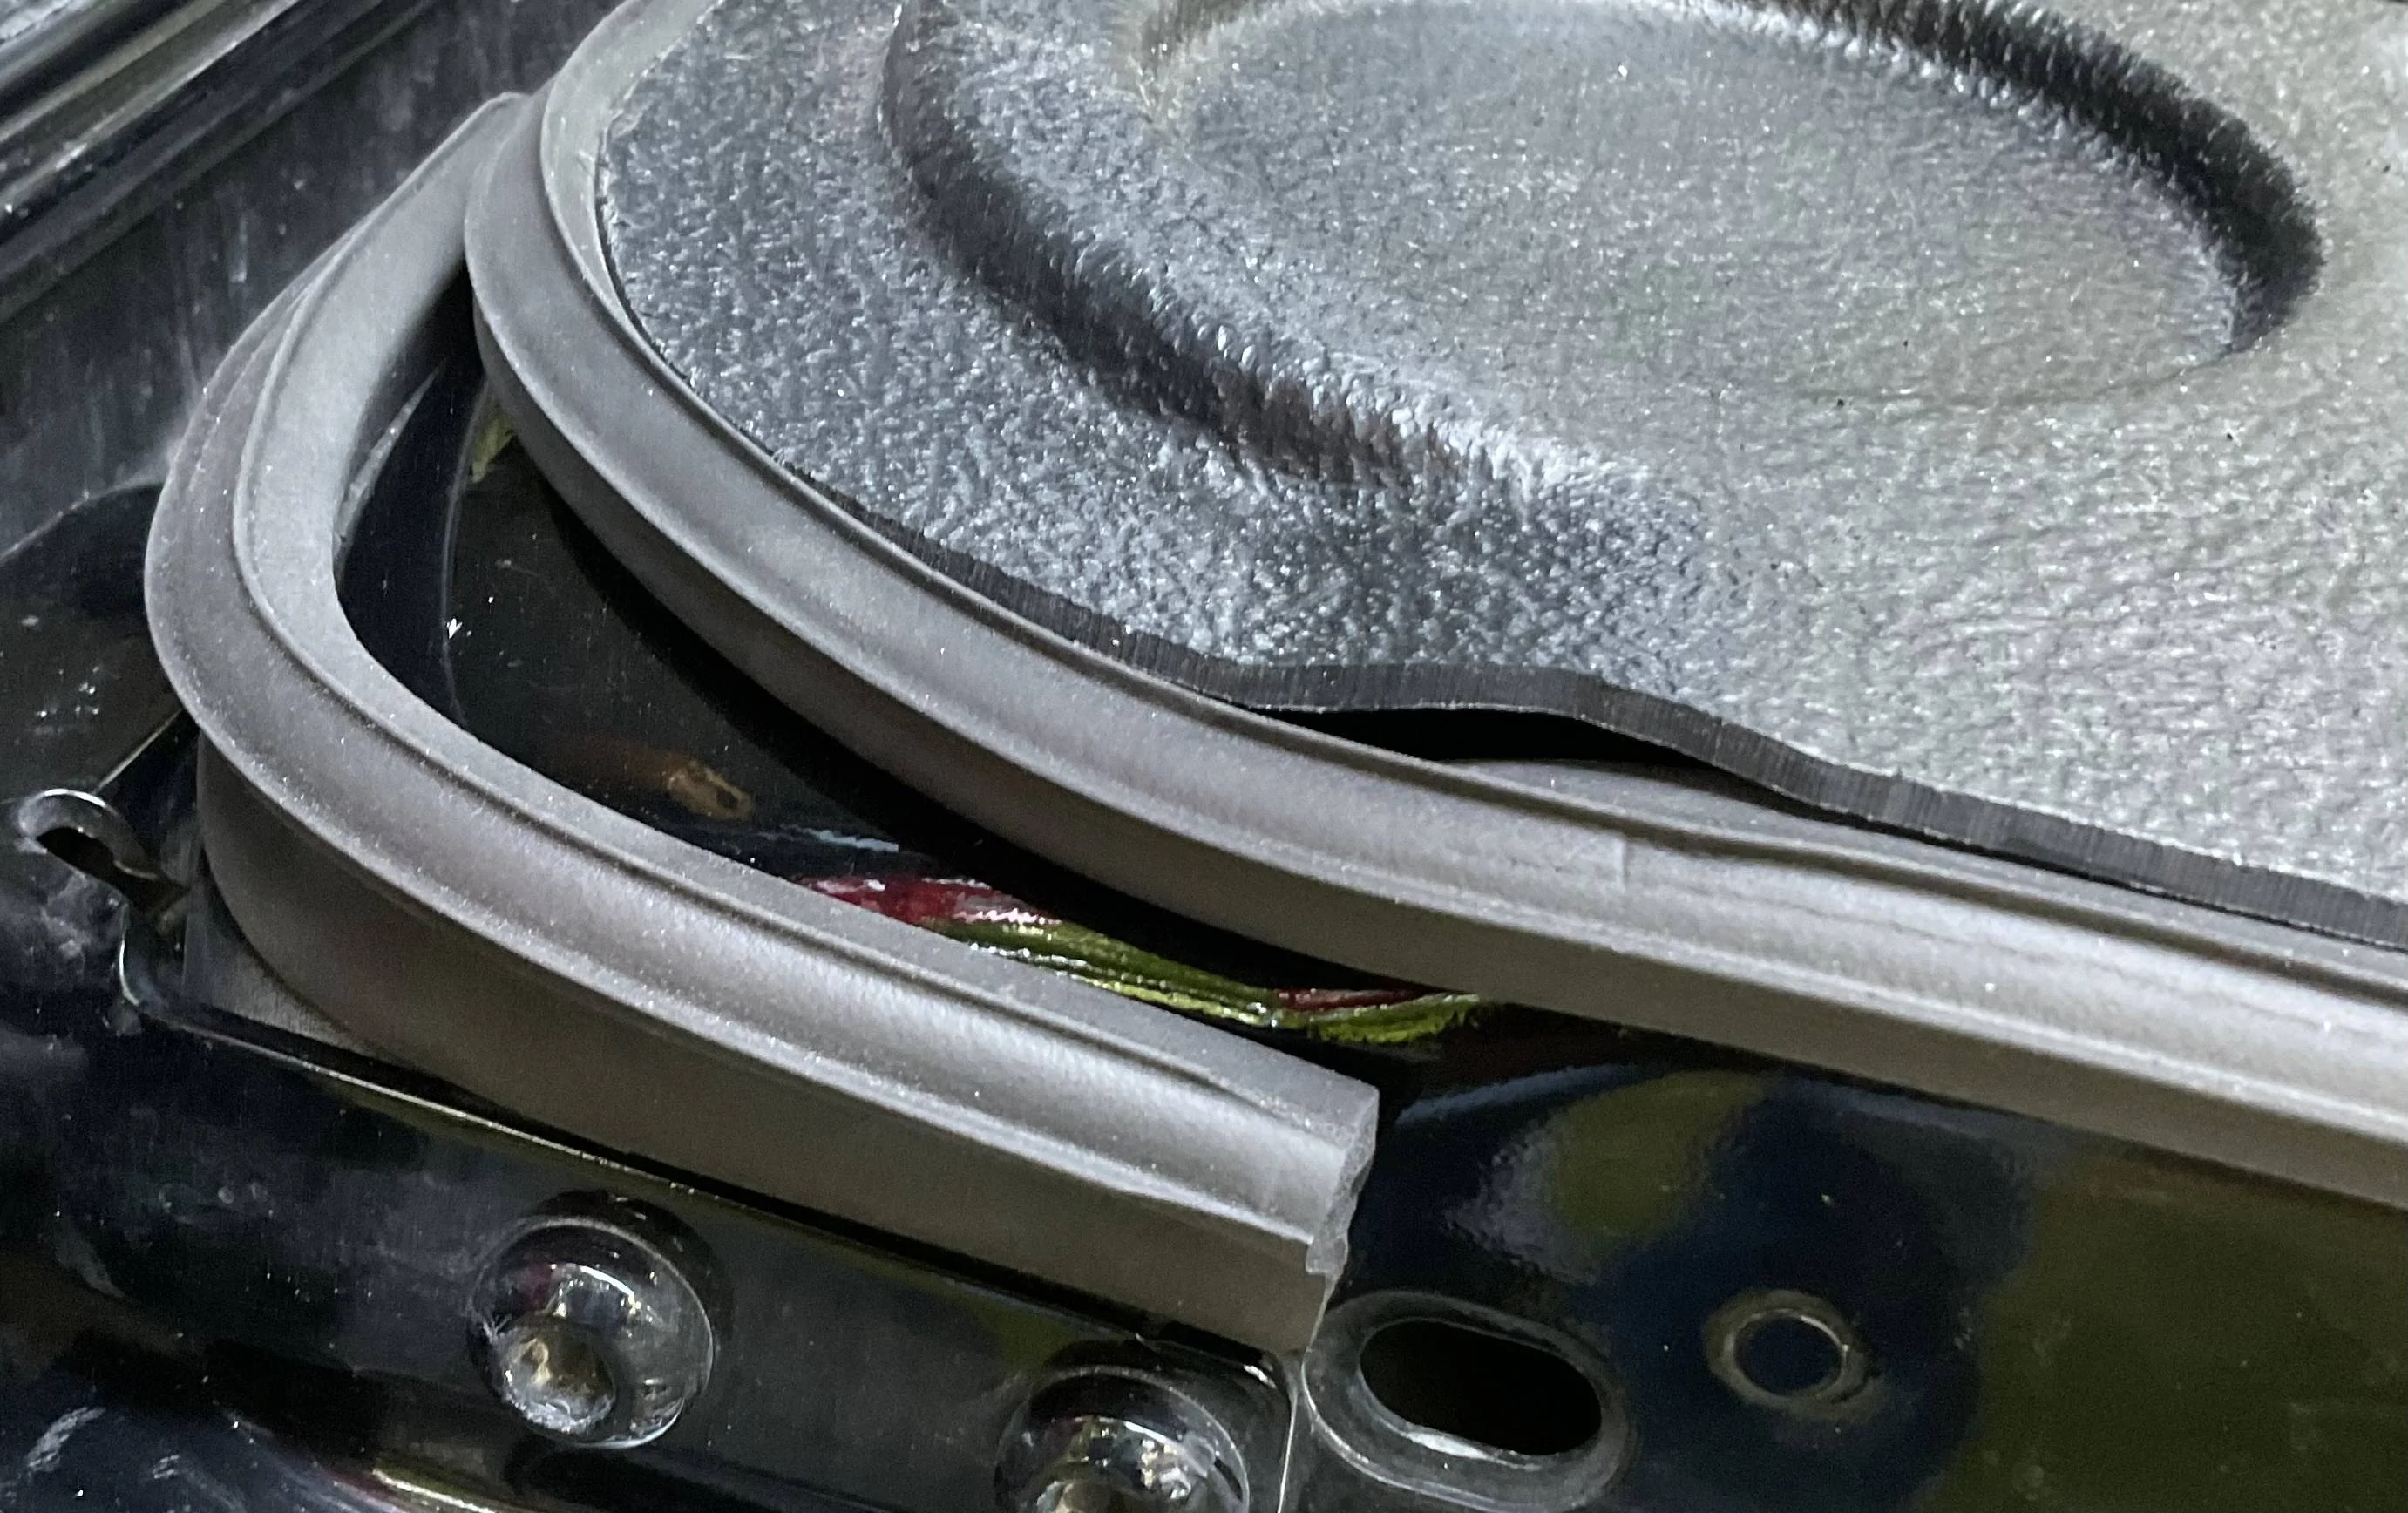
My cover has been on for four years so it was easy to see the scuffed up outline it created - bonus - because if I couldn’t see the outline, I’d have to put the cover back on (loosely) so I could tuck the sticky part under.
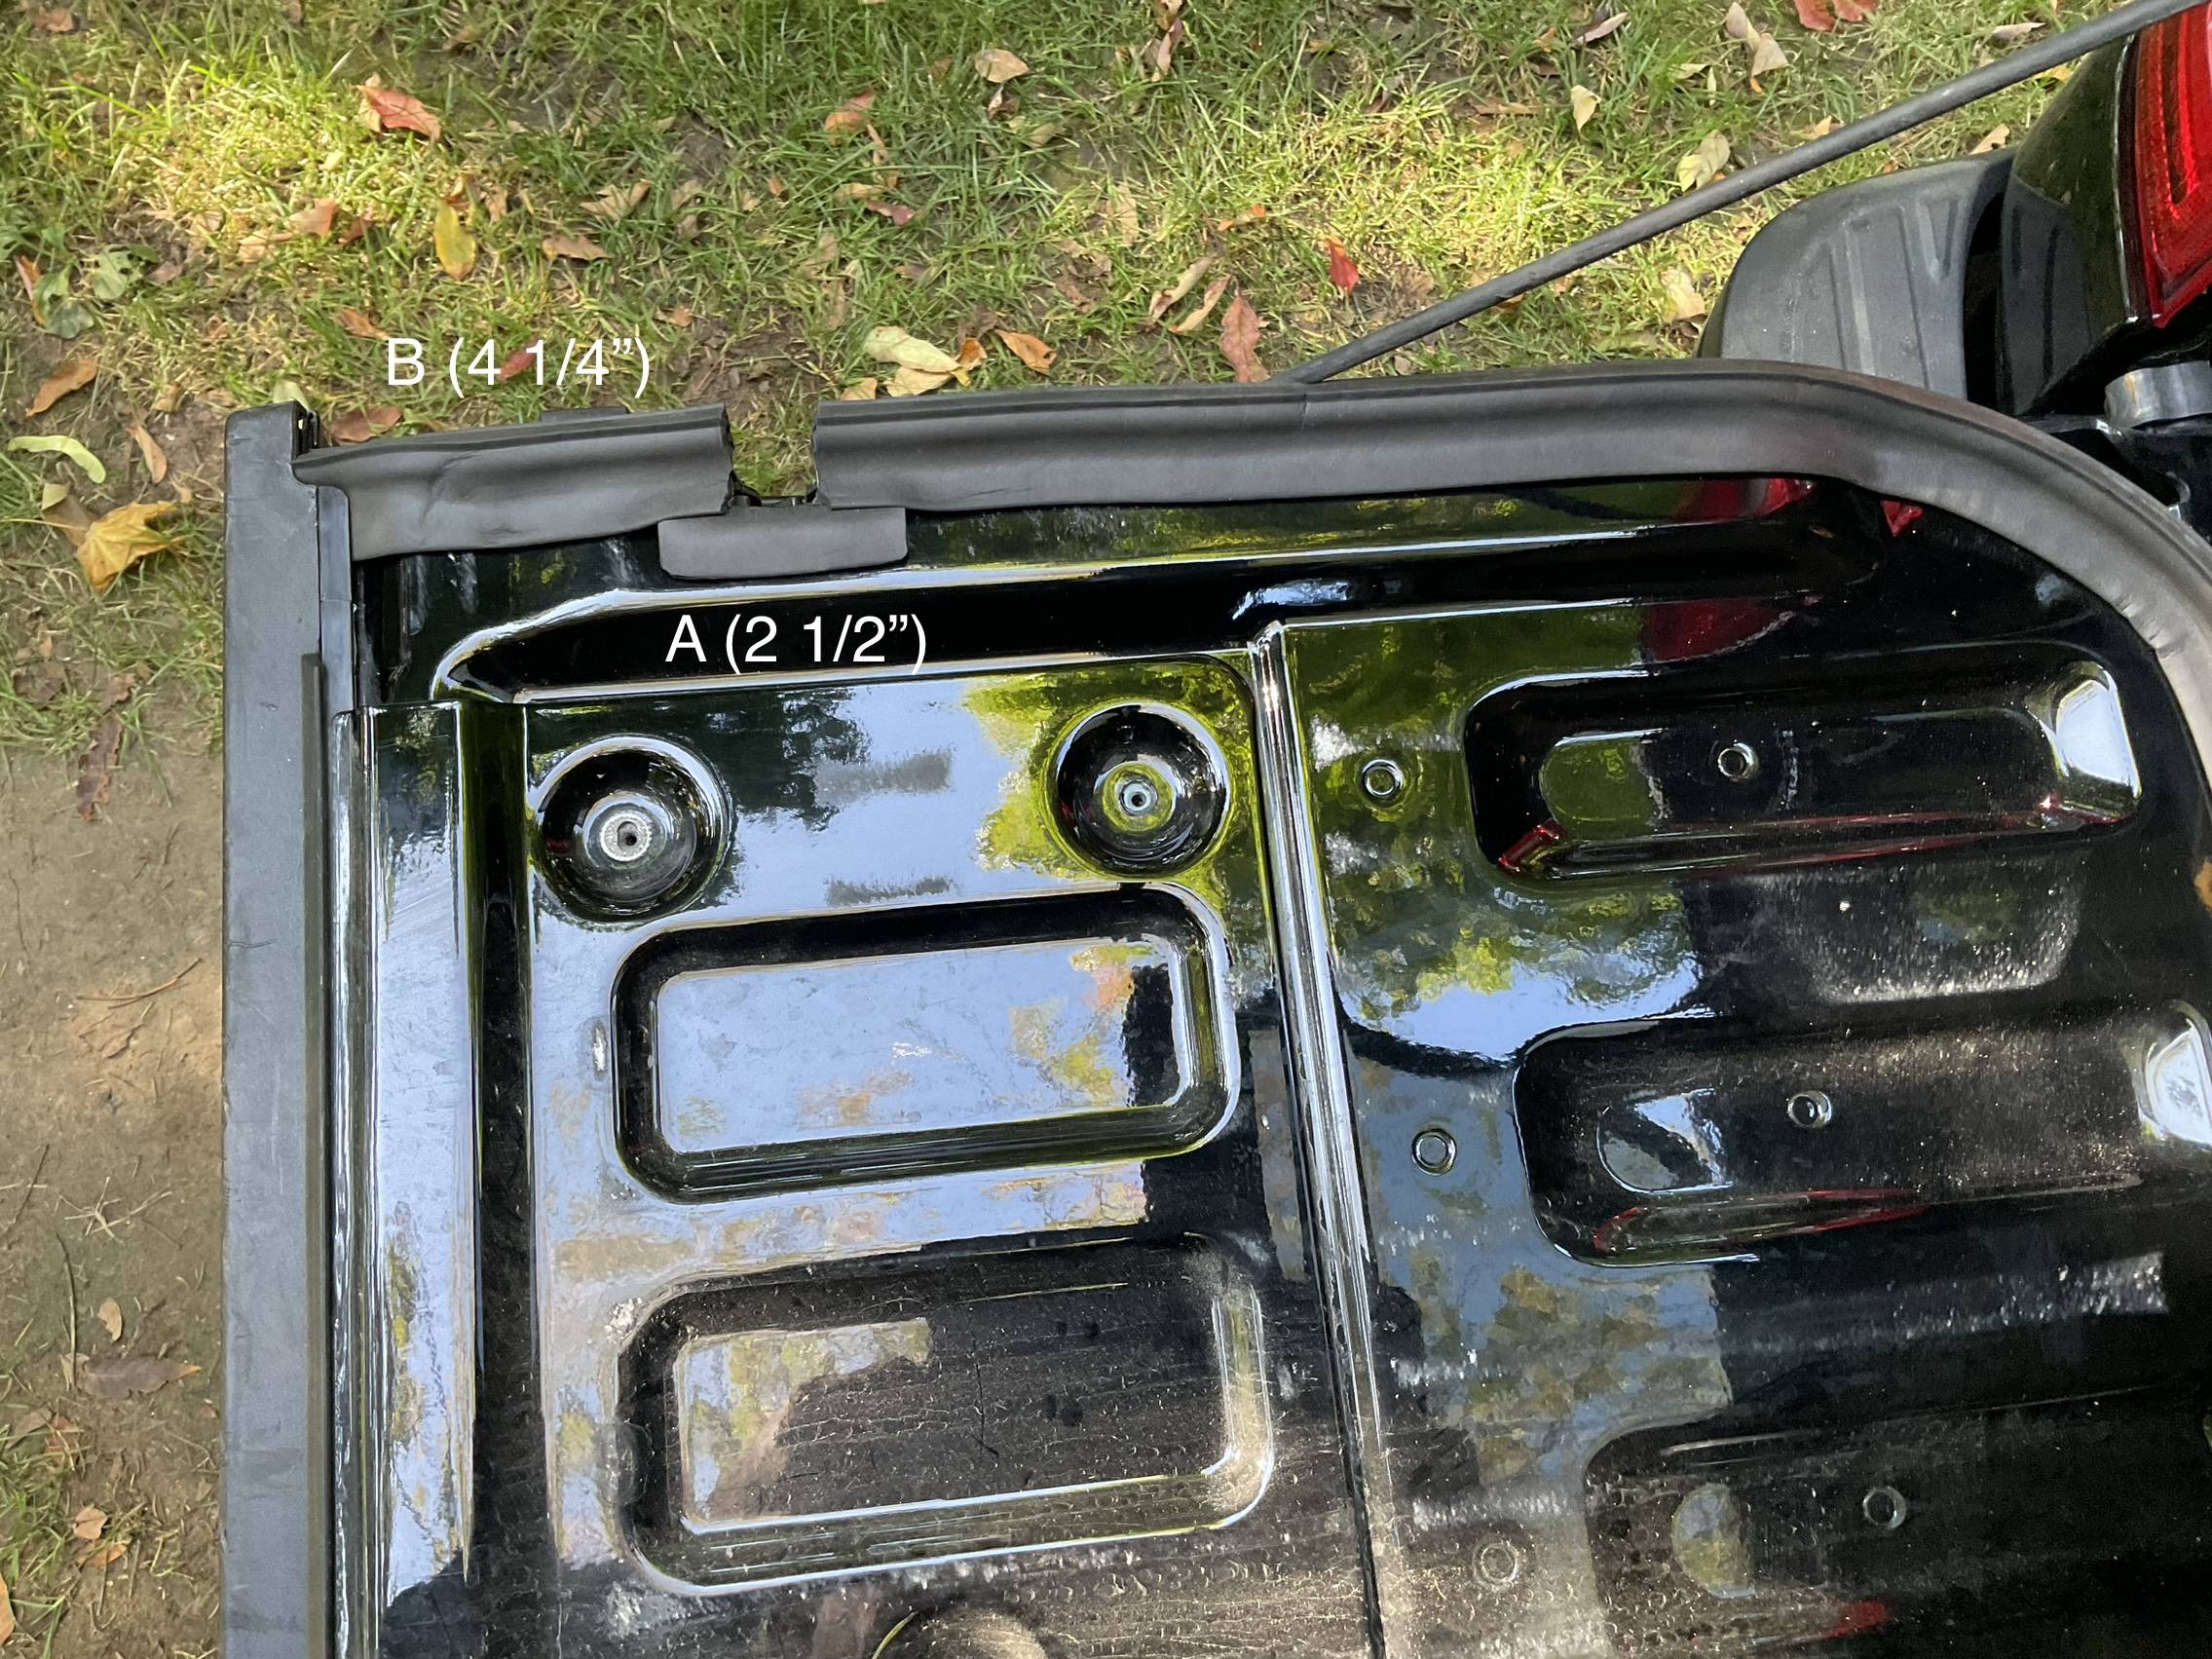
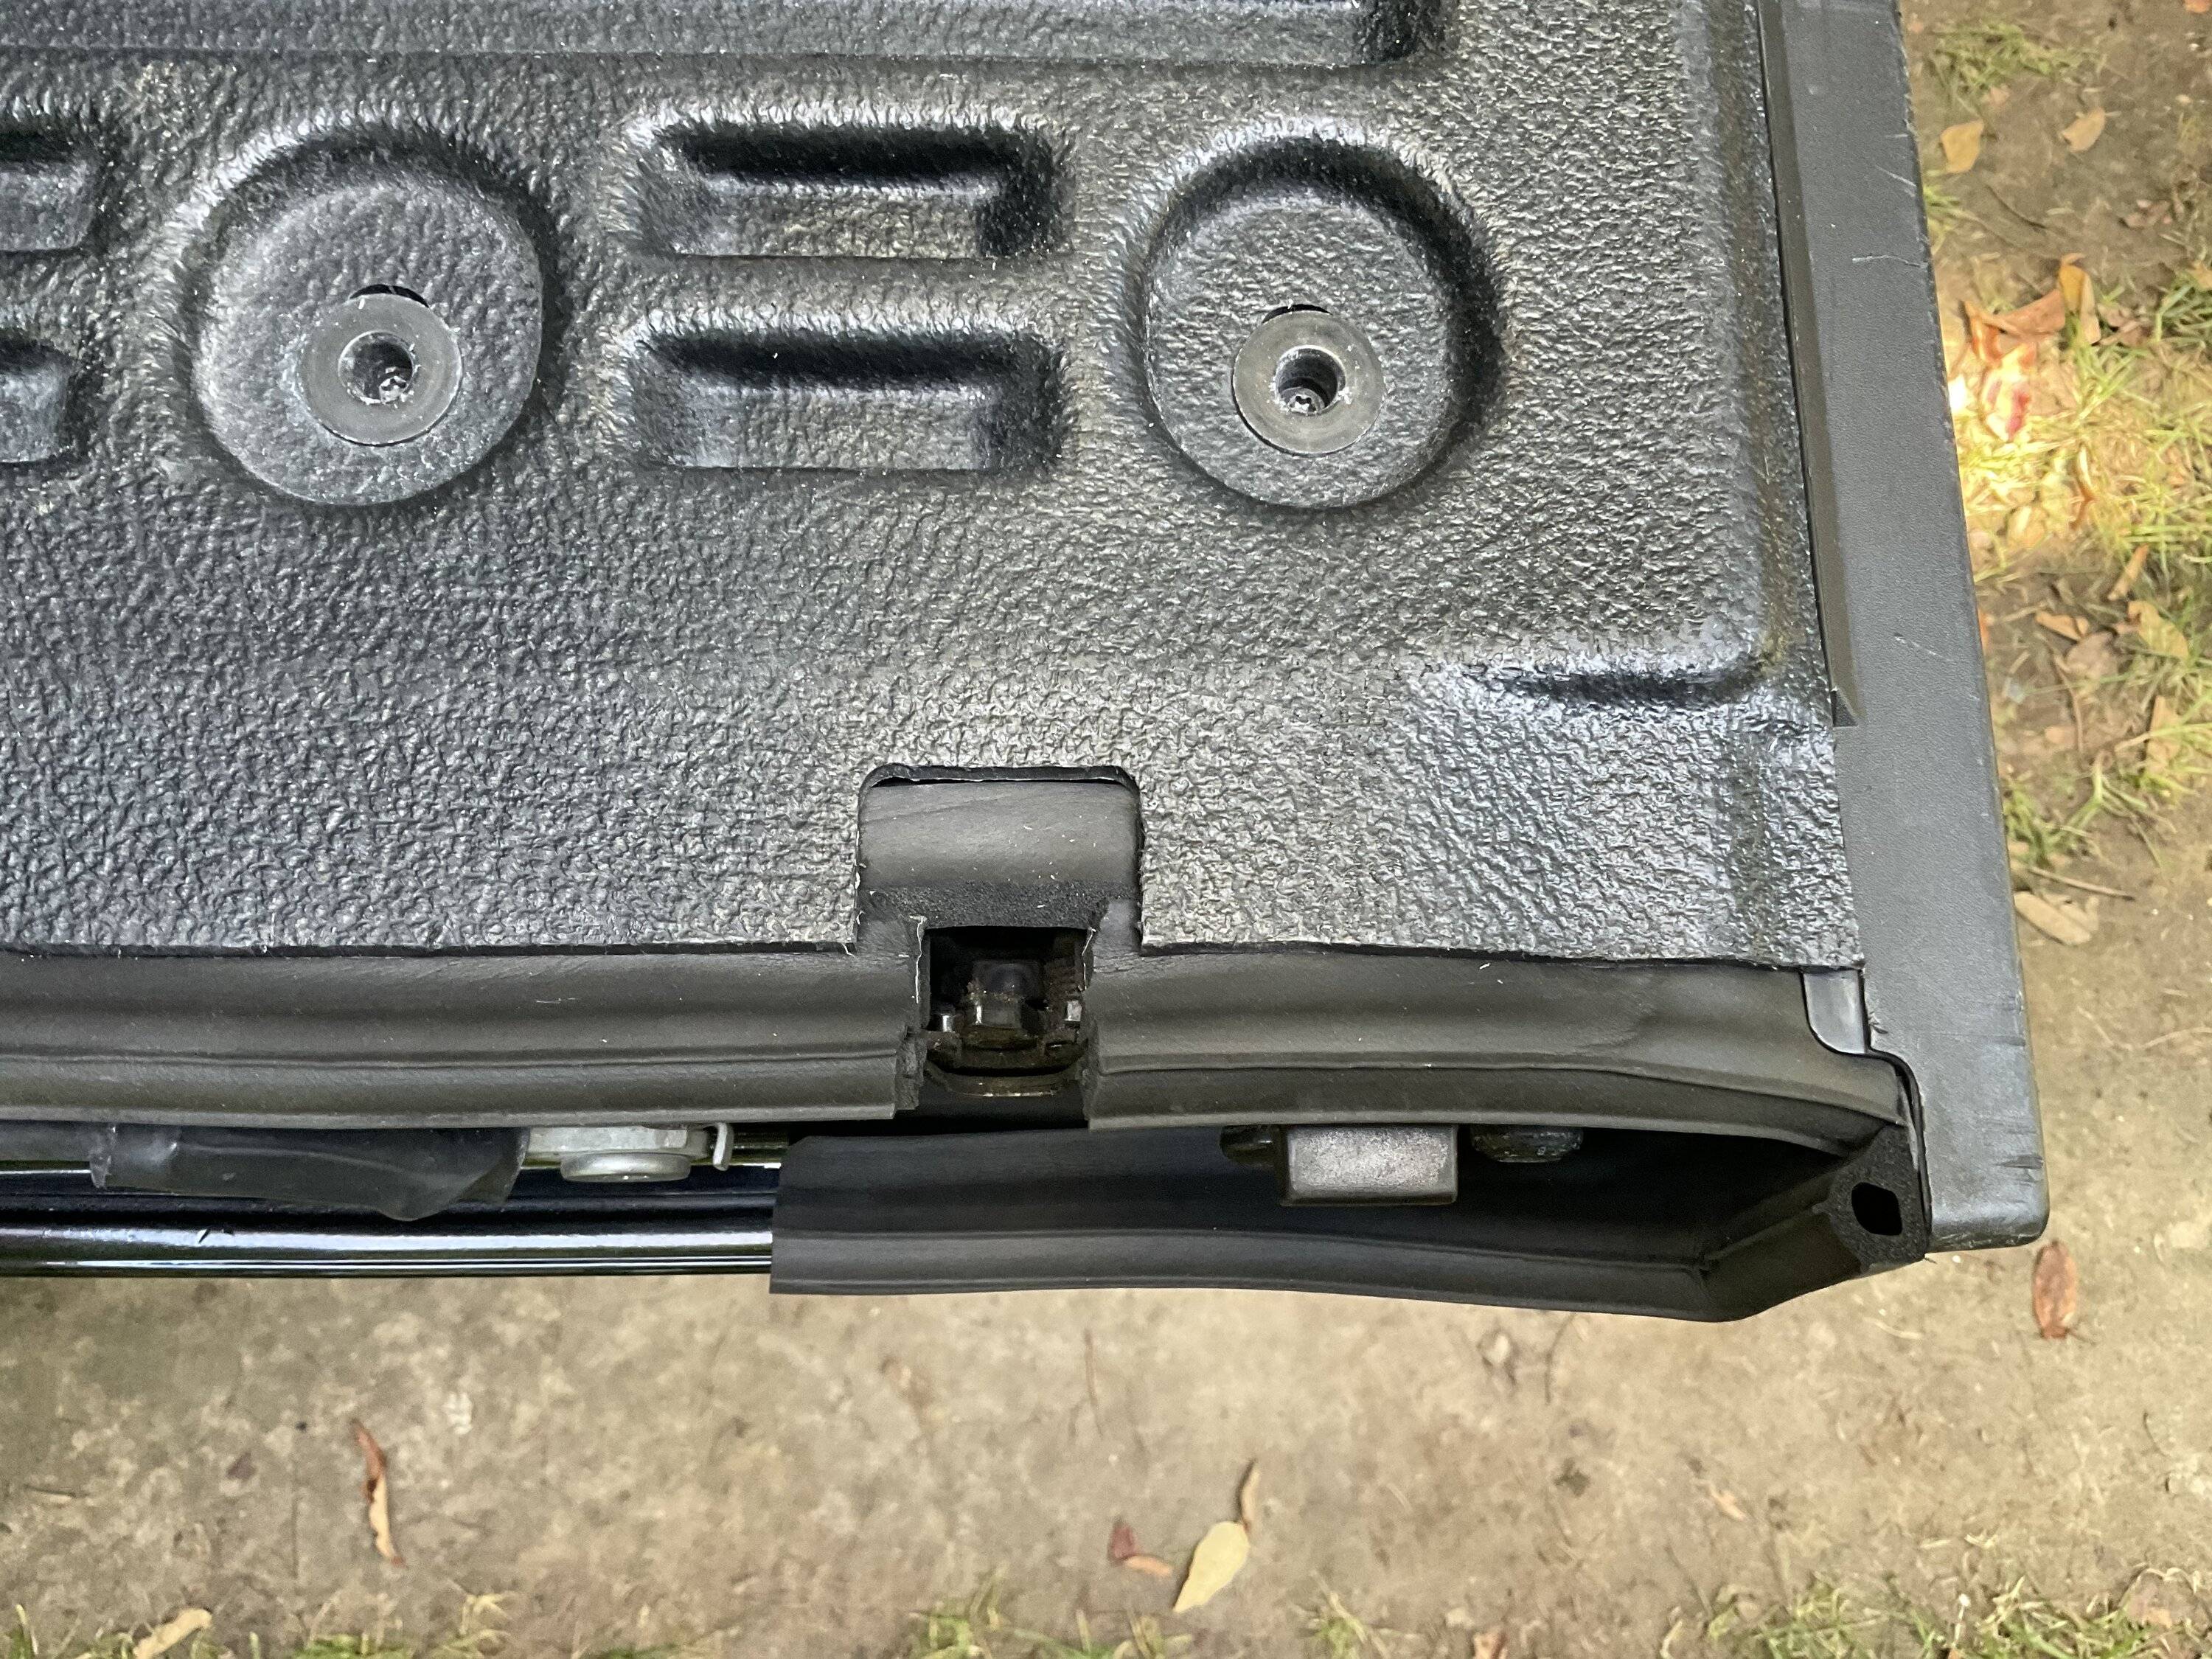
Second Step: Cut a piece of the thinner seal 2-1/2” (A) and another piece 4-1/4” (B). Cut the “bubble” section off the 2-1/2” piece - only the adhesive strip and a little bit of foam will be left. Expose the adhesive on the 2-1/2” piece place it on inside edge of the tailgate latch opening. It will be overlapped by other pieces of seal. It is really just meant as a trim piece to provide a finished look. Expose the adhesive on the 4-1/2” piece and, using a plastic trim tool, gently pry the plastic tailgate cap up and insert the adhesive flap under the cap - the start of the bubble should be flush to the side of the tailgate and it should terminate at the latch opening, slightly overlapping the 2-1/2” trim piece. Expose a generous amount of adhesive from your roll of seal and start laying it down on the opposite side of the latch opening, also slightly overlapping the small trim piece. Continue around the curve of the tailgate to the centre of the tailgate bottom and cut the seal.
See below…

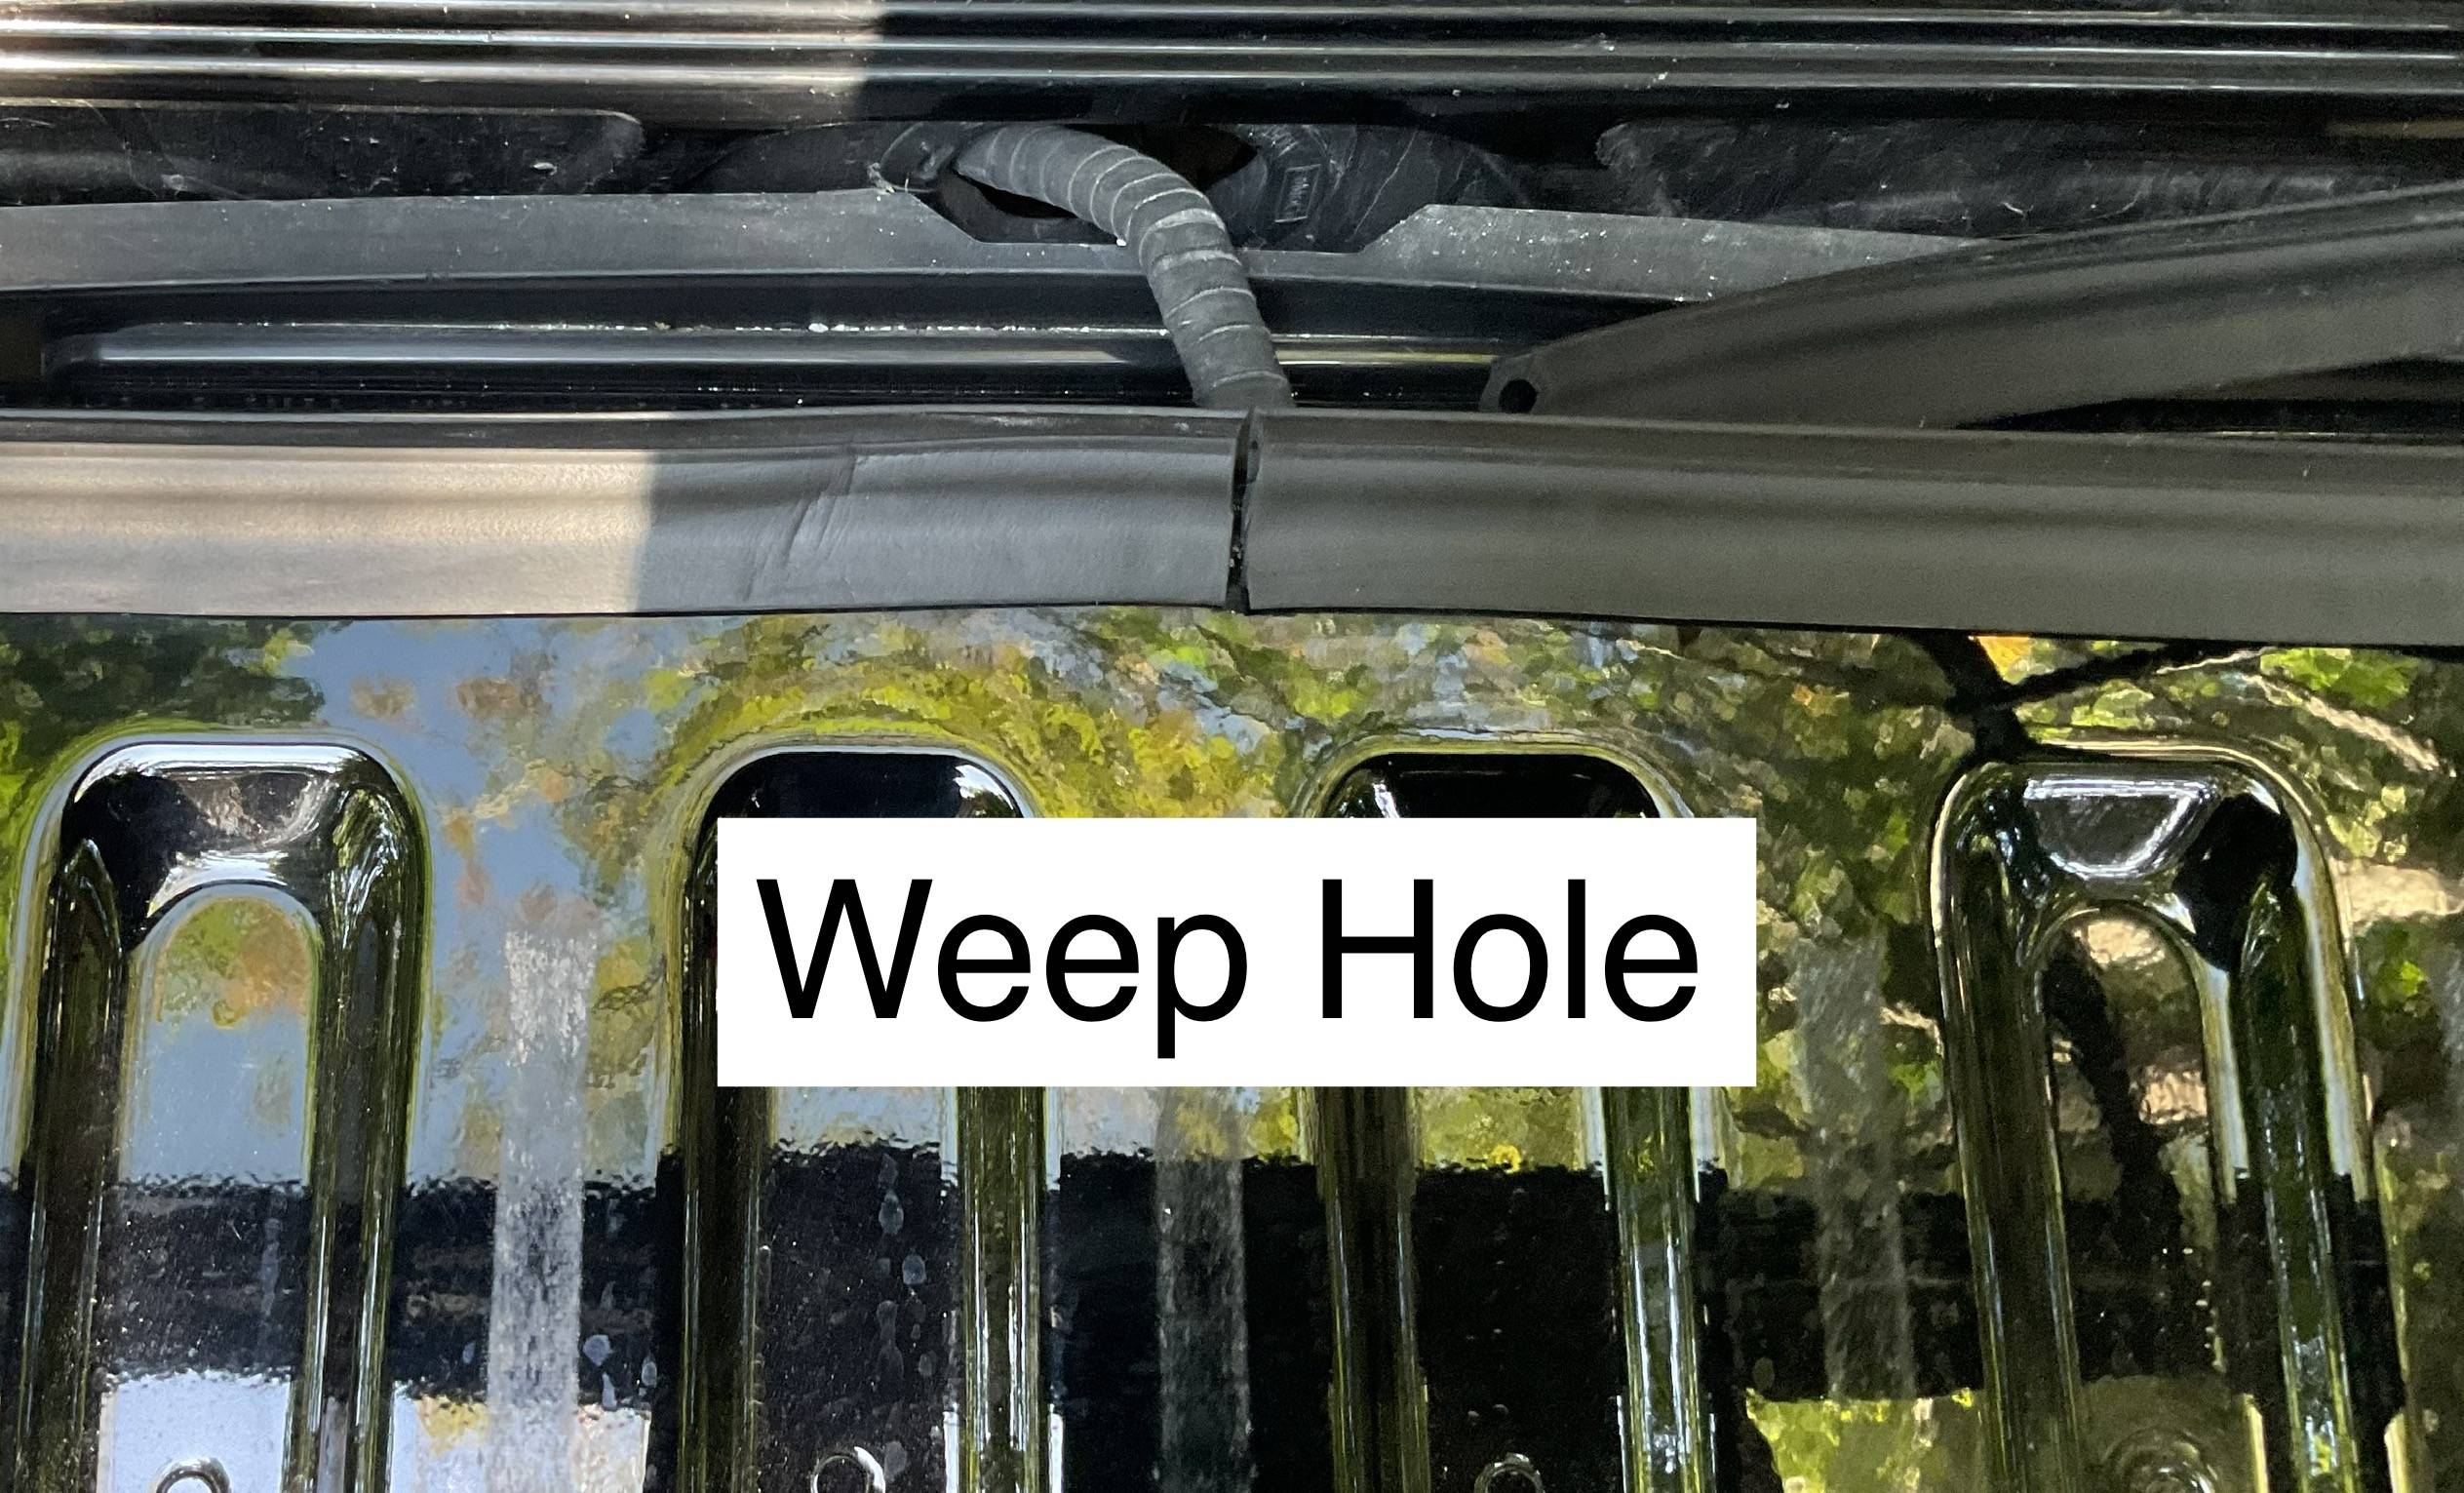
Third Step: Repeat second step for the opposite side, leaving a small, 1/8” gap as a weep hole.

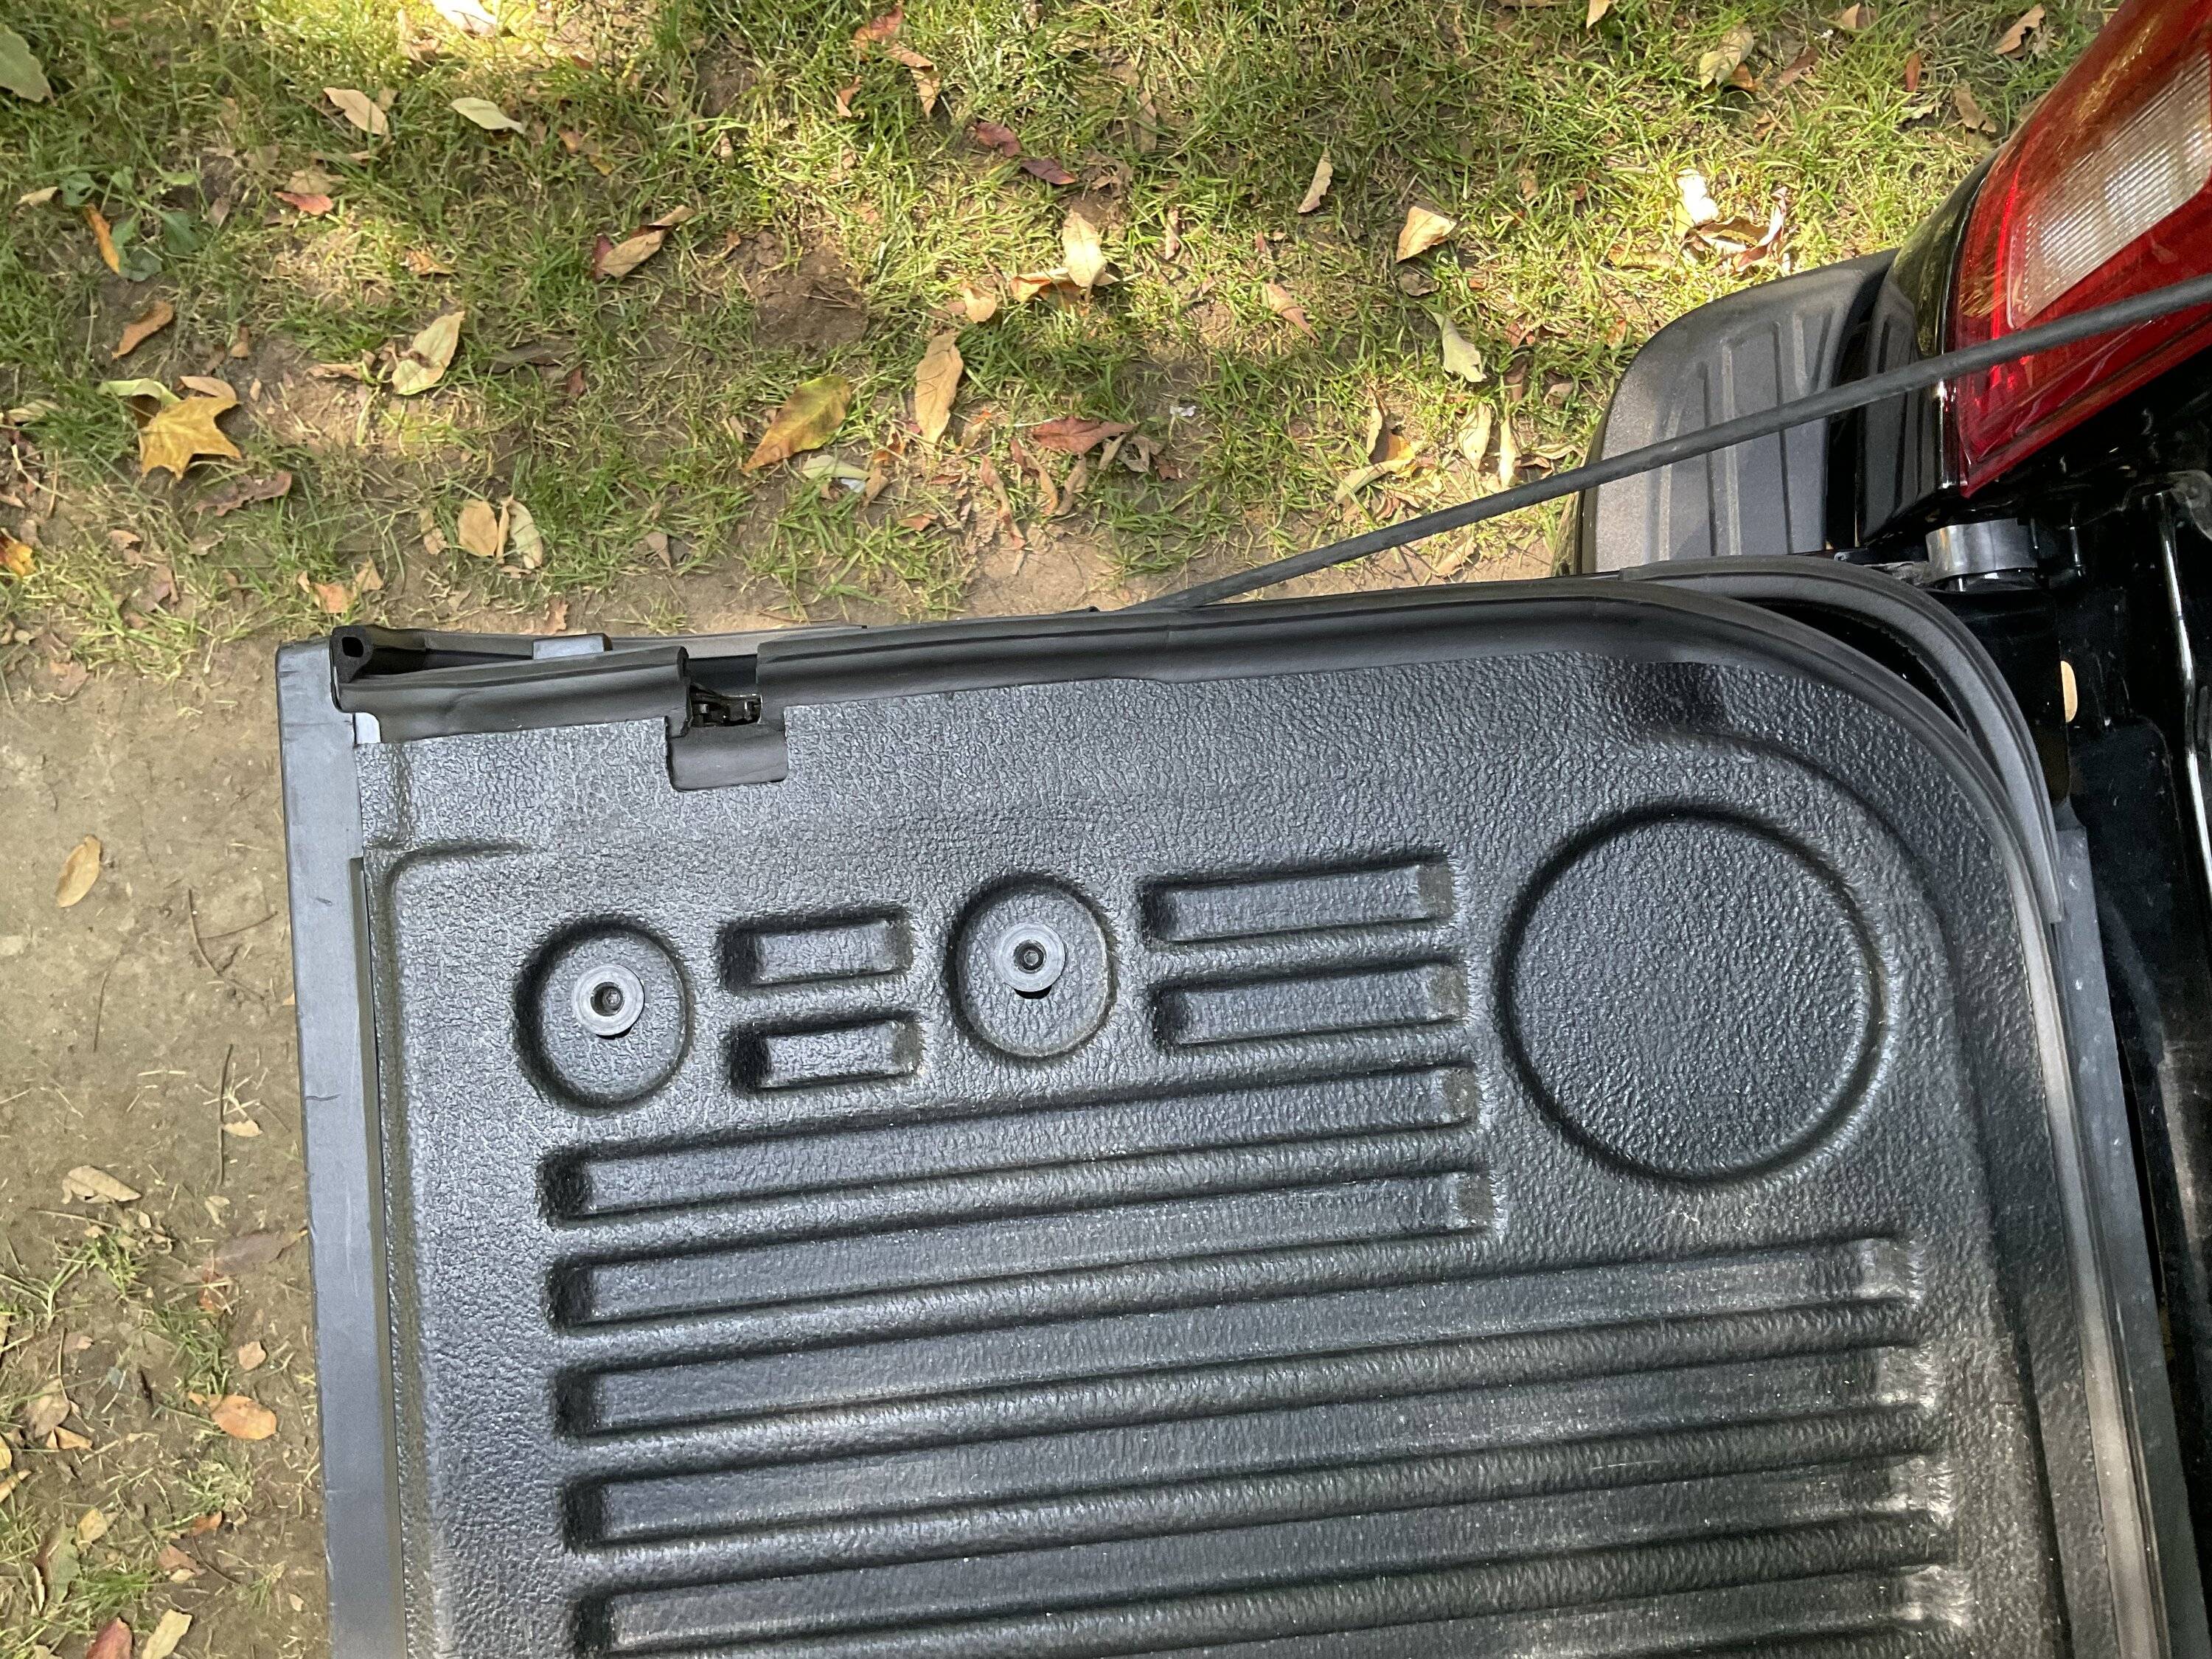
Fourth Step: Replace the tailgate cover and admire your work so far.
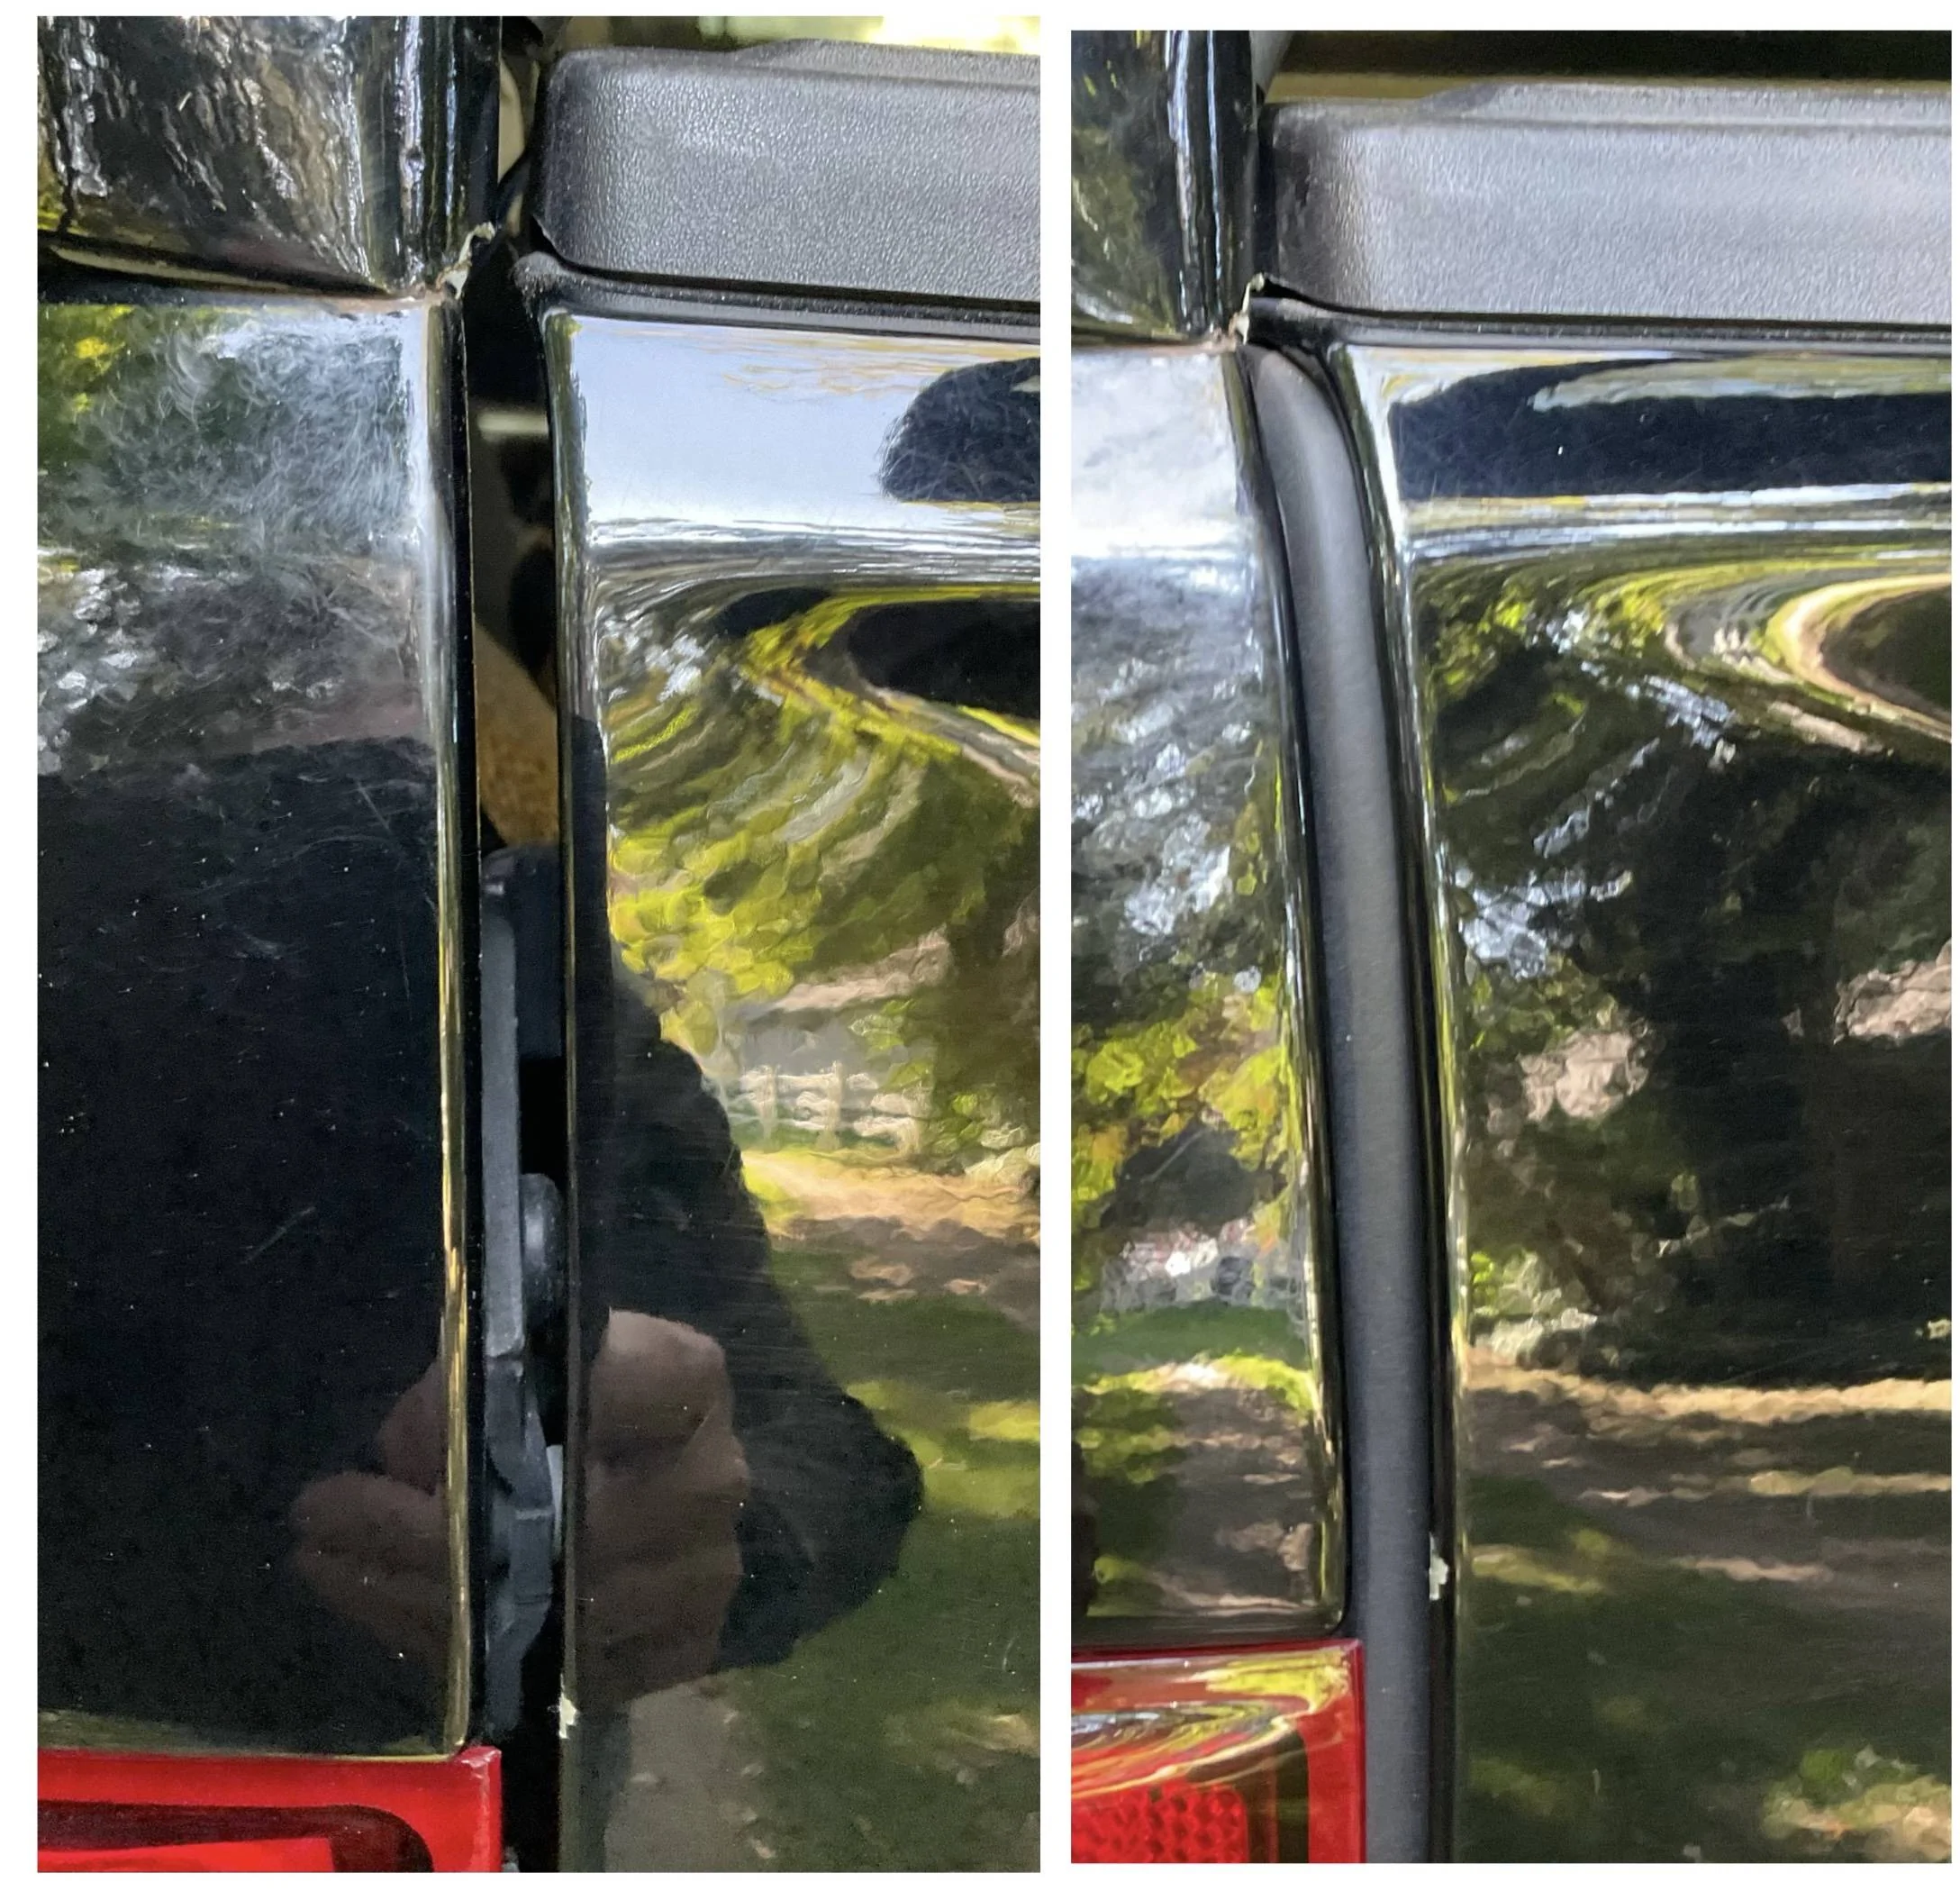
Fifth Step: Close the tailgate and feel how the seal works. Now, look at the top portion of the tailgate above the tail lights - there is a gap that you can see through - it runs from the top of the tailgate support cable to the top of the tailgate.
Using only as much of the smaller seal as needed (you’re getting low at this point and have another area to address), run that seal as shown below.…
The adhesive flap should be tight to the side of the tailgate - too far out and it bulges through the gap when you close the tailgate. Too far in and the gap doesn’t seal. Repeat for the other side.
This is what you’re hoping to achieve….

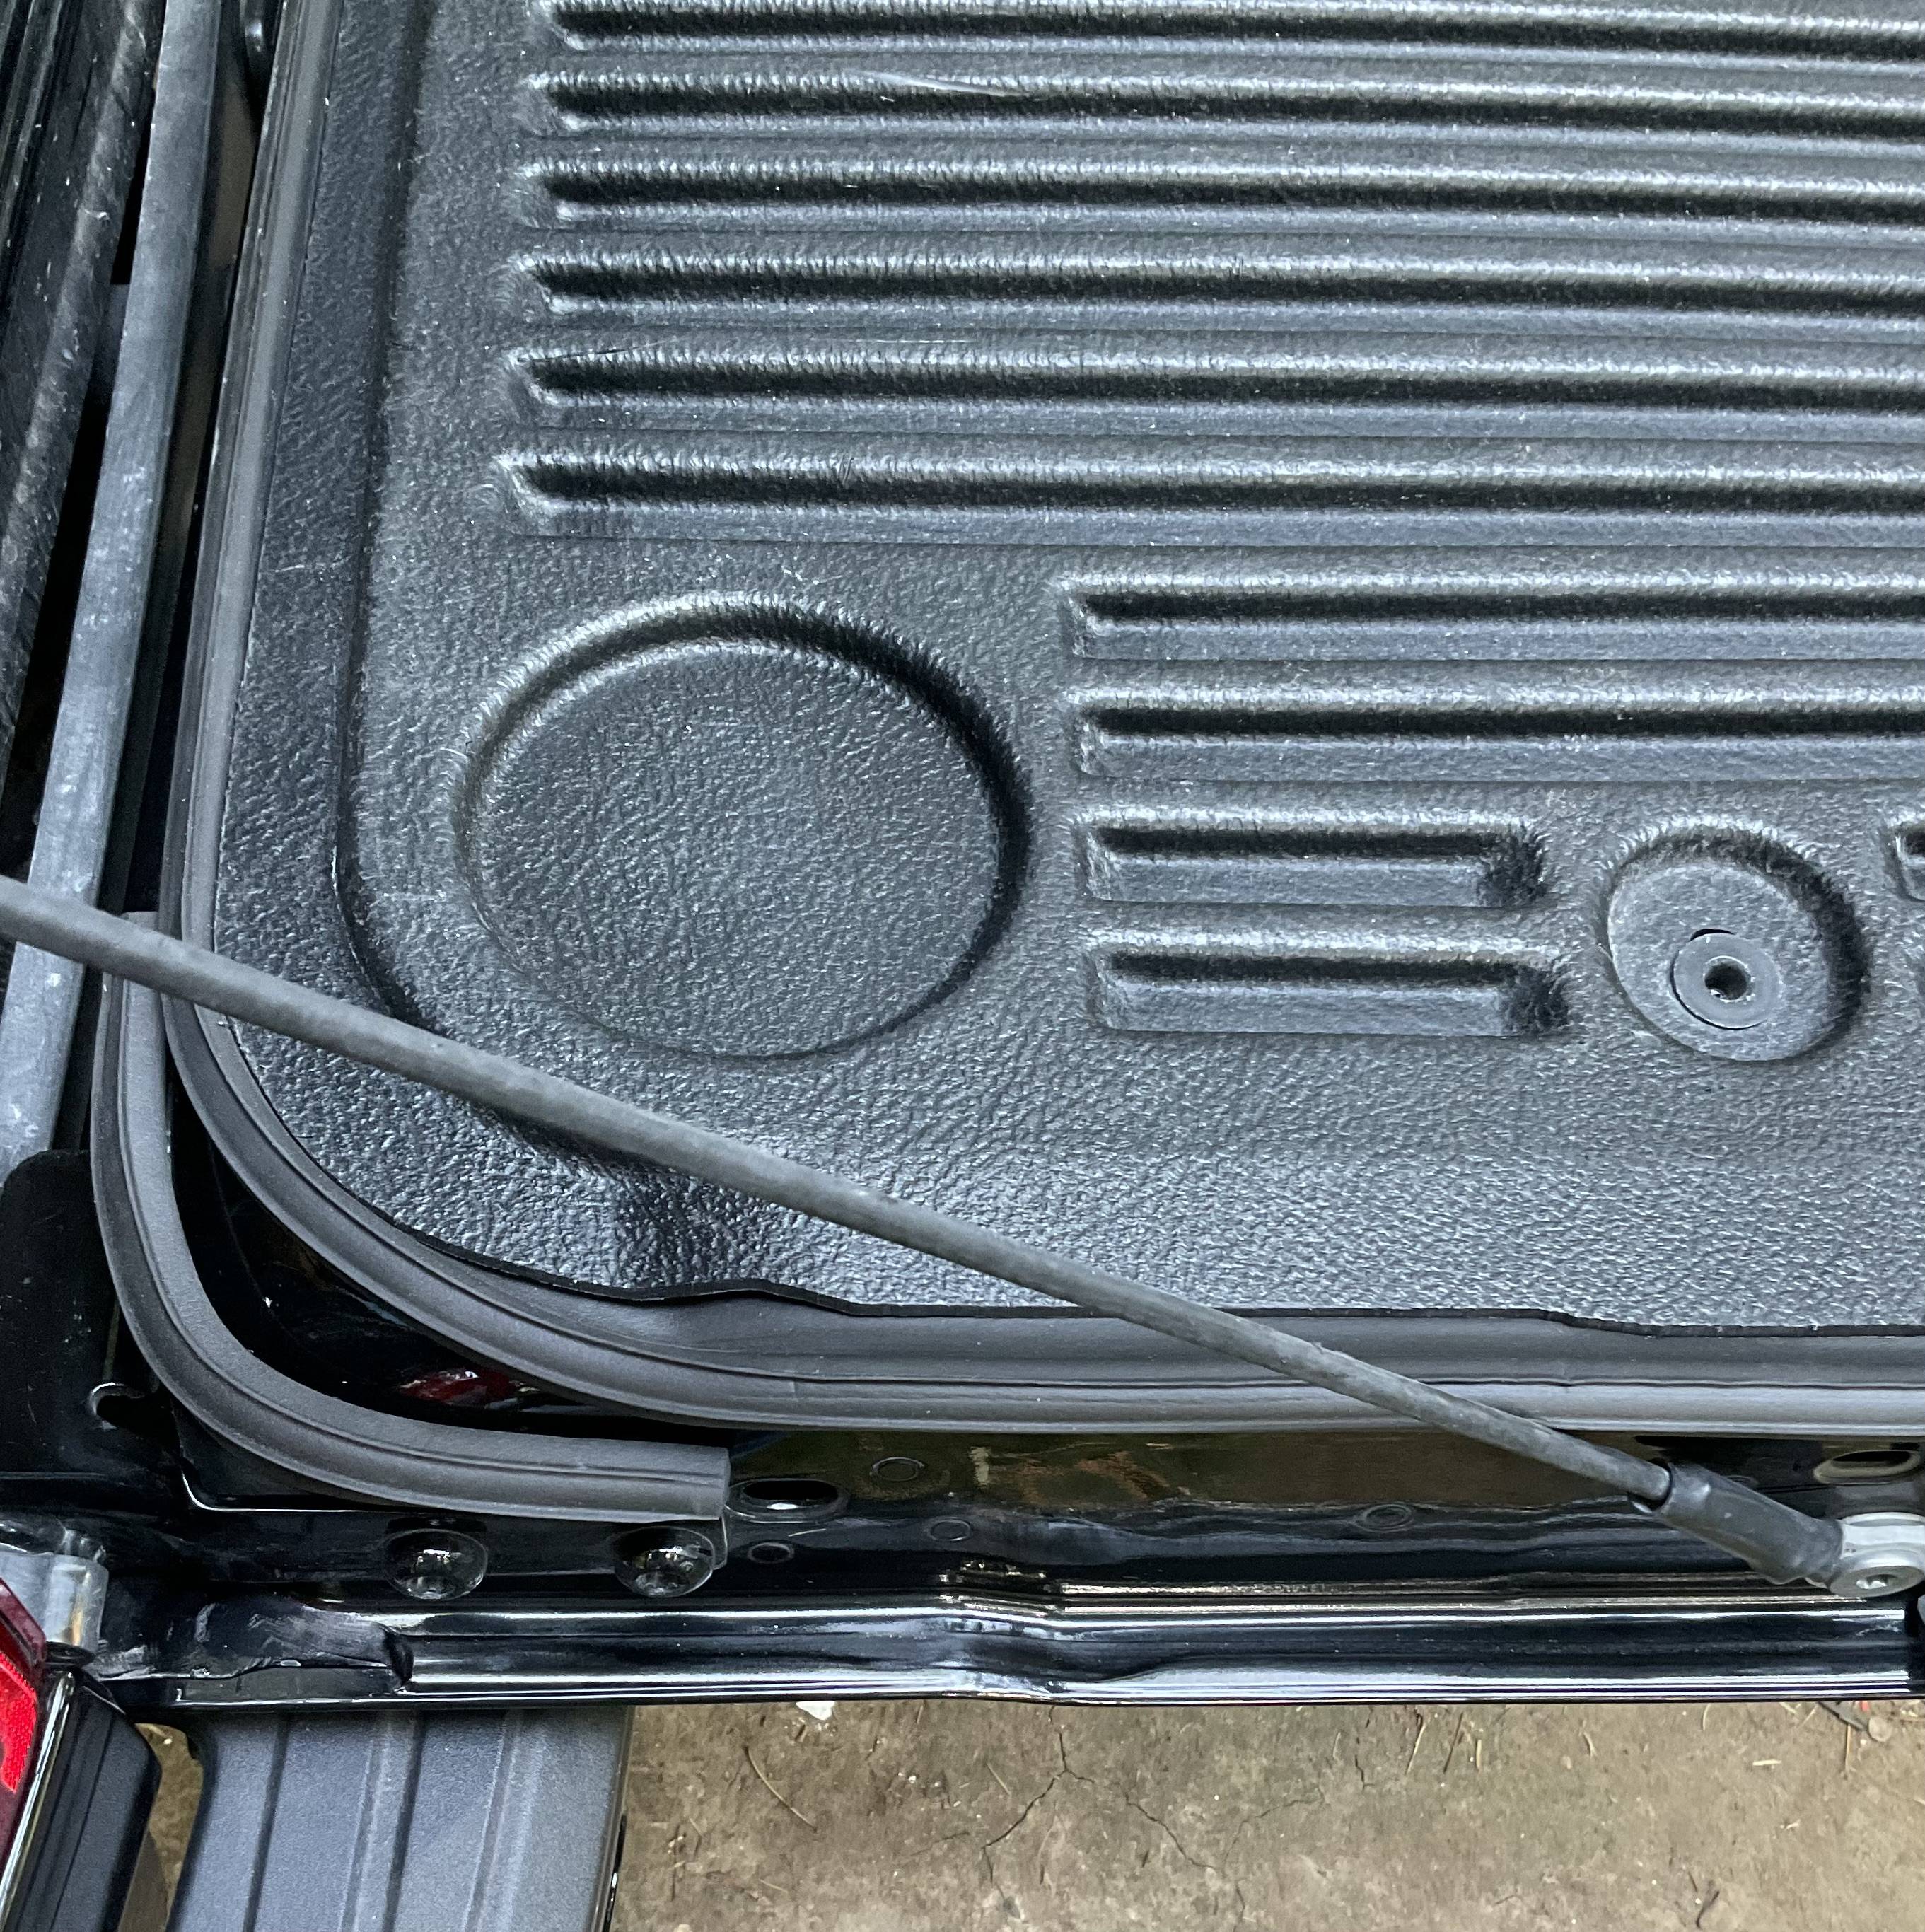
Sixth Step: With the tailgate closed, reach down into the bottom corner of the tailgate and you’ll feel a gap. You should have just enough seal left to close it up. Open up the tailgate and cut the last of your roll of small seal in half - should be about 5” or 6” each. Attach these on the bottom rounded coner of each side of the tailgate, bubble side up, along the hinge bracket as shown…


Close your tailgate and reach down to feel the seal.
You’re done.
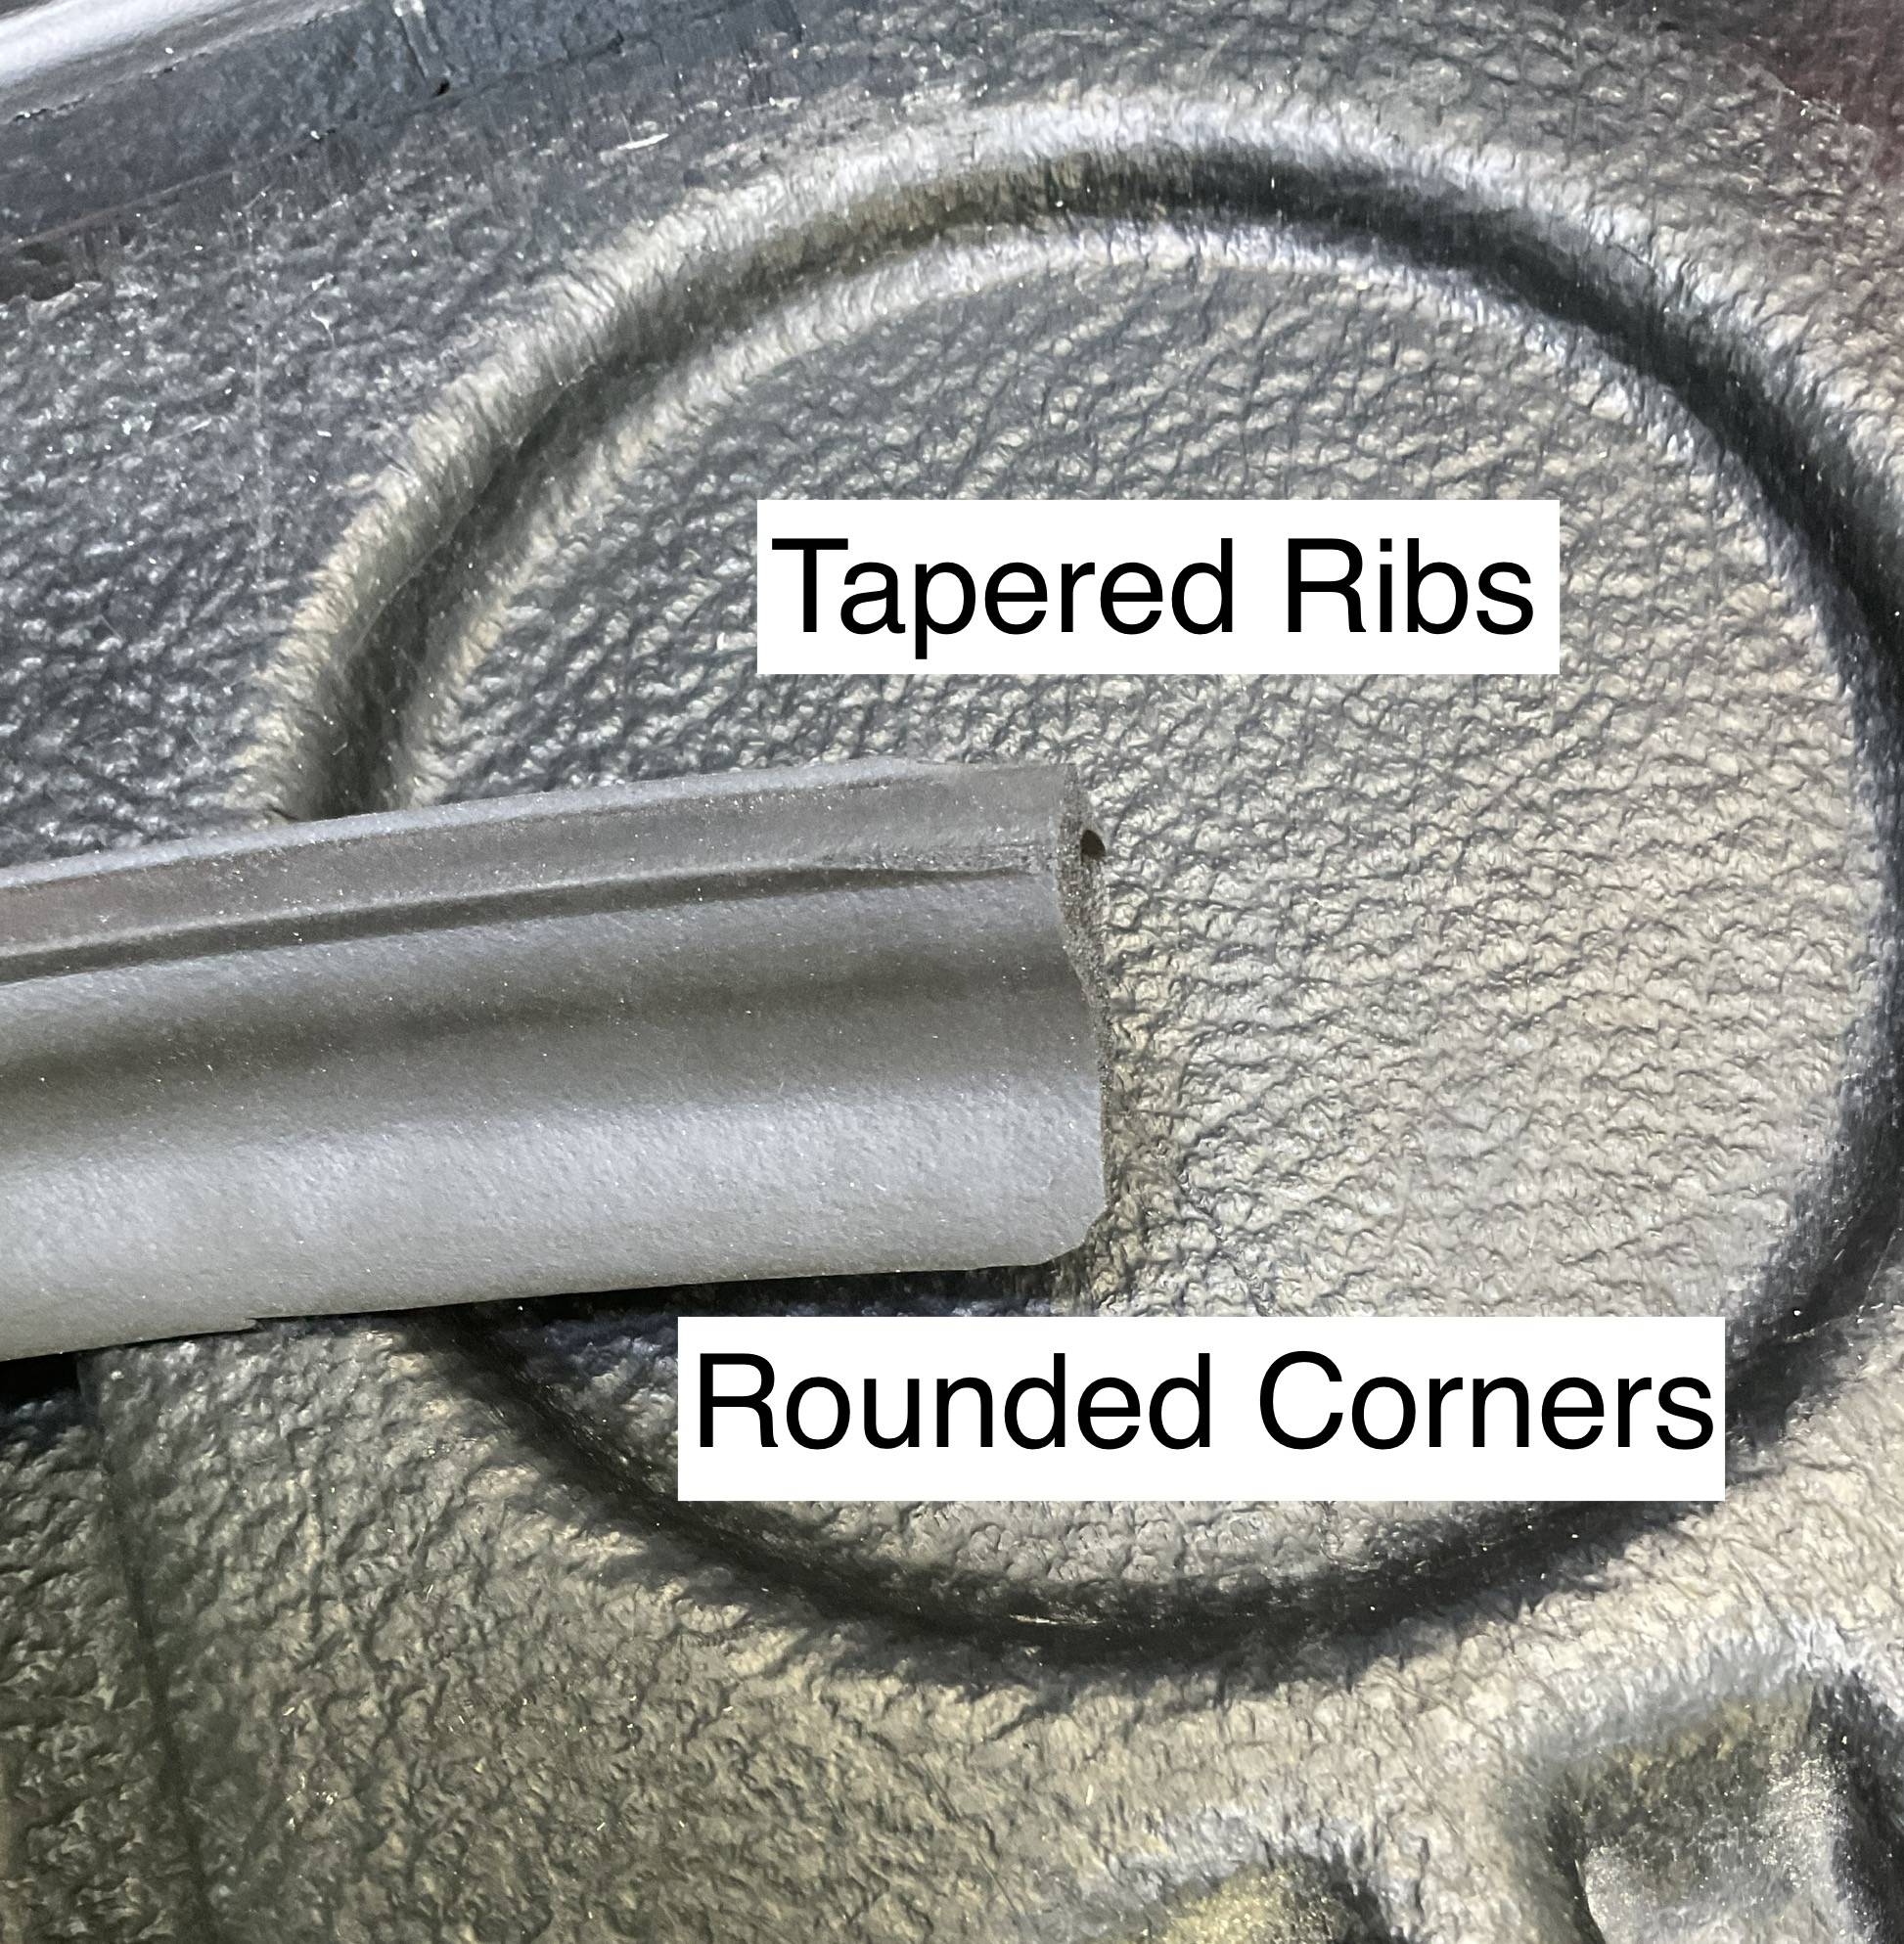
If you want to get all fancy, you can round the edges of the pieces you cut and taper the ribs - yes, I did that…I’m retired…I can do this stuff all day…I am also a bit anal retentive about such things…

Now, whenever I look out the rear window, I’m no longer fussed by the gap. Will the bottom edge get chewed up by tool cases, building materials, etc? Maybe, but the sides will still be fine and that was my goal.
Sponsored
