Isuzu elf would be better
Active Member
- Thread starter
- #1
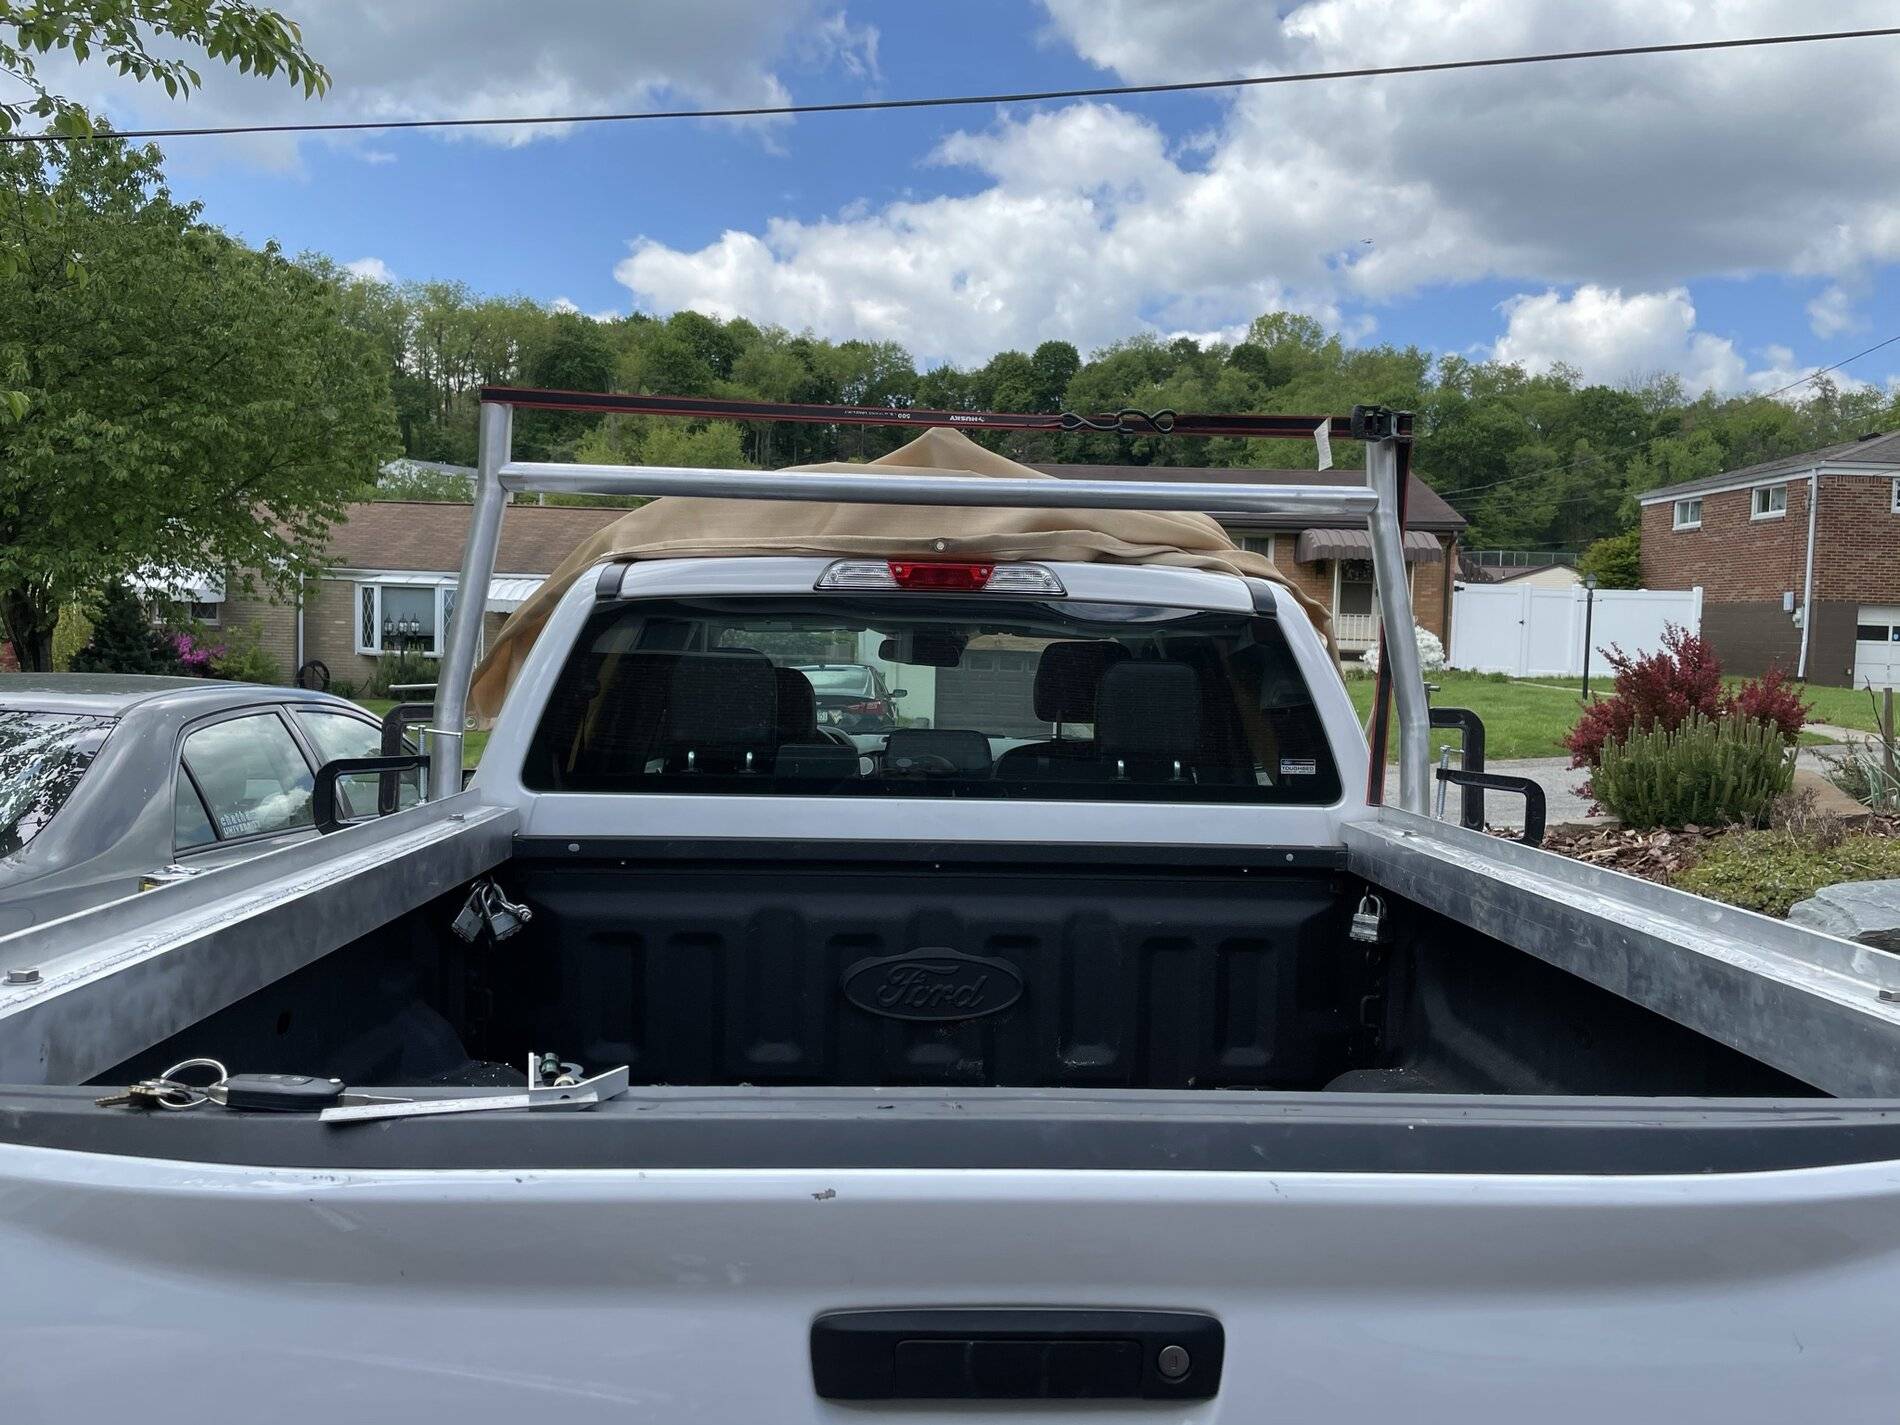
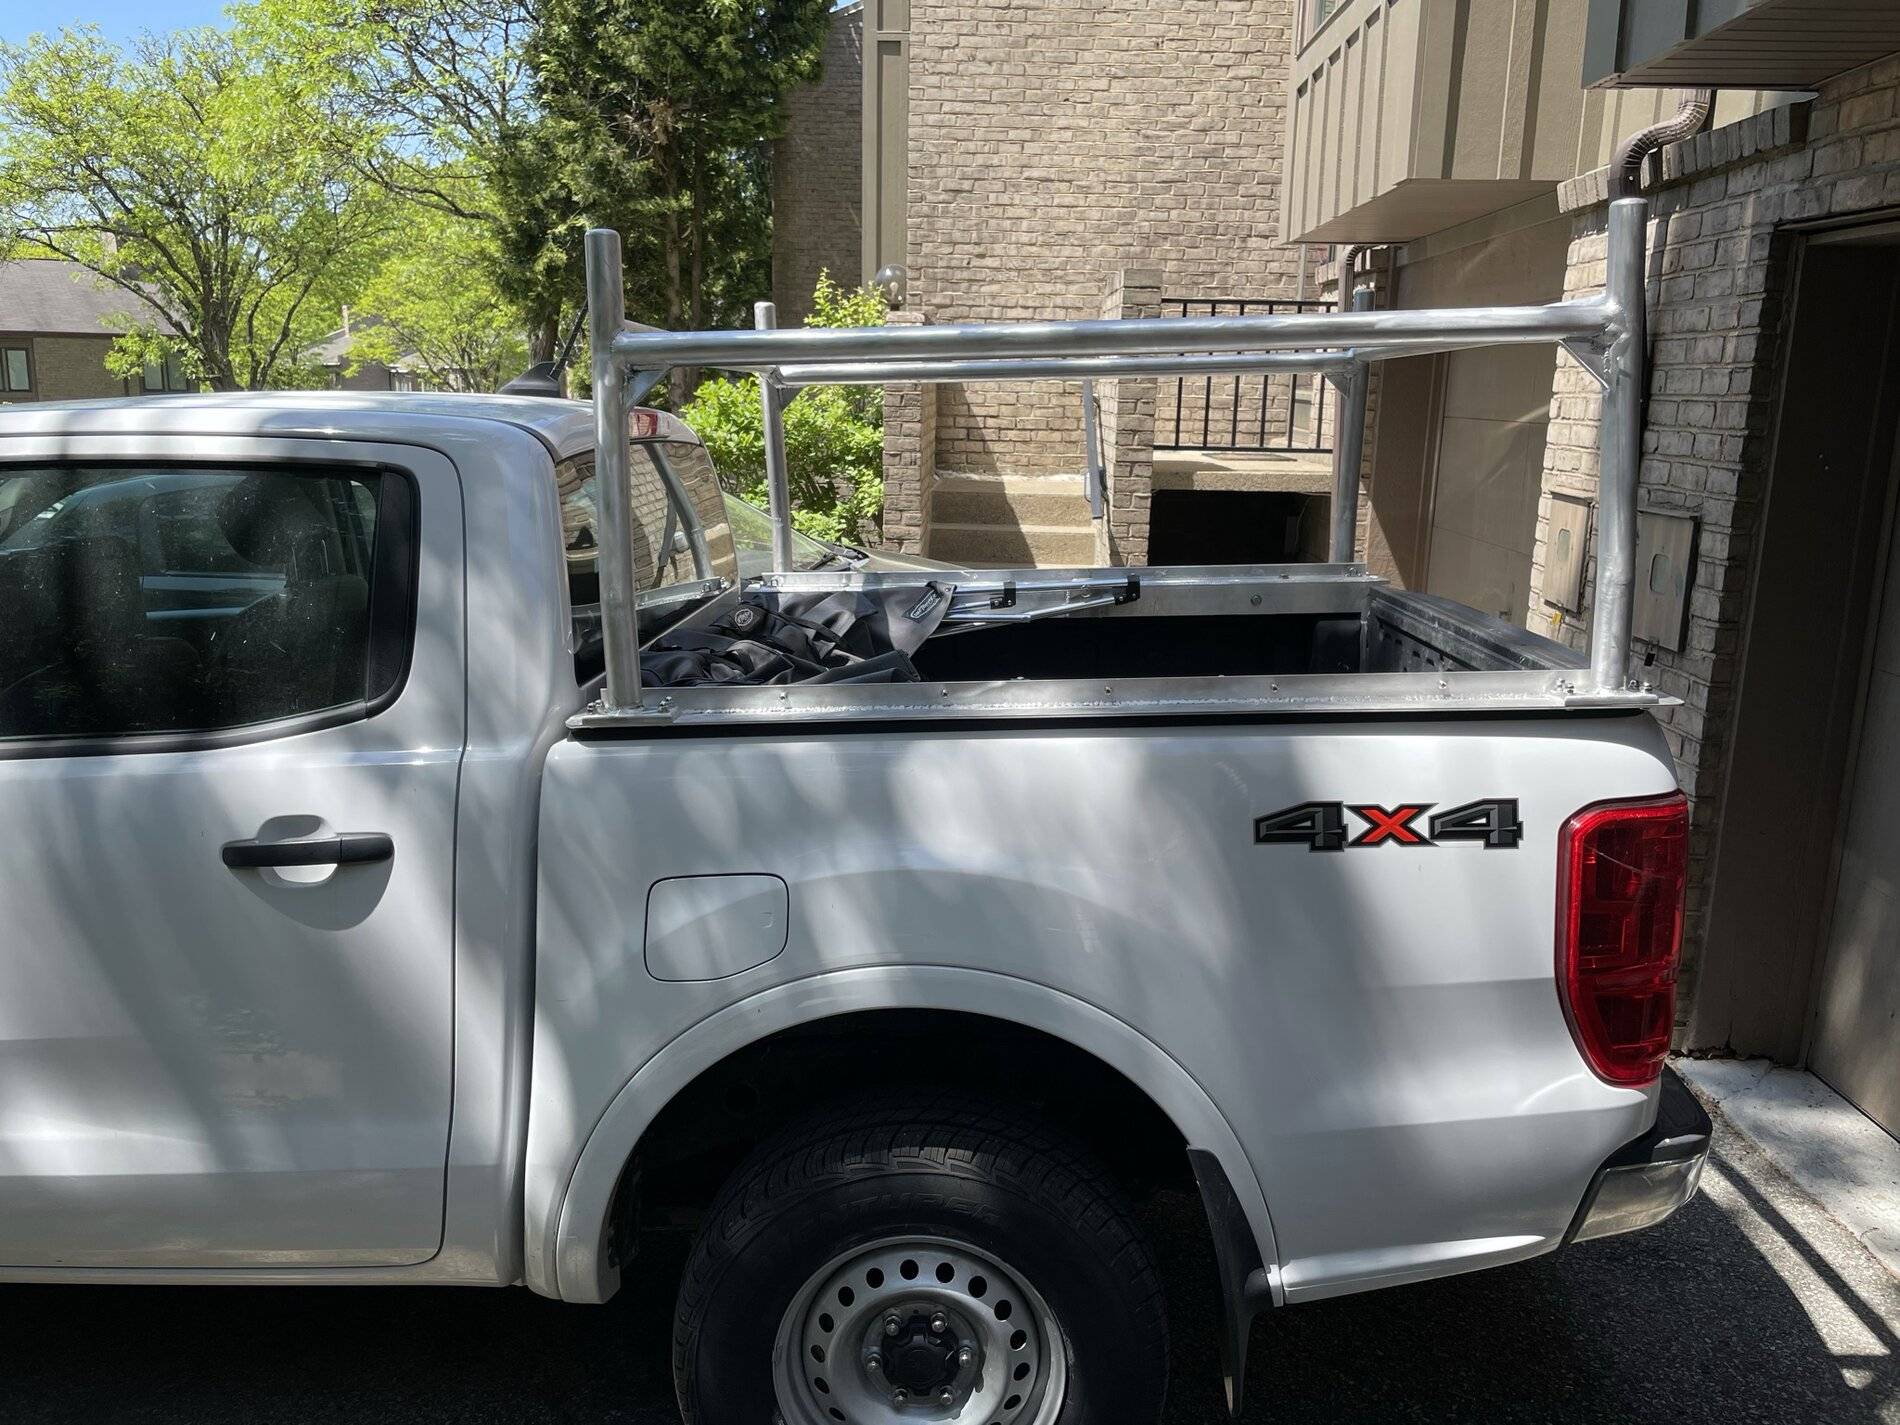
I'm excited to be able to share with you, on ranger5g, the bed rack that I put together over the last few months. Seeing some of the other projects people have taken on here really pushed me to take a stab at it myself. I've read many of you have run down the same search of looking for a rack that fits tight around a soft cap, racks made for open beds are too tight or intersect into the tub and cap encompassing racks are too wide and float far outside the tubs rails.
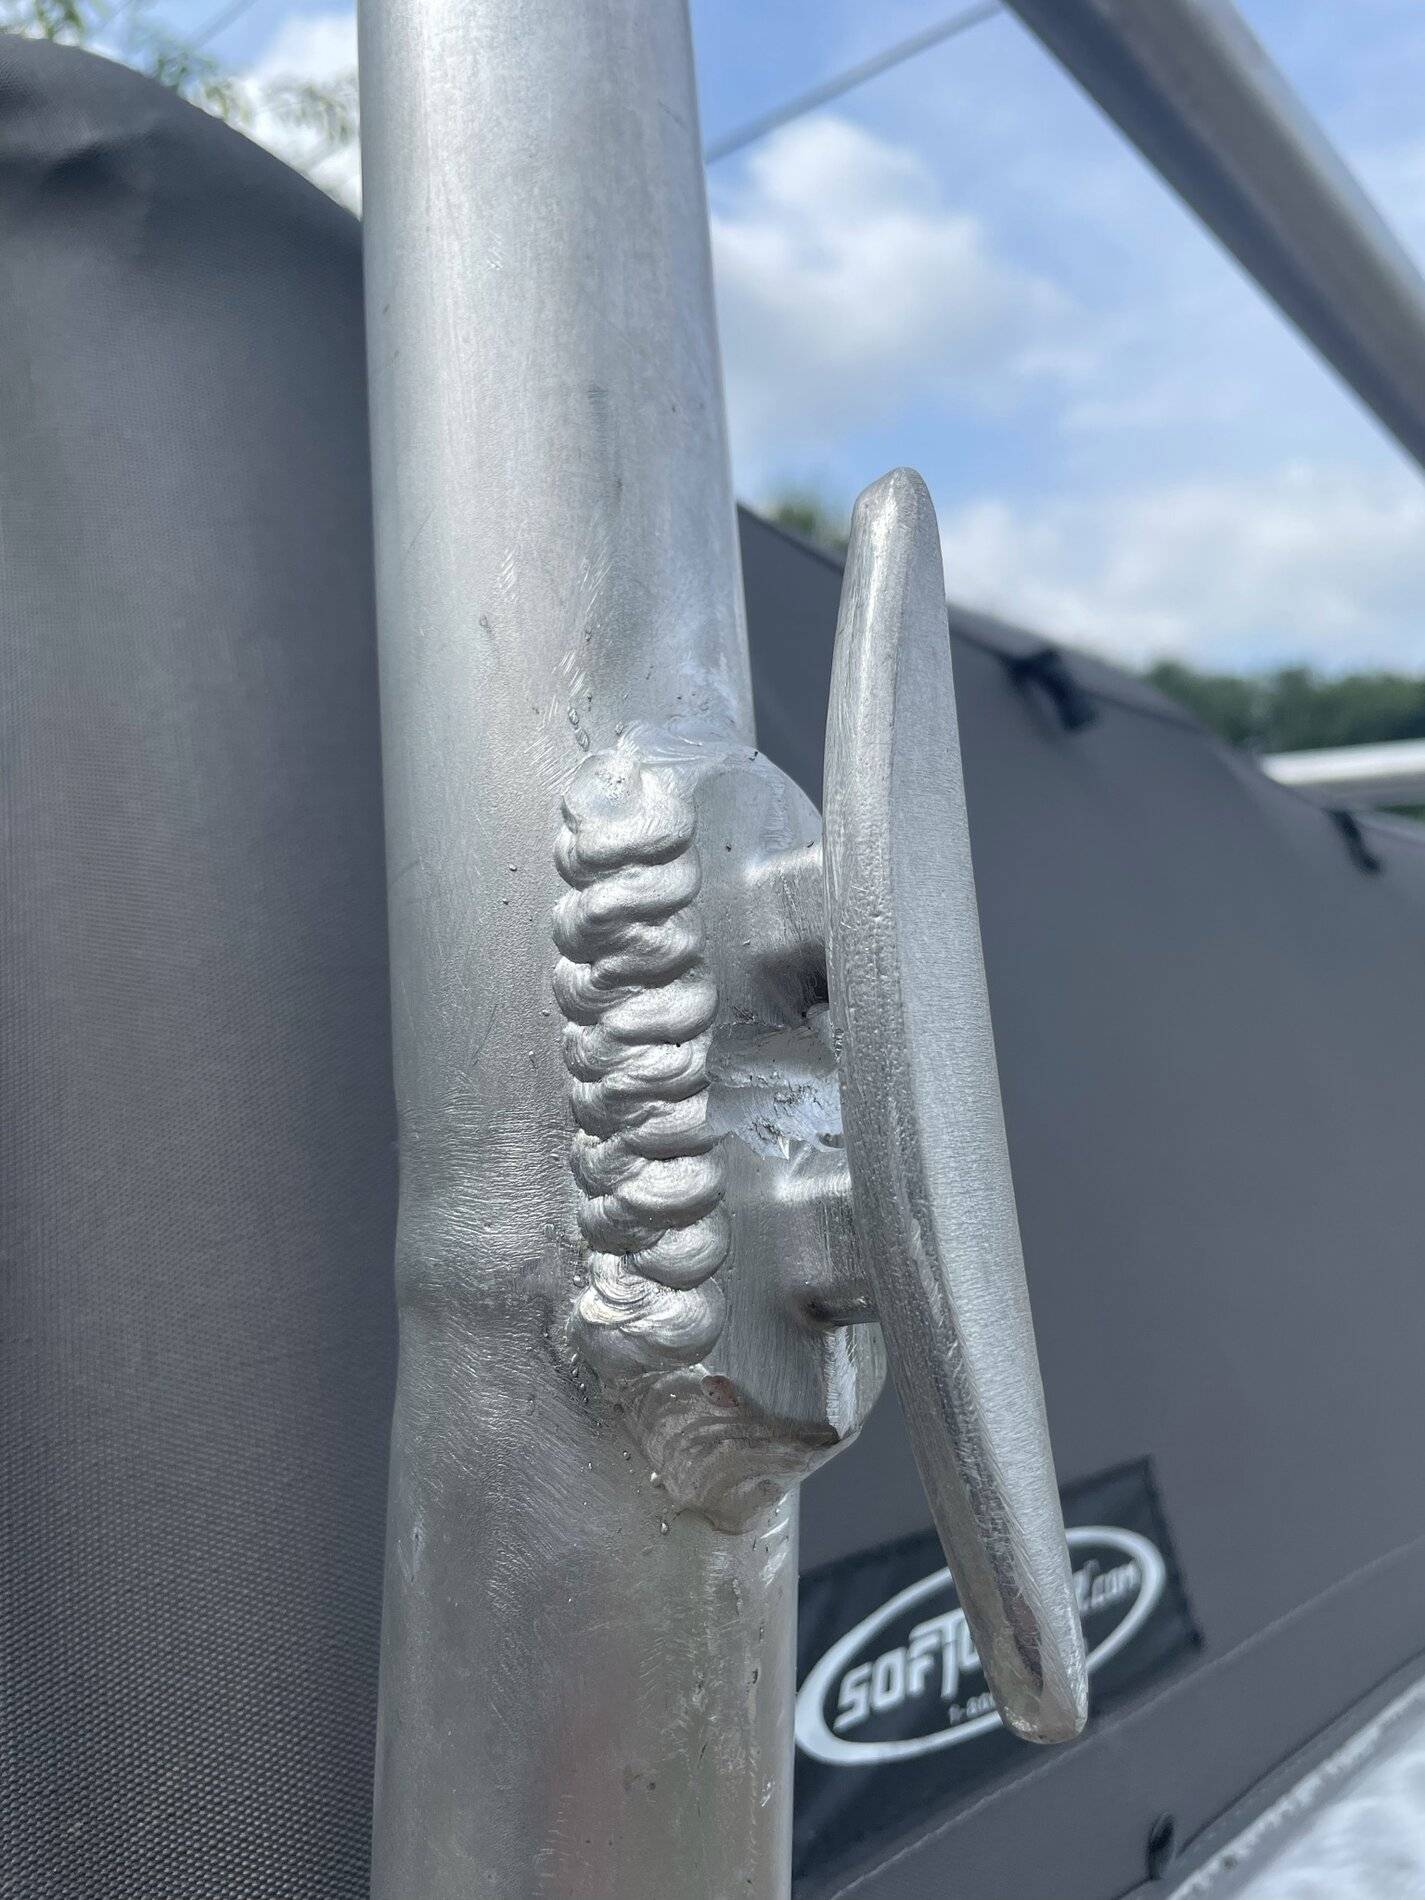
This was my first go at MIG welding aluminum, most joints were multi-pass with a stringer first followed by more stringers or a big ugly weave. I did have to file out a few welds in the process due to porosity (Though I left the cast cleats with their pores).
Anyways, hopefully you enjoy this thread and if it pushes you over the edge to try your project I'm glad.


My initial design was made up in SolidWorks, I learned how to import images which was a great help for generalizing a few features I wasn't sure how to measure.
I played with a few ideas of how to have the rear bar removable but at present the rack is simple and solid.


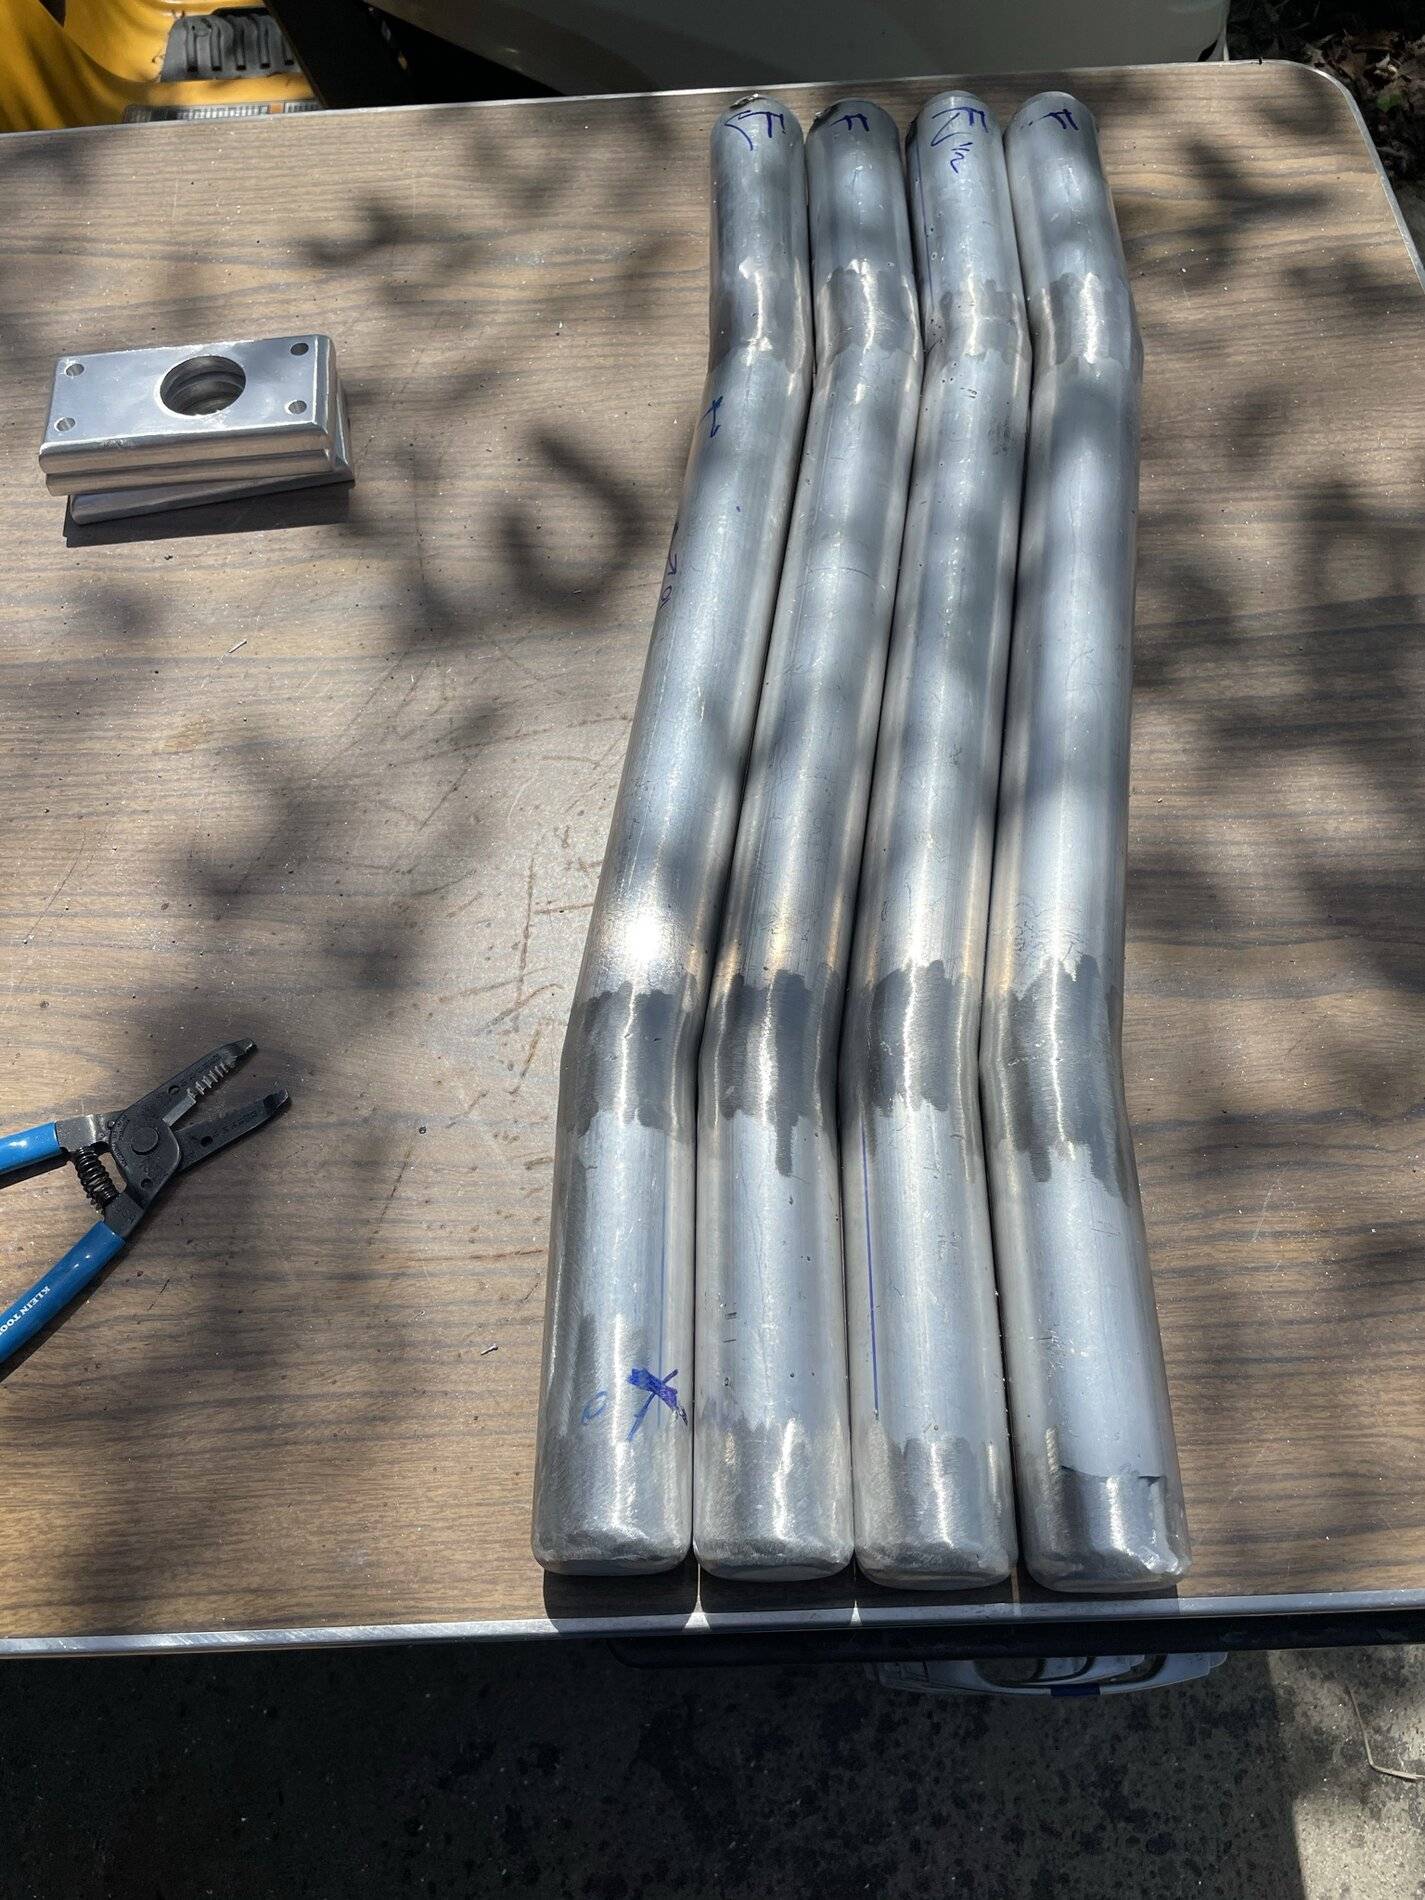
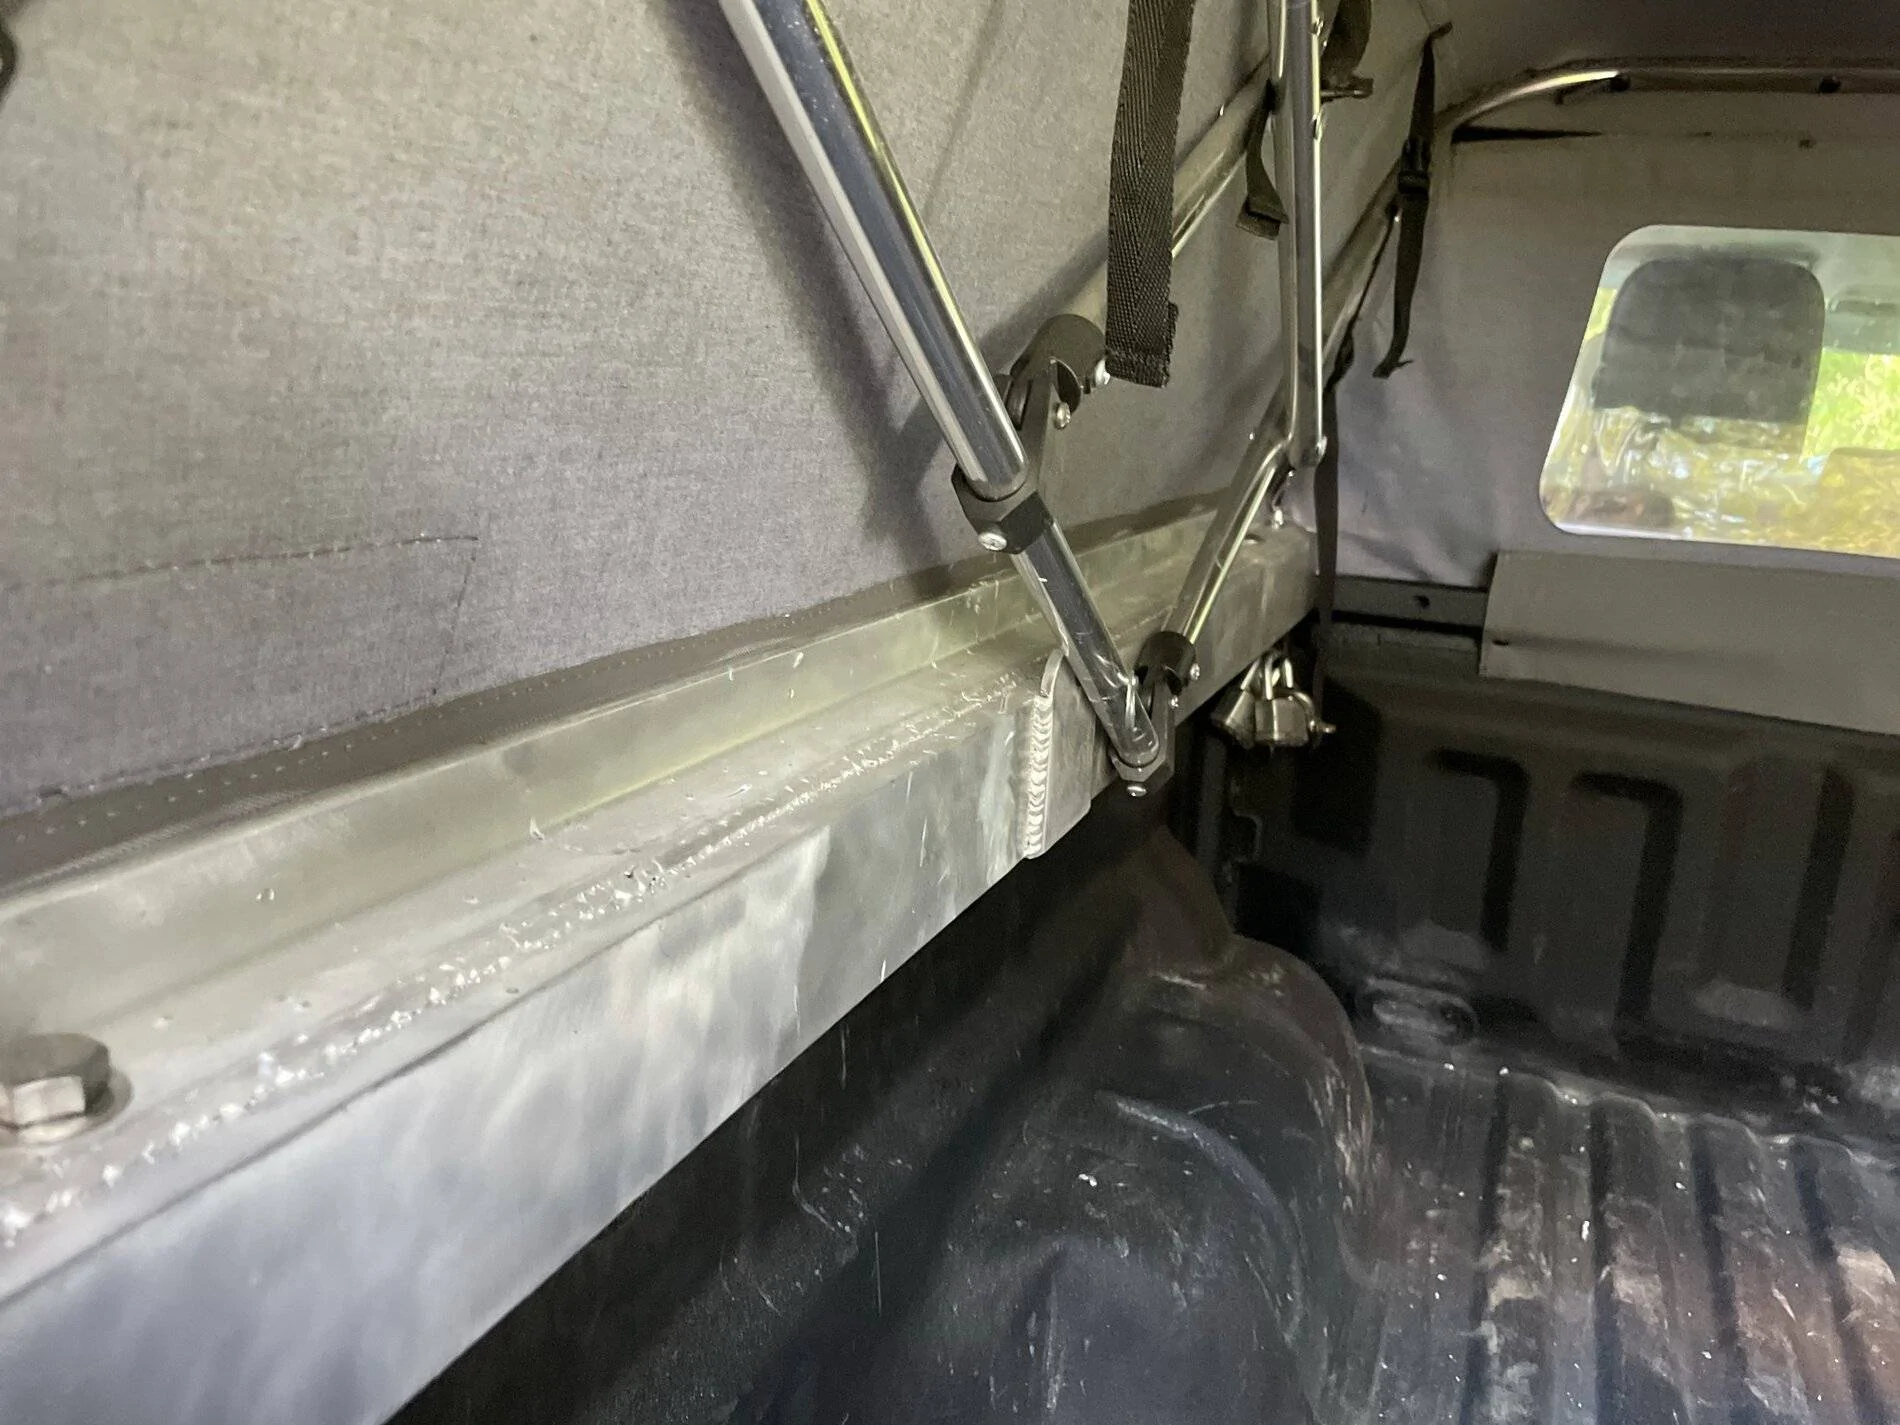
I used the rails as a chance to get somewhat up to speed on welding aluminum. I put 1 pass on the outside (to not get too built up where the baseplates of the rack will be) but I put 3 passes down the whole inside. The rails are 3x5x.25 and the cap's replacement rail is 1.5x1.5x.25.

I'm not sure it was a needed step but I roughed together some scrap wood to see if cab clearance would be enough. This wood version made a good work surface to weld the rails before getting the lawn chairs and milk crates out.
When I got to the baseplates and risers I wanted to work in some redundancy as to not just be relying on my welds. The bottom 4" are solid round stock plug welded into the riser and welded from below in the router-ed channel on the baseplates.
I originally wanted to put the 10* angles in with a pipe bender but after one try (all the spare material I wanted to waste) I moved on to cutting and butting the riser legs.
I wasn't sure how to clamp the rails while assembling the rack, strapping worked well enough. the neighbors may have seen me topple the mess a few times before I was tacked together. At this point I sat fish mouth on fish mouth instead of mitering, I like this "field fit" better since it leaves the sides lower for my sausages and ropes when I have anything on the rack.

I'm not sure if there is a better finish to give the rack but from 10' the brushed finish looks good enough.
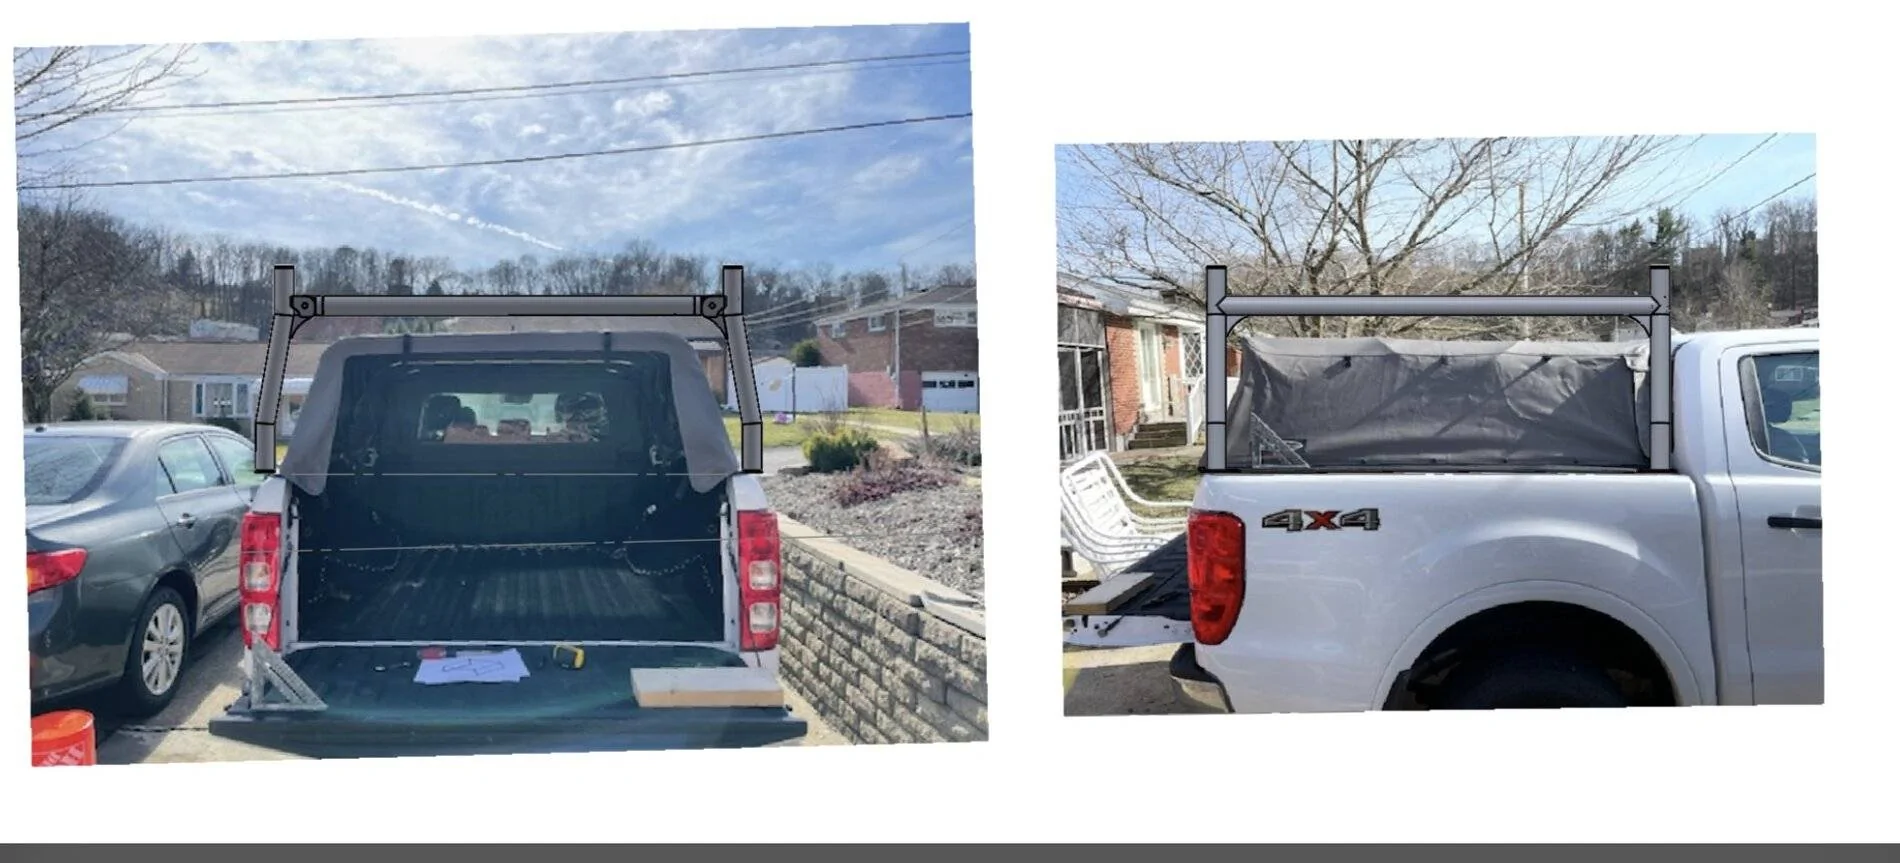
Fitment of the topper wasn't too bad when the rack was finished. I added the tombstones with pin for the topper frame after using a 2x4 and bottle jack to lift the buttoned topper into a tight position (I attempted first to roughly mimic the topper's pin measuring the original rails but it didn't sit right).


The topper folds up and down with no issues (that wasn't planned).
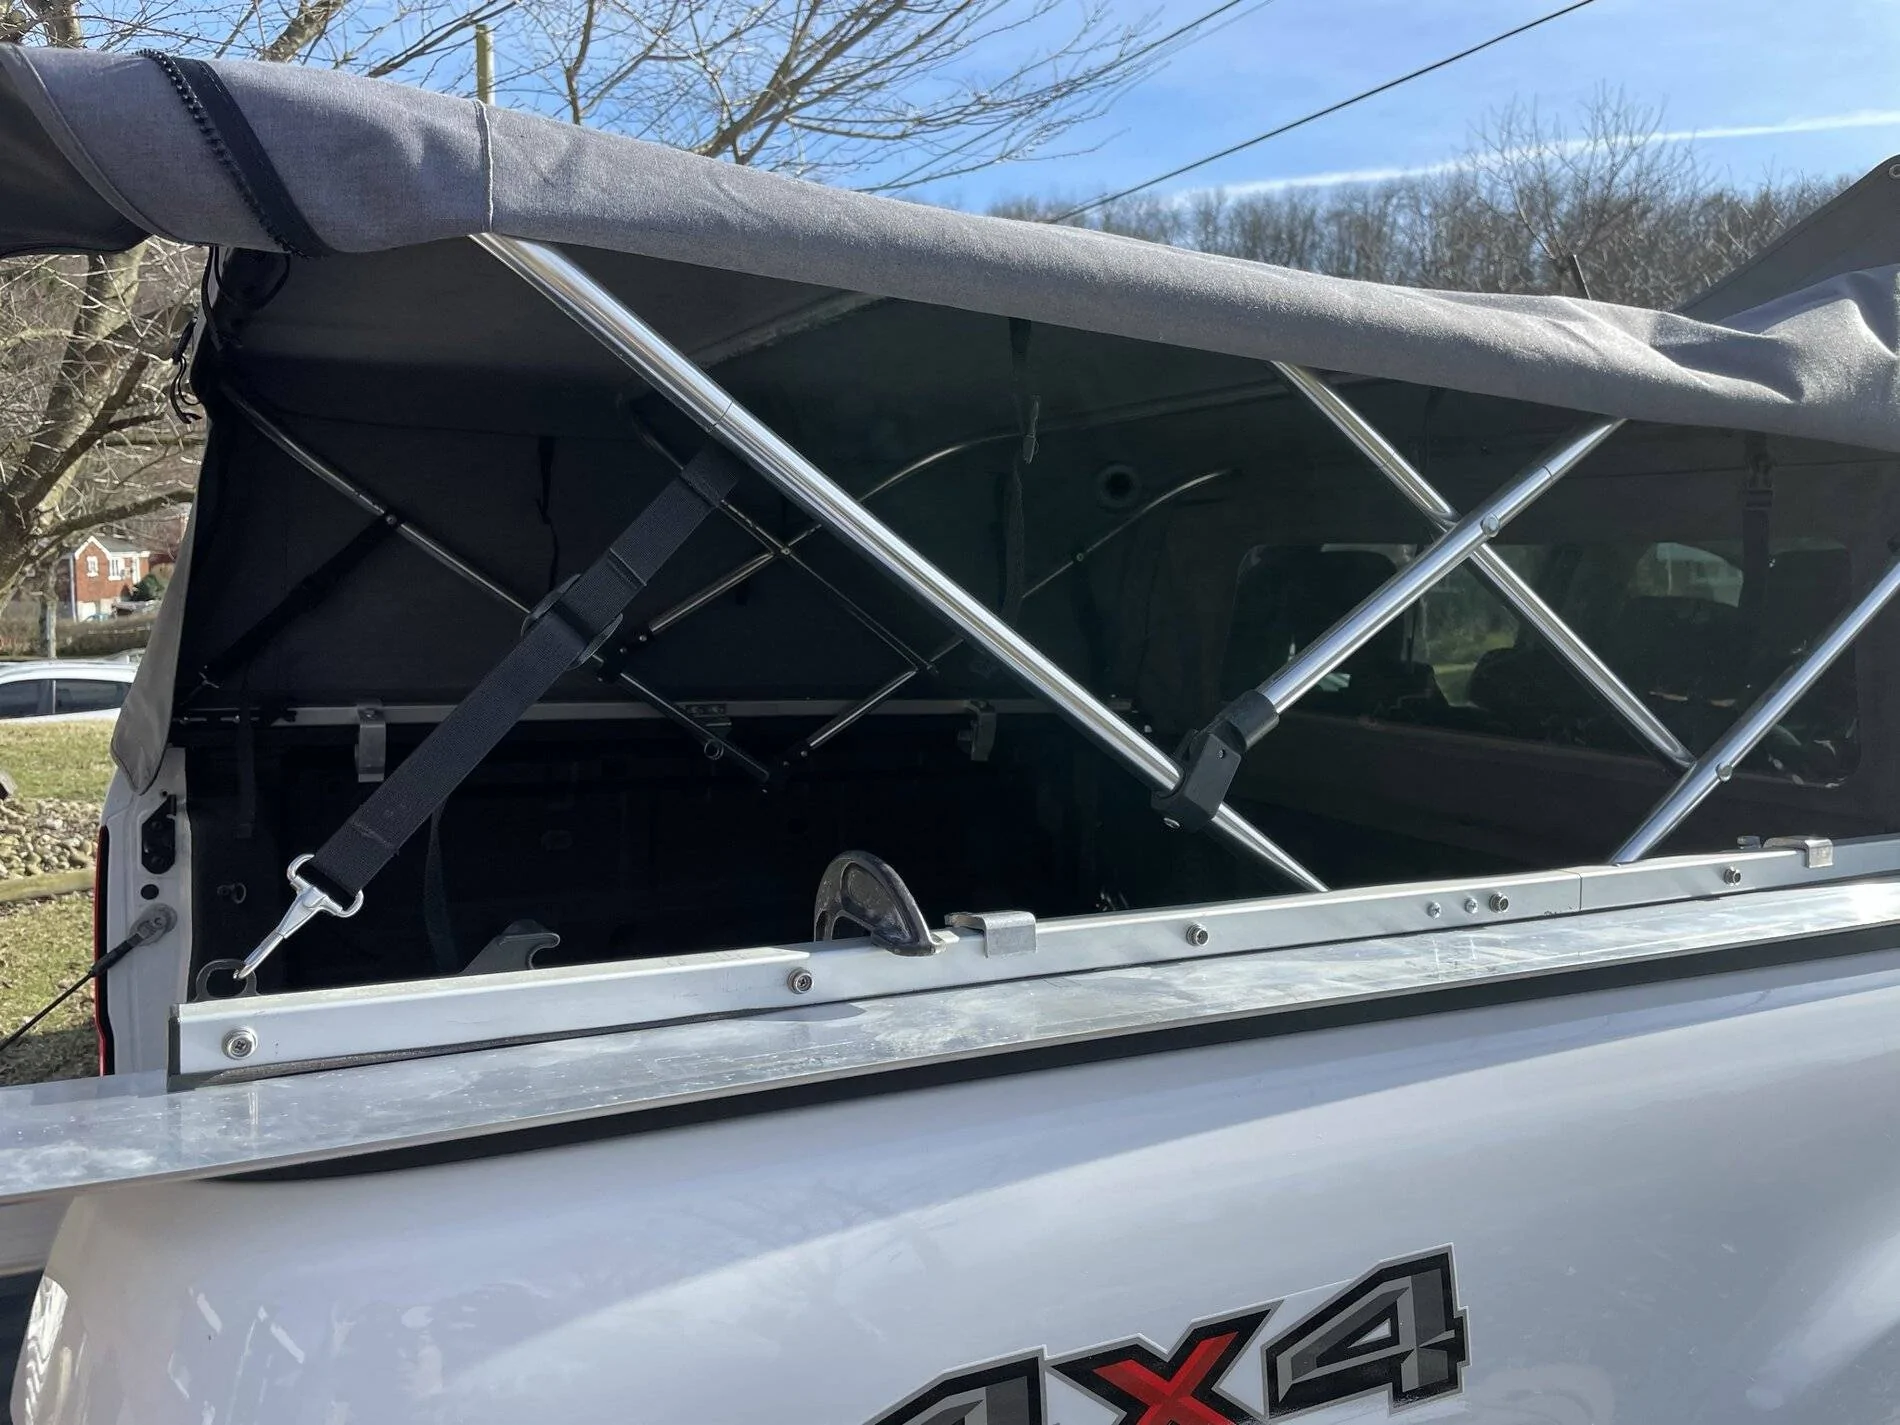
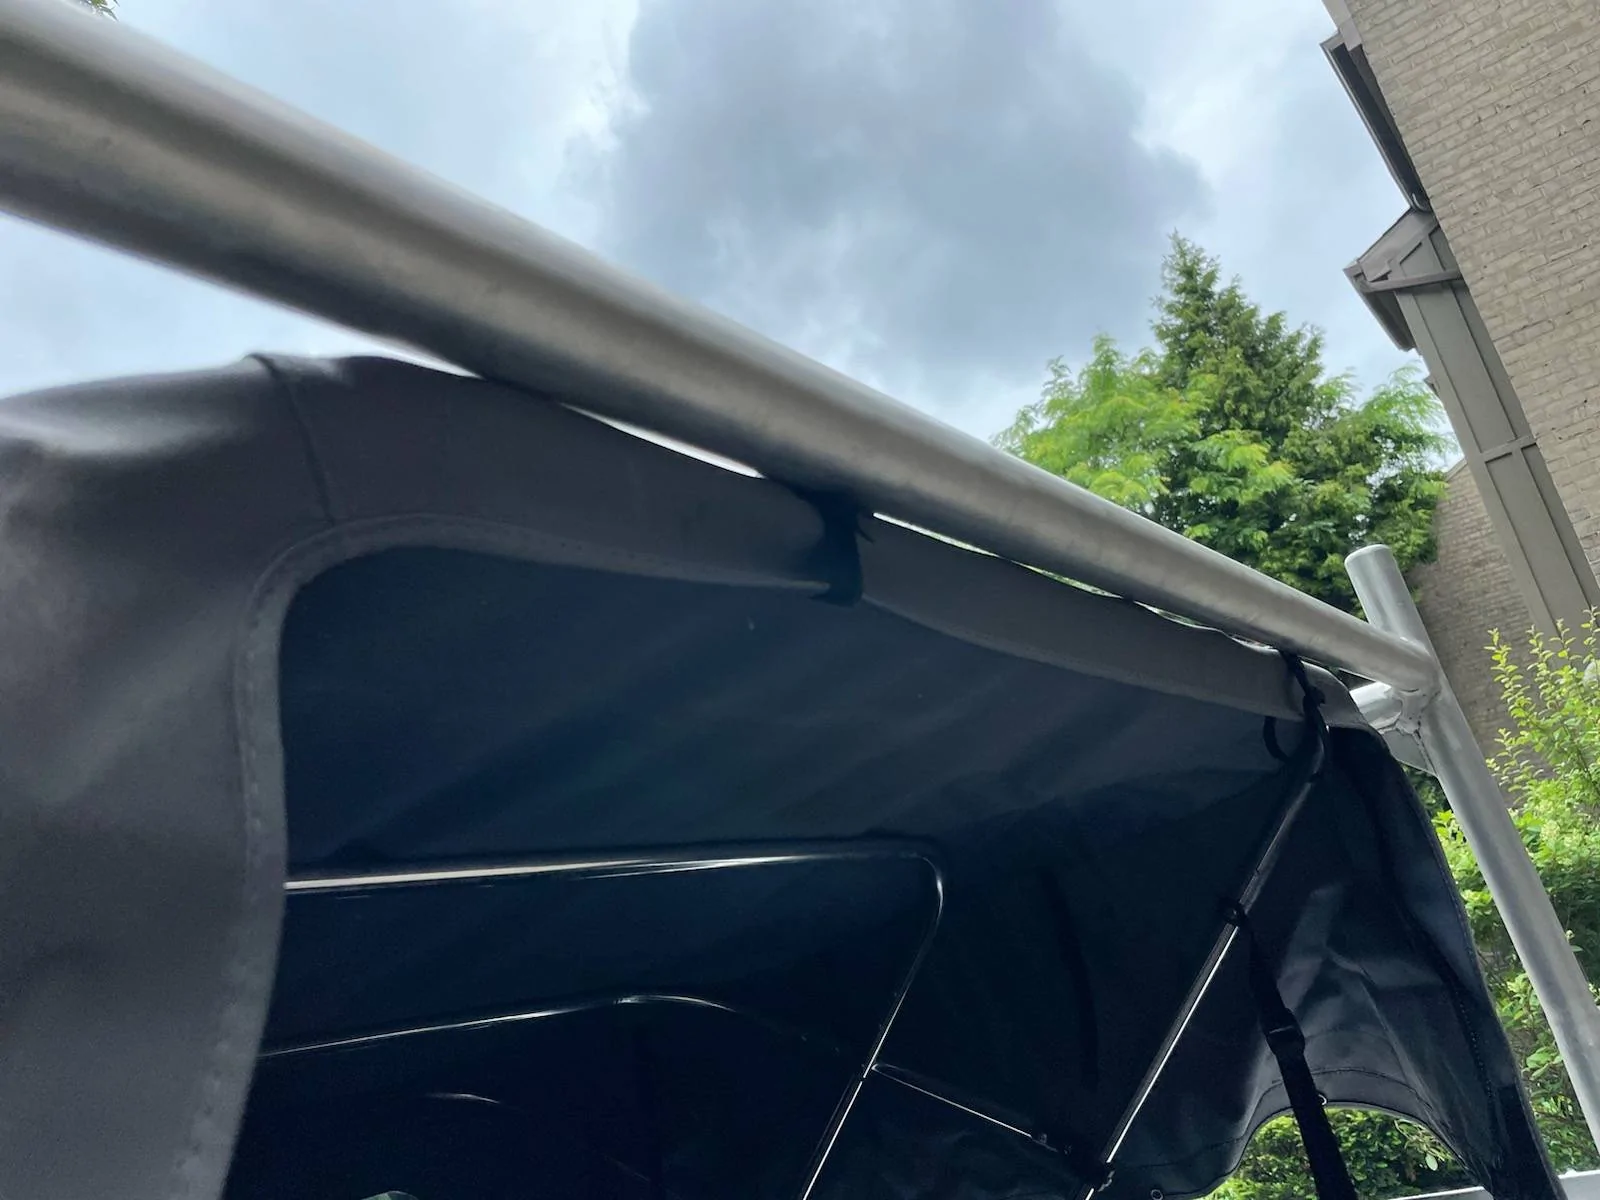
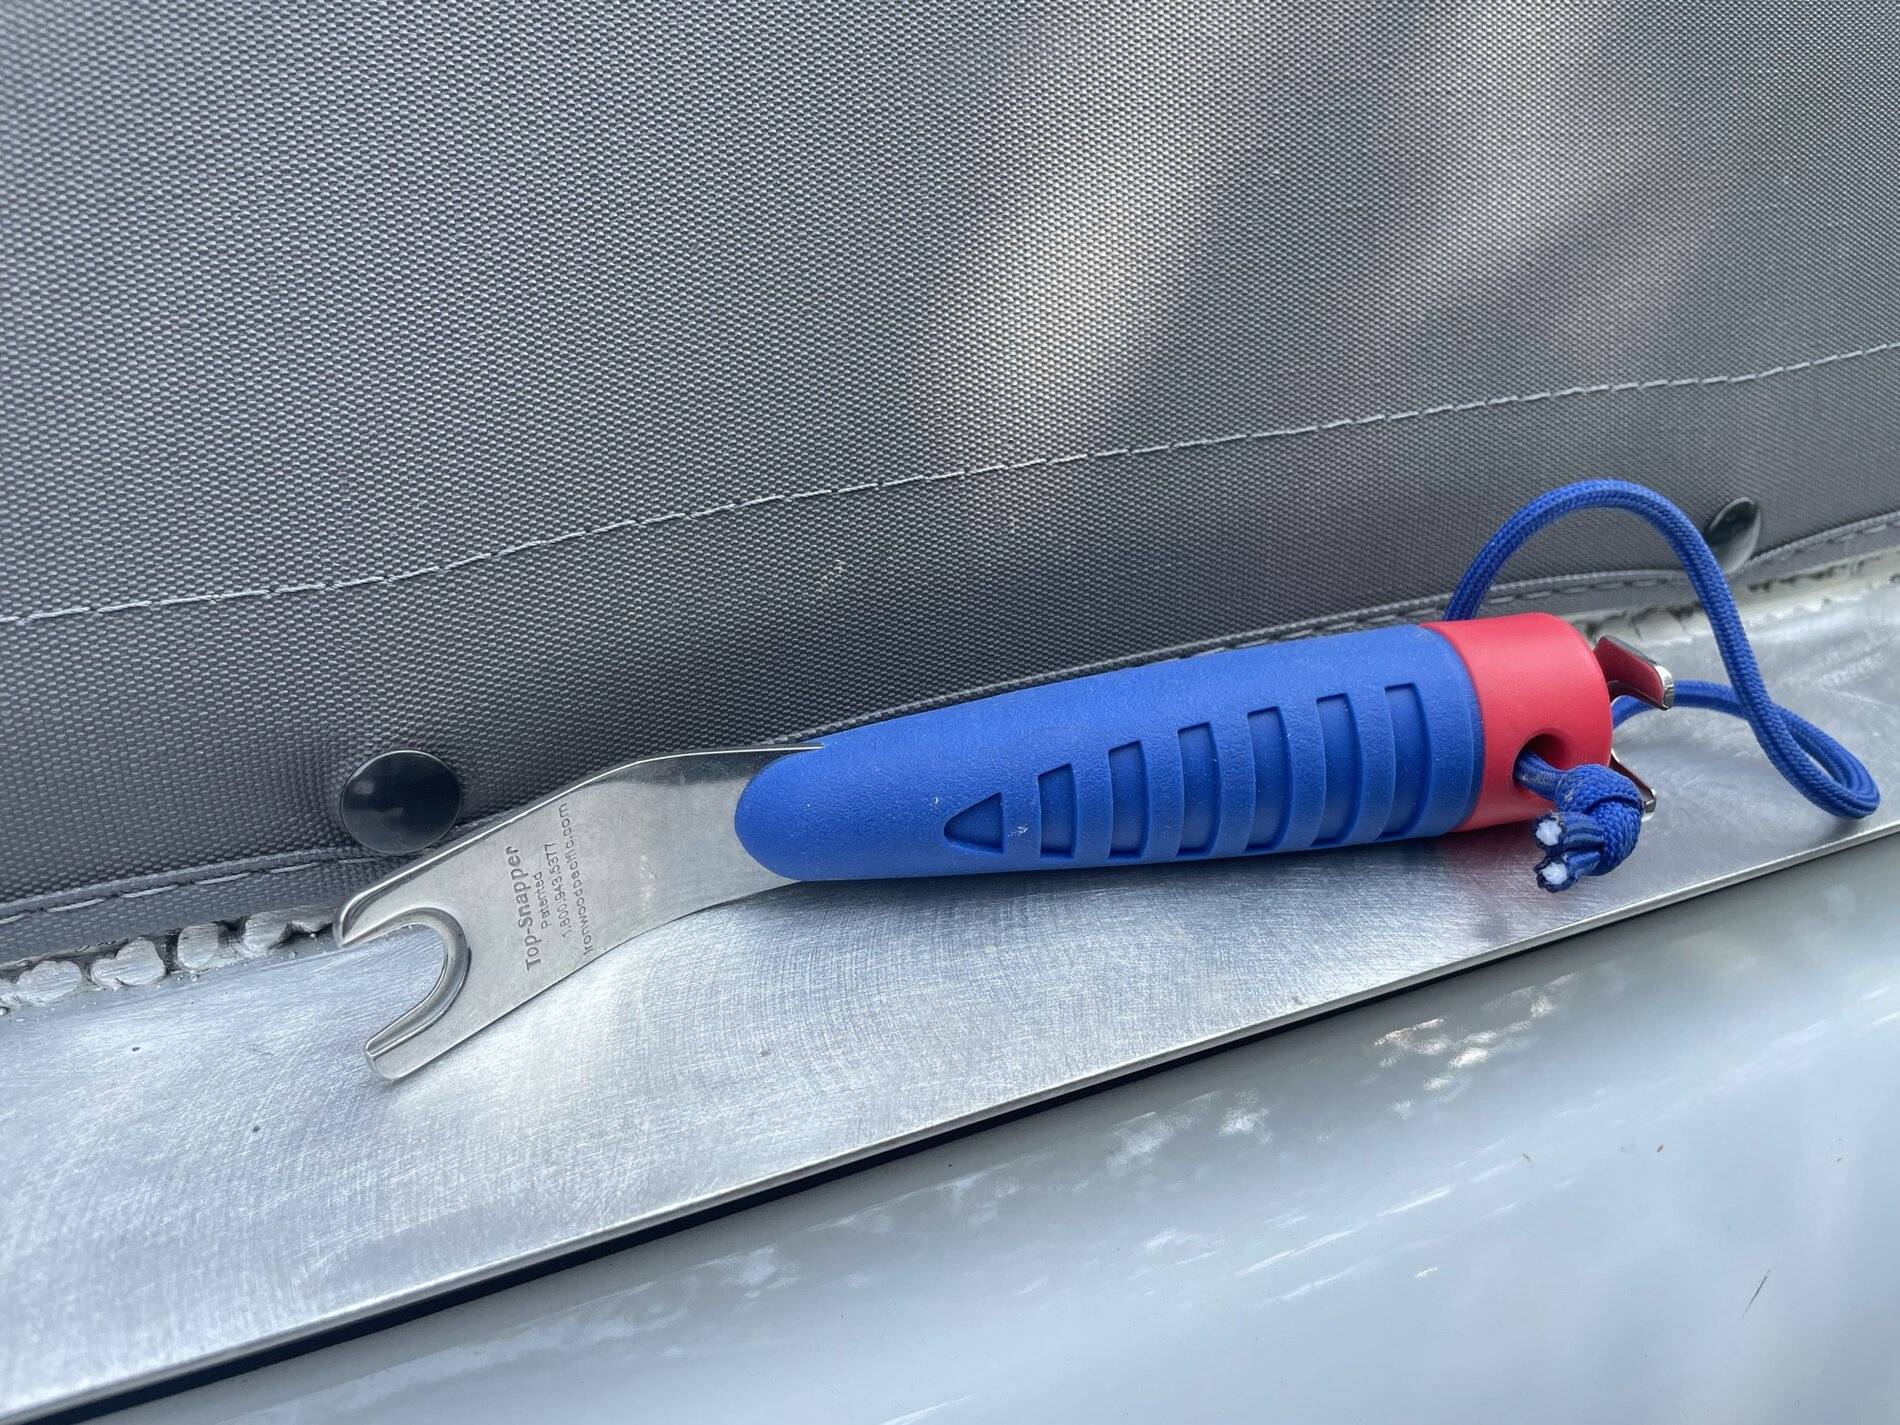
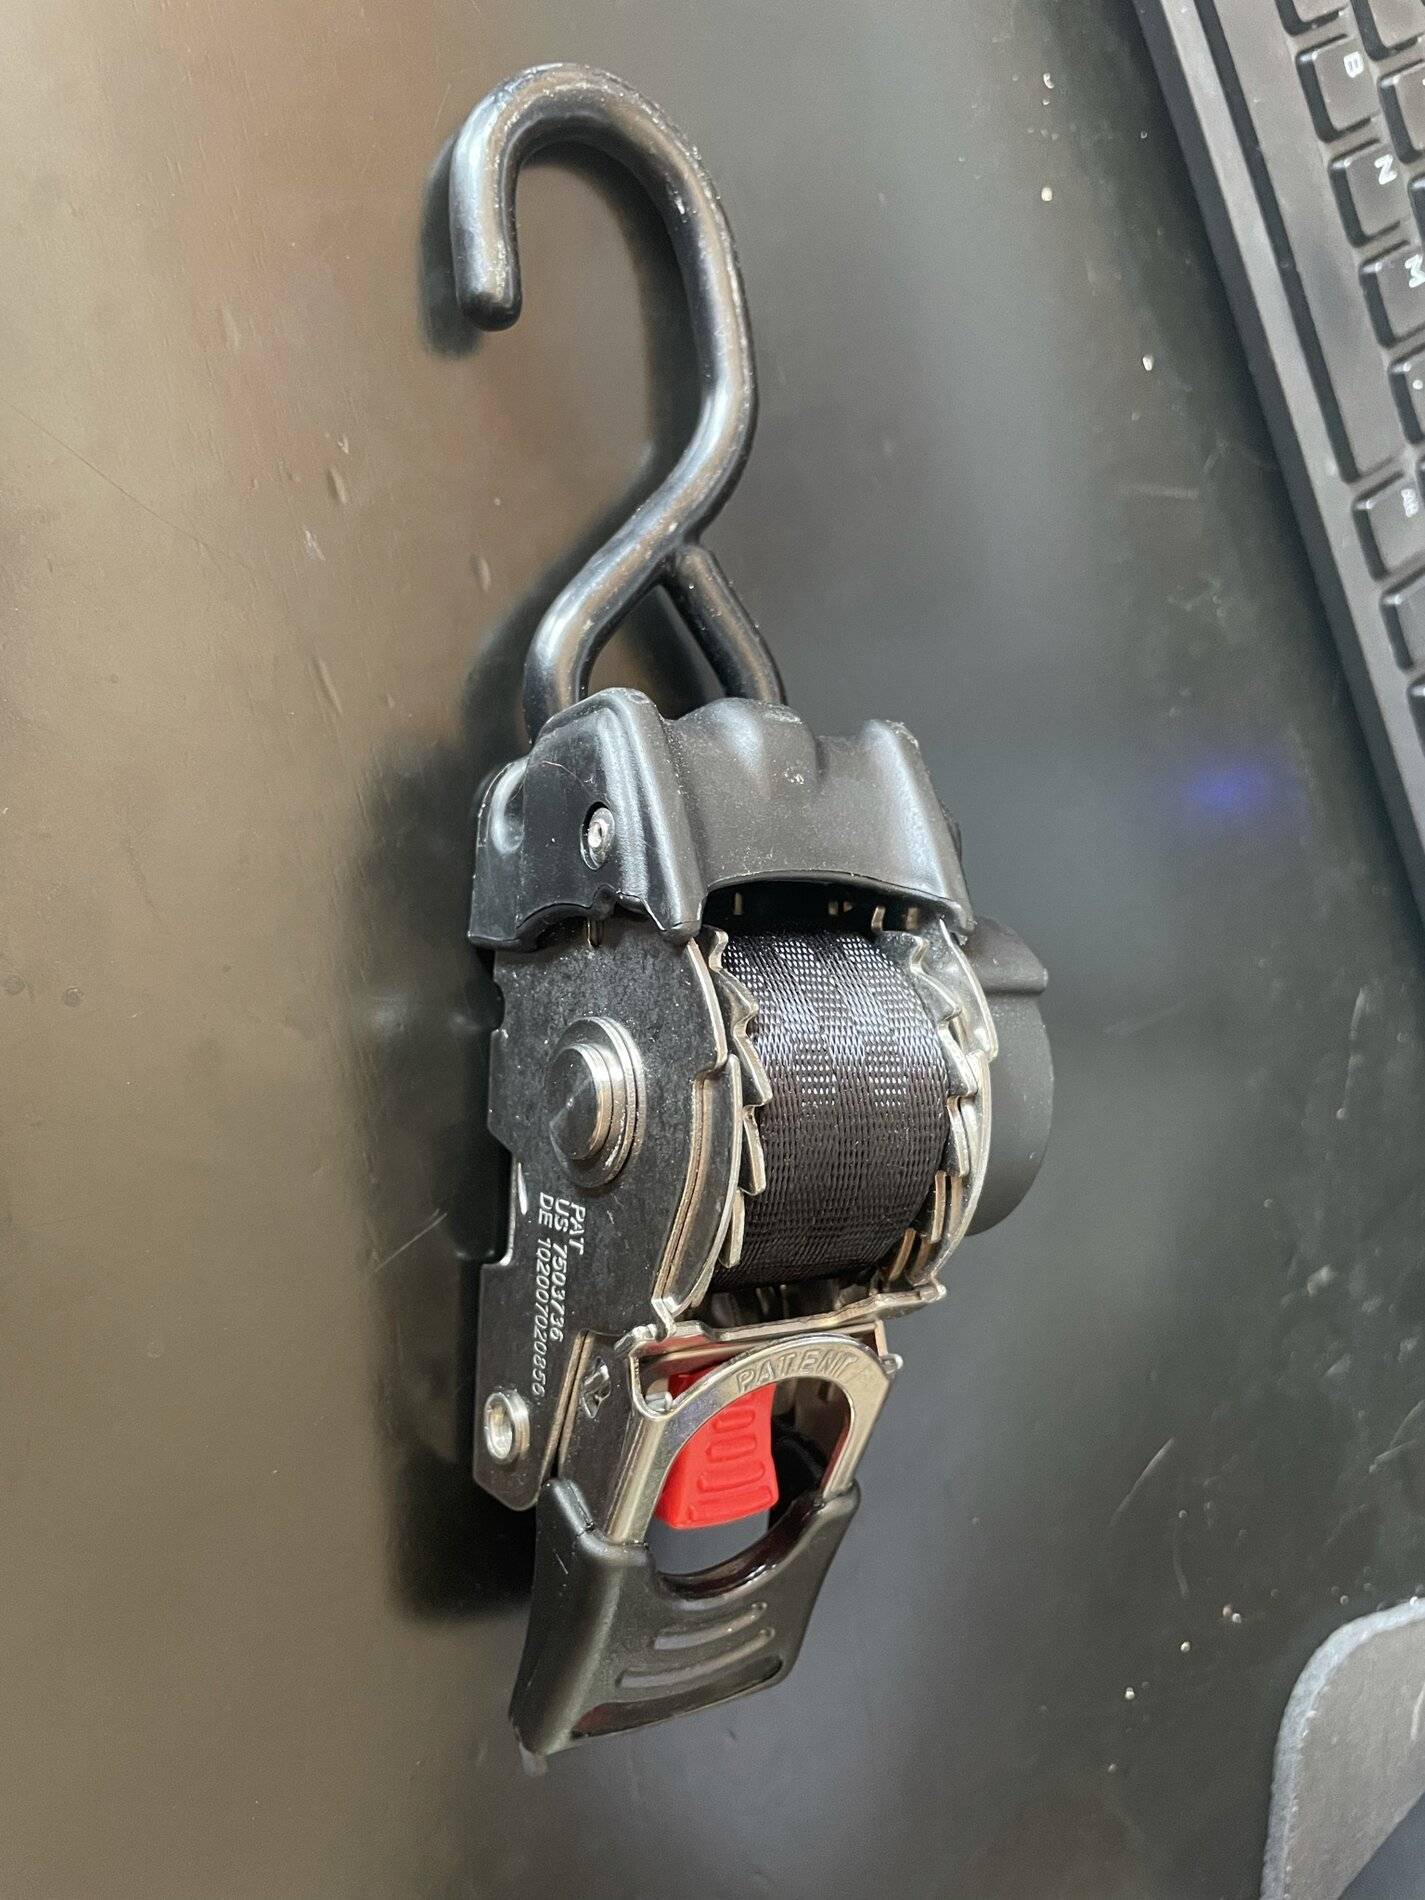
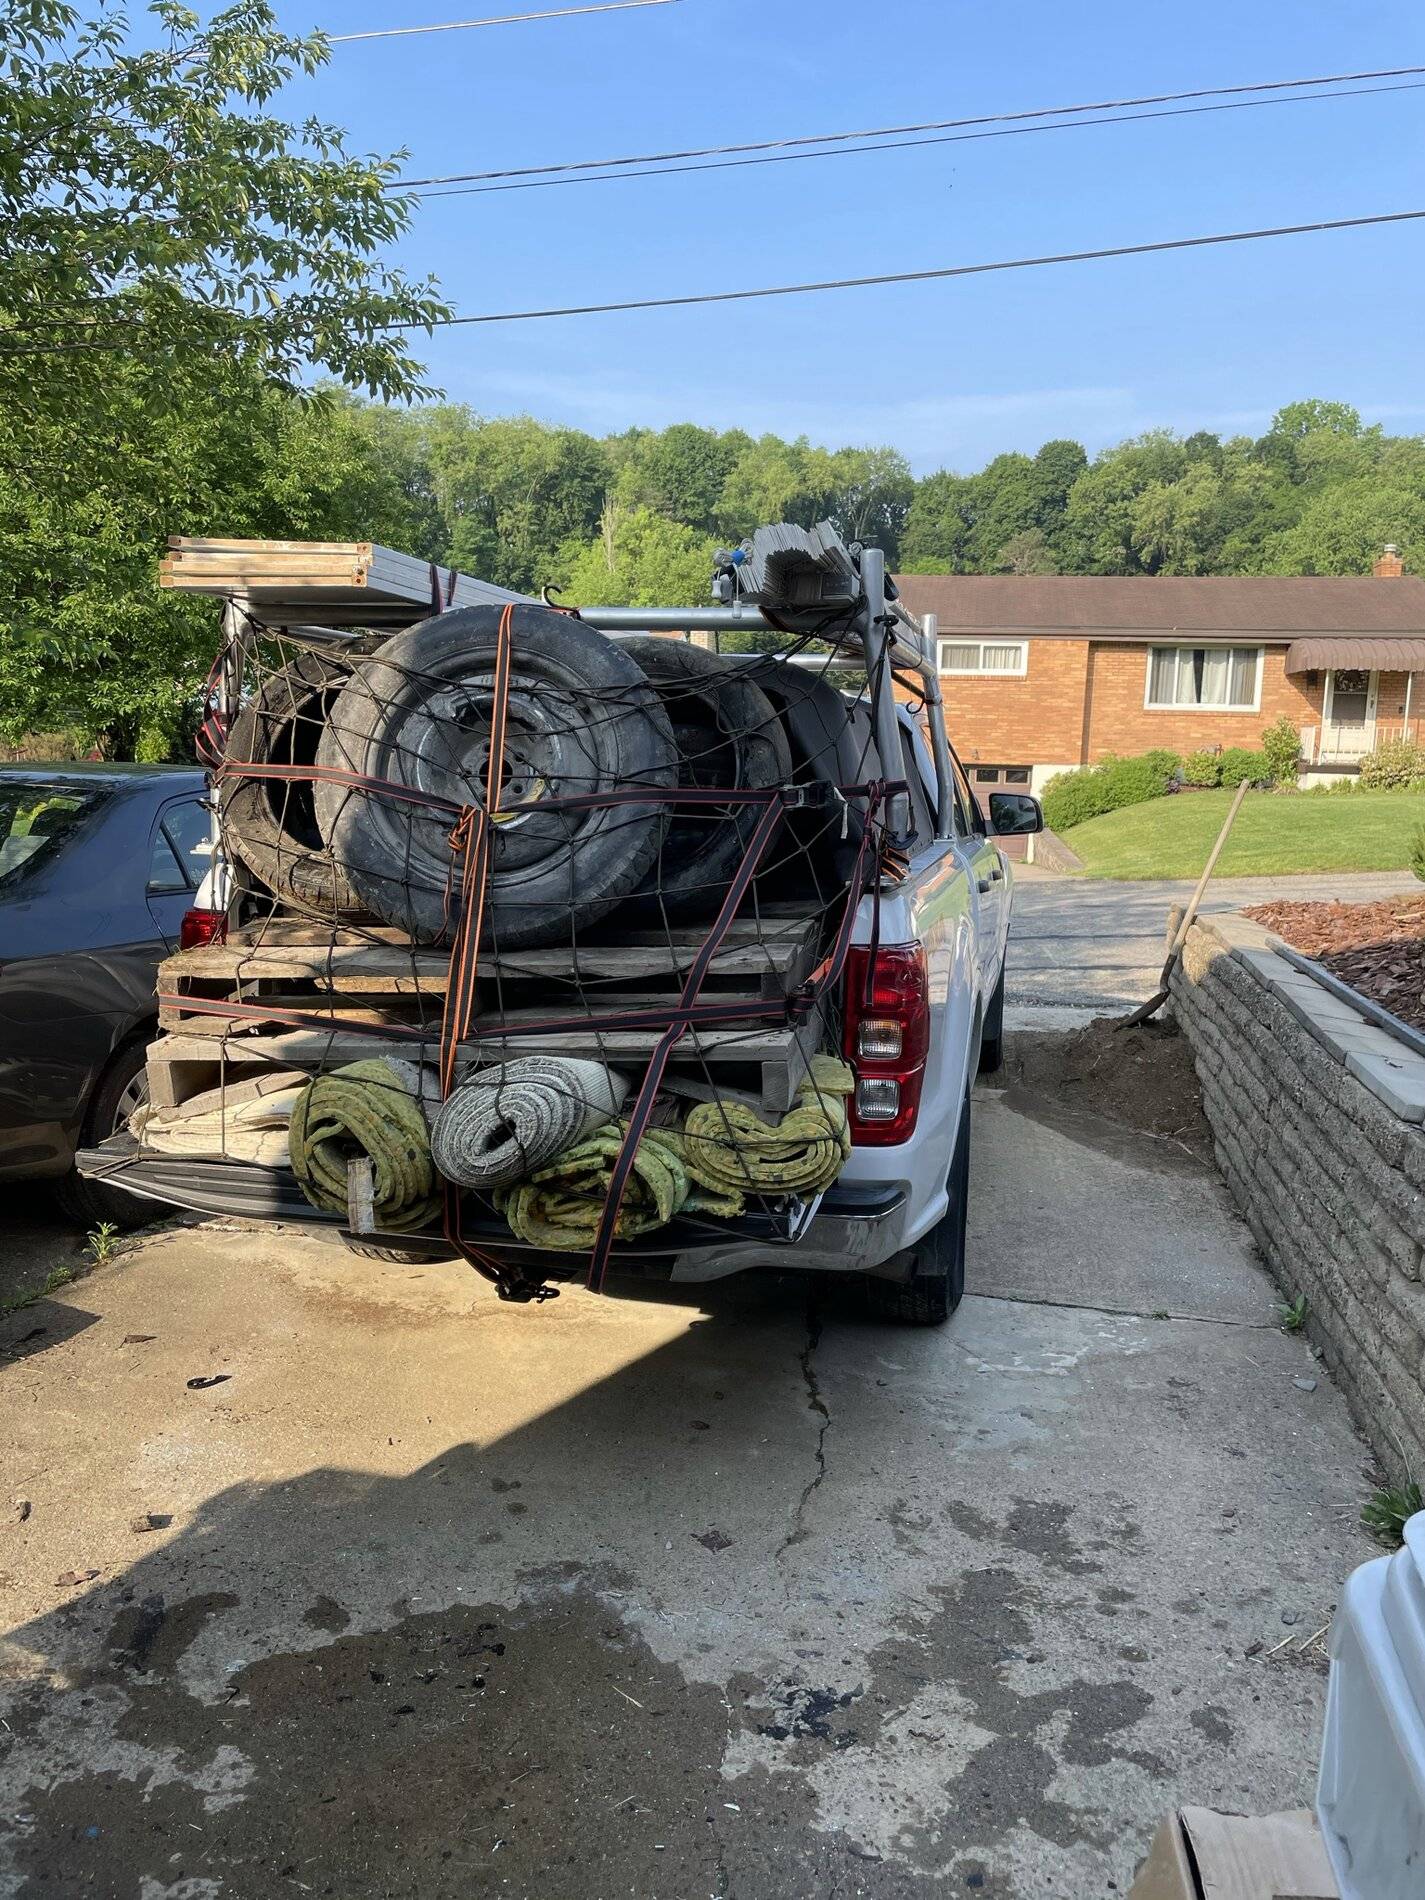
Cleats were added to overlap the lower butt joint in the risers, all joints at this point have some sort of layering. I knew I was going to have some tight snap clearances so my drivers door holds a snap tool (I highly recommend one if you have a tight topper). Next steps include adding stainless ratchet straps (2 on each side).

Yes there is a learning curve scratch on my roof from taking the canoe off the first time. Having a bed rack makes these short beds the perfect length. Thank you for the read/look.
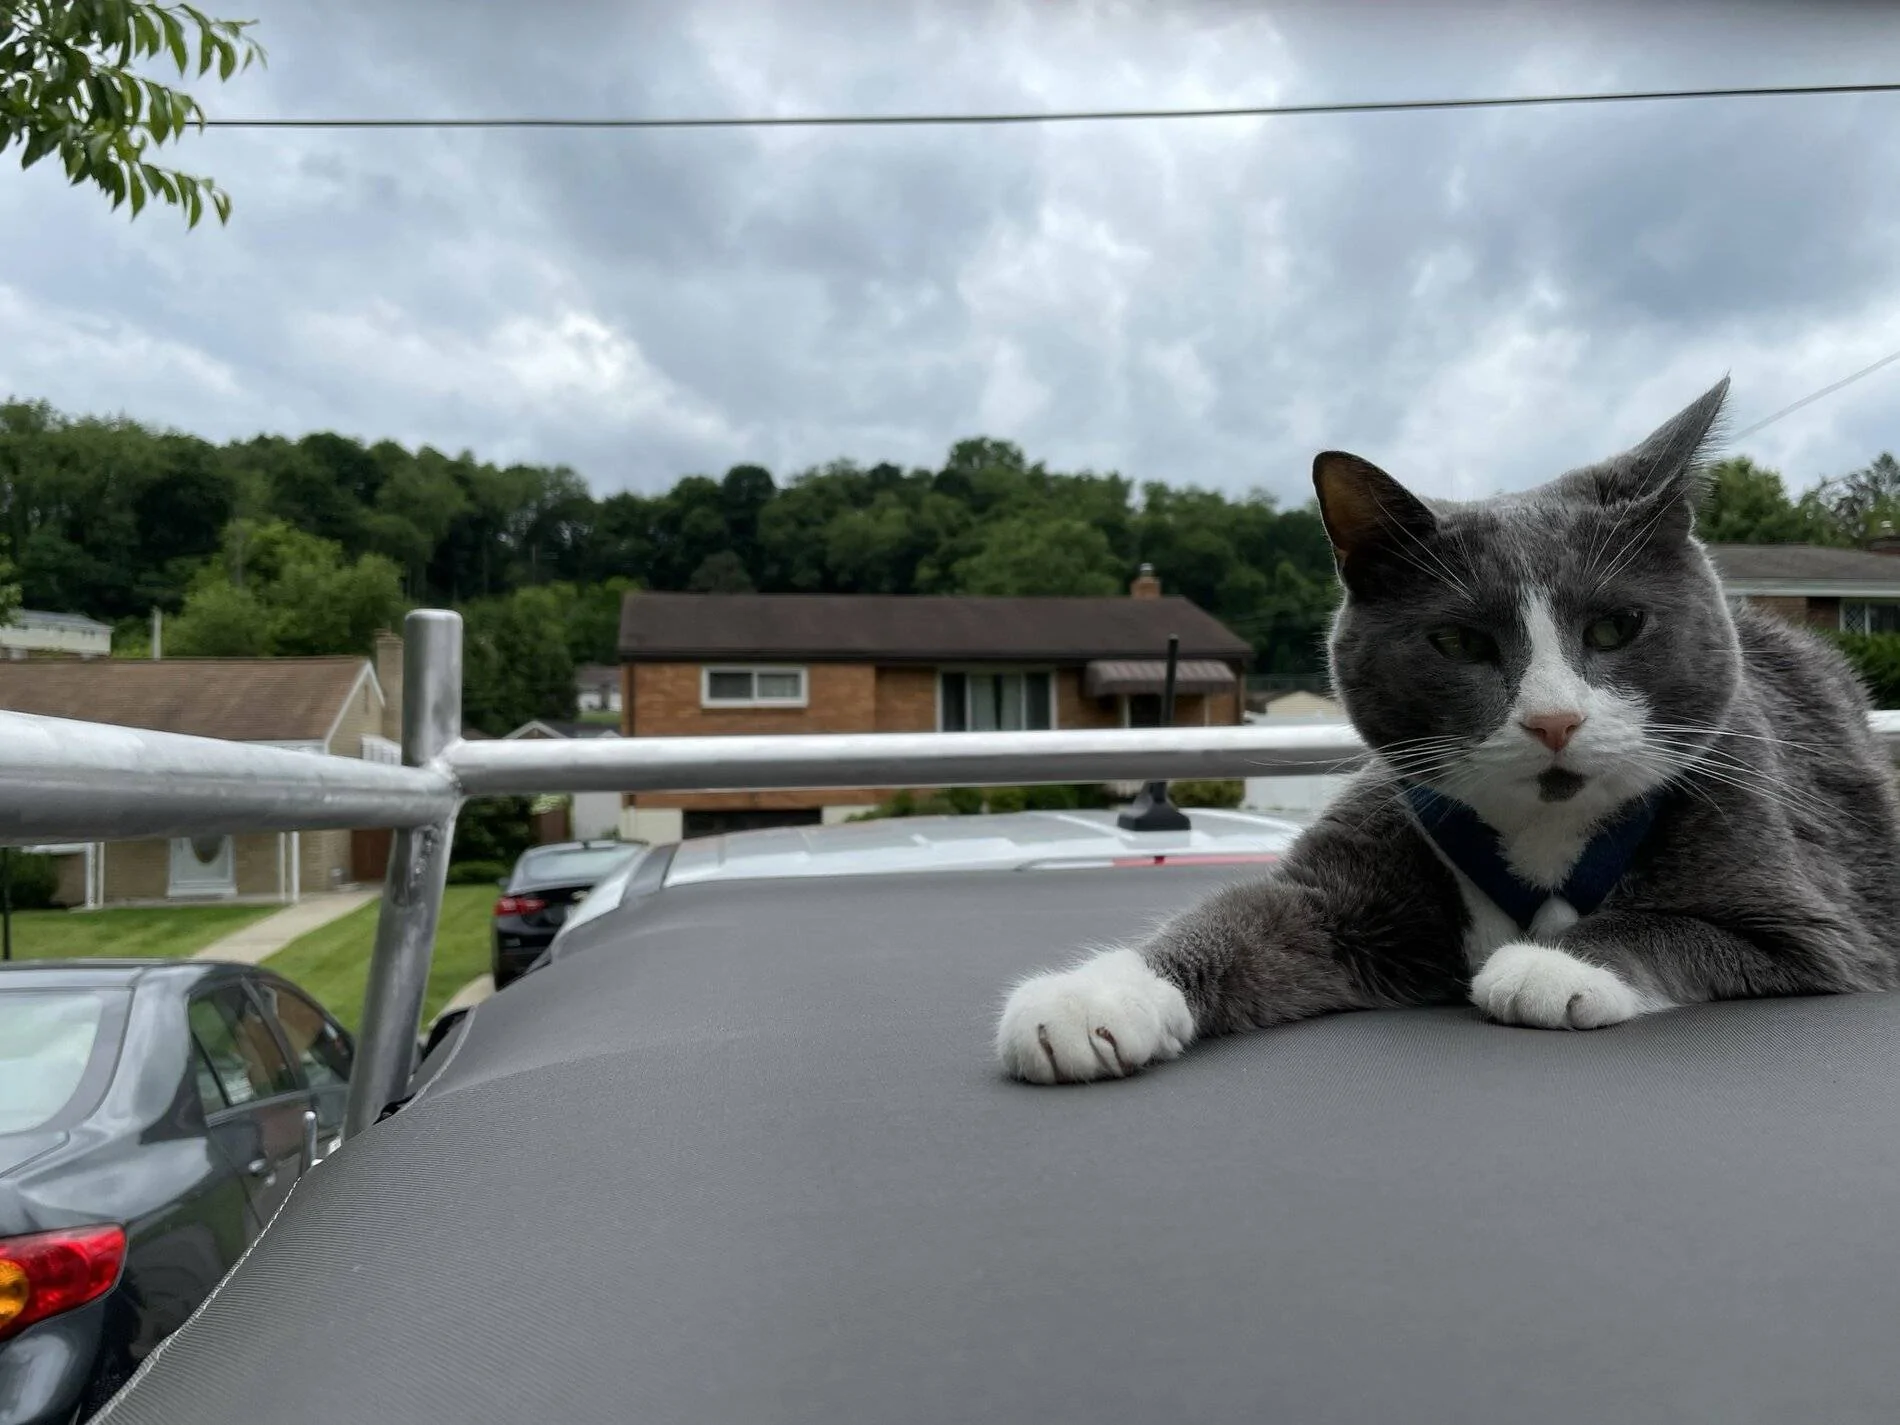
RIP Sam (grey cat)
This was my first go at MIG welding aluminum, most joints were multi-pass with a stringer first followed by more stringers or a big ugly weave. I did have to file out a few welds in the process due to porosity (Though I left the cast cleats with their pores).
Anyways, hopefully you enjoy this thread and if it pushes you over the edge to try your project I'm glad.
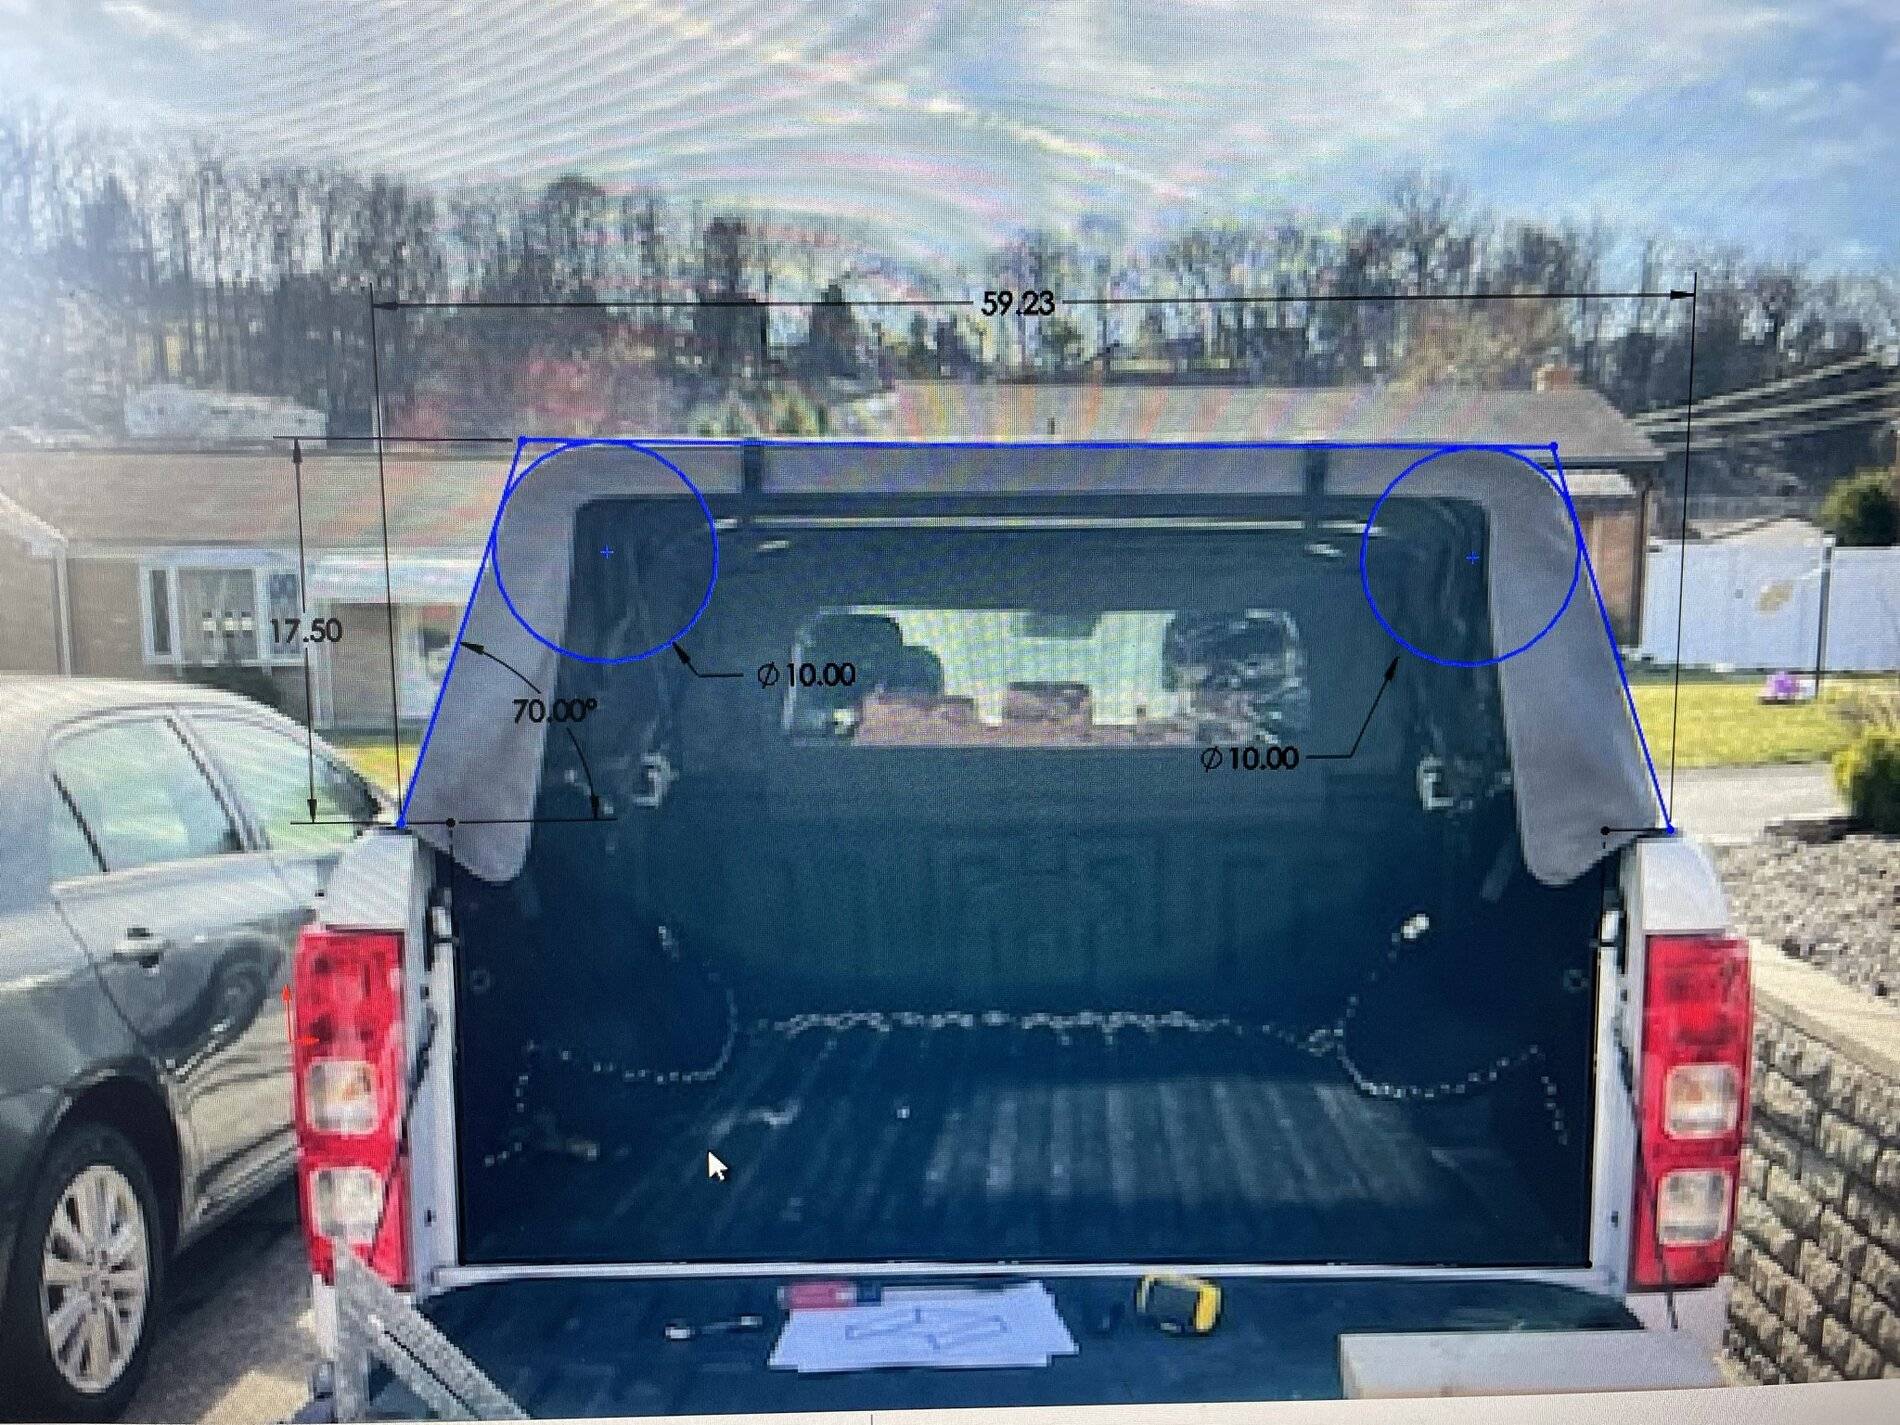
My initial design was made up in SolidWorks, I learned how to import images which was a great help for generalizing a few features I wasn't sure how to measure.
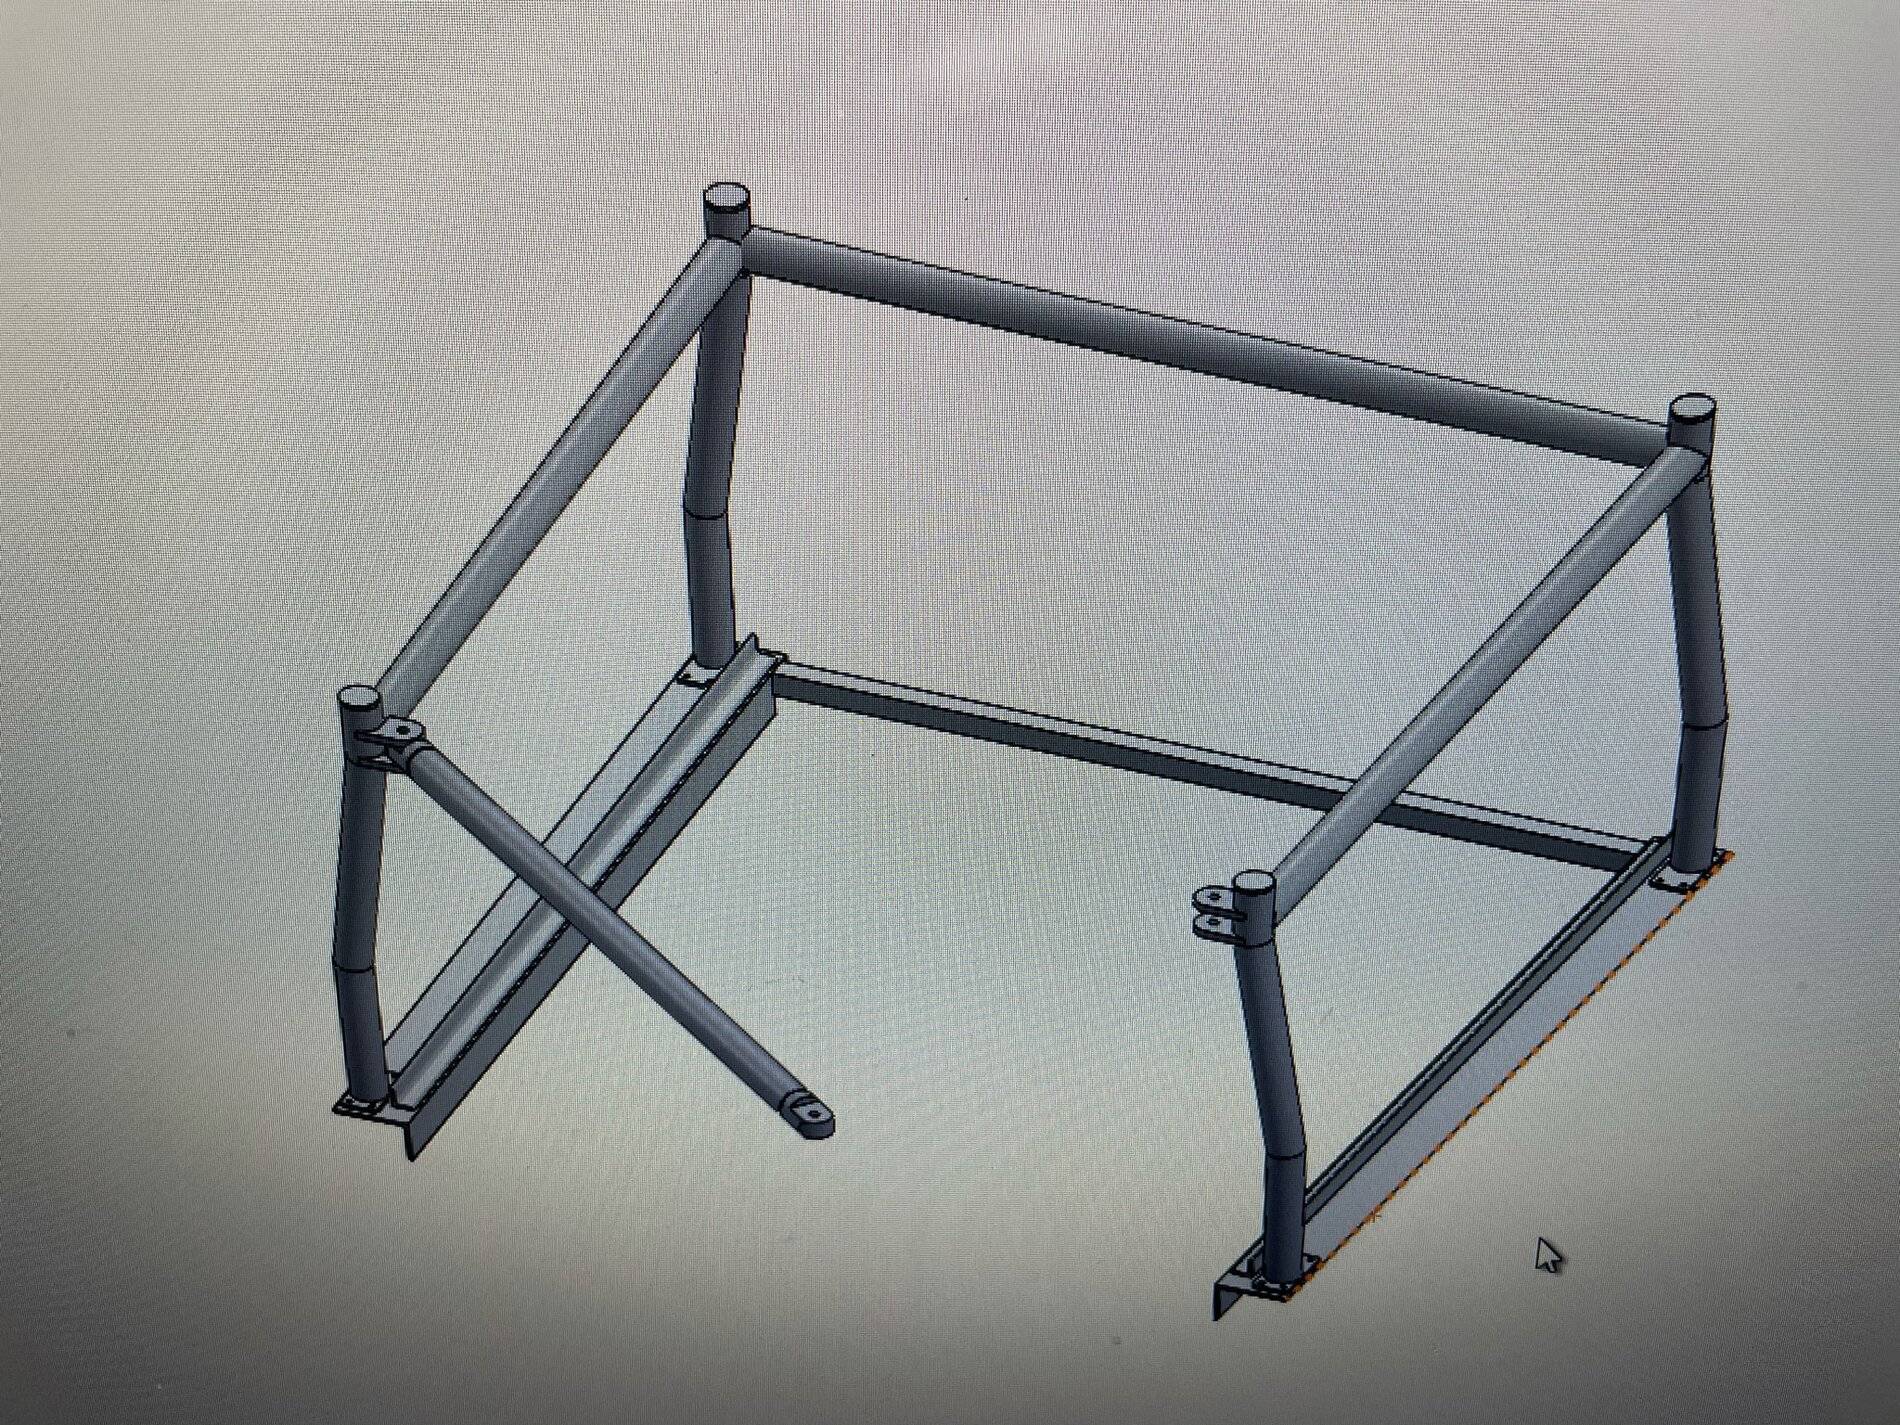
I played with a few ideas of how to have the rear bar removable but at present the rack is simple and solid.
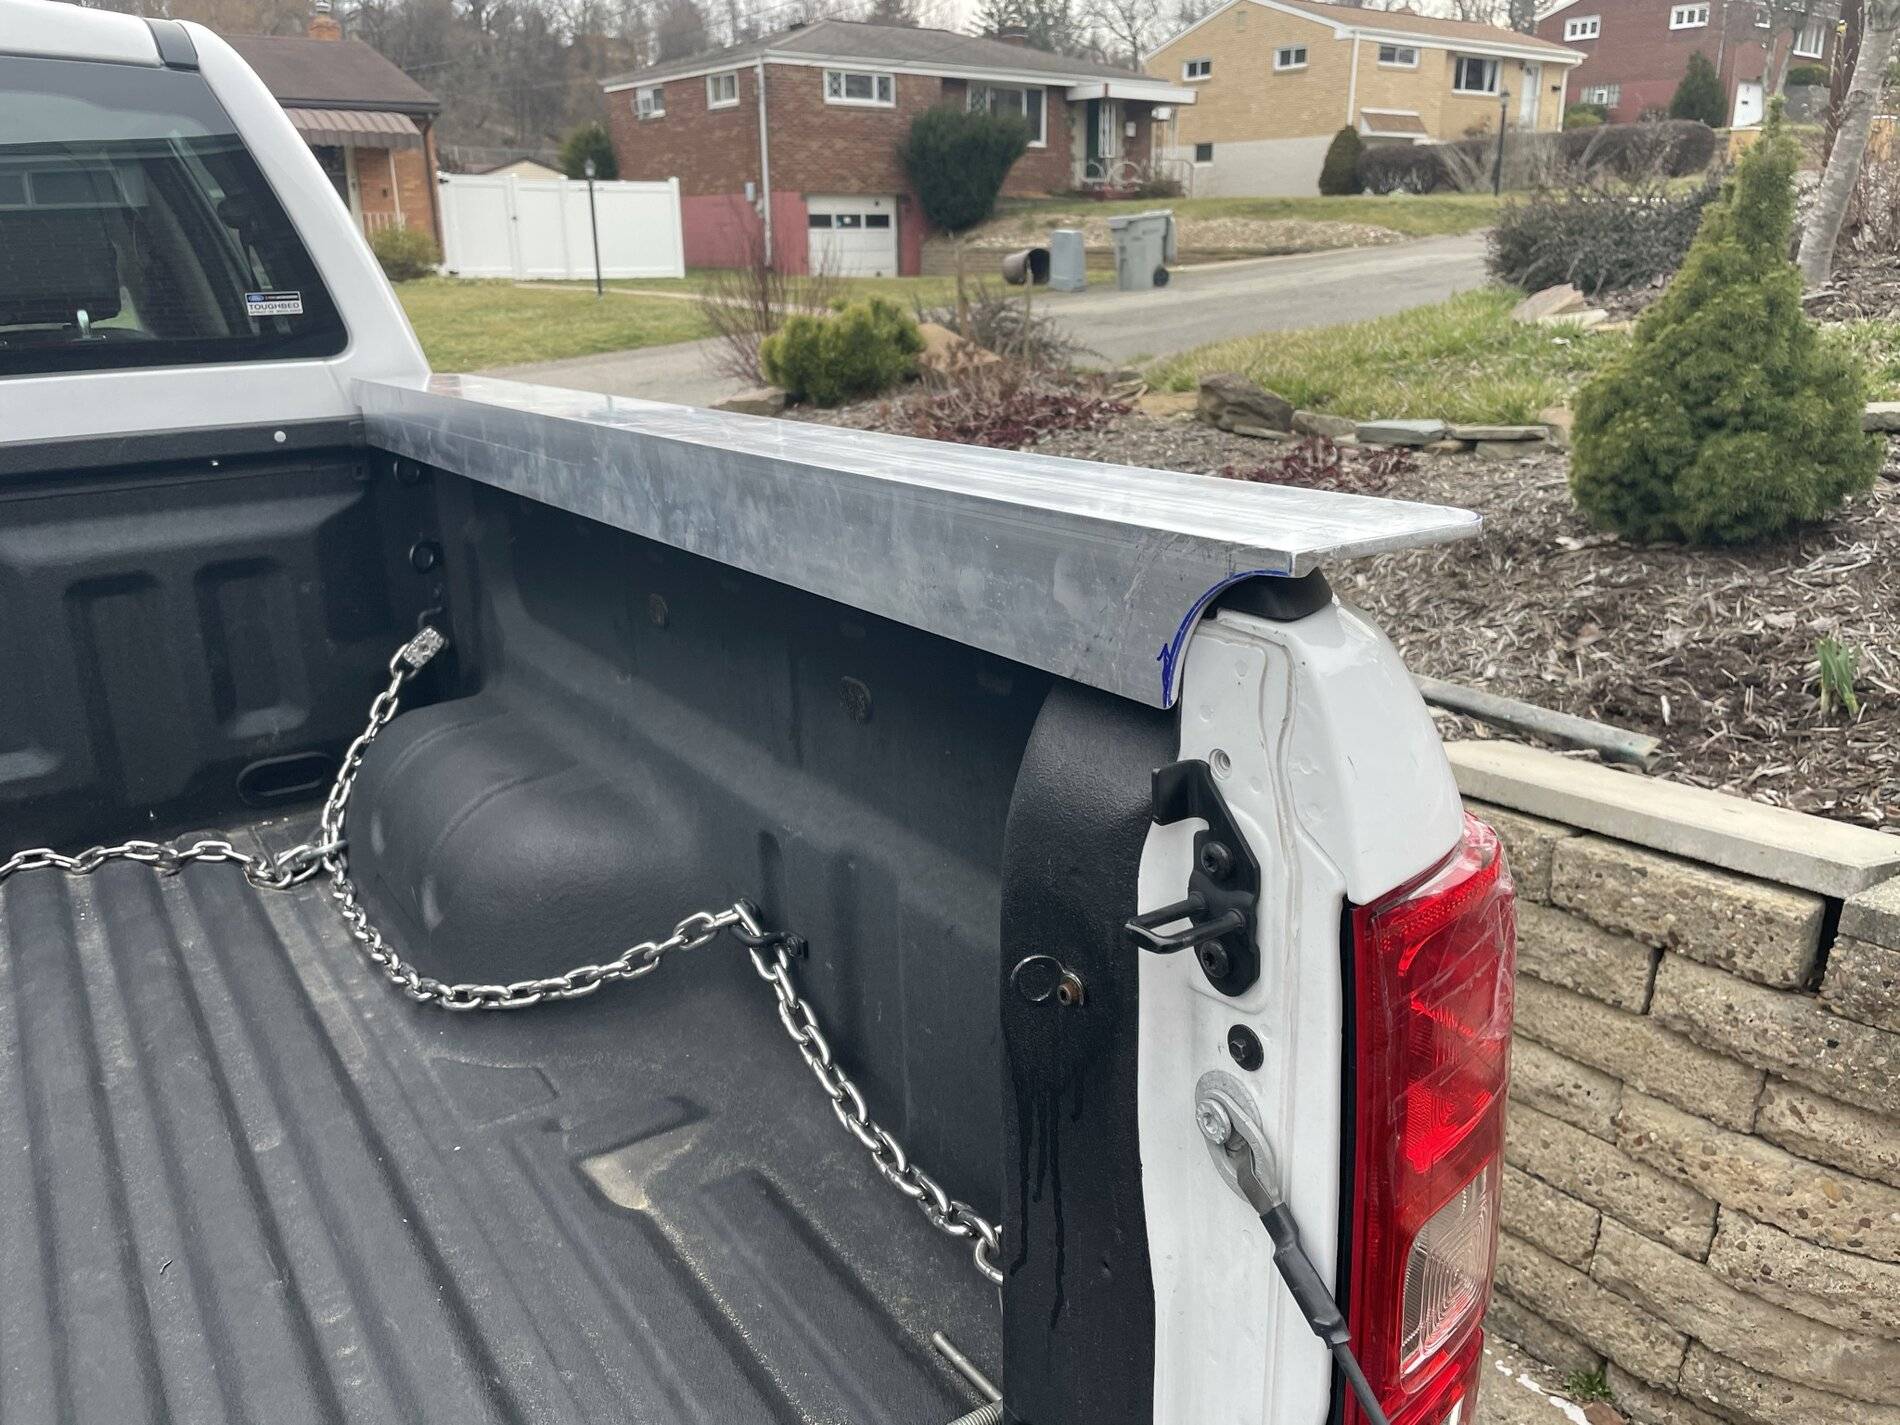
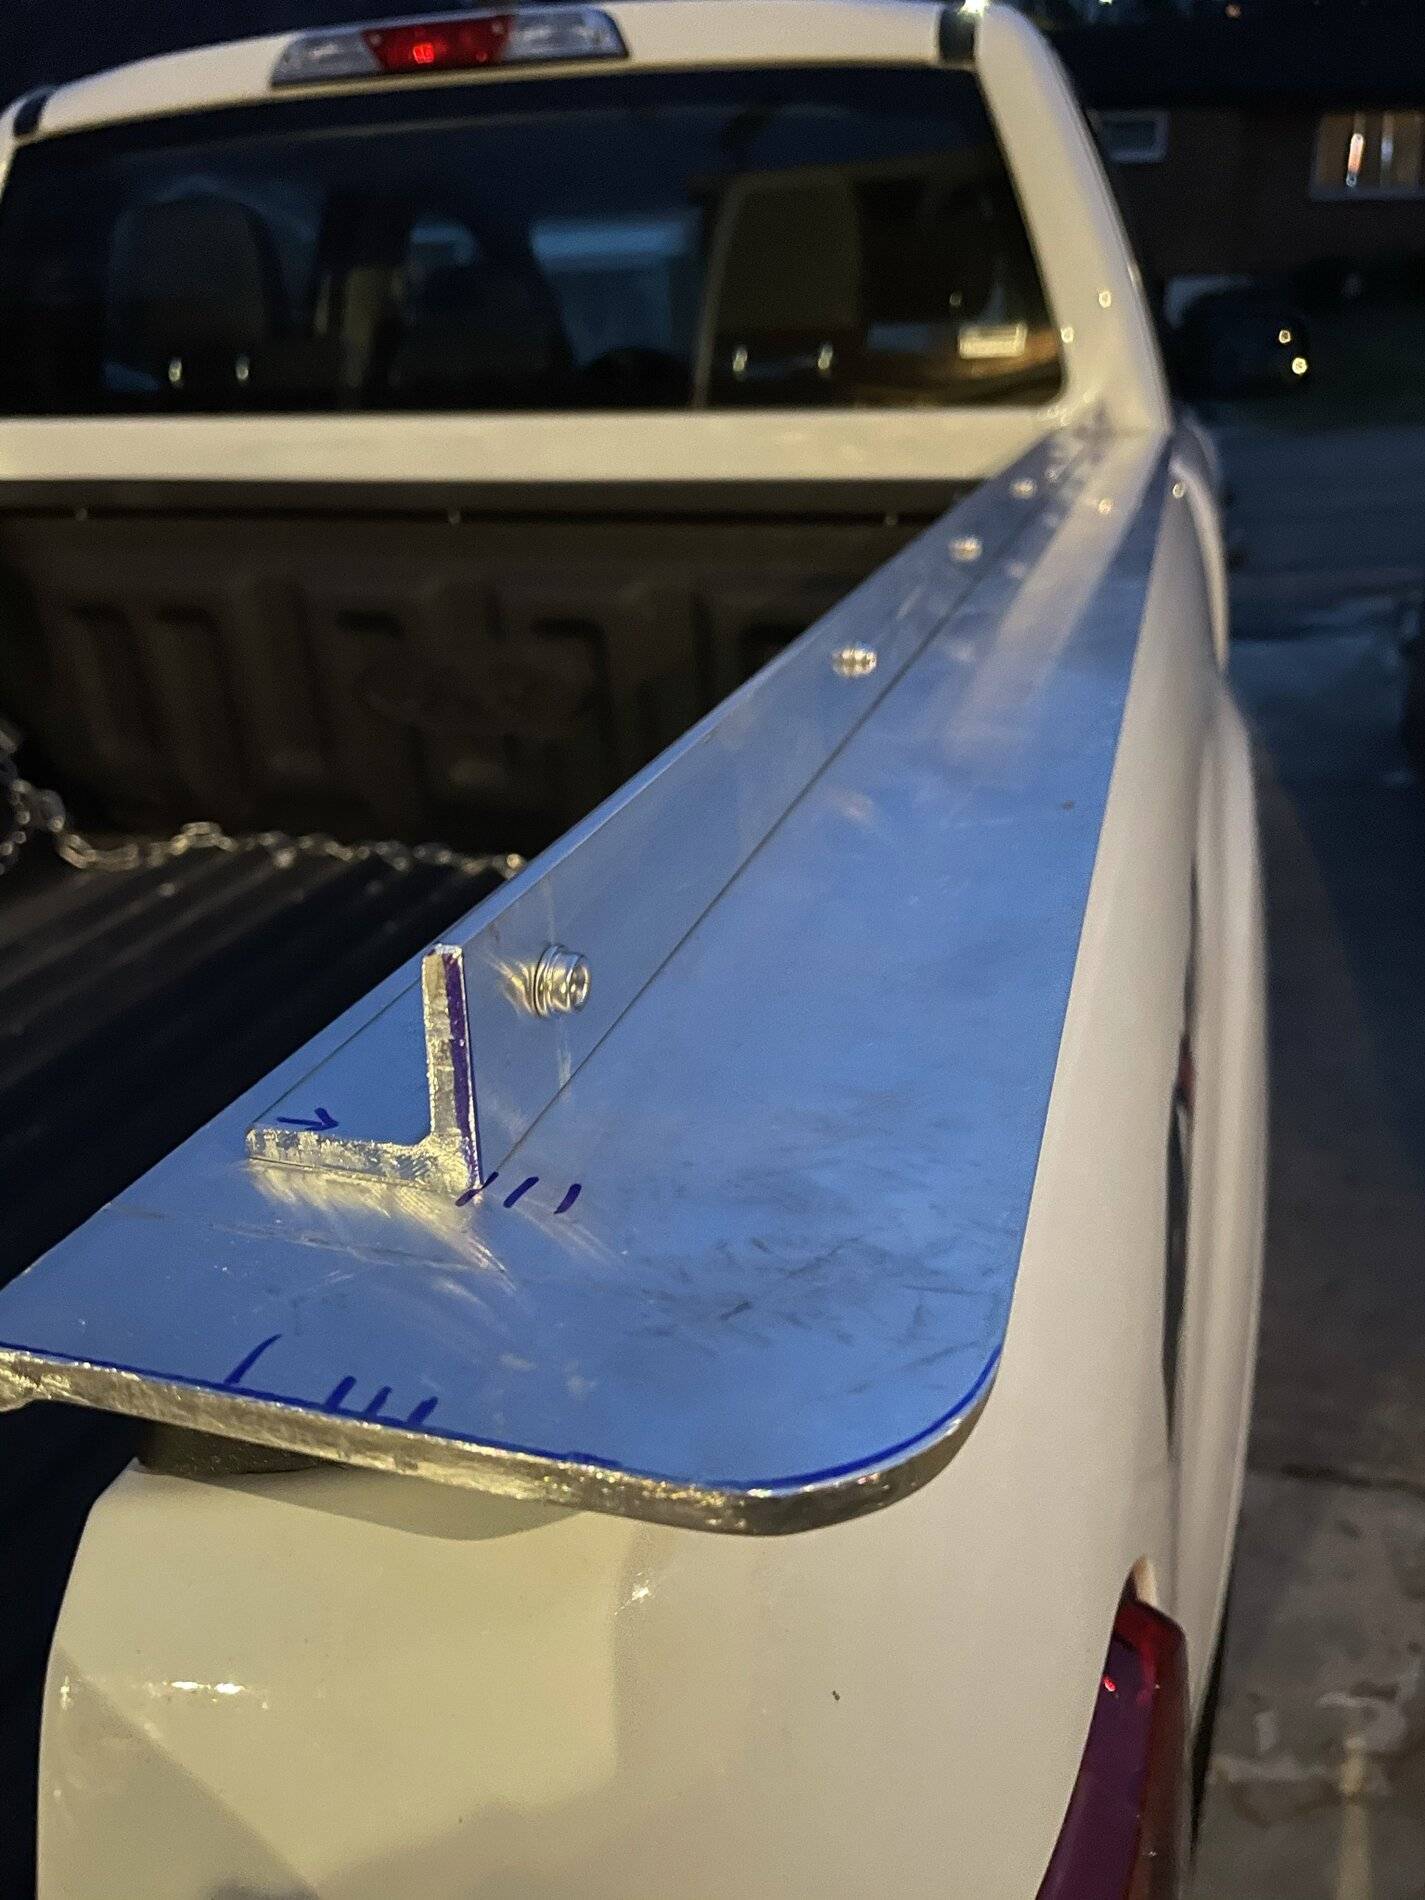
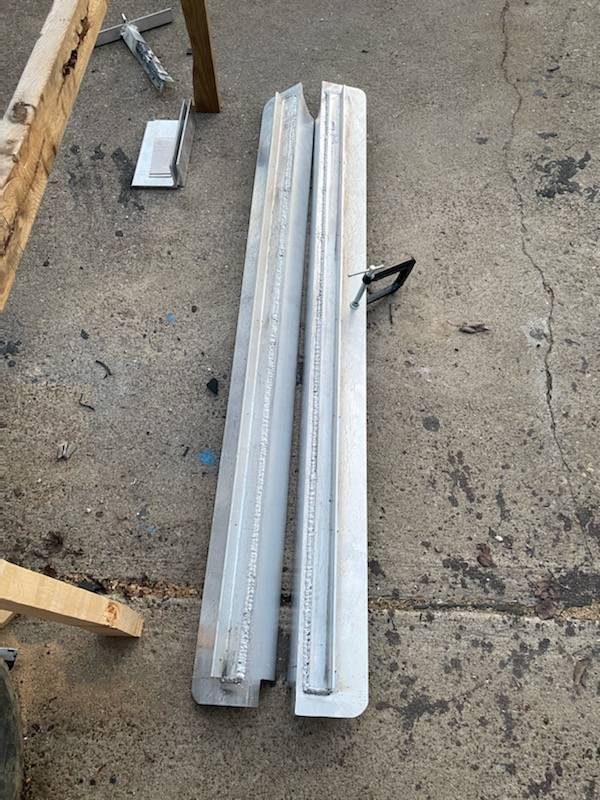
I used the rails as a chance to get somewhat up to speed on welding aluminum. I put 1 pass on the outside (to not get too built up where the baseplates of the rack will be) but I put 3 passes down the whole inside. The rails are 3x5x.25 and the cap's replacement rail is 1.5x1.5x.25.
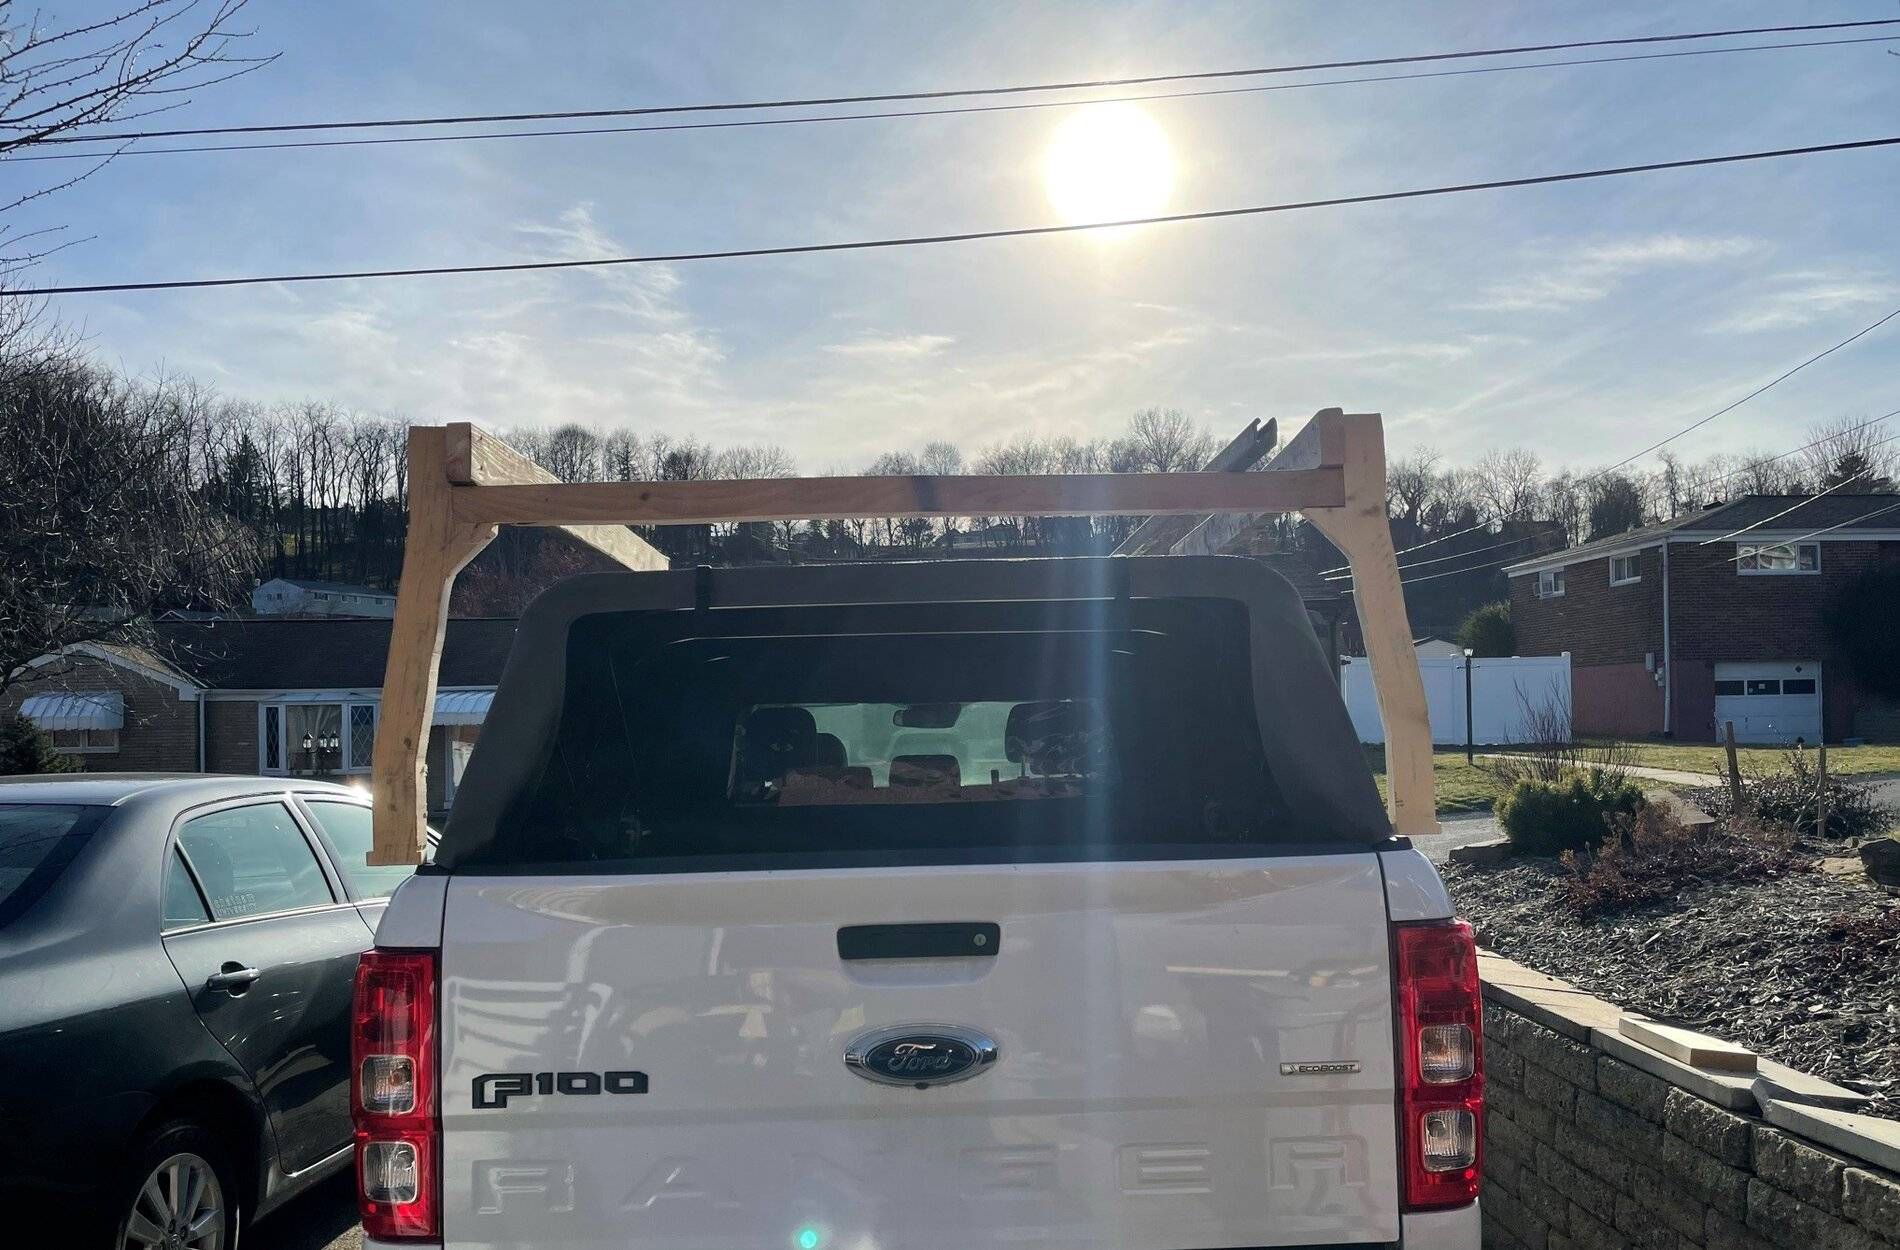
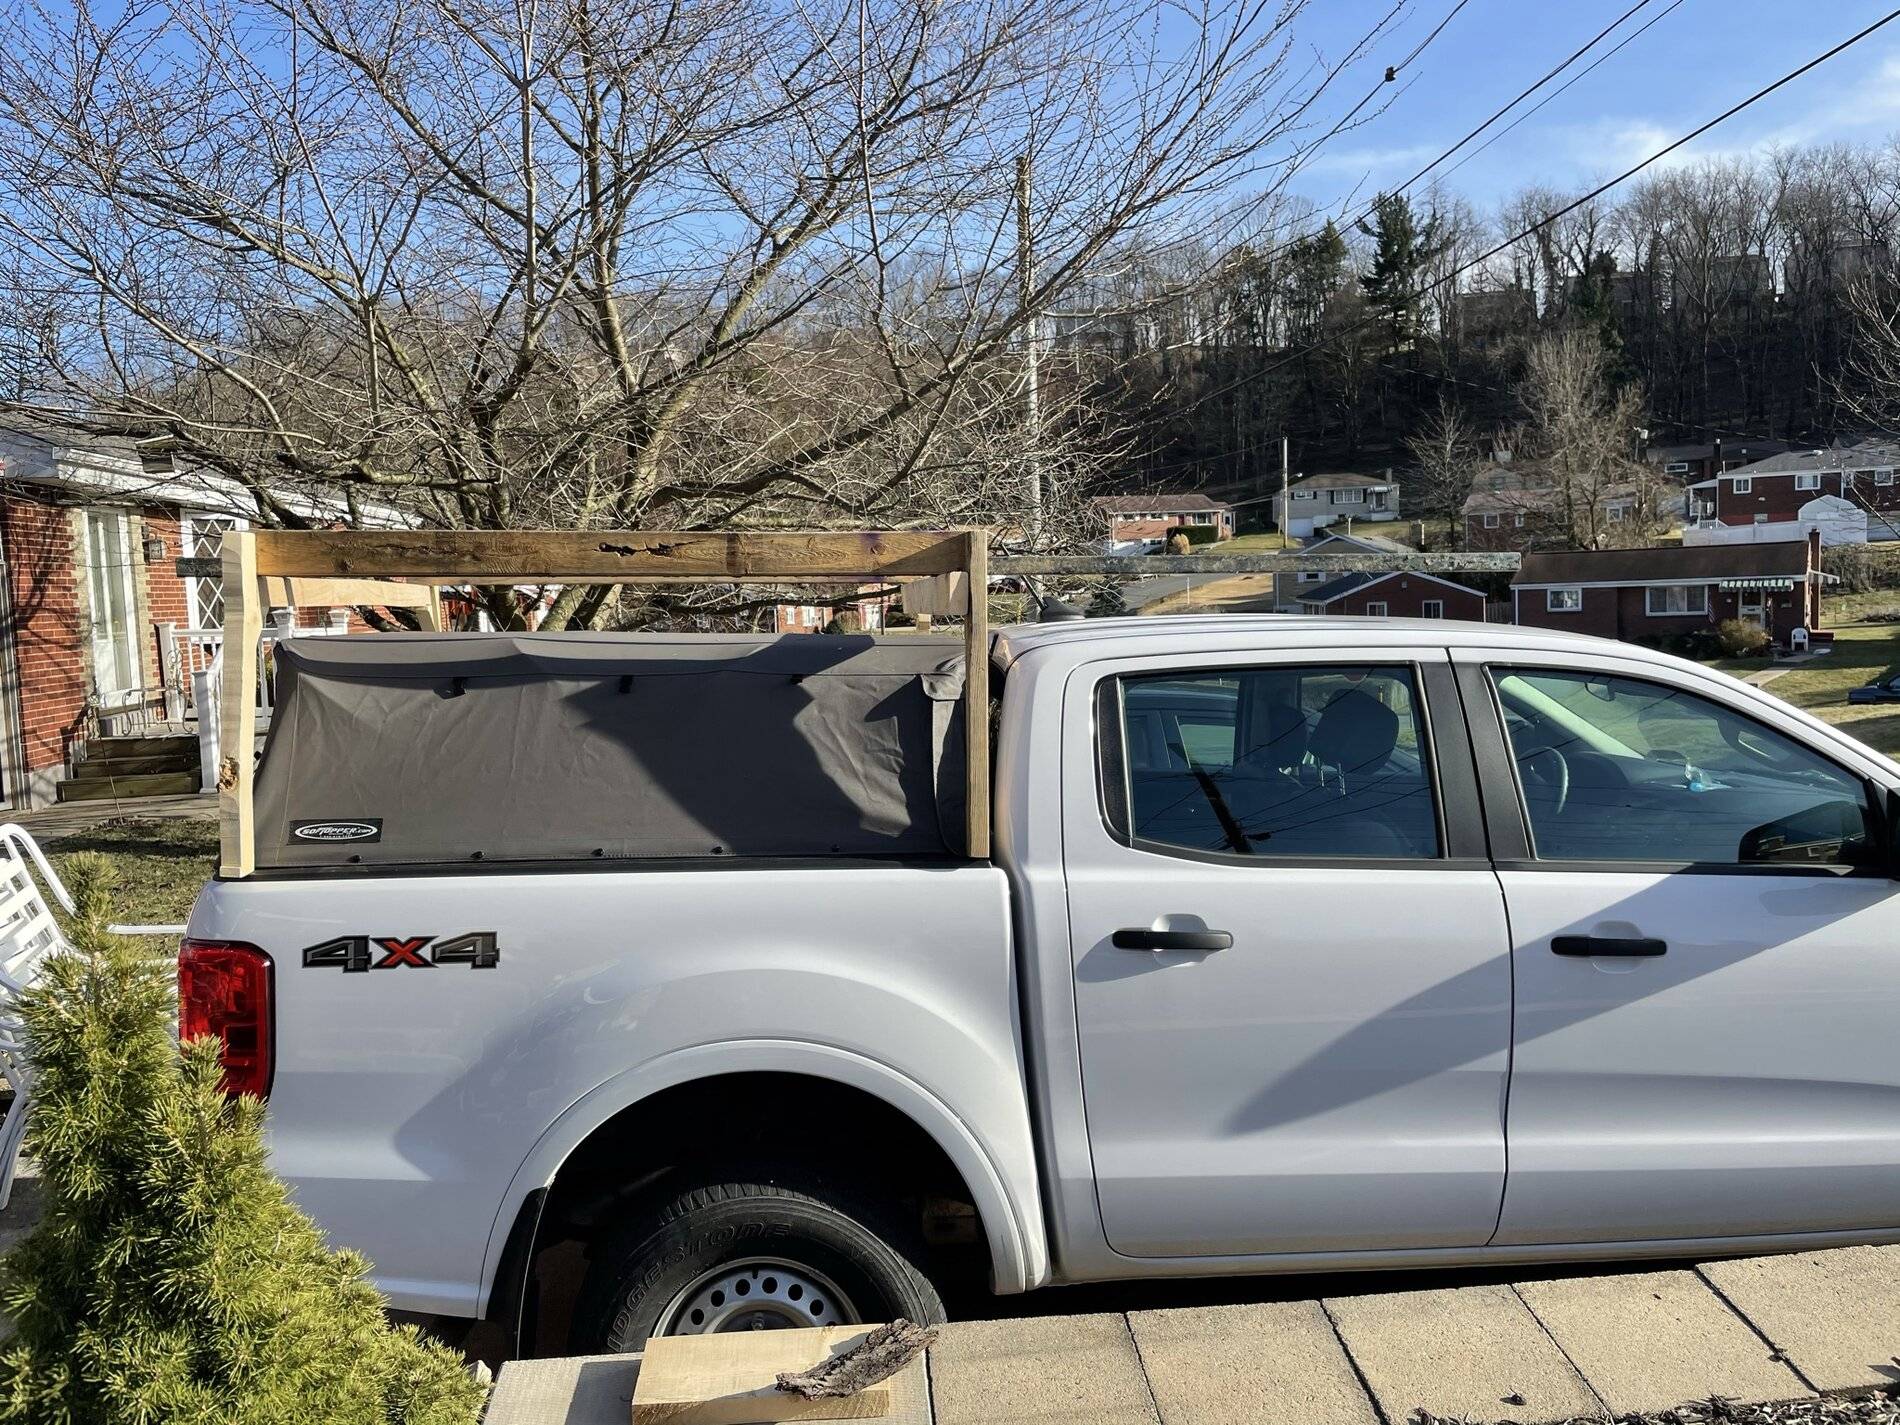
I'm not sure it was a needed step but I roughed together some scrap wood to see if cab clearance would be enough. This wood version made a good work surface to weld the rails before getting the lawn chairs and milk crates out.

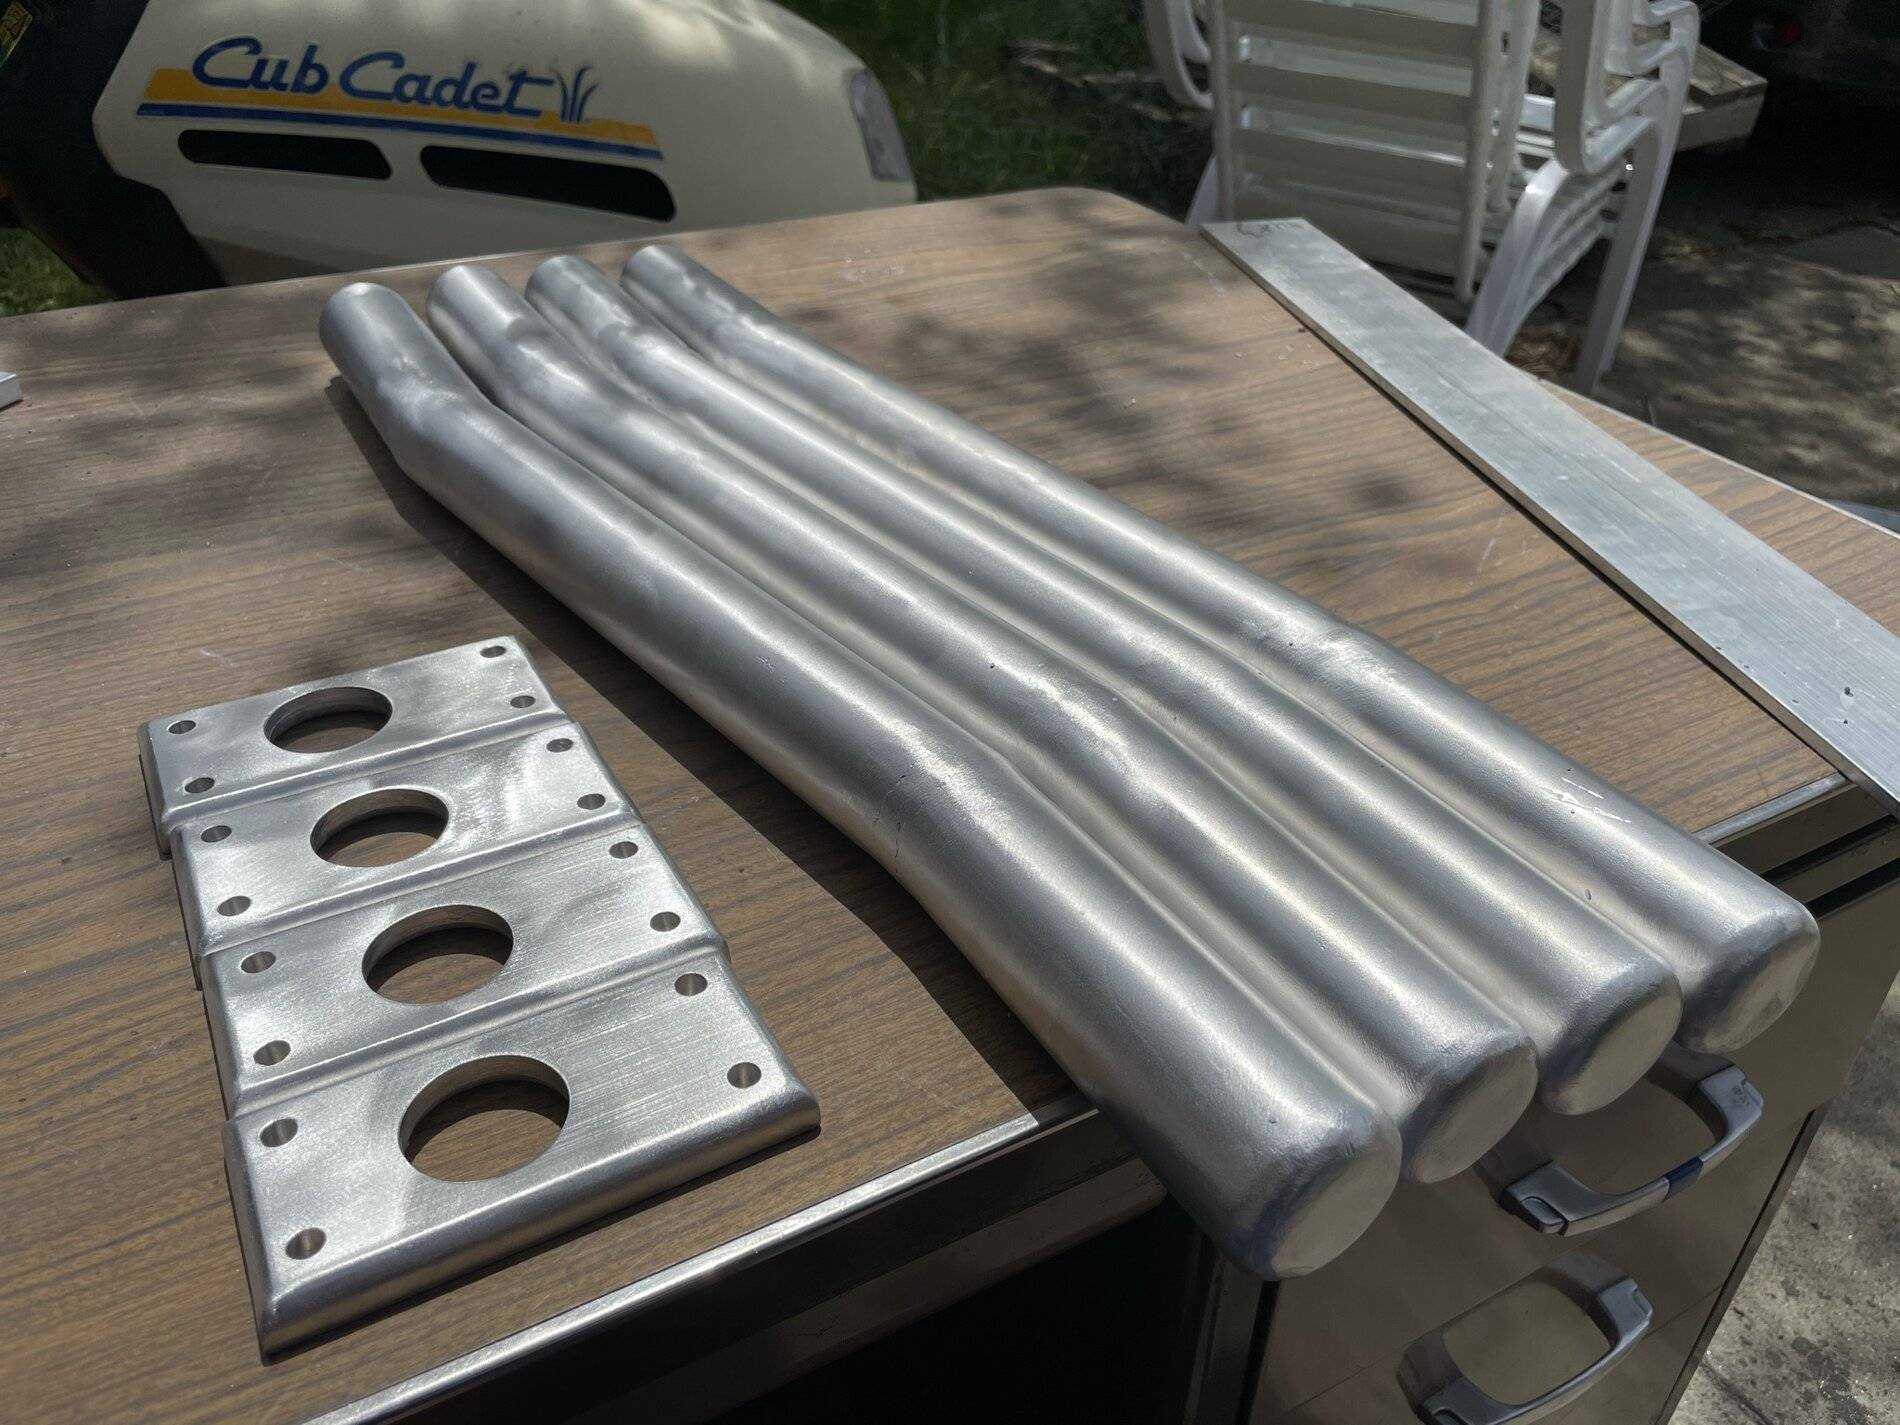
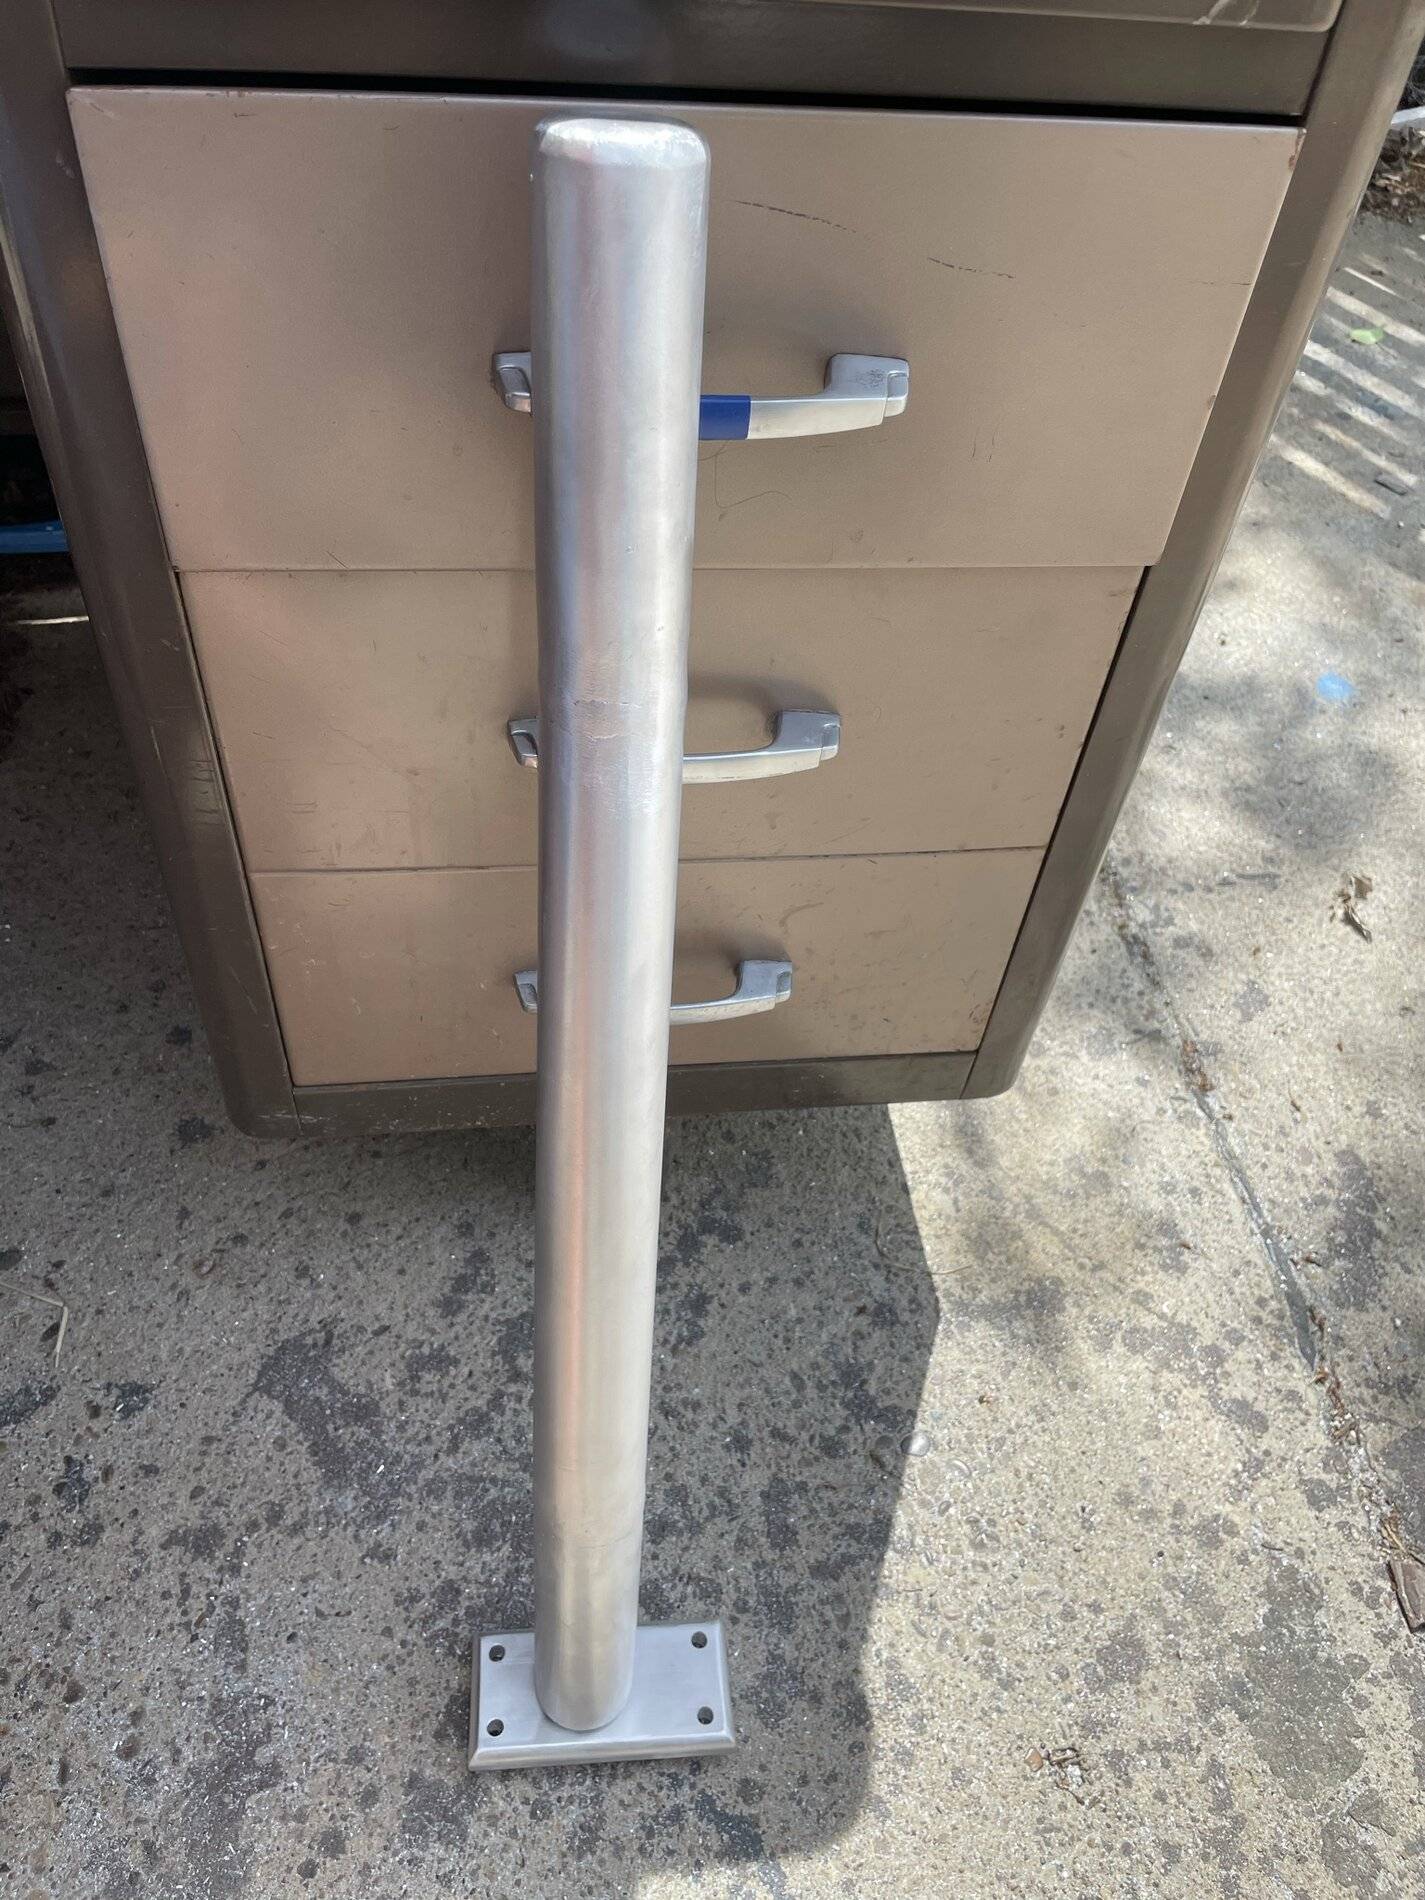
When I got to the baseplates and risers I wanted to work in some redundancy as to not just be relying on my welds. The bottom 4" are solid round stock plug welded into the riser and welded from below in the router-ed channel on the baseplates.
I originally wanted to put the 10* angles in with a pipe bender but after one try (all the spare material I wanted to waste) I moved on to cutting and butting the riser legs.
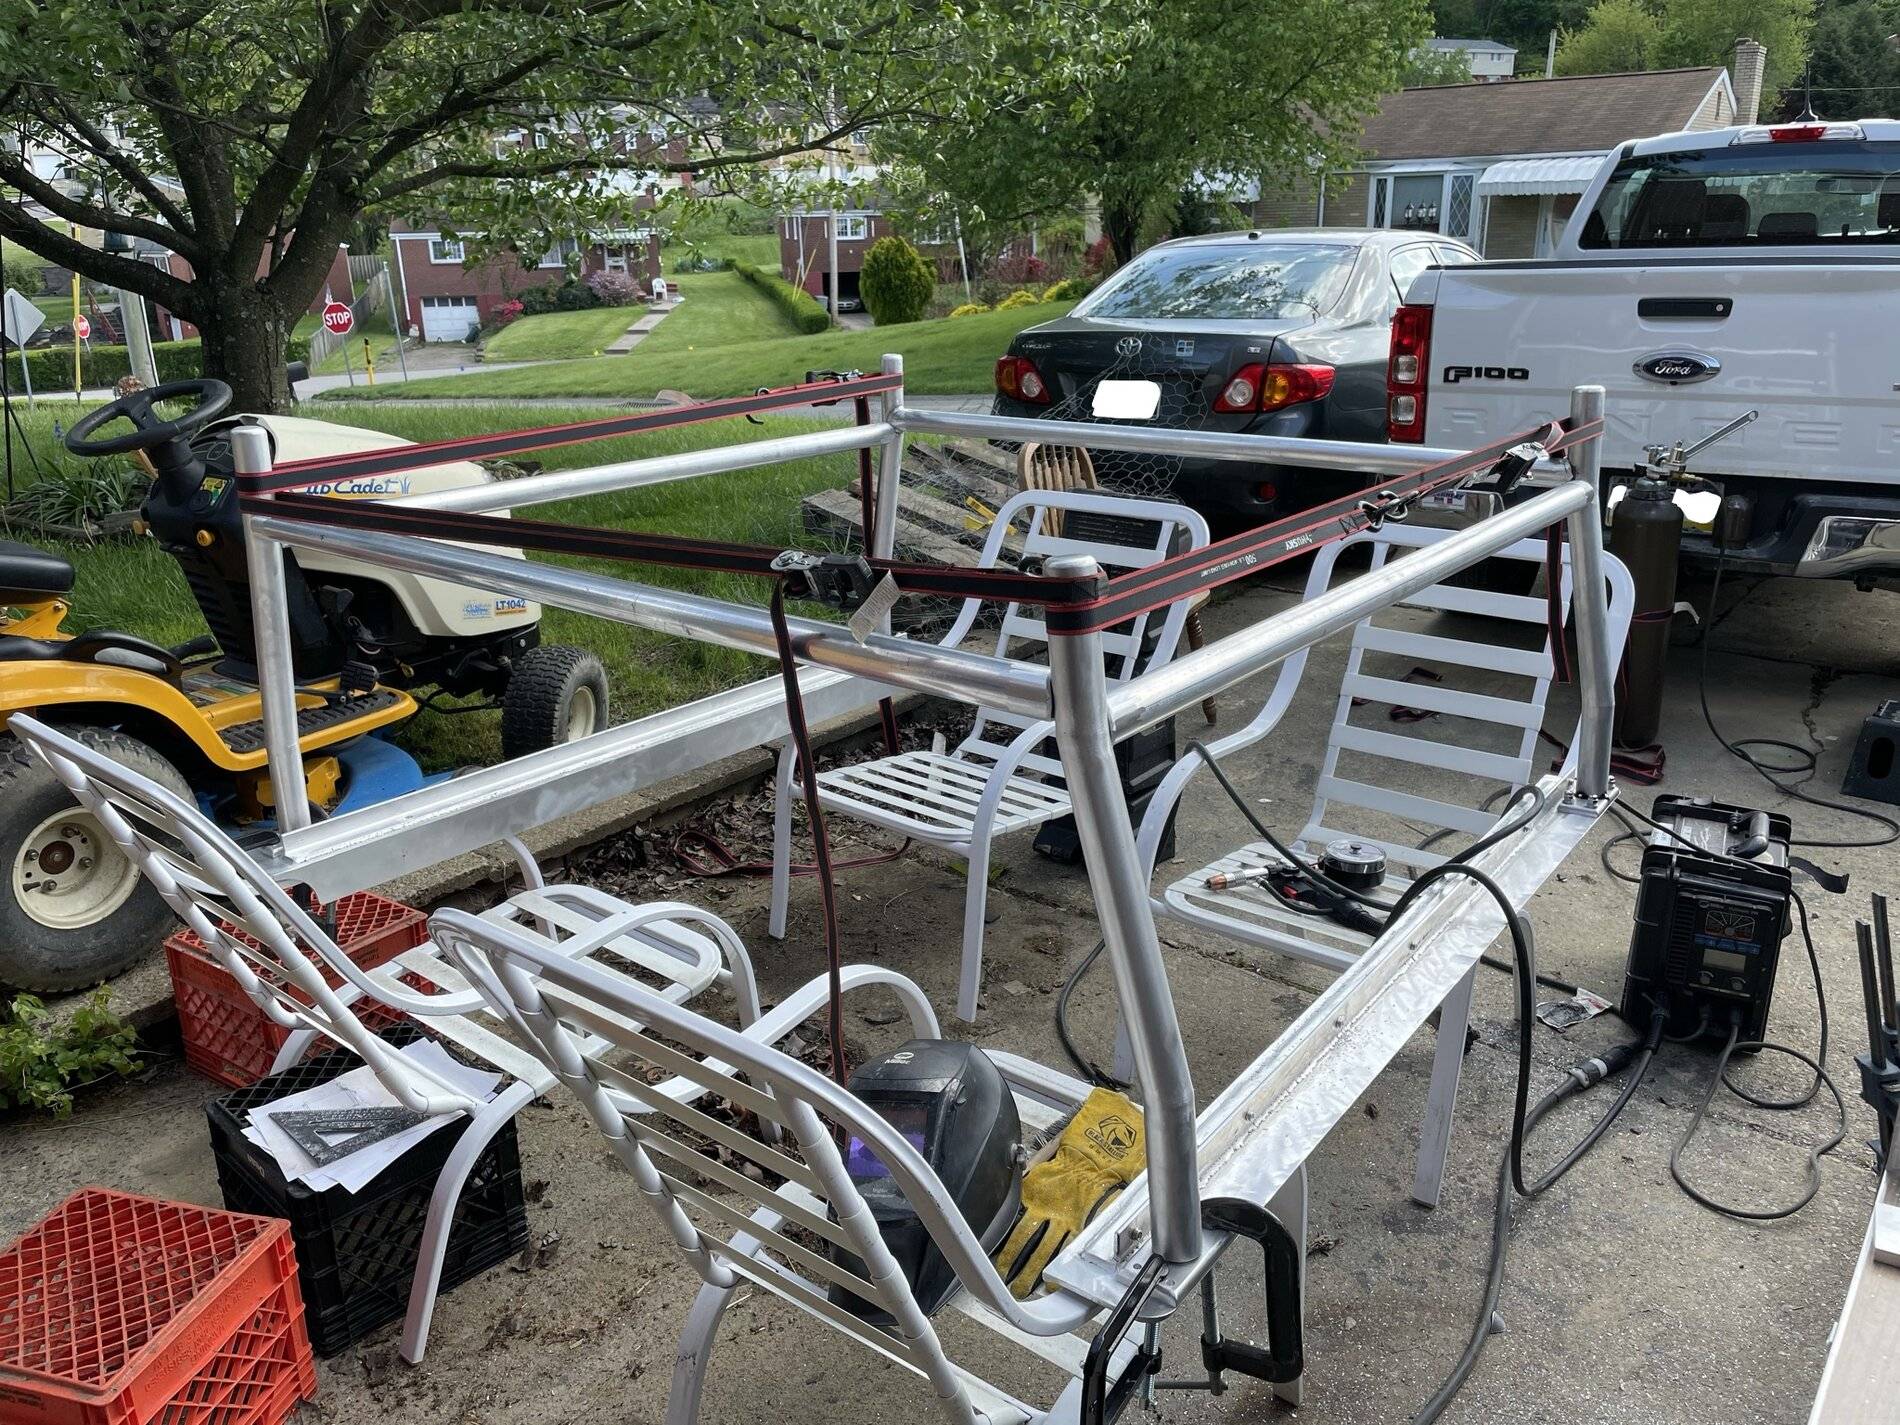
I wasn't sure how to clamp the rails while assembling the rack, strapping worked well enough. the neighbors may have seen me topple the mess a few times before I was tacked together. At this point I sat fish mouth on fish mouth instead of mitering, I like this "field fit" better since it leaves the sides lower for my sausages and ropes when I have anything on the rack.

I'm not sure if there is a better finish to give the rack but from 10' the brushed finish looks good enough.

Fitment of the topper wasn't too bad when the rack was finished. I added the tombstones with pin for the topper frame after using a 2x4 and bottle jack to lift the buttoned topper into a tight position (I attempted first to roughly mimic the topper's pin measuring the original rails but it didn't sit right).
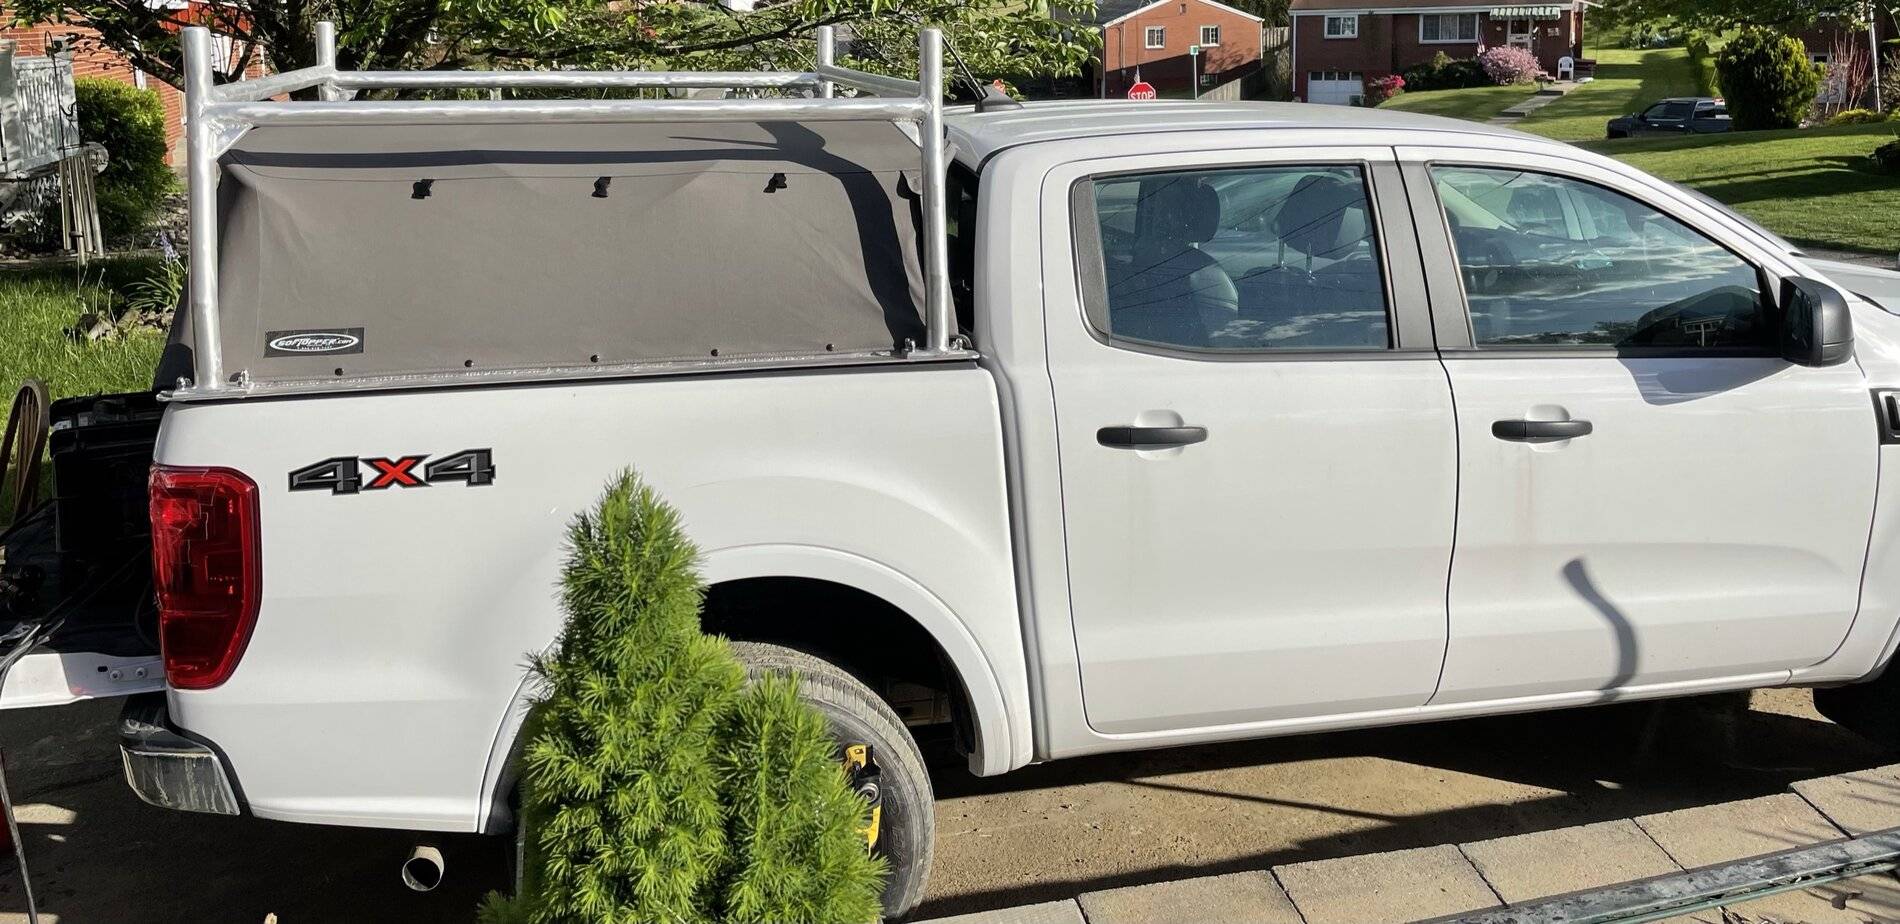
The topper folds up and down with no issues (that wasn't planned).
Cleats were added to overlap the lower butt joint in the risers, all joints at this point have some sort of layering. I knew I was going to have some tight snap clearances so my drivers door holds a snap tool (I highly recommend one if you have a tight topper). Next steps include adding stainless ratchet straps (2 on each side).
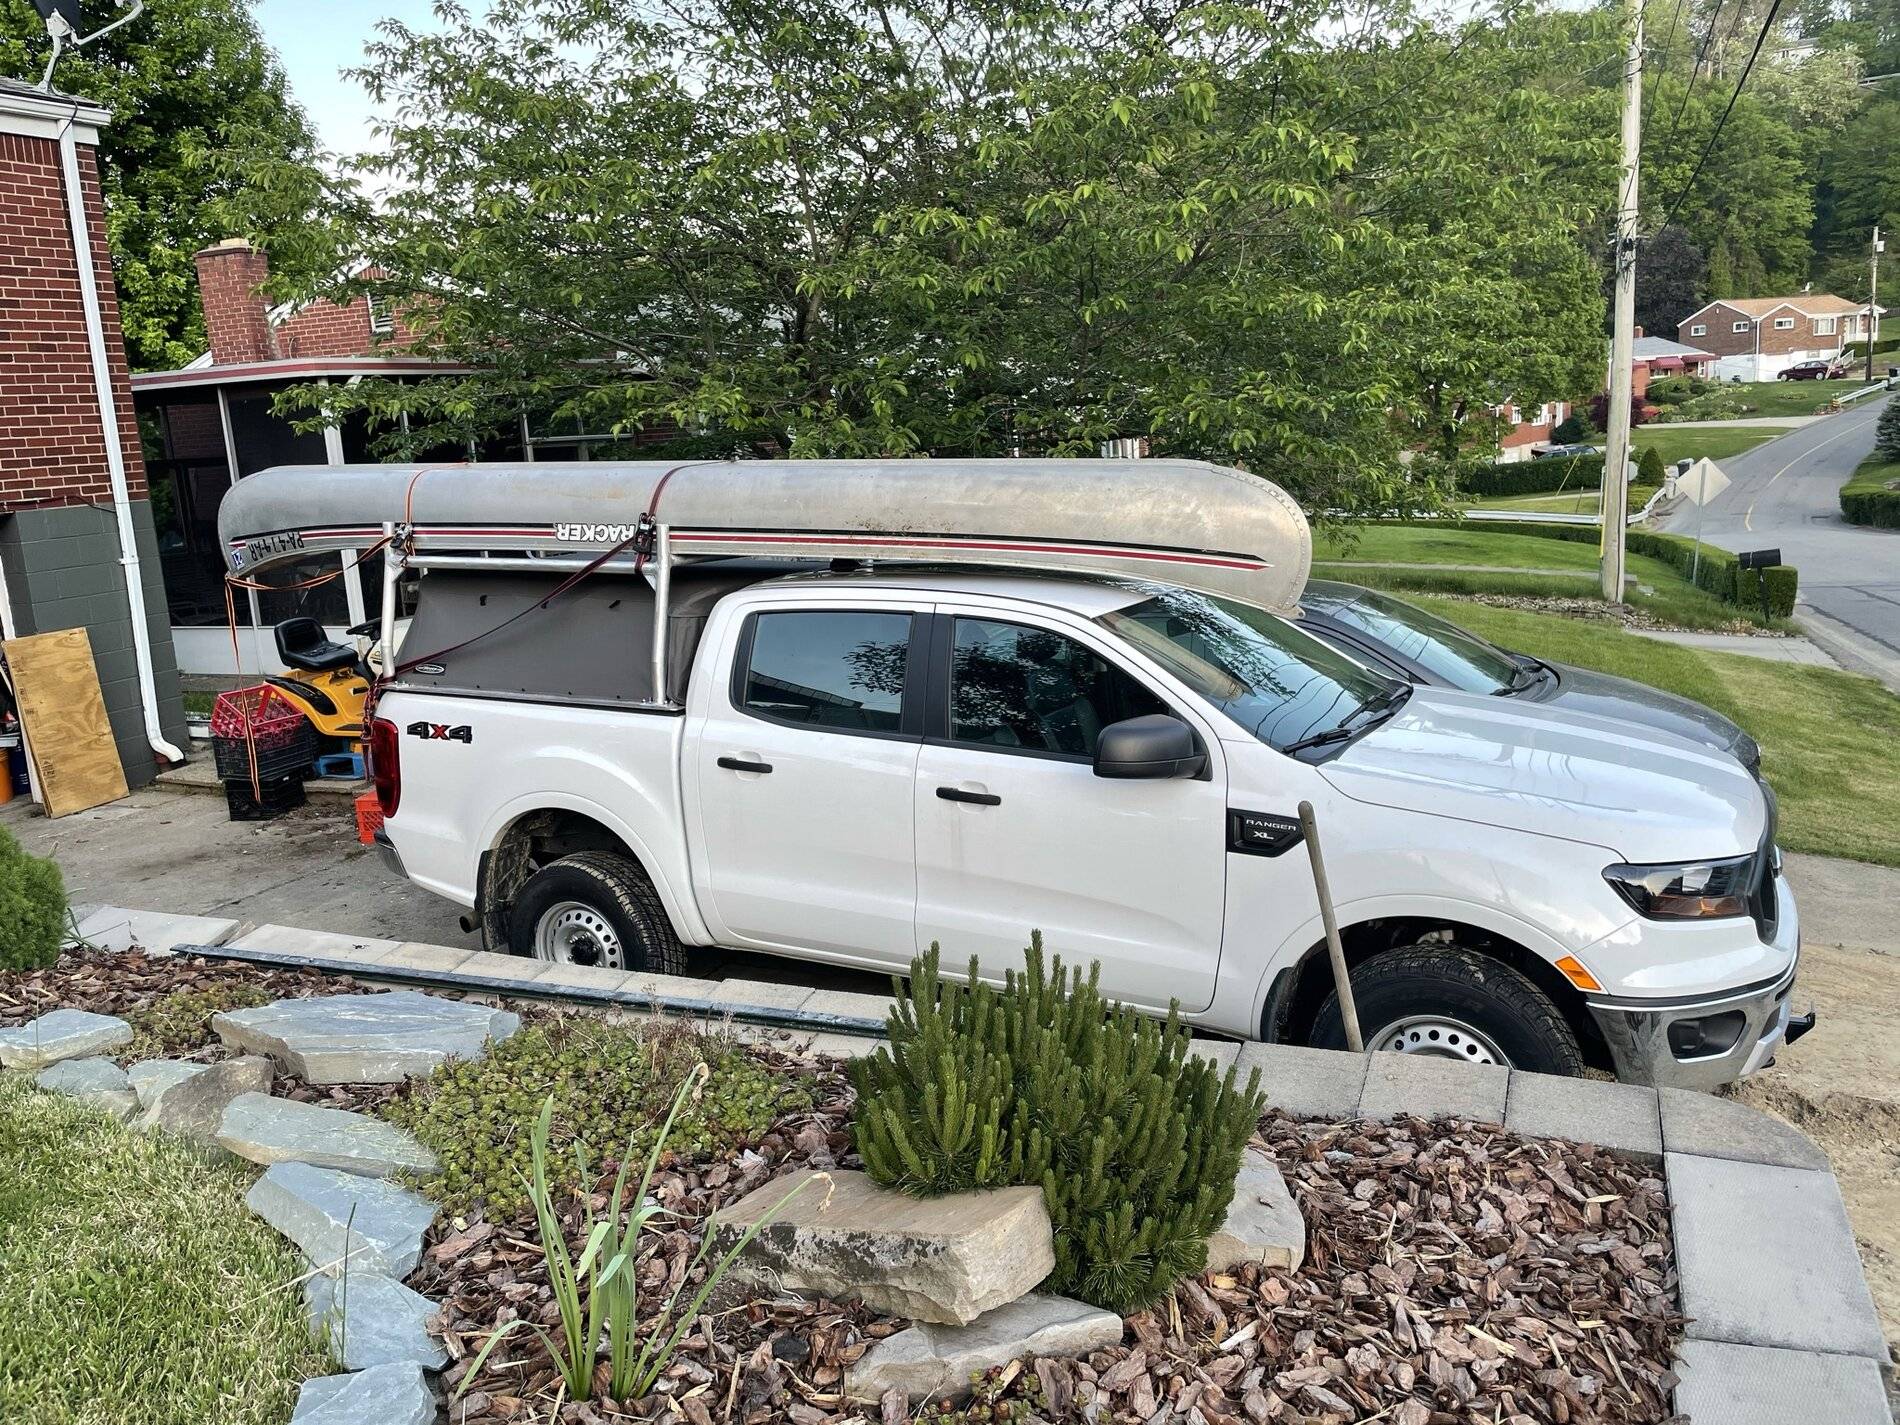
Yes there is a learning curve scratch on my roof from taking the canoe off the first time. Having a bed rack makes these short beds the perfect length. Thank you for the read/look.
RIP Sam (grey cat)
Sponsored
Last edited:
