tehschkott
Well-Known Member
- First Name
- Scott
- Joined
- Sep 5, 2020
- Threads
- 25
- Messages
- 278
- Reaction score
- 384
- Location
- Flavor Country
- Vehicle(s)
- 2020 Ranger Lariat Crew Cab 4x4
- Occupation
- Cat herder
- Vehicle Showcase
- 1
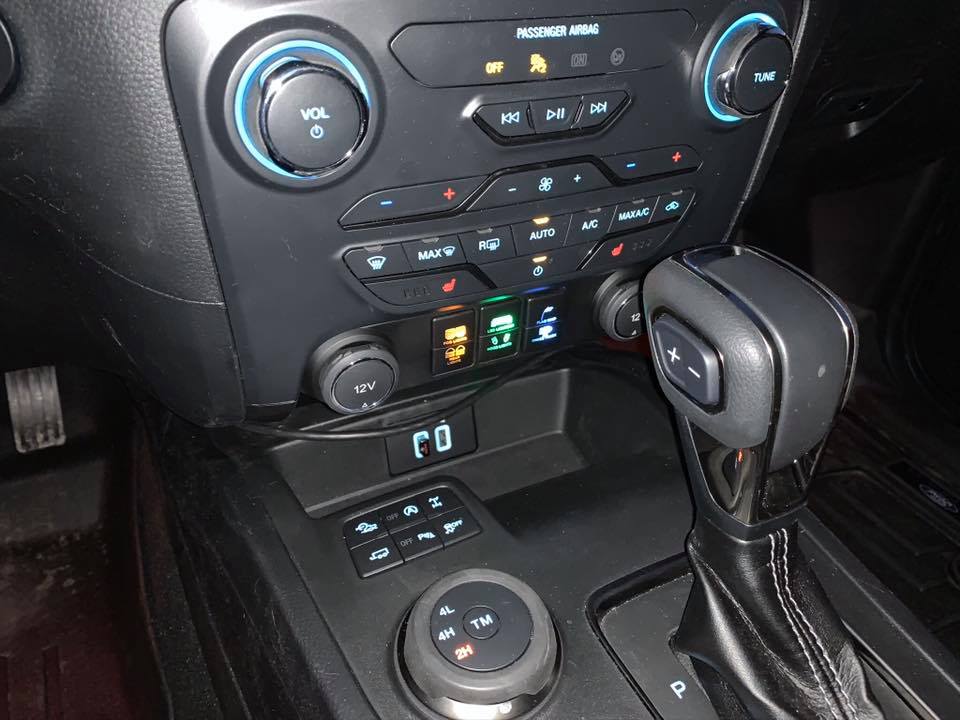
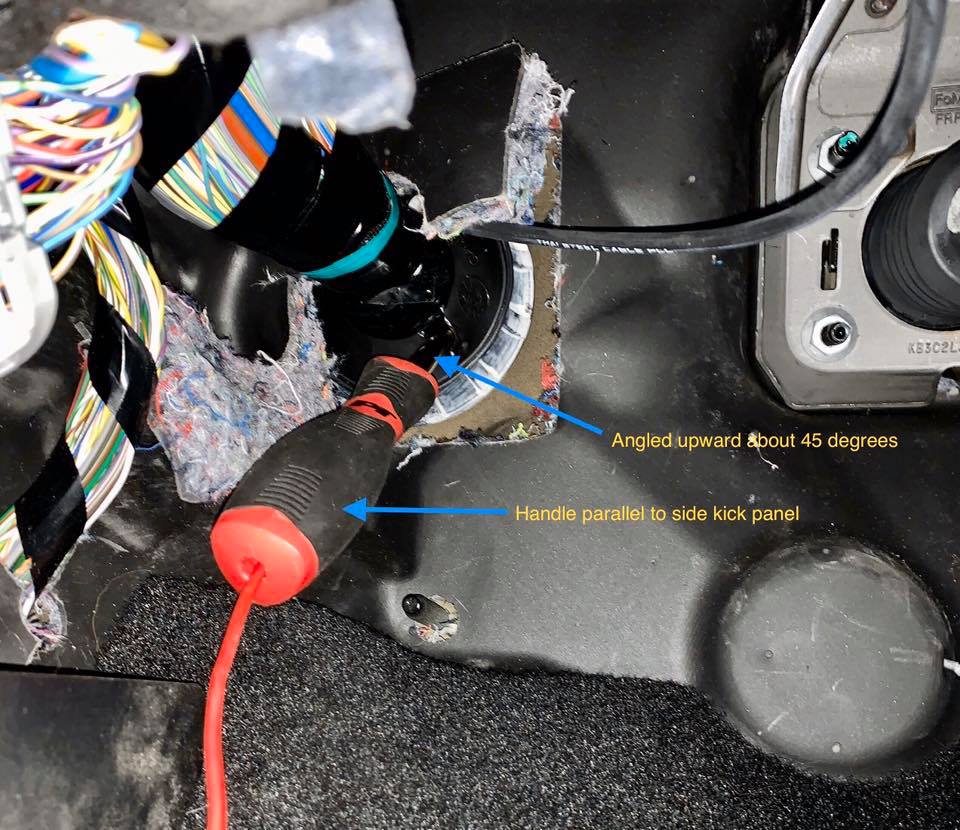
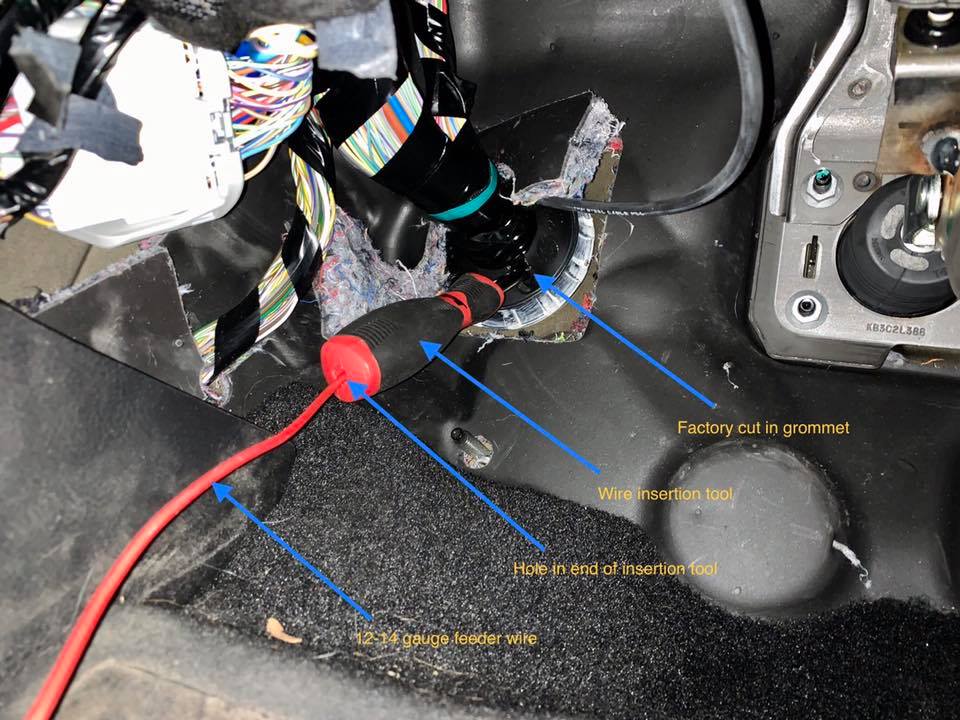
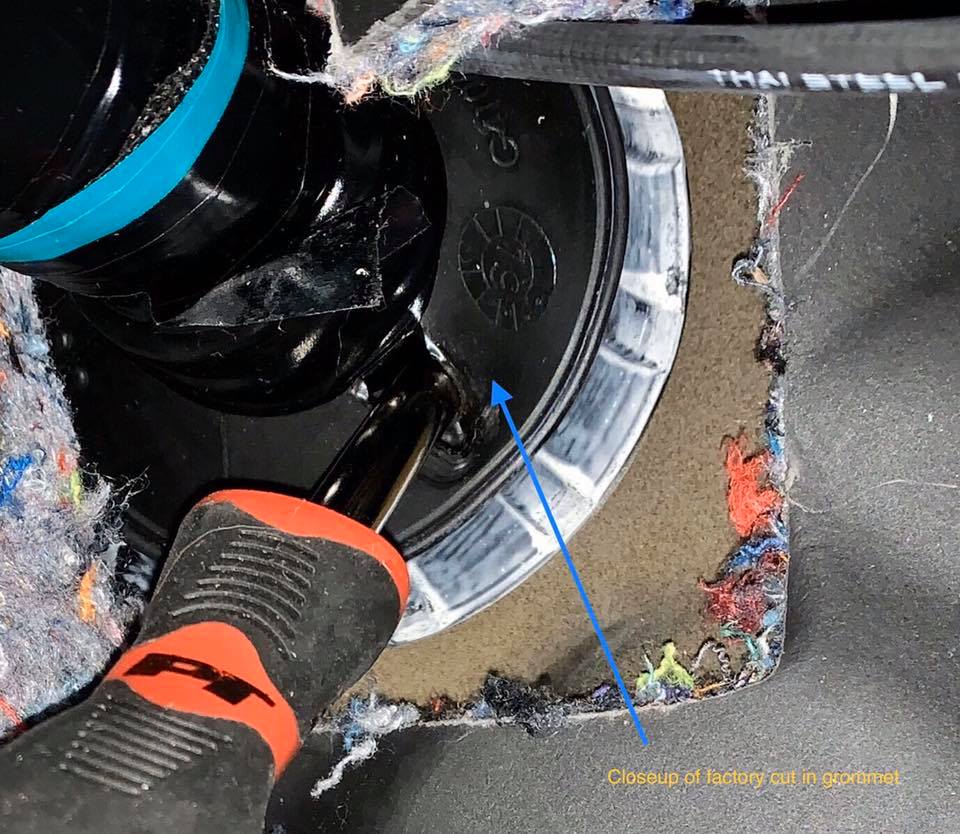
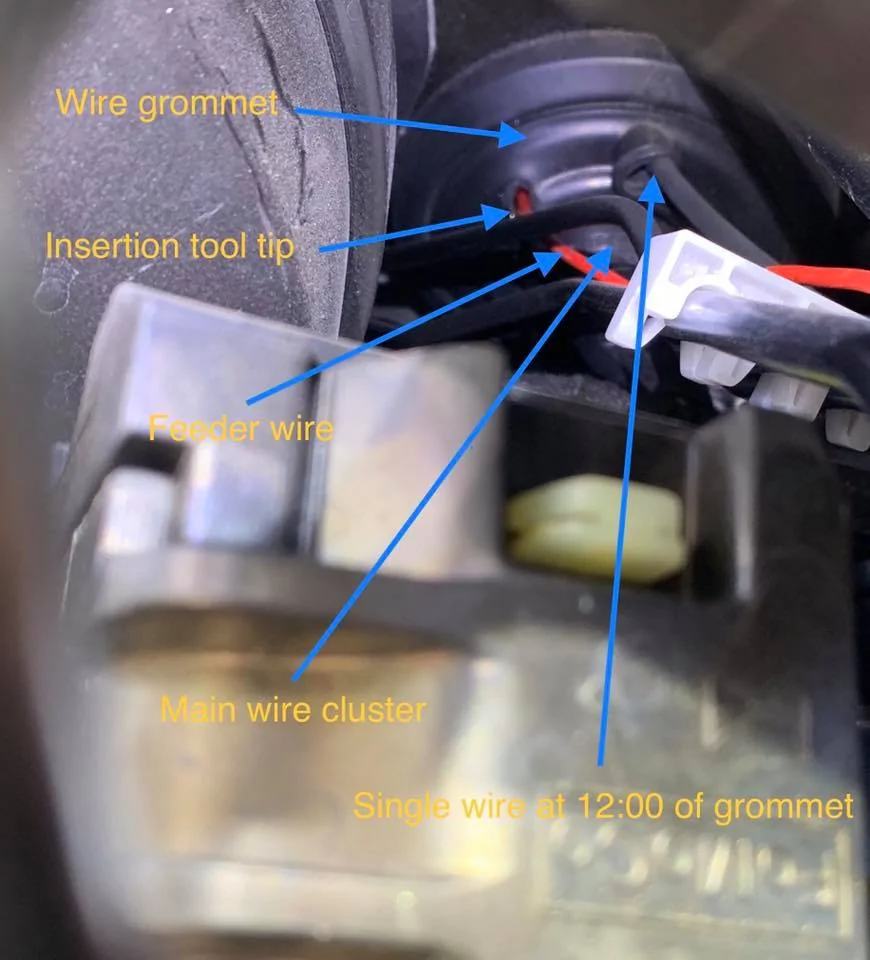
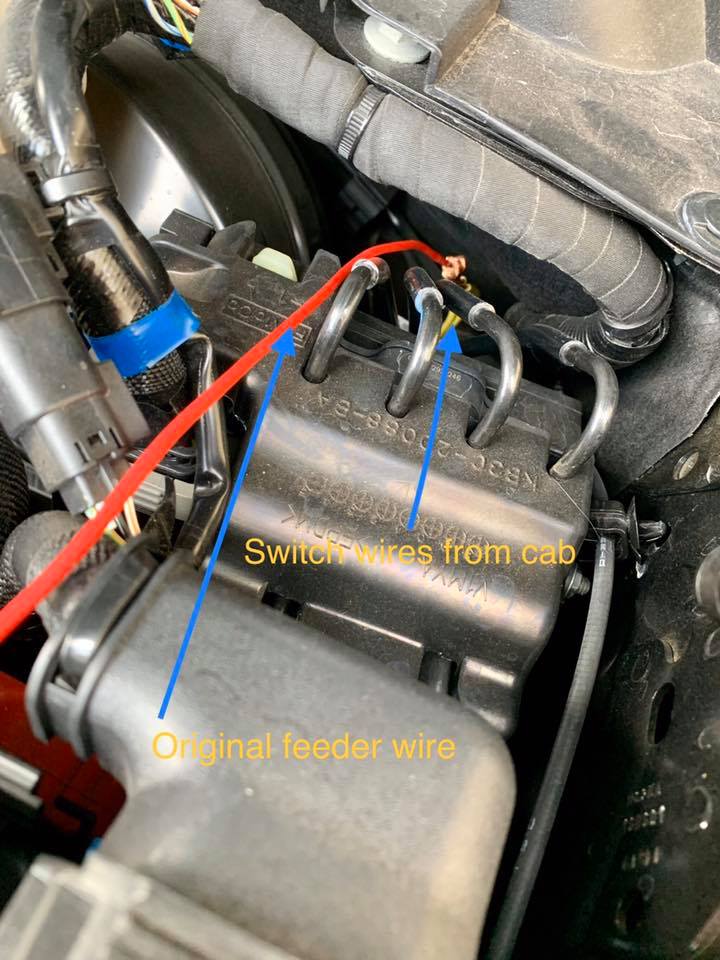
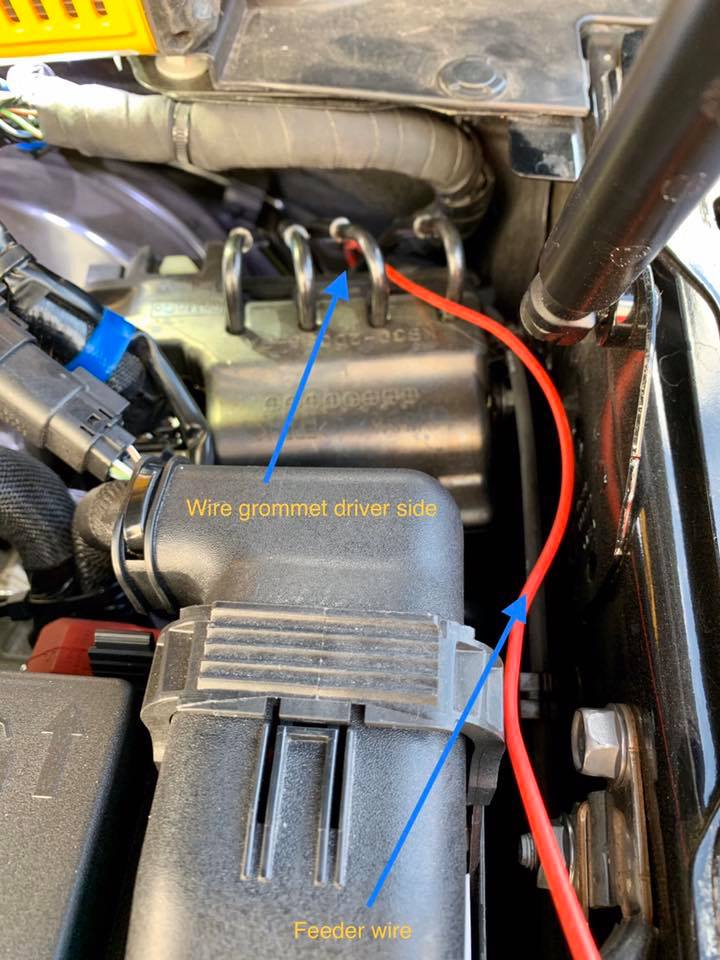
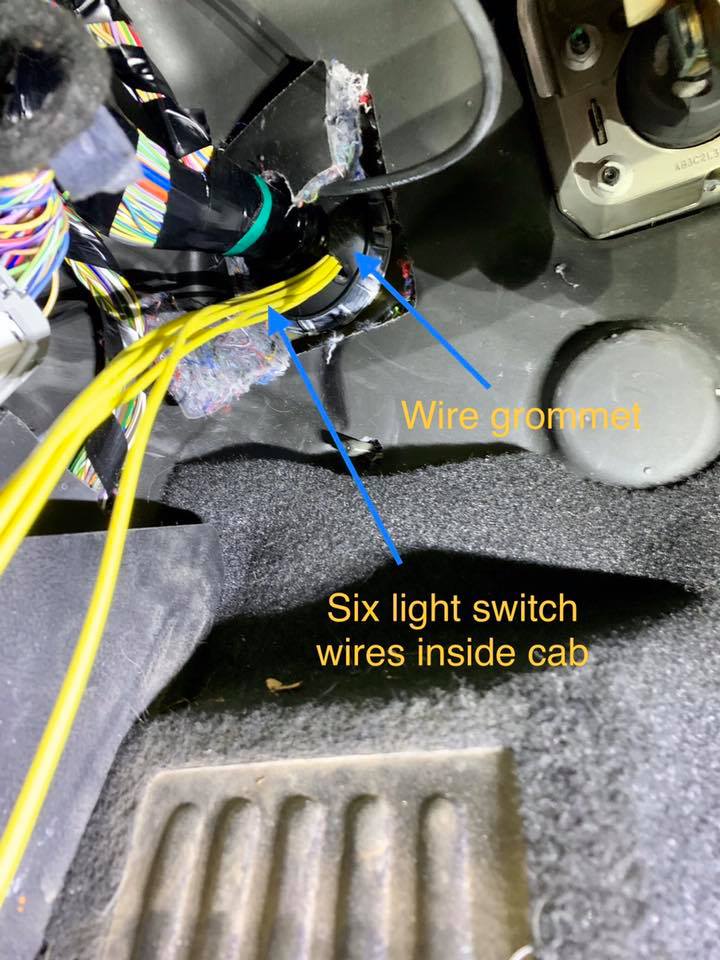
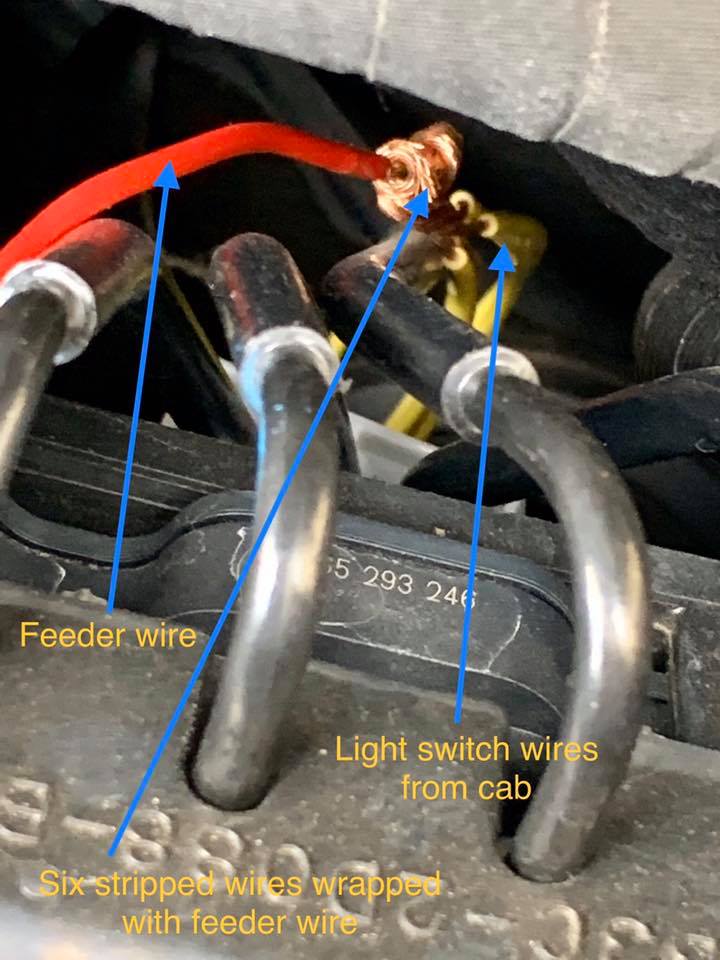
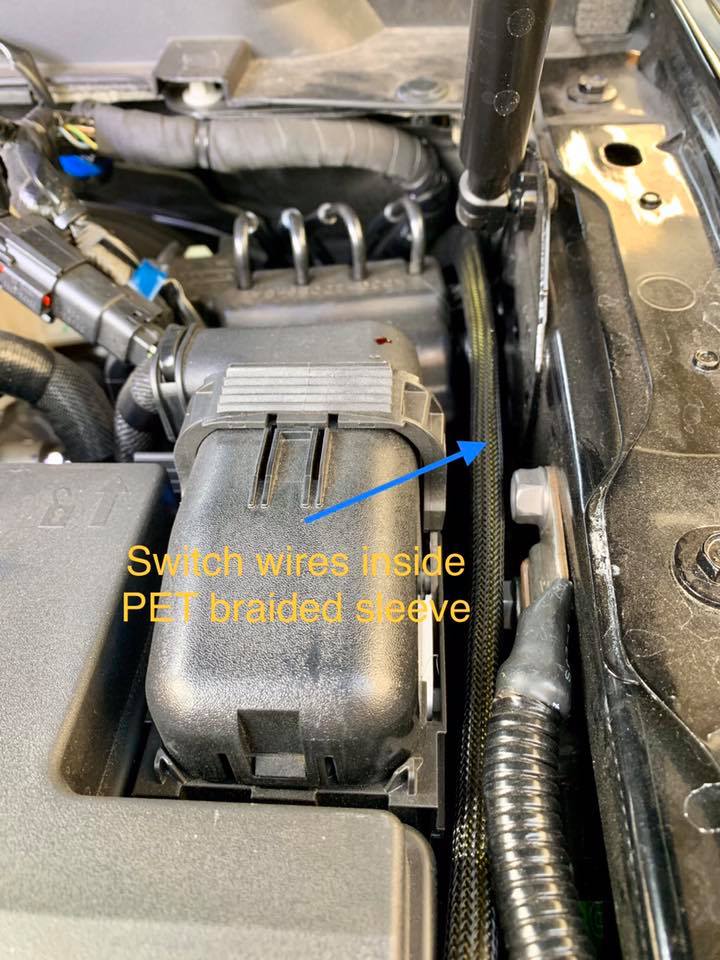
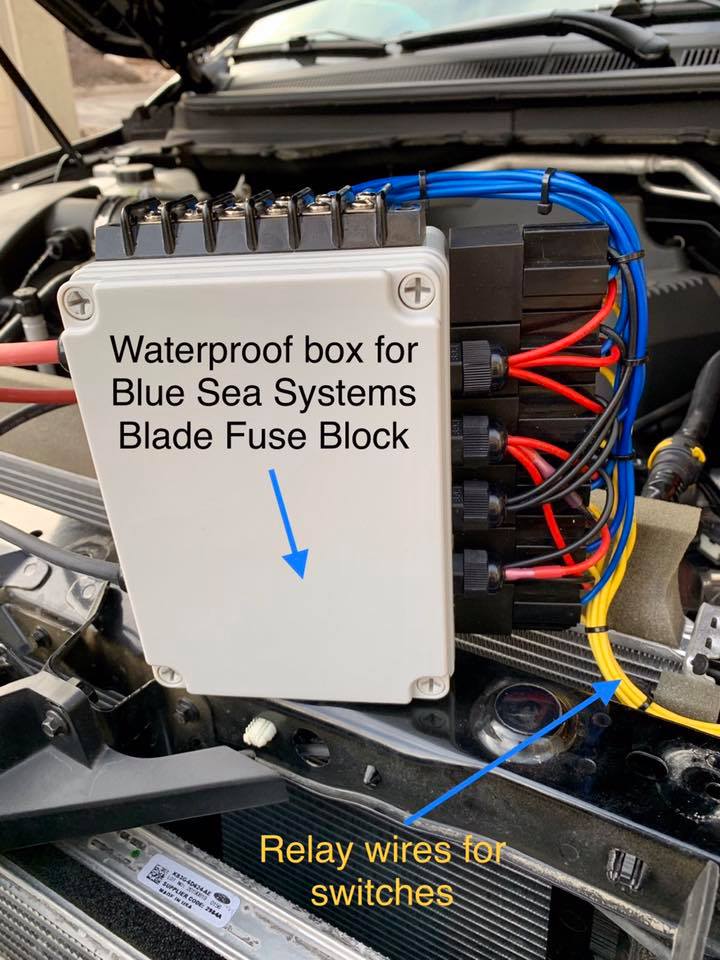
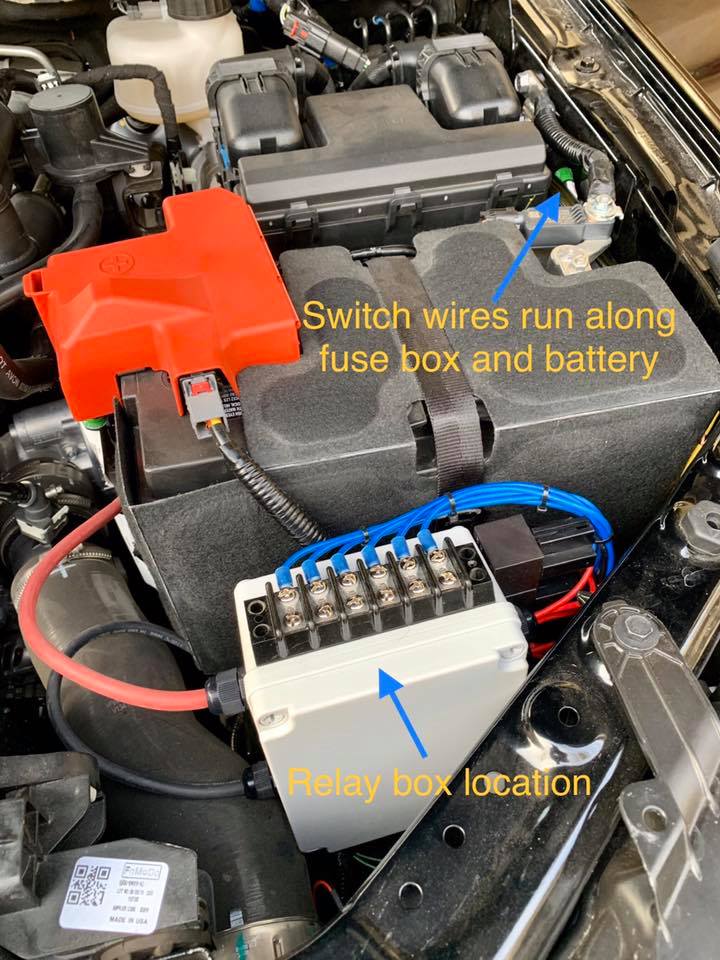
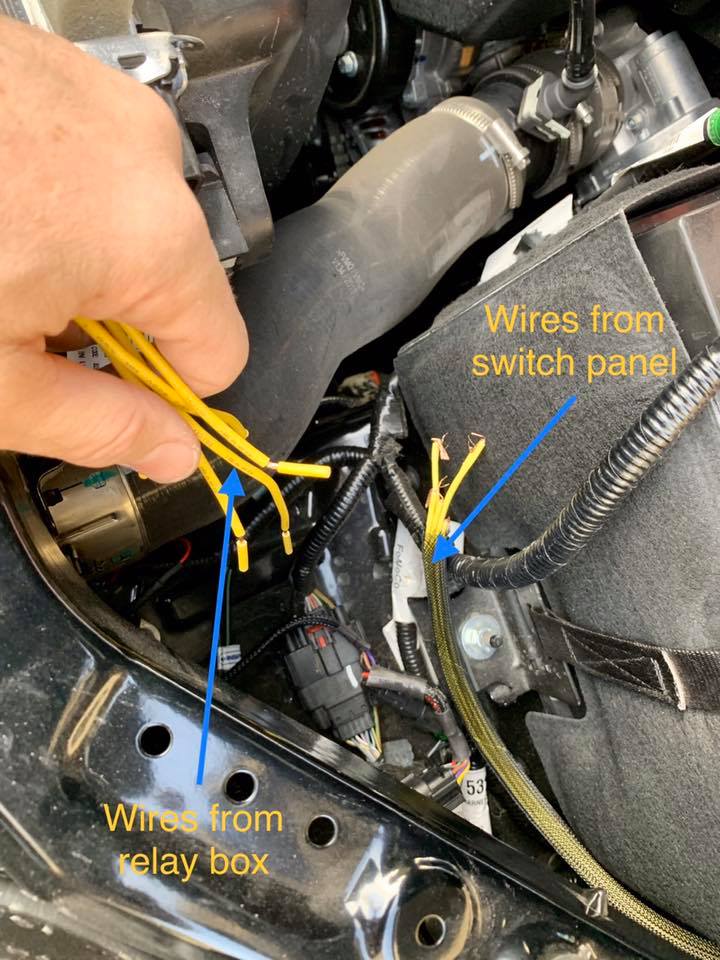
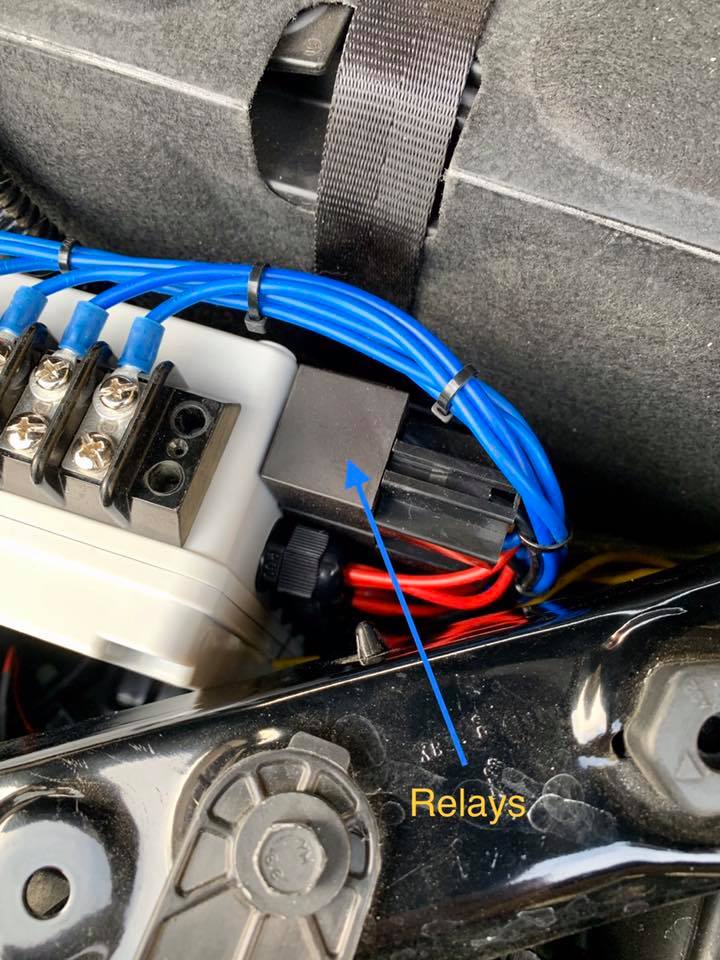
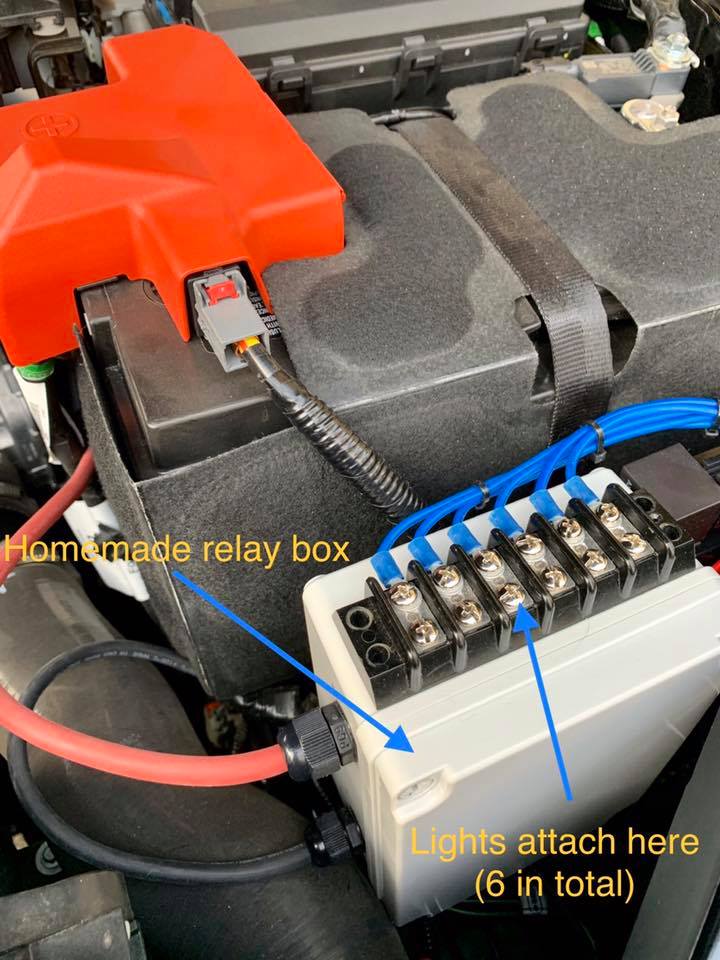
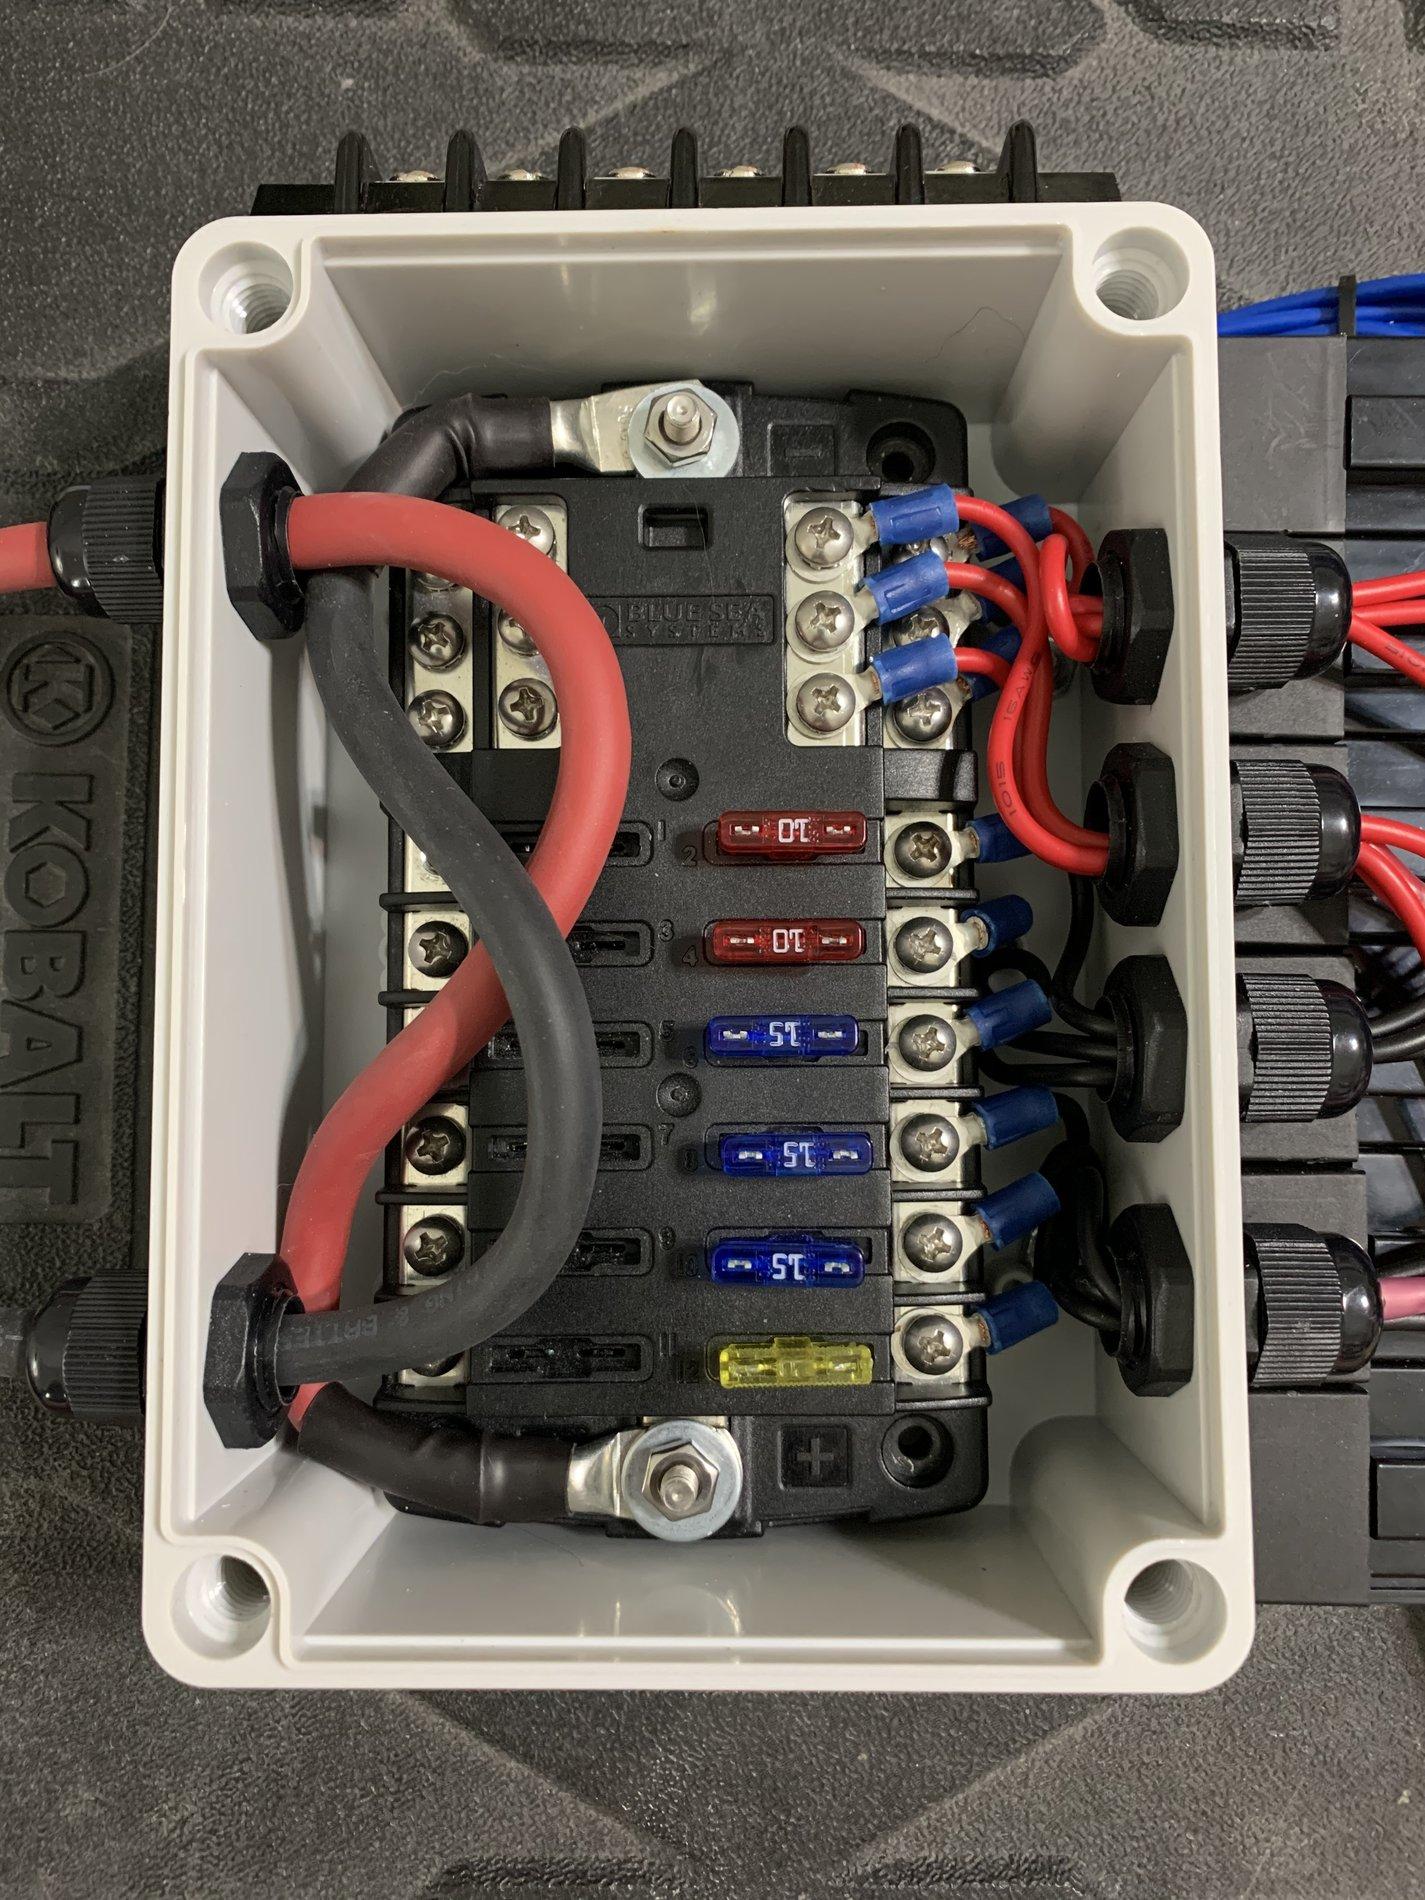
These were absolutely killer instructions I cannot thank you enough for detailing them. I literally drove over to O'reilly, bought the tool, and an hour later had the job done and my new GMRS Radio run.Pics of the install and wiring from cab to engine bay. Lightforce Switch Fascia, Custom Relay Box, (2) Vision X Light Cannons, (1) Rigid Midnight Edition RDS 30", (1) Rigid Amber E-Series 20", (4) Rigid D2 Driving Pros, (2) Rigid SR-M Series Flood 4". Plus (2) Rigid SR-Q wired into reverse lights.
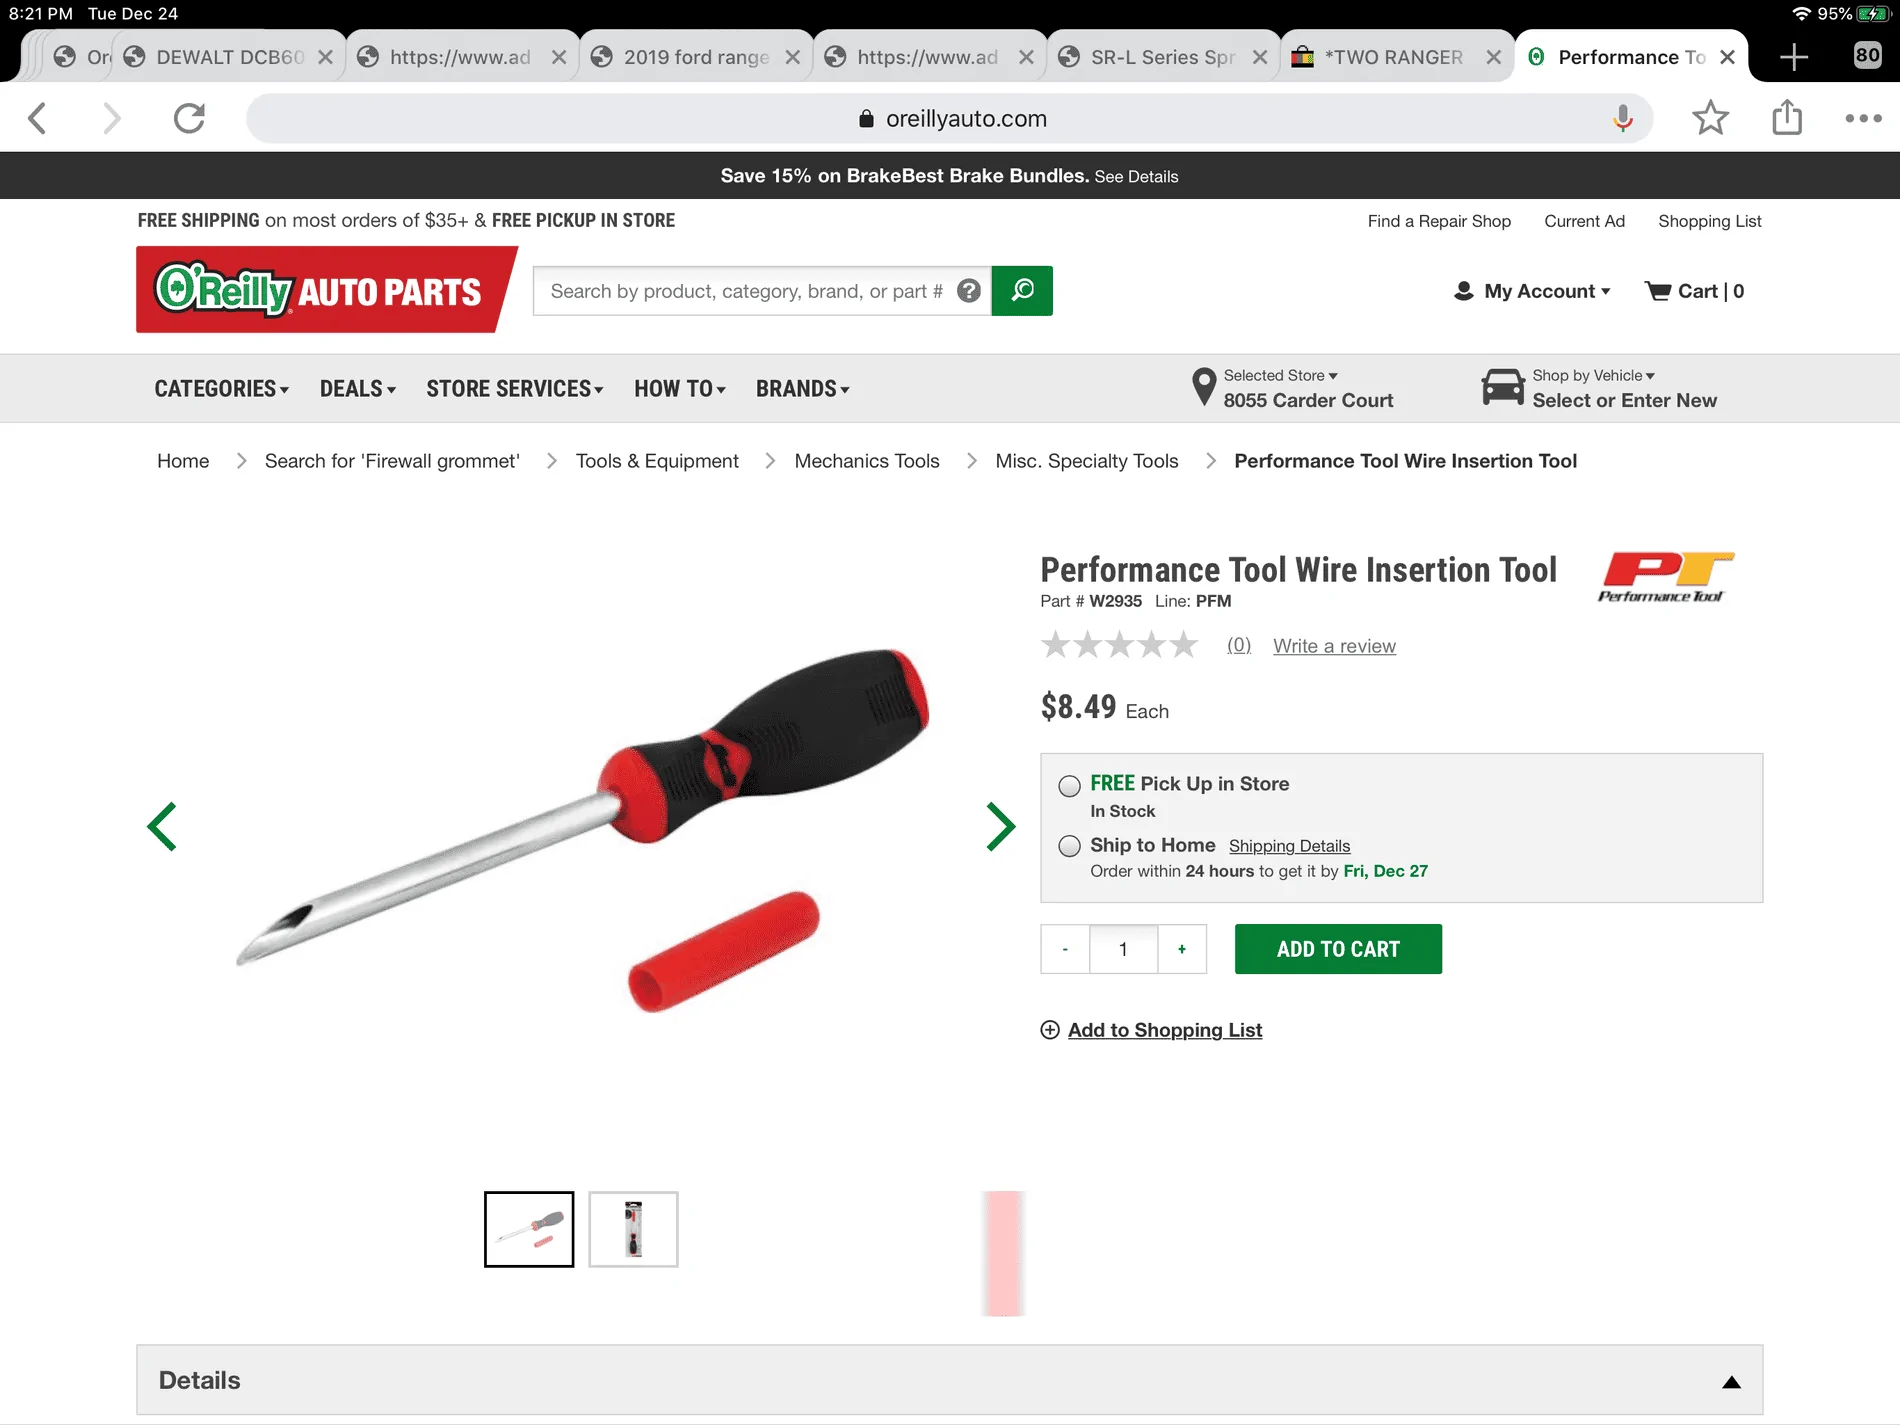
The $10 Wire Insertion Tool was the key to this easy install (easier than I expected, but not for a beginner).


Sponsored
")