Sponsored

Belltech lowering kit install (1043SP)

dmeyers8

Active Member
First Name
Dave
Joined
Aug 26, 2023
Threads
3
Messages
37
Reaction score
106
Location
Ada, MI
Vehicle(s)
2019 Ranger XLT
Occupation
CPA
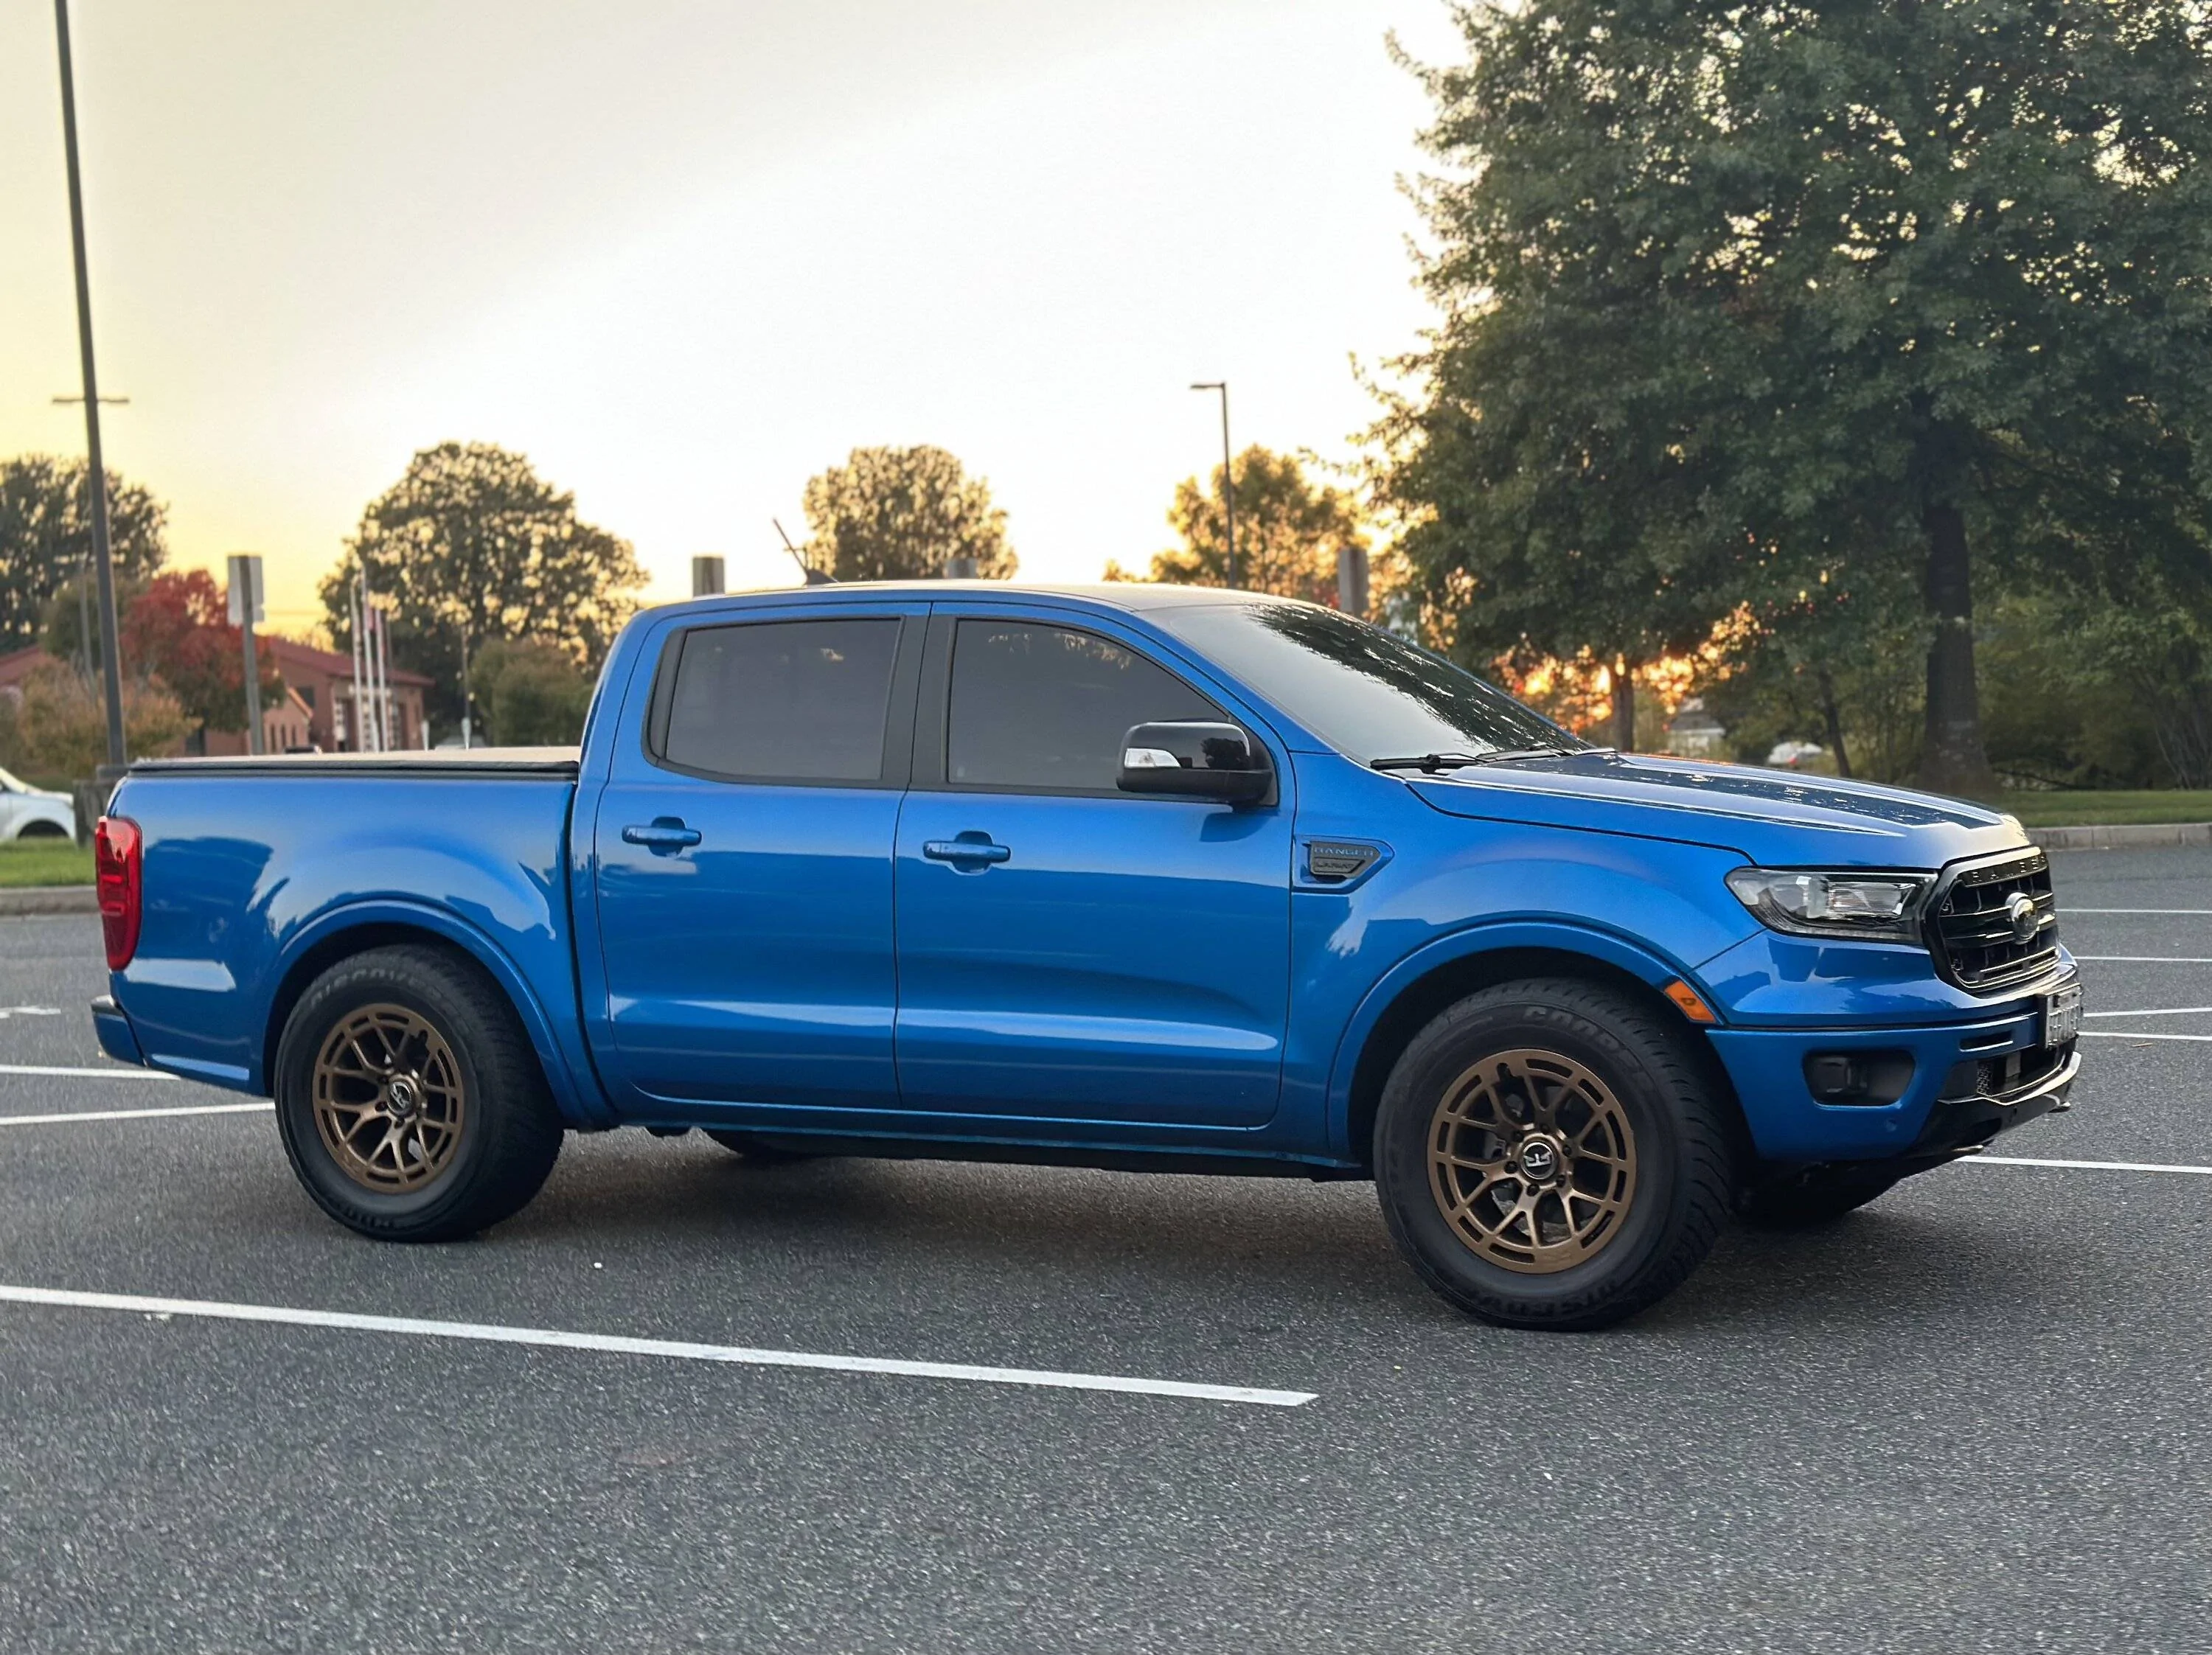
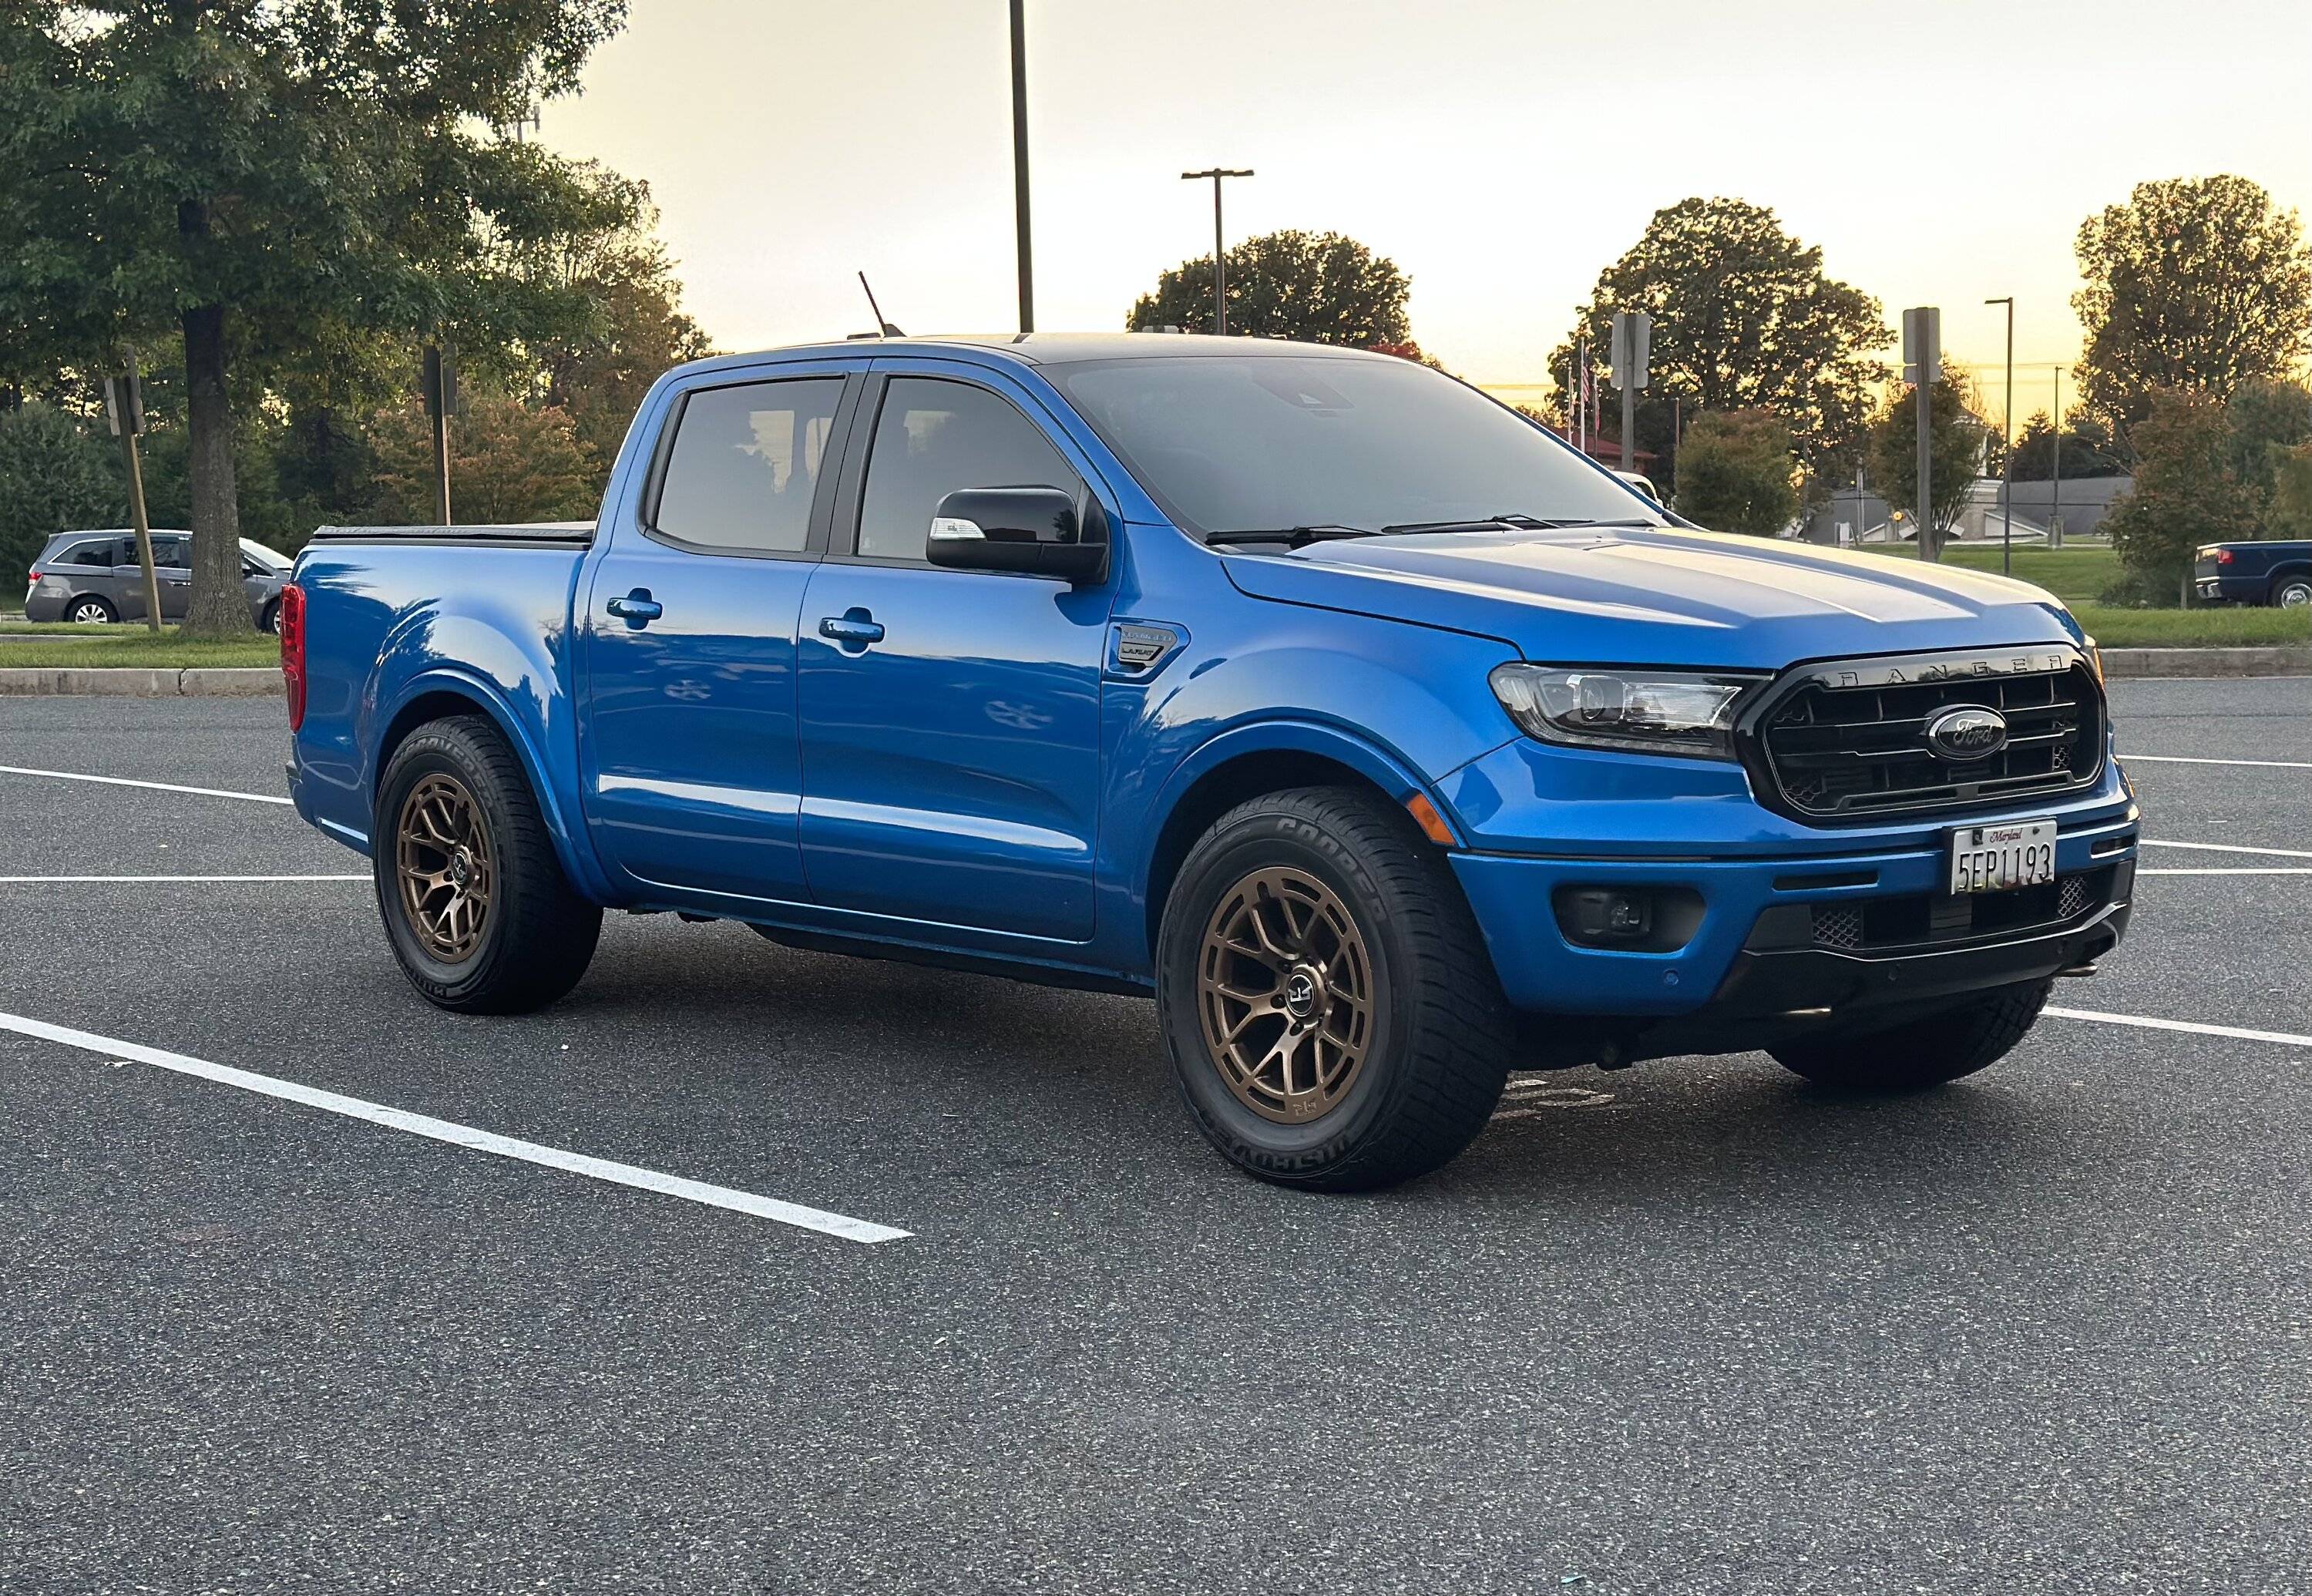
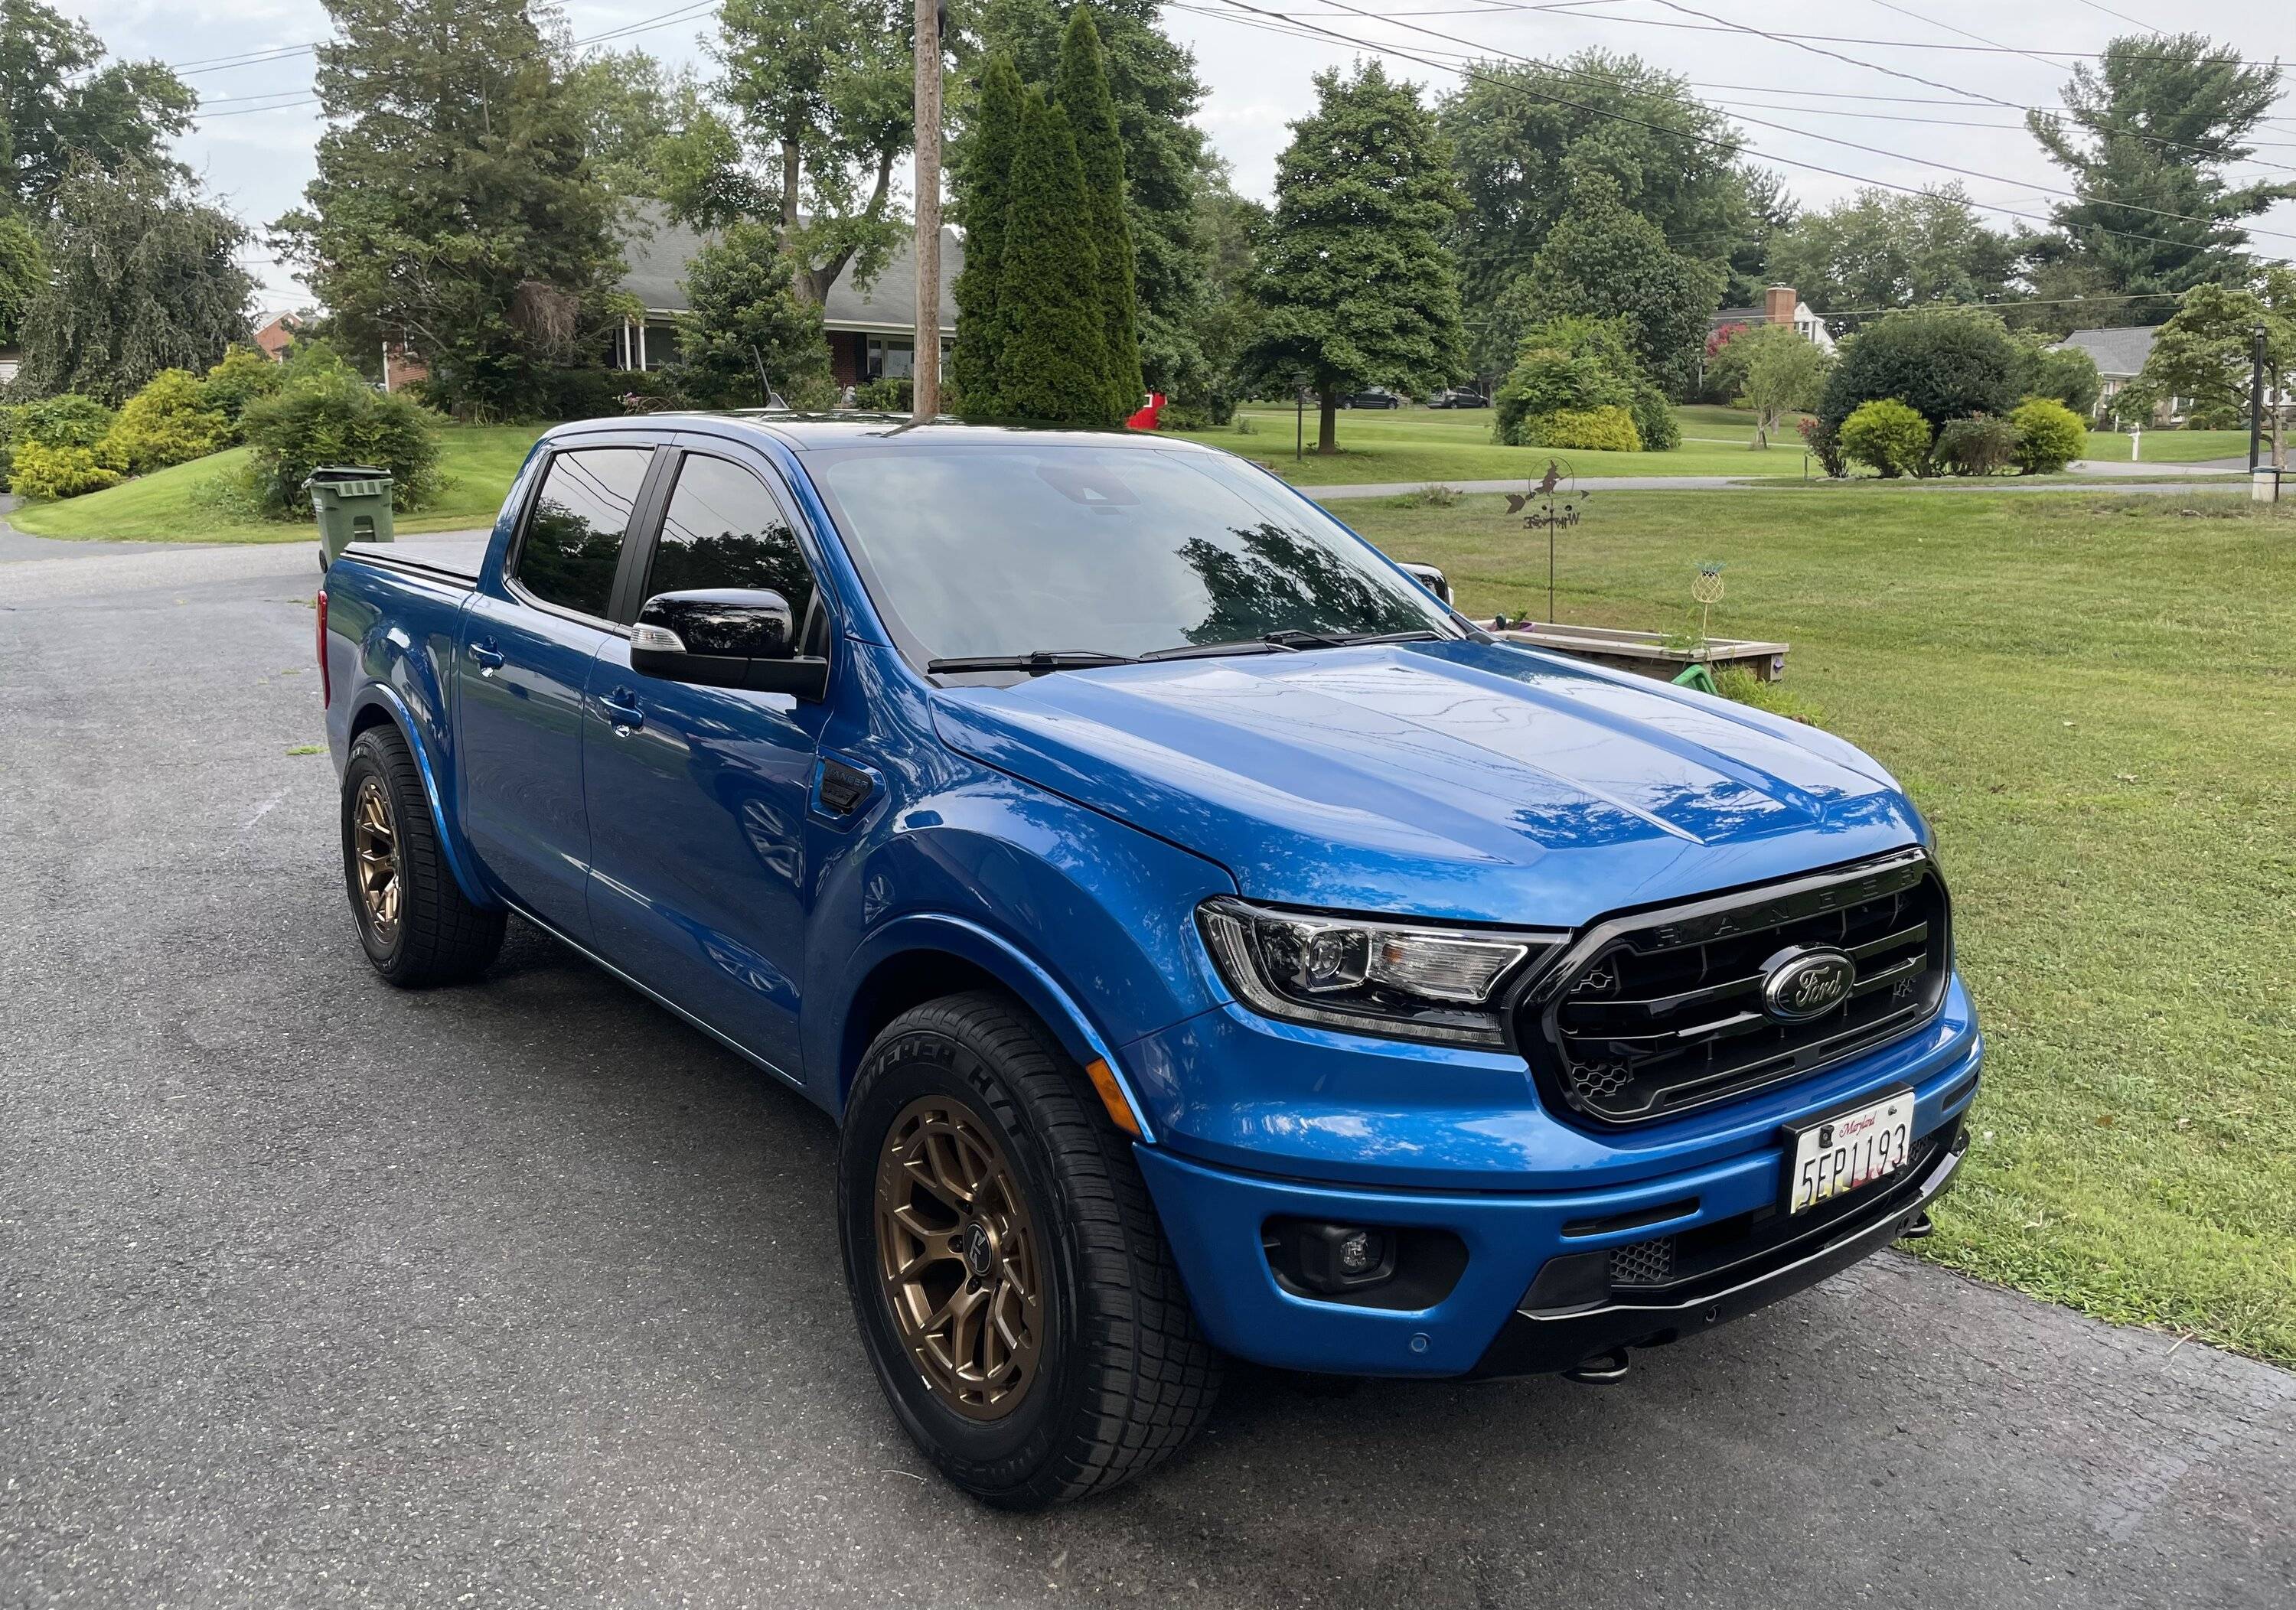
I've recently purchased a 2019 XLT to do duty mostly as a daily driver but also to pull a car trailer a number of times a year. I know it may be a bit odd to get a 4x4 and lower it, however my history and passion involves cars that handle well and driving at track days. I'm not trying to turn the truck into an autocross vehicle or have any illusions that it will out-handle a car with much lower ride height - just like being different and have a more unique look. I also live on the west side of Michigan, so lake effect snow is a thing. I'm a big proponent of sticky, high performance tires in the summer, and serious snows for the winter.

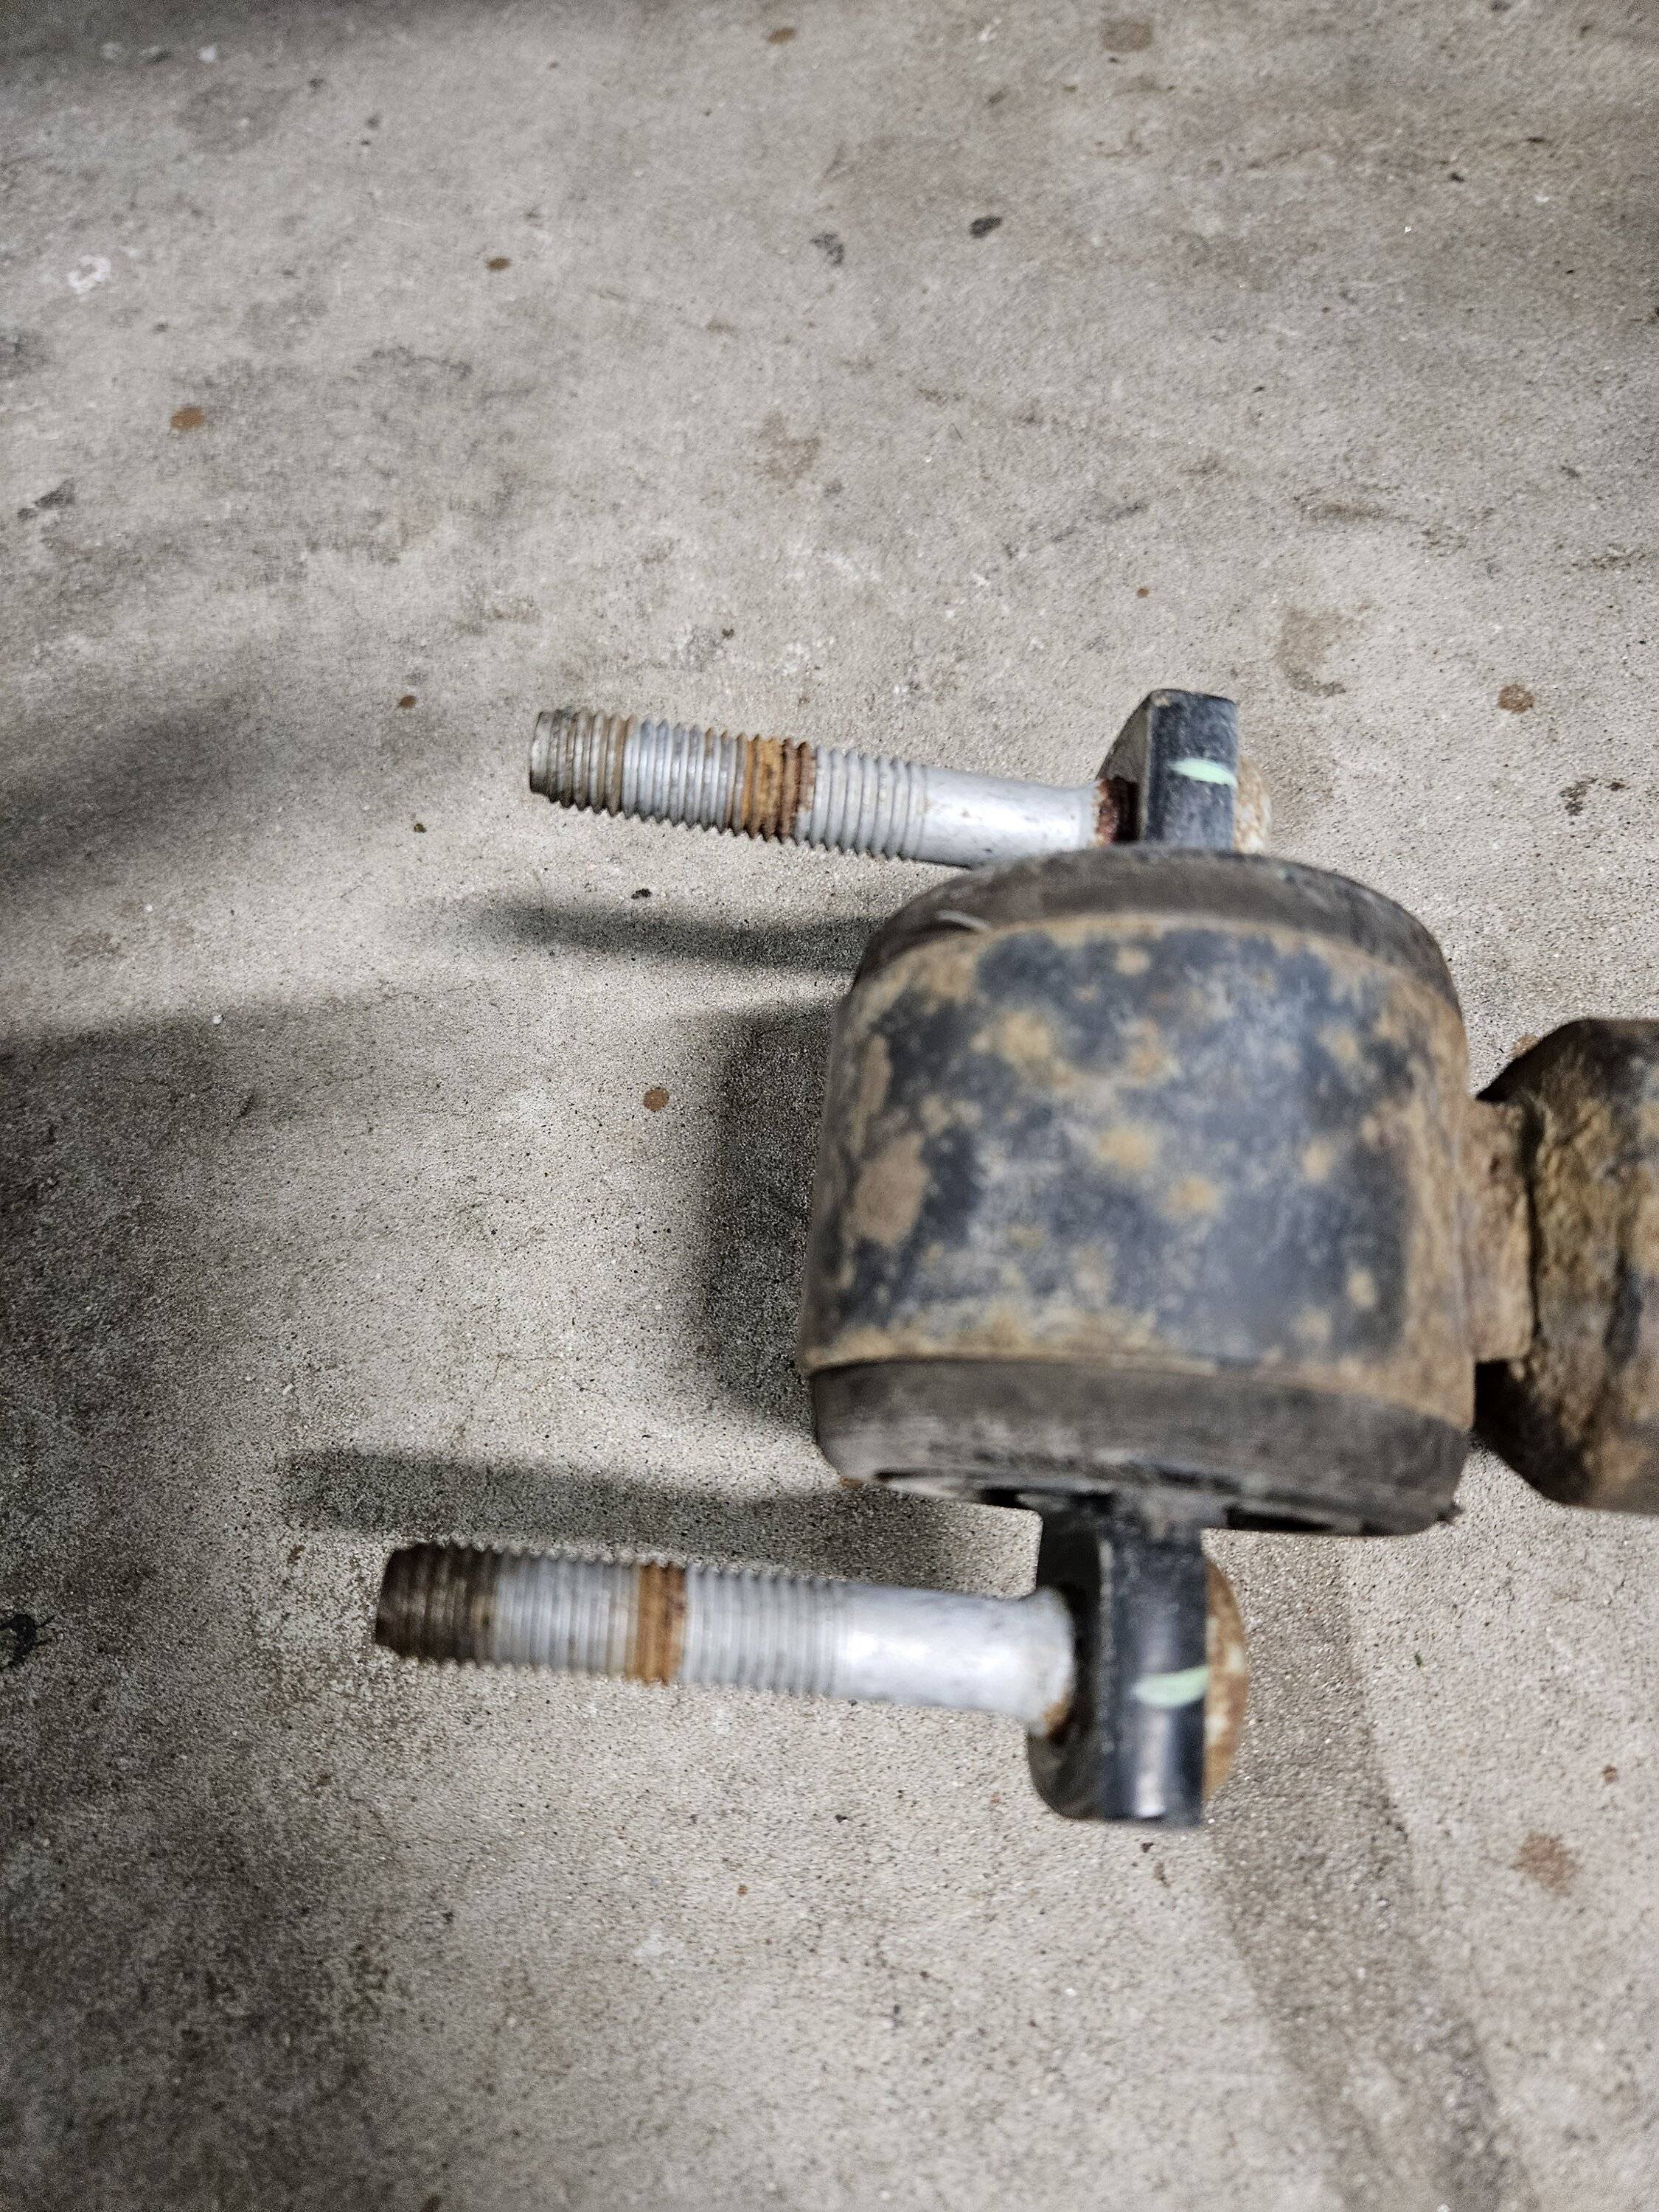
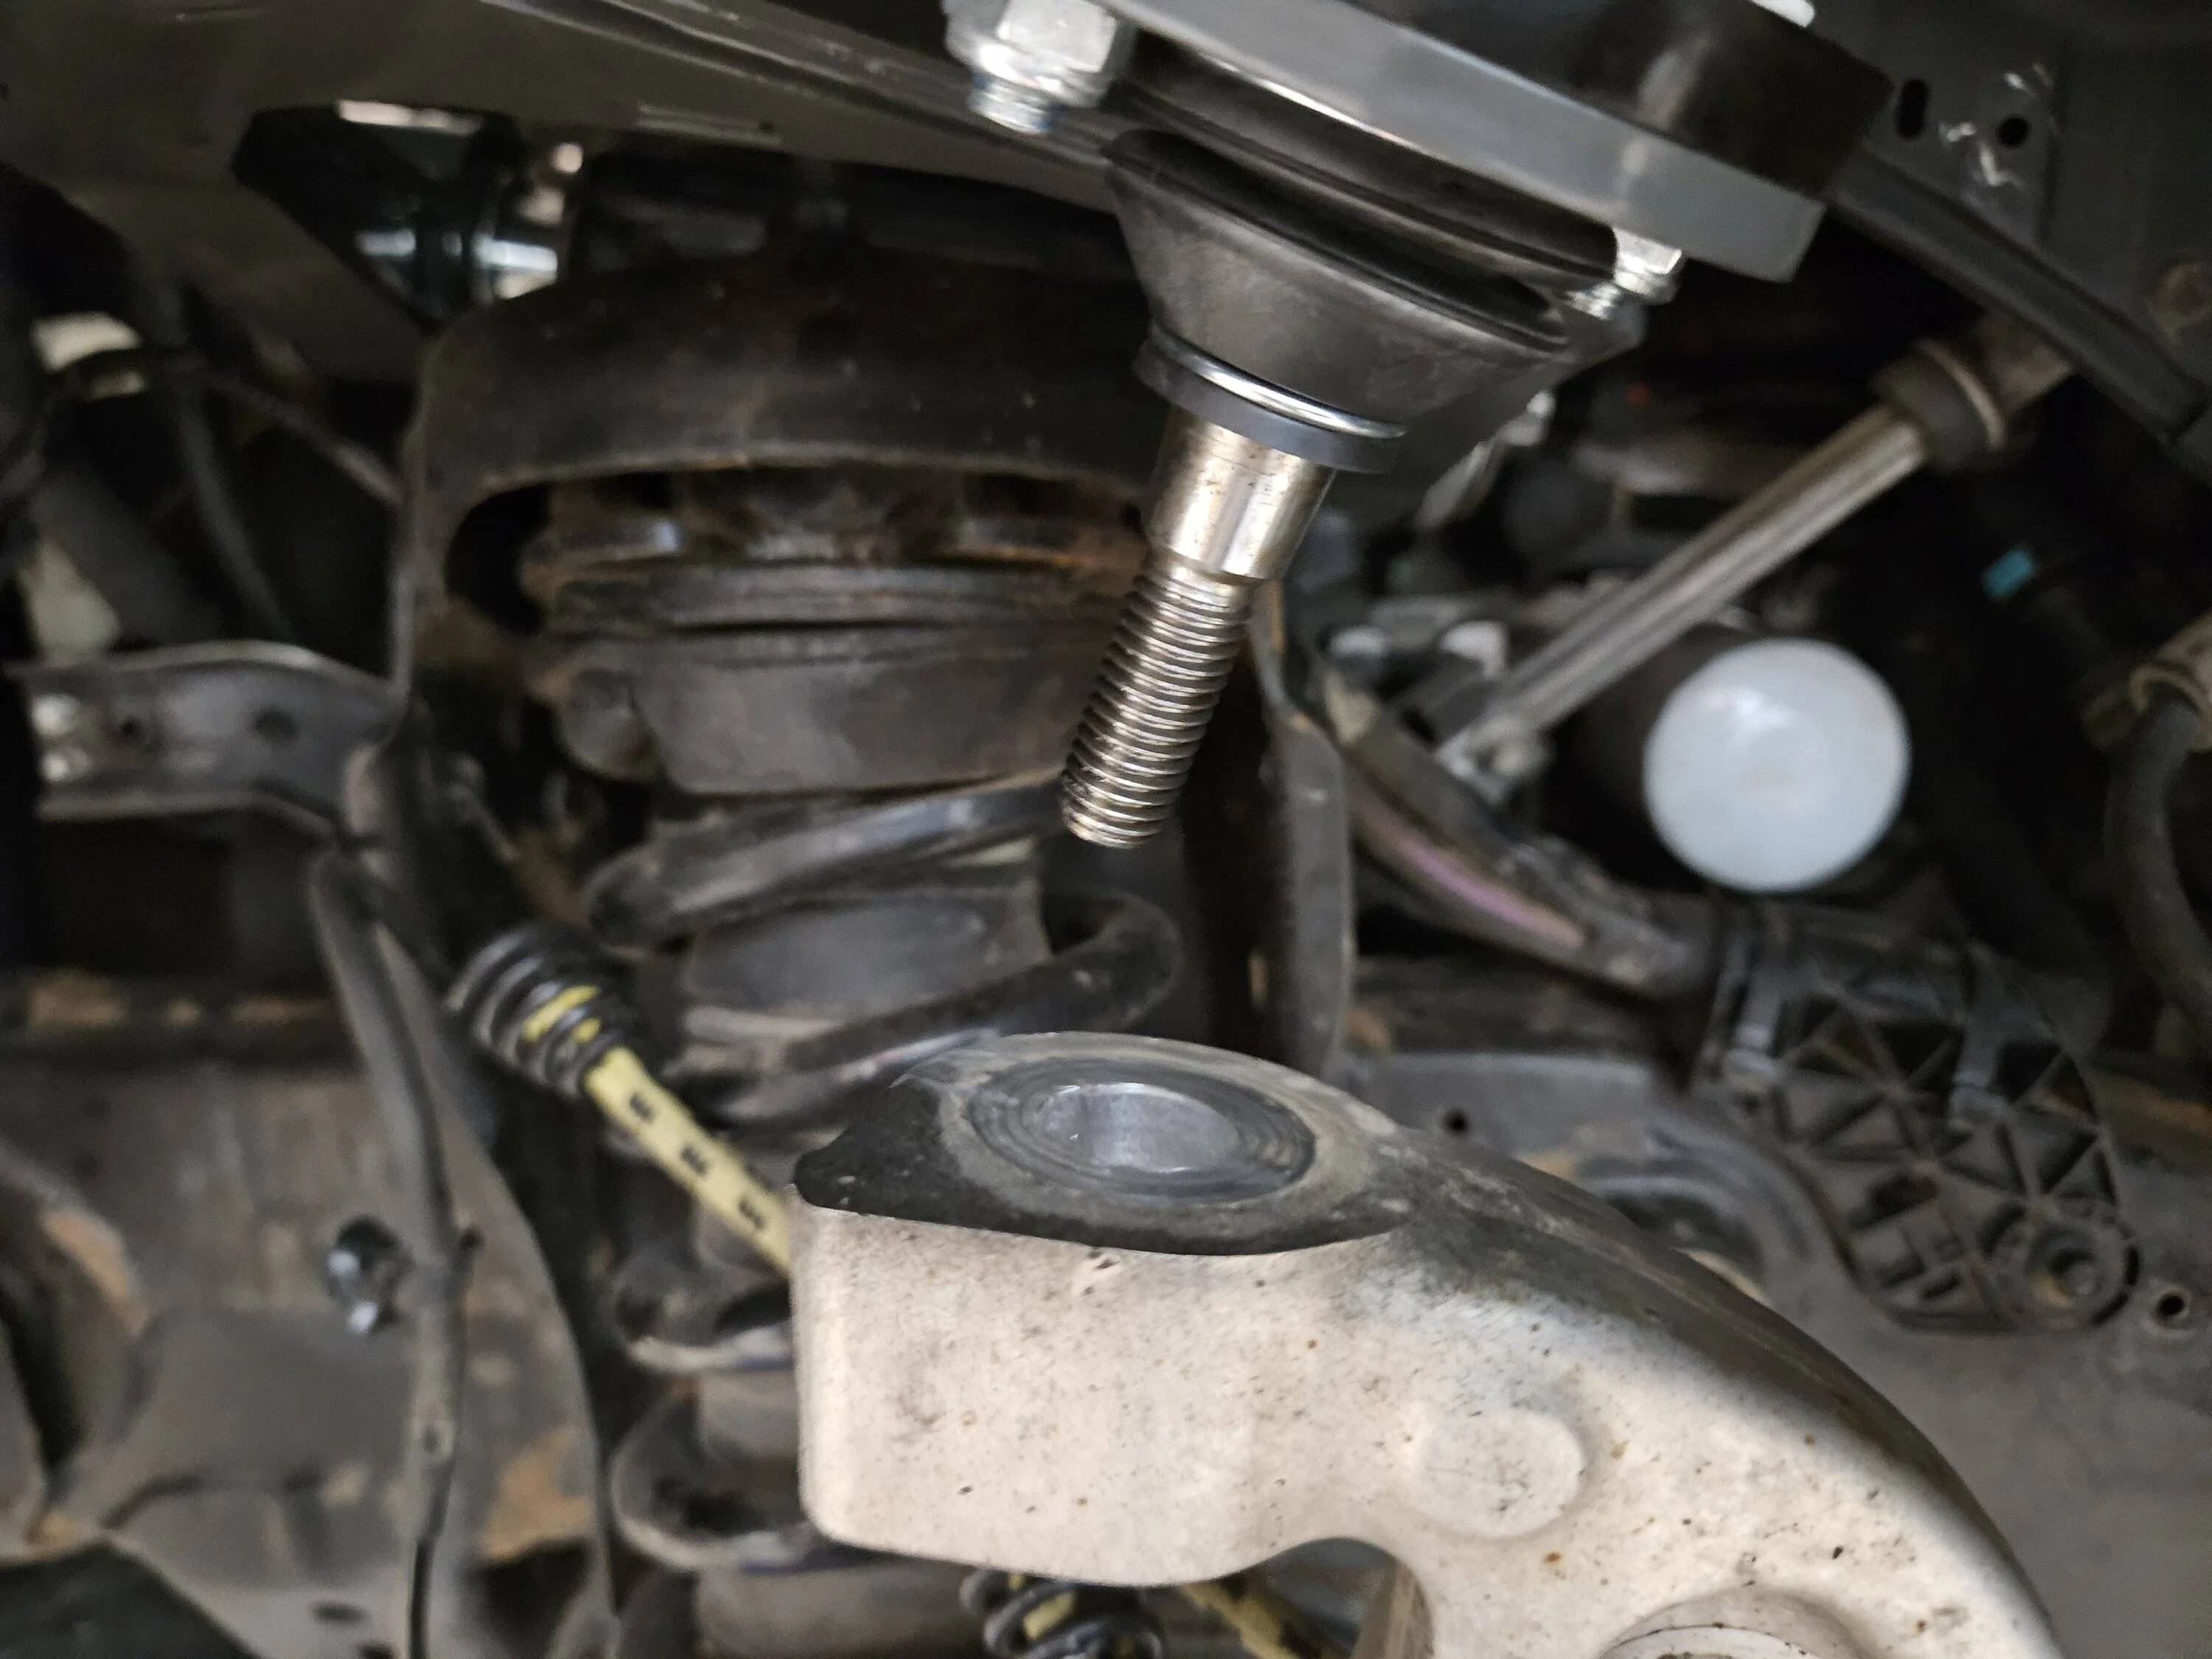
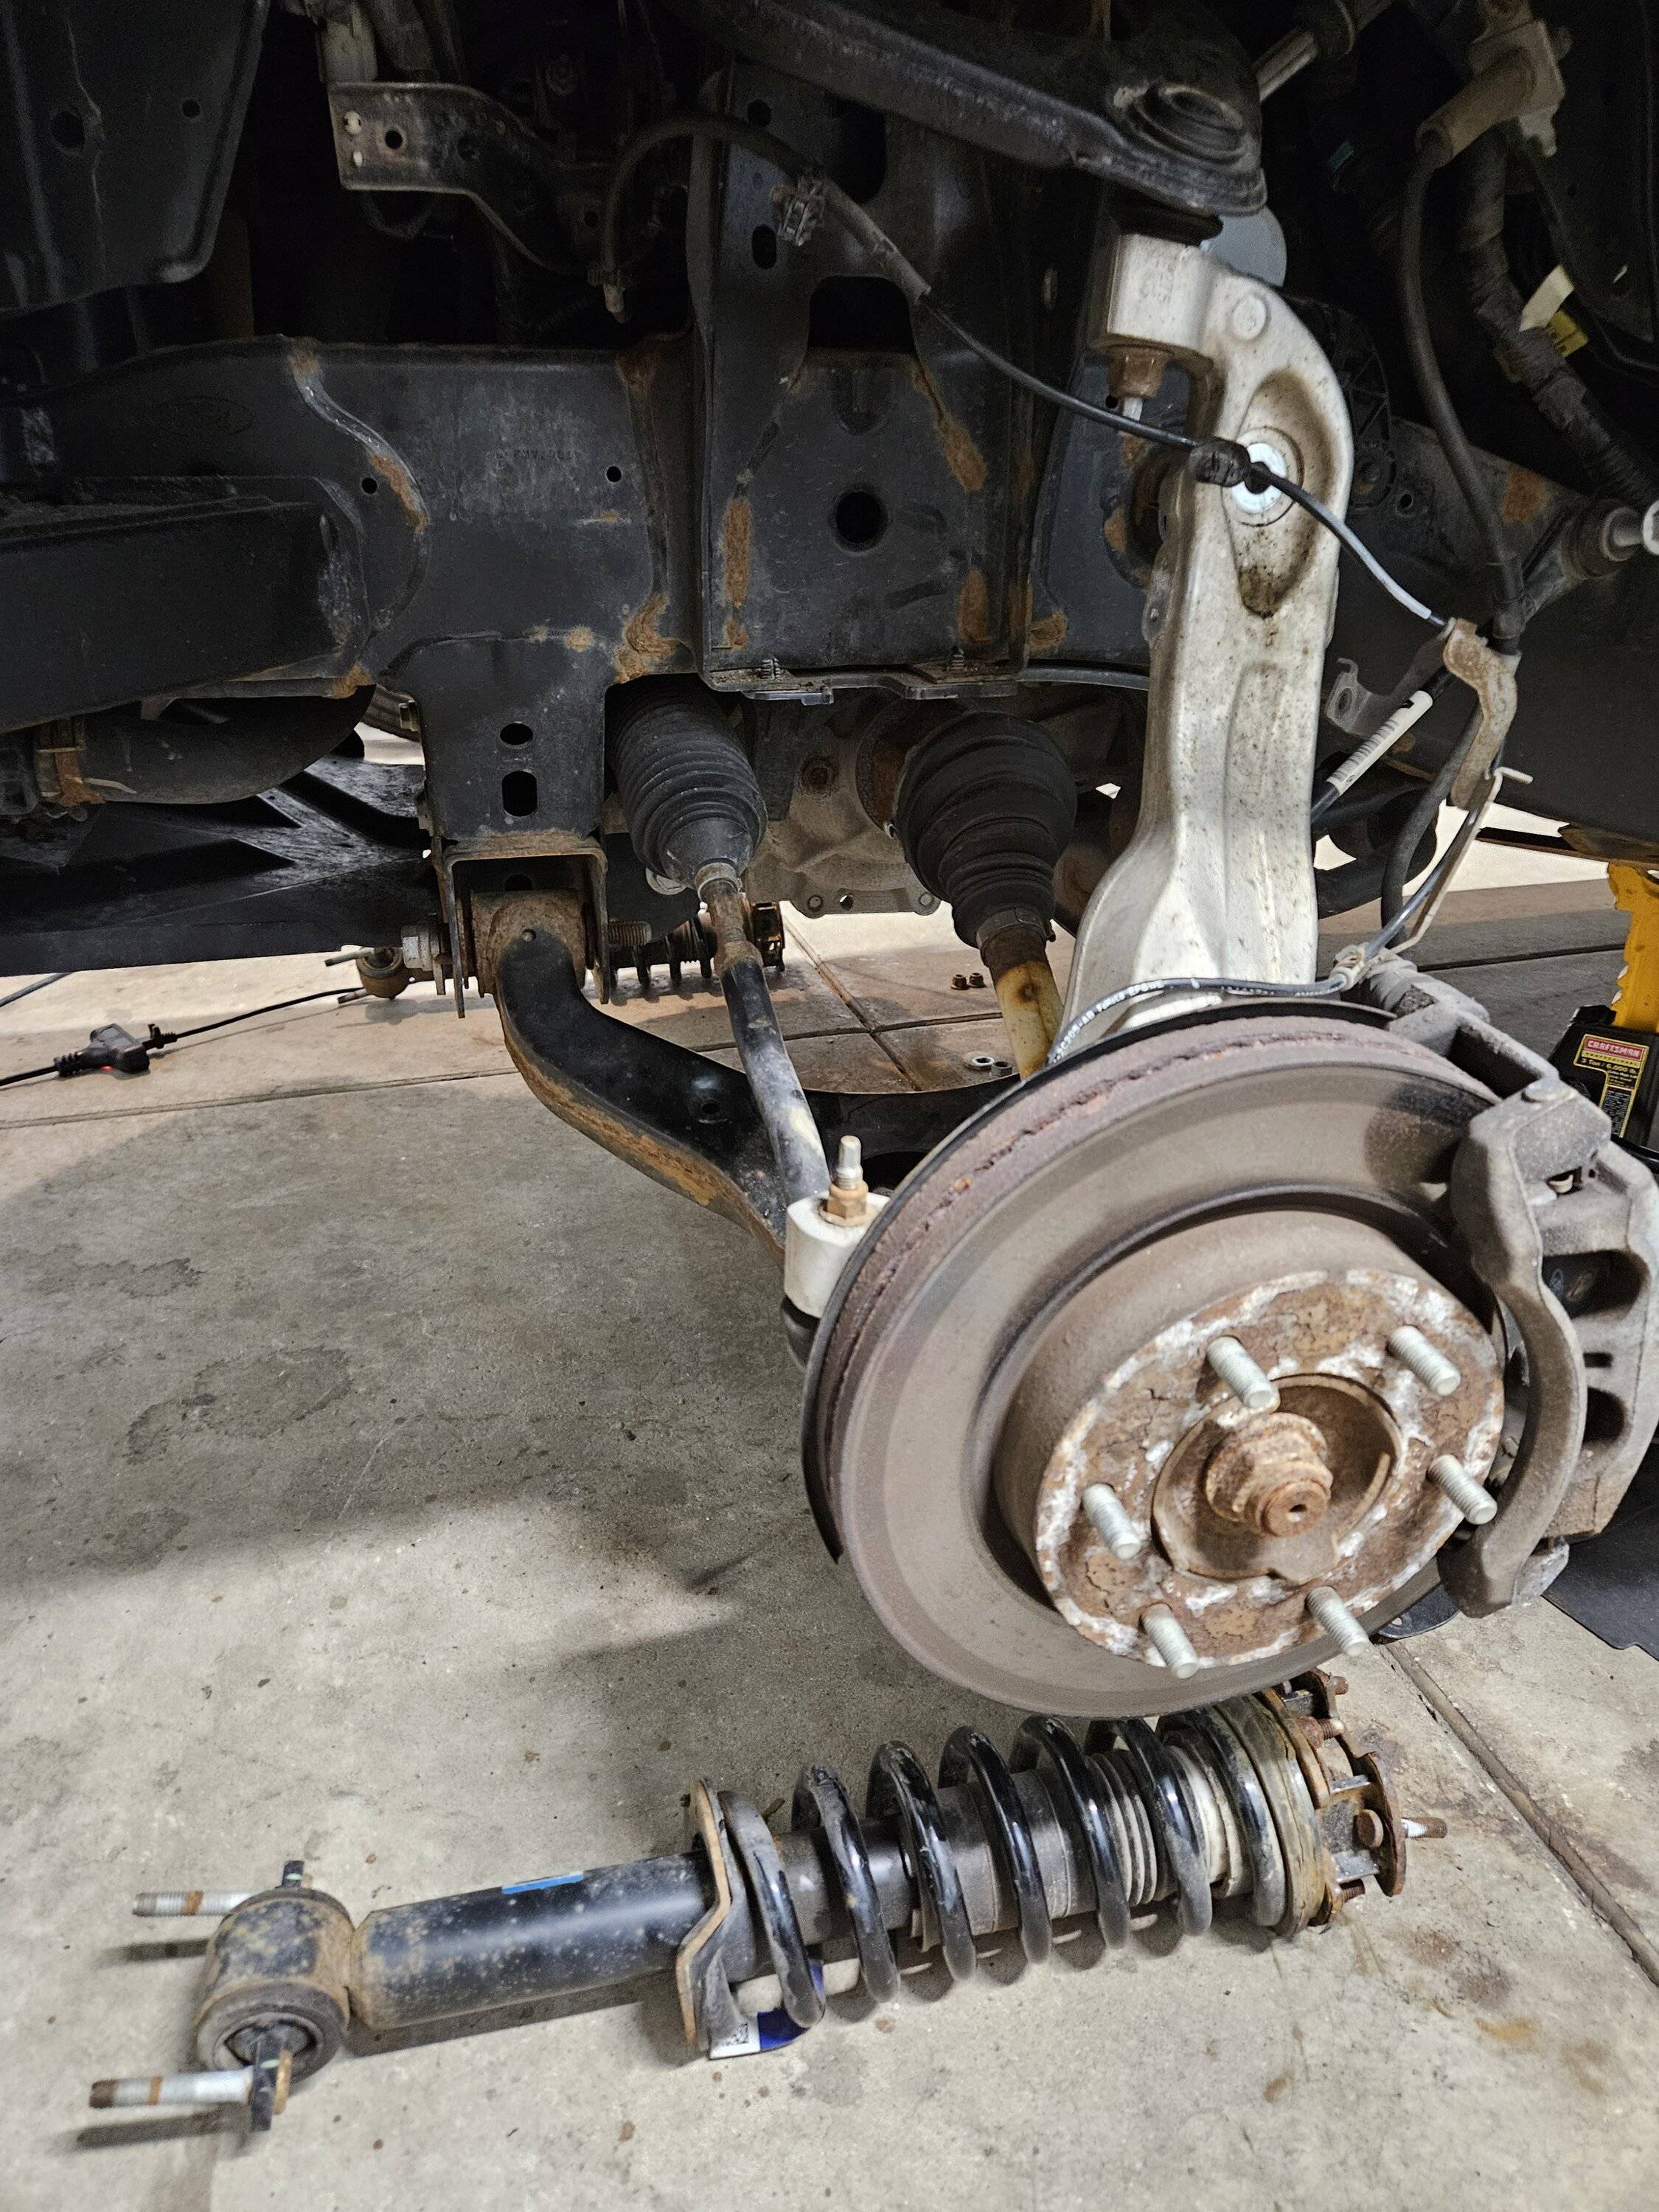
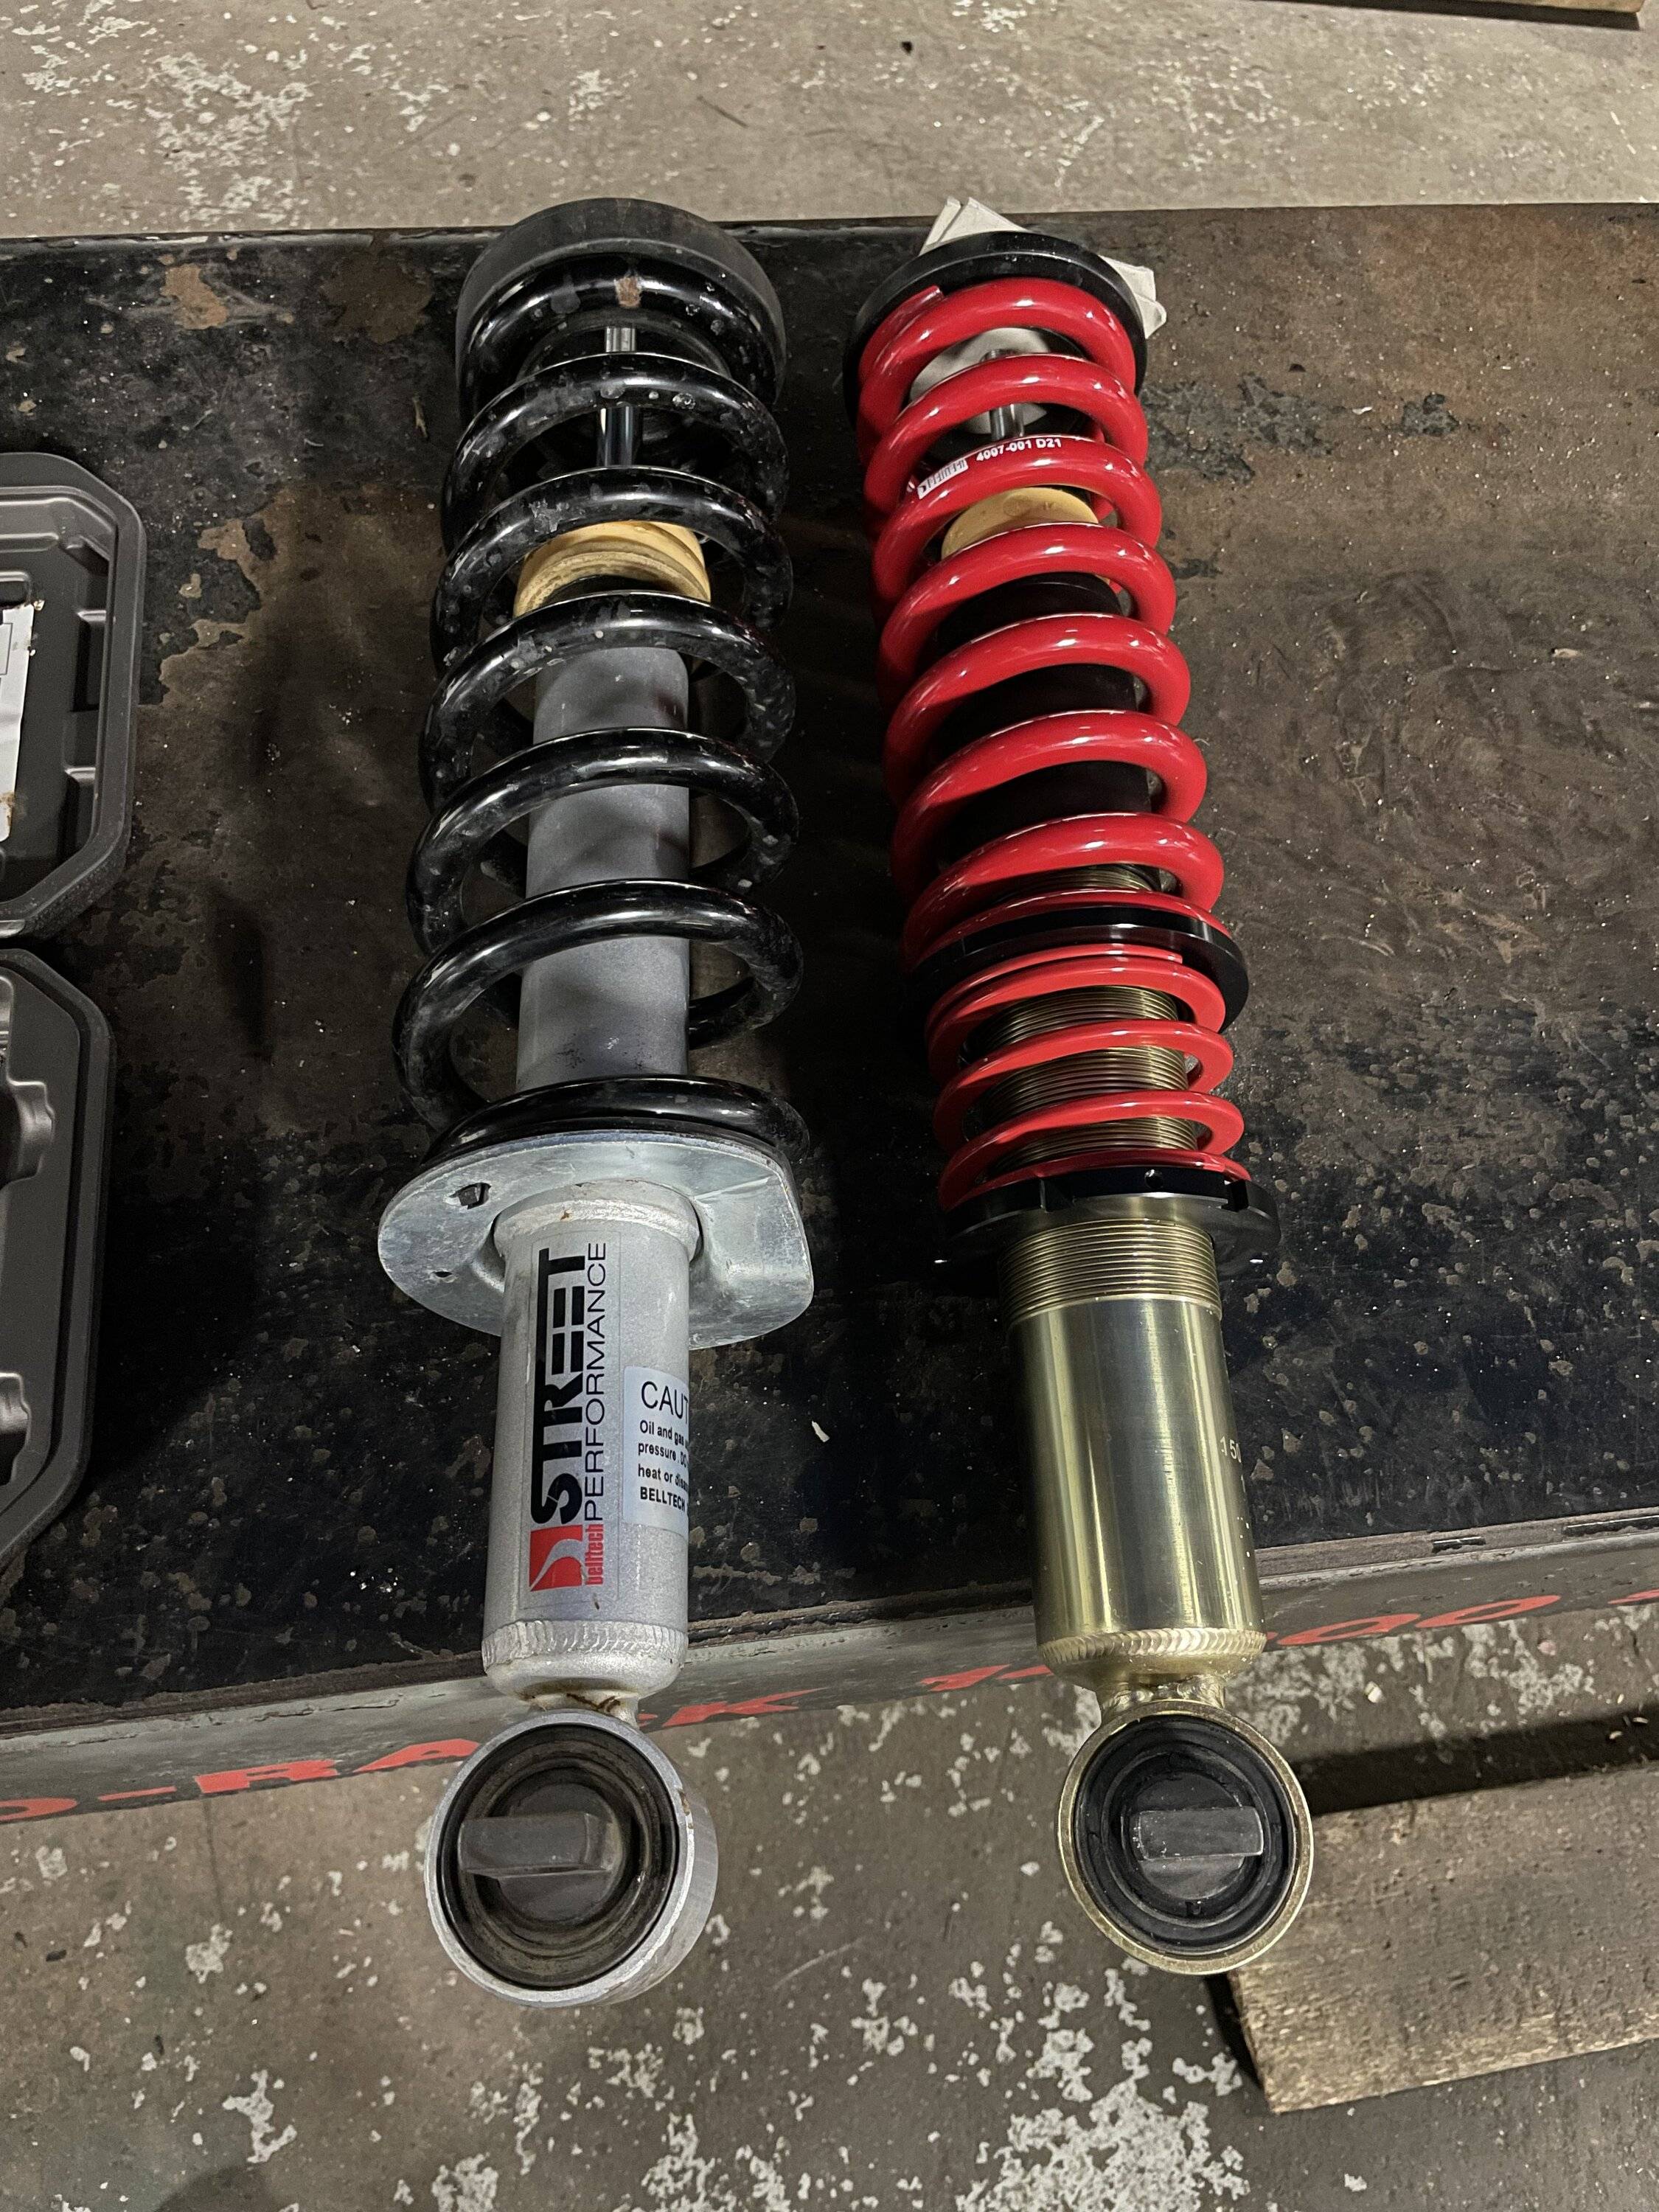
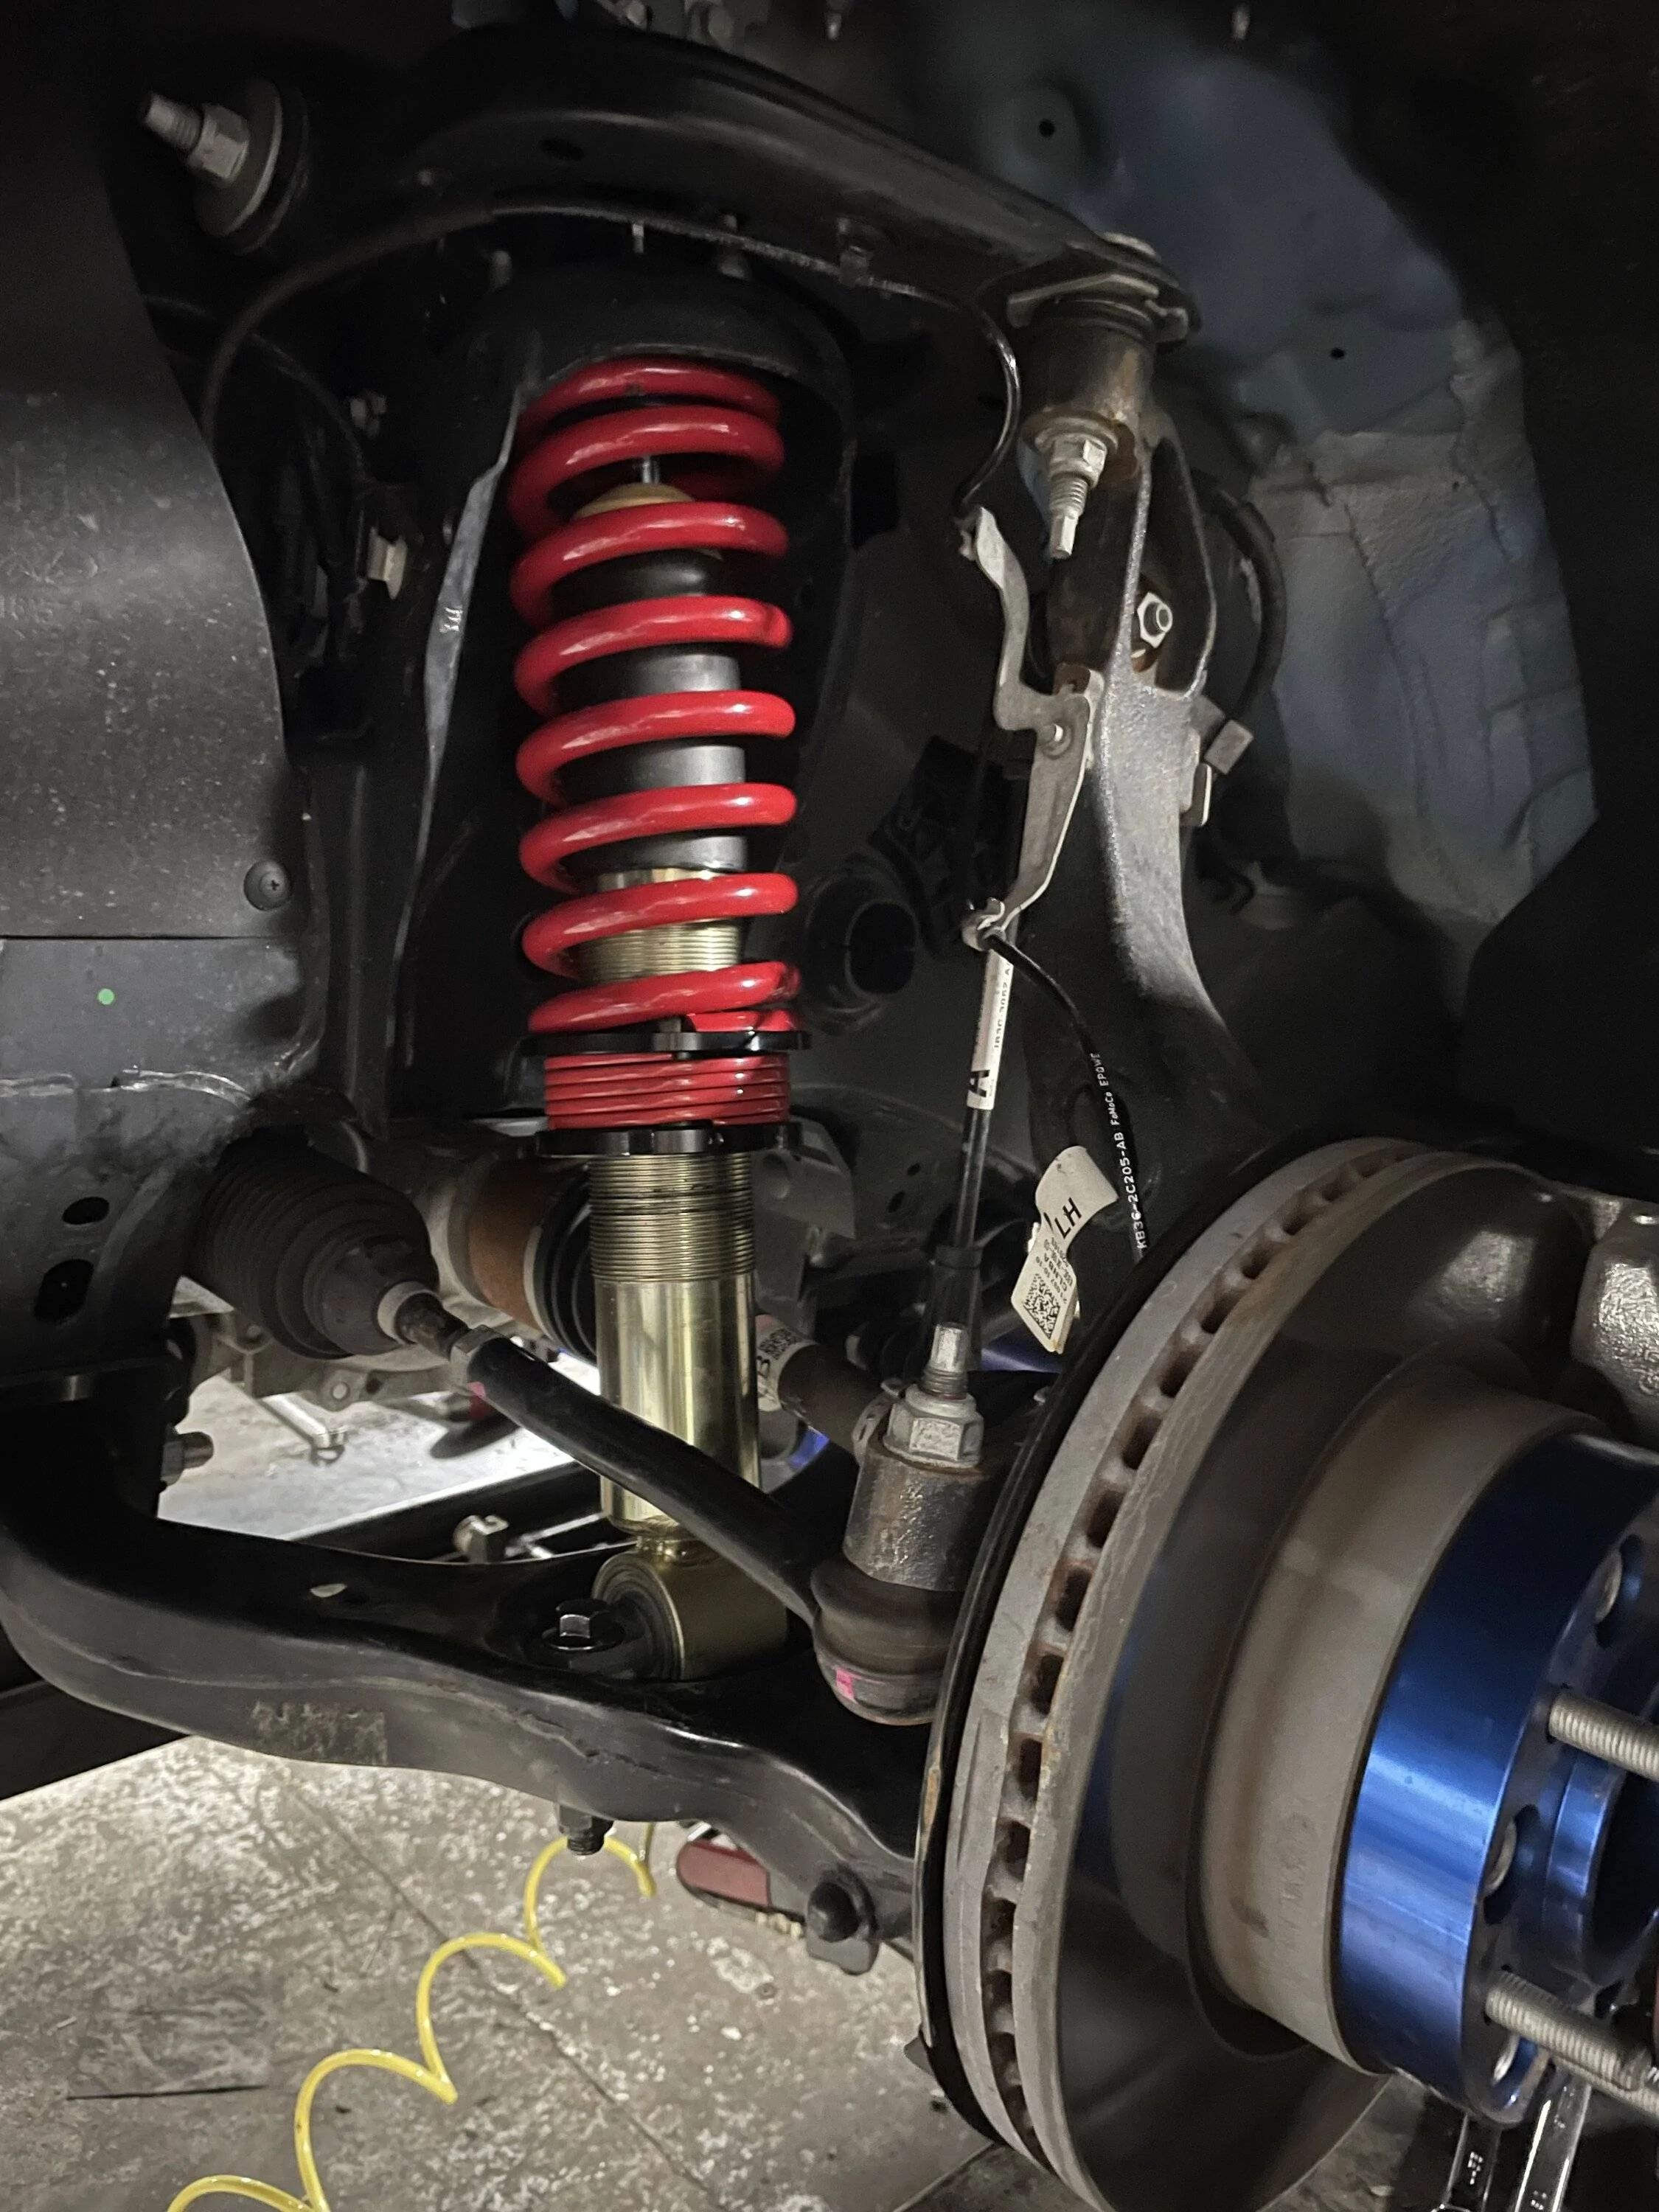
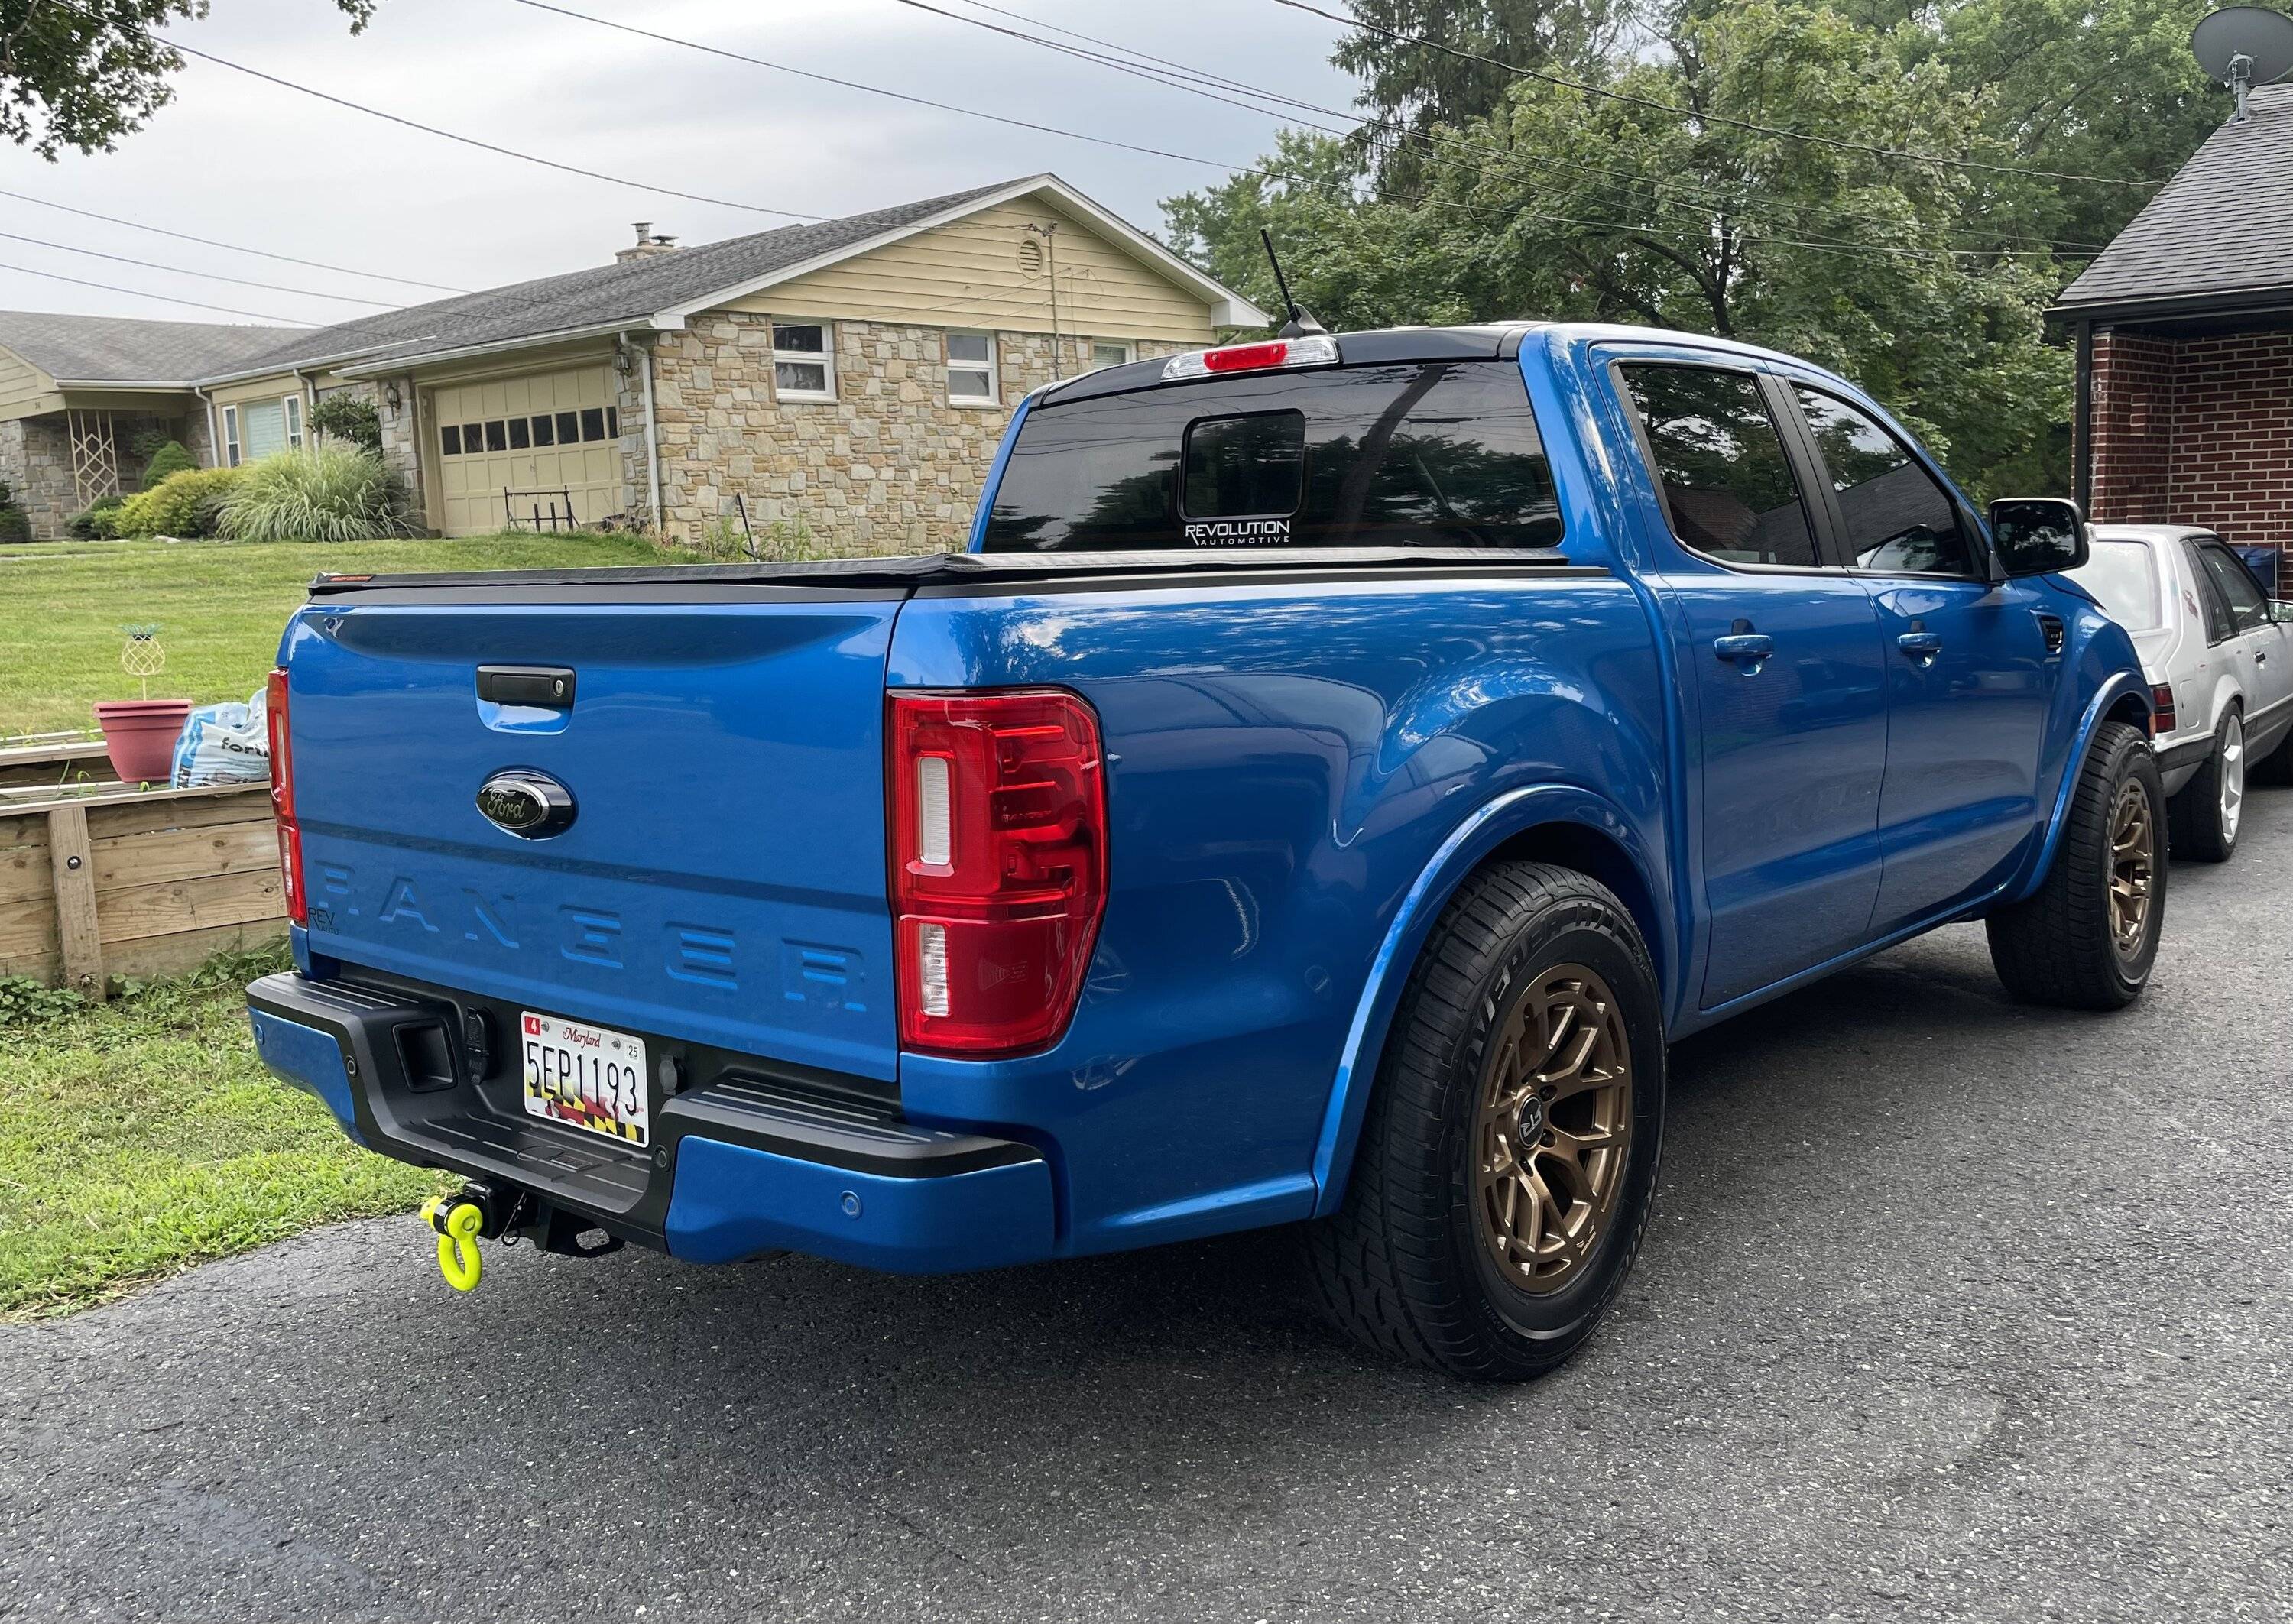
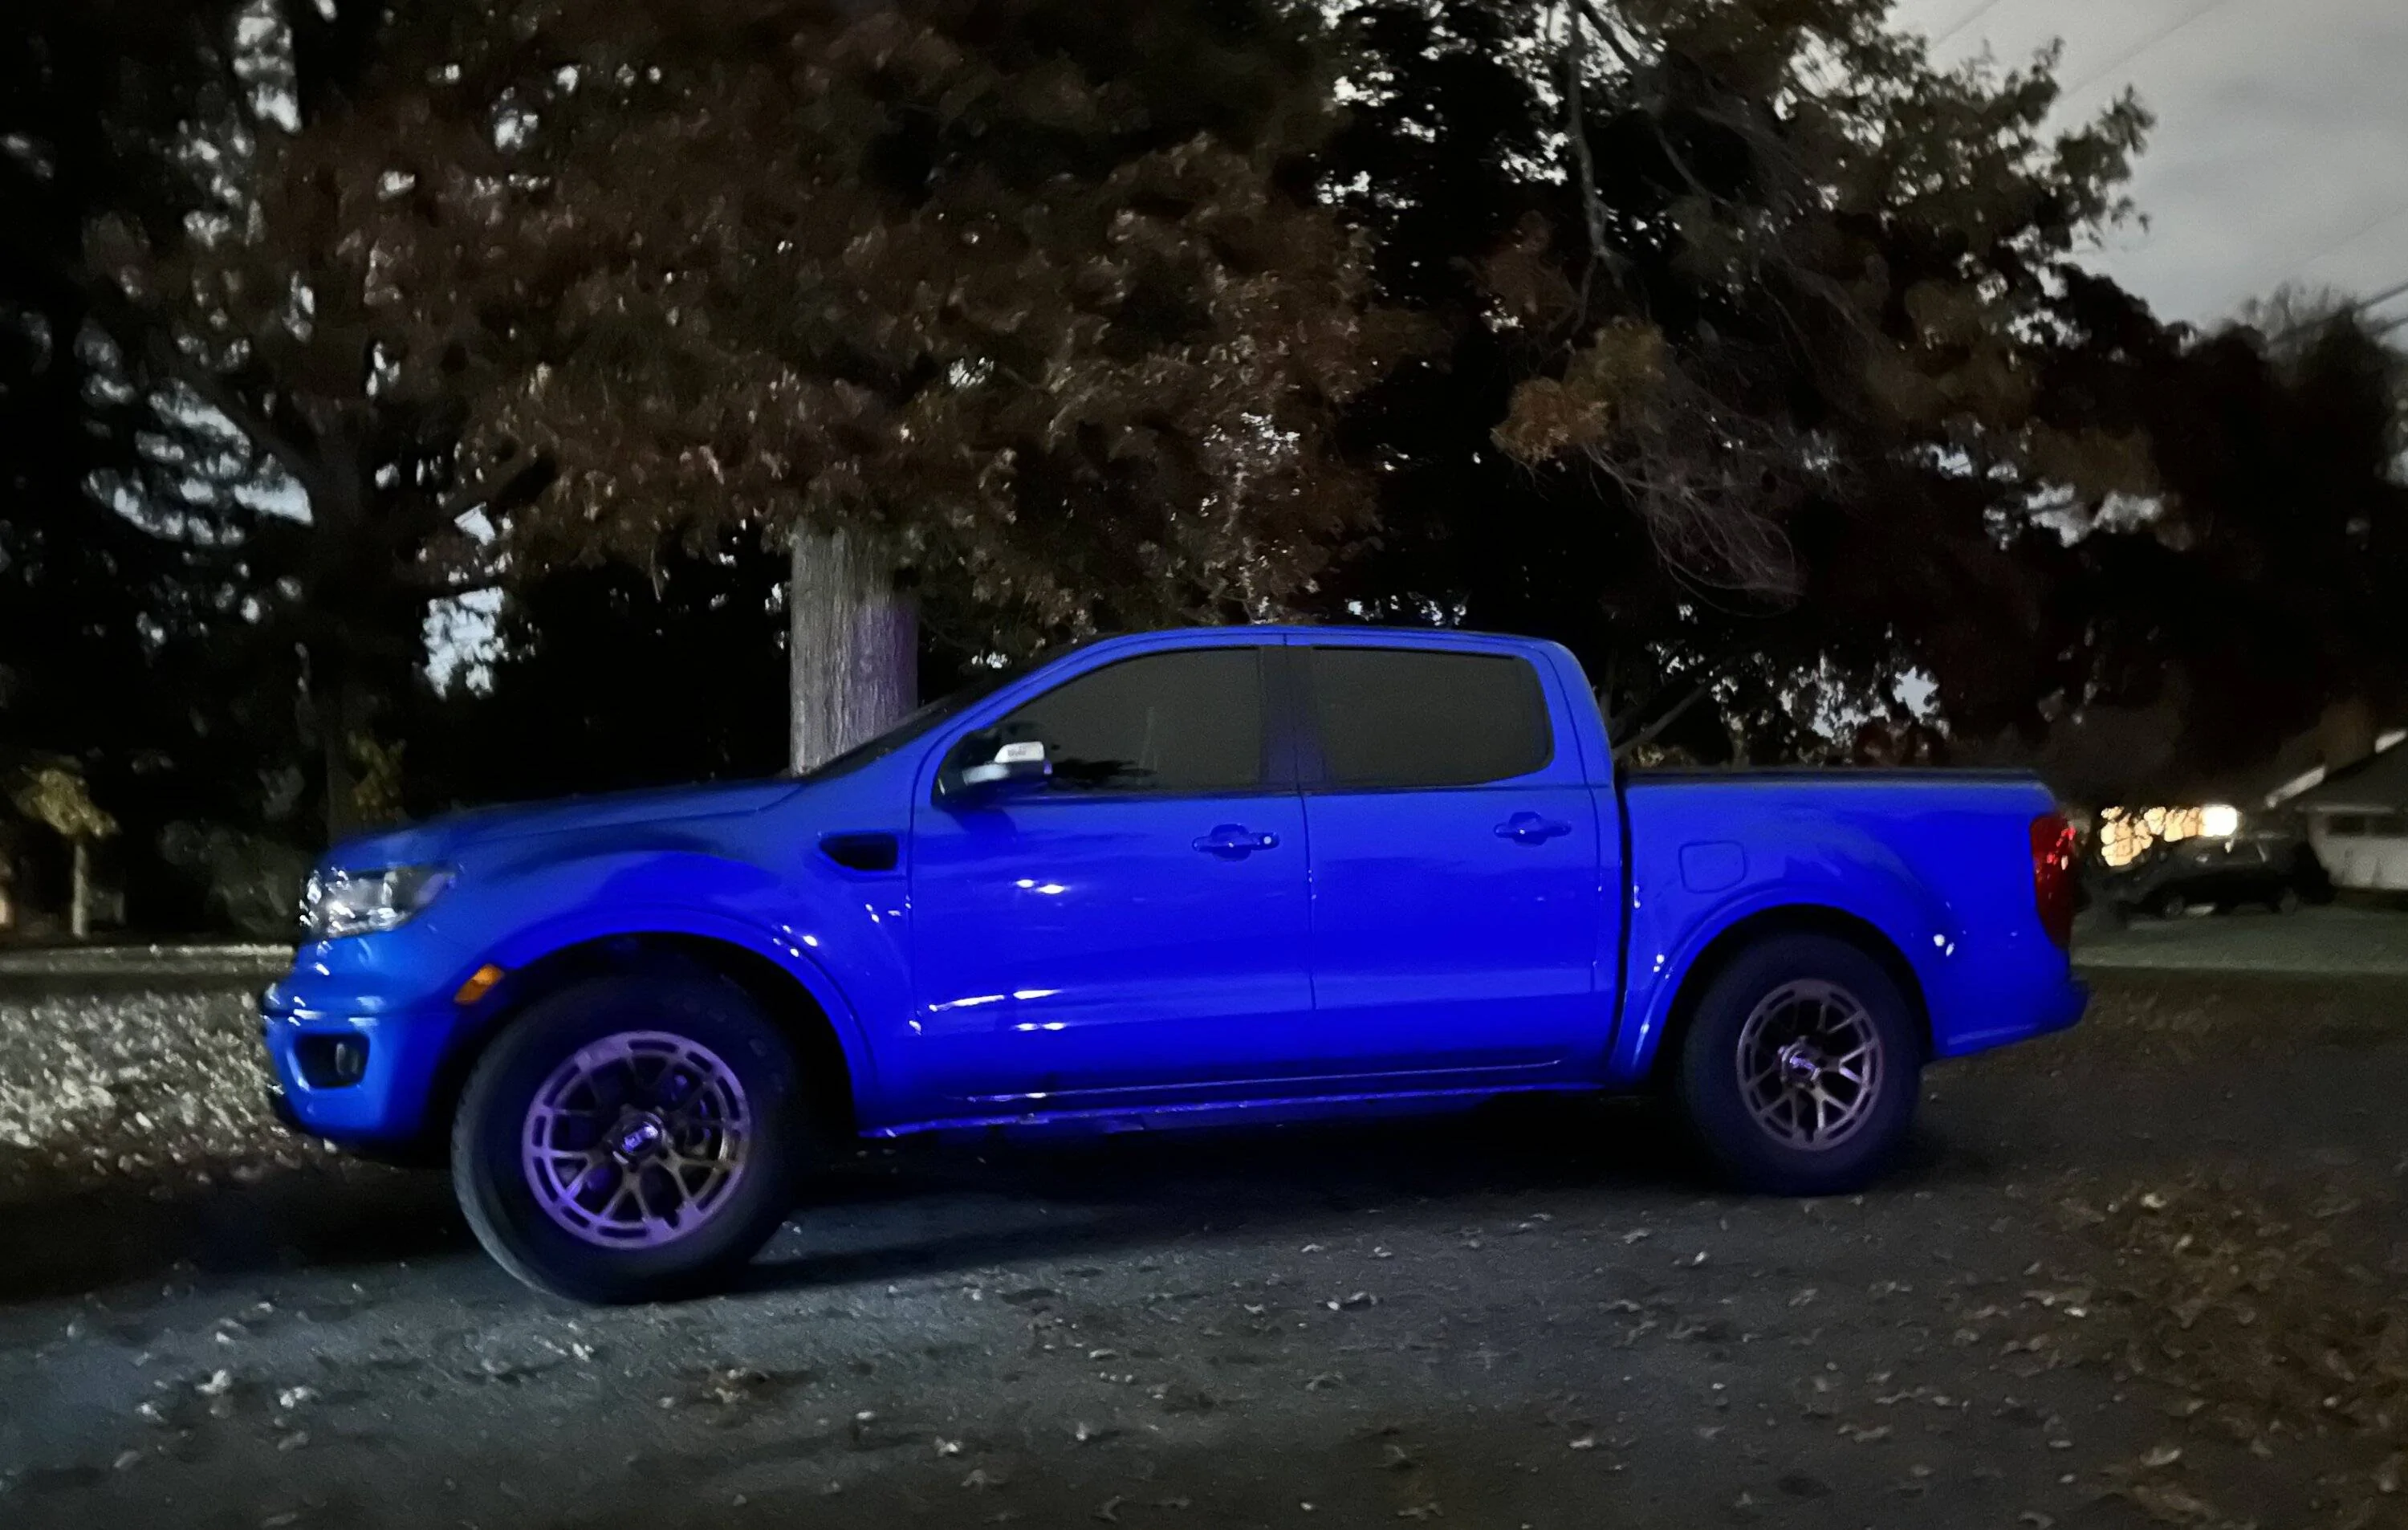
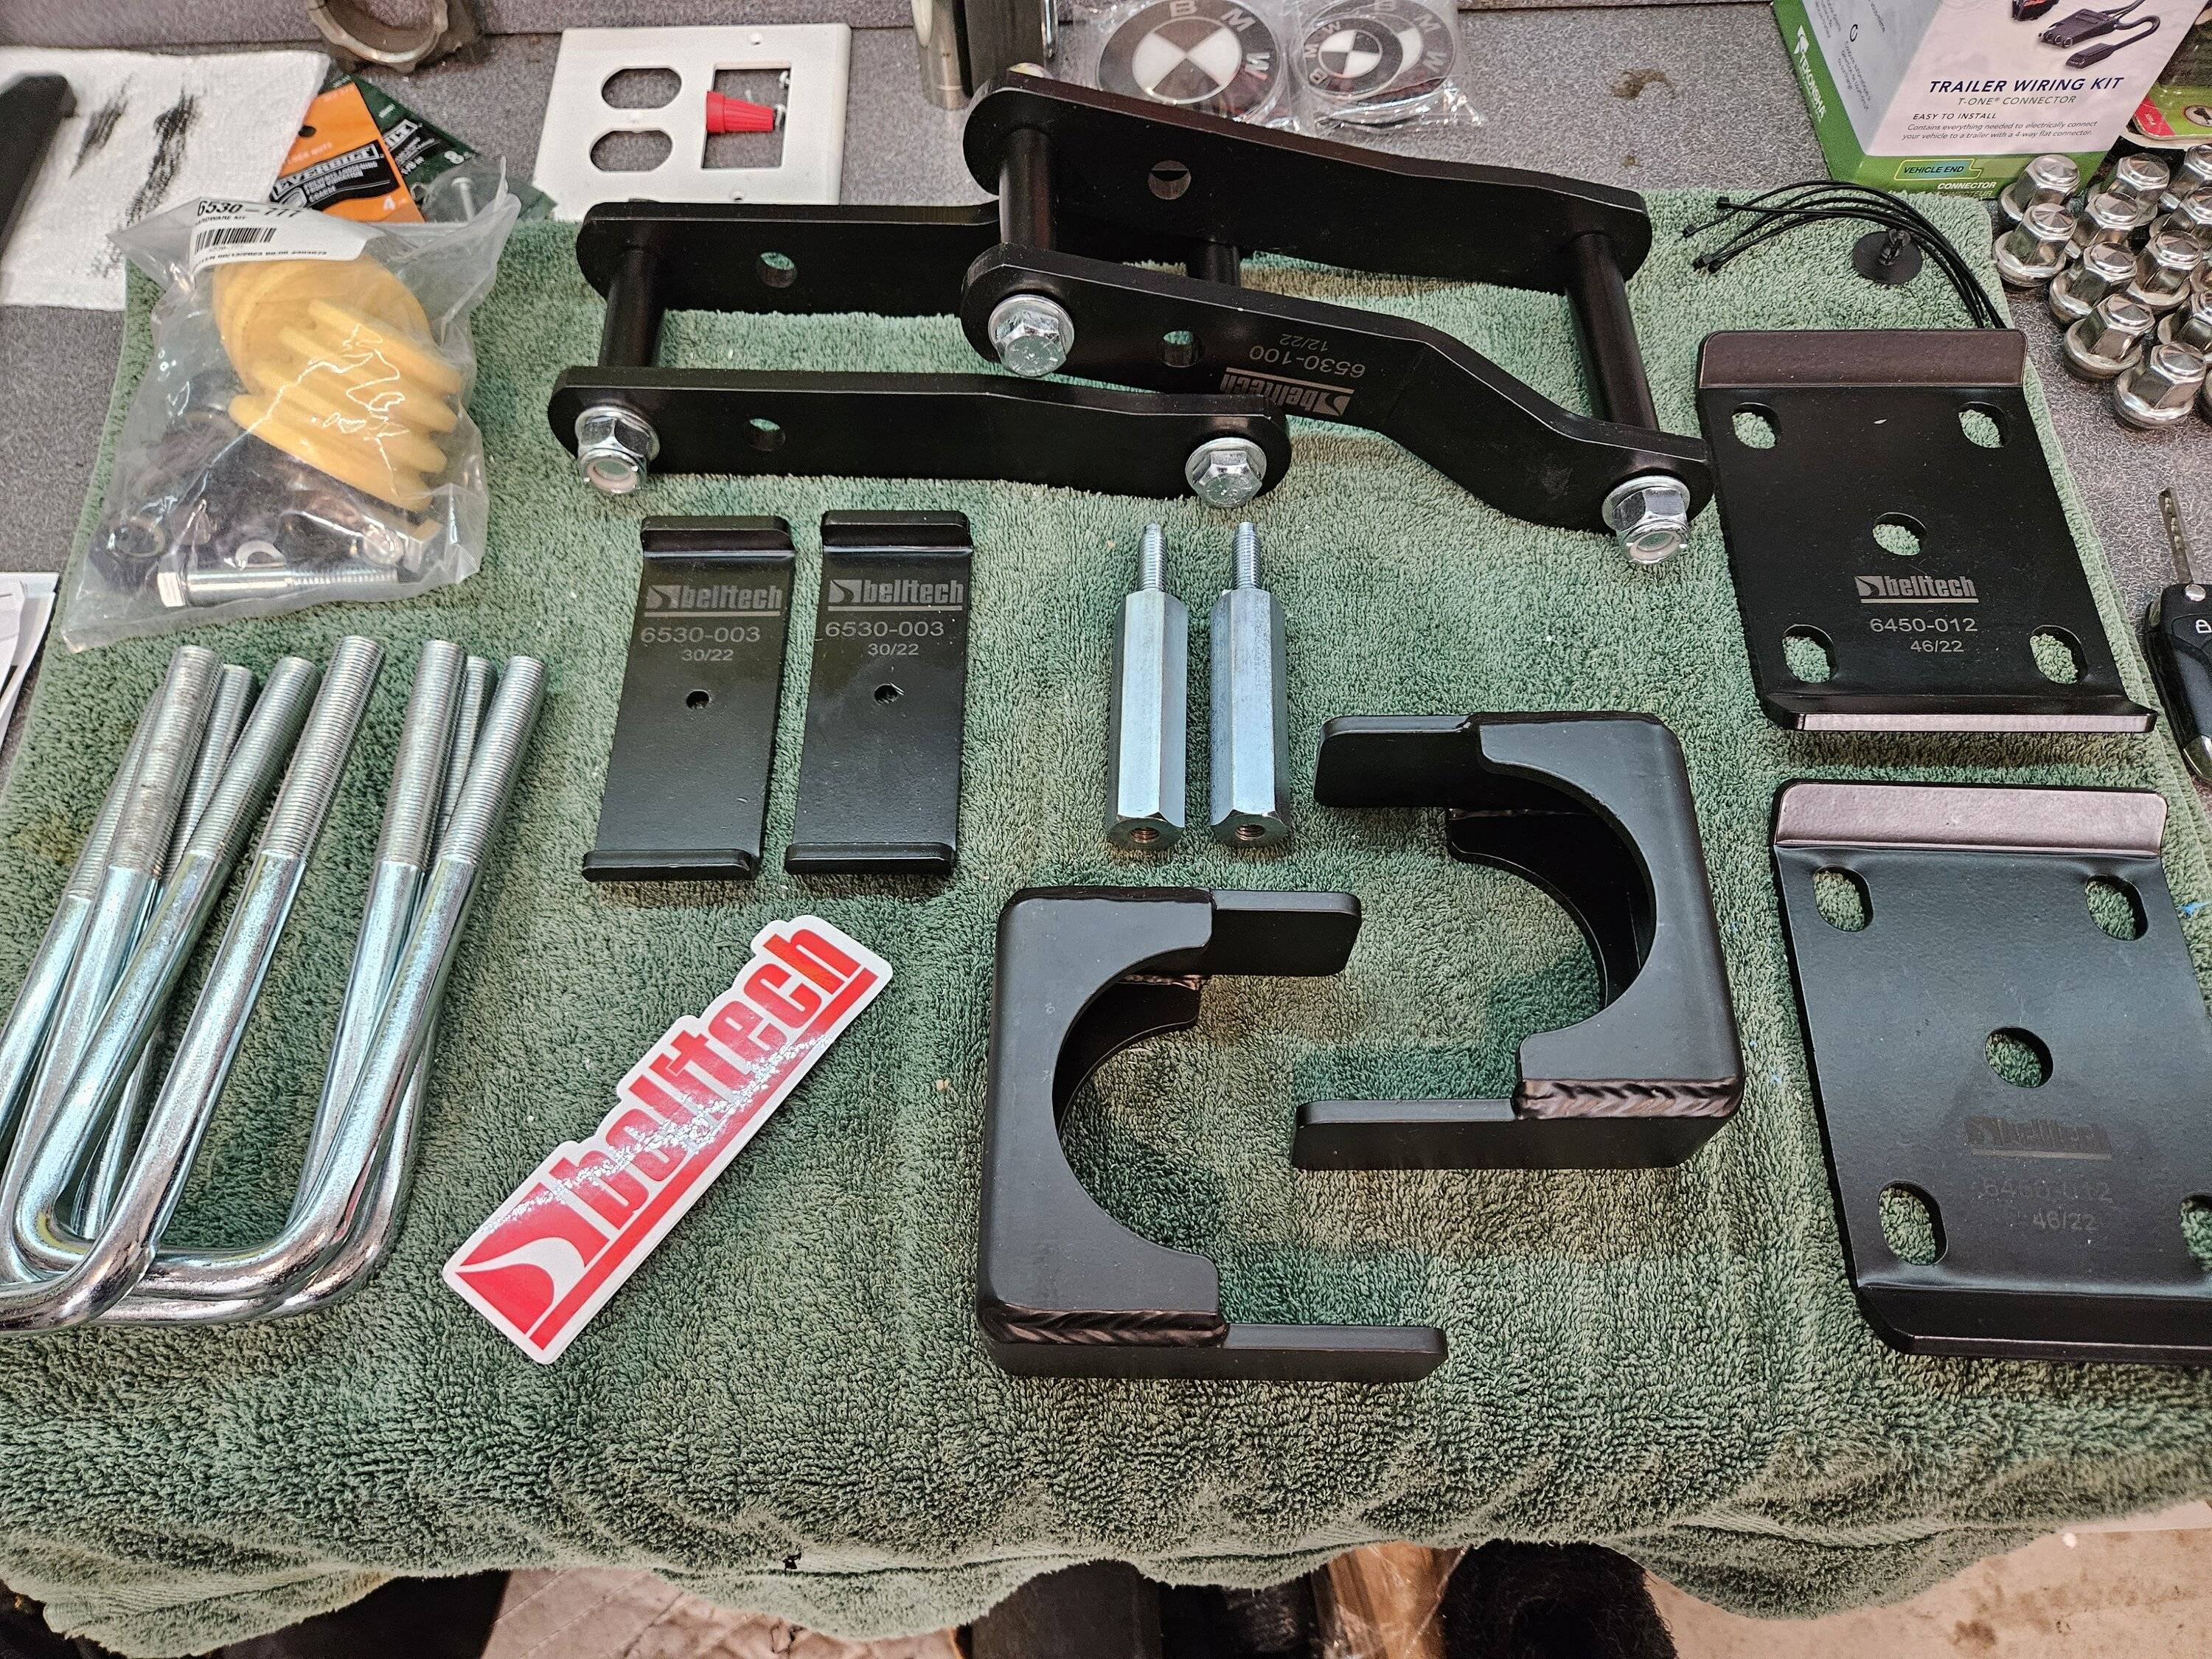
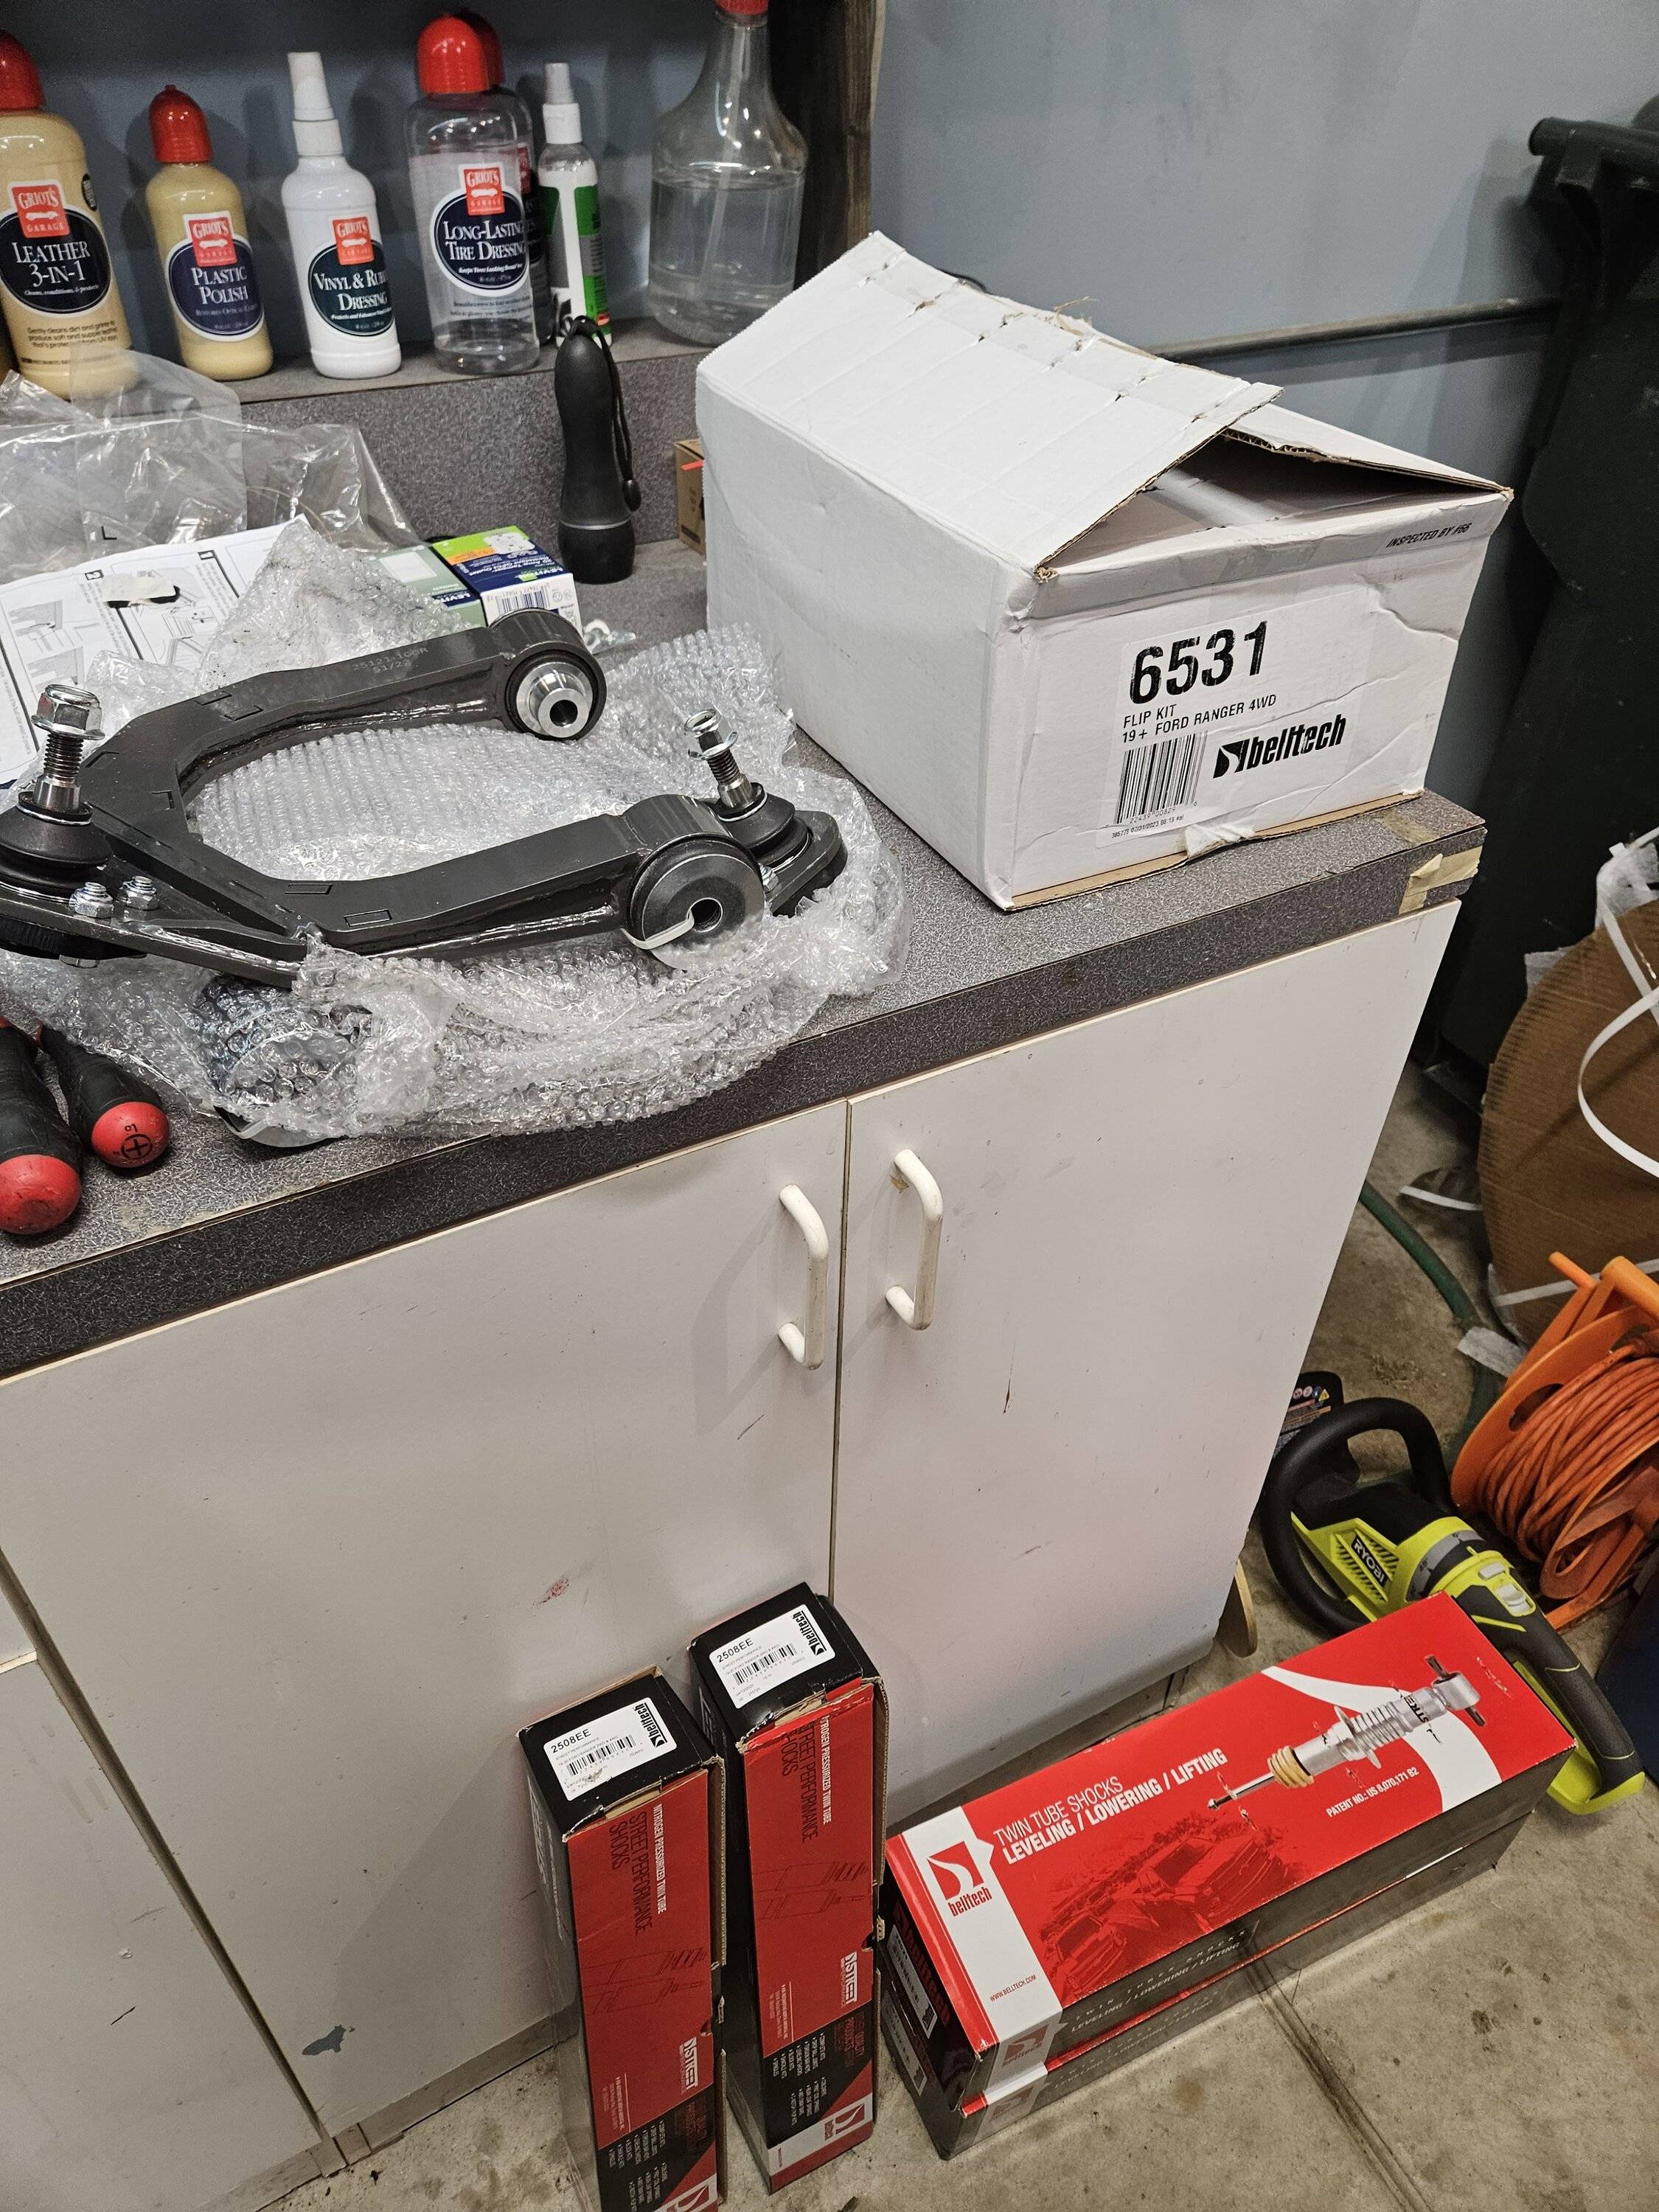
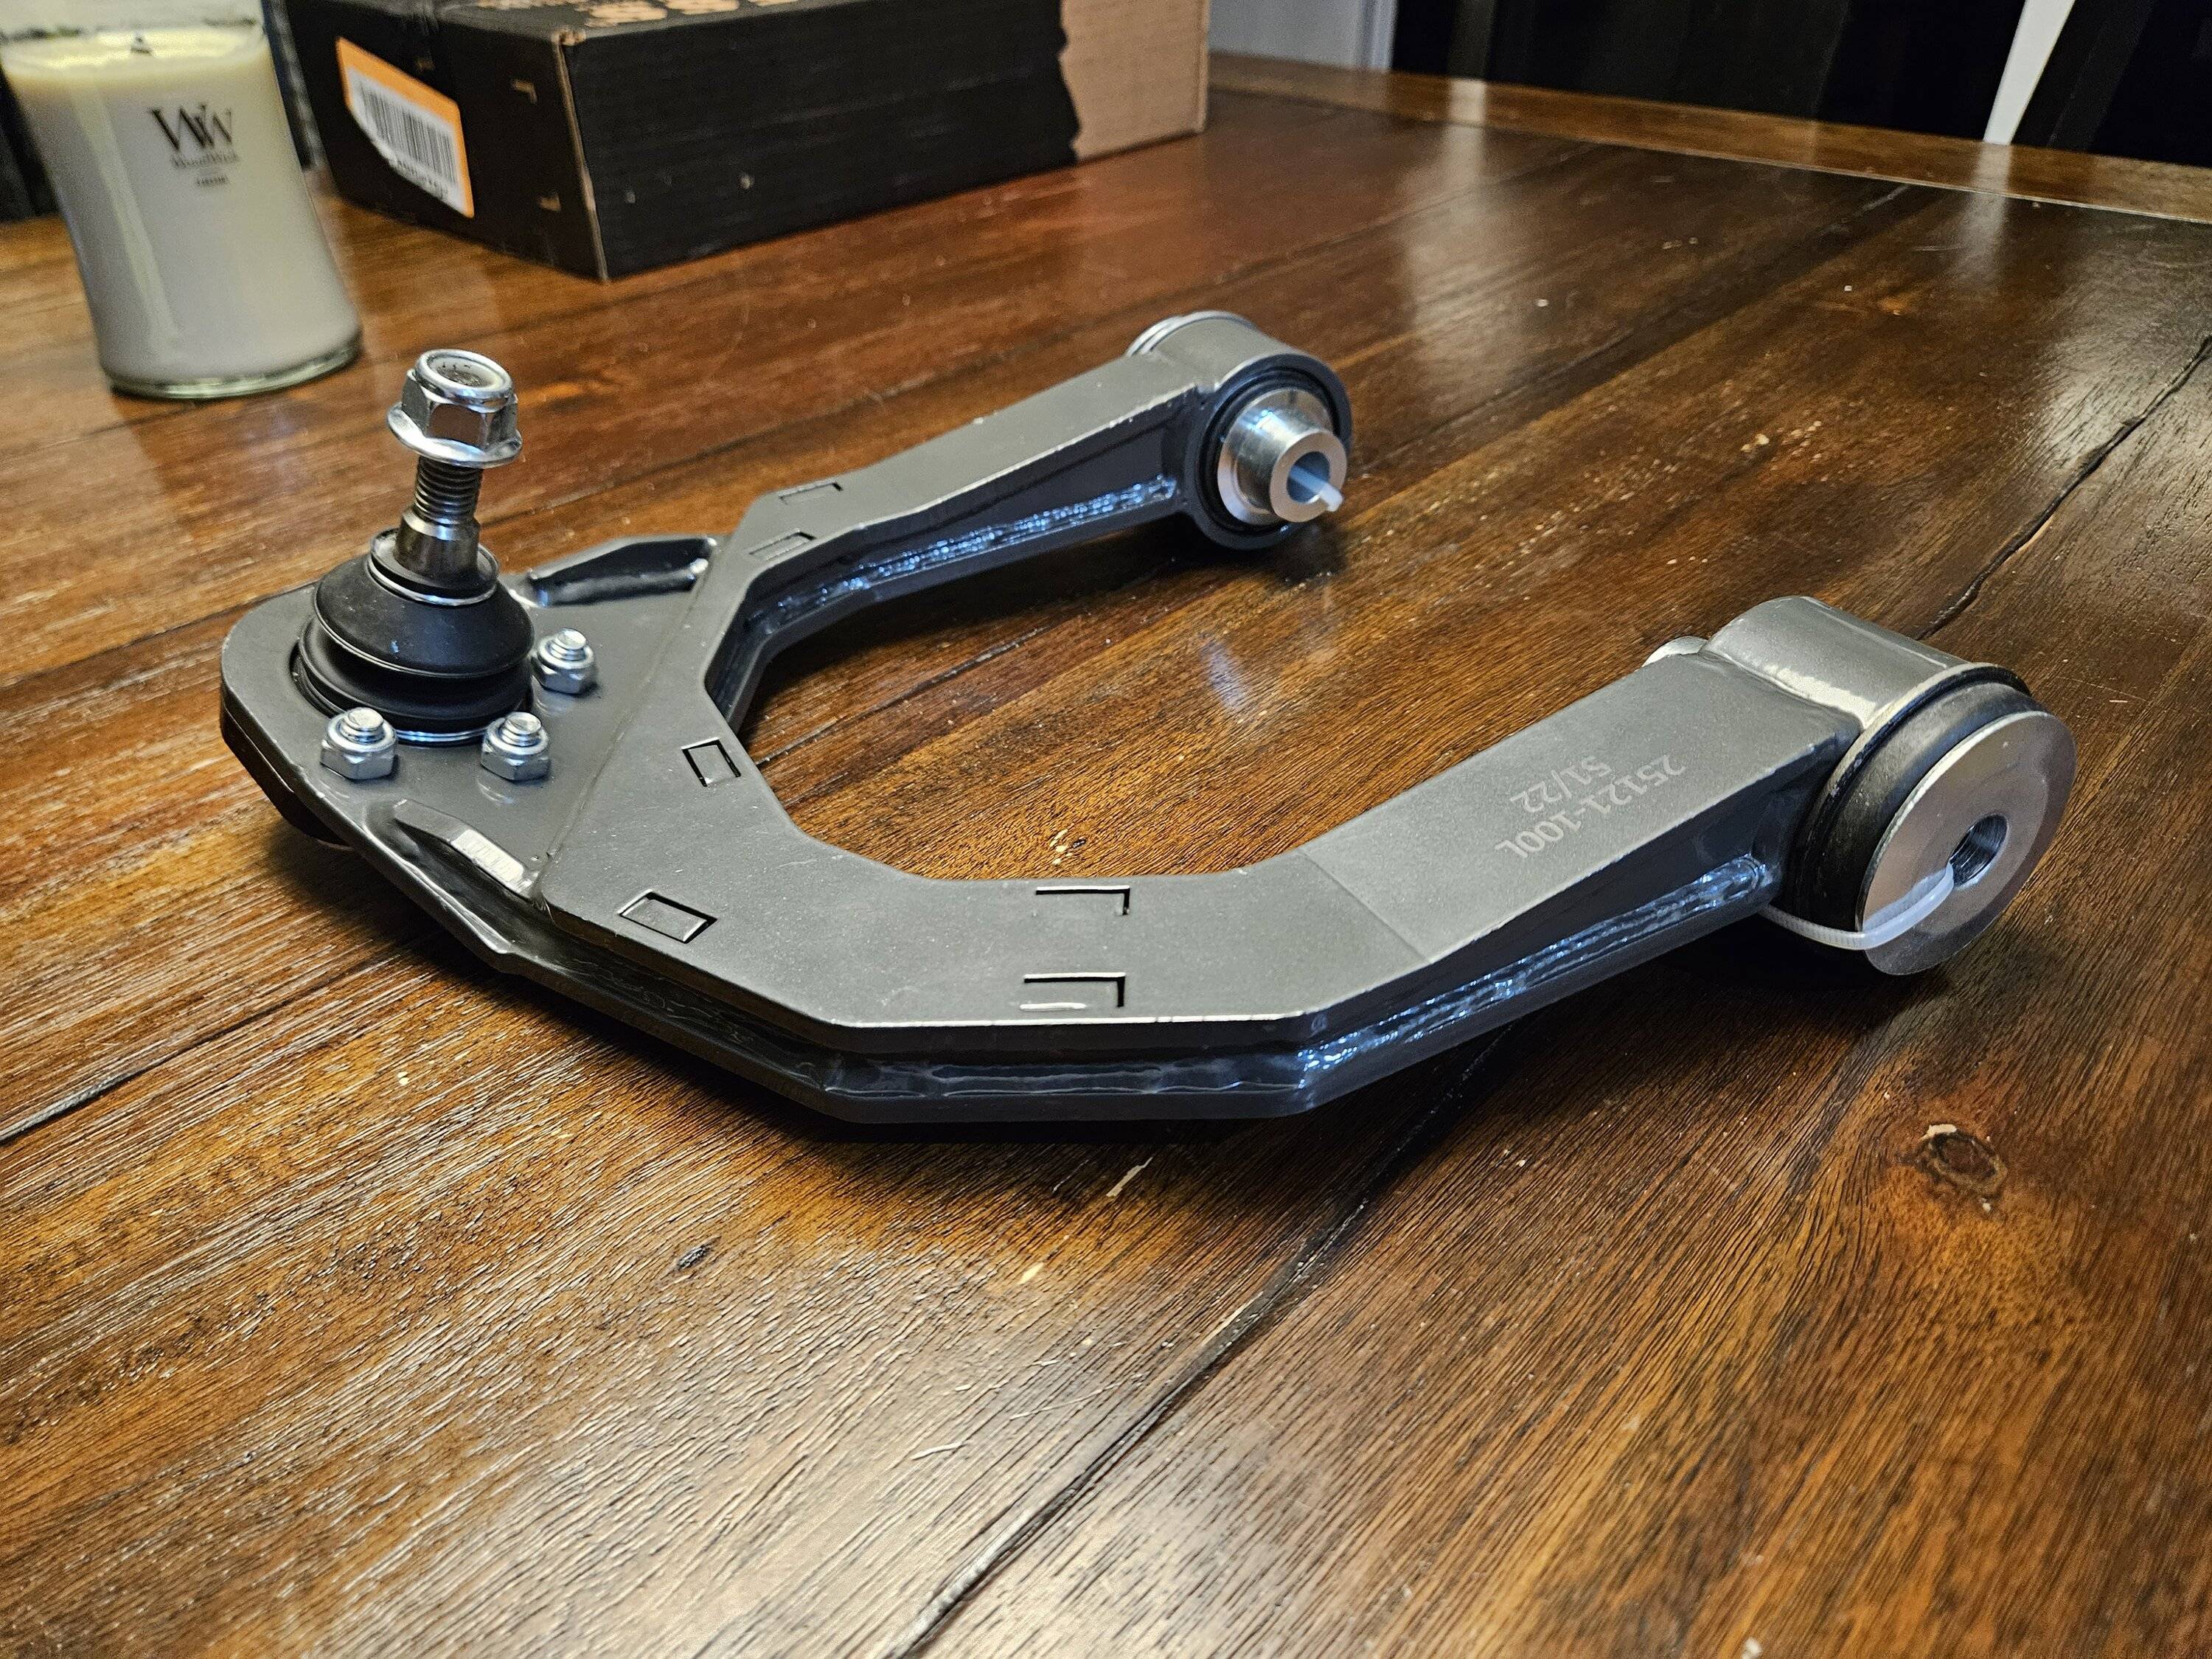
I settled on the Belltech 1043SP kit which lowers the front 3" and the rear 4-6". Note this is different than Belltech's 1045SP kit which is a 2/4" drop. The 1043 kit includes different upper control arms that correct the suspension geometry when going down that extra bit in the front.

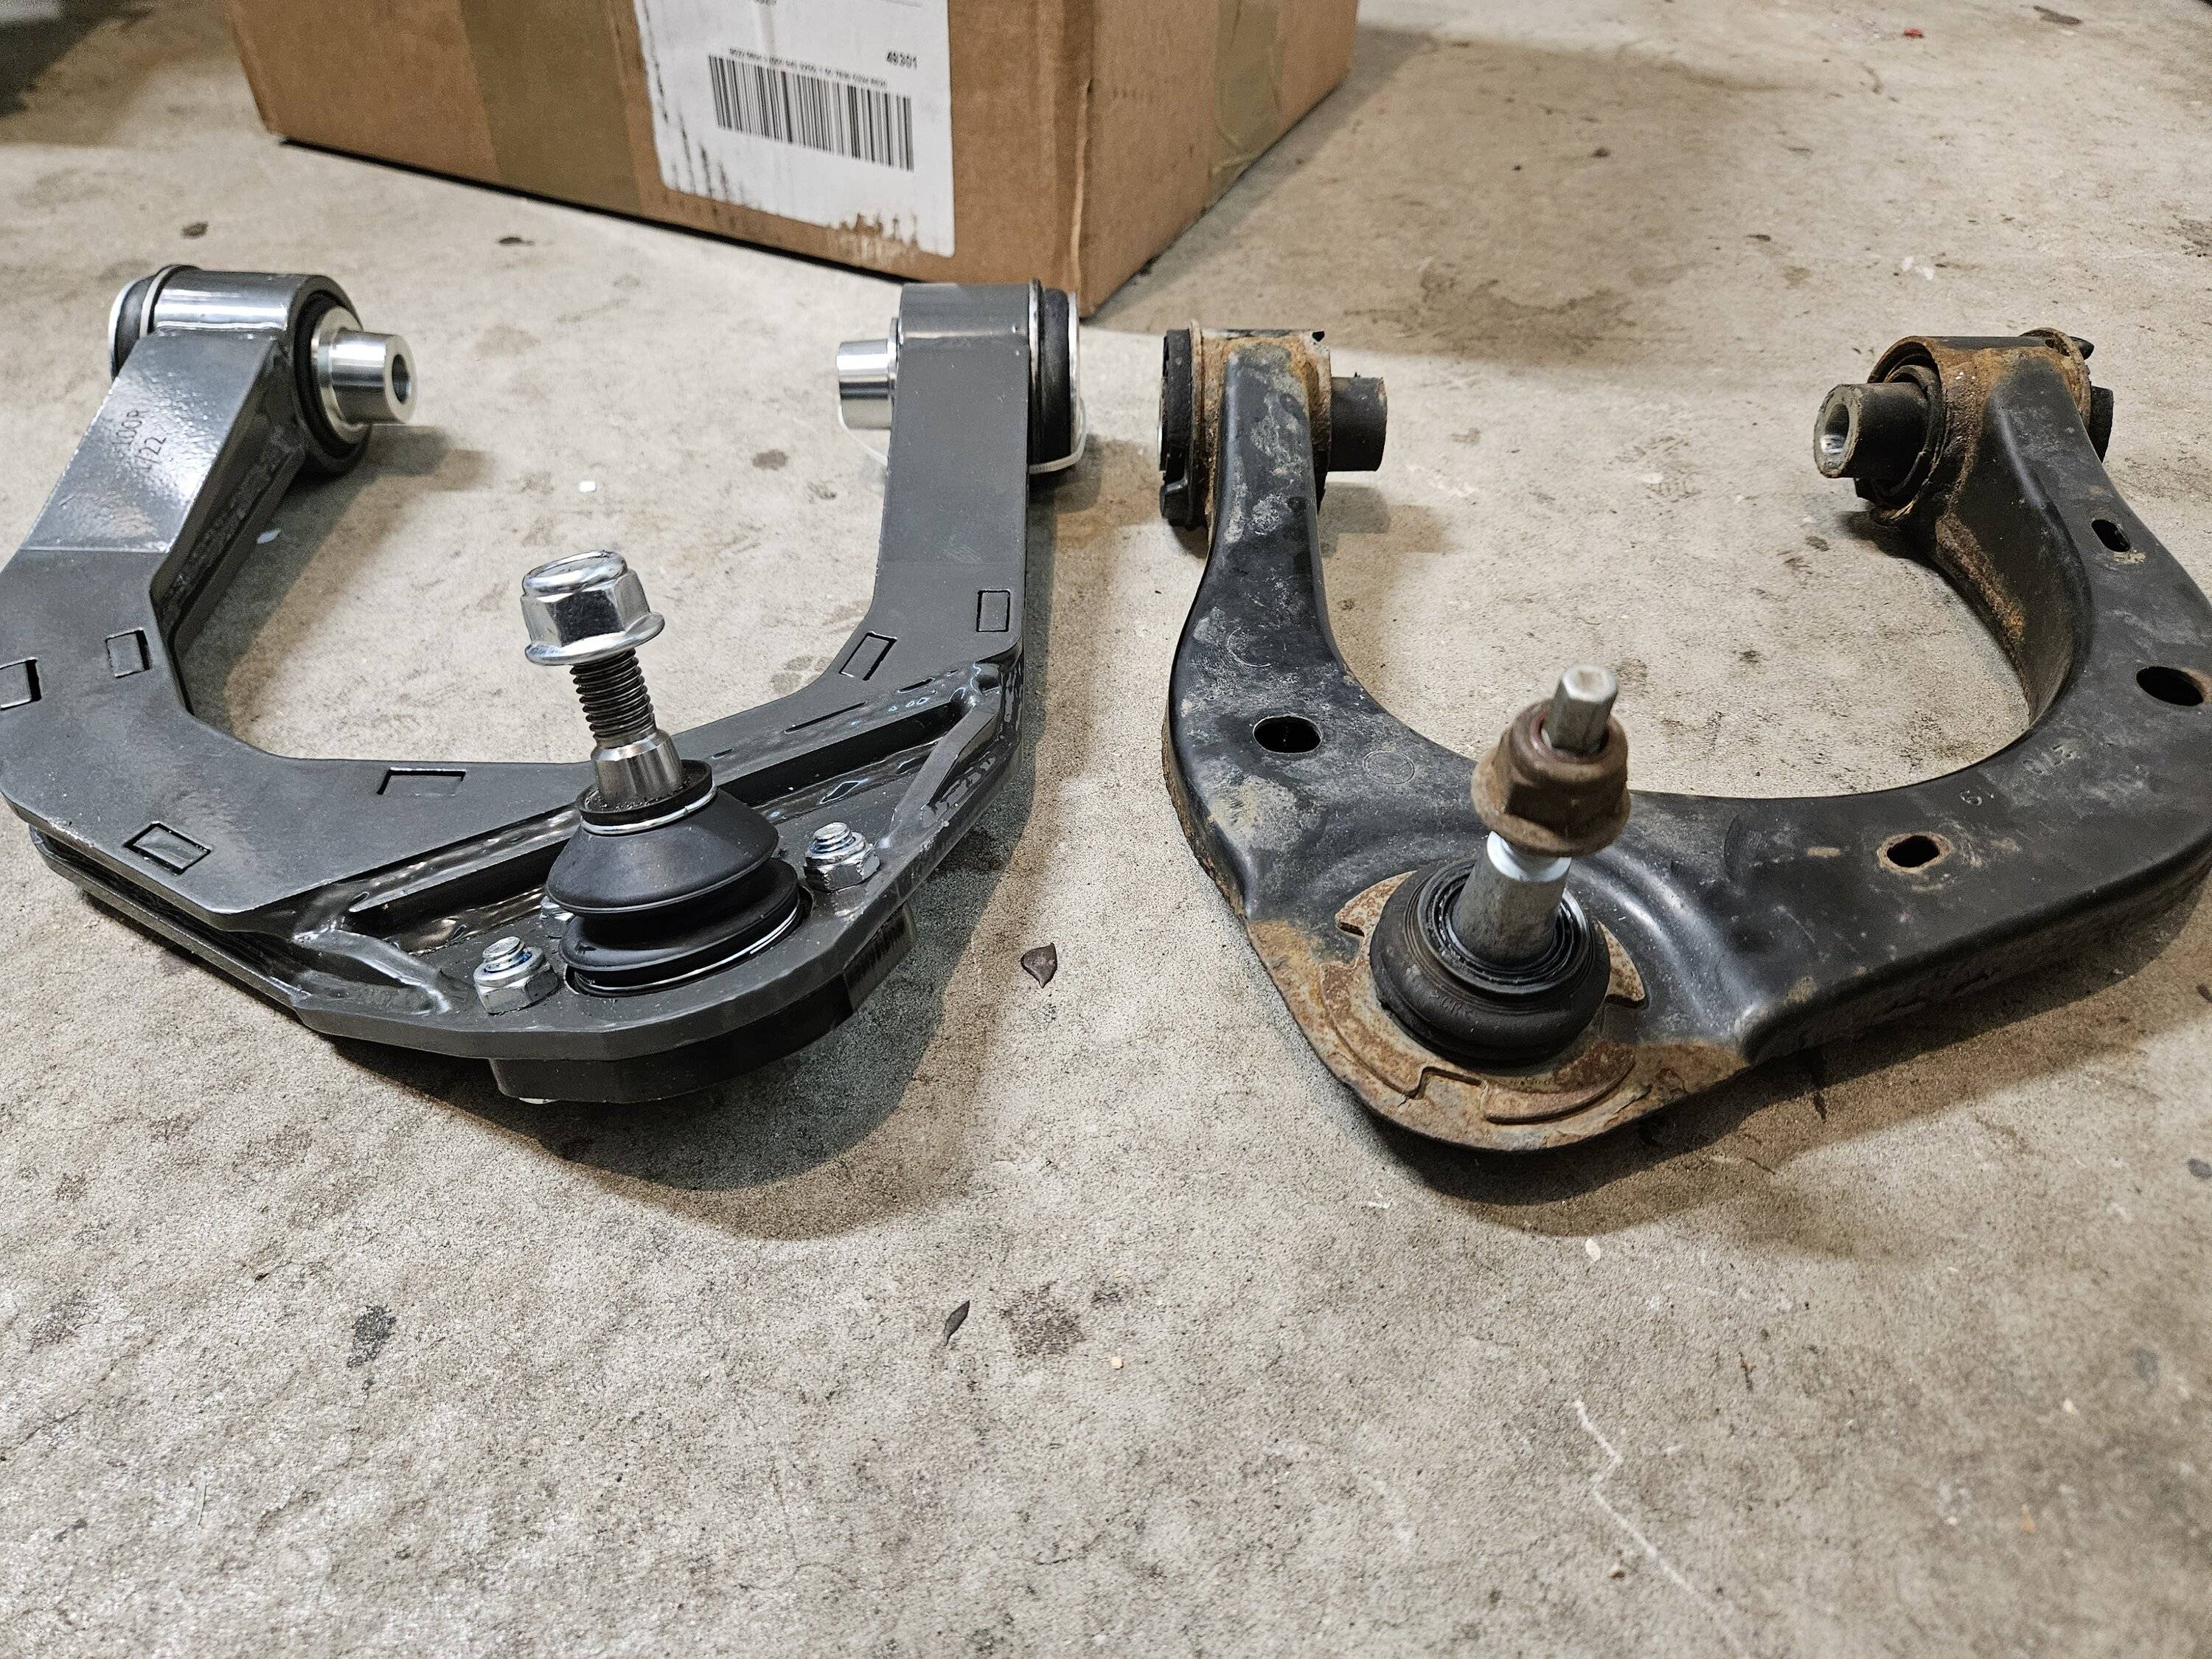
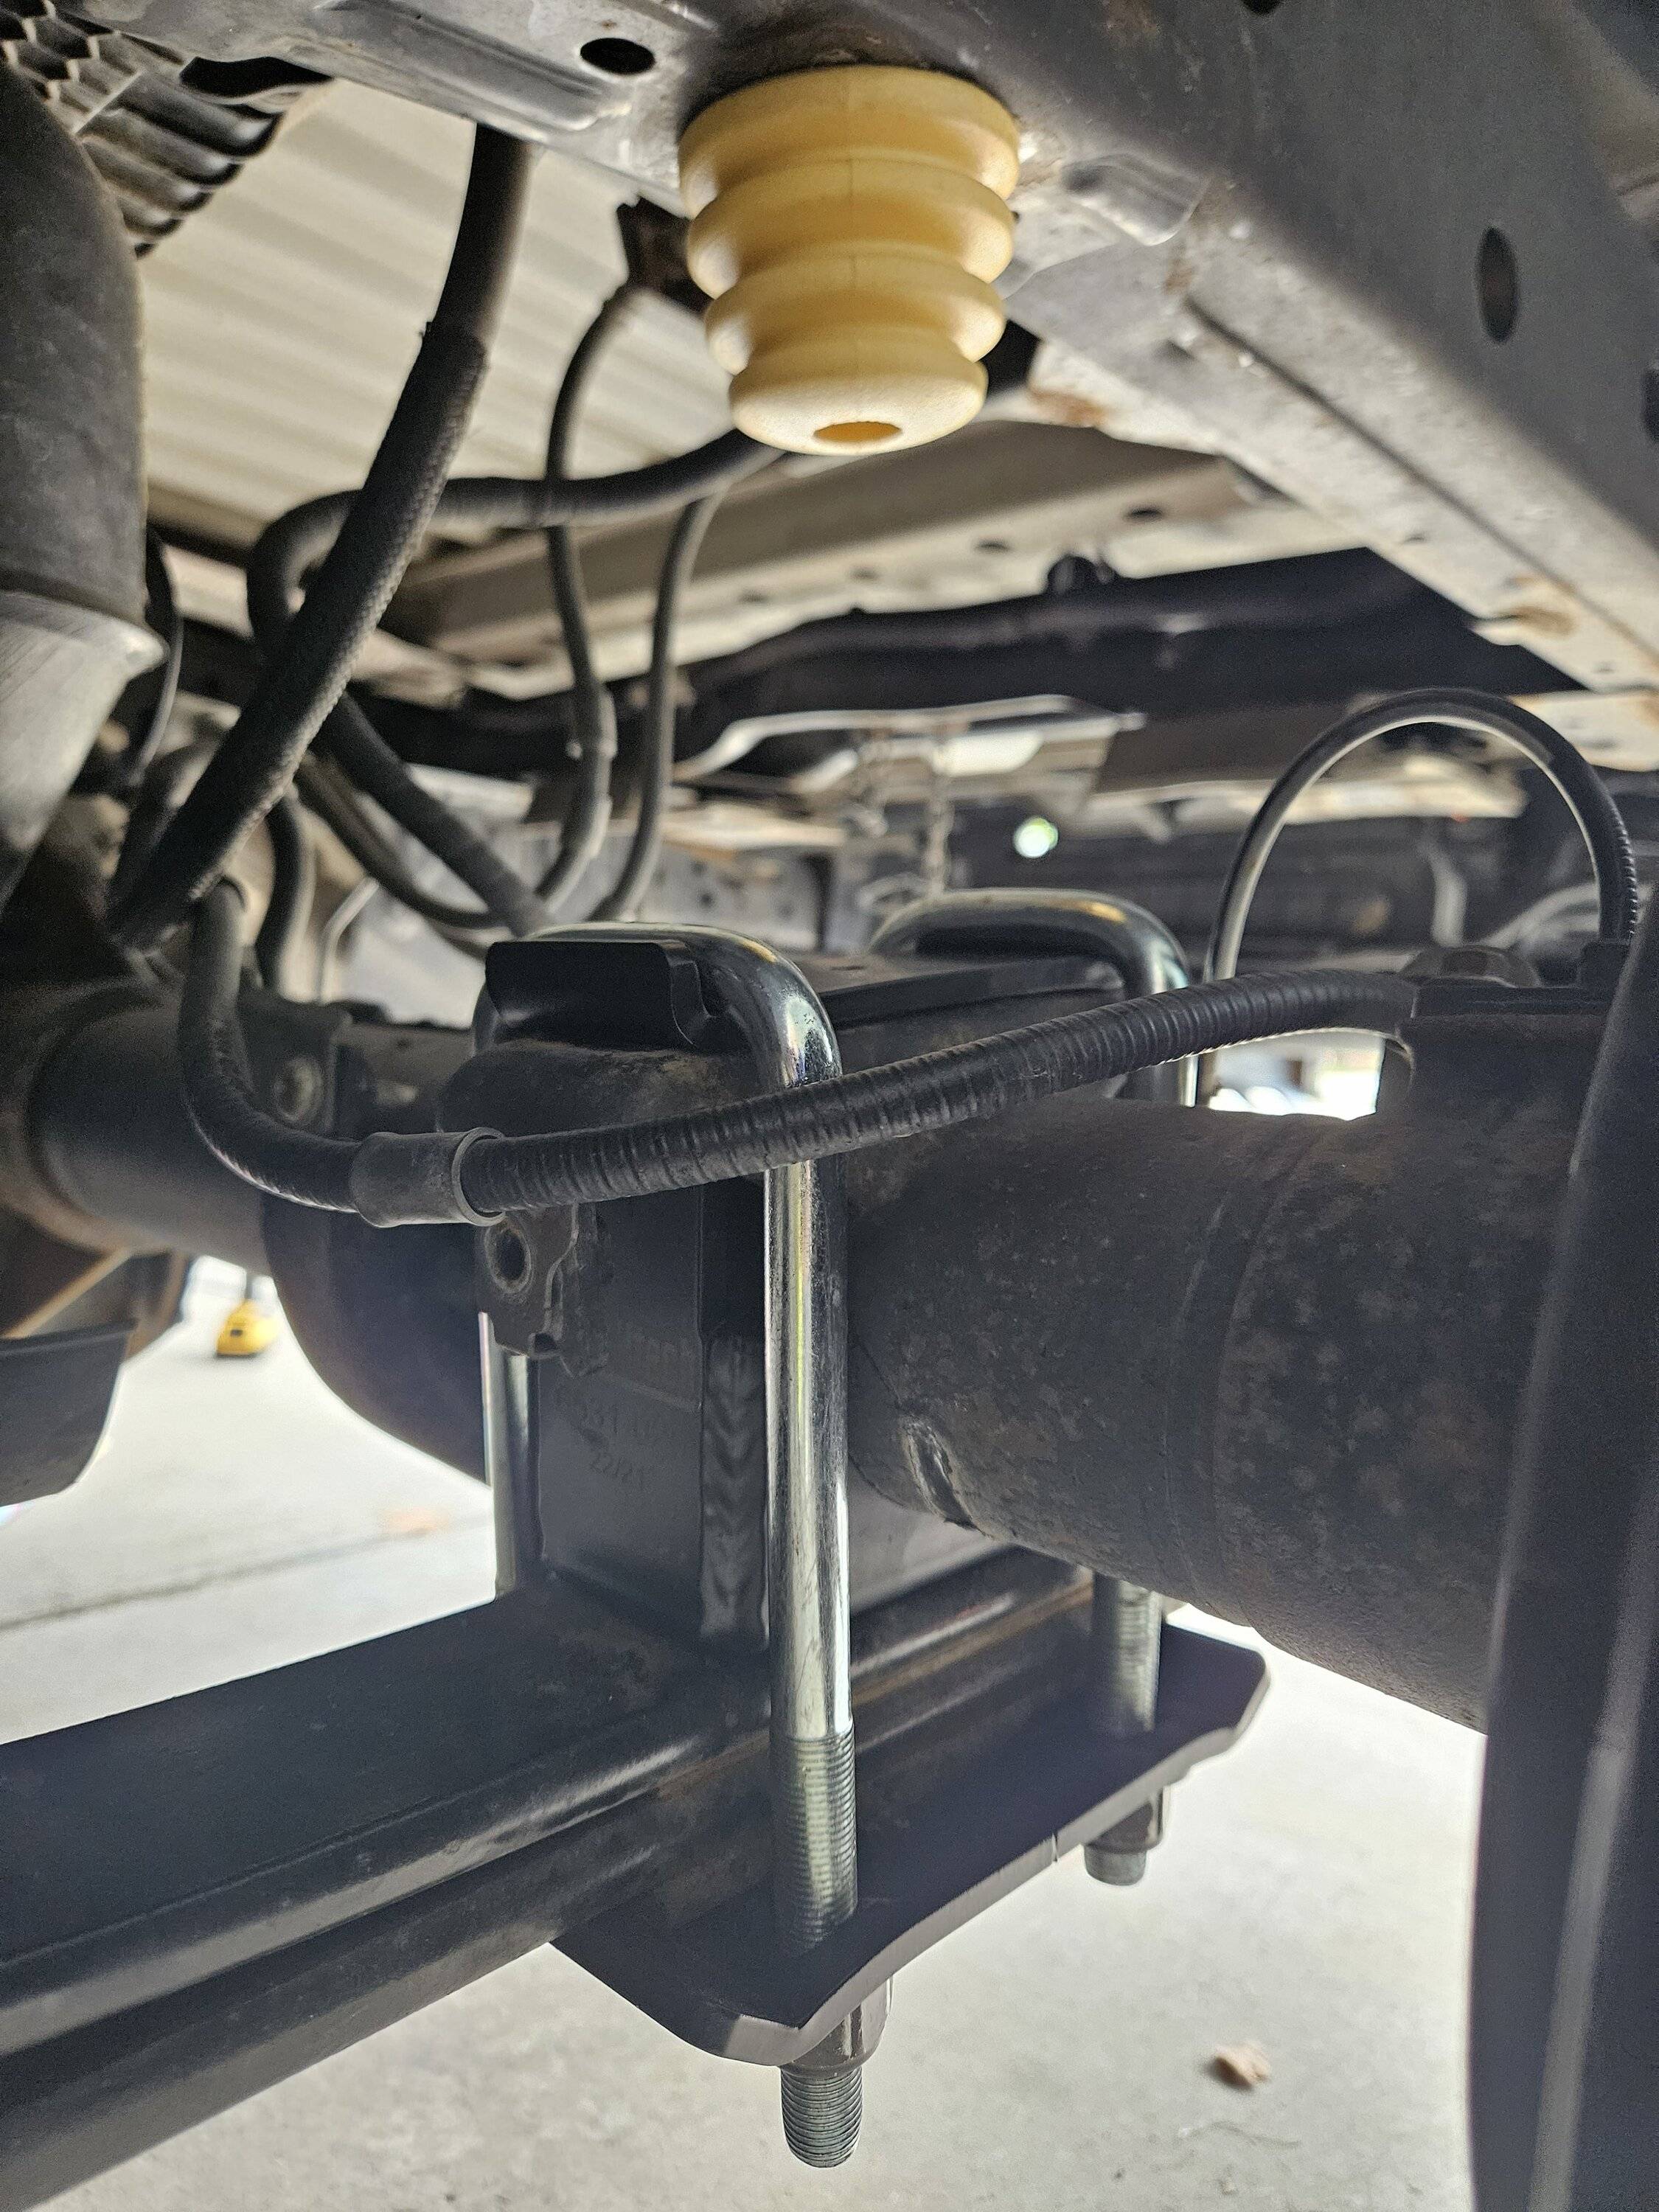
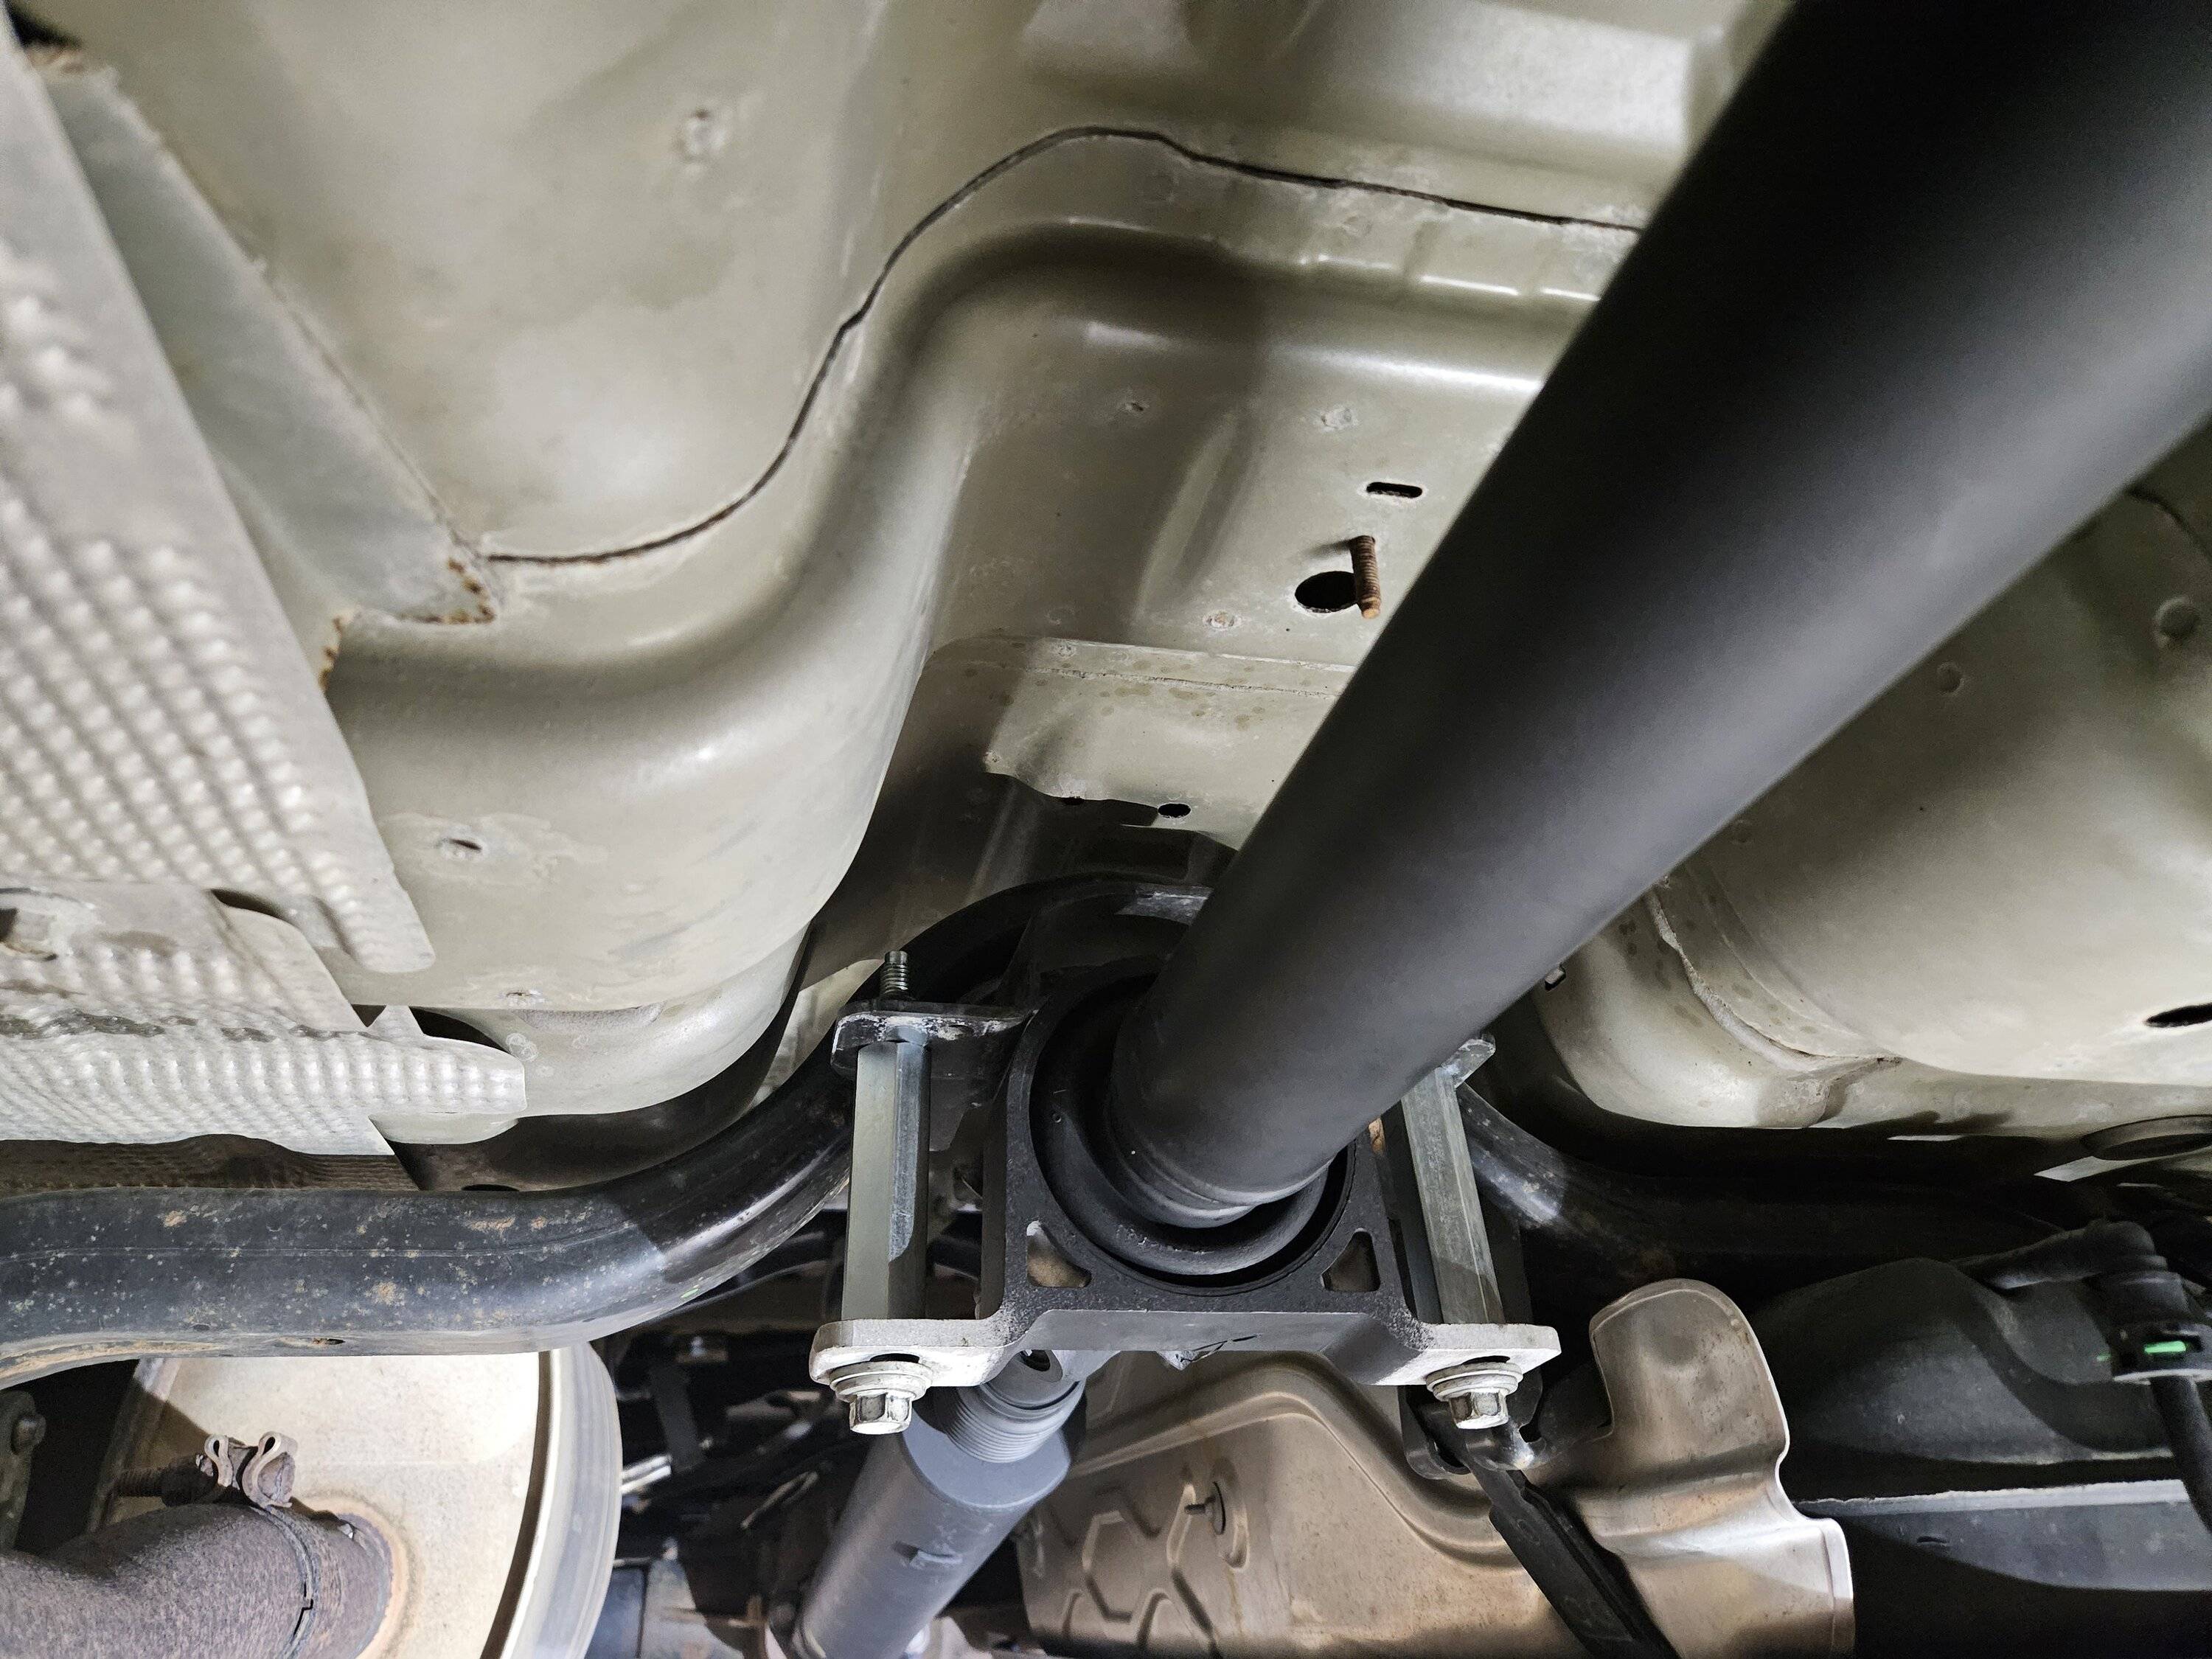
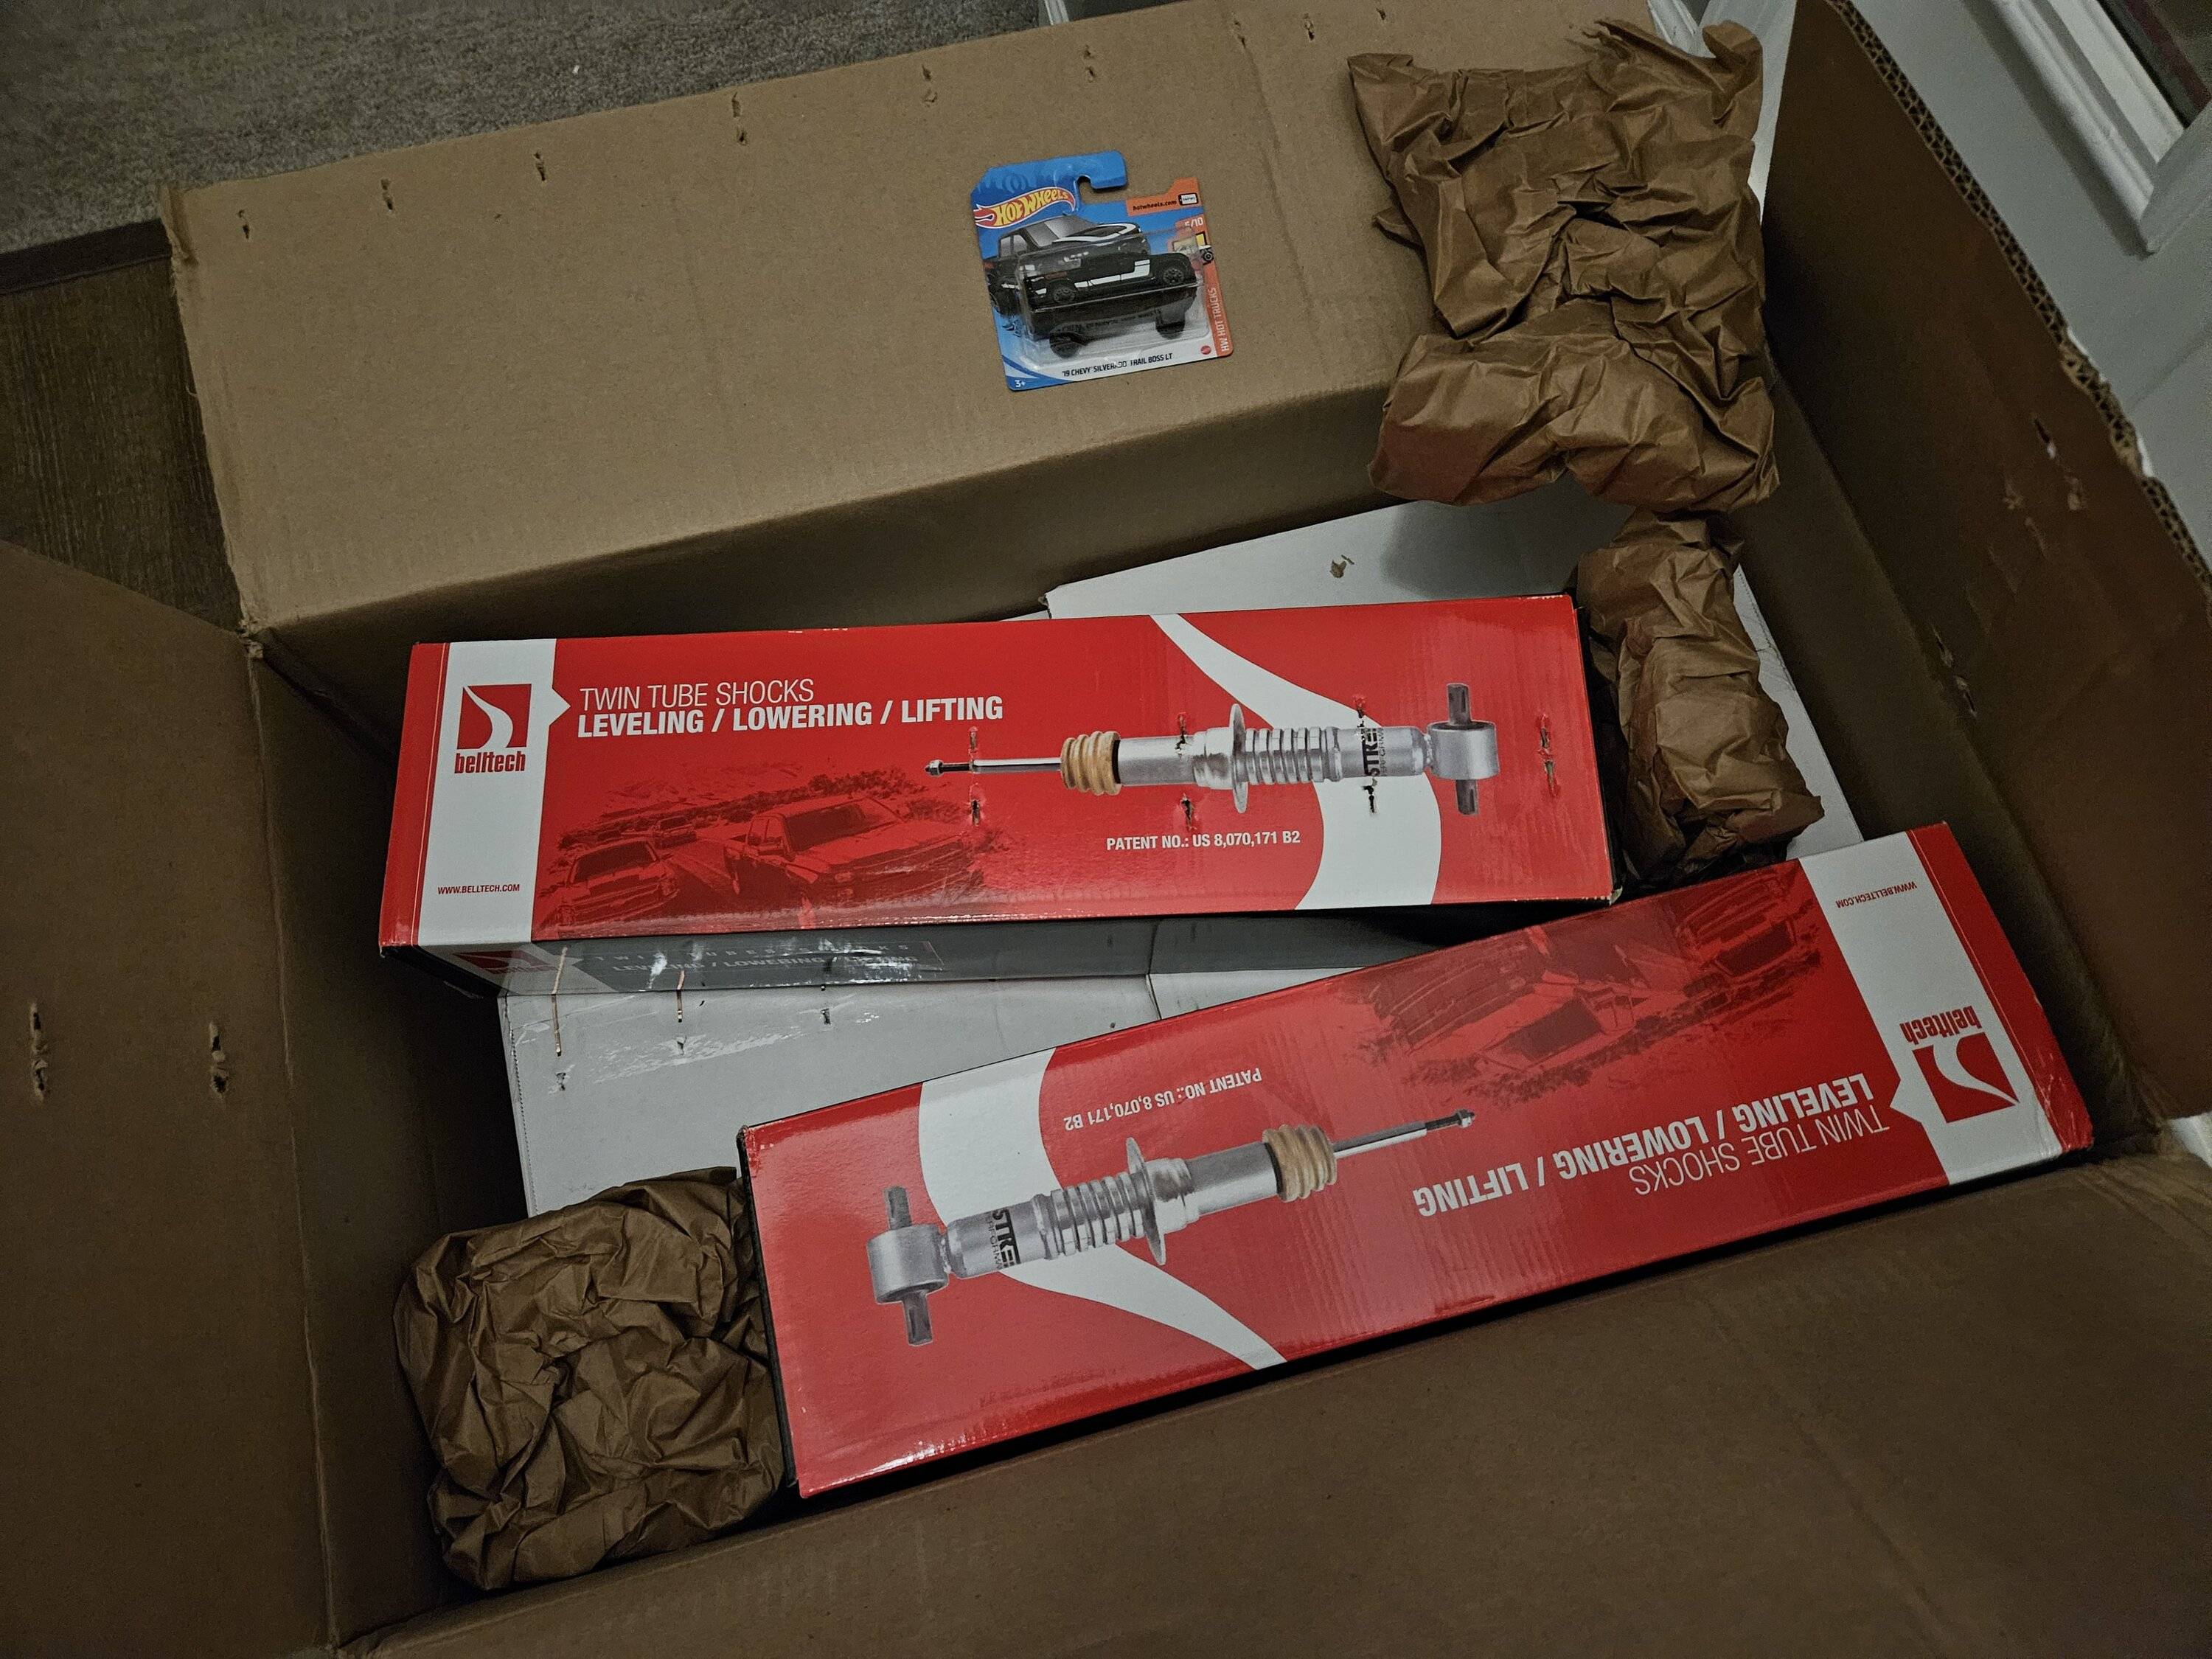
The kit comes very well packed with items individually wrapped so no scratches or chips. The upper control arms are nice and beefy, along with the new rear hangers and the axle plates. My kit even came with a Hot Wheels truck - and being a kid at heart, it was a nice touch.

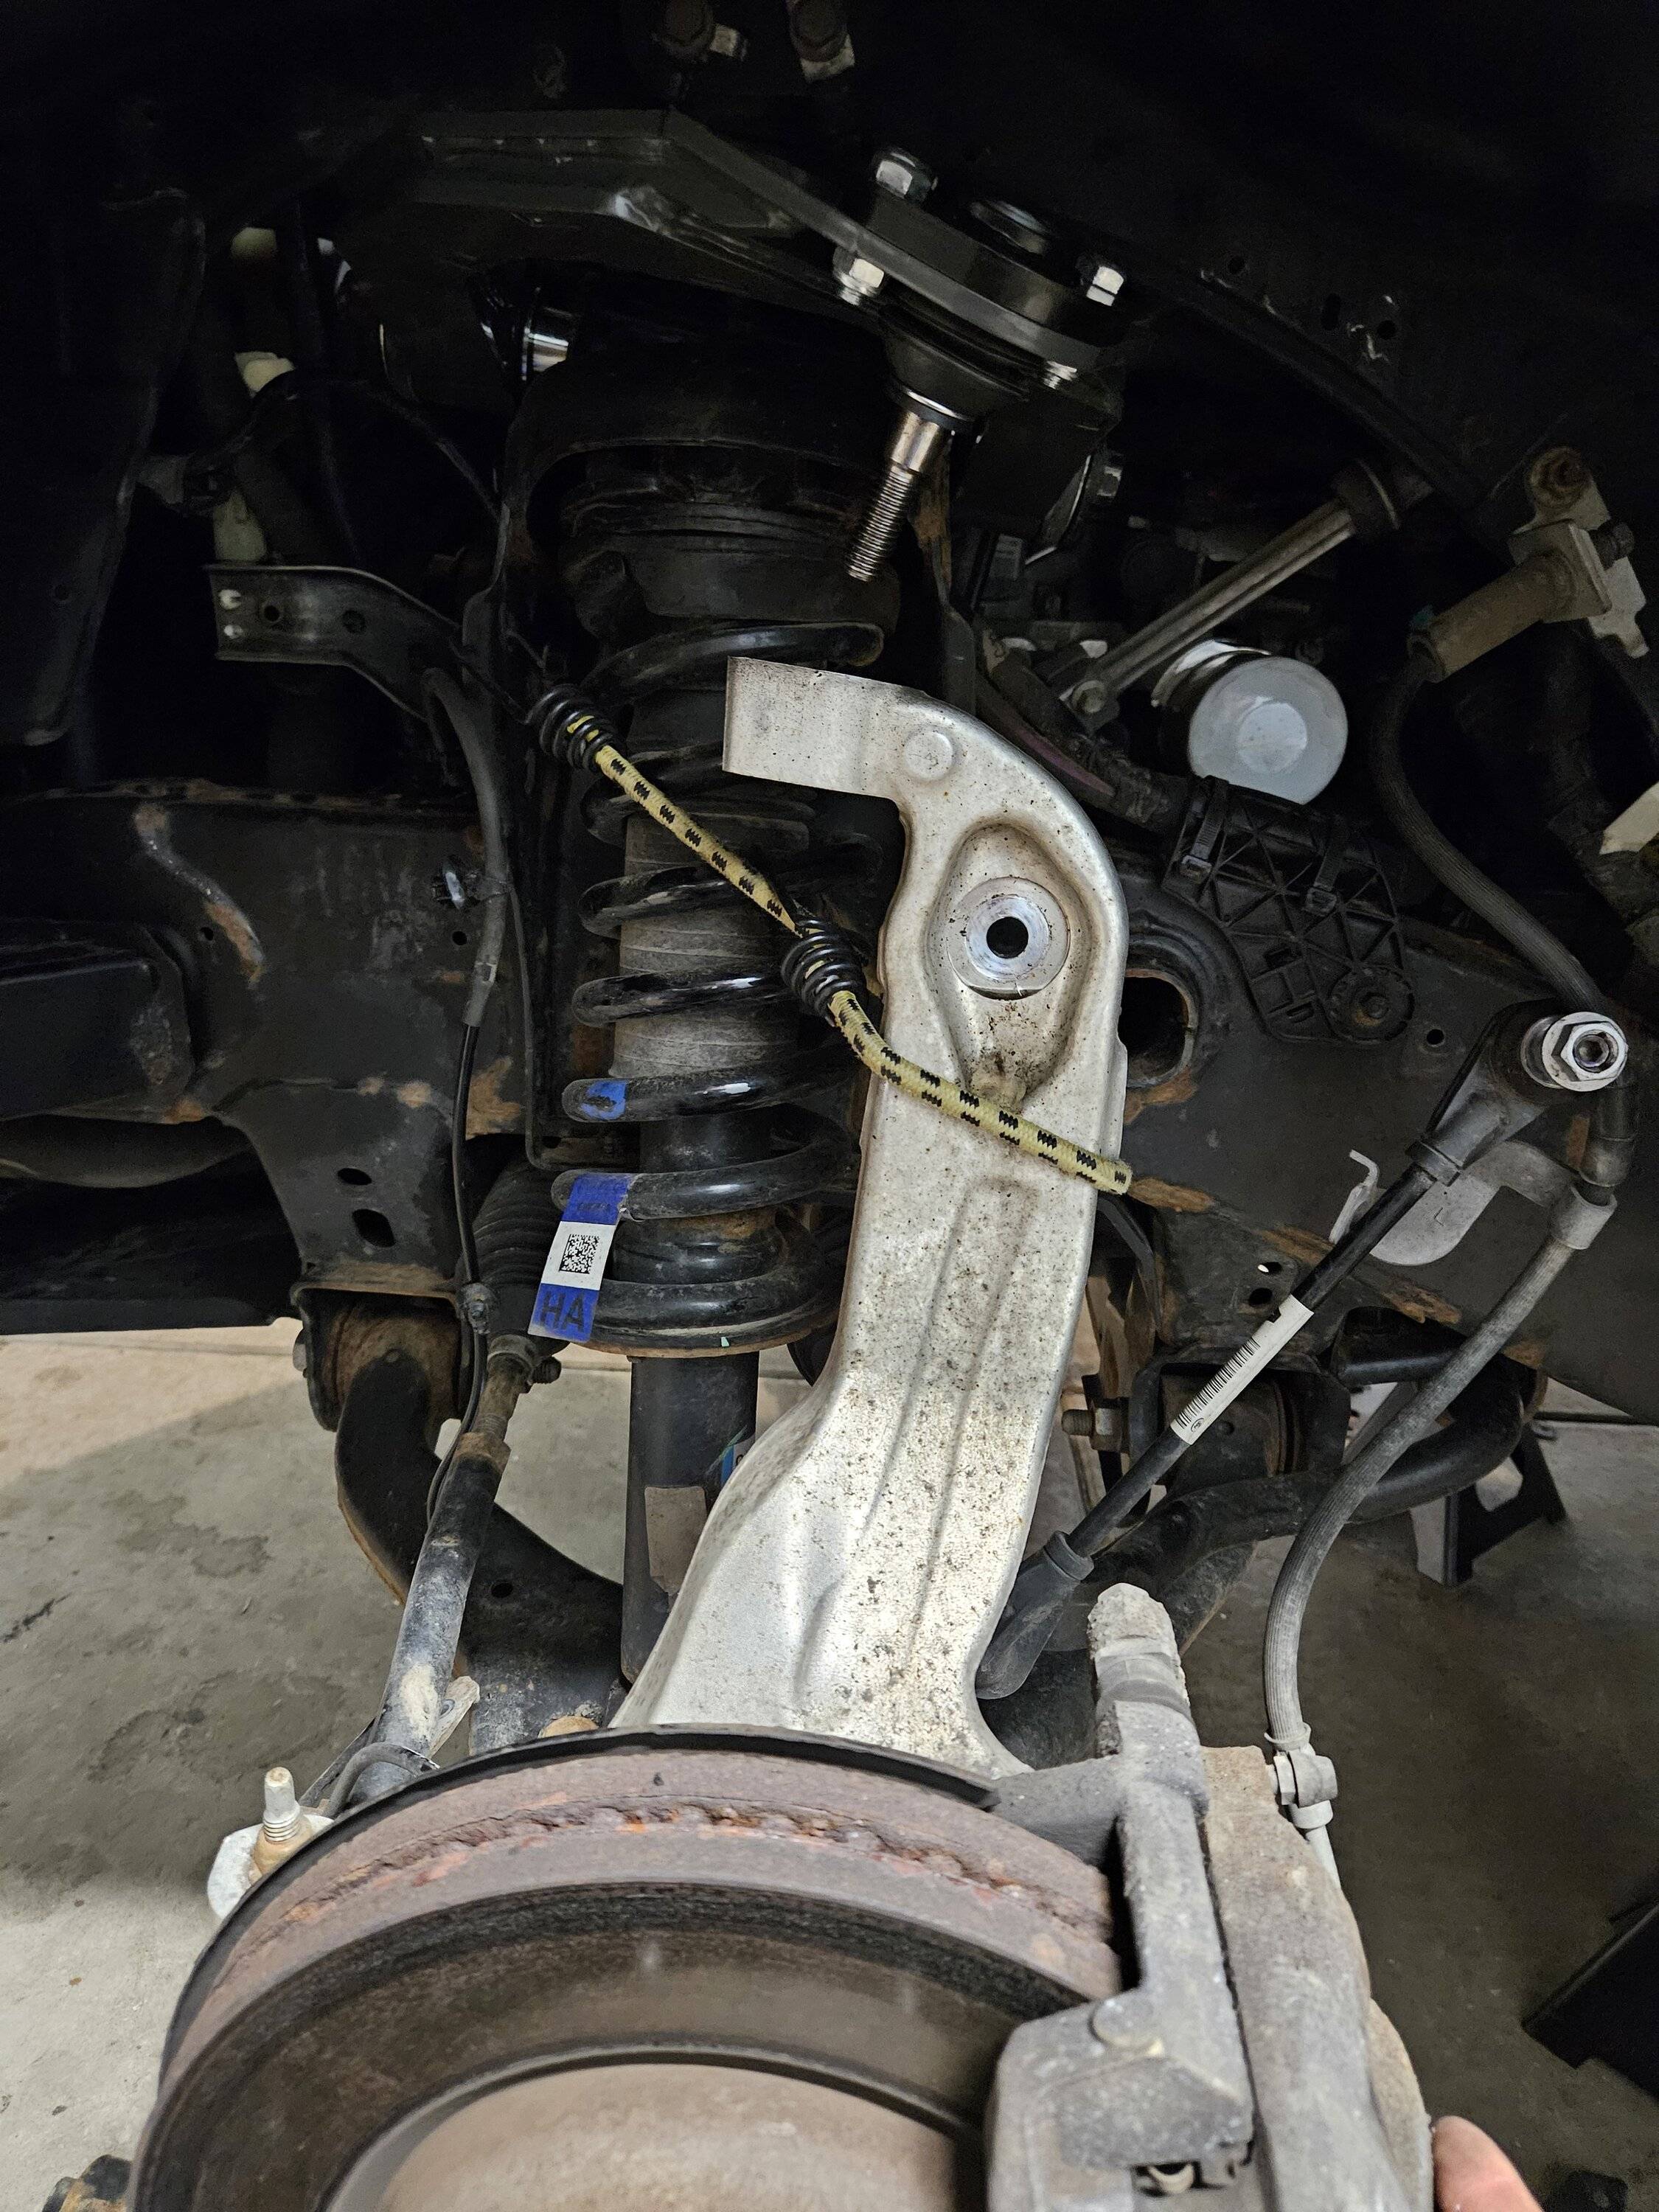
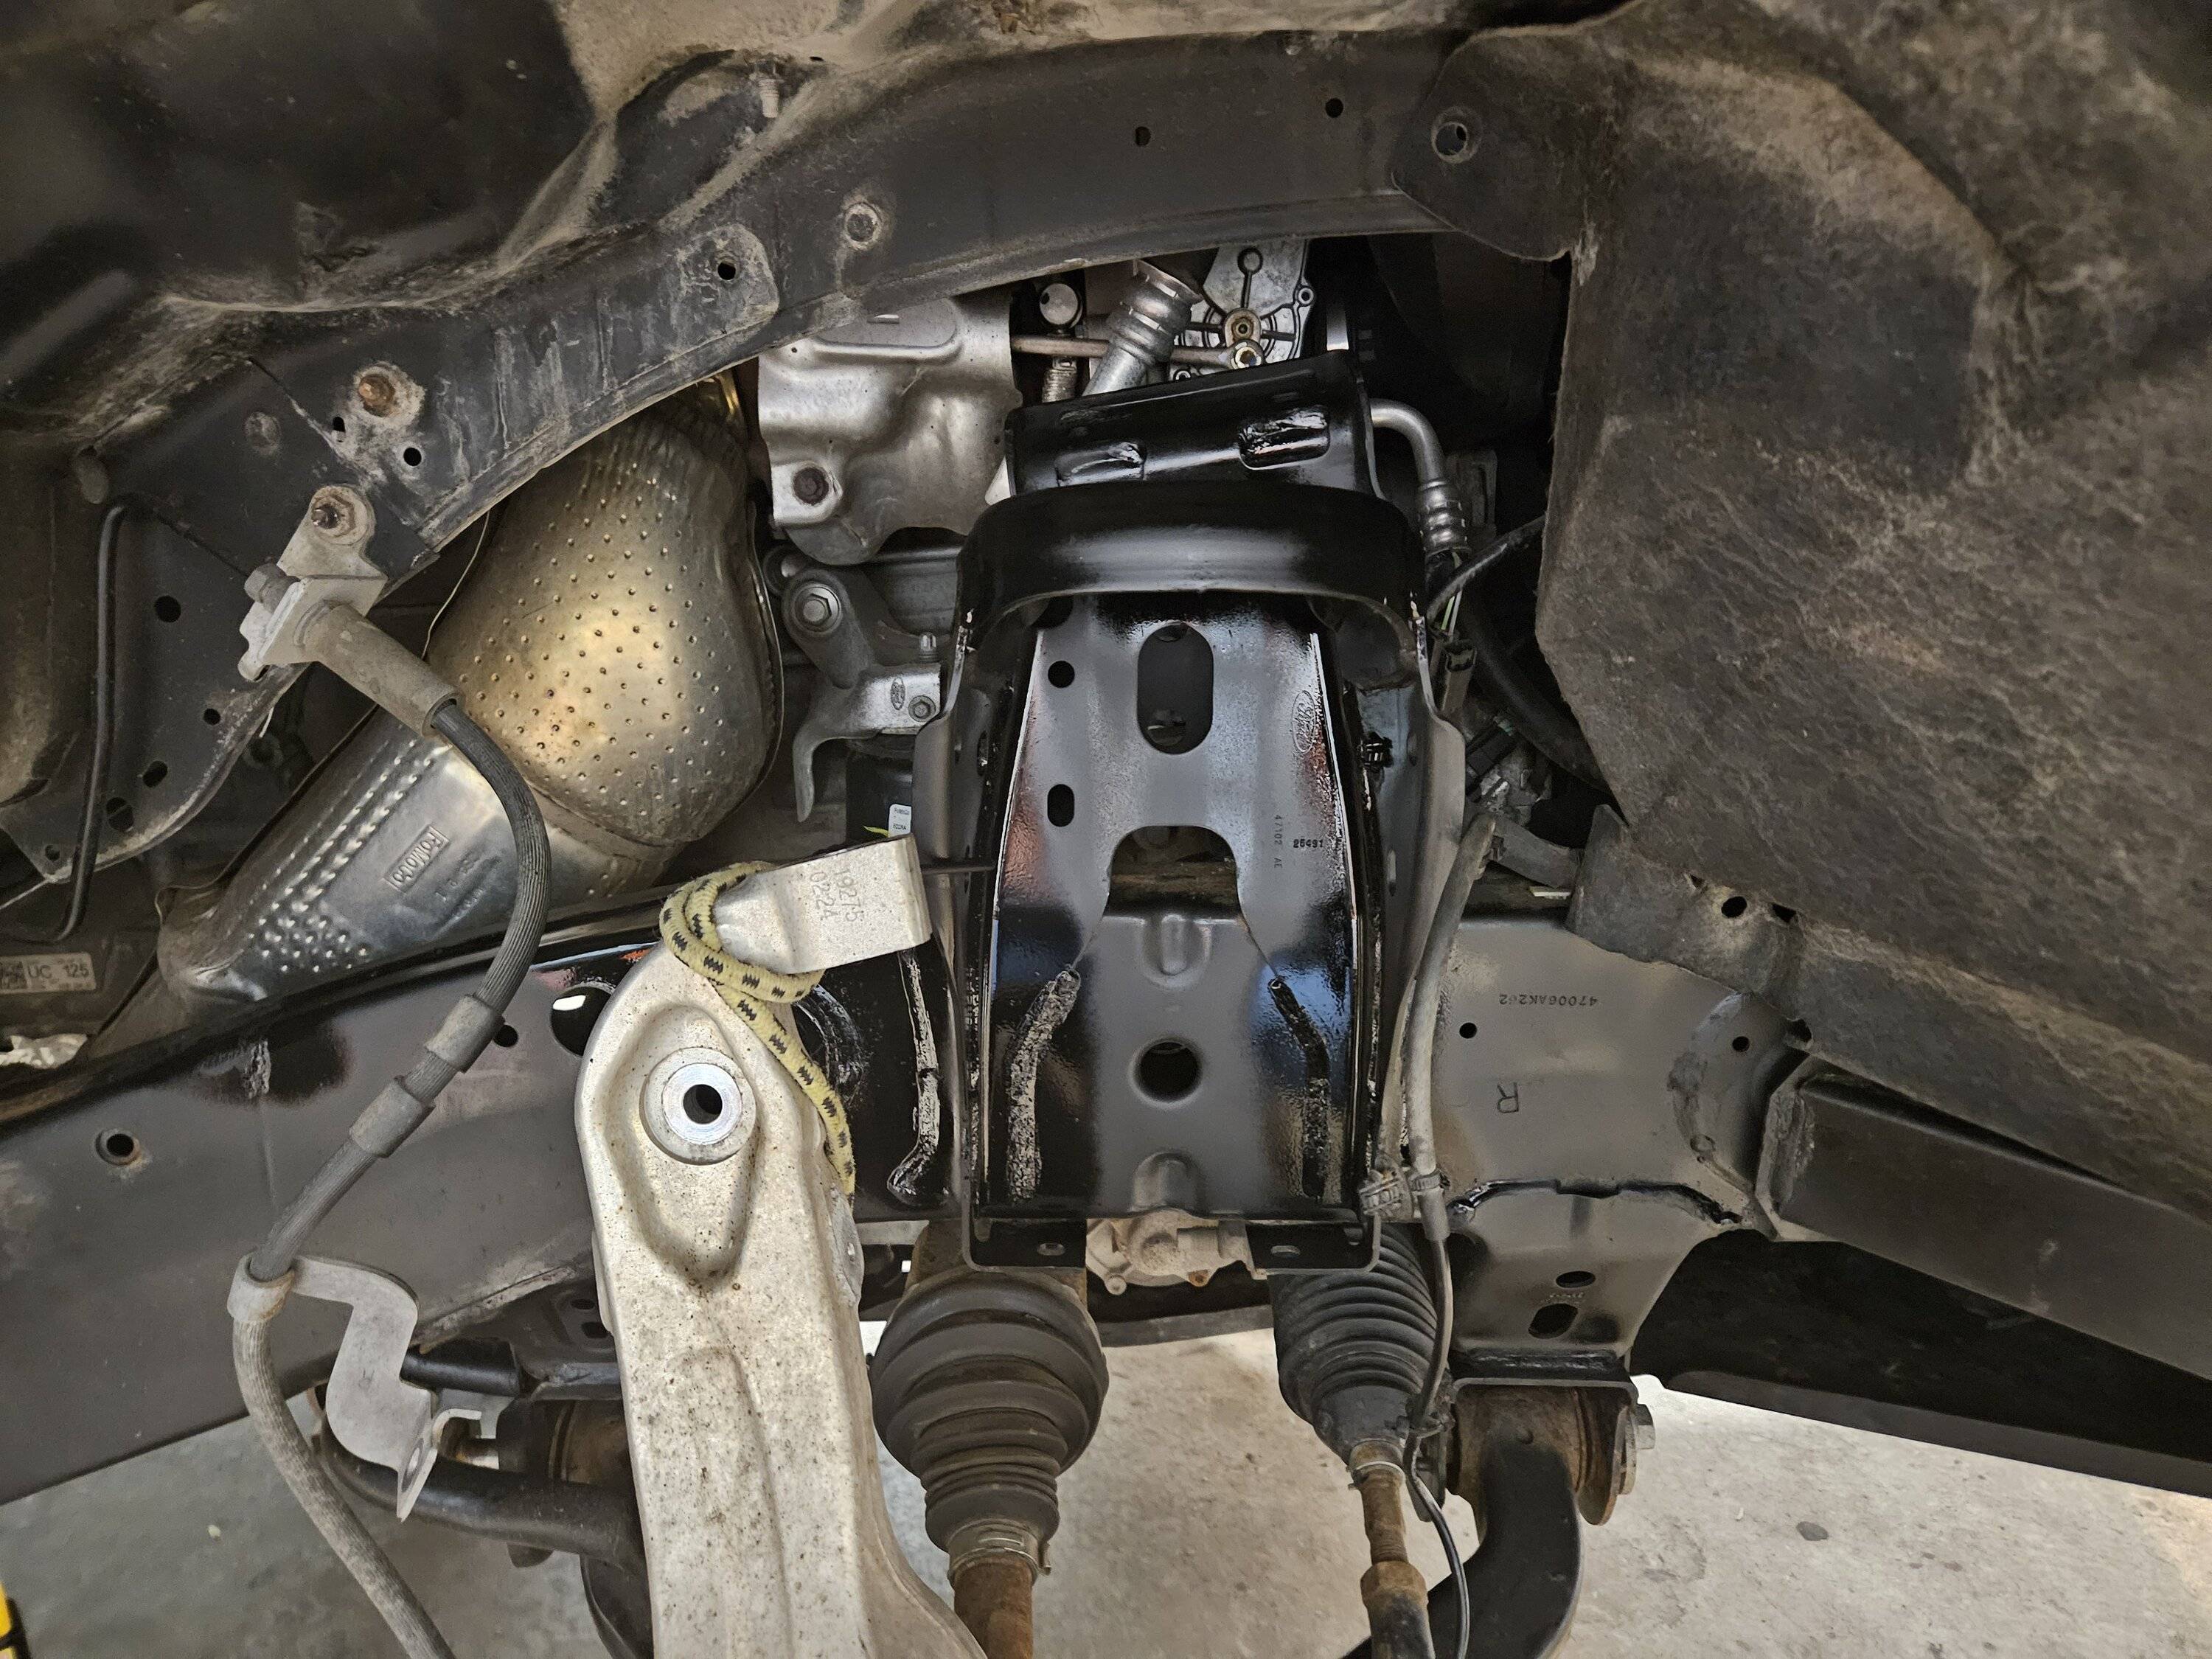
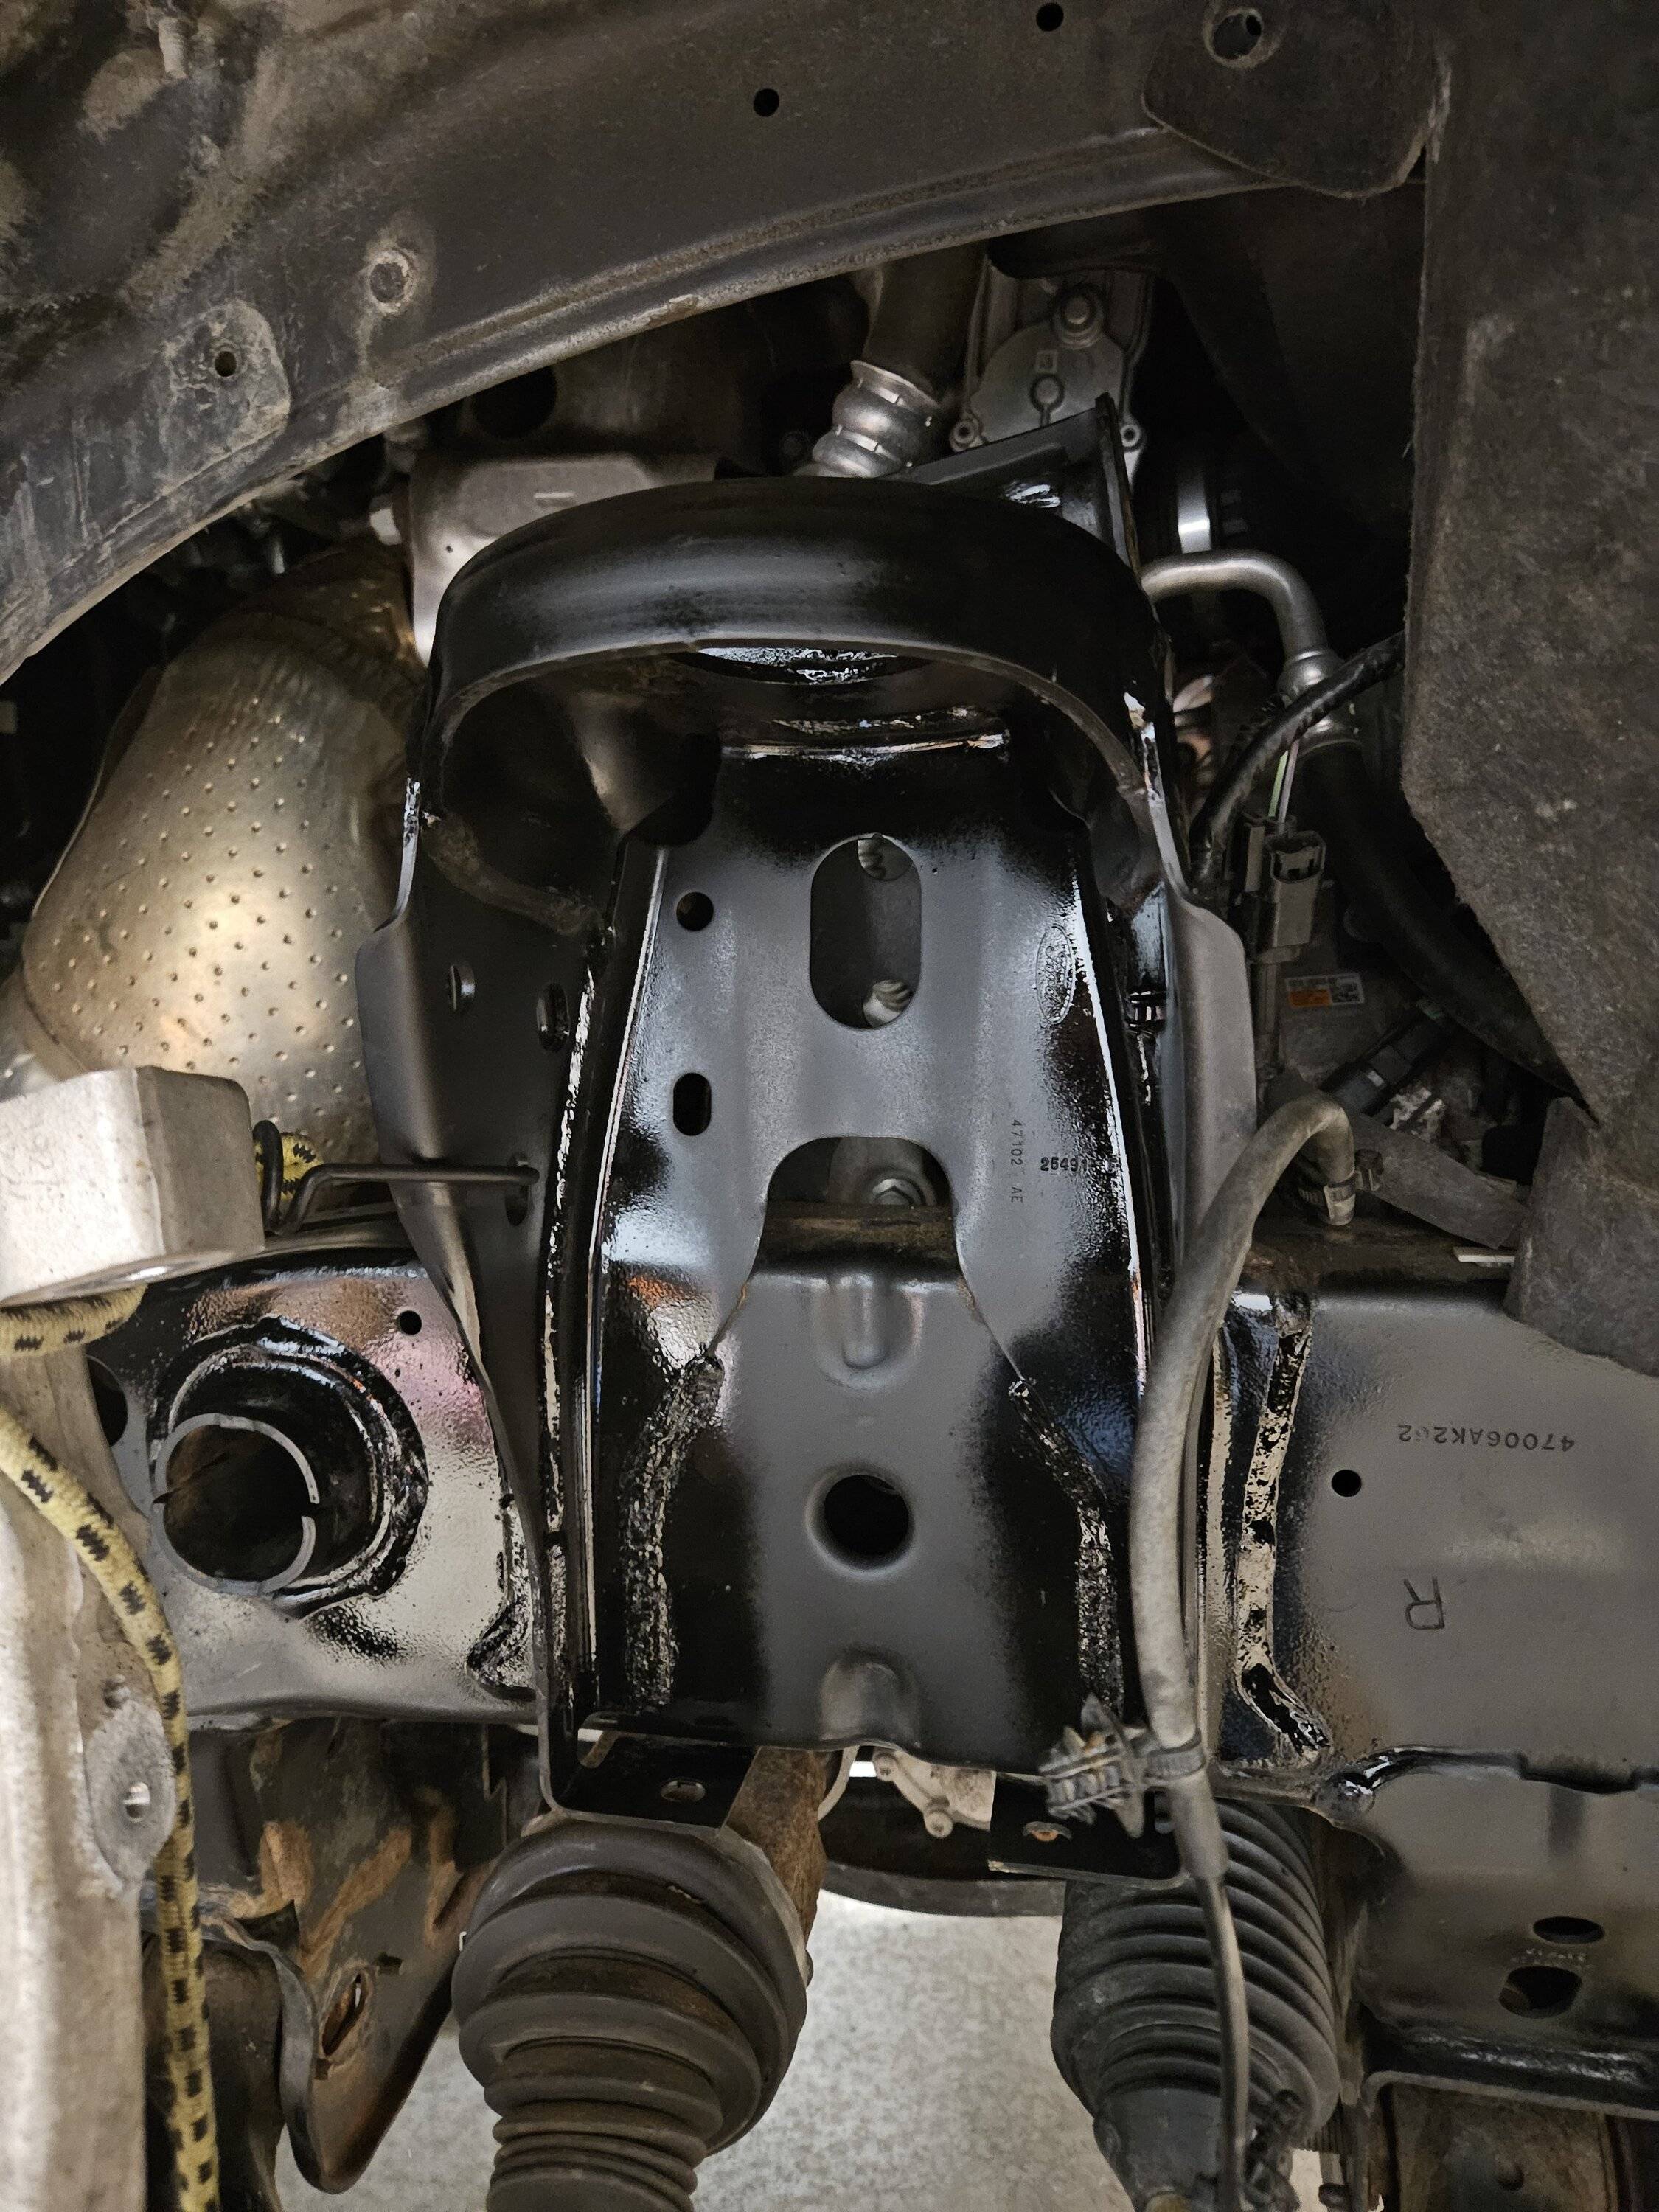
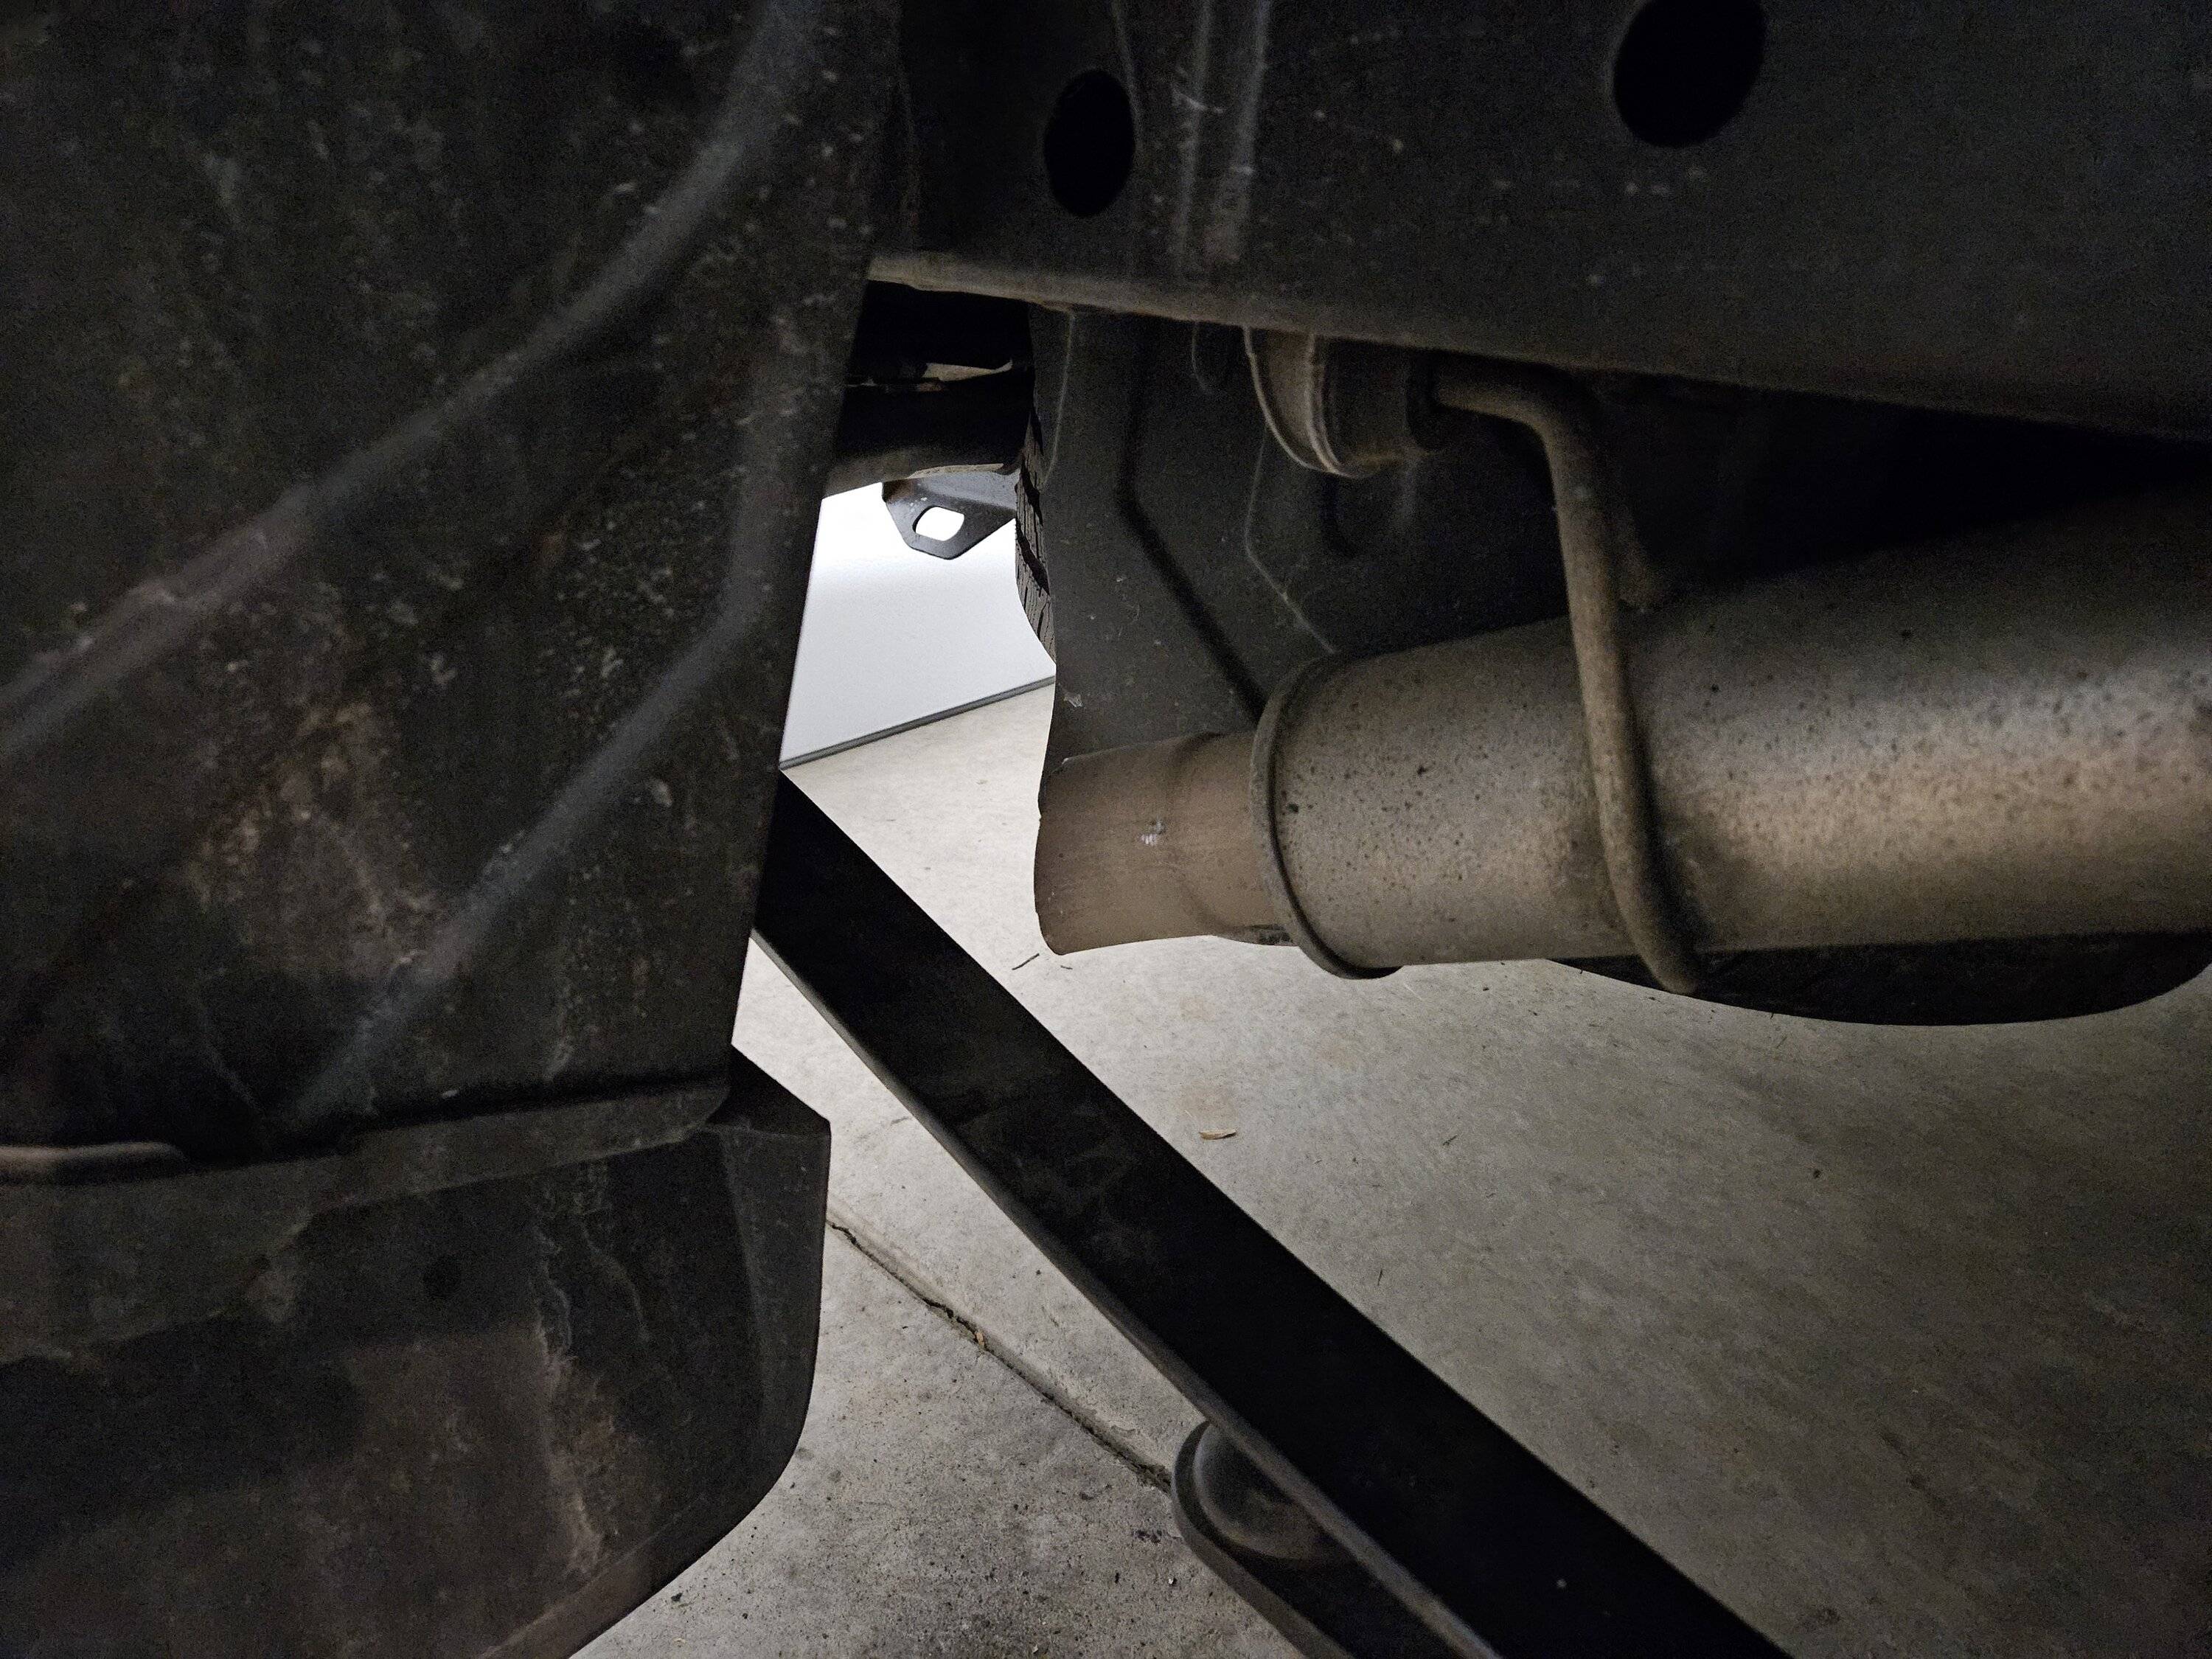
Belltech's instructions that come with the kit are very good, however I hope to add a few notes on my particular experience that might help someone along the way. You never know what you are going to run into when taking things apart and always good to be prepared. At a minimum you'll want a solid set of hand tools including an impact driver, some not-always-in-your-standard-kit socket sizes (22mm, 24mm), and I found a 21mm wrench very helpful.
20231008_171419.jpg
20230916_083125.jpg
20230906_214942.jpg
20230906_215432.jpg
Sponsored

 
OP
OP
dmeyers8

dmeyers8

Active Member
First Name
Dave
Joined
Aug 26, 2023
Threads
3
Messages
37
Reaction score
106
Location
Ada, MI
Vehicle(s)
2019 Ranger XLT
Occupation
CPA
Taking things apart - the front
My truck had ~60,000 miles of life in Canada on it before I got it. That meant a little more corrosion on the underside than I would have preferred but the interior and exterior were in very good shape. My boys and I have owned and wrenched on Subarus for years, keeping them going until up to 300K miles. I swore I've never deal with rusty suspension components again, but here I go. Never say never, eh? :rolleyes:

Being new to the truck world, I didn't realize the truck had a Rough Country leveling kit on the front. Crappy design IMO as the bolts coming out the top that attach to the truck frame are studs. Well, those studs were the first thing to strip out. As soon as I applied a little force to the nuts, they spun out. All 3. Both sides. Nice. :headbang: 
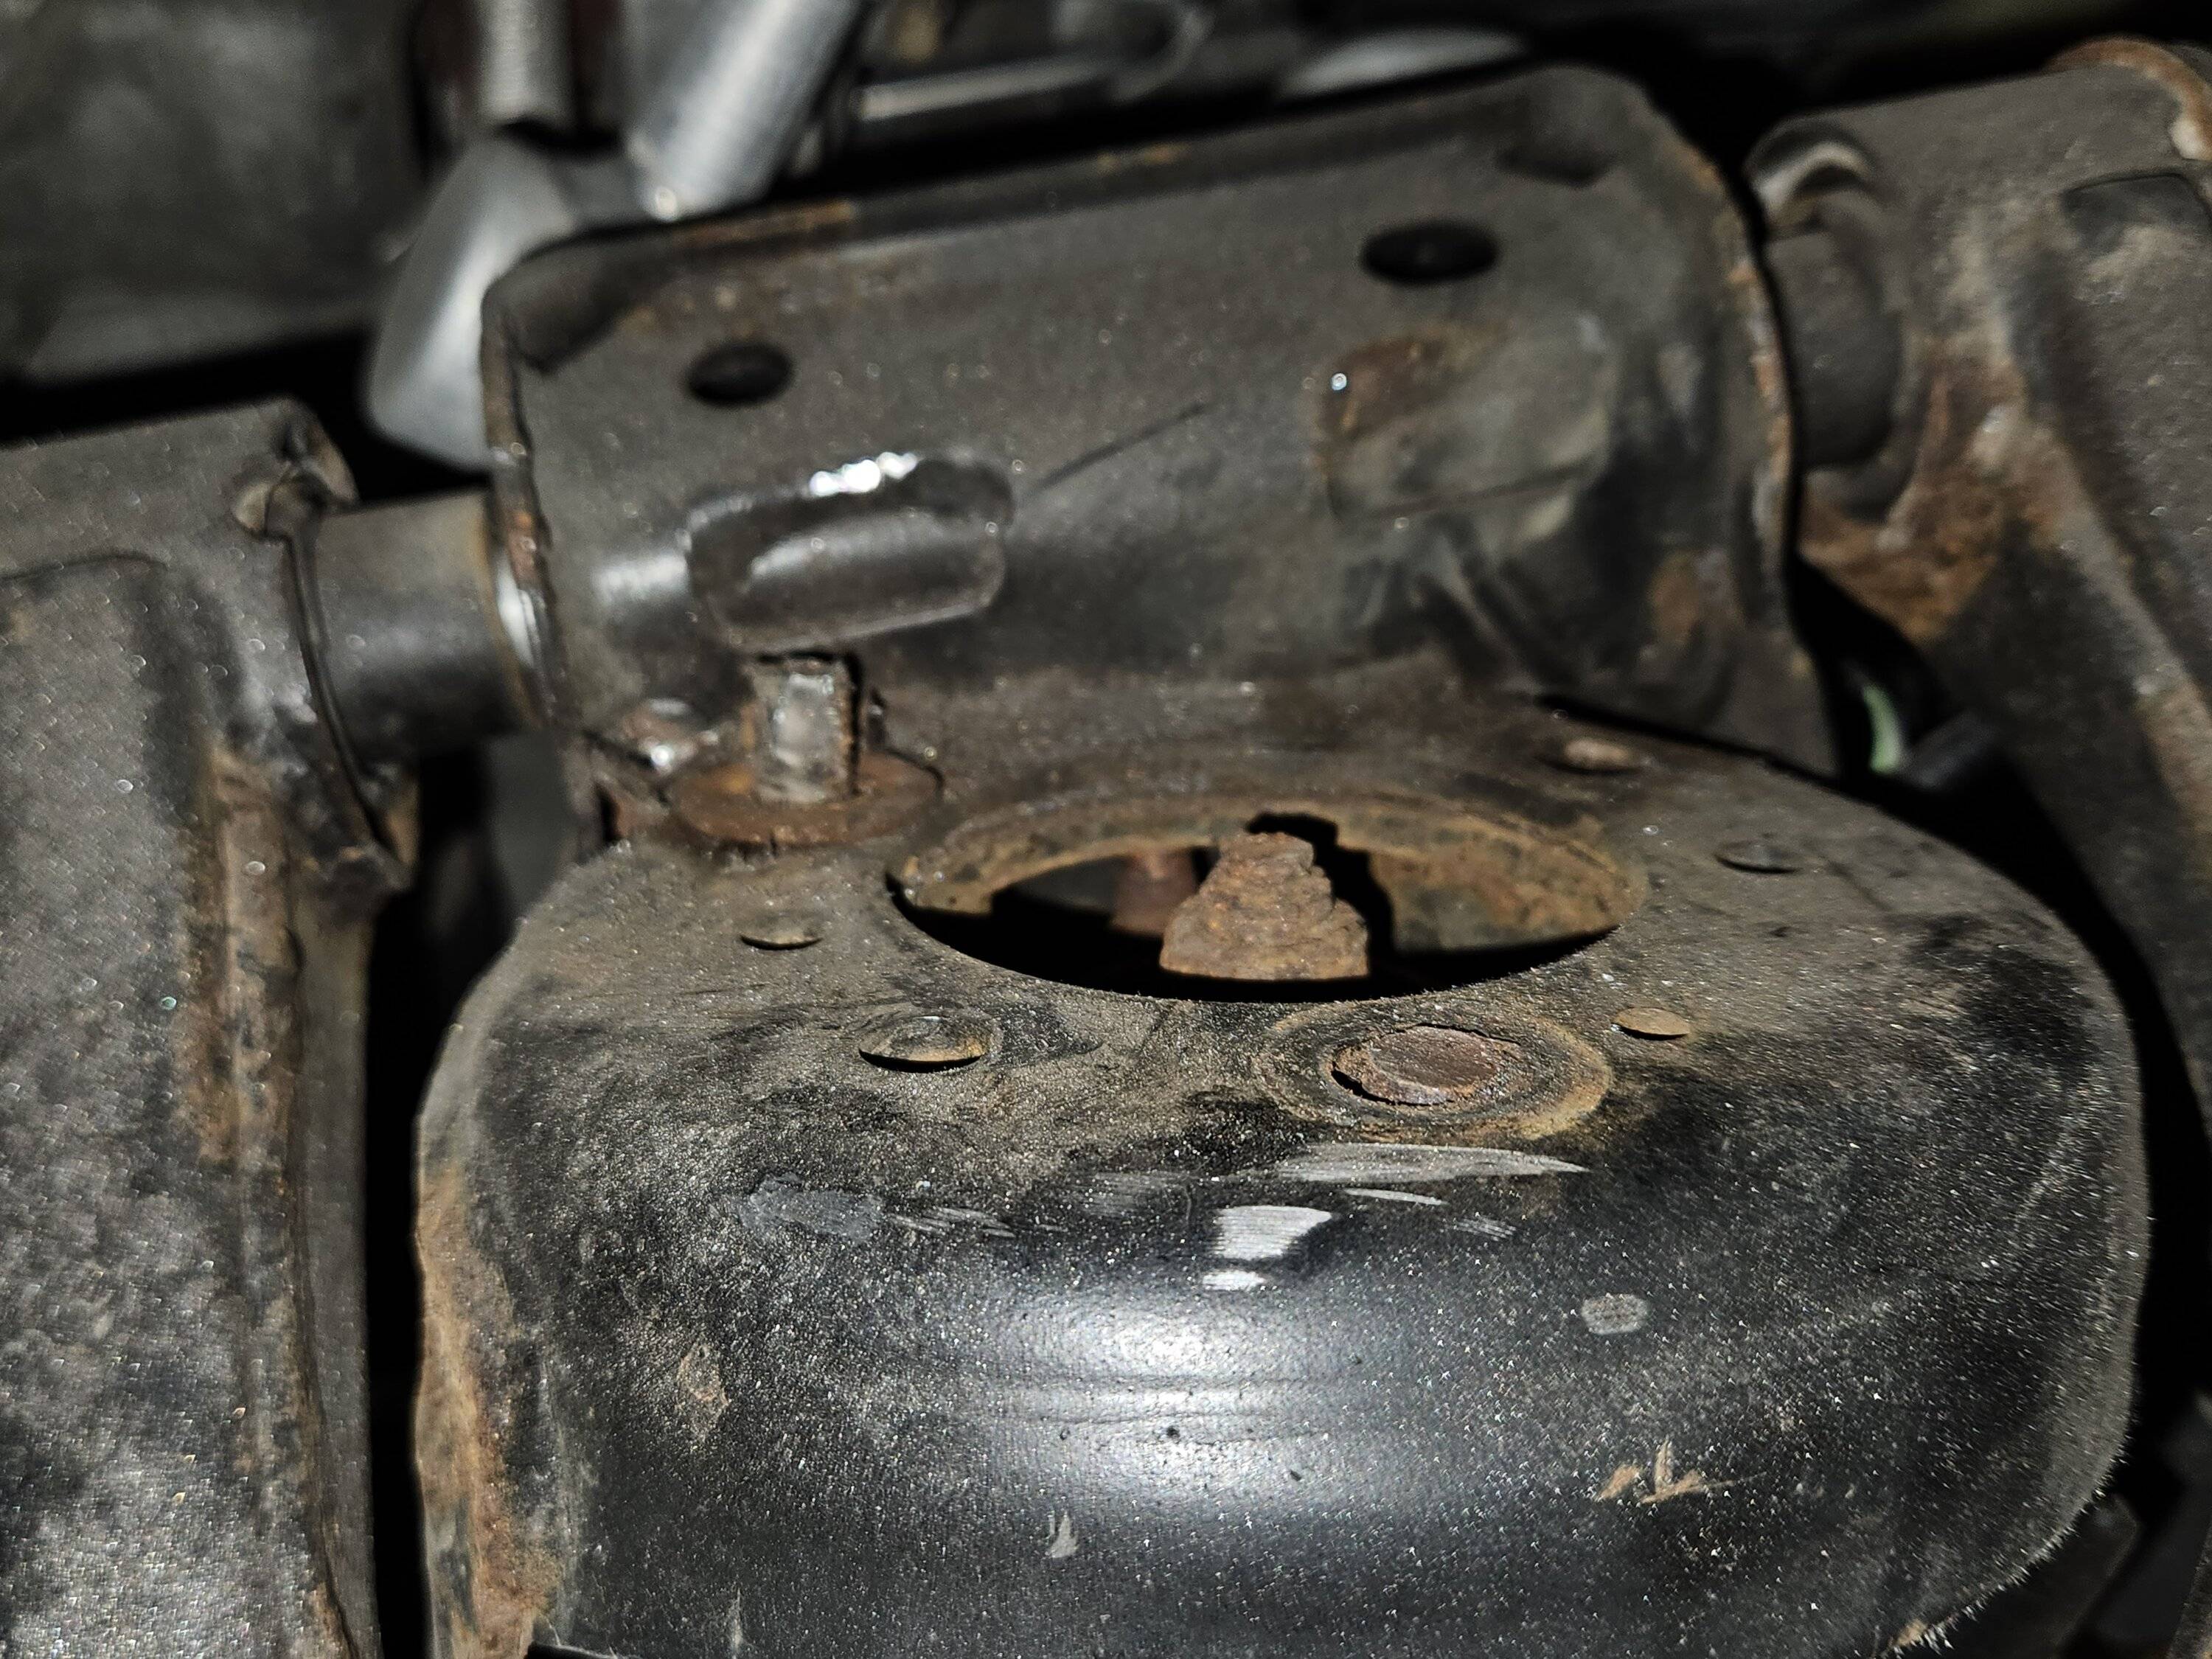
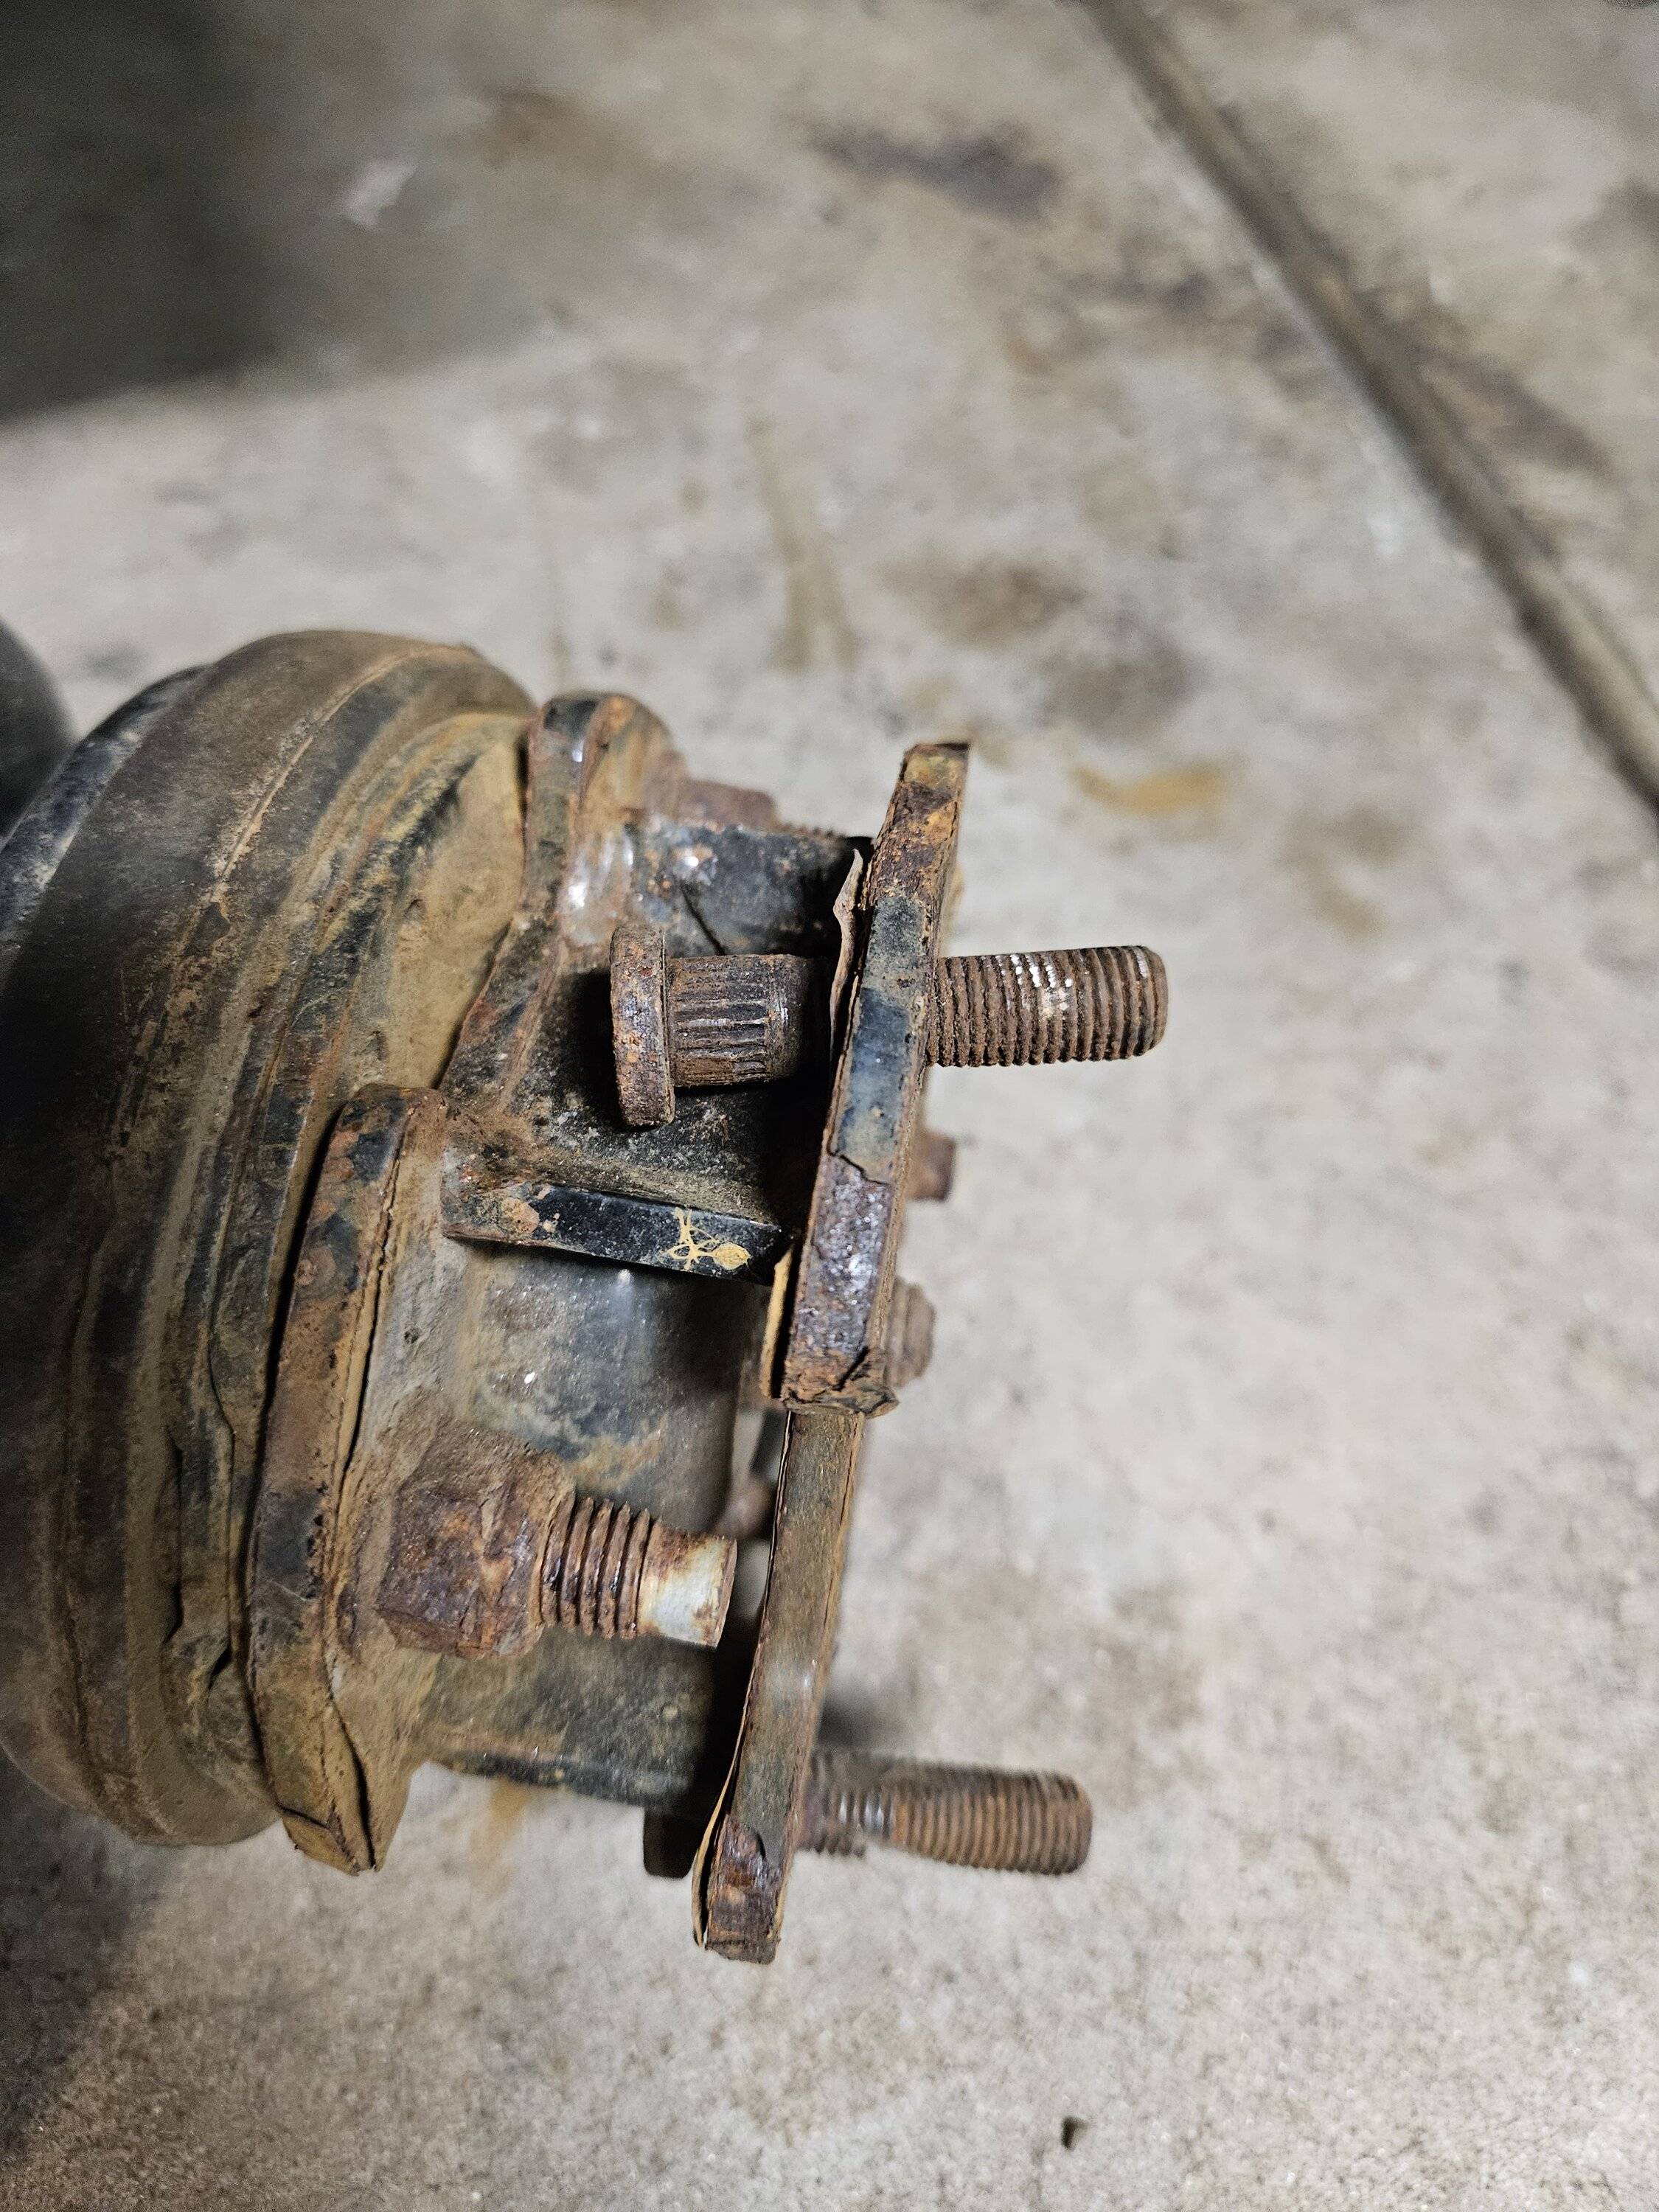
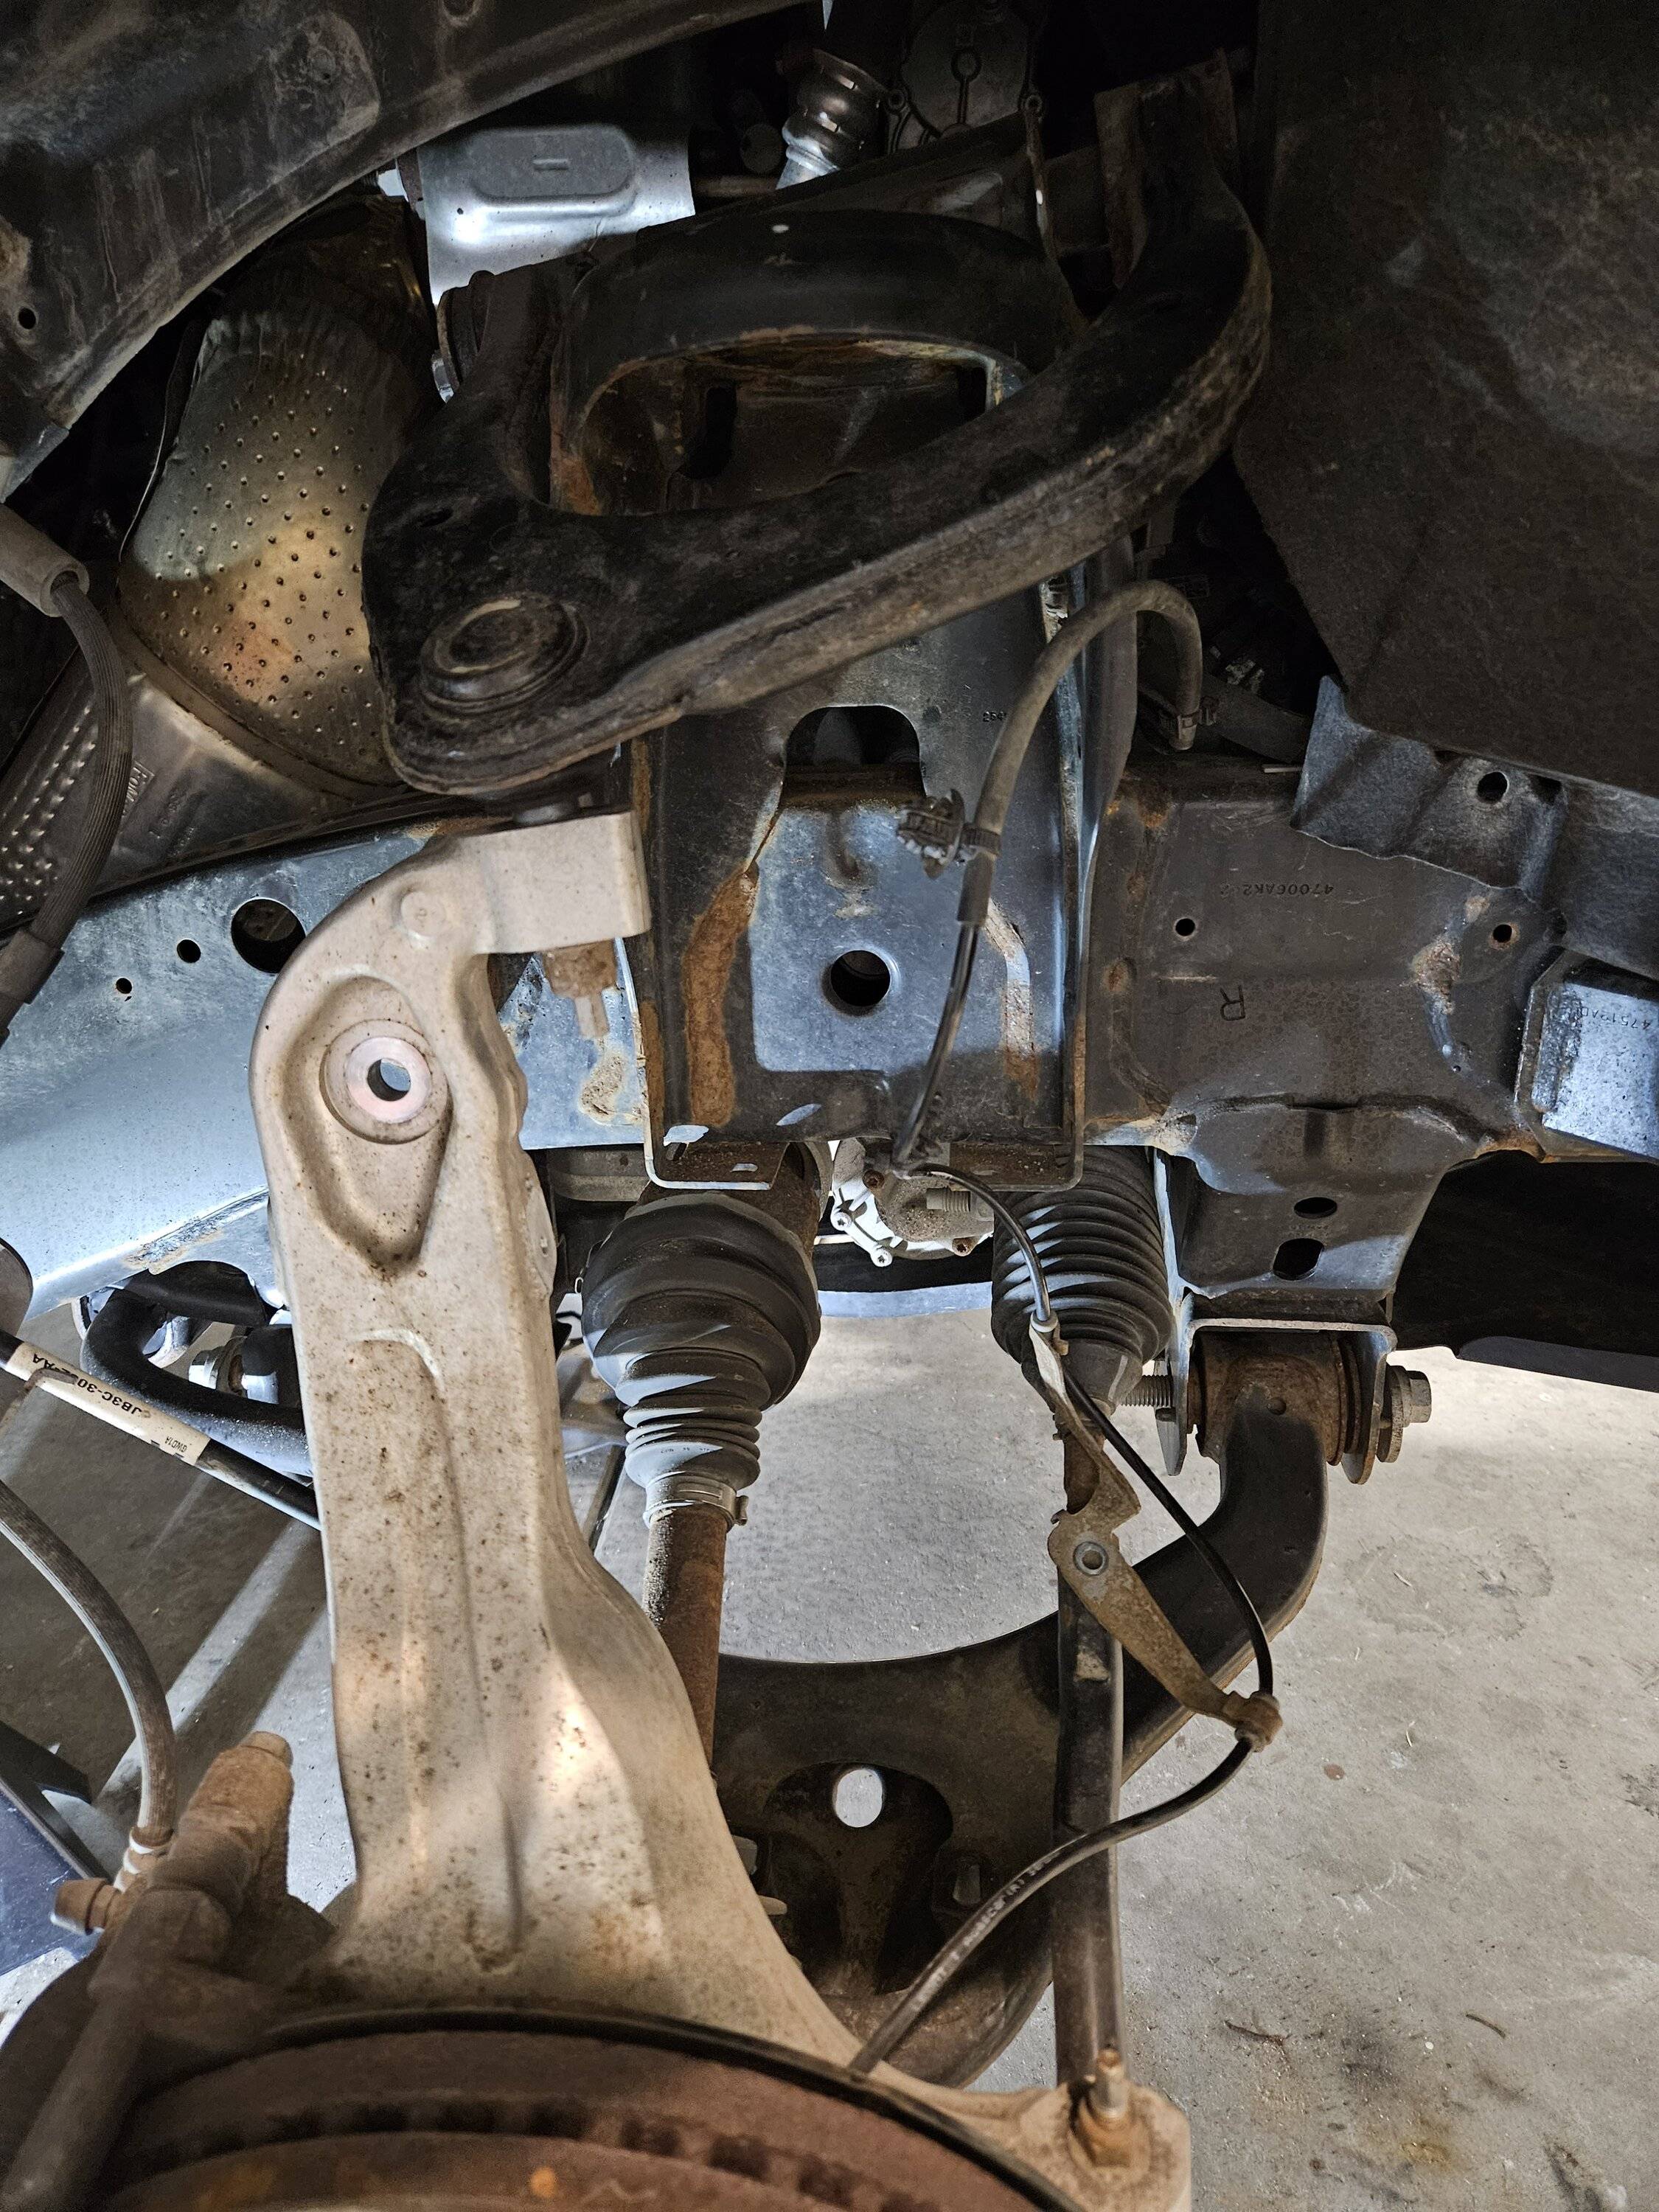
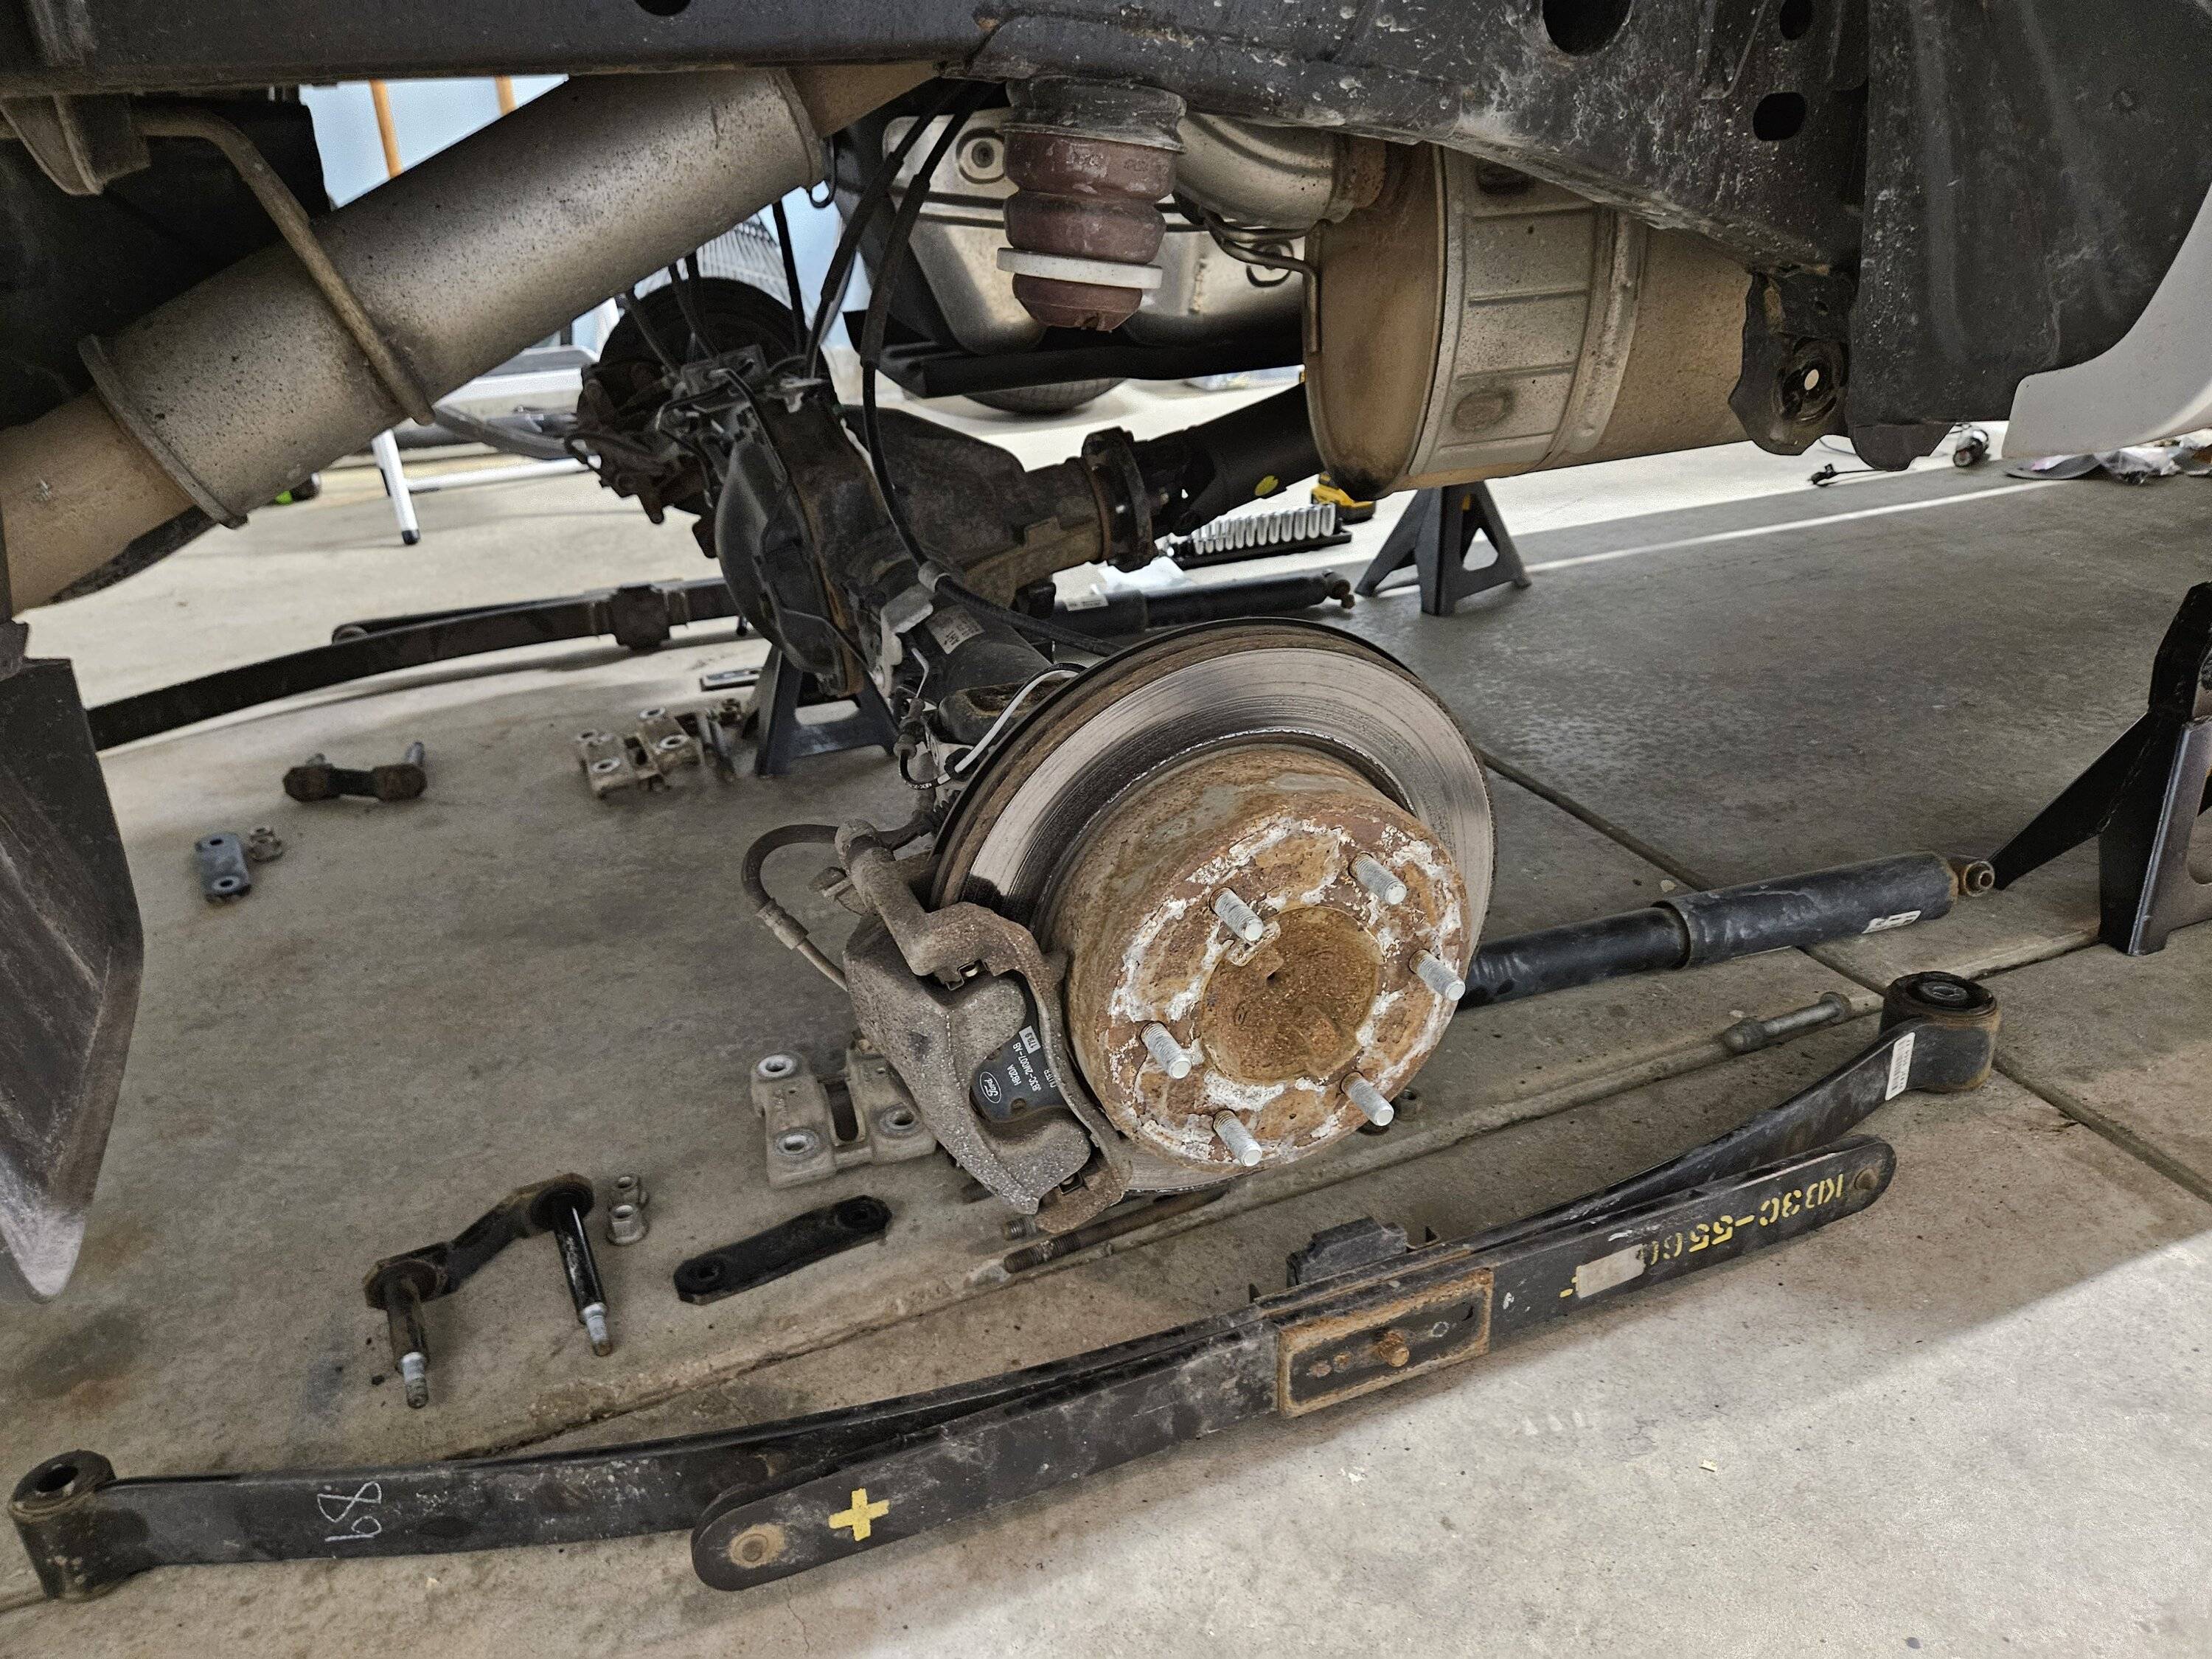
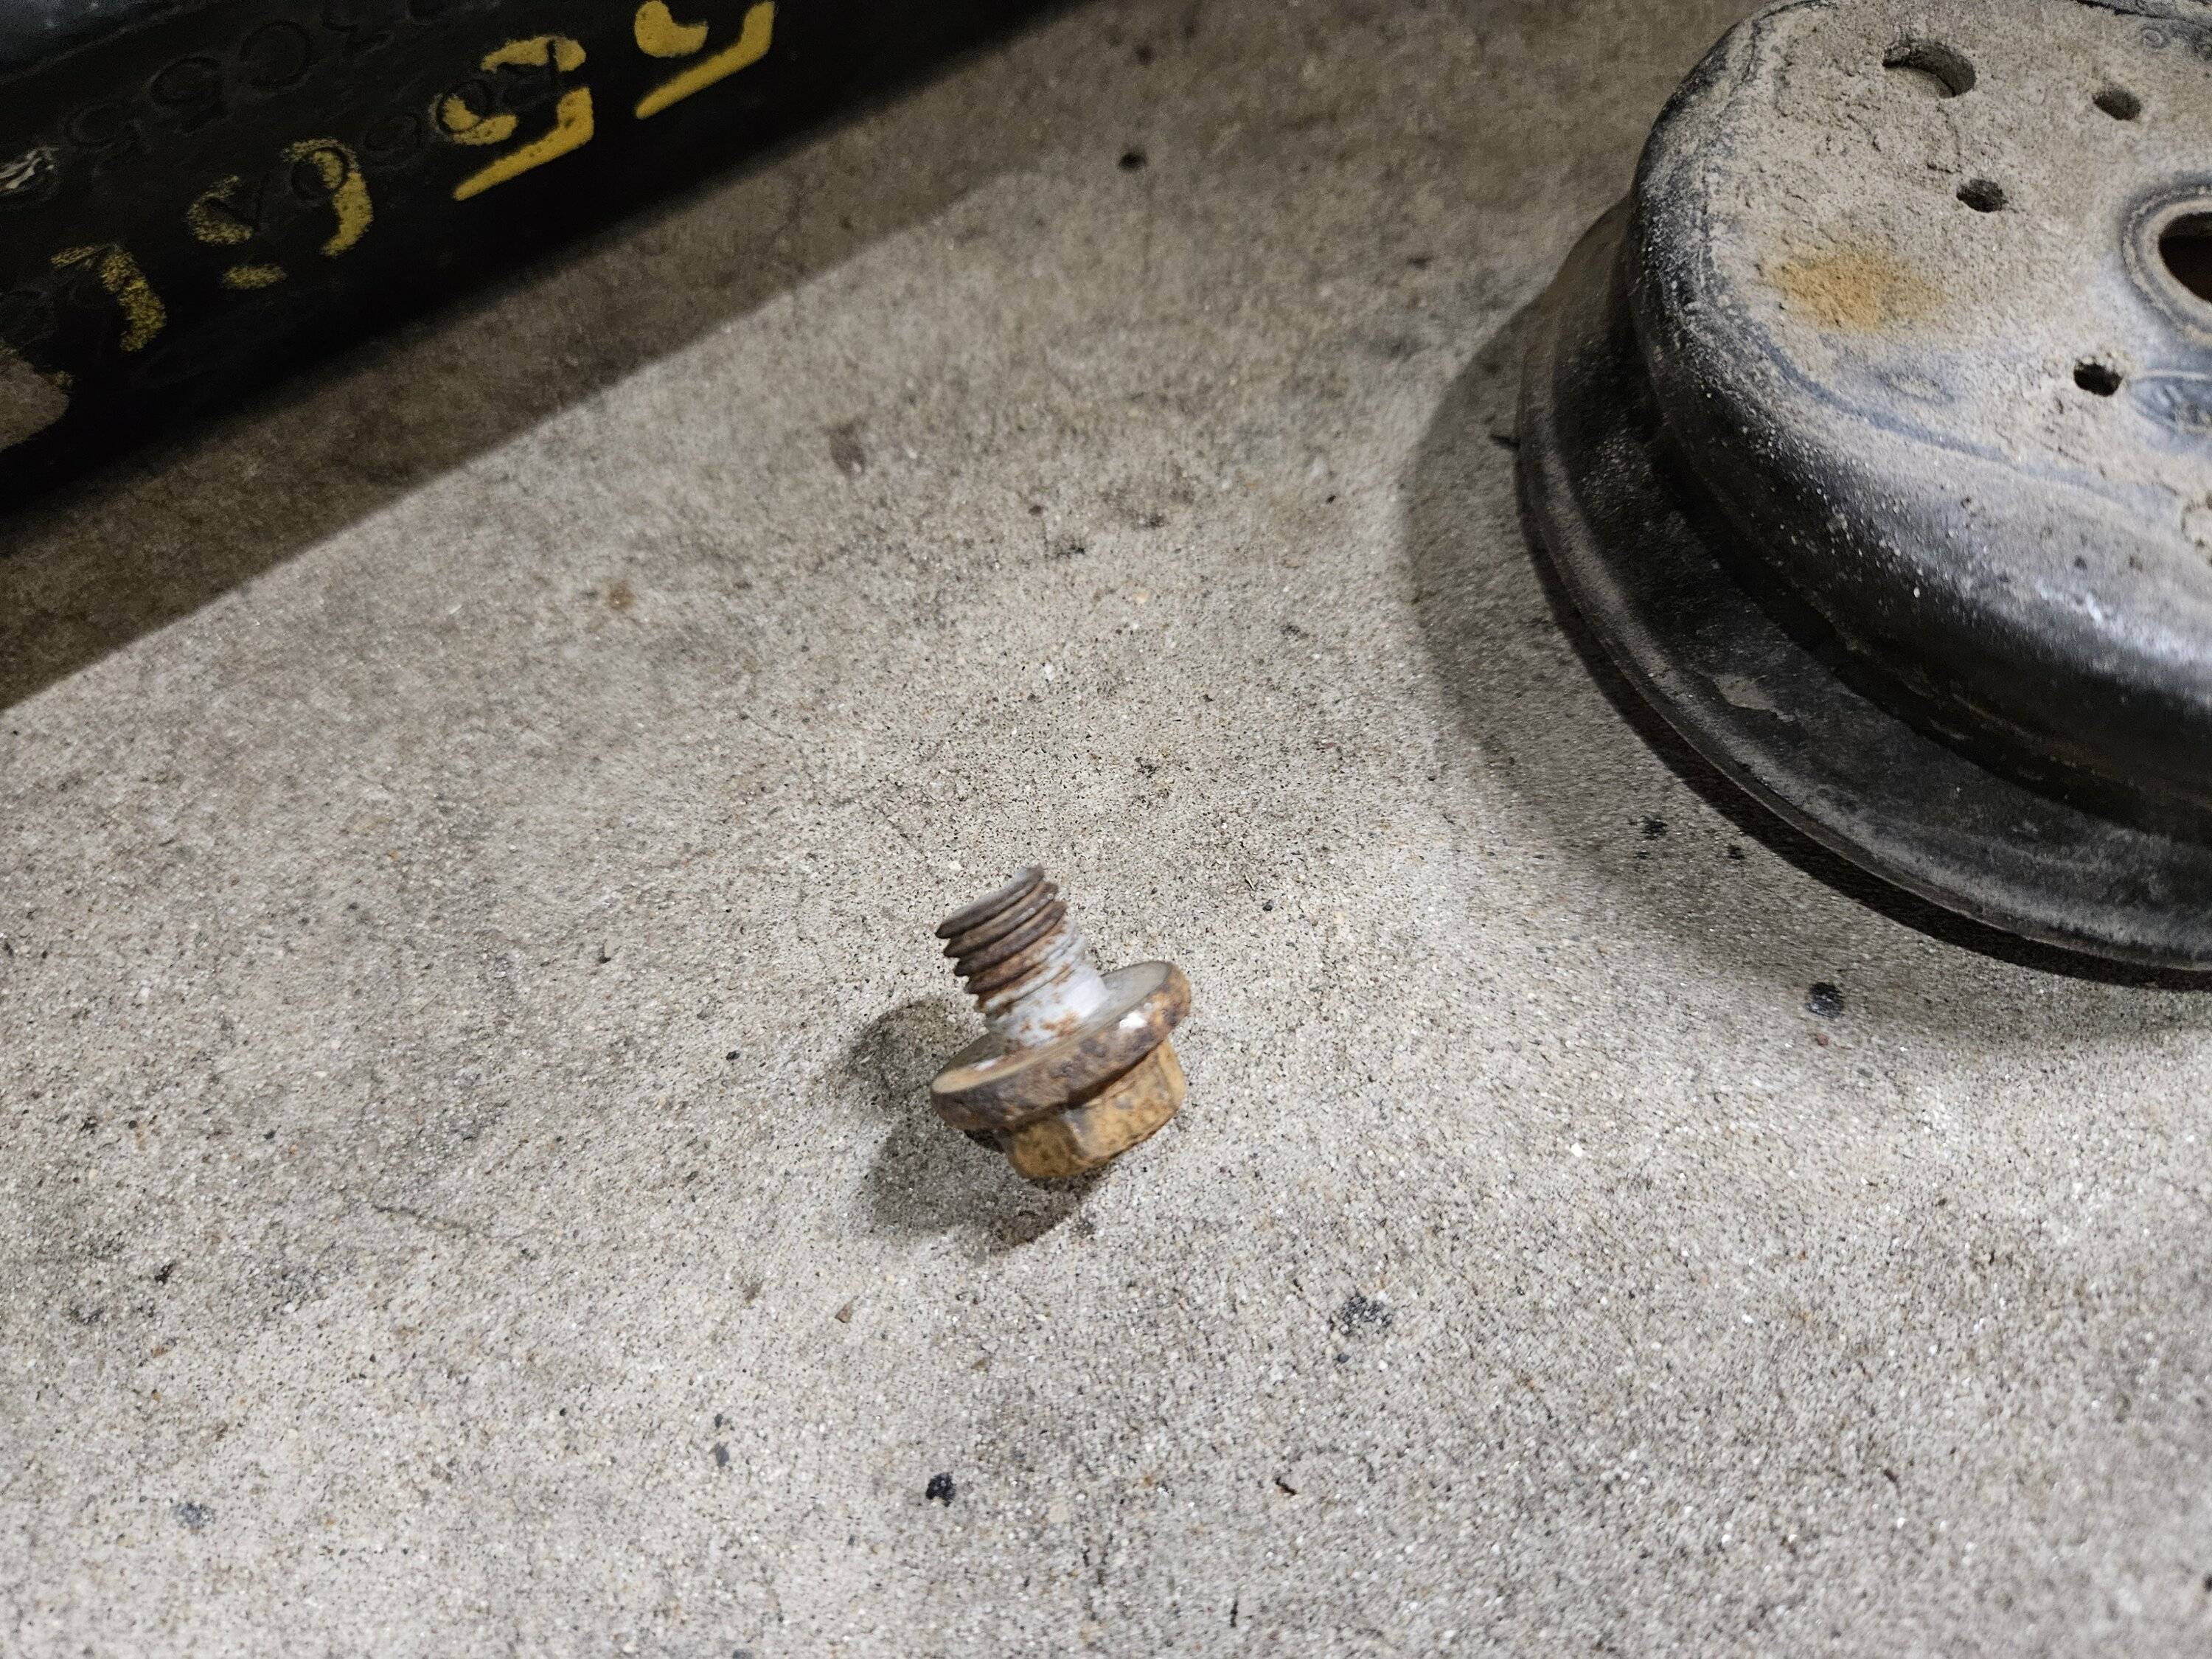
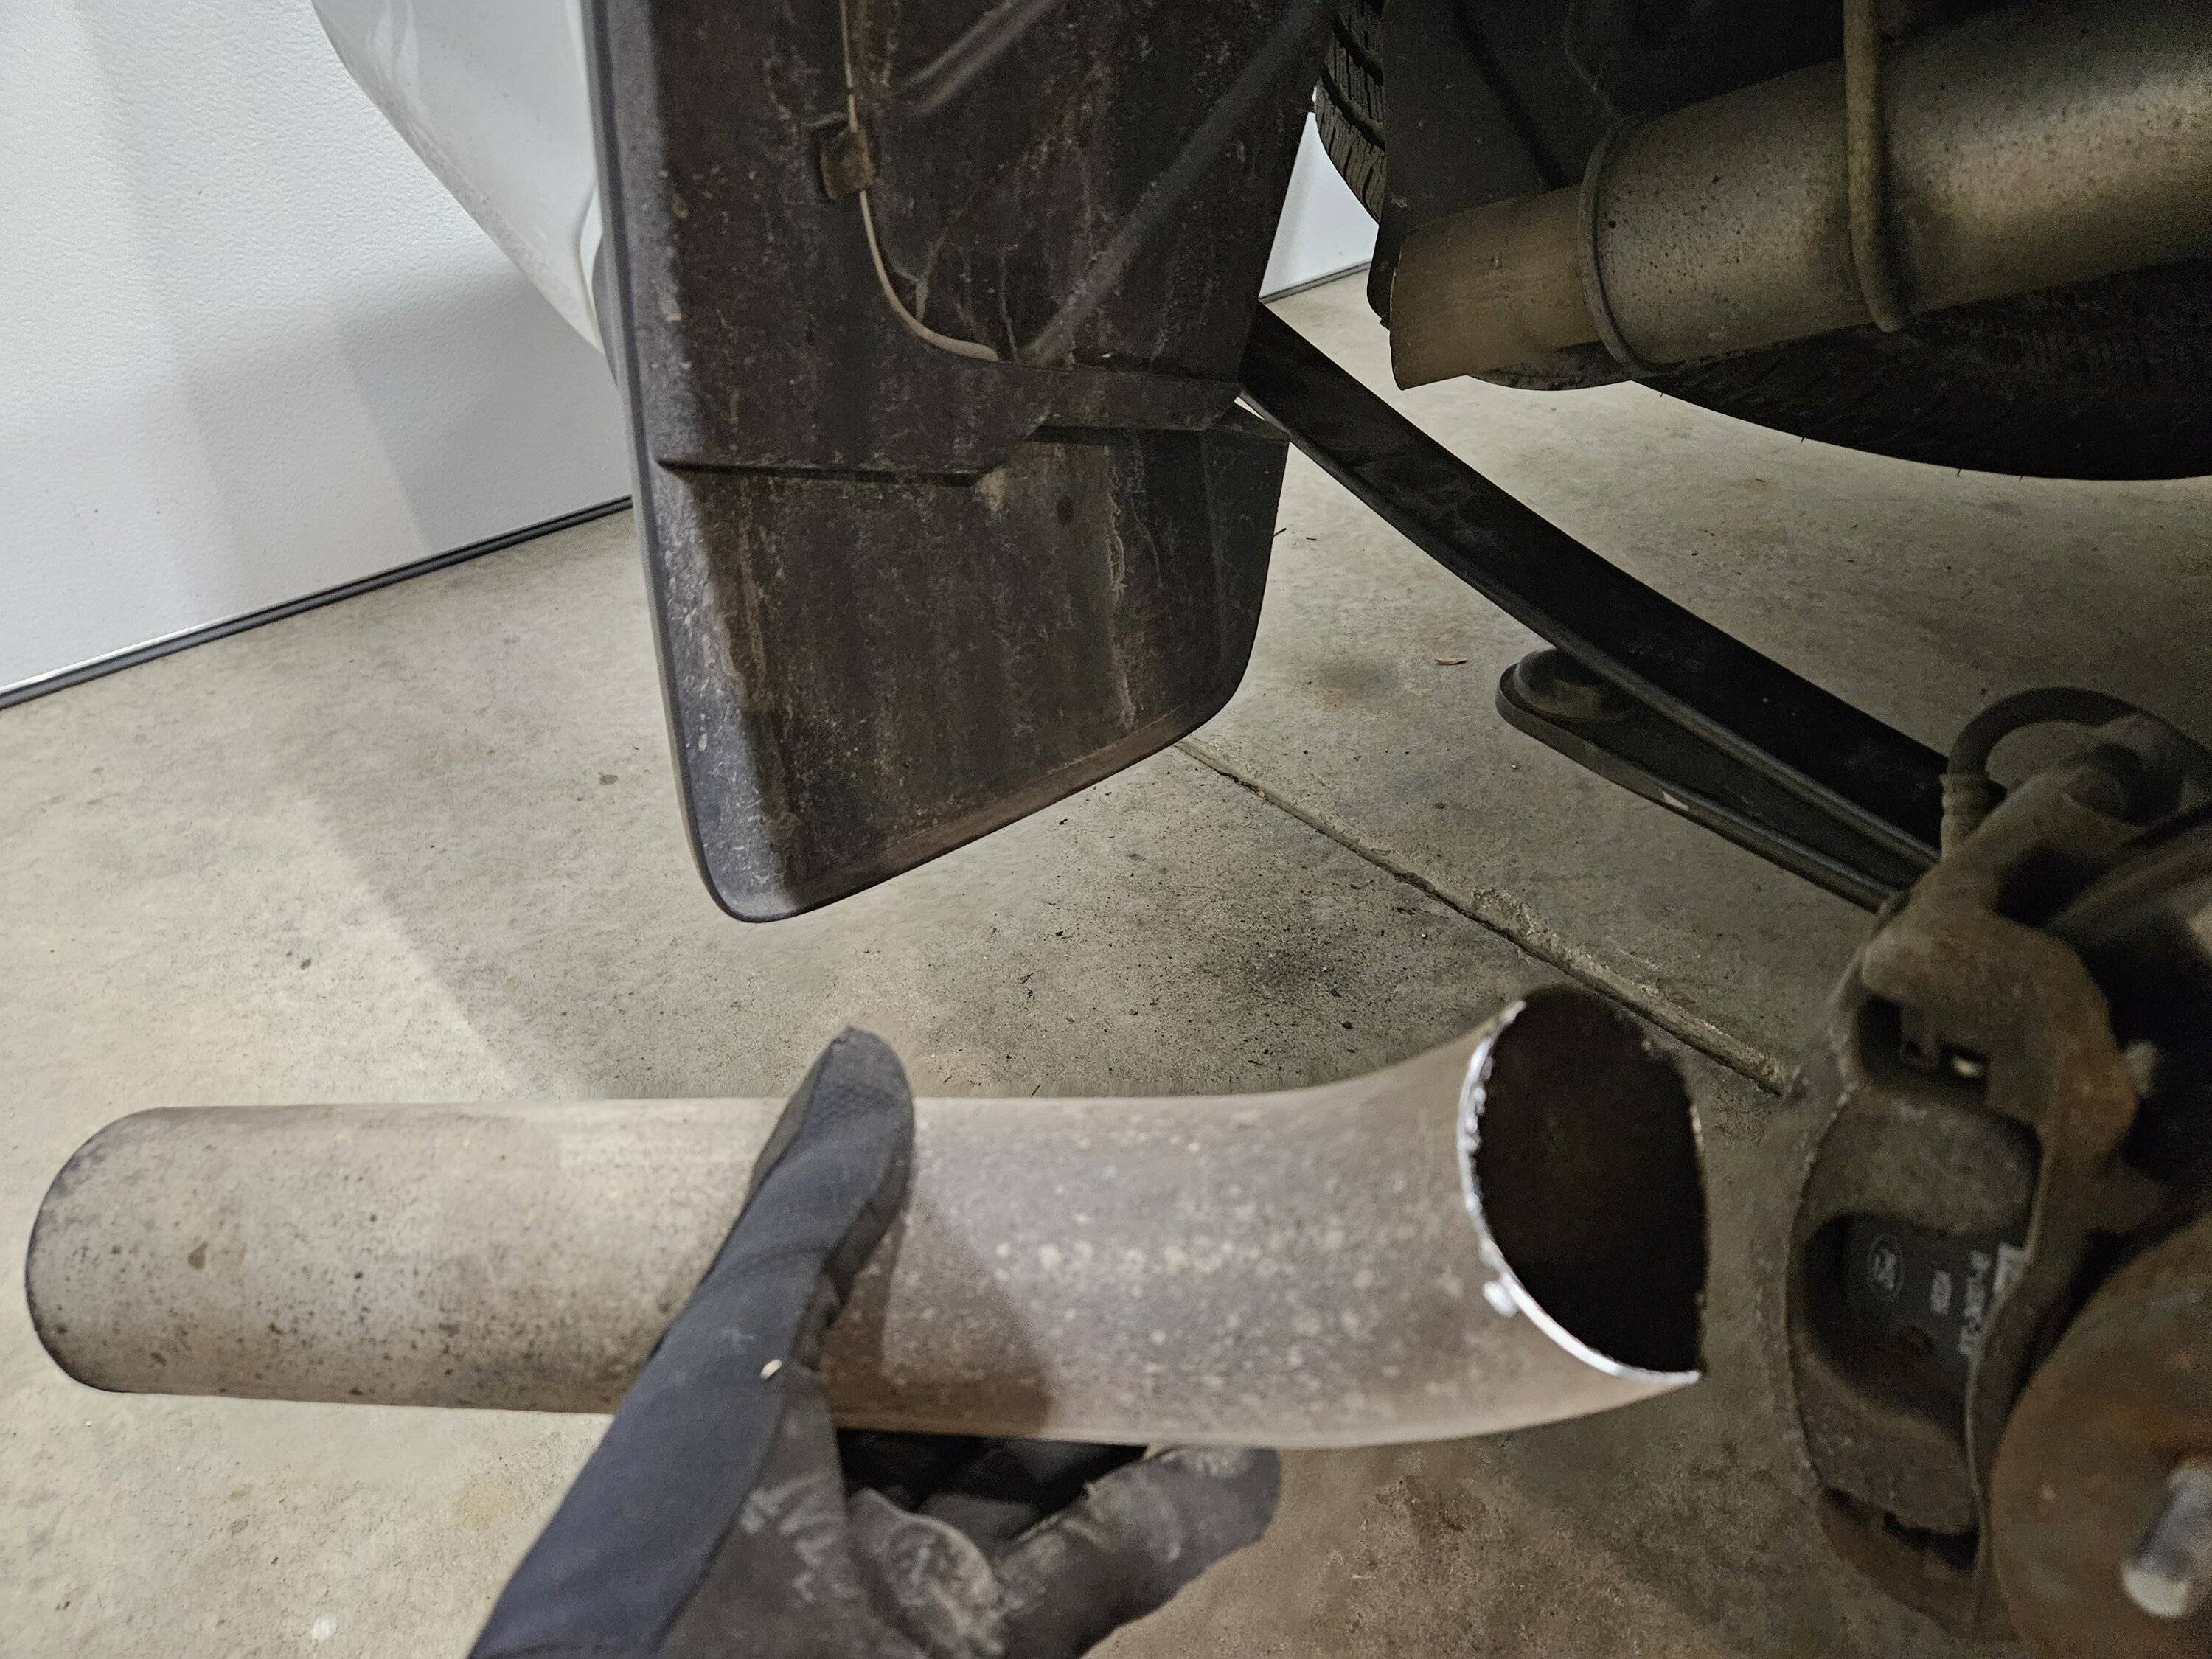
My grinding wheel made quick work of the outside stud, however there is little space in which to work and was forced to use a Dremel and a few cutting wheels (and a lot of time) to get the others.

Parts you will want: New lock nuts to replace the ones on top you take off (or cut off!). The instructions say to use the OEM nuts, but your call based on age/corrosion. Cheap enough to get 6 new nuts. The stock struts also have studs that attach to the lower control arms. The new struts in the kit do not have studs and the instructions said to use the supplied flanged bolts/nuts. My kit did not have these, so got some auto-grade hardware instead (3" bolts, FWIW).

20231007_211827.jpg


20231008_160451.jpg


20231008_165230.jpg


20231008_164559.jpg
 
OP
OP
dmeyers8

dmeyers8

Active Member
First Name
Dave
Joined
Aug 26, 2023
Threads
3
Messages
37
Reaction score
106
Location
Ada, MI
Vehicle(s)
2019 Ranger XLT
Occupation
CPA
Upper control arms
NOTE - INSTALL THESE AFTER YOU INSTALL THE NEW STRUTS

These come with separate install instructions (part #25121 - control arm kit)

As you take apart the front suspension to remove the strut you will want to leave the top control arm connected to the hub carrier/upright for support. As I did my project over a few different evenings, I thought I'd tackle the upper control arms one evening when I didn't have as much time for the struts. Due to the angle of the ball joint, the suspension must be shortened in order for this to align/attach. I was a bit worried at first, but kudos to Beltech's support who emailed back and forth with me to confirm things would be OK. Here is what it looks like and the issue I ran into. Without the shorter strut, the angle of the ball joint ino the hub carrier is totally off.
20230926_221208.jpg

20230926_221230.jpg

To get to the inside control arm bolt/nut, I found it easiest to remove the various protective panels in the wheel well. I took these all the way out to clean things. The little push-type rivets will not all come out easy, so you may need to replace some. If you can't get them through a Ford dealer (my local shop had none) you can get generic ones from an auto parts store. I got mine at NAPA (Balkamp part number 665-2356).
20231105_090130.jpg


The driver's side upper arm is much easier to access than the passenger's side. You aren't getting an impact gun in on either side, but access for a breaker bar is there, just a challenge. I ended up taking out the windshield washer reservoir and removing some of the fender liner on the passenger side to get access for a socket to the nut towards the front of the truck.

New and old bits.
20230926_220632.jpg
 
Last edited:
OP
OP
dmeyers8

dmeyers8

Active Member
First Name
Dave
Joined
Aug 26, 2023
Threads
3
Messages
37
Reaction score
106
Location
Ada, MI
Vehicle(s)
2019 Ranger XLT
Occupation
CPA
A few before and after shots of the frame. I took a wire brush to the welds that had some surface rush, cleaned the whole area, and sprayed some new paint on things while I had the access, especially with the upper arms out.
20231008_160437.jpg
20231008_164421.jpg
20231025_201010.jpg
20231025_201036.jpg
 
OP
OP
dmeyers8

dmeyers8

Active Member
First Name
Dave
Joined
Aug 26, 2023
Threads
3
Messages
37
Reaction score
106
Location
Ada, MI
Vehicle(s)
2019 Ranger XLT
Occupation
CPA
Rear suspension and axle flip
The rear portion of the Belltech kit is part #6531. It achieves the drop by locating the axle on top of the leaf springs instead of the bottom. The leaf springs attach to the frame with a fixed mount toward the front of the vehicle, and a hanger toward the rear. If you want to lower the full 6", you use the OEM hanger. If you want to lower 4" or 5", you use the longer Belltech hangers.

Here is everything apart:
20231008_184446.jpg


The Belltech instructions are very good, so not much to add. One, clean out the rubber bushings for the rear hangers and use a little grease during reassembly so the sleeves don't bind. Two, take the spare tire out. Being new to truck world, I was thrilled with the amount of access space, especially when removing/installing the shocks. No contorting! A plus.

Can't ever be easy, though. Both bolts holding the stock bump stops snapped in the frame when trying to get them out. Due to my crappy drill bits, it took a while to drill out the old bolt and tap for a new bolt. Had I not had a die/tap set, this would have caused a problem. Once back together and lowered (see the other pic below), there isn't much space to get tools in between the axle and frame. So that could have been a fair amount of time for a shop to fix it and get the new bump stops mounted.
20231008_190012.jpg


Without the bump stop bolt issue, this would have been a piece of cake. I was able to do it solo, but needed extra jack stands to support the rear axle (both sides and the front/driveshaft to keep it from rotating down). I'm a bit OCD, so it took longer simply due to the fact that I wire brush all OEM bolt threads and hit them with a little WD40 before putting things back together, just in case I have to take it apart again.

Here is everything back together. More kudos to the Belltech folks. The stock bolts that hold the brake lines to the front and rear of this housing are too long once you've flipped the axle. The kit comes with shorter bolts (which are not installed in this pic). Same for the lower shock mount. Well thought out.
20231020_141156.jpg


Loweredon33s

Well-Known Member
First Name
Mike
Joined
Dec 13, 2022
Threads
9
Messages
748
Reaction score
1,804
Location
Baltimore
Vehicle(s)
2021 Ranger
Occupation
Performance person
I’m planning on getting control arms and better coilovers soon. I’d like to get my drop closer to 3/5, it’s currently closer to 2.5/5 because Belltech doesn’t allow for much front travel and the springs and valving are too soft. I love the improved ride, traction and handling but their shocks and struts kinda suck.

IMG_5168.jpeg


IMG_5169.jpeg


IMG_1091.jpeg


IMG_1093.jpeg


IMG_5331.jpeg


IMG_5924.jpeg


IMG_5920.jpeg


IMG_1487.jpeg
 

Frenchy

Well-Known Member
First Name
Chris
Joined
Mar 15, 2020
Threads
164
Messages
7,541
Reaction score
10,751
Location
Elizabeth, Colorado
Vehicle(s)
2012 Nissan Frontier, 1994 F150 XL, 2022 Ford Transit
Occupation
Field Service Technician
Definitely different, but not terrible looking either. Something to keep in mind is the CV Axle angles. Because you lowered the front by 4 inches from factory the CV Axles most likely have extra angle similar to those of us that lifted the Ranger. I bring this up basically warning you to be careful in 4WD as the CV Axles will be under more stress.
 

Loweredon33s

Well-Known Member
First Name
Mike
Joined
Dec 13, 2022
Threads
9
Messages
748
Reaction score
1,804
Location
Baltimore
Vehicle(s)
2021 Ranger
Occupation
Performance person
Definitely different, but not terrible looking either. Something to keep in mind is the CV Axle angles. Because you lowered the front by 4 inches from factory the CV Axles most likely have extra angle similar to those of us that lifted the Ranger. I bring this up basically warning you to be careful in 4WD as the CV Axles will be under more stress.
I’m not sure what you mean, nobody said anything about lowering the front 4”

The axle angle at 2.5-2.75” isn’t very bad and I’m sure 3” wouldn’t be terrible. It’s not much different than increasing the front height by 3” as far as the axles are concerned.
 

Frenchy

Well-Known Member
First Name
Chris
Joined
Mar 15, 2020
Threads
164
Messages
7,541
Reaction score
10,751
Location
Elizabeth, Colorado
Vehicle(s)
2012 Nissan Frontier, 1994 F150 XL, 2022 Ford Transit
Occupation
Field Service Technician
I’m not sure what you mean, nobody said anything about lowering the front 4”

The axle angle at 2.5-2.75” isn’t very bad and I’m sure 3” wouldn’t be terrible. It’s not much different than increasing the front height by 3” as far as the axles are concerned.
My bad as I meant to say 3 inches, but it is still the same idea like when lifting the front by 3 inches. Without lift these CV axles are right about Neutral.
 

Loweredon33s

Well-Known Member
First Name
Mike
Joined
Dec 13, 2022
Threads
9
Messages
748
Reaction score
1,804
Location
Baltimore
Vehicle(s)
2021 Ranger
Occupation
Performance person
My bad as I meant to say 3 inches, but it is still the same idea like when lifting the front by 3 inches. Without lift these CV axles are right about Neutral.
Right, not too worried. Thanks for the suggestion though.
 
OP
OP
dmeyers8

dmeyers8

Active Member
First Name
Dave
Joined
Aug 26, 2023
Threads
3
Messages
37
Reaction score
106
Location
Ada, MI
Vehicle(s)
2019 Ranger XLT
Occupation
CPA
Axle bearing modification
One item that I didn't know about before beginning this project was that there is a possibility that due to a different driveshaft angle, your truck could end up with some vibrations. This is warned about in the directions (and I may have missed it, but should be in the product ads). One way the kit tries to avoid this is to adjust the position of the center carrier bearing for the driveshaft. The carrier is a U-shaped piece that bolts to the frame. The kit turns the U upside down and mounts it to new pieces, effectively moving the bearing up relative to where it was before.

Here is a pic after the modification. A very easy install...and thankfully in my case, I have very little, if any vibrations as a result.
20231028_190159.jpg
 
OP
OP
dmeyers8

dmeyers8

Active Member
First Name
Dave
Joined
Aug 26, 2023
Threads
3
Messages
37
Reaction score
106
Location
Ada, MI
Vehicle(s)
2019 Ranger XLT
Occupation
CPA
I’m planning on getting control arms and better coilovers soon. I’d like to get my drop closer to 3/5, it’s currently closer to 2.5/5 because Belltech doesn’t allow for much front travel and the springs and valving are too soft. I love the improved ride, traction and handling but their shocks and struts kinda suck.

IMG_5168.jpeg


IMG_5169.jpeg


IMG_1091.jpeg


IMG_1093.jpeg


IMG_5331.jpeg


IMG_5924.jpeg


IMG_5920.jpeg


IMG_1487.jpeg
Your truck looks great! A beautiful blue. What coilovers are you running now? What would you get if you replaced them? In the future, I might go a touch lower, which would require a coilover in front as the Belltech kit is as low as it's going to be.
 

Loweredon33s

Well-Known Member
First Name
Mike
Joined
Dec 13, 2022
Threads
9
Messages
748
Reaction score
1,804
Location
Baltimore
Vehicle(s)
2021 Ranger
Occupation
Performance person
Your truck looks great! A beautiful blue. What coilovers are you running now? What would you get if you replaced them? In the future, I might go a touch lower, which would require a coilover in front as the Belltech kit is as low as it's going to be.
Thank you! I have the red and gold ones from Belltech but they just make them too long. I’m either making a custom upper mount for more travel or I’ll make brackets and run Vikings or Ridetech ones.
 
OP
OP
dmeyers8

dmeyers8

Active Member
First Name
Dave
Joined
Aug 26, 2023
Threads
3
Messages
37
Reaction score
106
Location
Ada, MI
Vehicle(s)
2019 Ranger XLT
Occupation
CPA
Exhaust modification
Another item I didn't know about until getting the kit was that for the 4" drop, you will need to cut the tailpipe. That particular configuration puts the passenger side leaf spring right where the exhaust comes out at the side of the truck. I initially dropped the truck 6" in the rear (more on that in my next post), so didn't have to deal with it, but then tried the 4" setting and "chop, chop" it was. I'll find a more permanent exhaust solution later. Like the broken bump stop bolts, this would have created an issue if I didn't have the right tools once the truck was apart. Just needed a cutting wheel, but might not be something everyone has.

This would be WAY easier to follow the directions and do it when the leaf spring is out. Doing it after things are back together was not as simple from an access standpoint.
20231030_201354.jpg
20231030_201405.jpg
Sponsored

 
Last edited:


Top