OP
OP
deleriumtremor
Well-Known Member
- Thread starter
- #16
This. ?Basically he said to repeat the steps over and over again. He said top techs in the field keep having problems with the driver side of the Ranger and basically you got to keep going until you have zero resistance without the motor, pushing it up and down. He said to just keep repeating these over and over again. I that’s what I did until the problem went away I believe 99.5 %. Good luck!

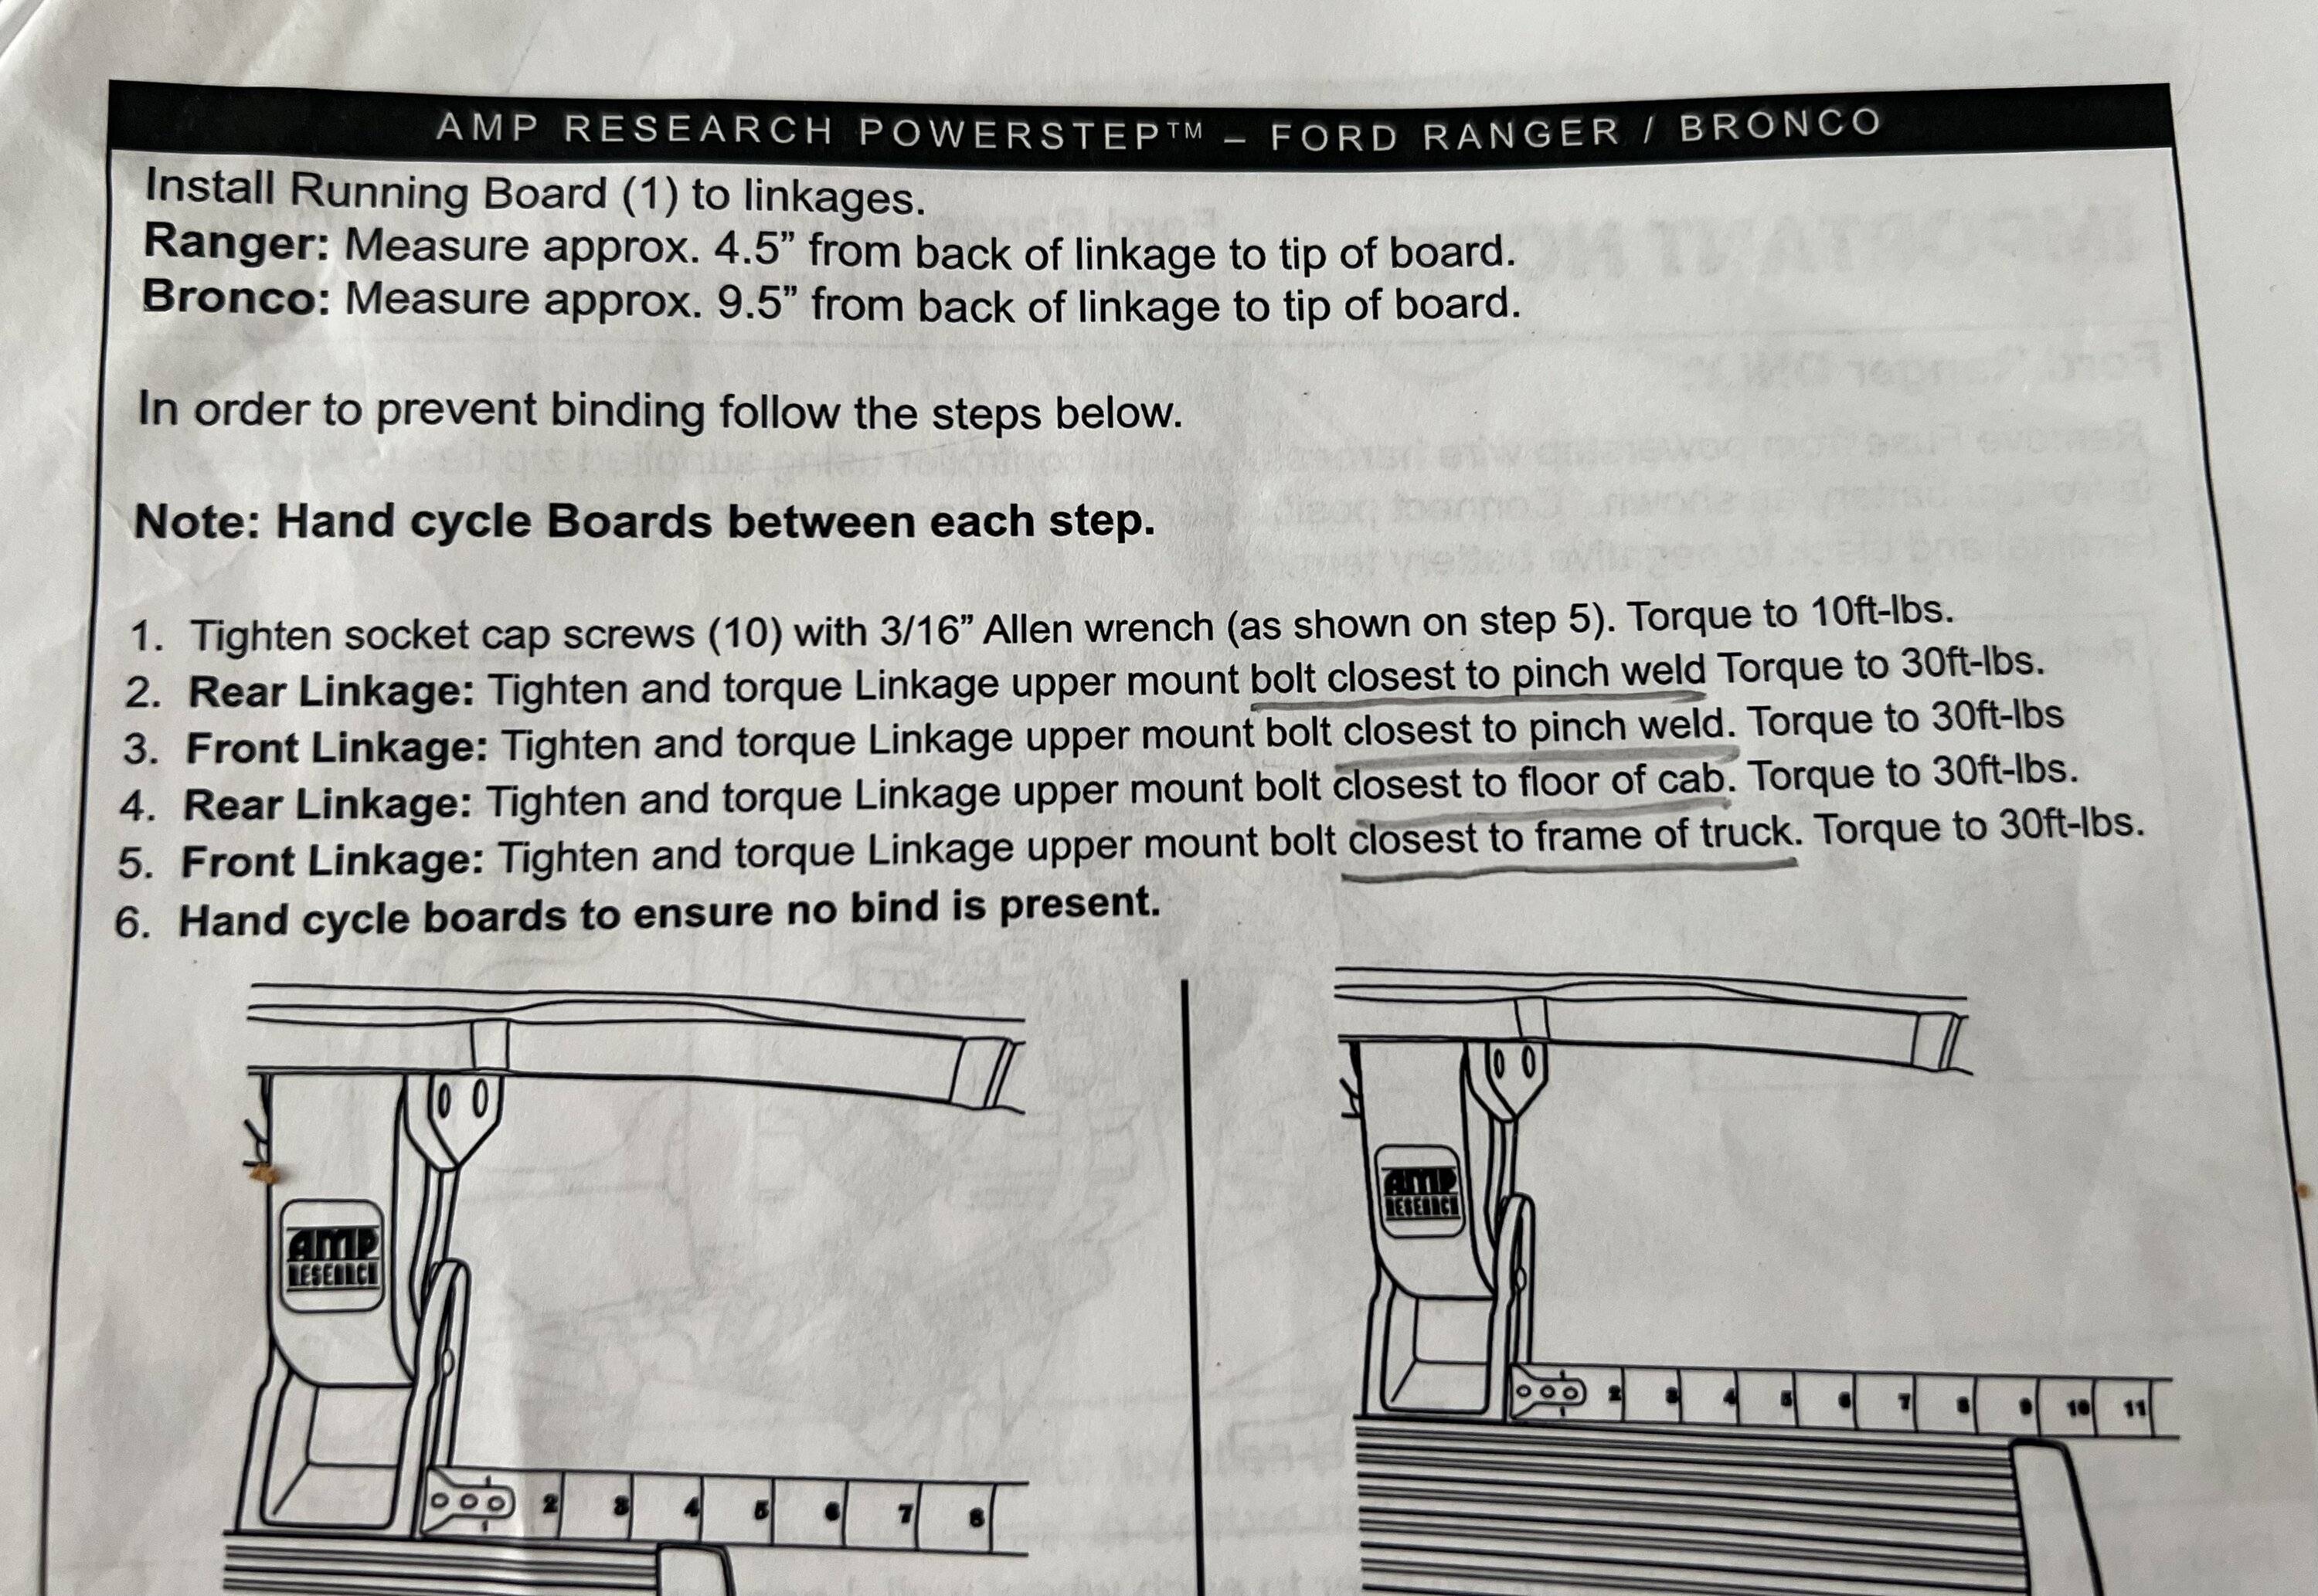
When I did my install, initially I didn’t even download the instructions. I just bolted up the linkages, mounted the steps and cycled them by hand.
I then mounted the motors and wired them up.
When I cycled the steps electrically they wouldn’t close all the way up front. That is when I decided to download the instructions and print them off.
As soon as I read the detail of the tightening sequence I knew I had screwed up. I took the motors back off, loosened the linkages and then tightened/torqued them in the sequence the instructions above. When I went to install the motors again, the only way I could get them back on was by selecting a half down position (essentially one tooth around on the motor), so while I had taken them off with the steps all the way down, they got remounted with the steps half way up. I then put the fuse in and the steps went all the way up and the gap up front was gone. Upon further cycling I got full motion up and down with a solid clunk when the boards finish their up motion.
Good luck.
Sponsored


")