SuperCab audio install

Plinky

Active Member
First Name
Chris
Joined
May 3, 2020
Threads
2
Messages
25
Reaction score
40
Location
Dallas, TX
Vehicle(s)
2019 Ranger XLT SuperCab
Occupation
automotive technician
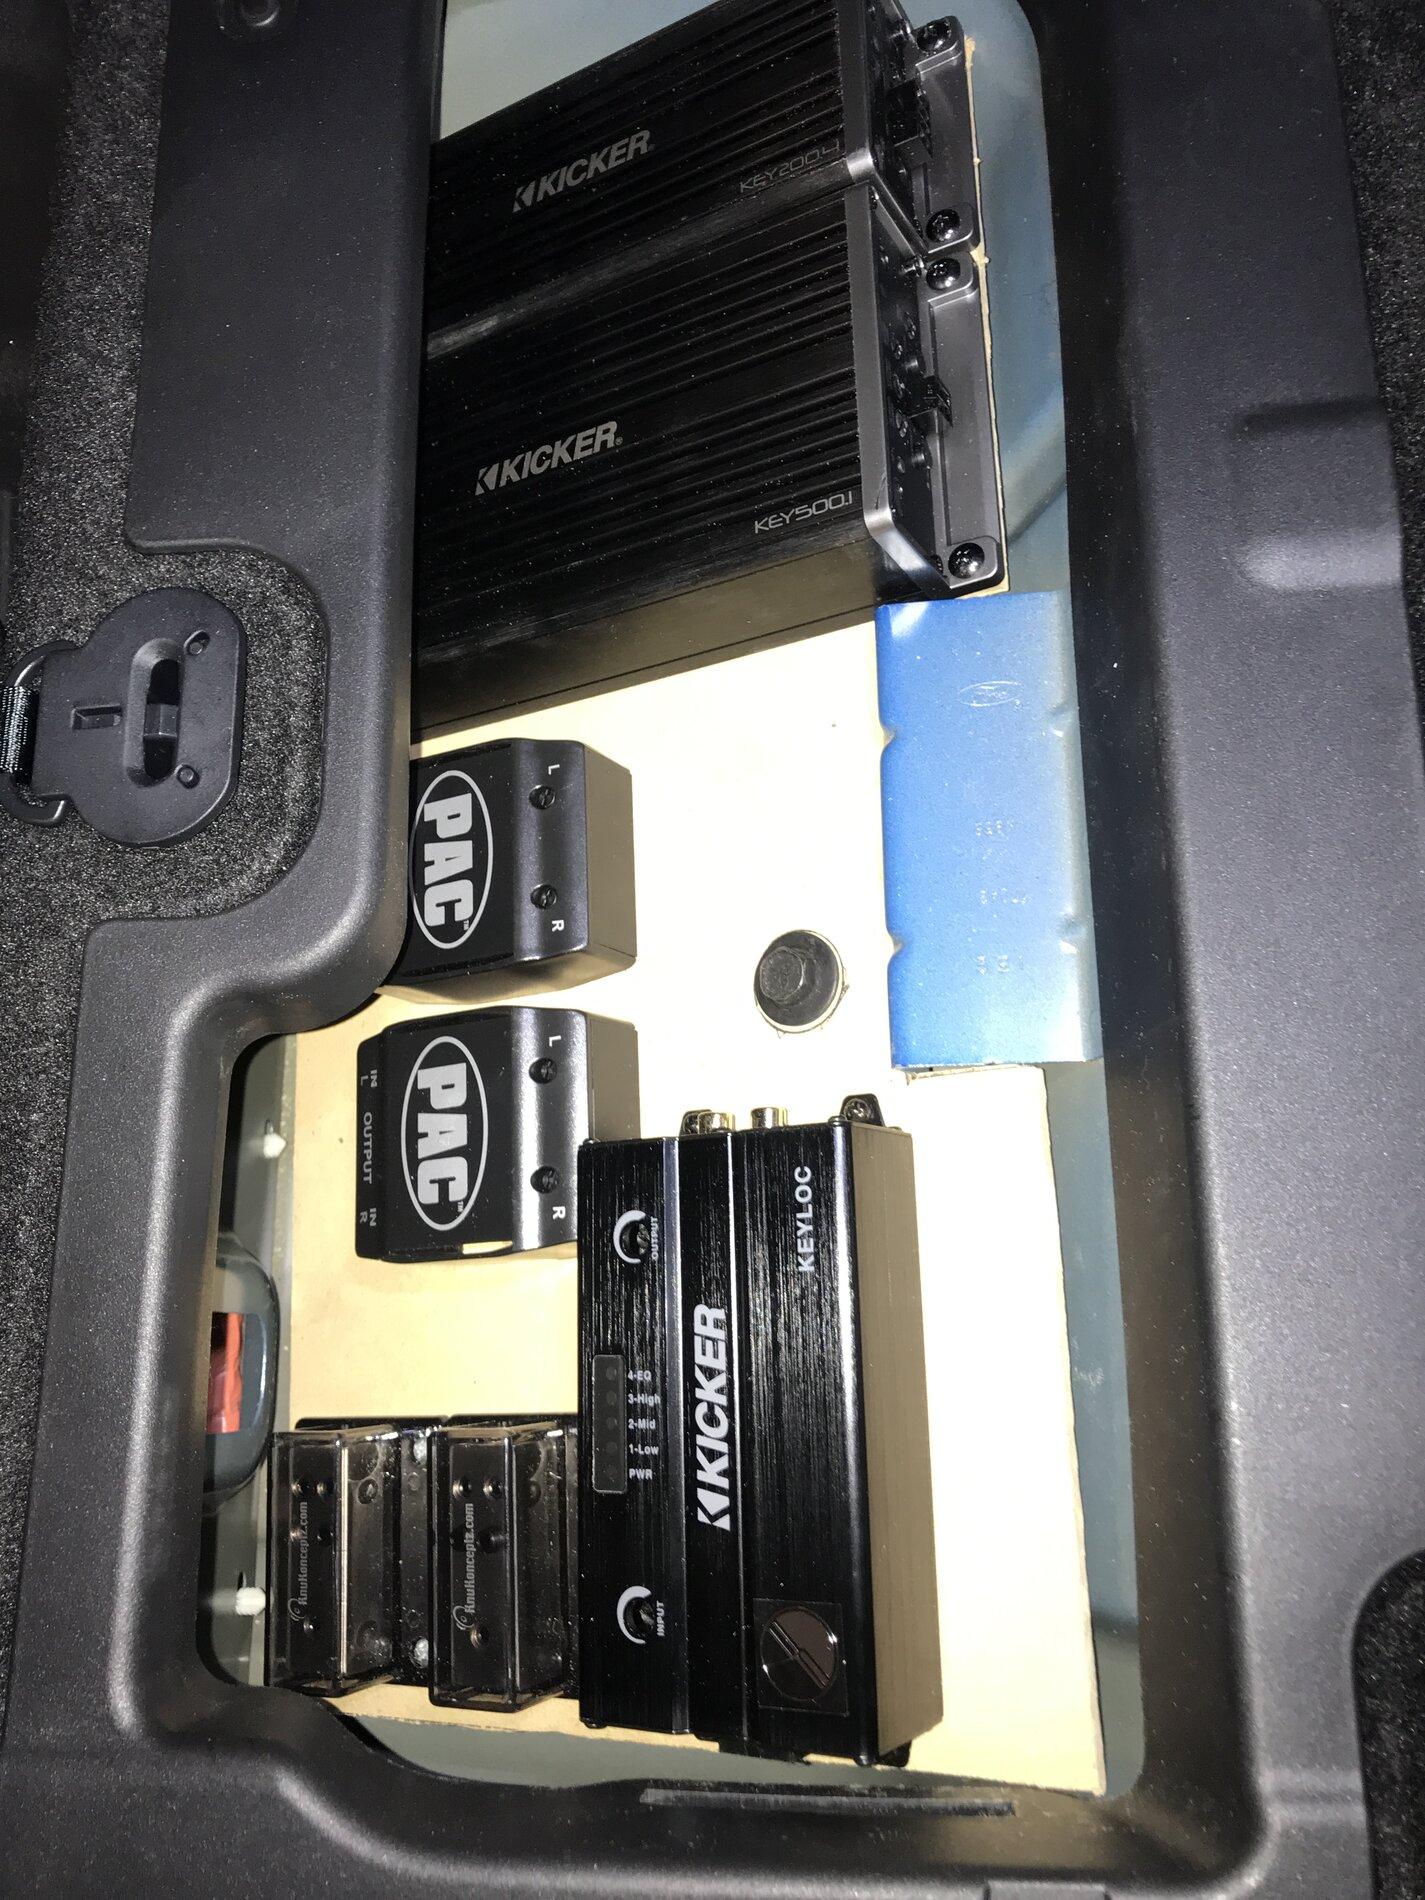
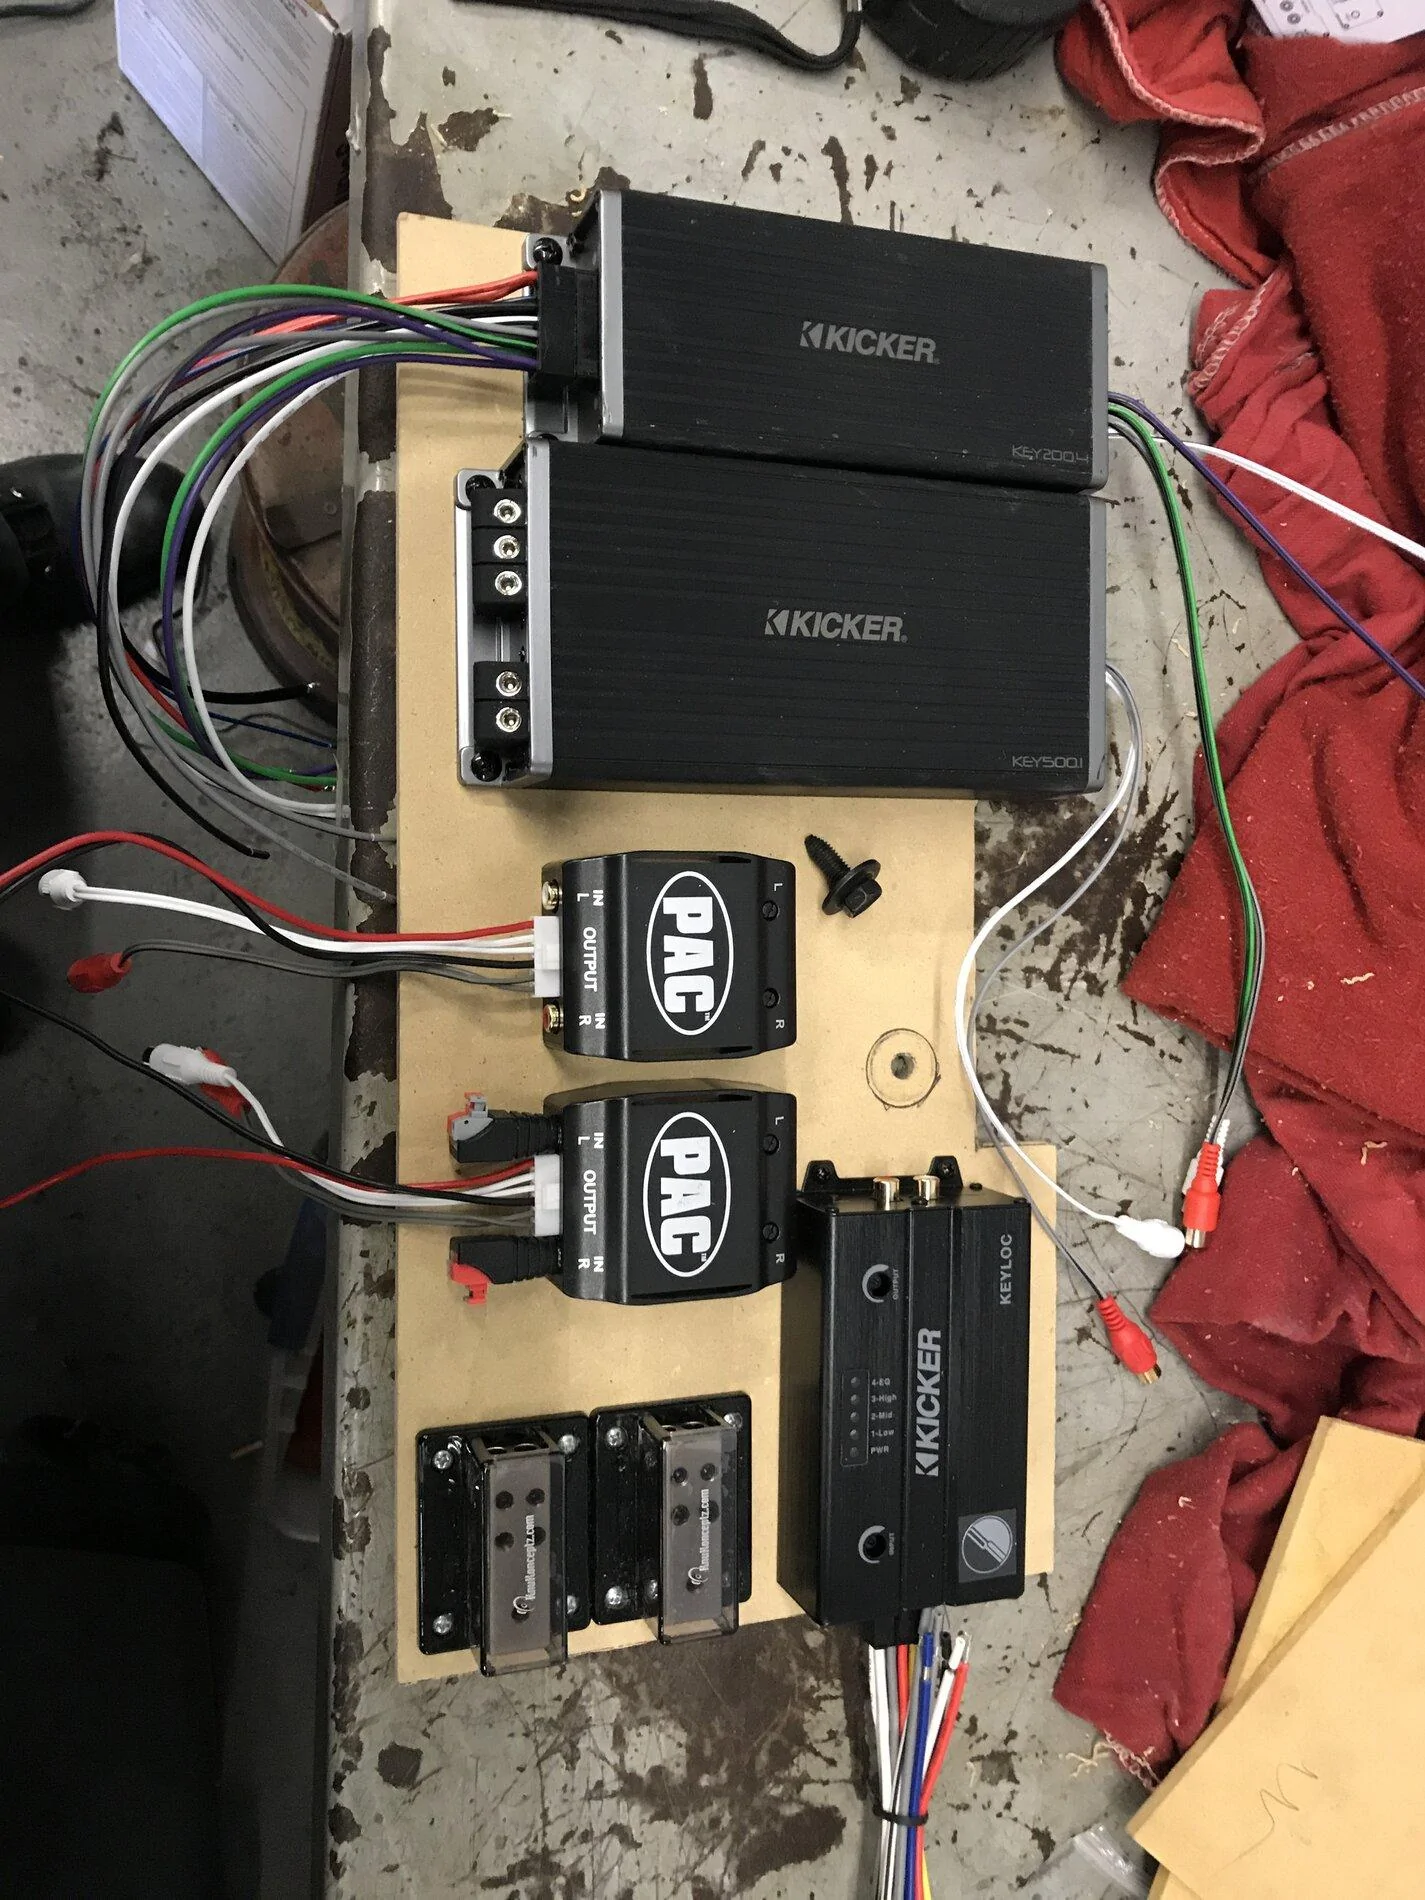
Already installed Rockford Fosgate component speakers in the front doors & 3-ways in the rear doors, complete with Stinger Fast Rings & Noico Mat (cheaper Russian? Dynamat equivalent on Amazon). Just the speaker change made a dramatic difference in audio quality, but we need to push the speakers to their RMS limit, so it’s Kicker Key amp time.

Theory is to use Forscan to remove factory
B38D6795-5931-4DC9-9A8F-CDA12068B83B.jpeg
A3D74F85-578F-4EF5-AF27-8E63D0CB83B8.jpeg
FB37FCDC-7119-4808-B9FD-40FE3987D84D.jpeg
C2543496-9F0C-4514-BE0A-74411C6B88C3.jpeg
83D8986C-A397-4870-B361-9CFF12E65C24.jpeg
69082819-73ED-4BF2-A312-D8AE3F4E7BE5.jpeg
FF2C2EFB-18F7-439F-A884-F2FA85734E55.jpeg
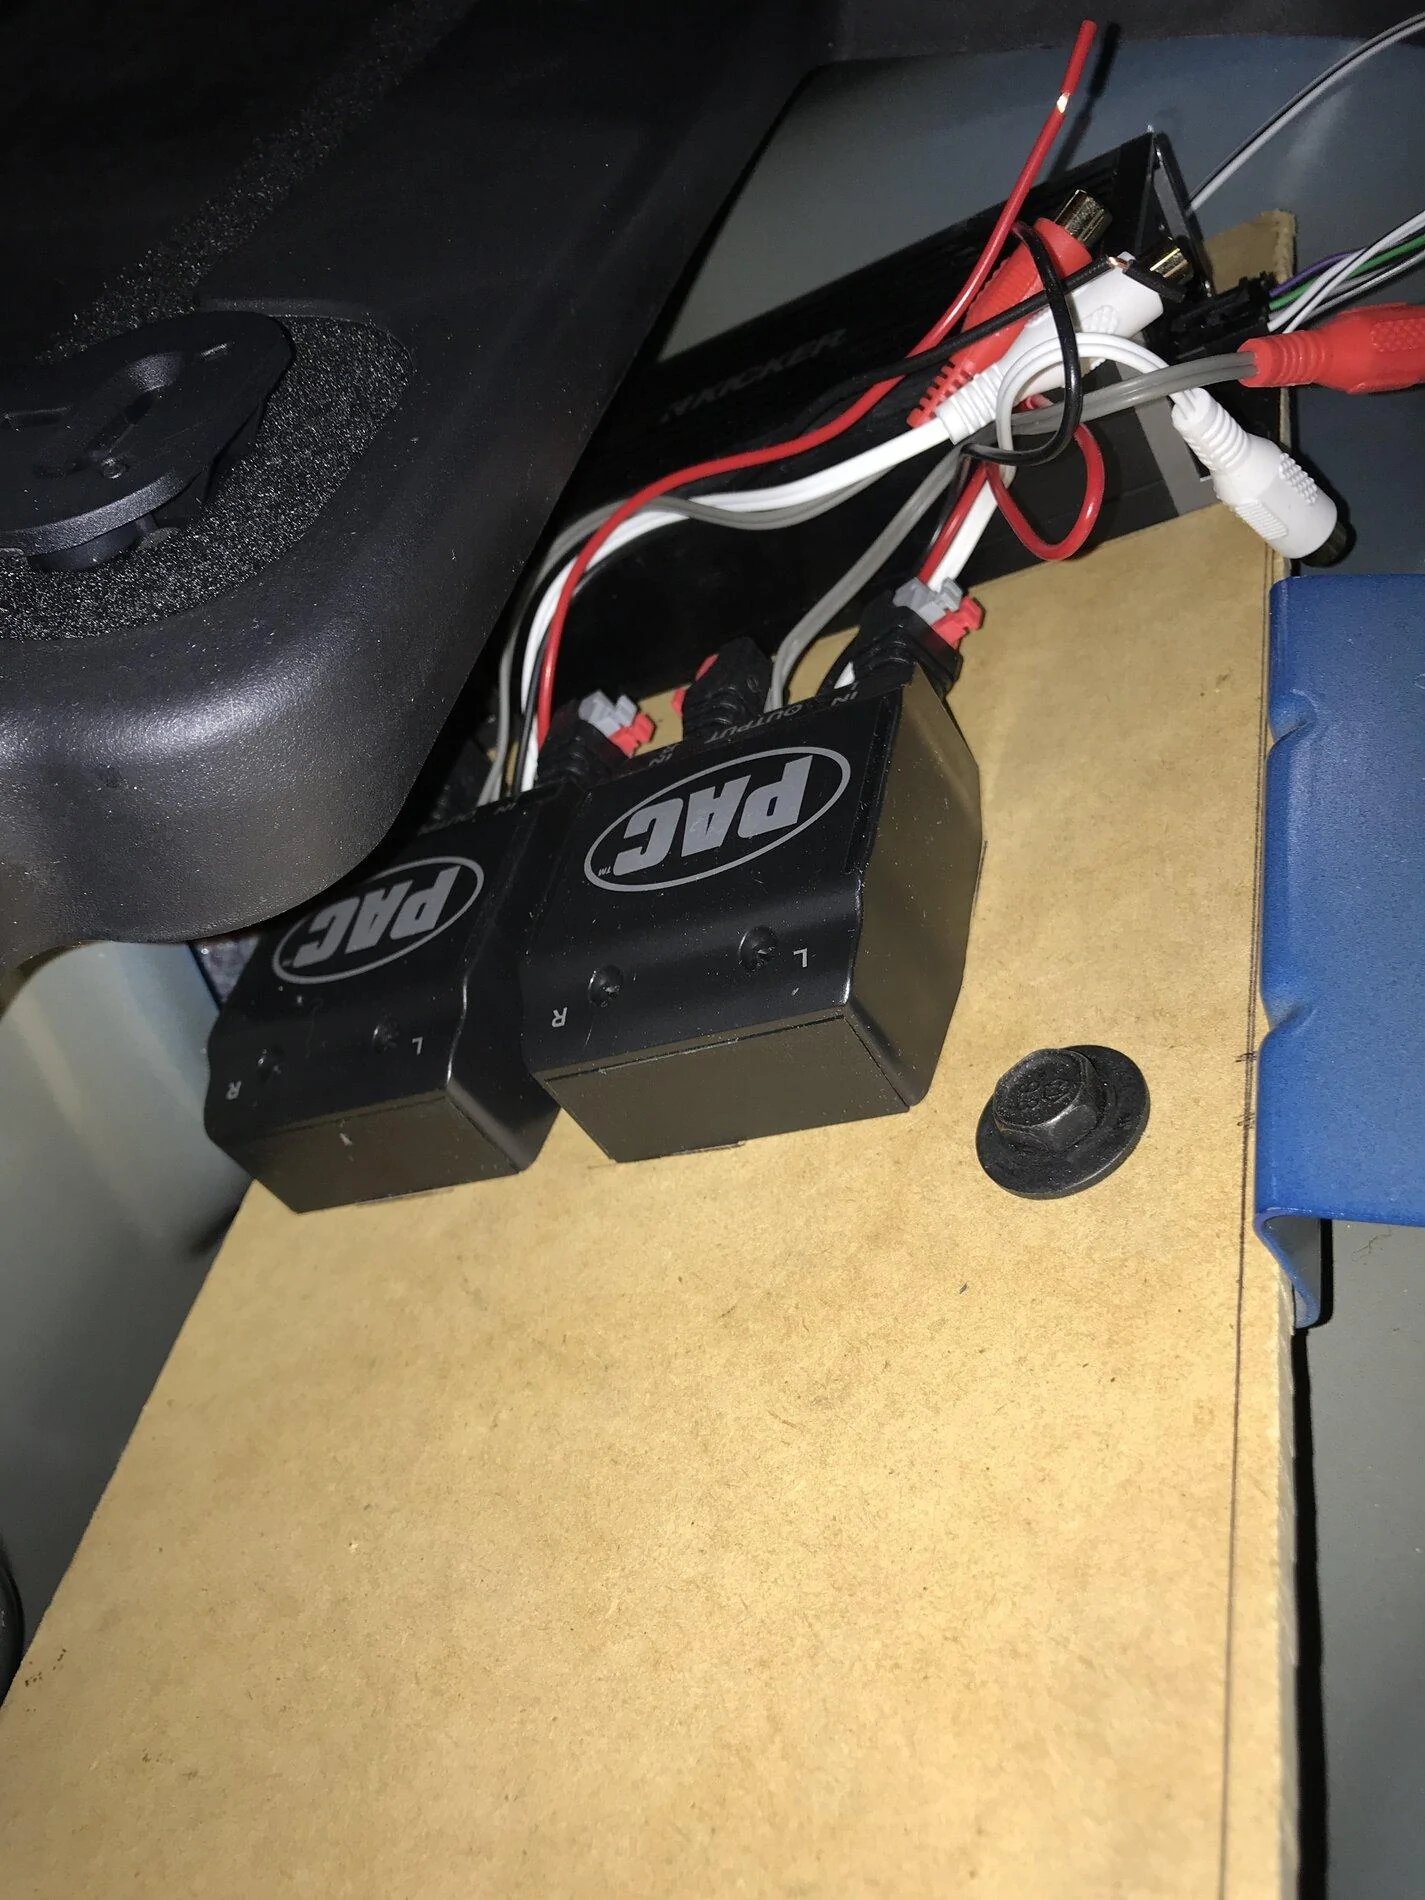
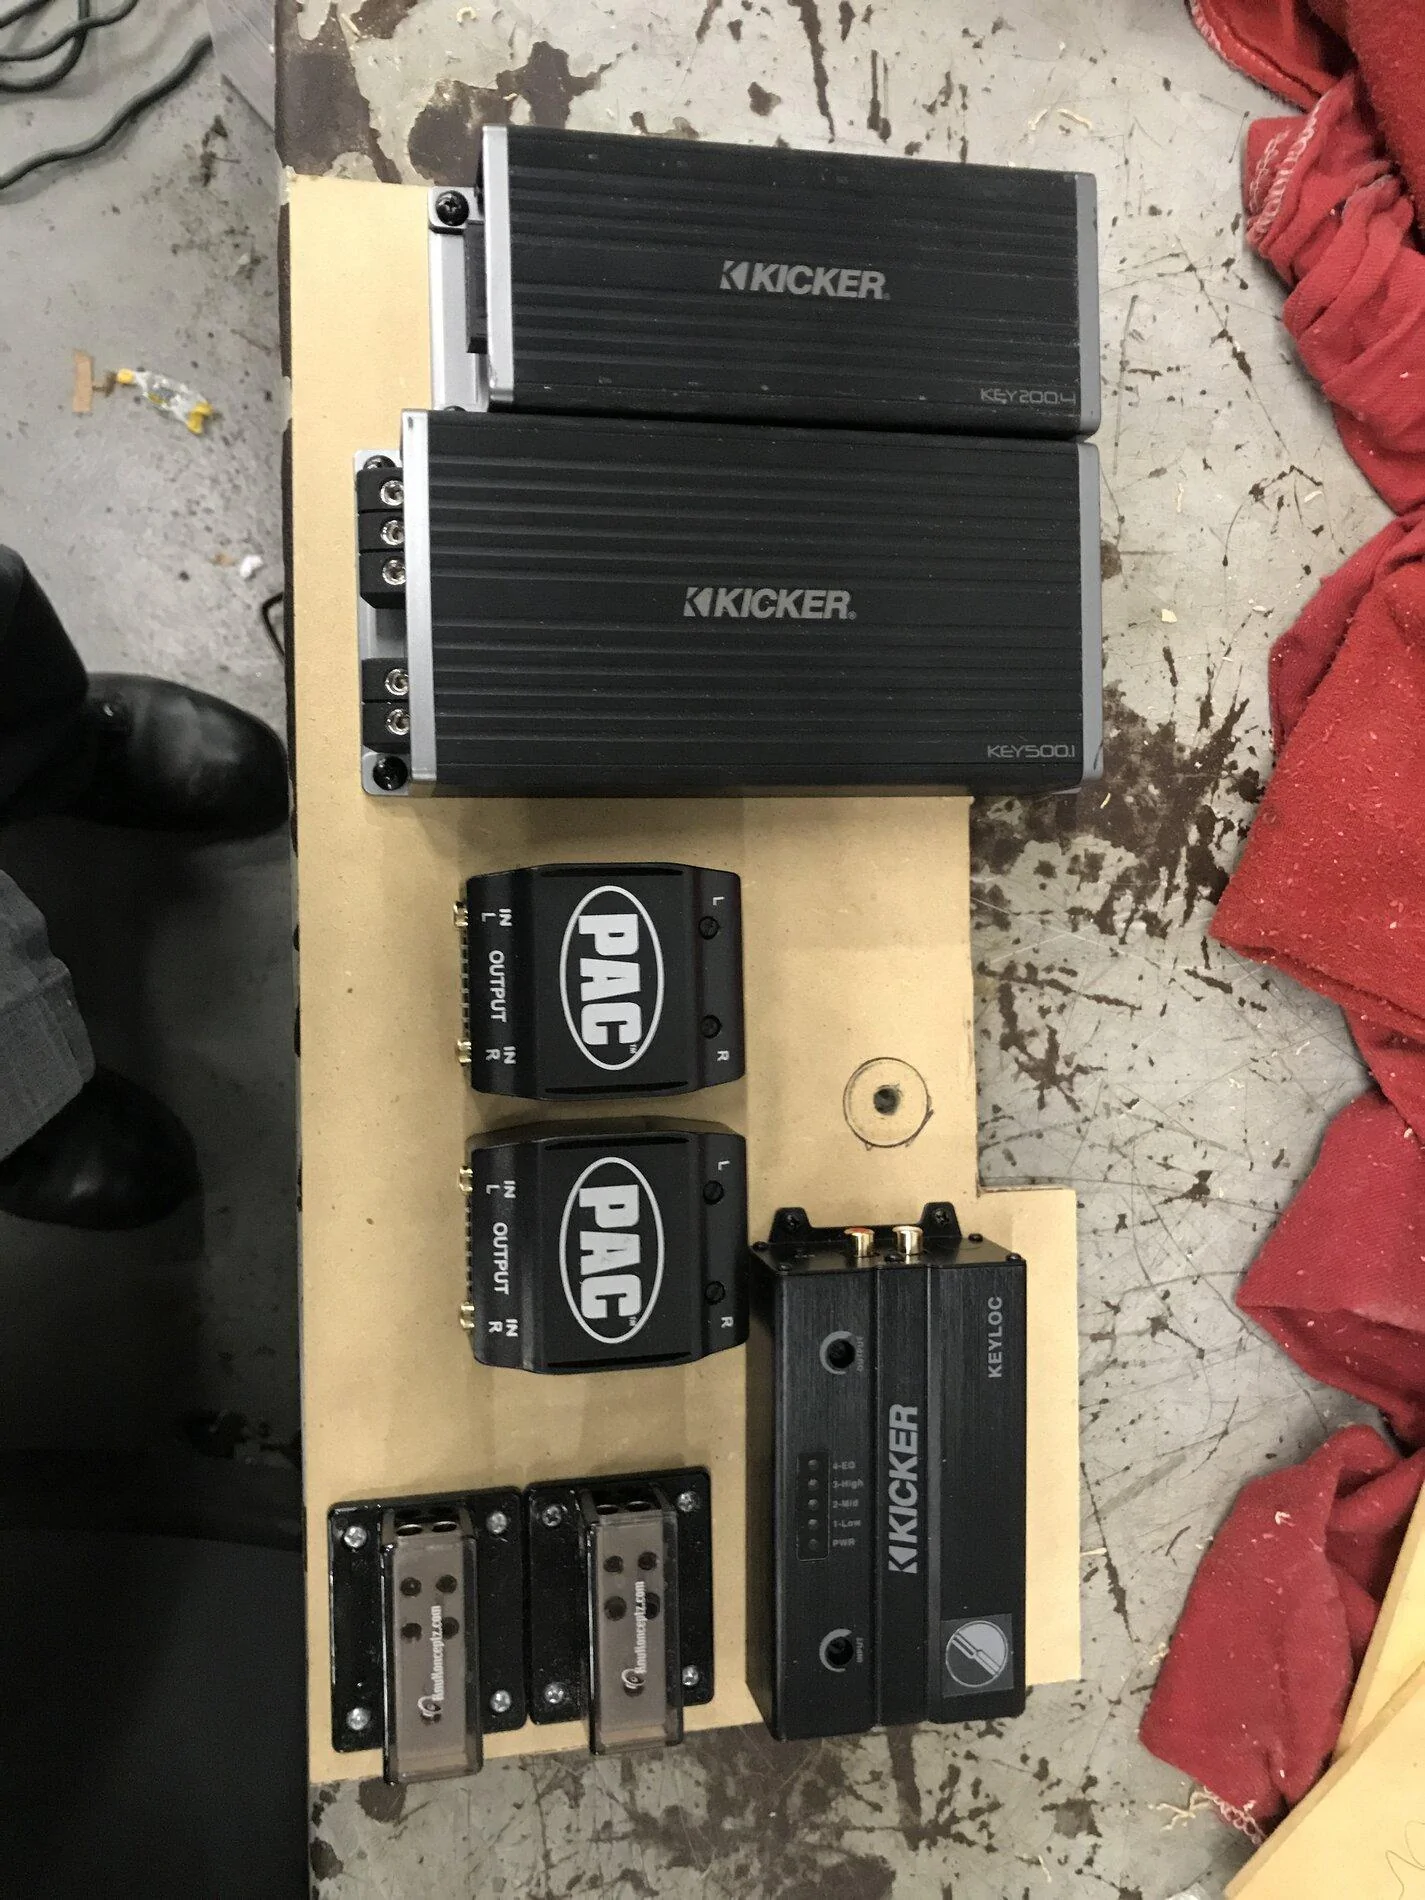
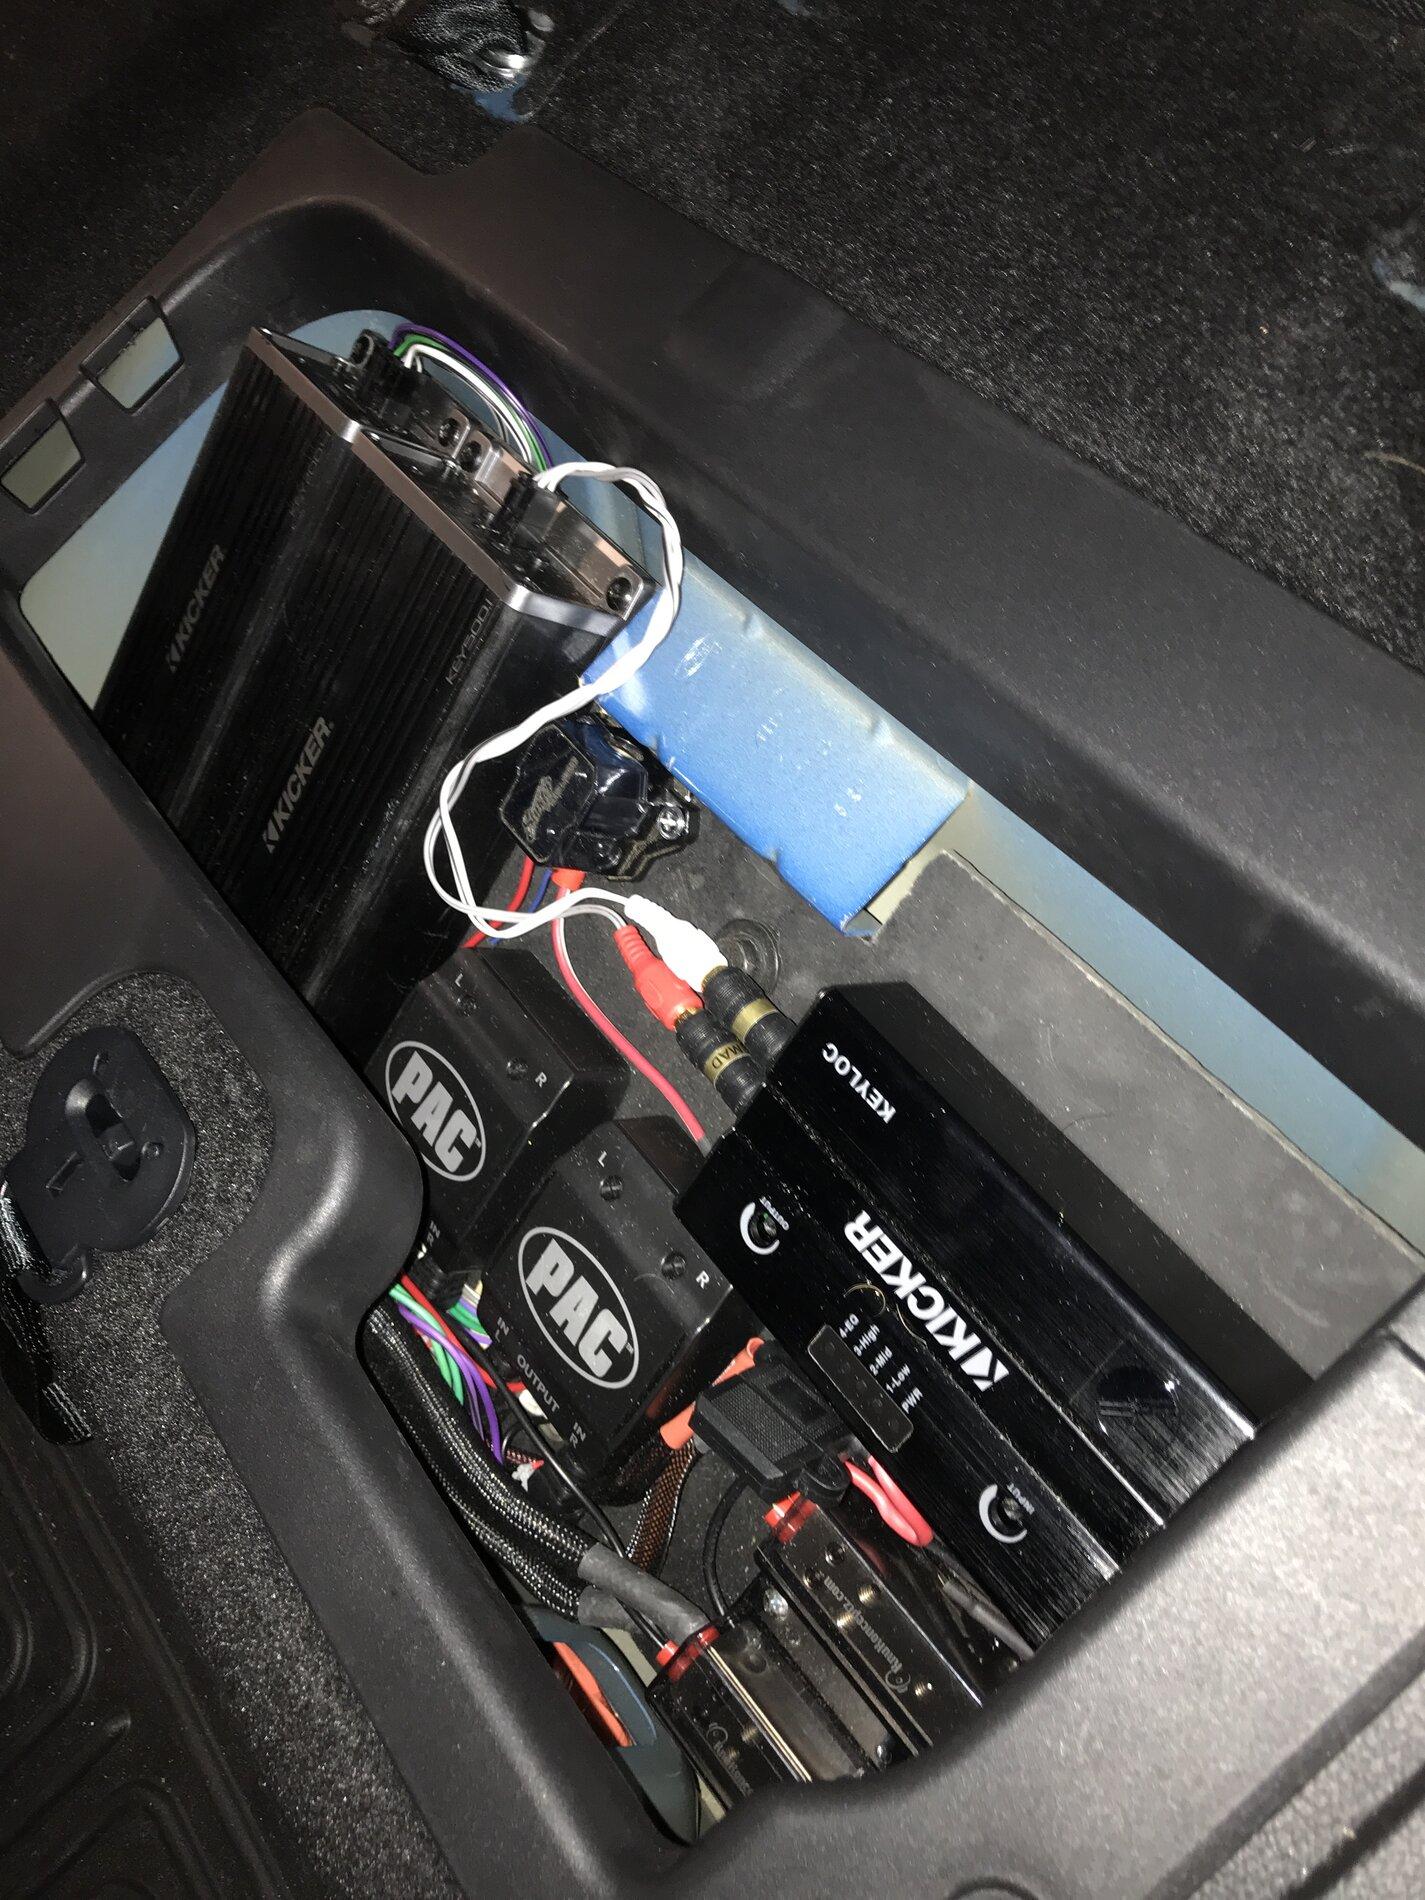
DSP & convert to line level output on the OEM source unit, then use 2 PAC LD10s to boost that signal to drive the amp.

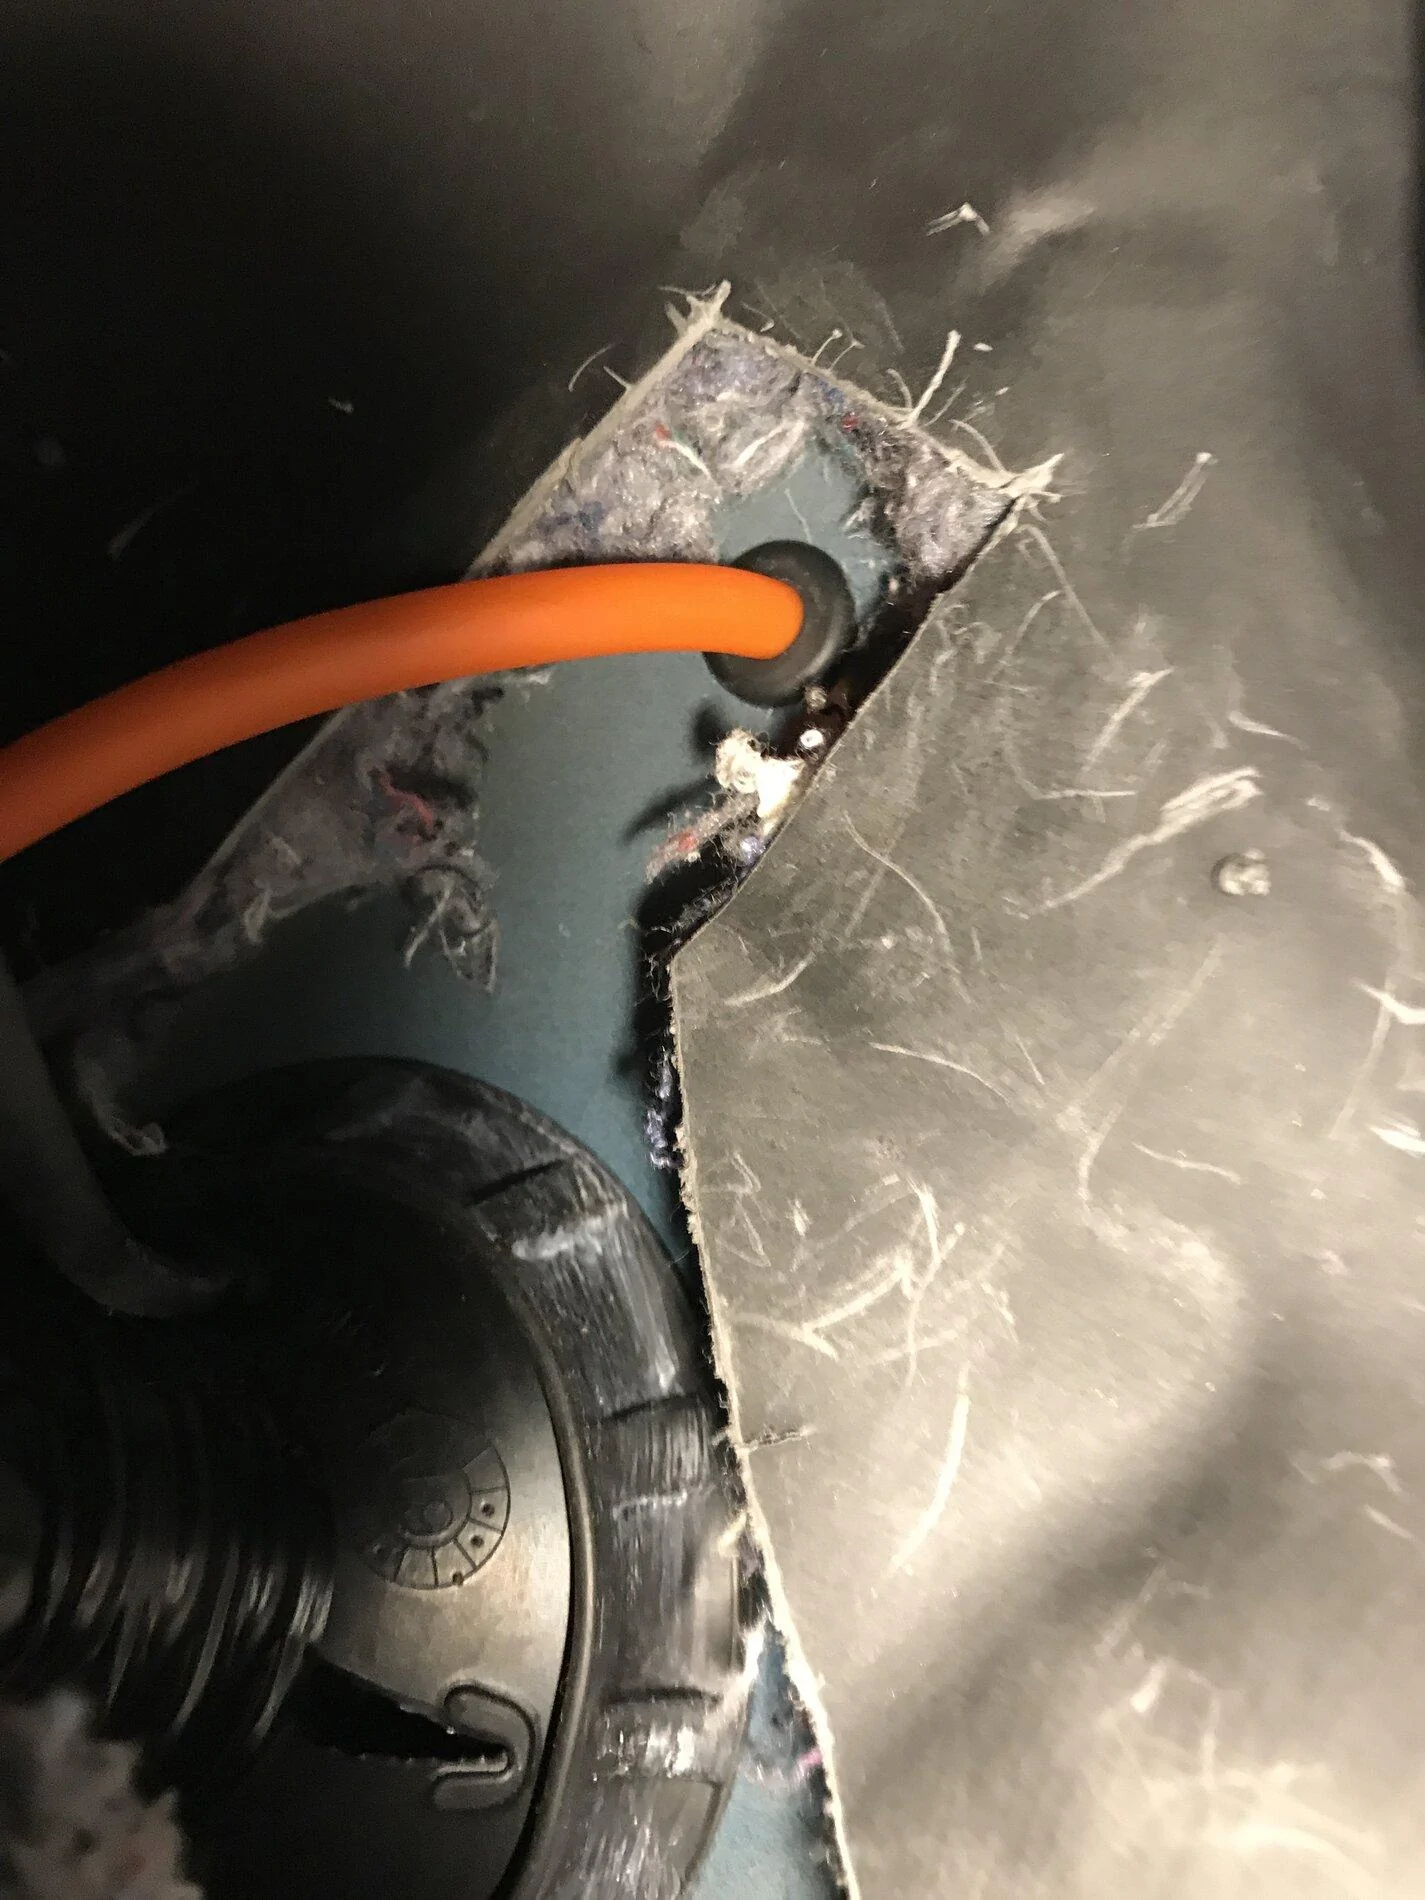
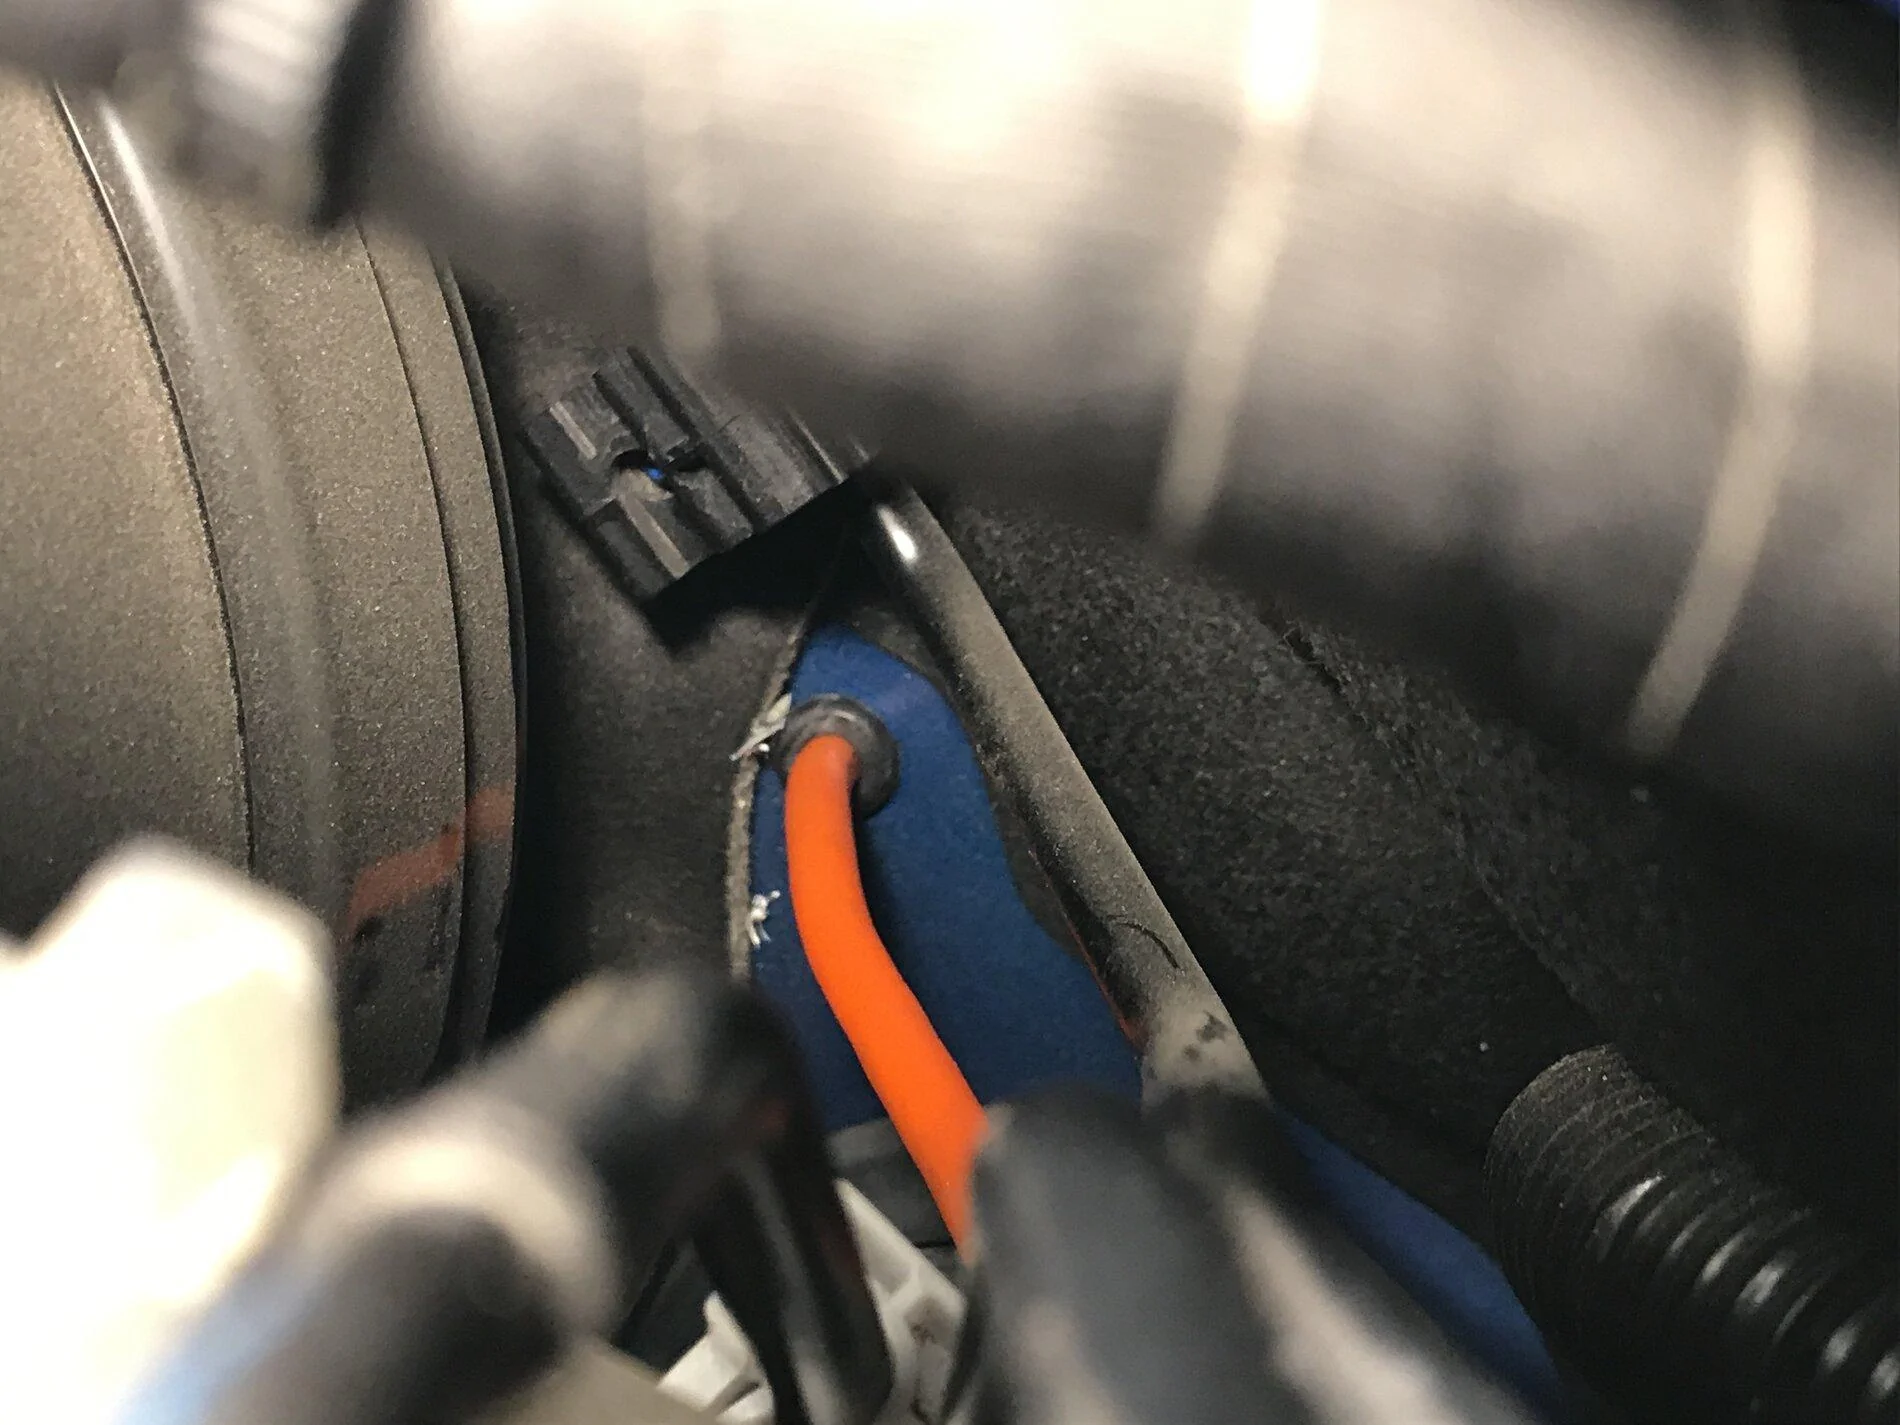
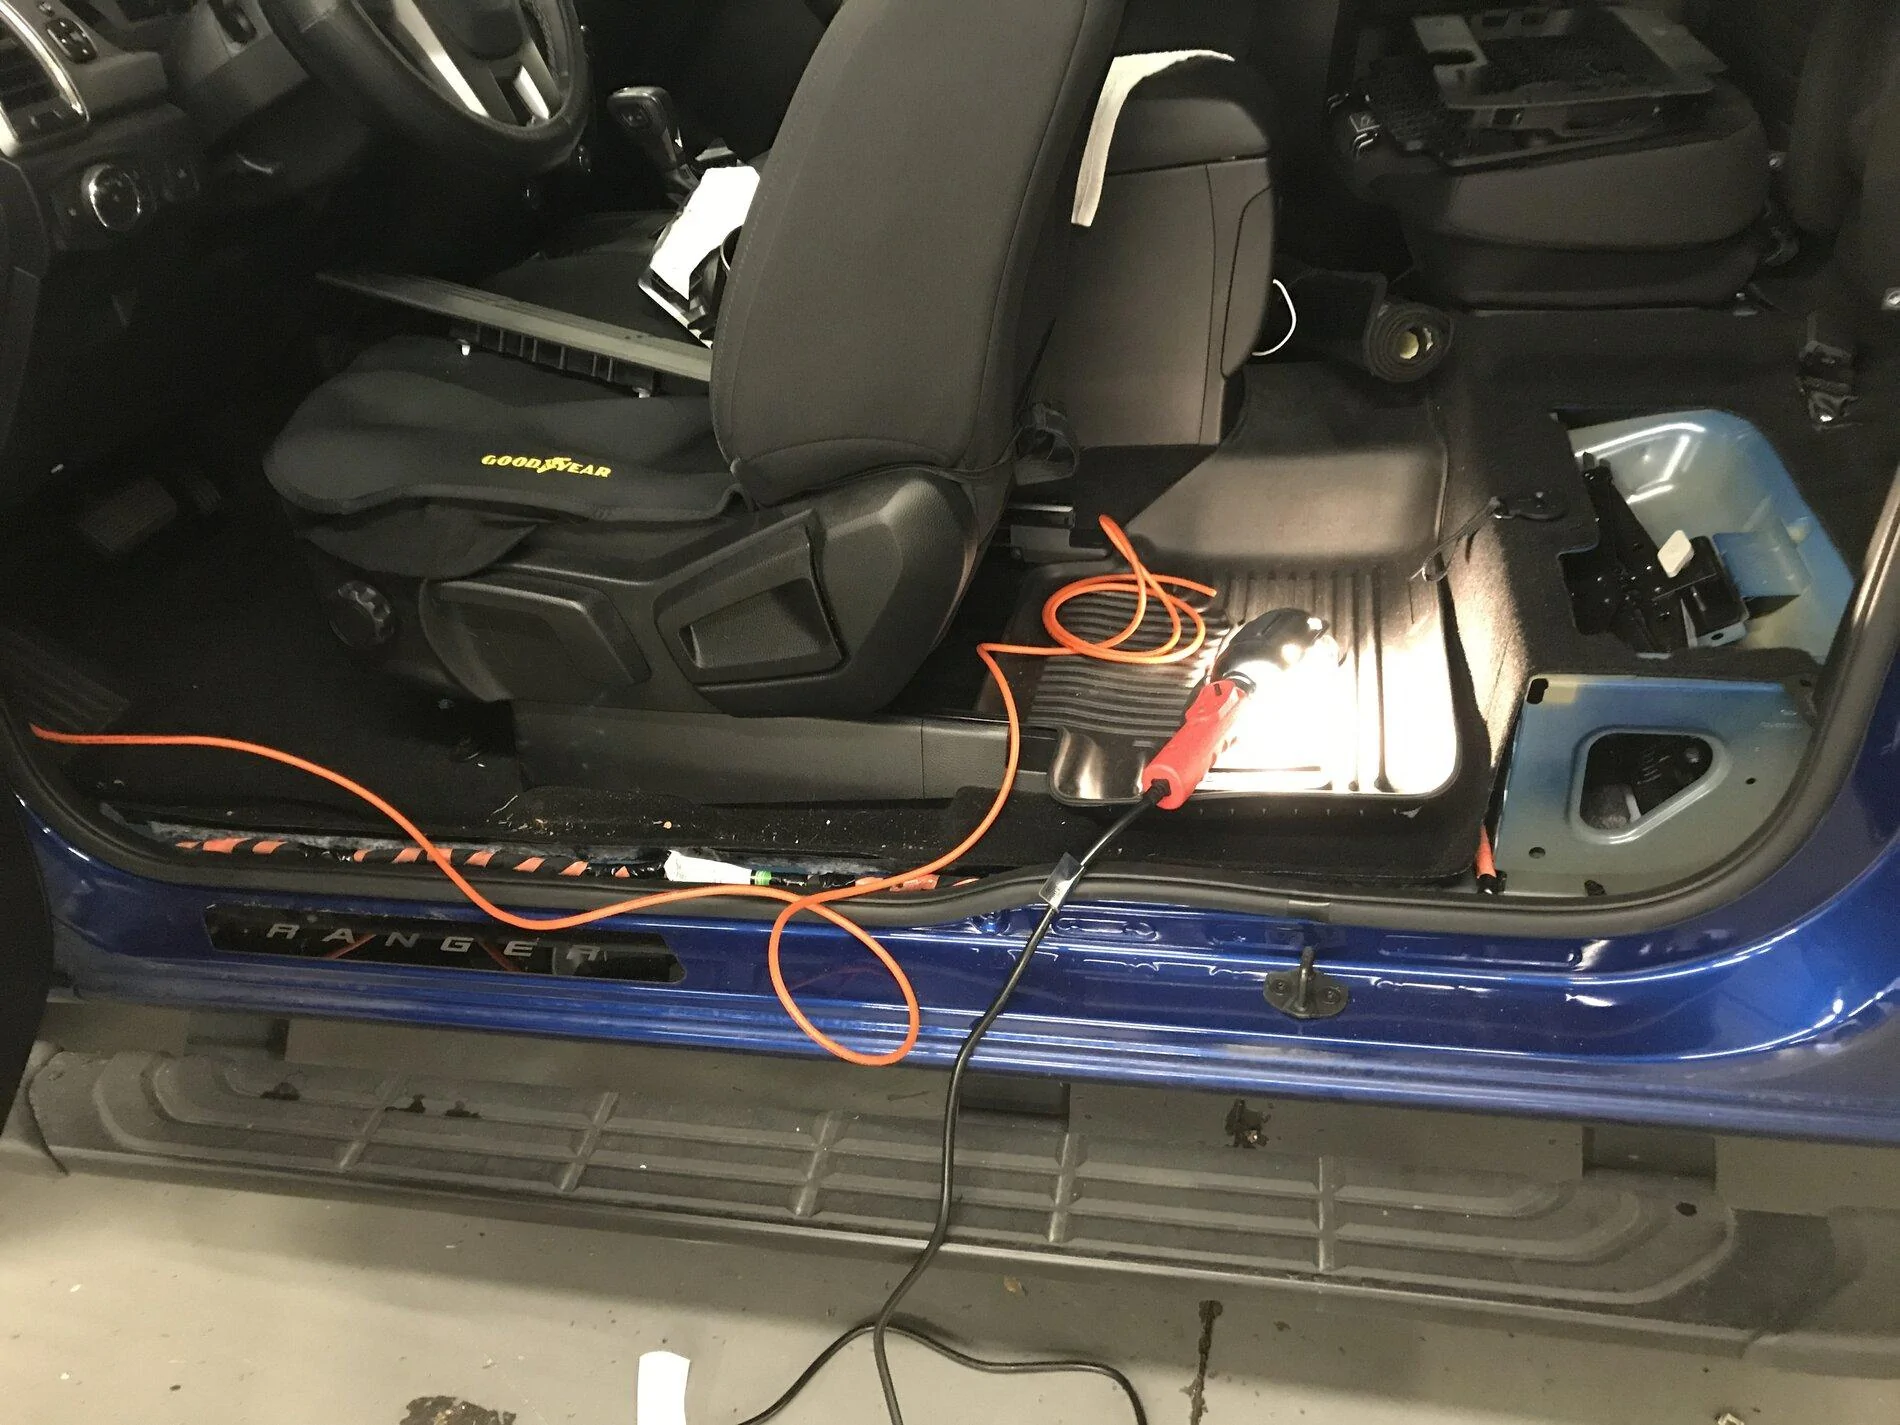
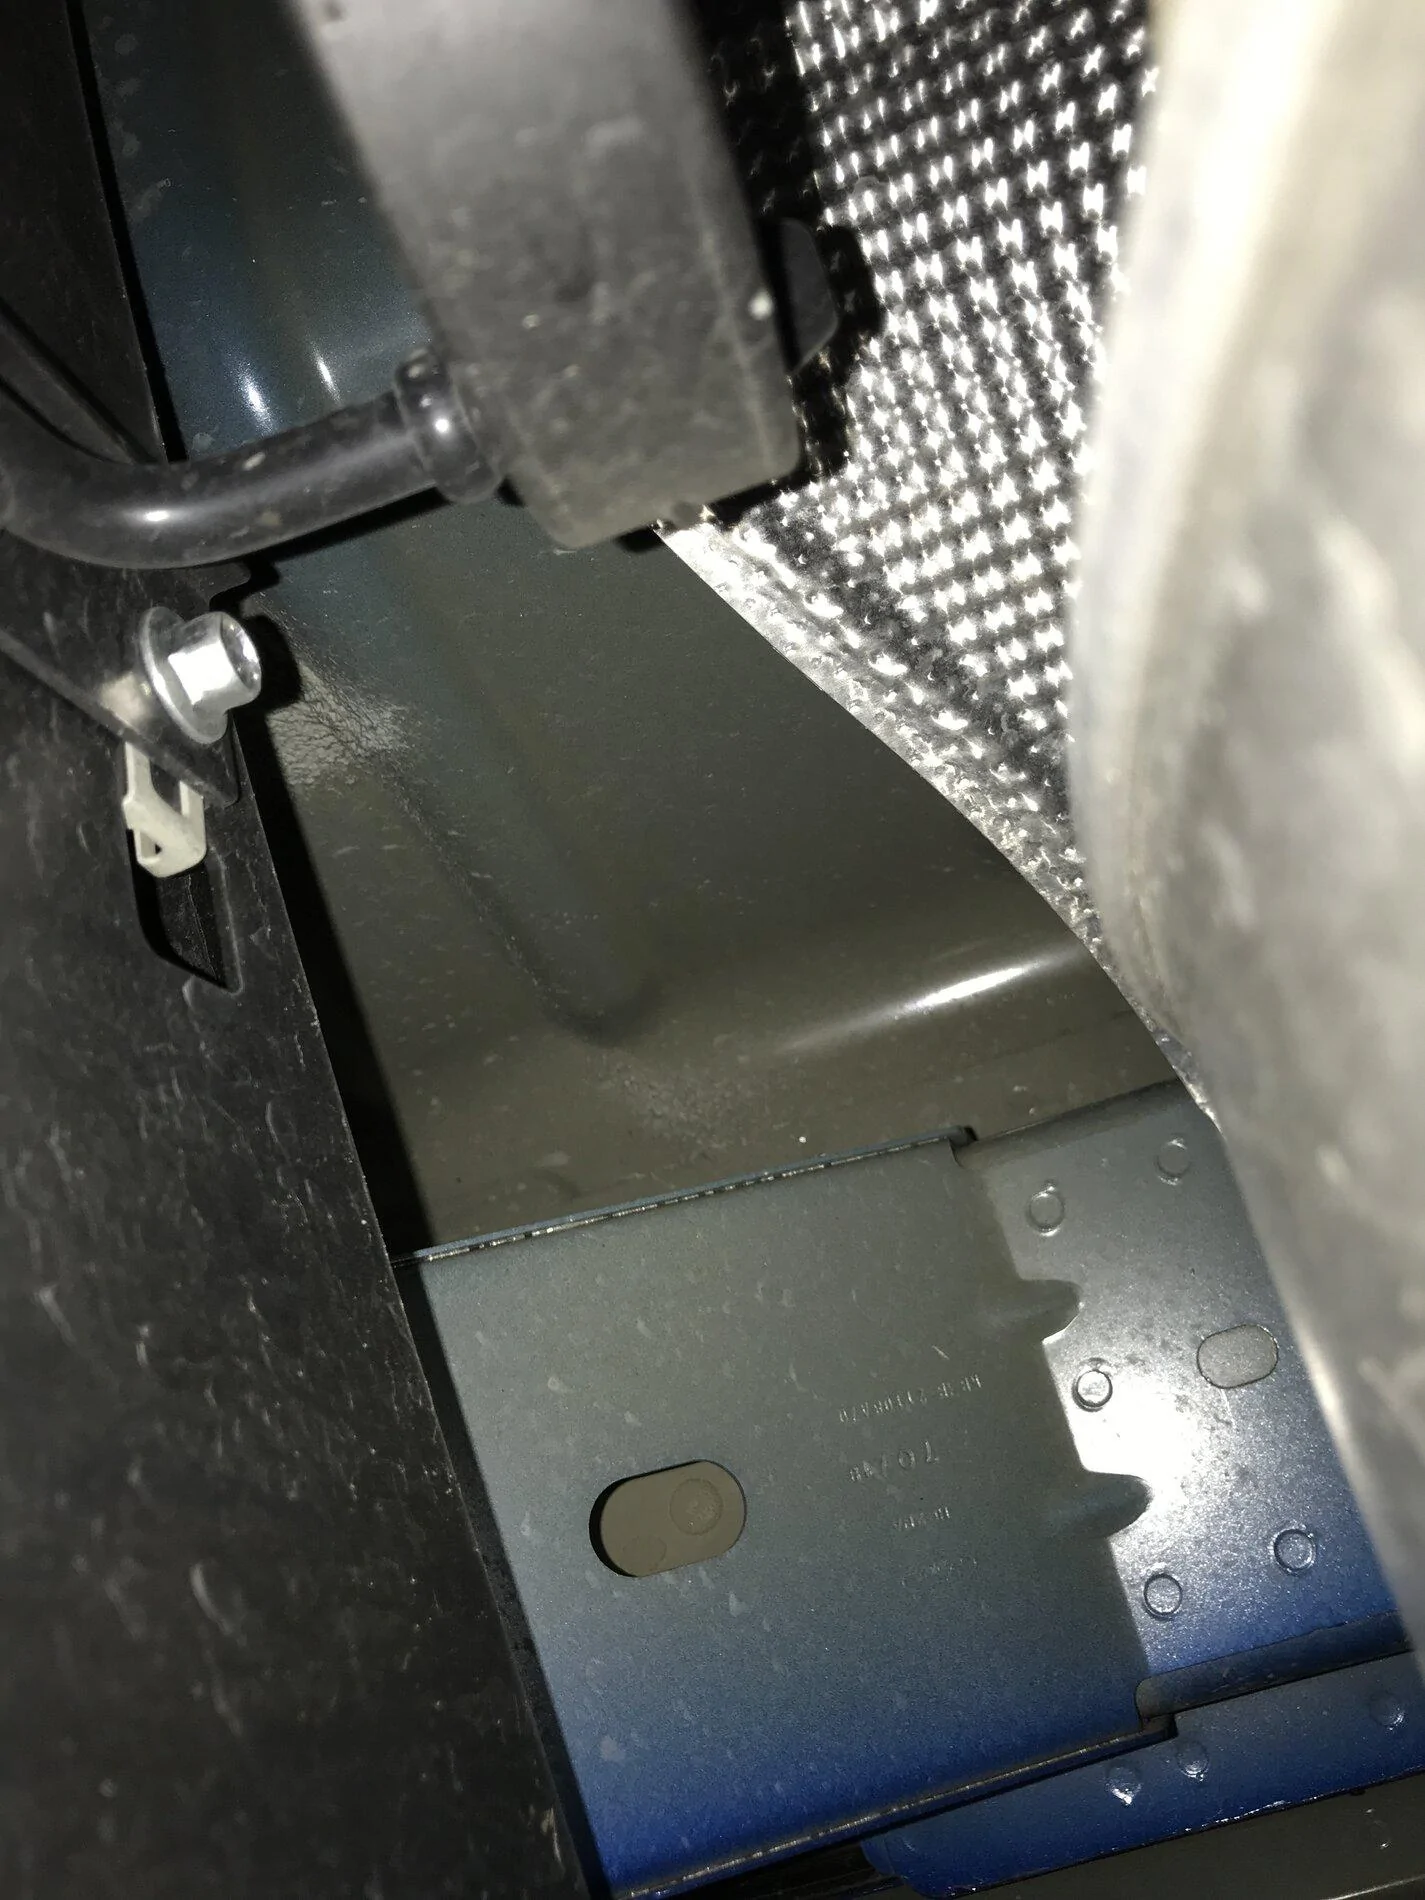
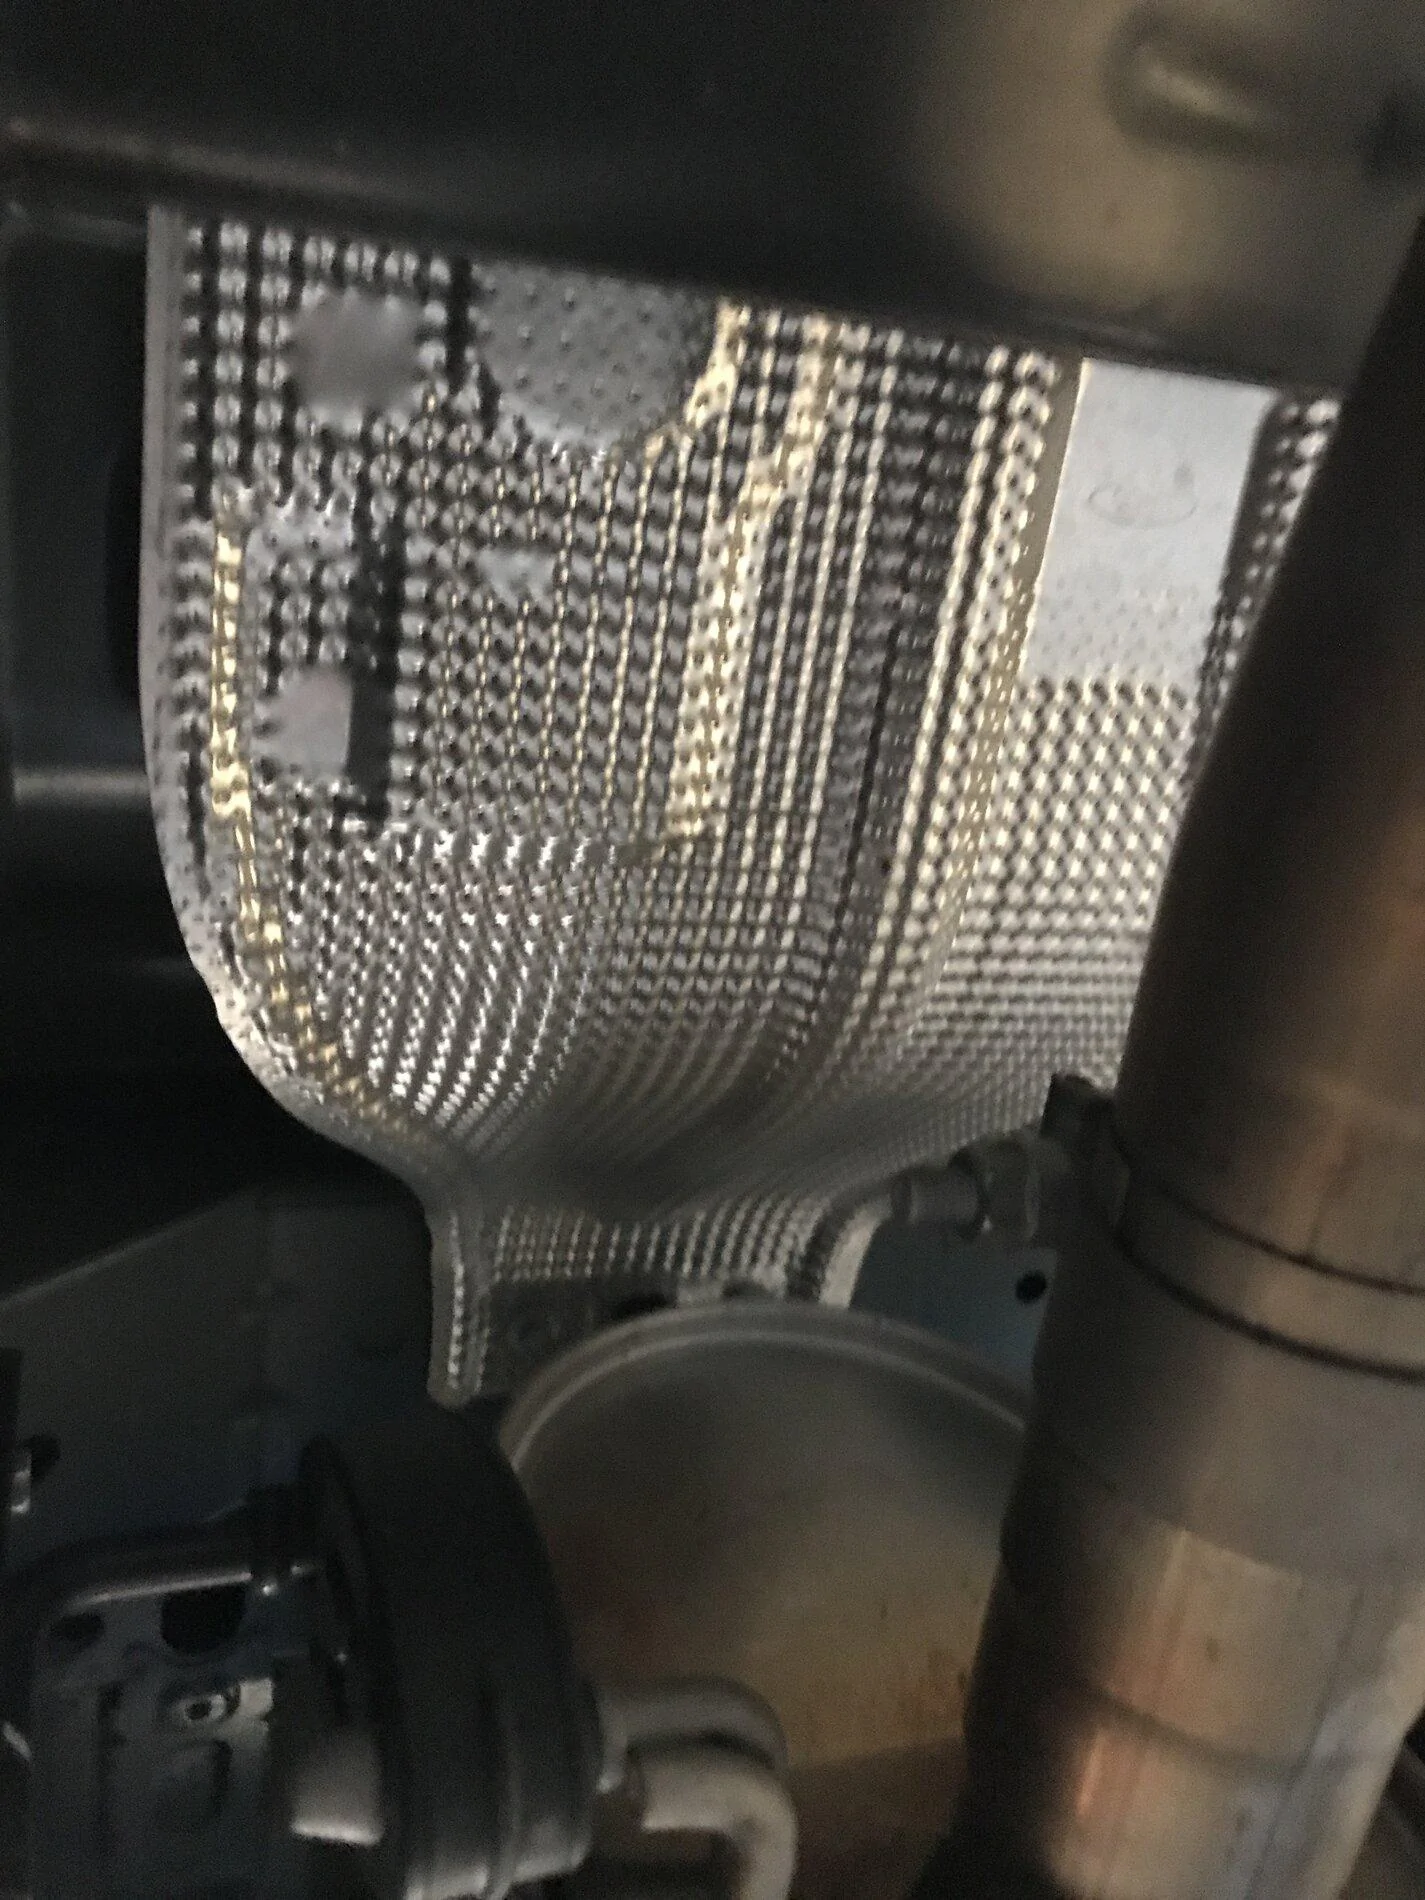
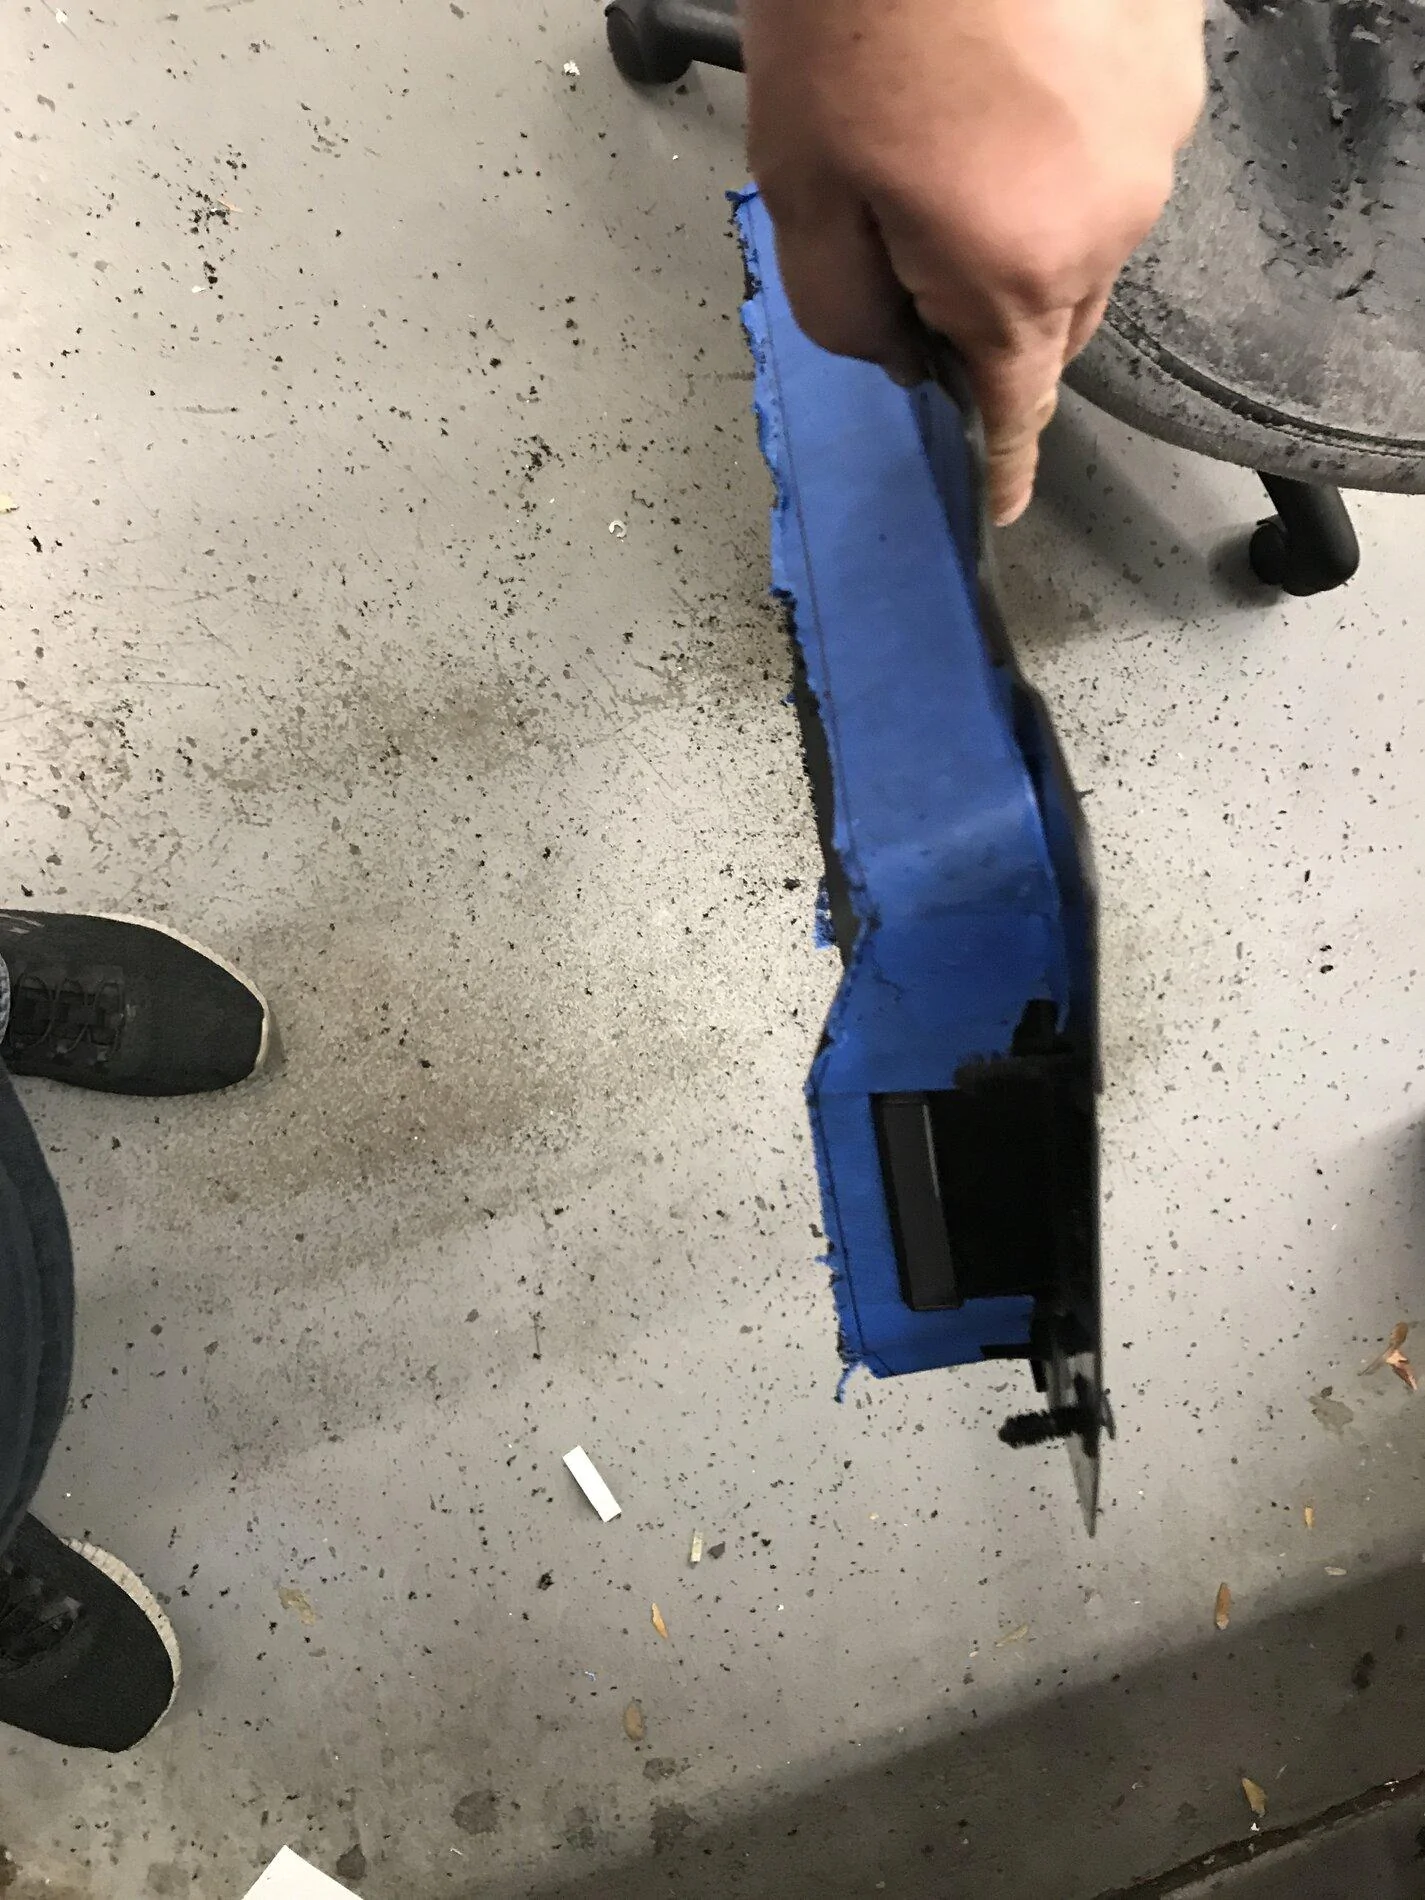
Started inspecting & testing for amp installation last weekend. As much as I’d love to use the unused 20A fuses in the Body Control Module, I really don’t want to brick a BCM if the amp starts heating things up. Still gonna use them
, but will run power wire from the engine compartment. Luckily only 8 gauge is needed, so passing thru should be easy.

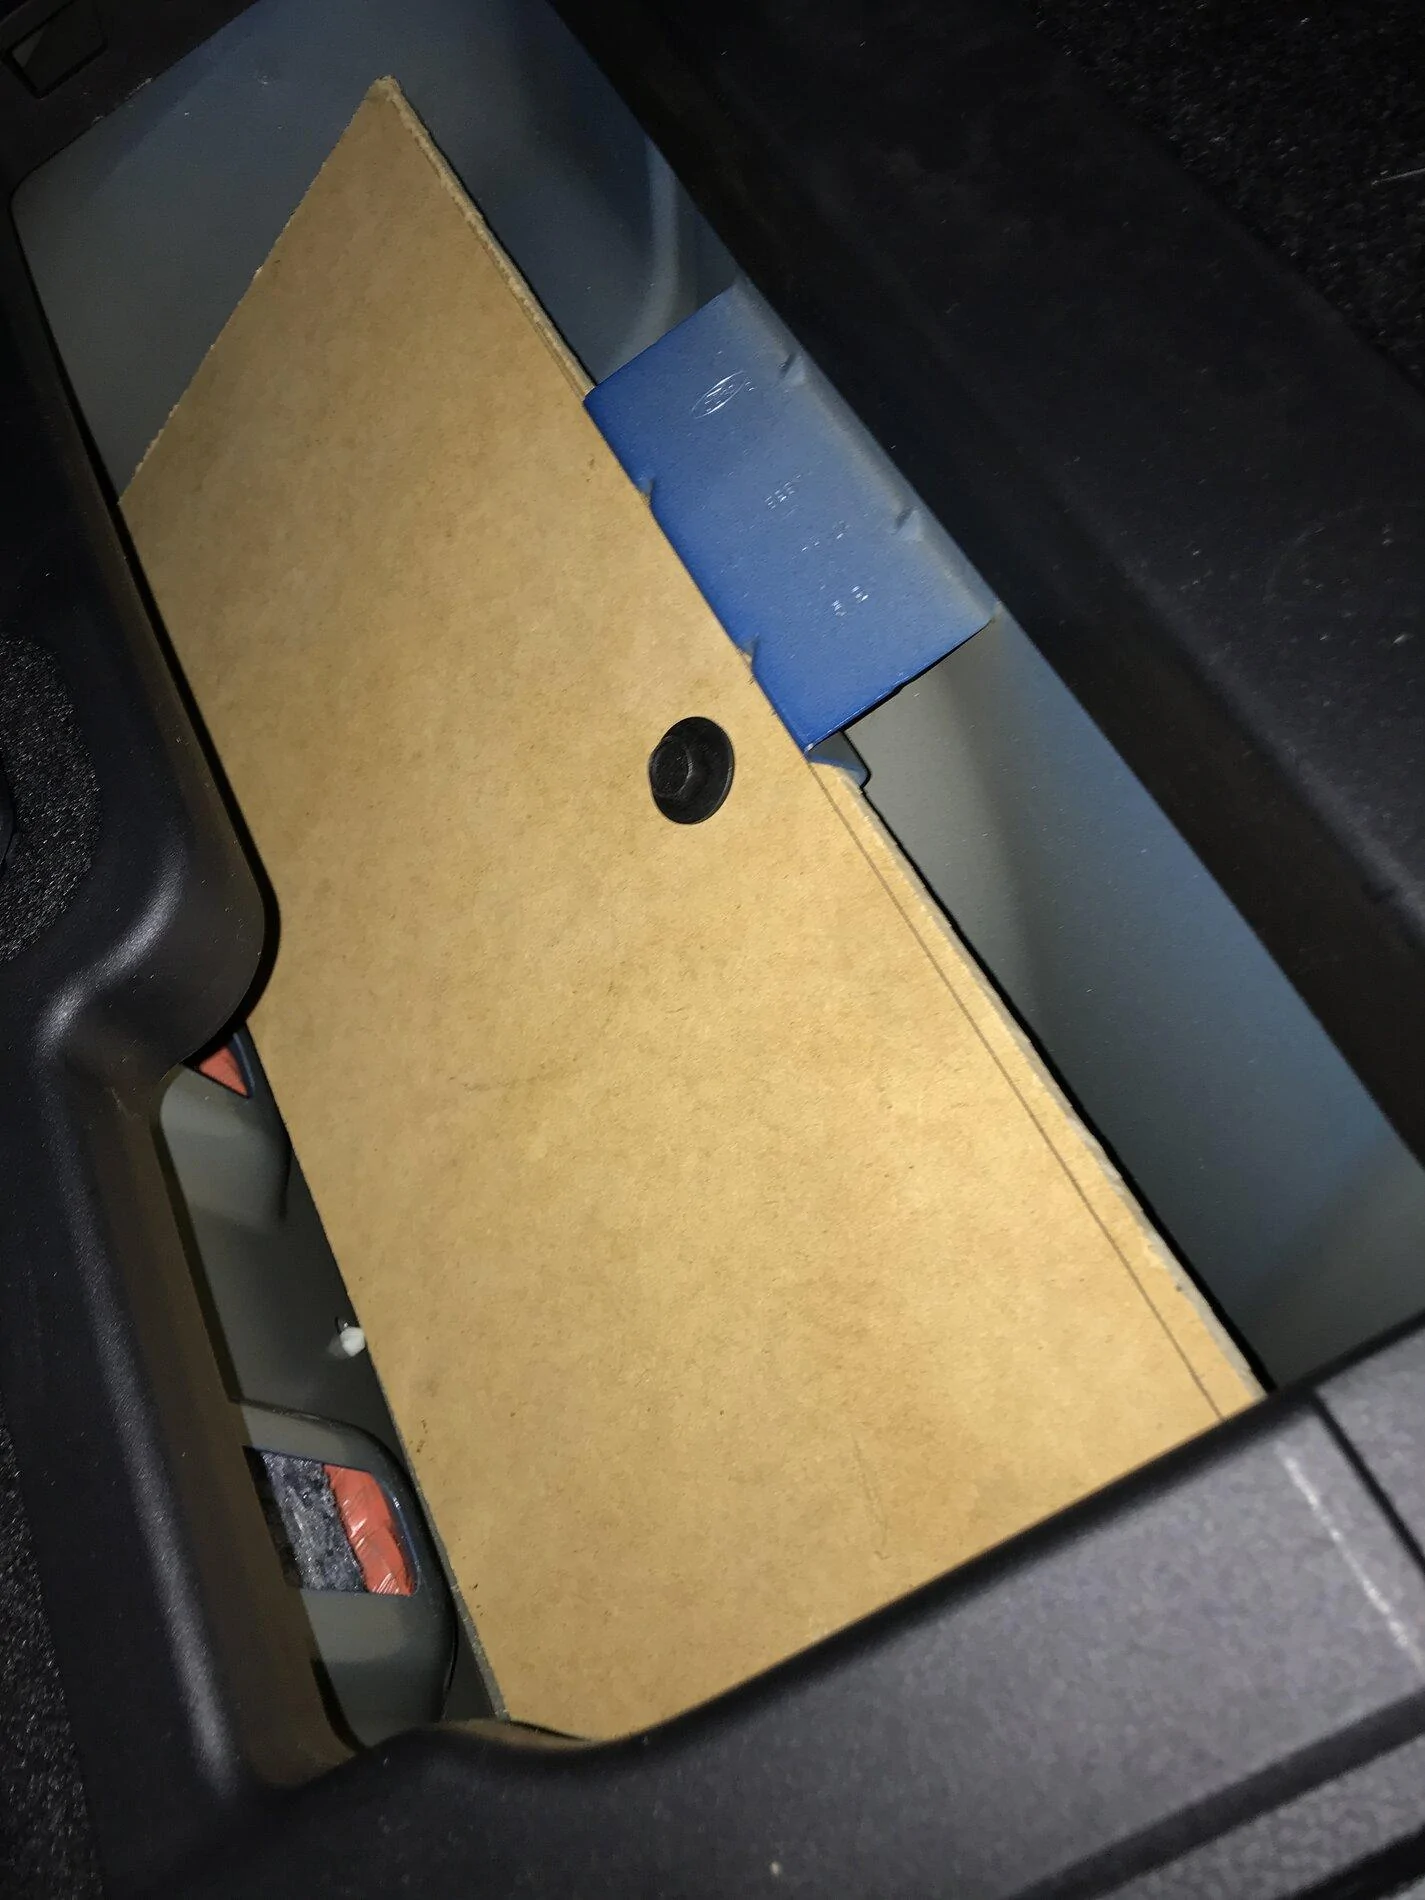
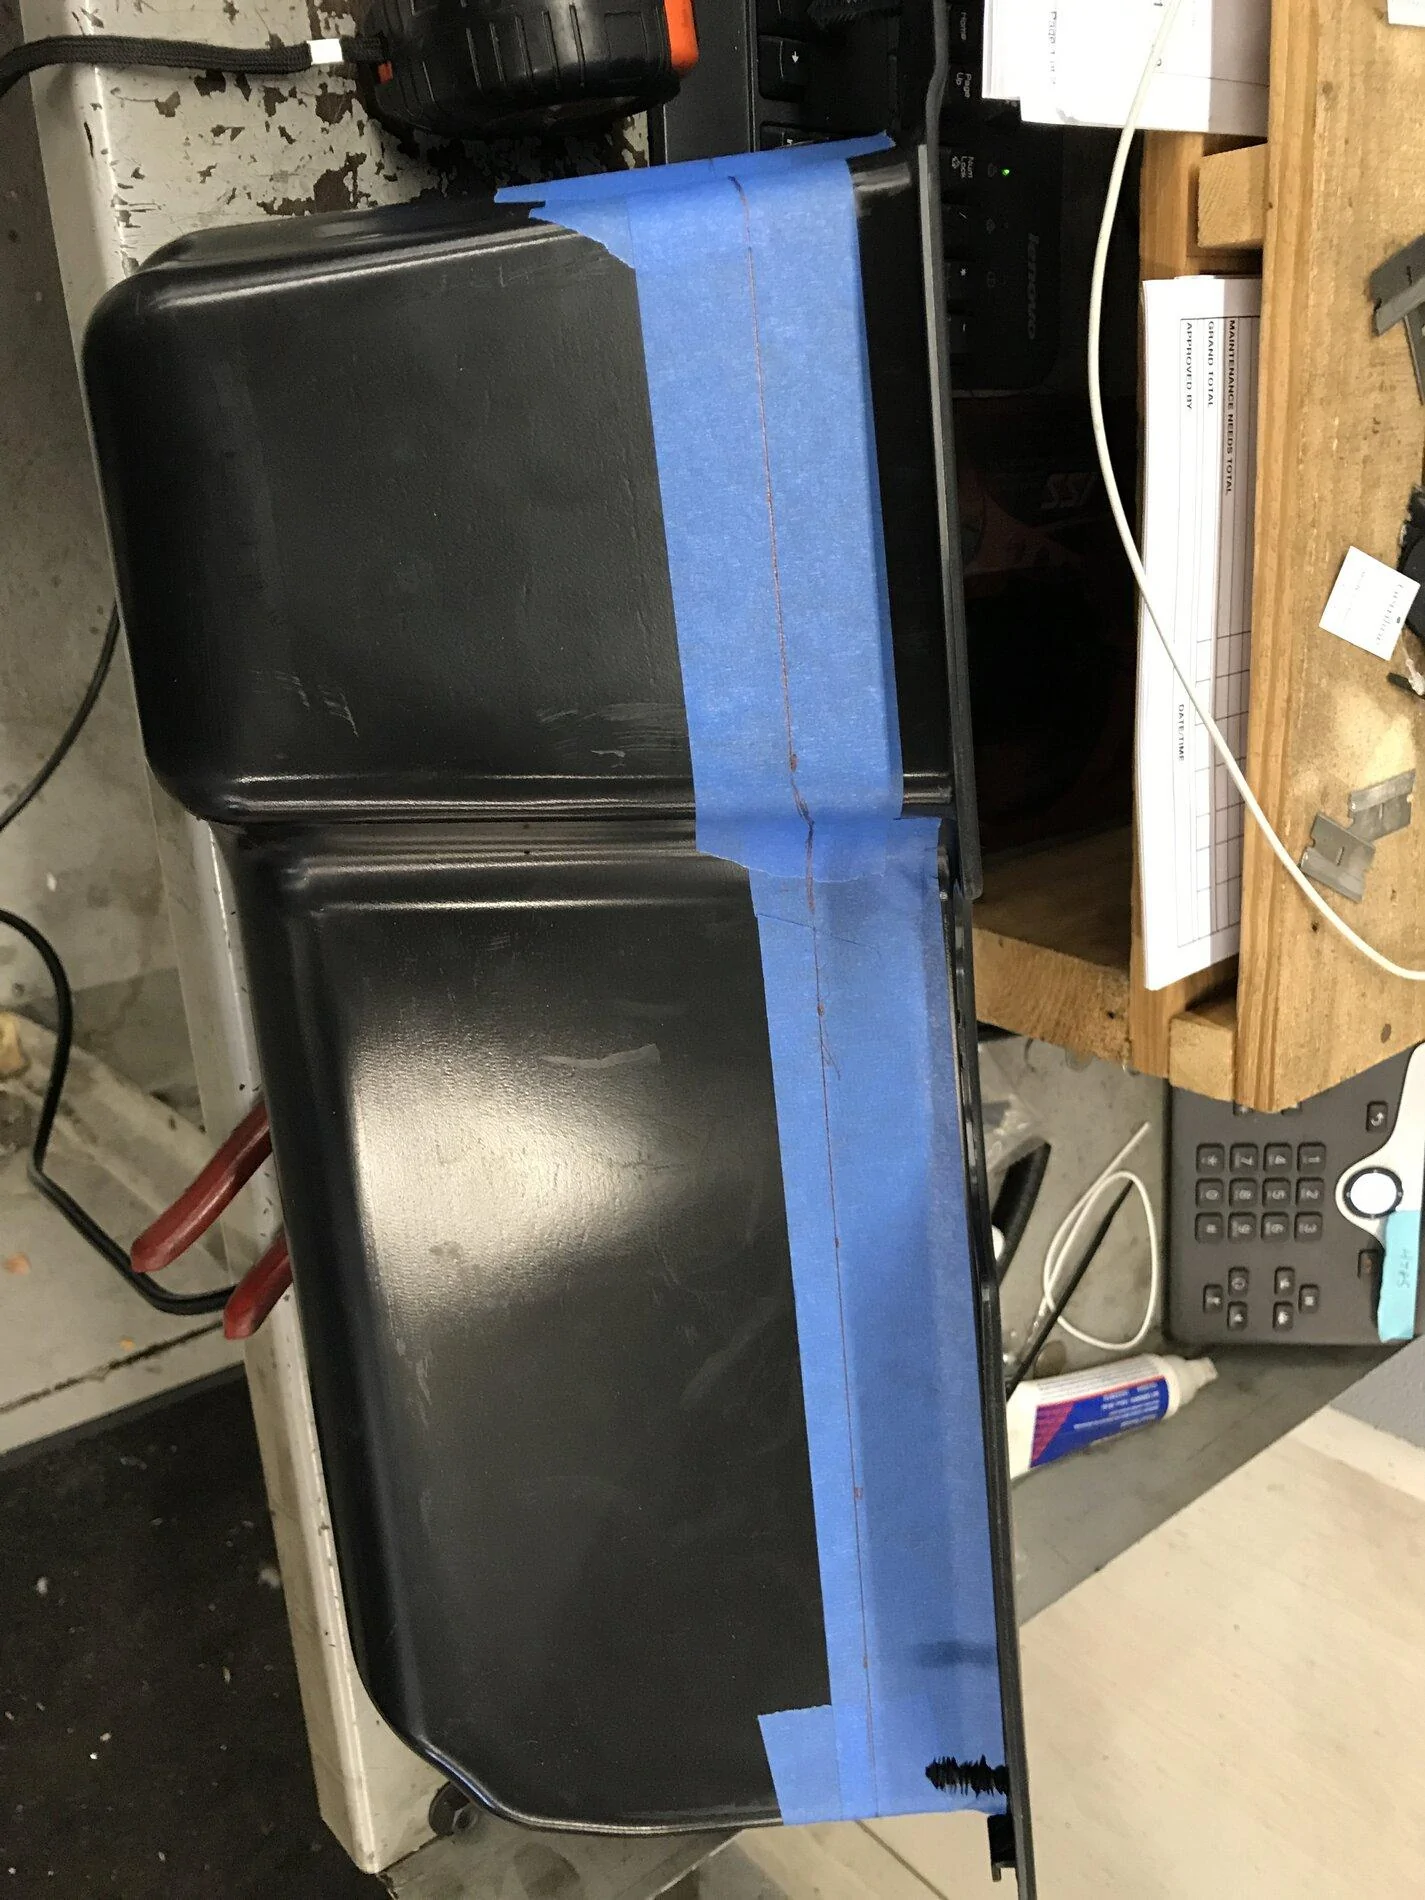
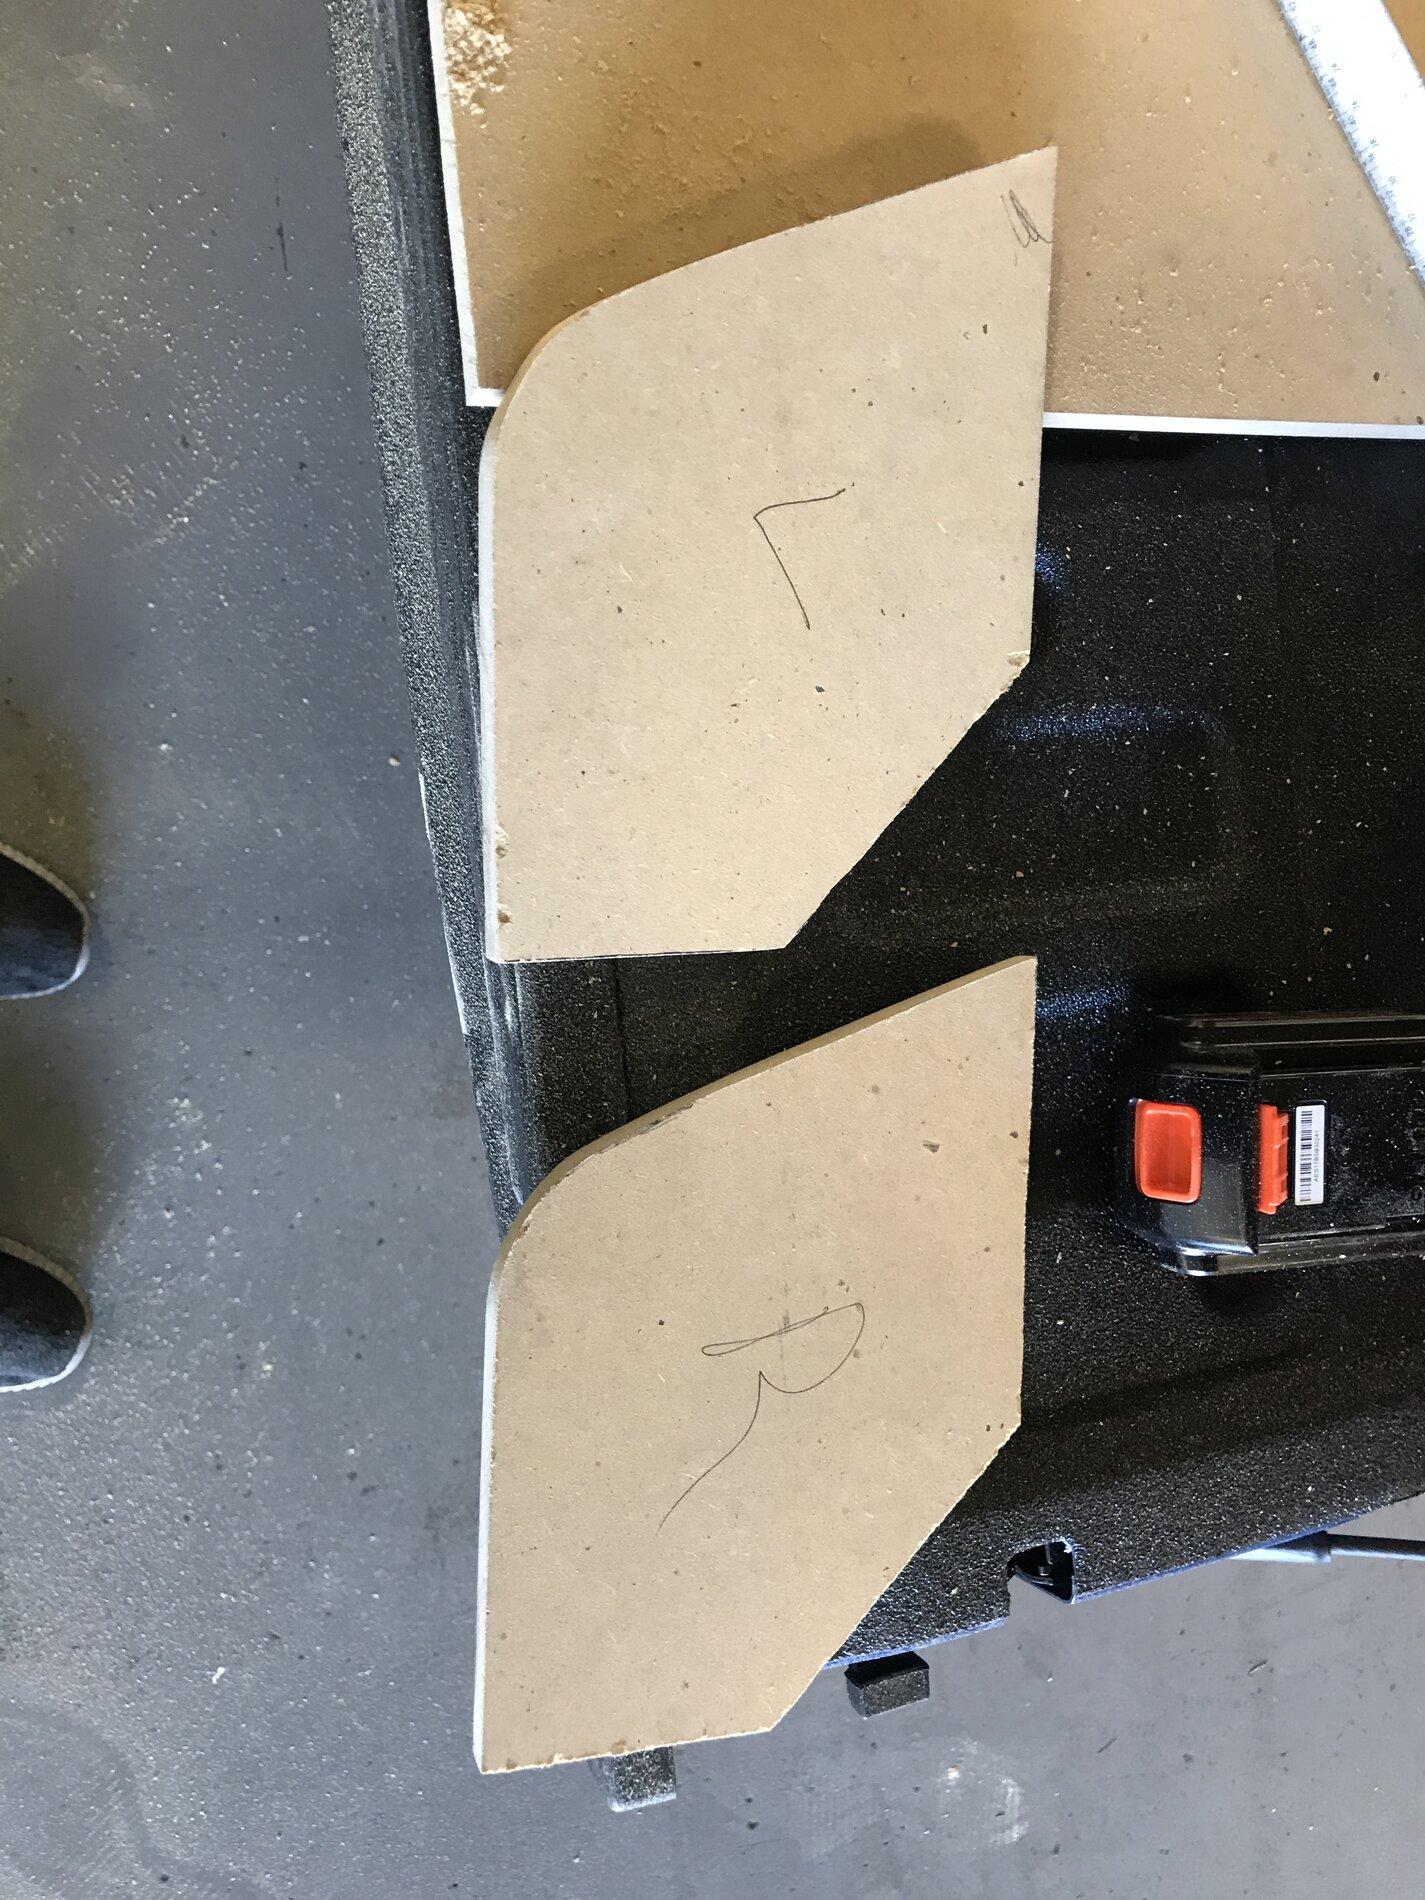
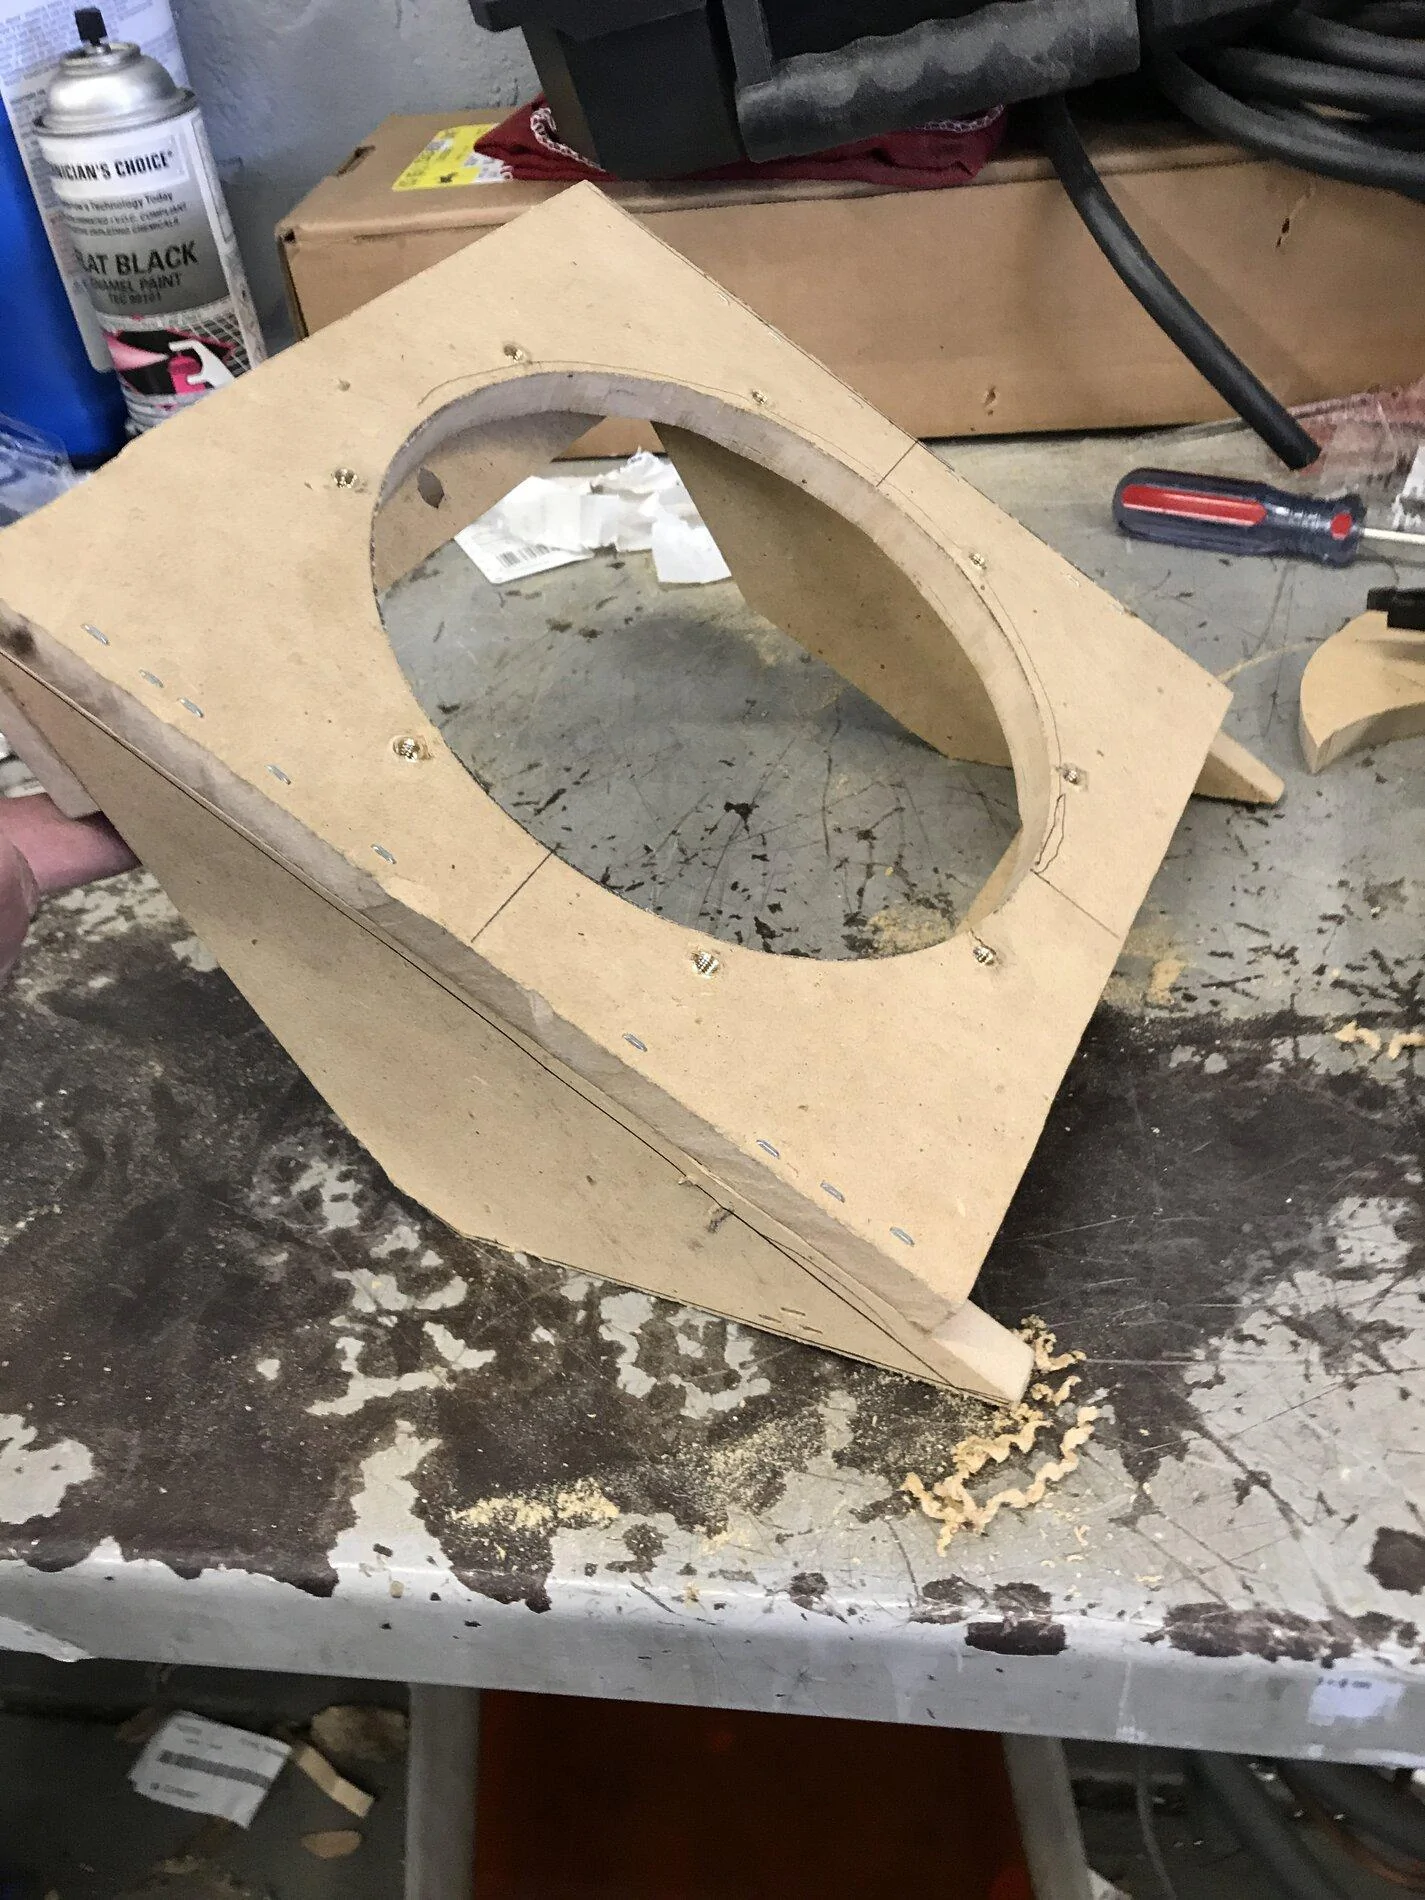
Made an amp mounting platform from a scrap piece of 1/4 inch mdf. Will probably make another as more room is needed for the sub amp in the future.

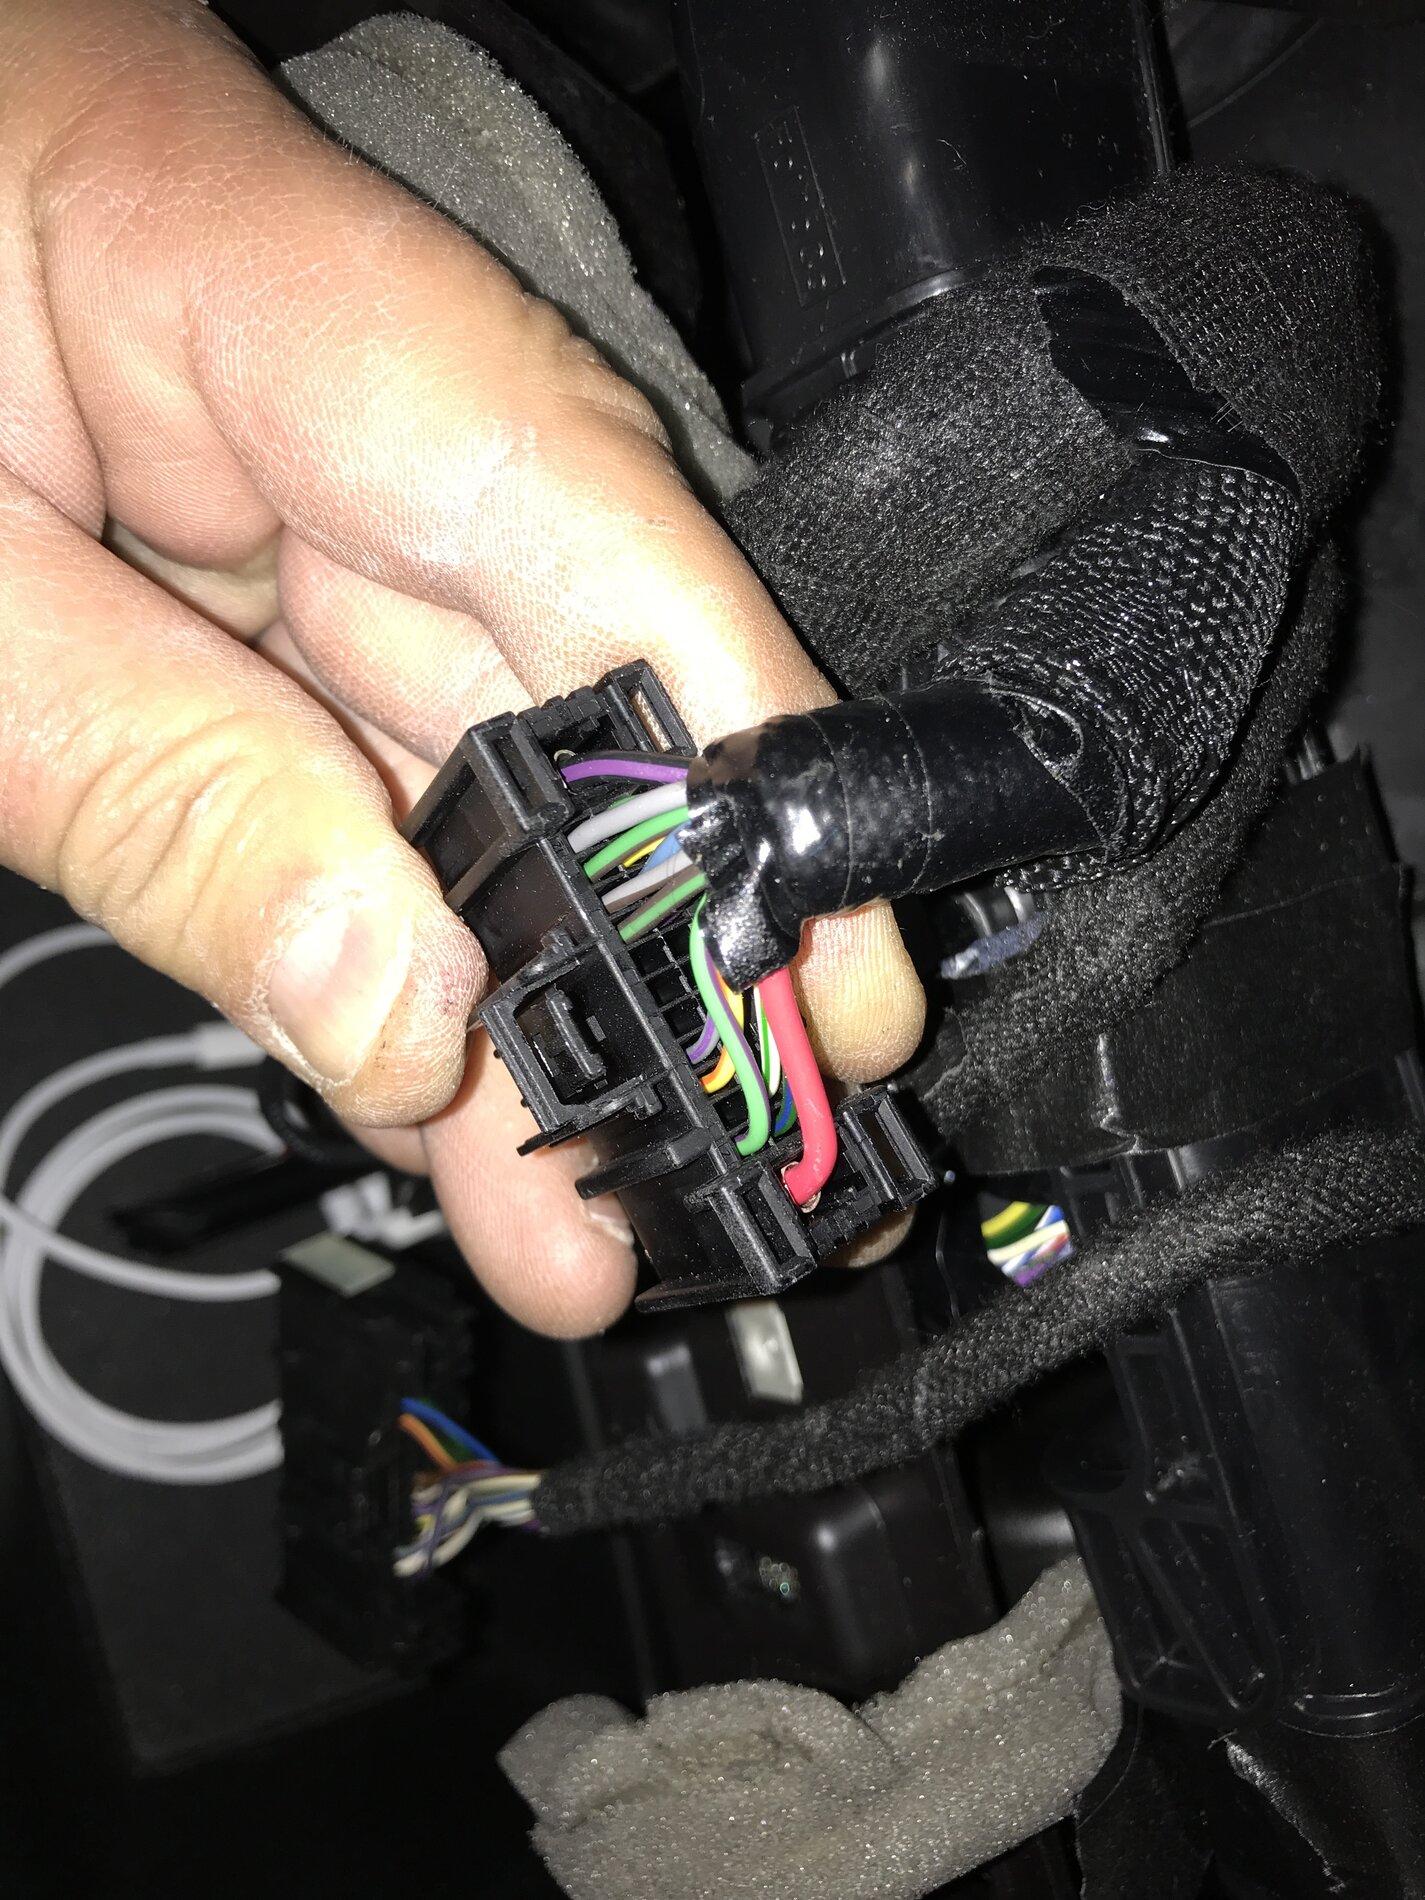
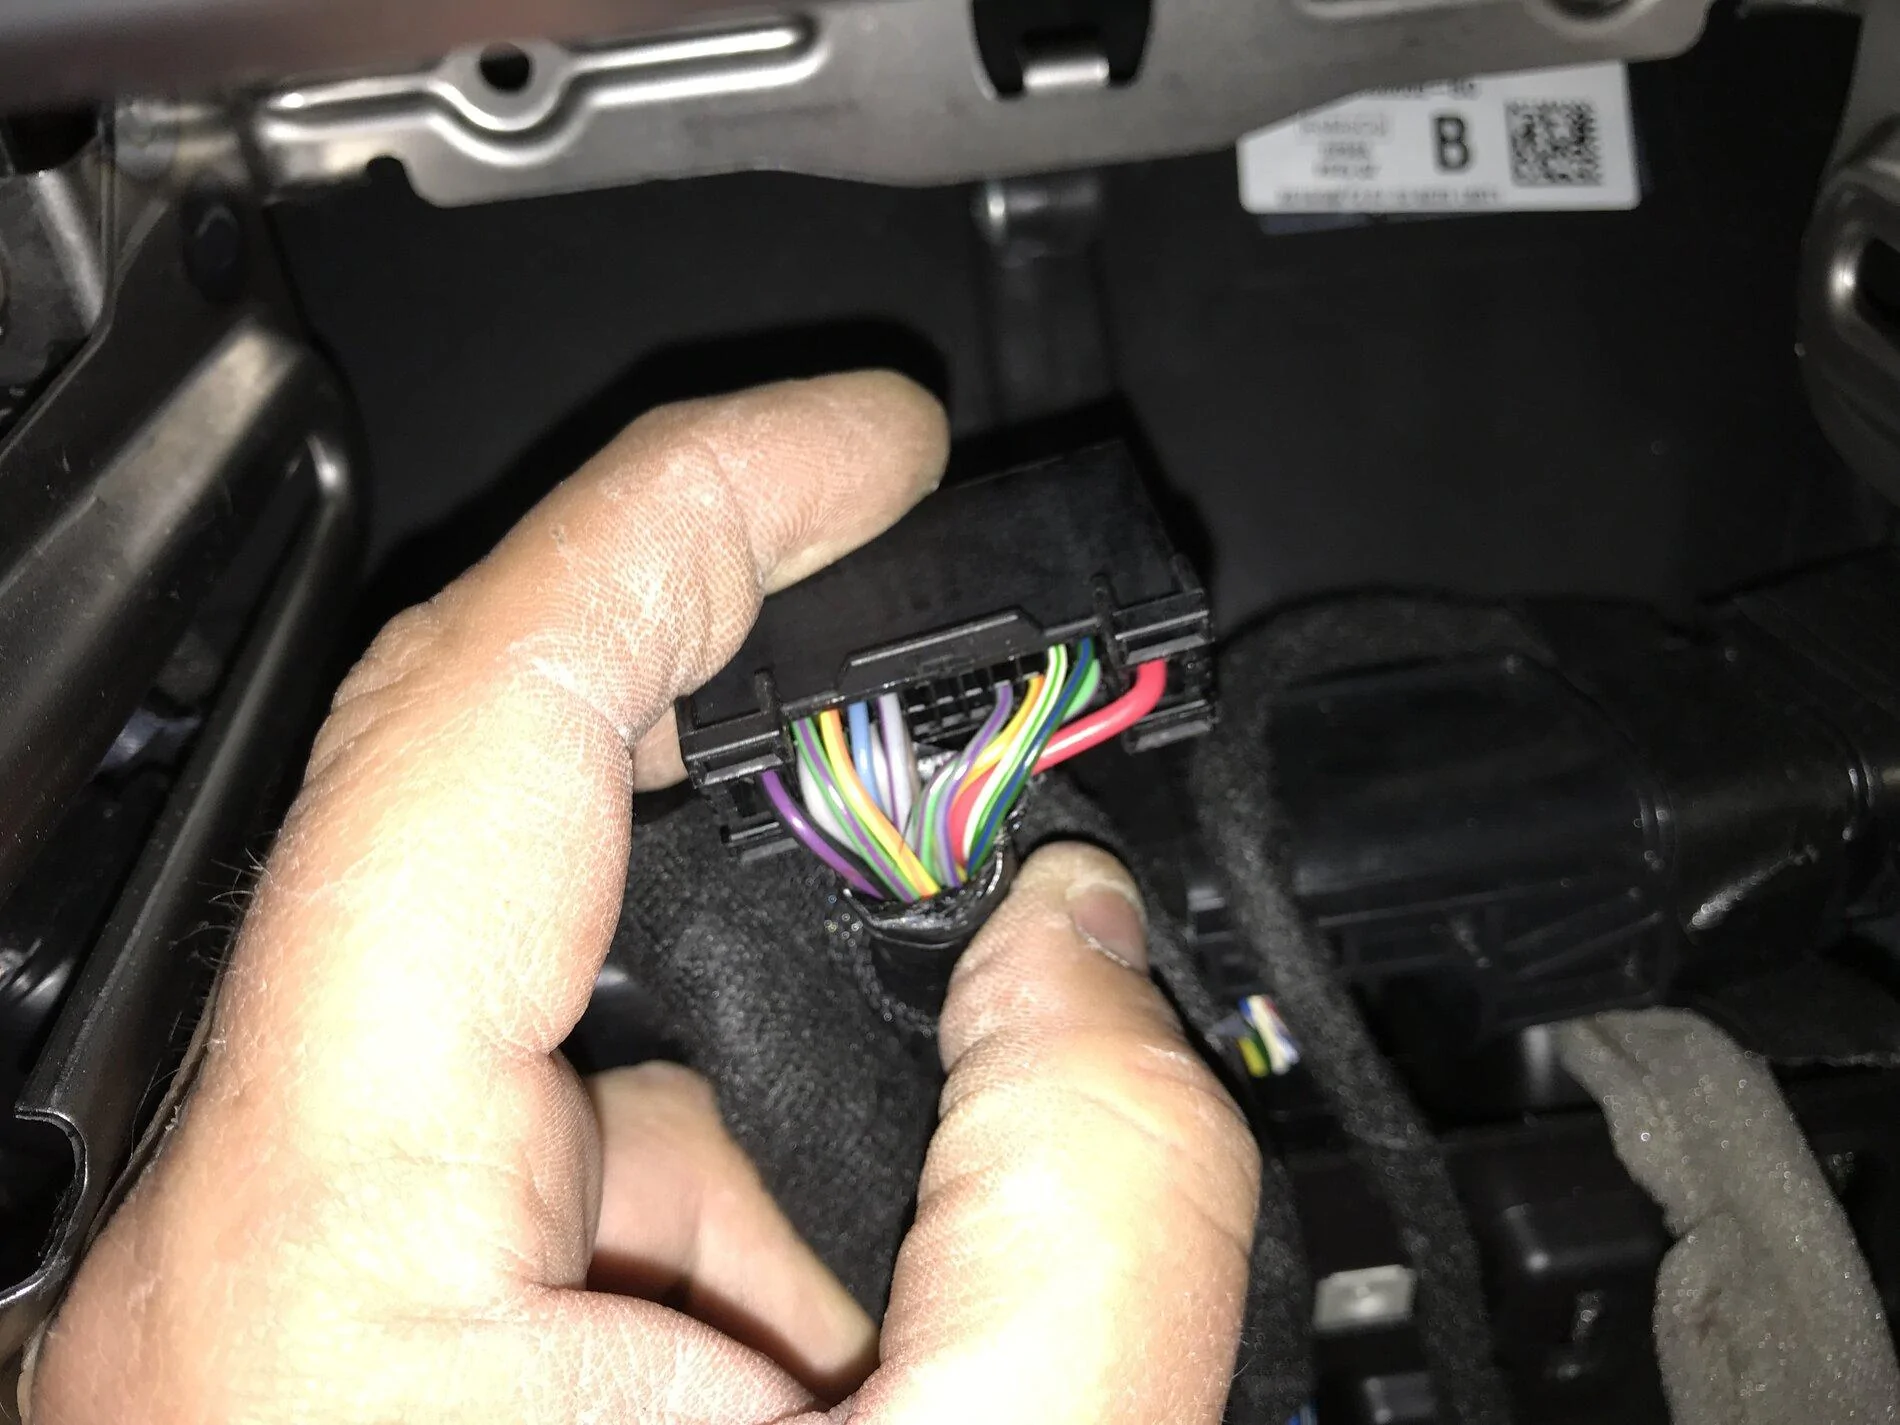
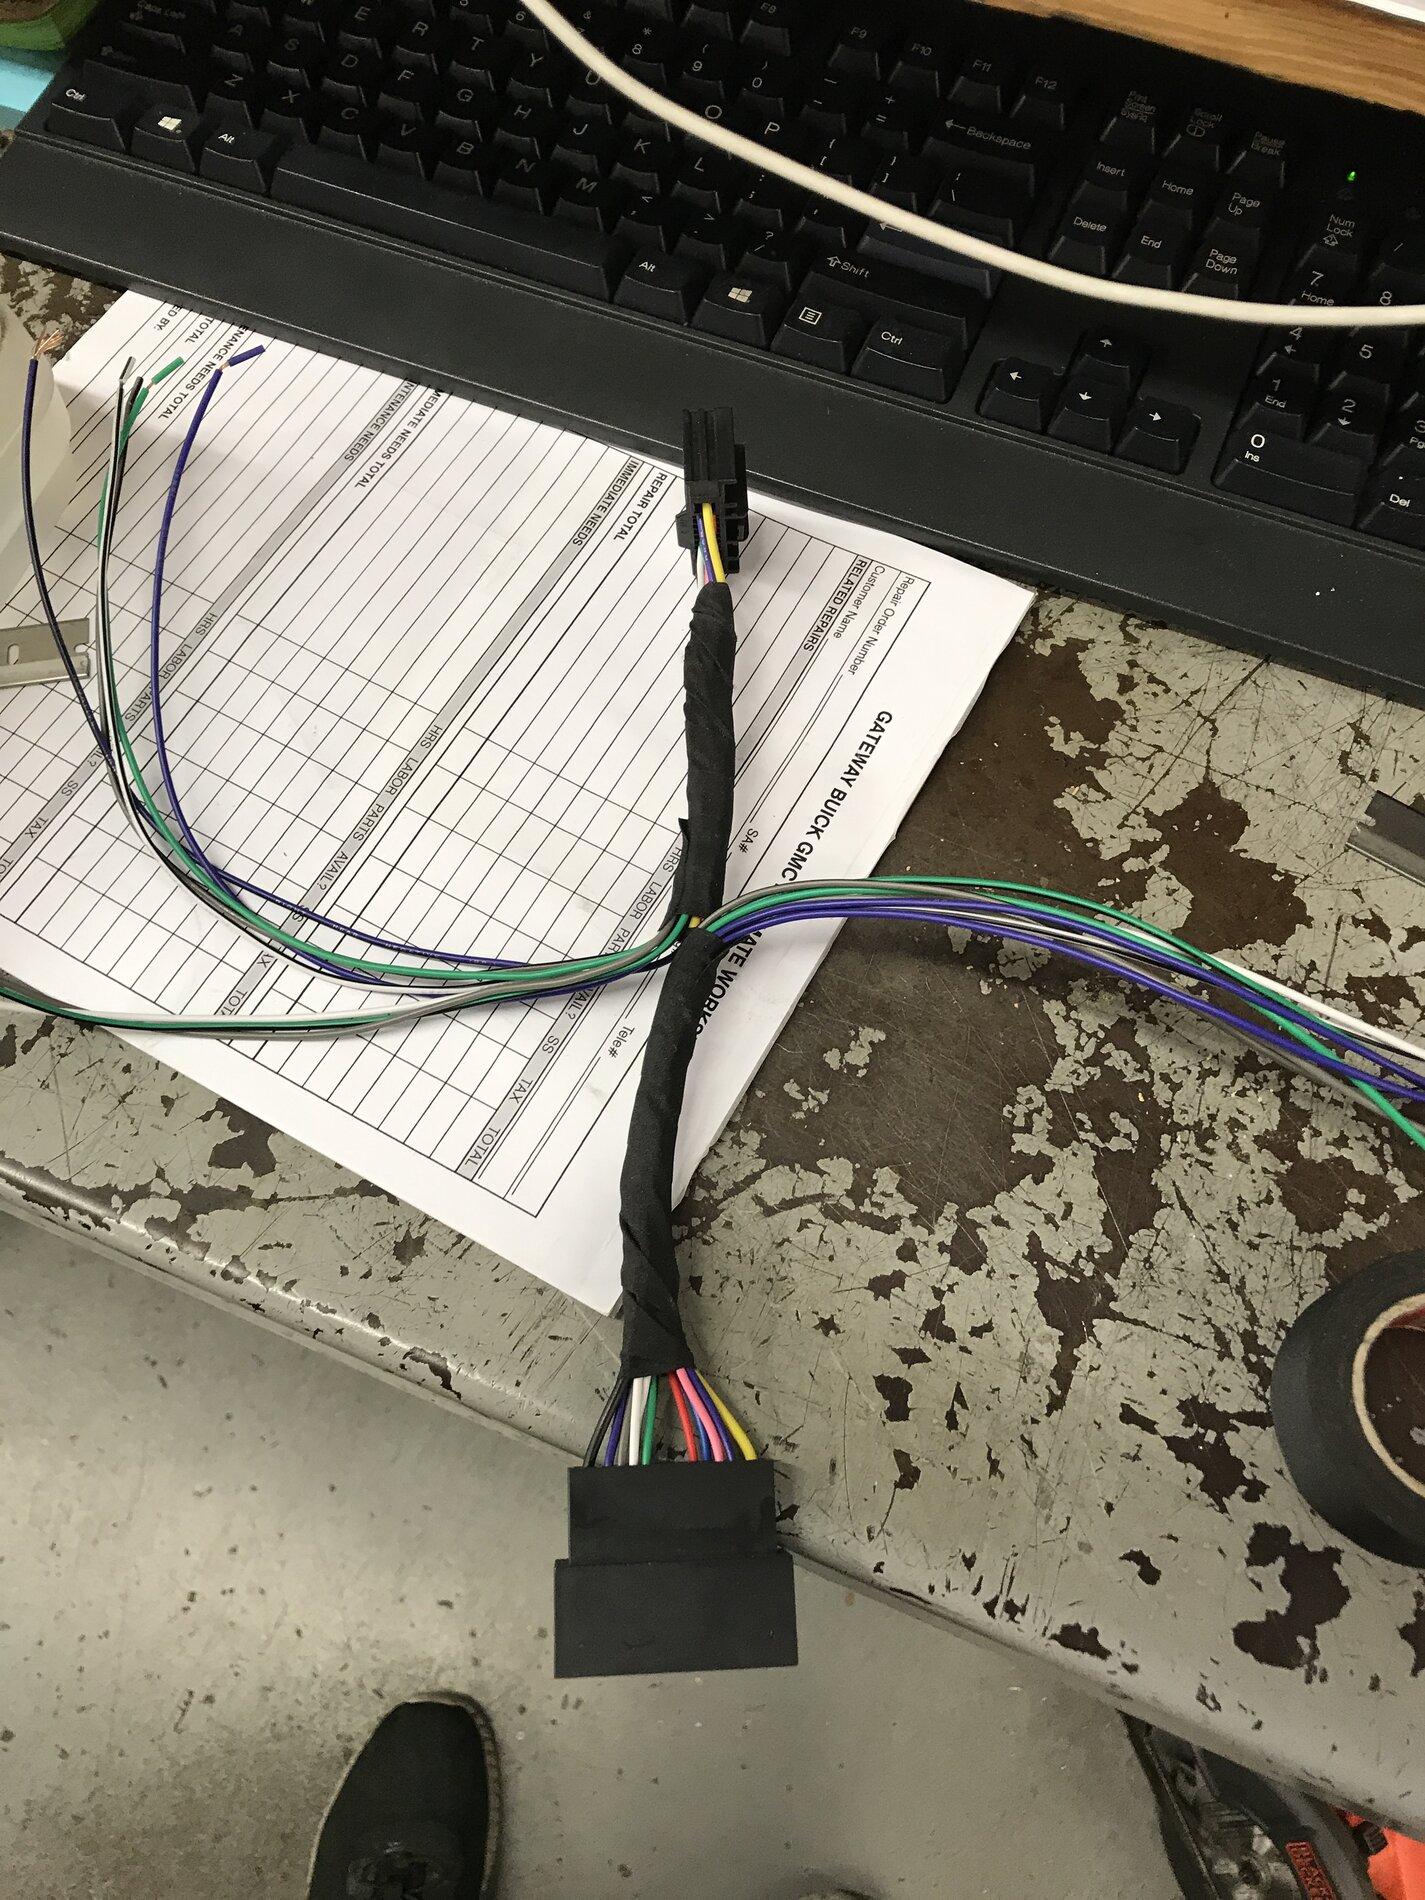
Pulled the radio to compare the radio connection with the t-harness & removed unnecessary wires. Still debating on whether to install connectors on the 9-wire to the t-harness as space is very limited in this dash & connectors cost more than I wanna spend, but are very convenient if stuff needs removing.

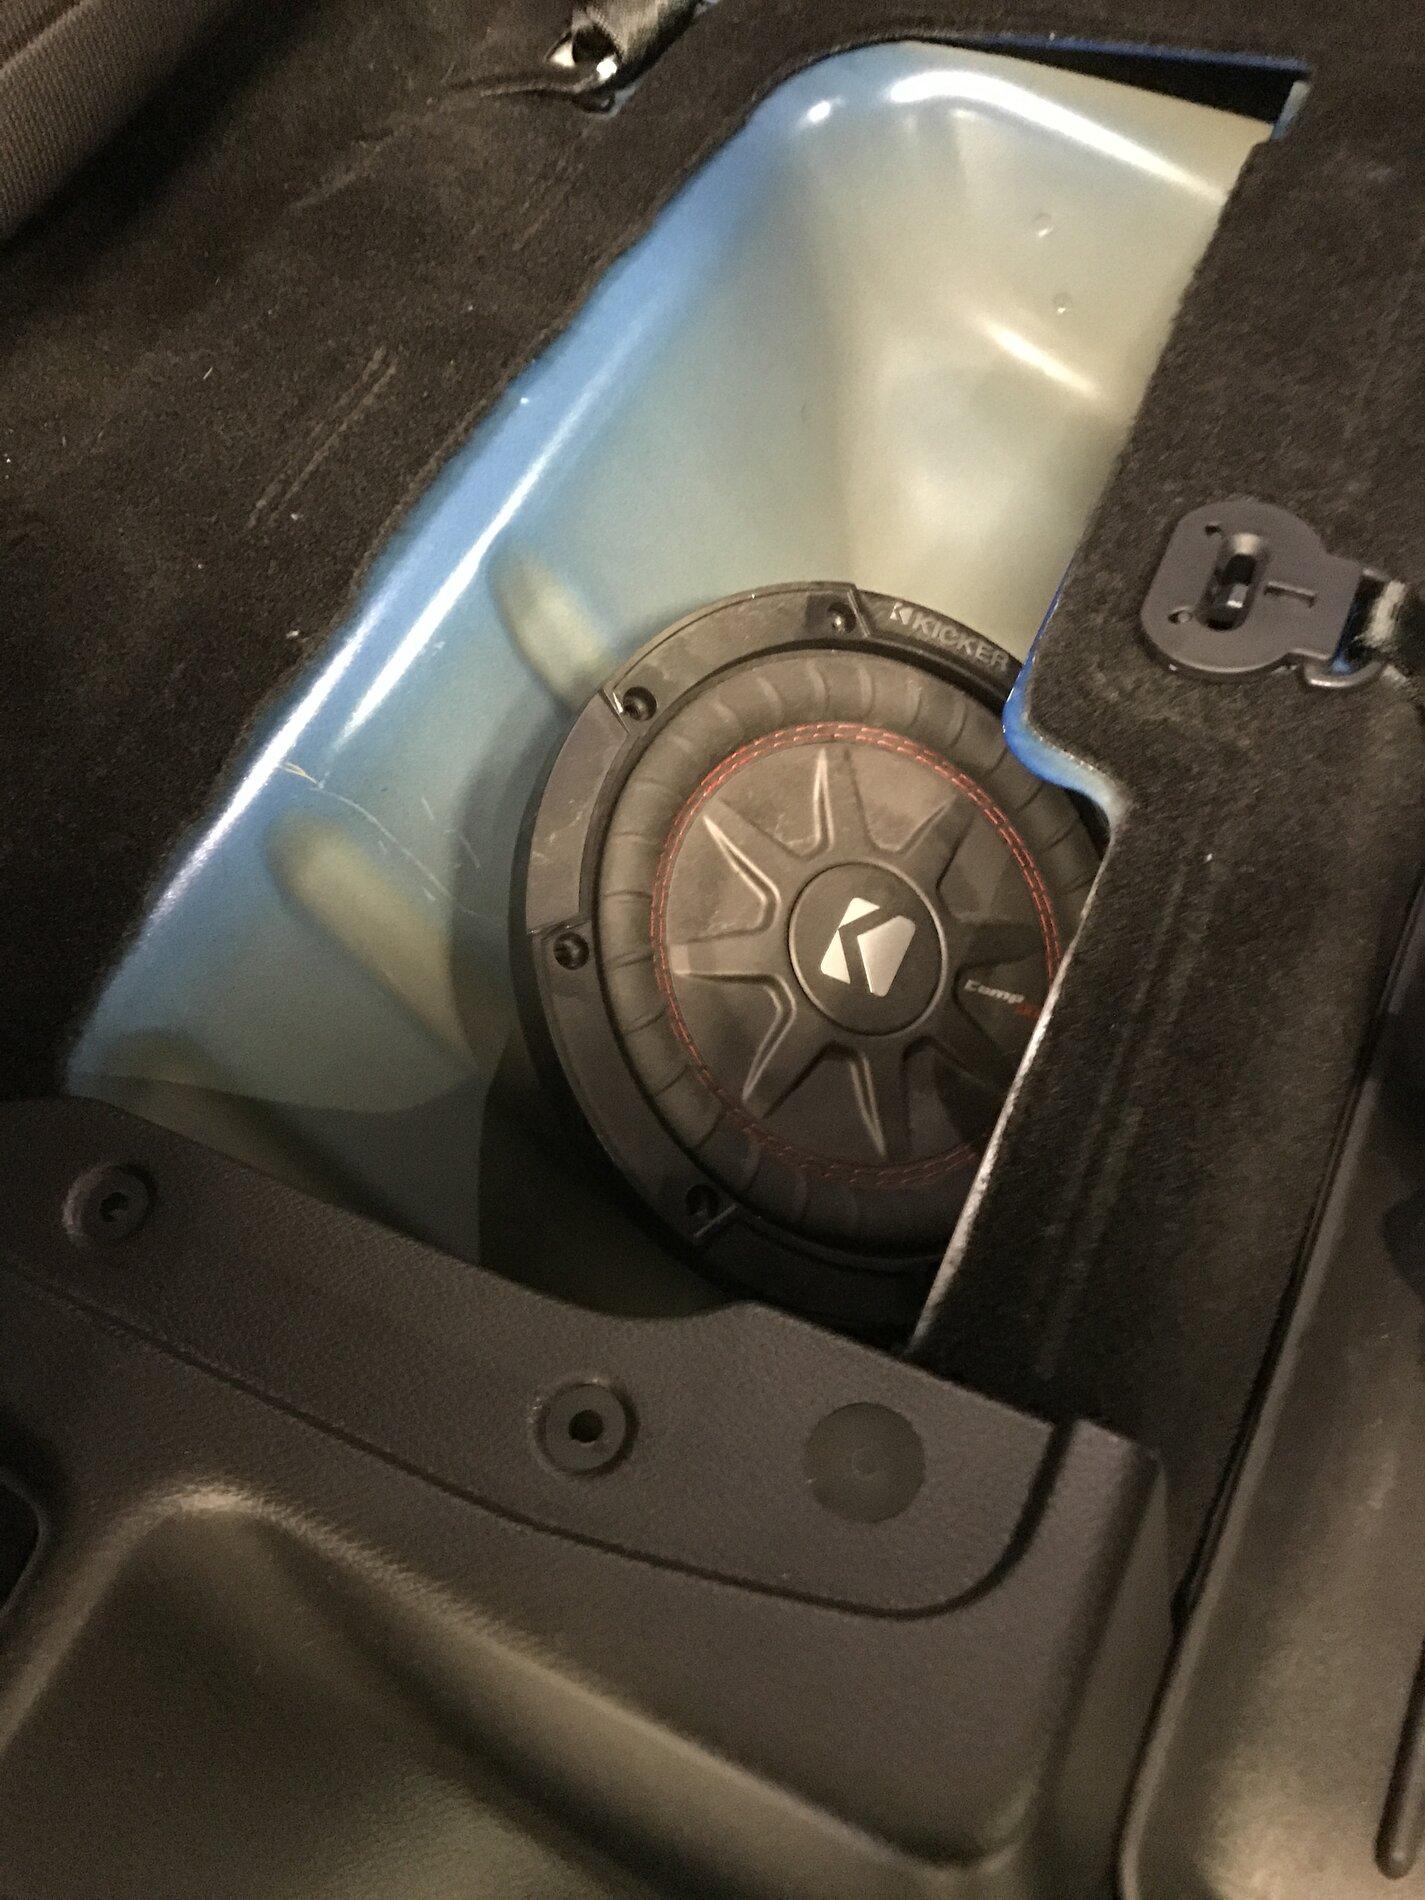
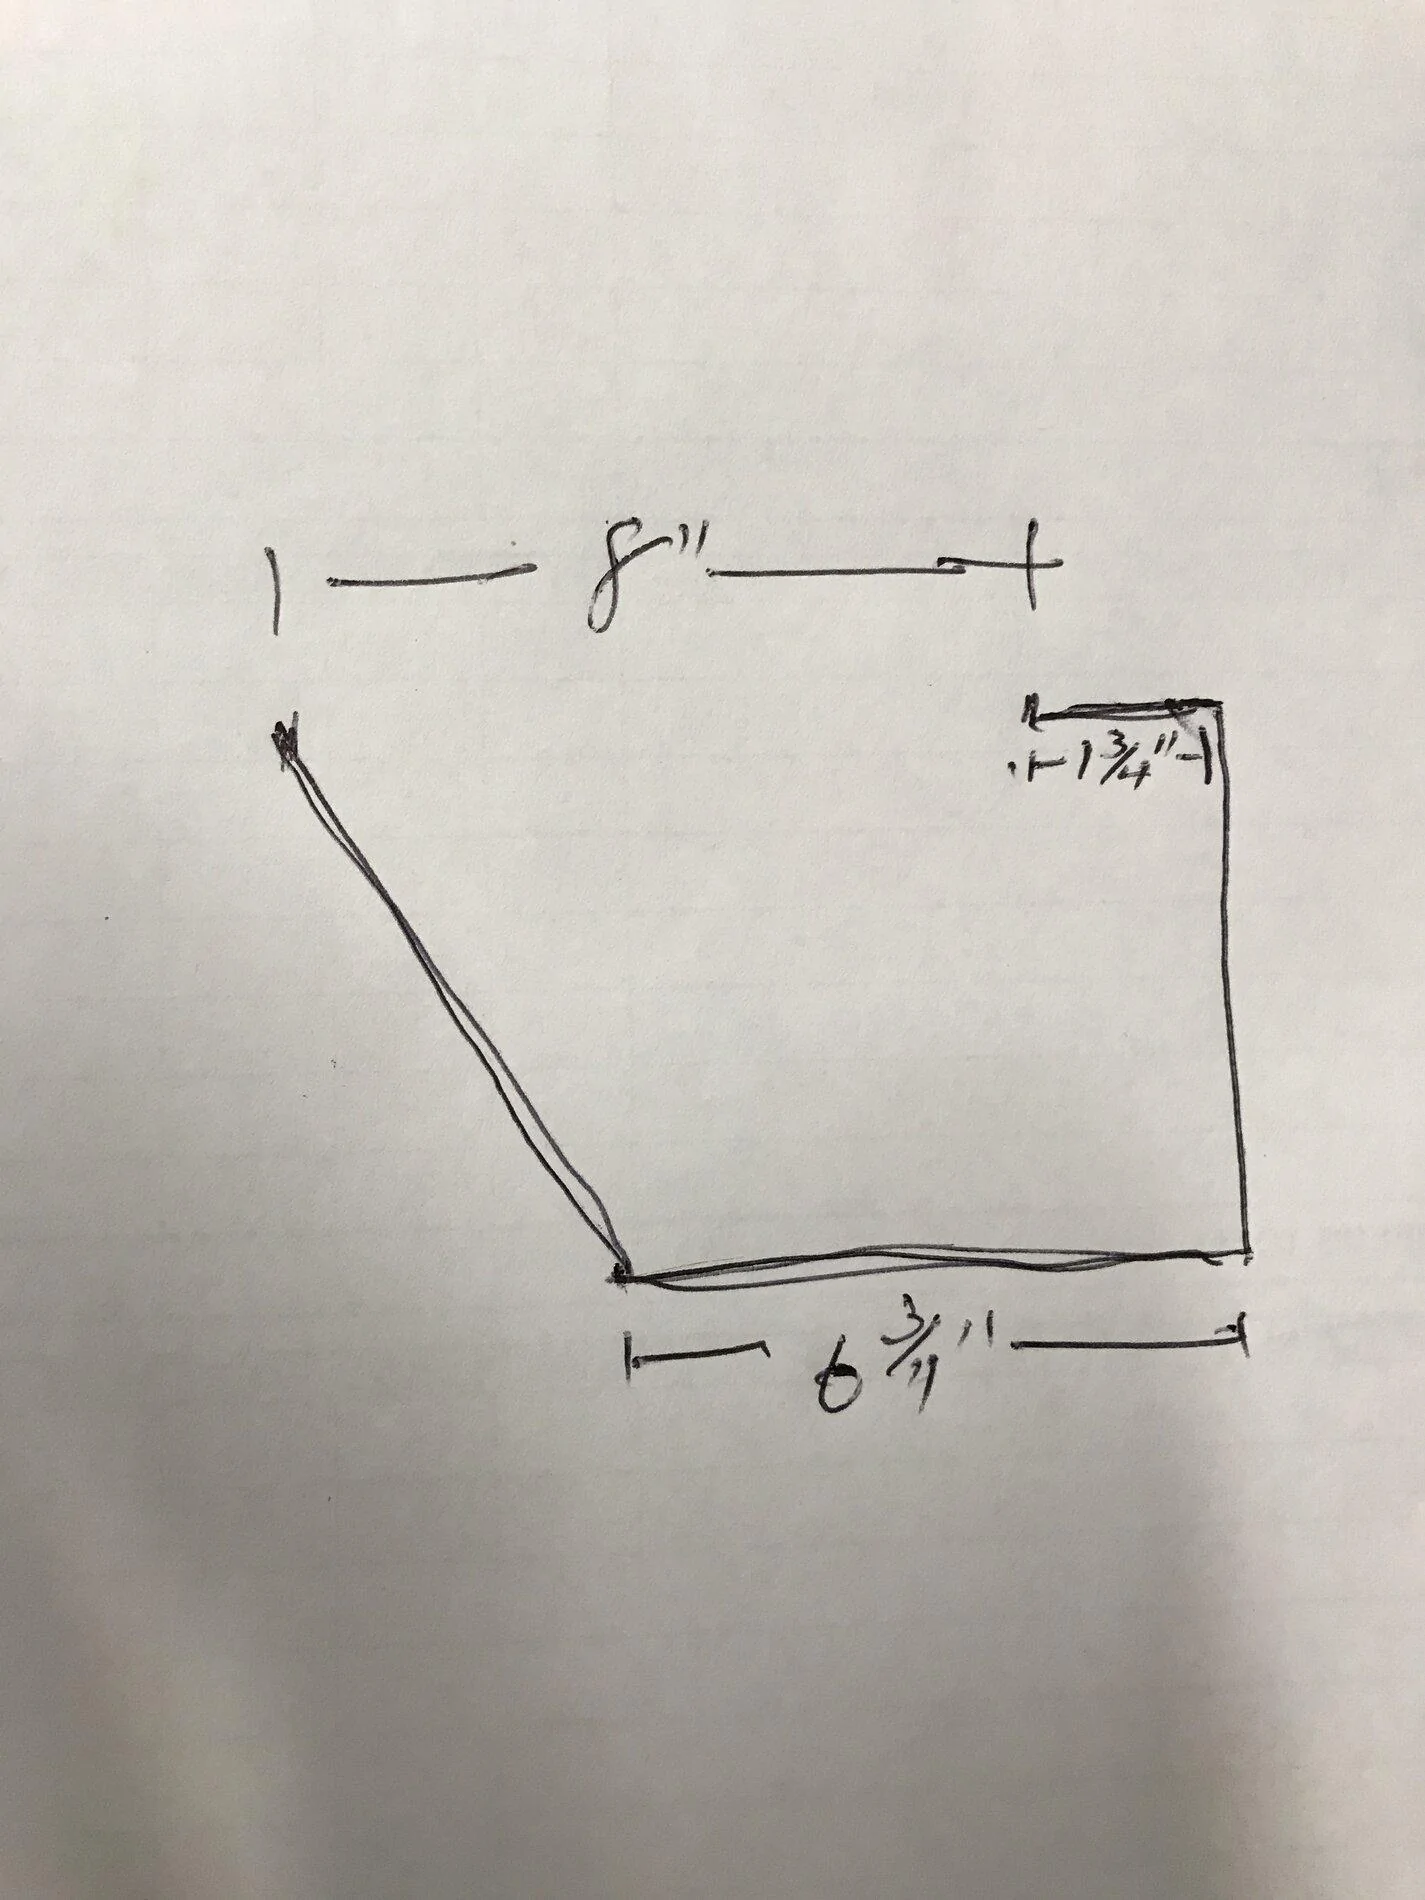
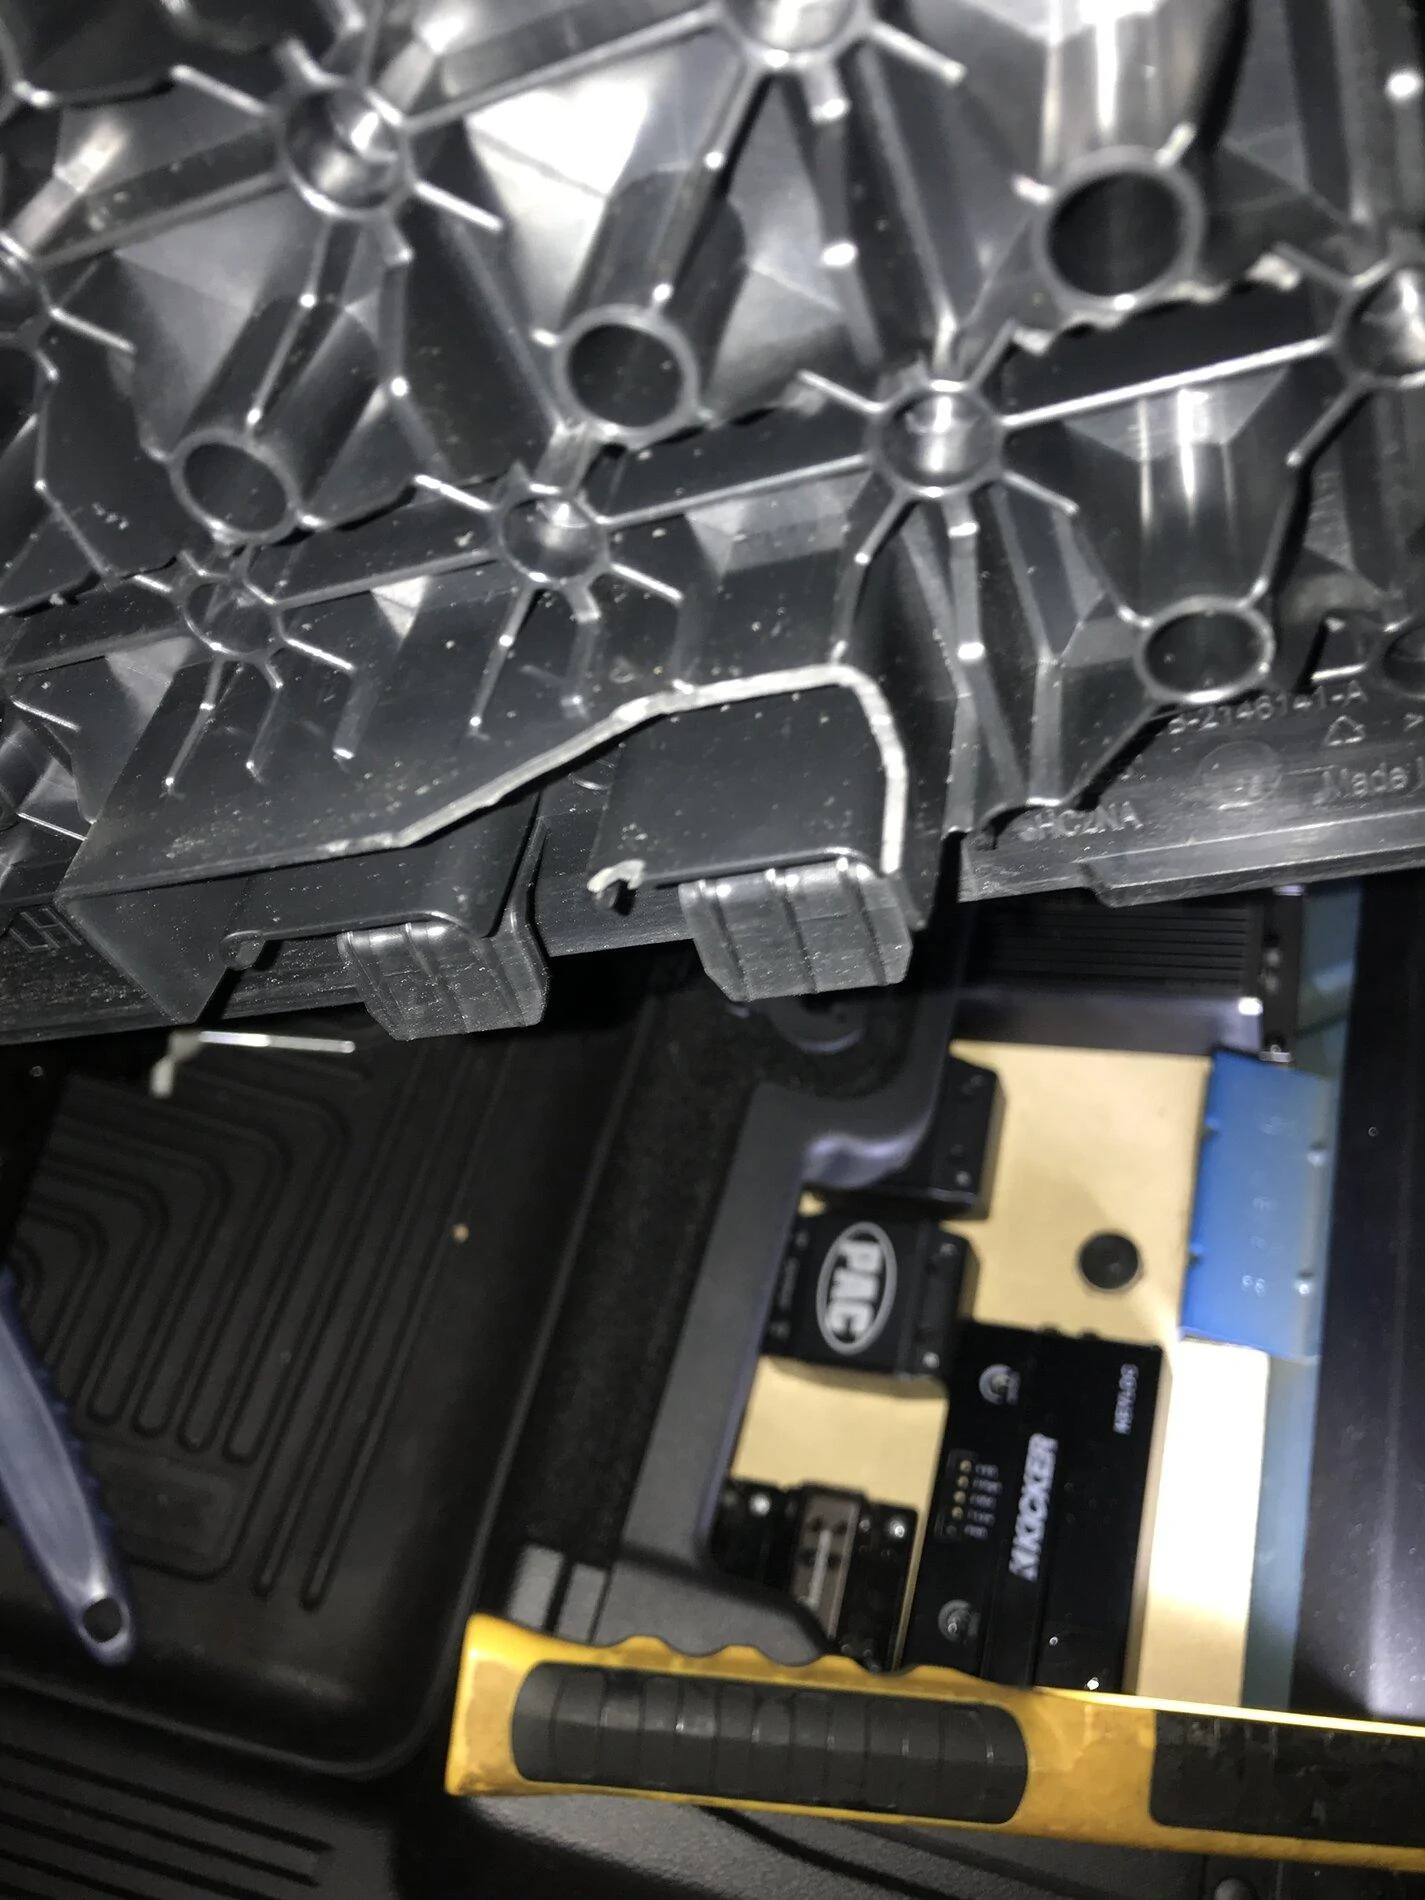
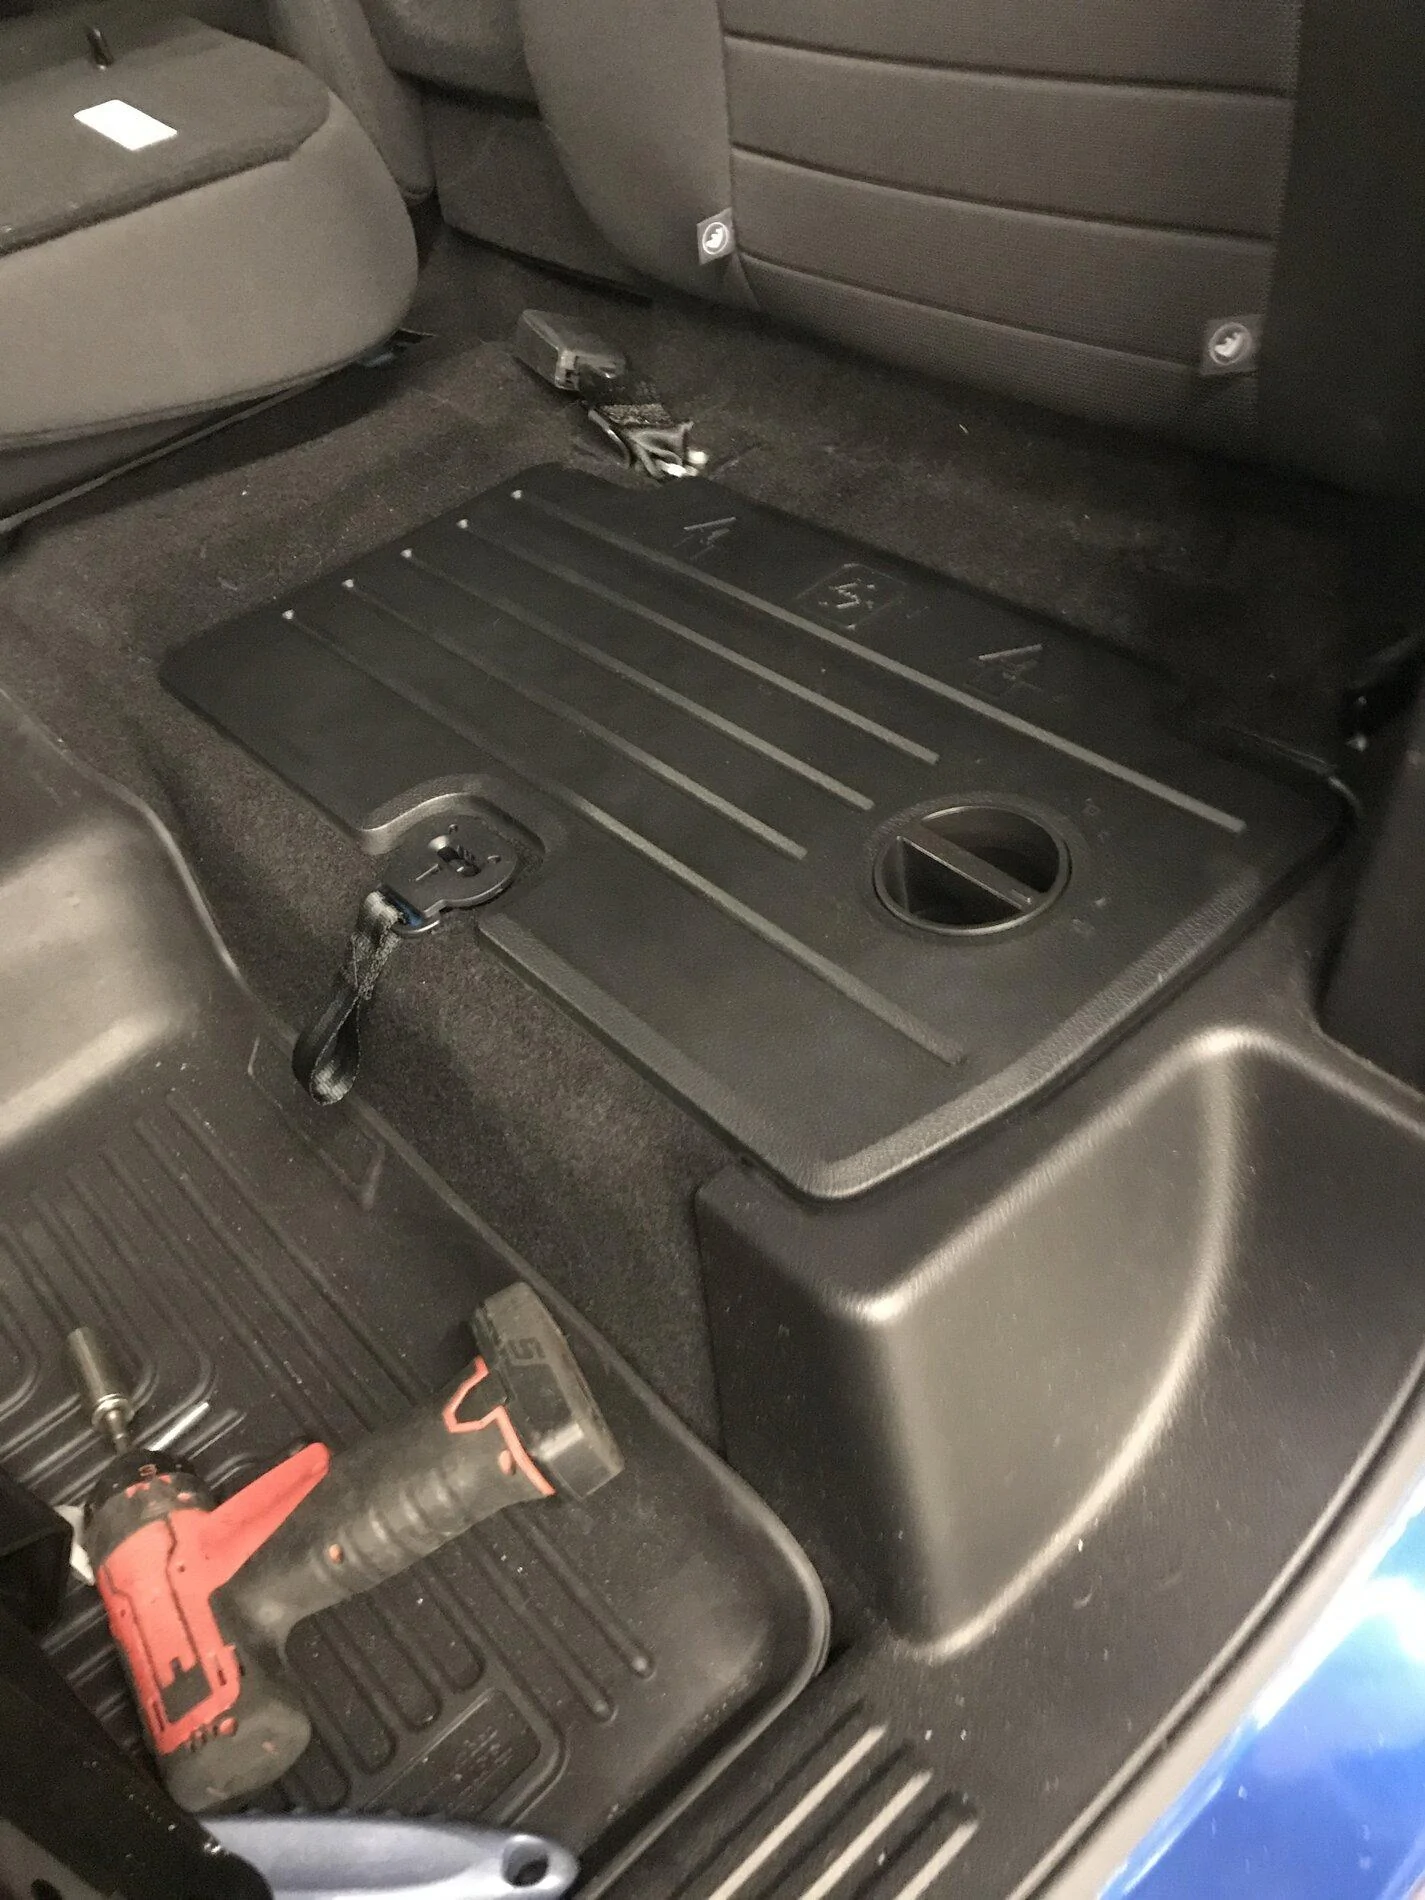
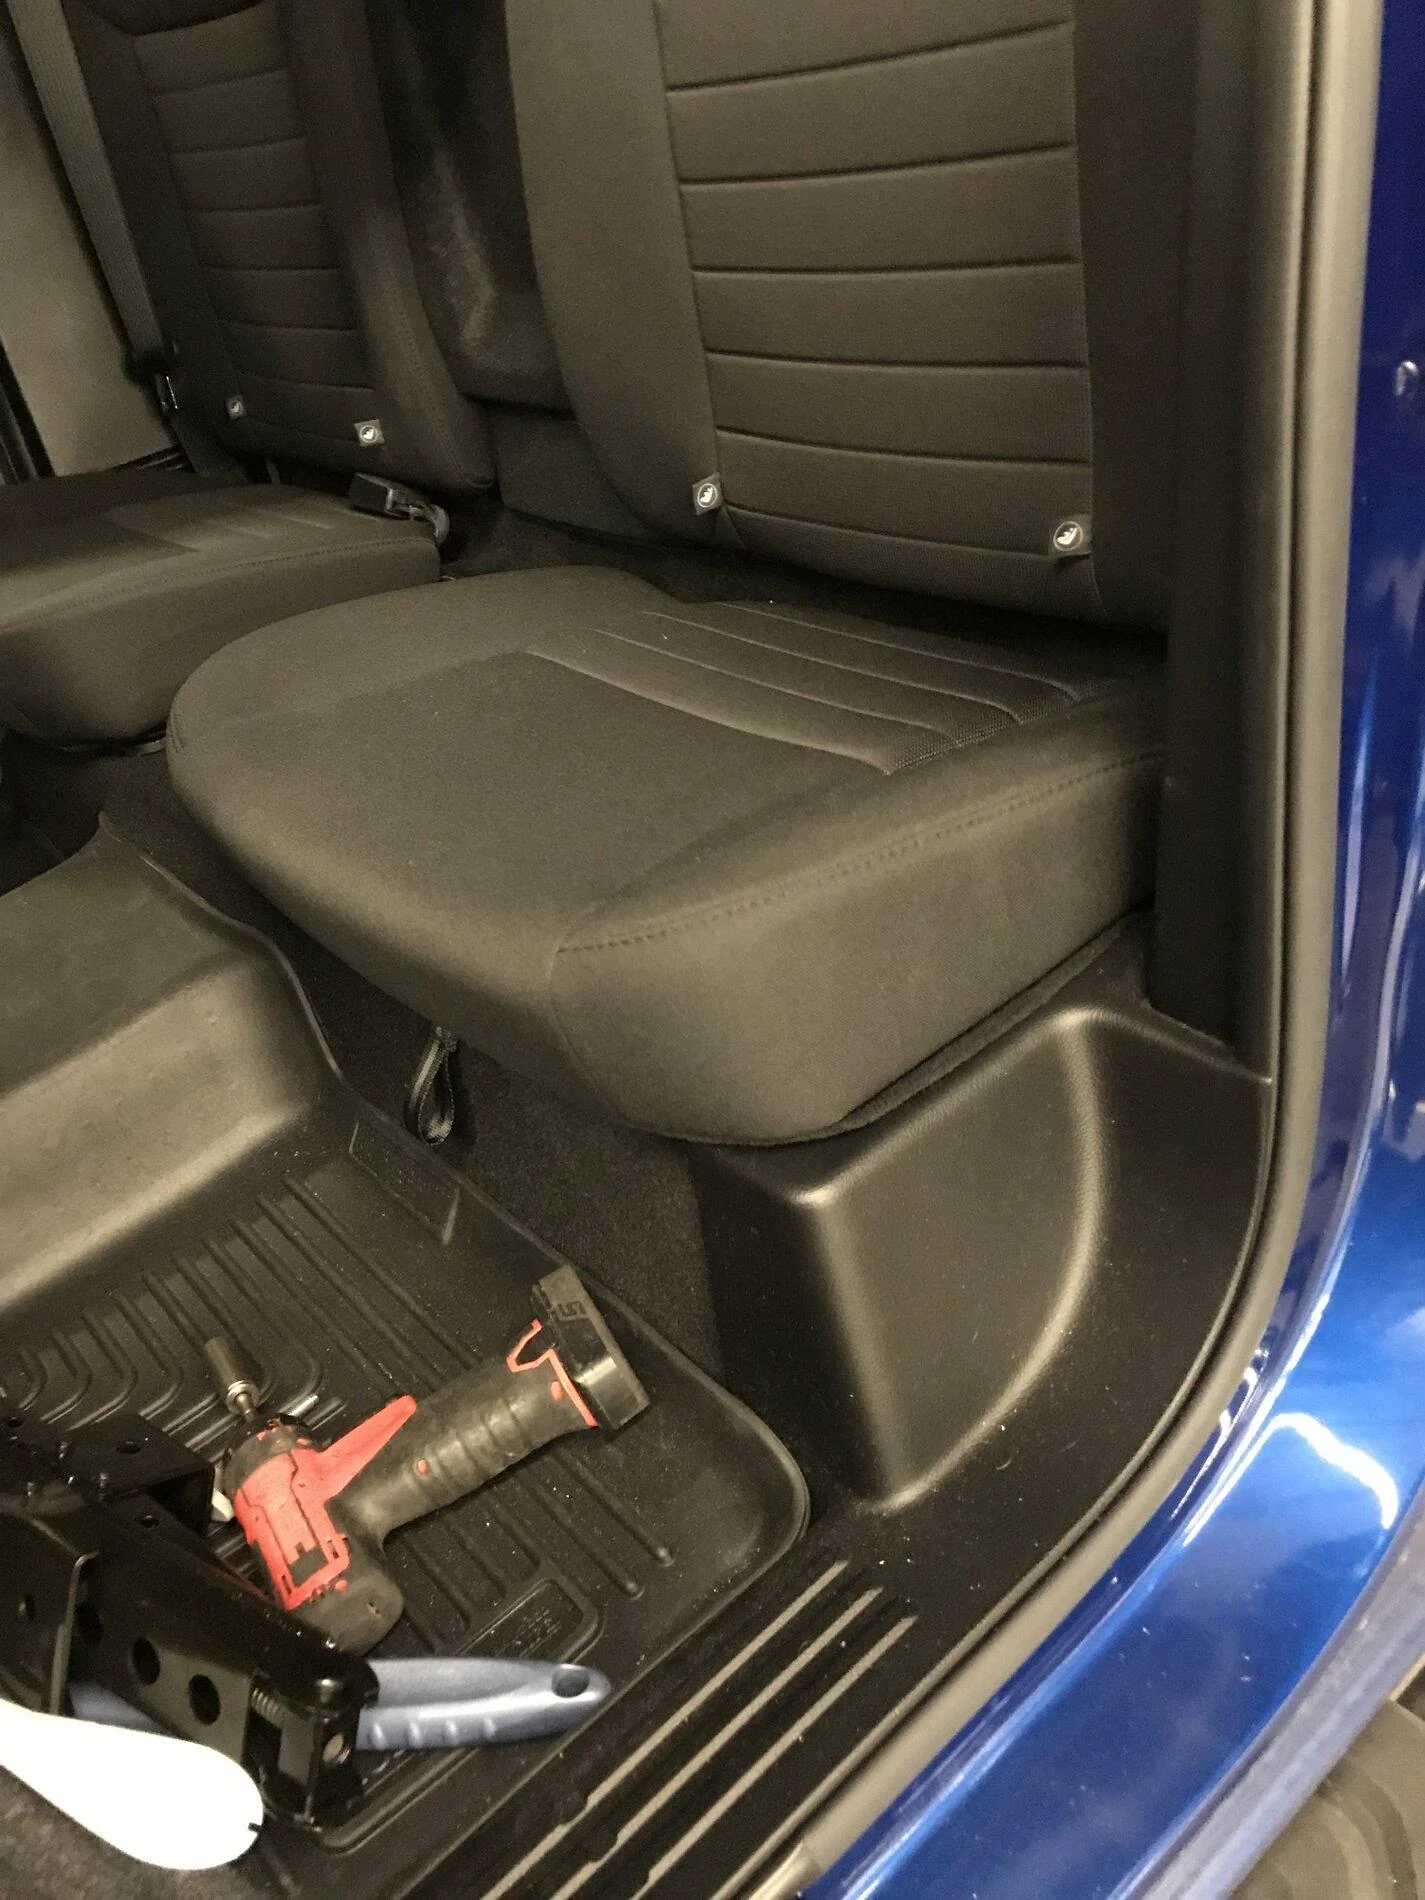
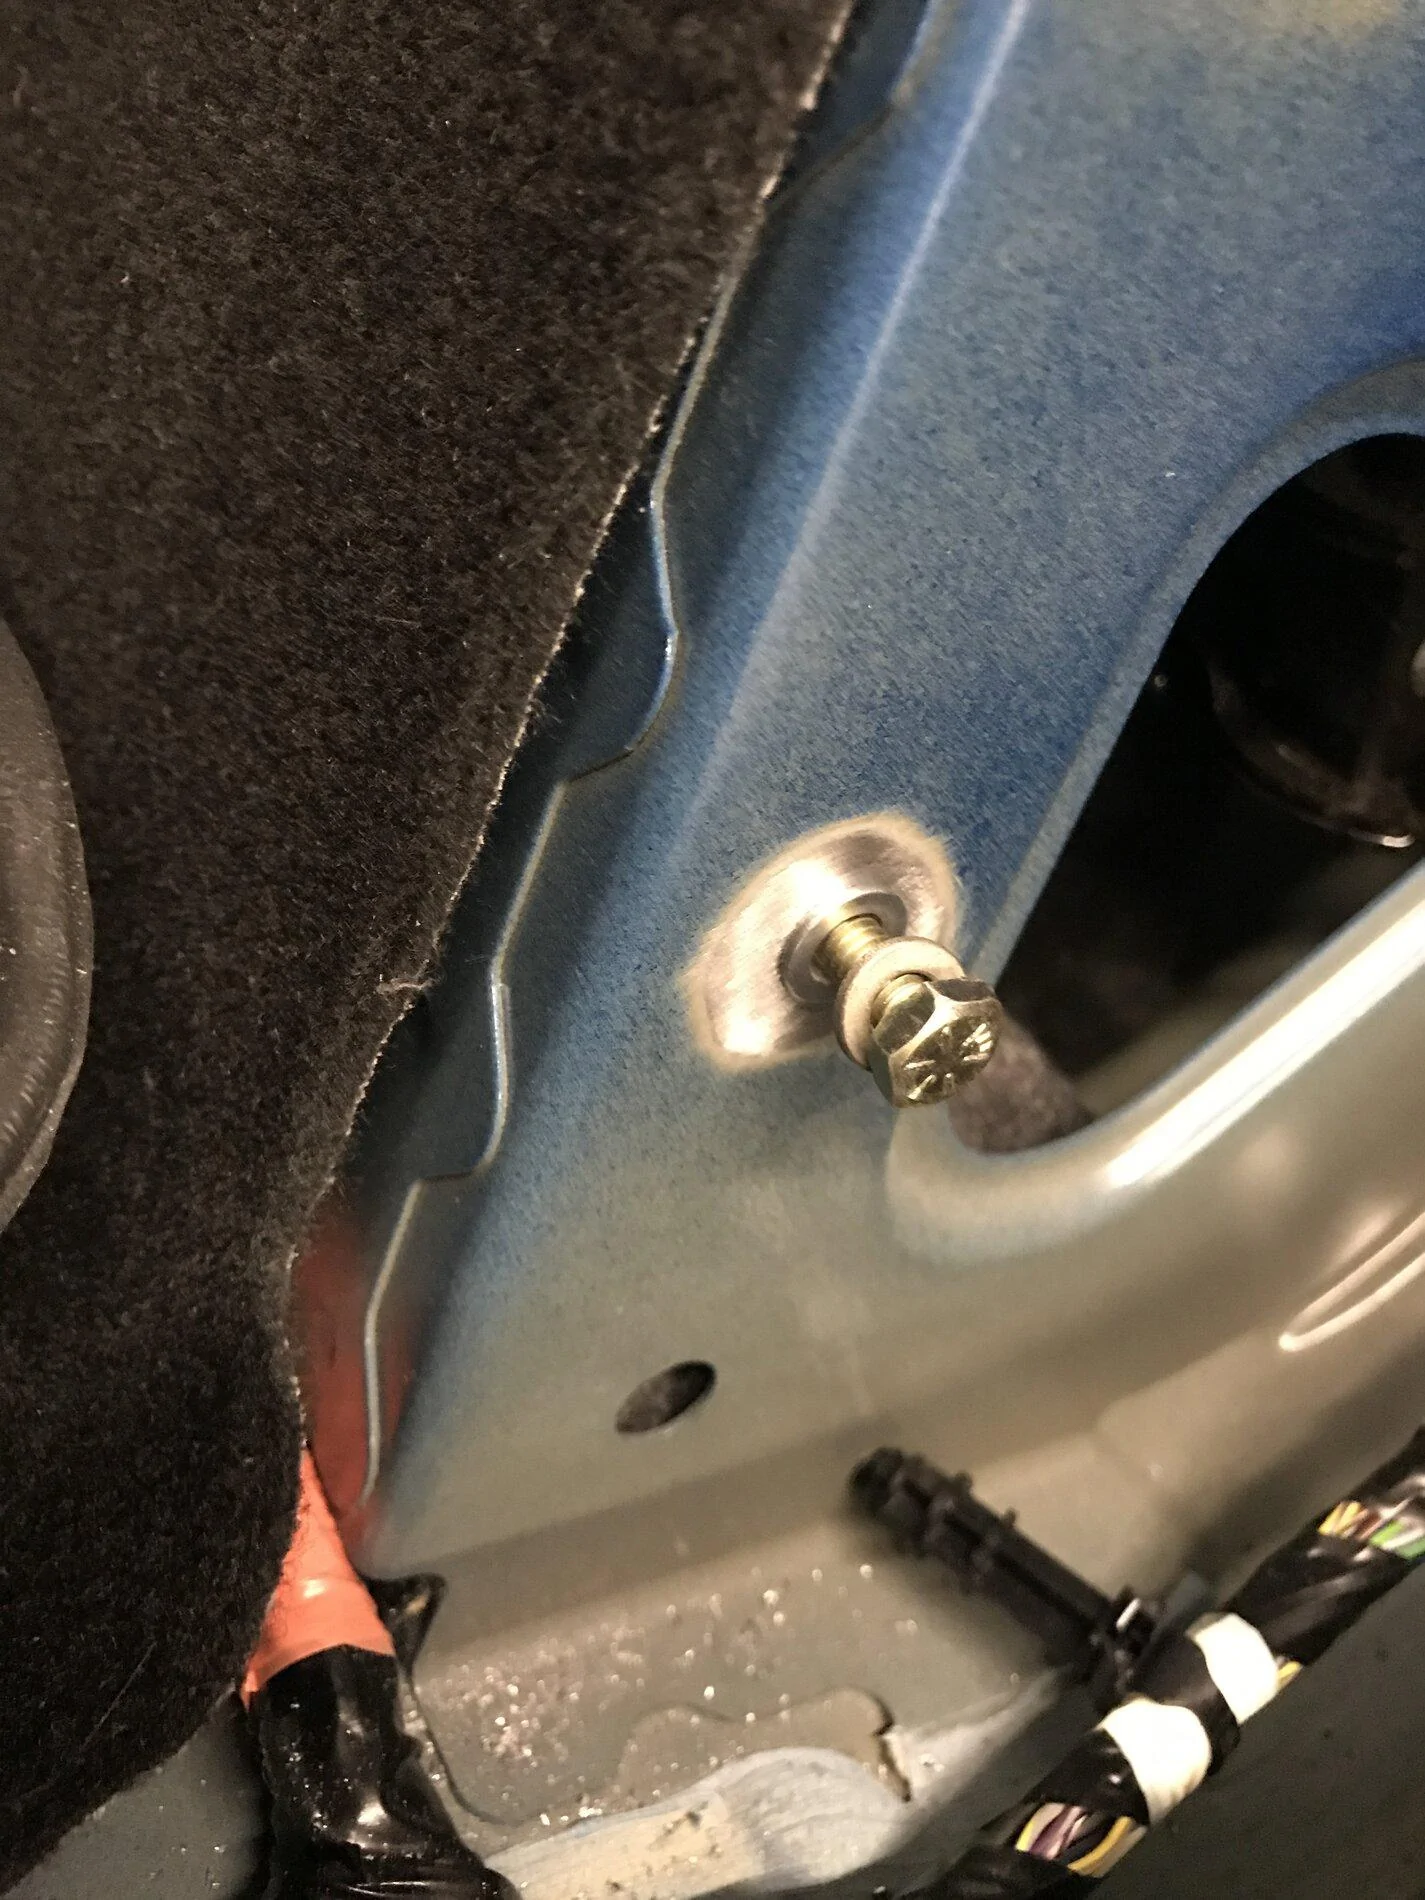
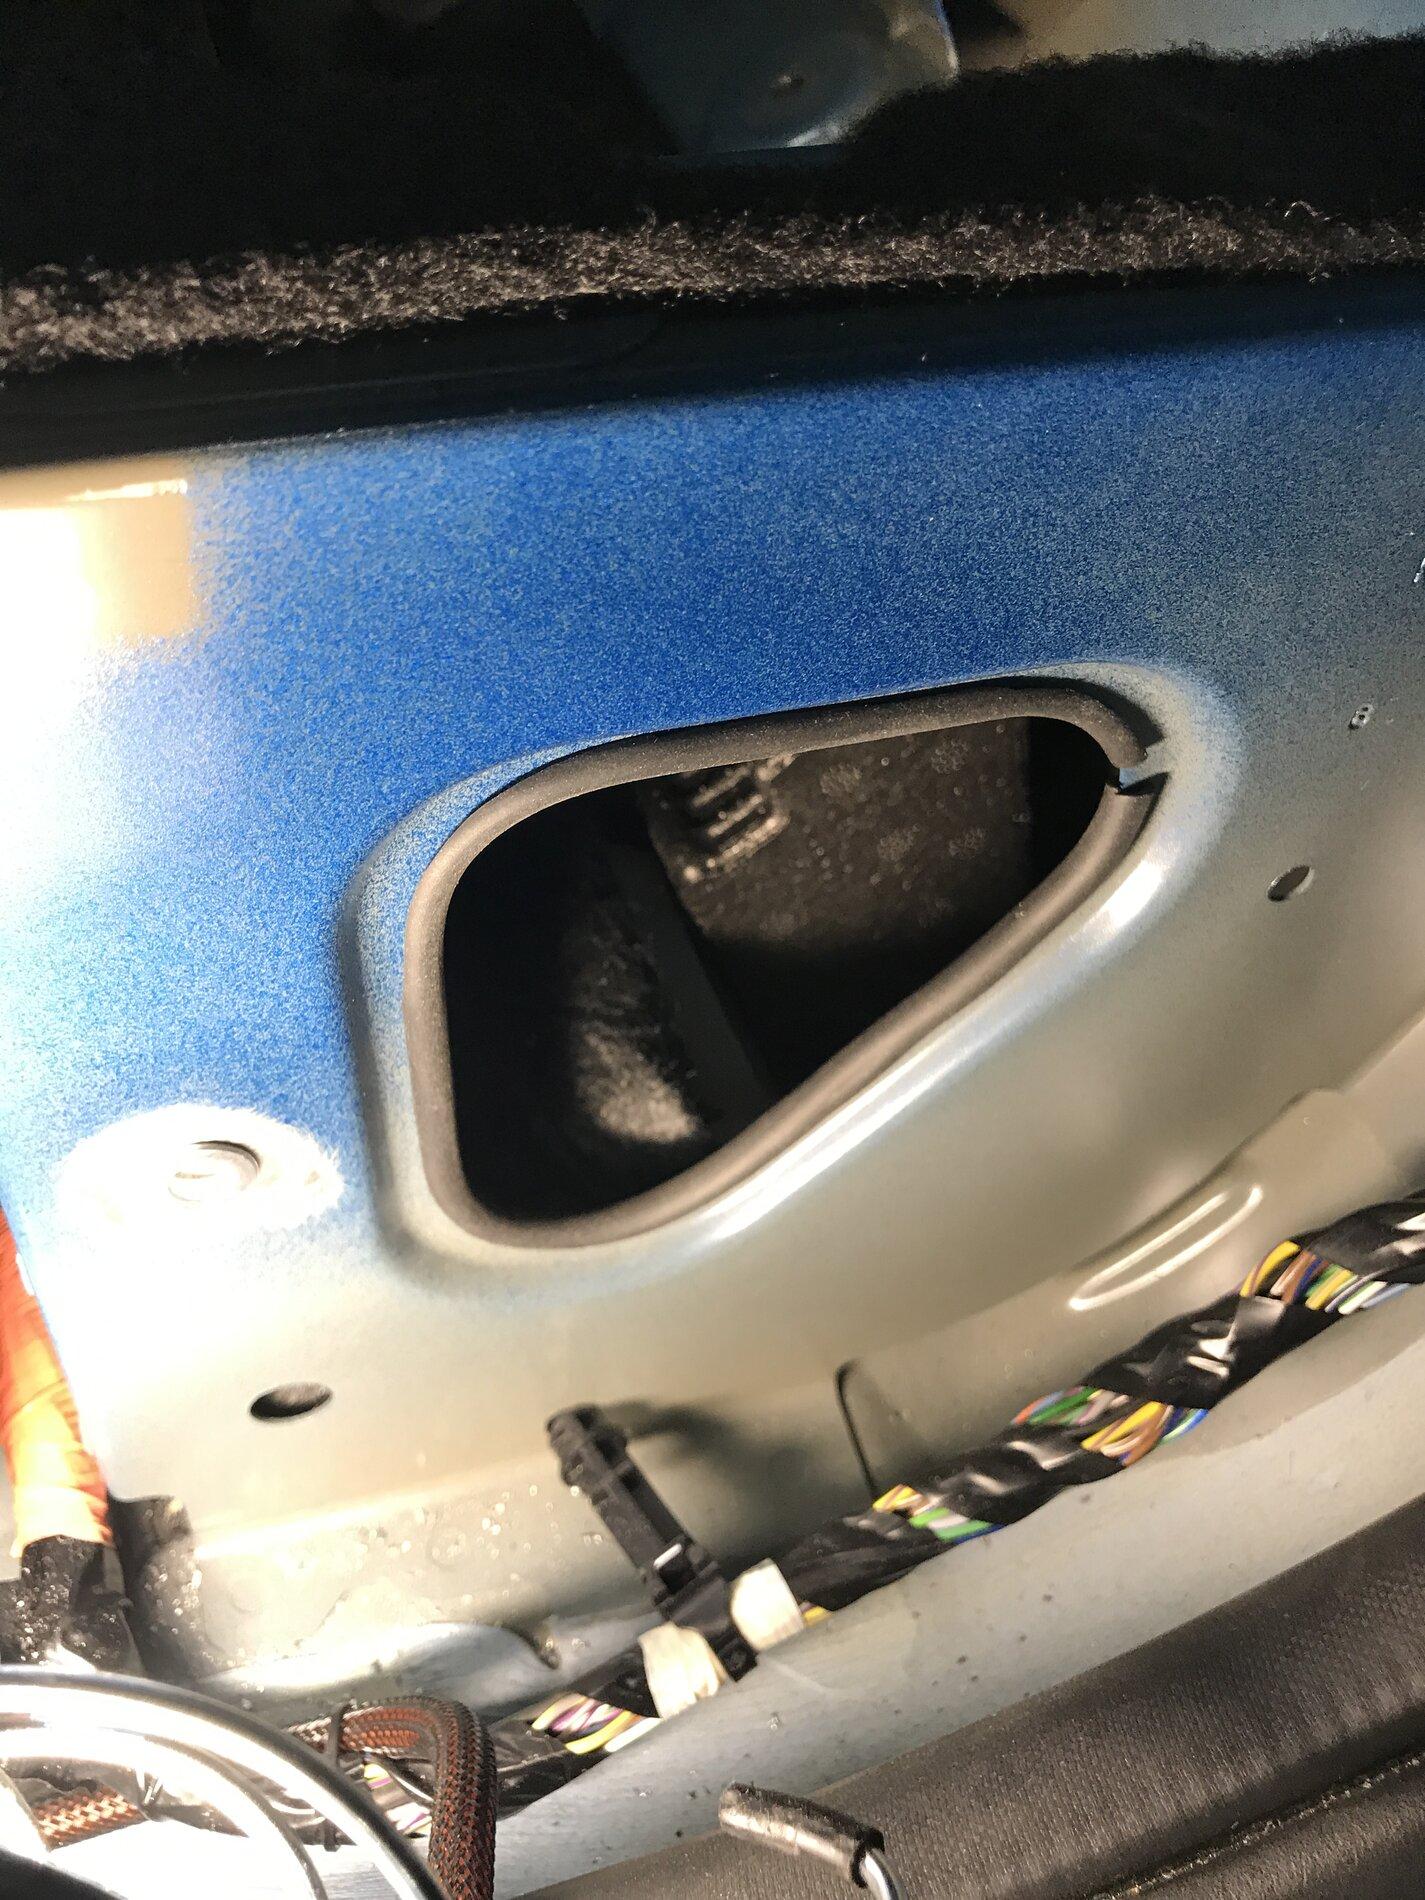
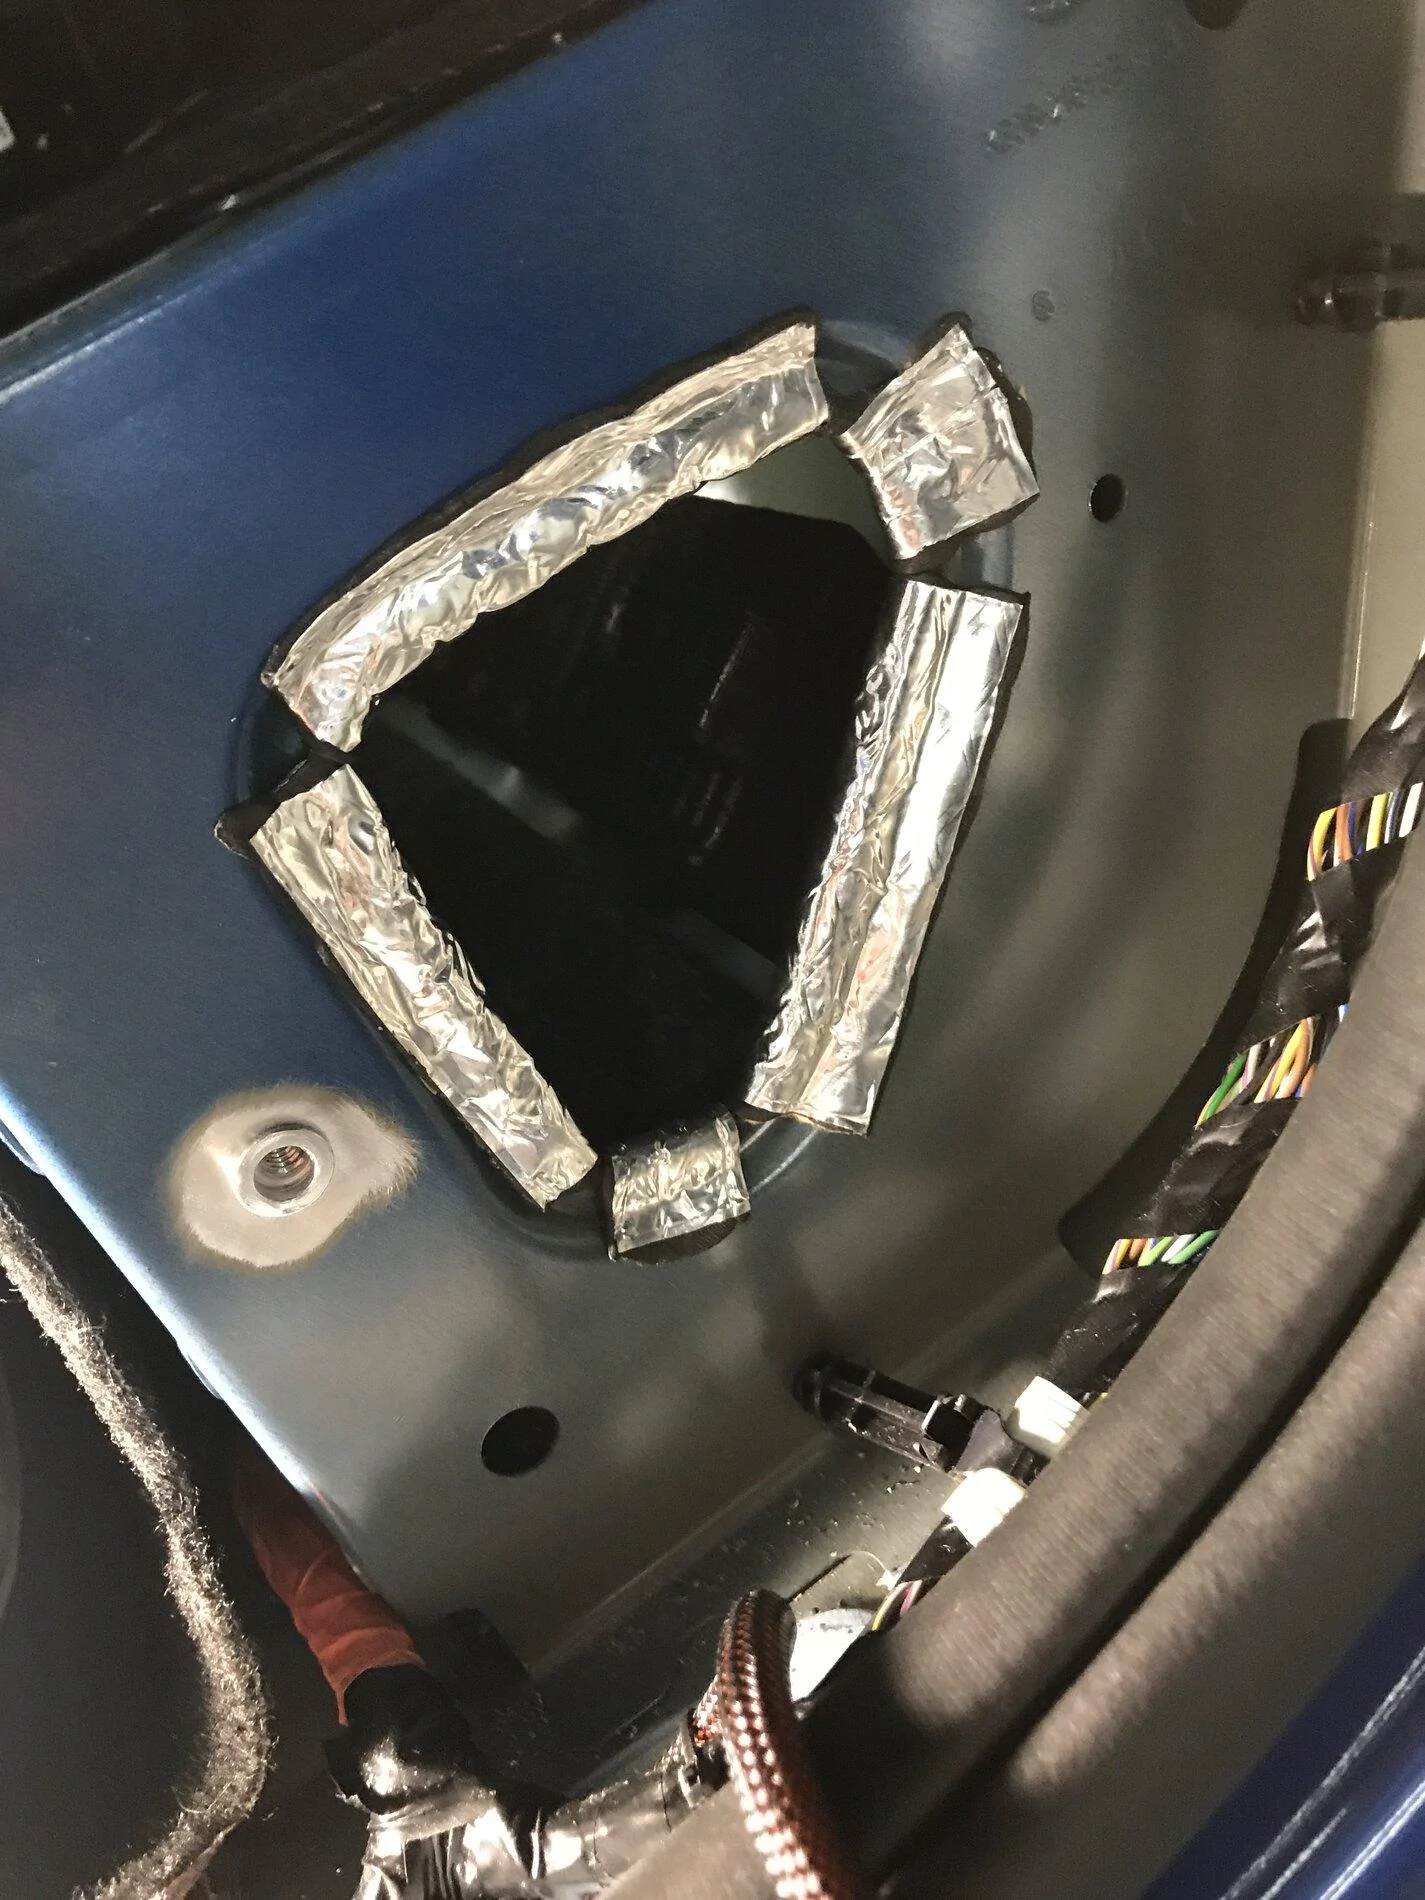
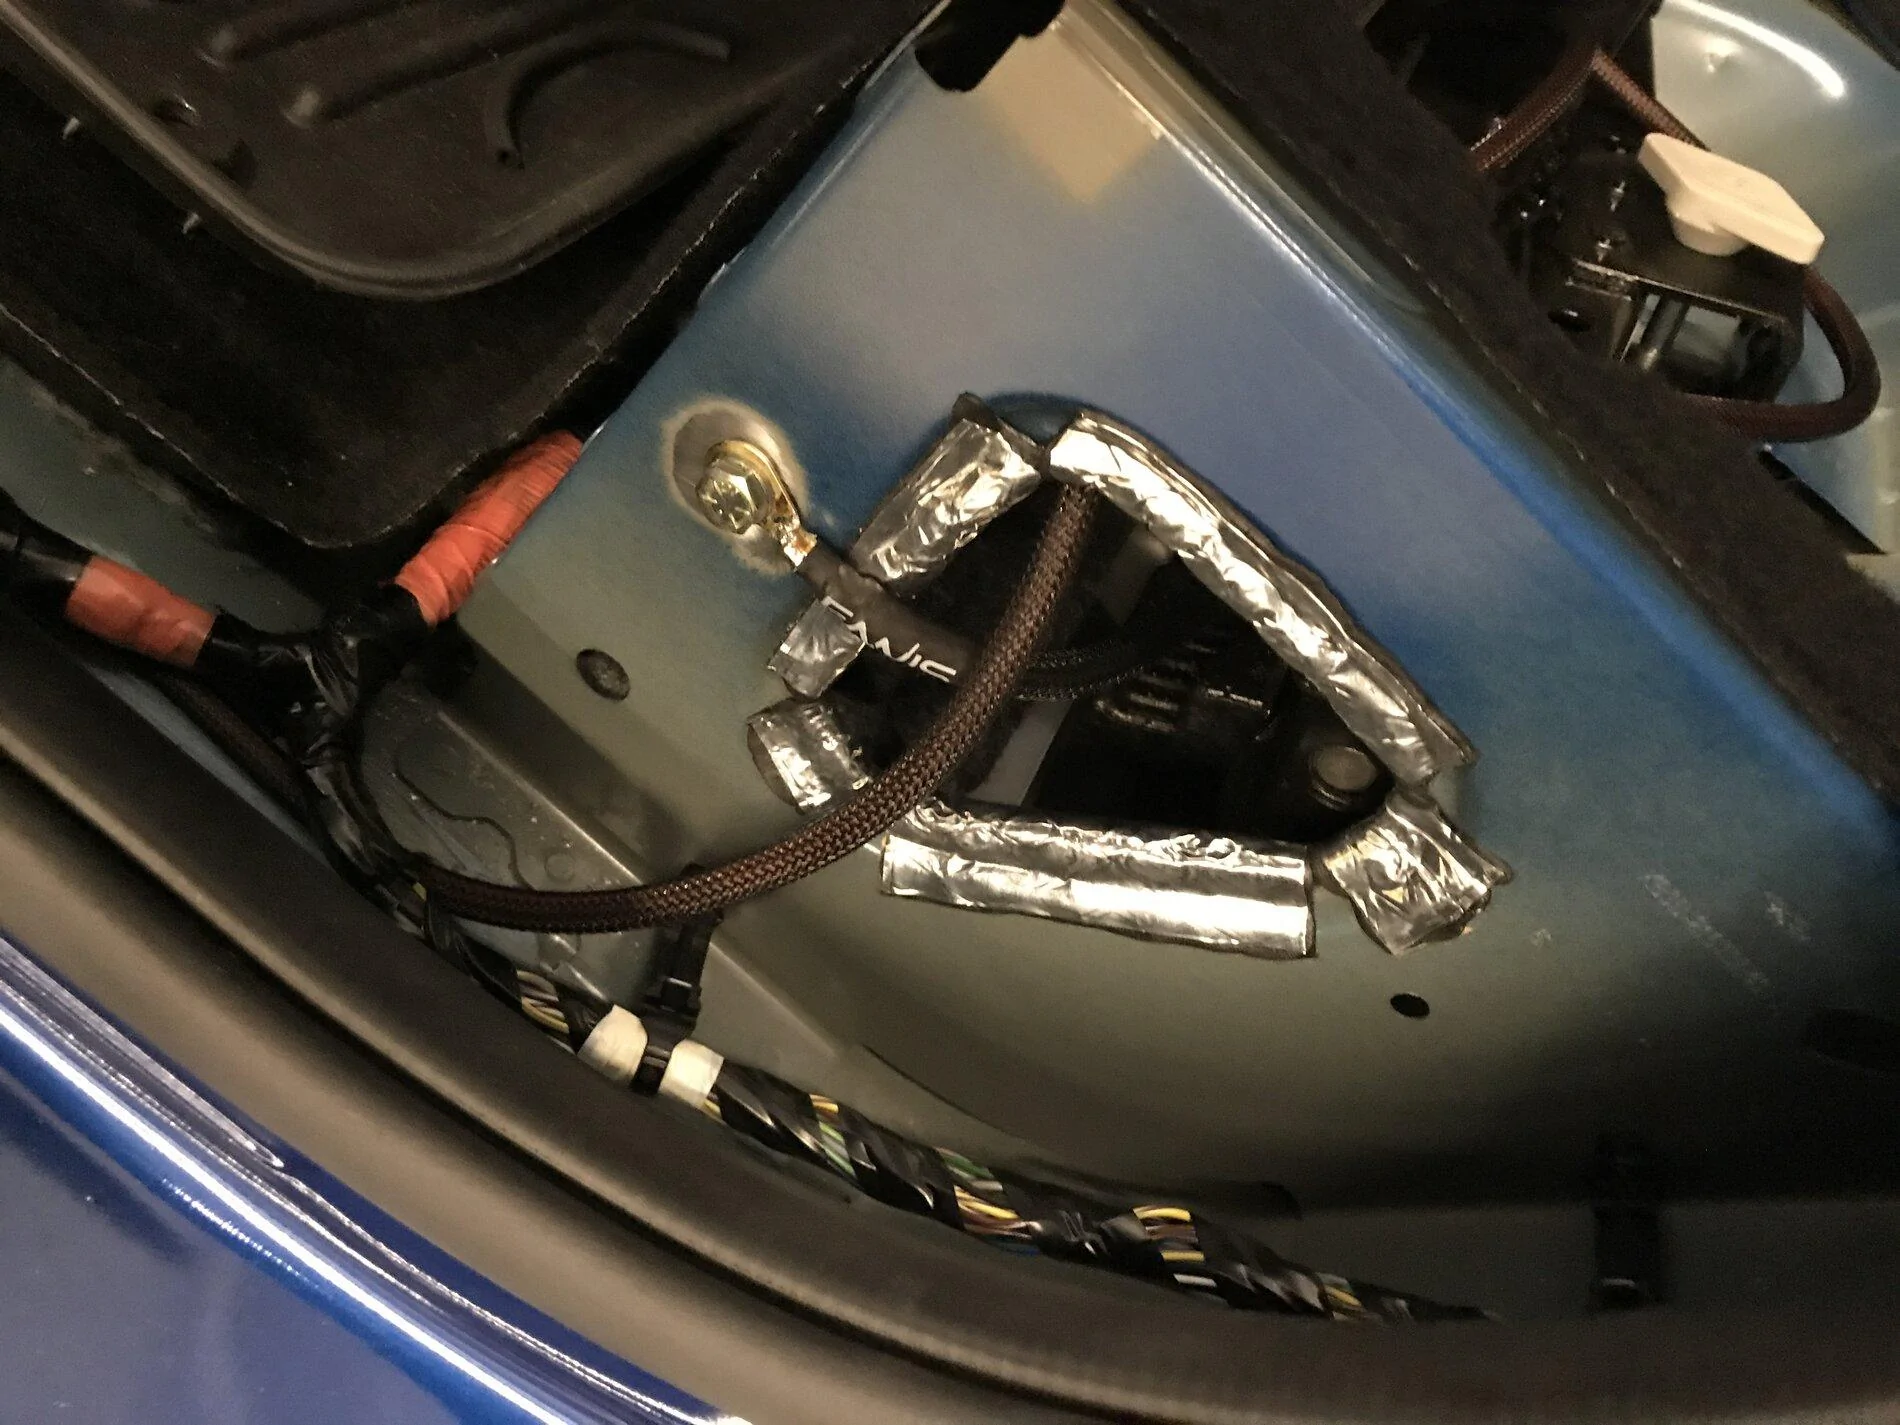
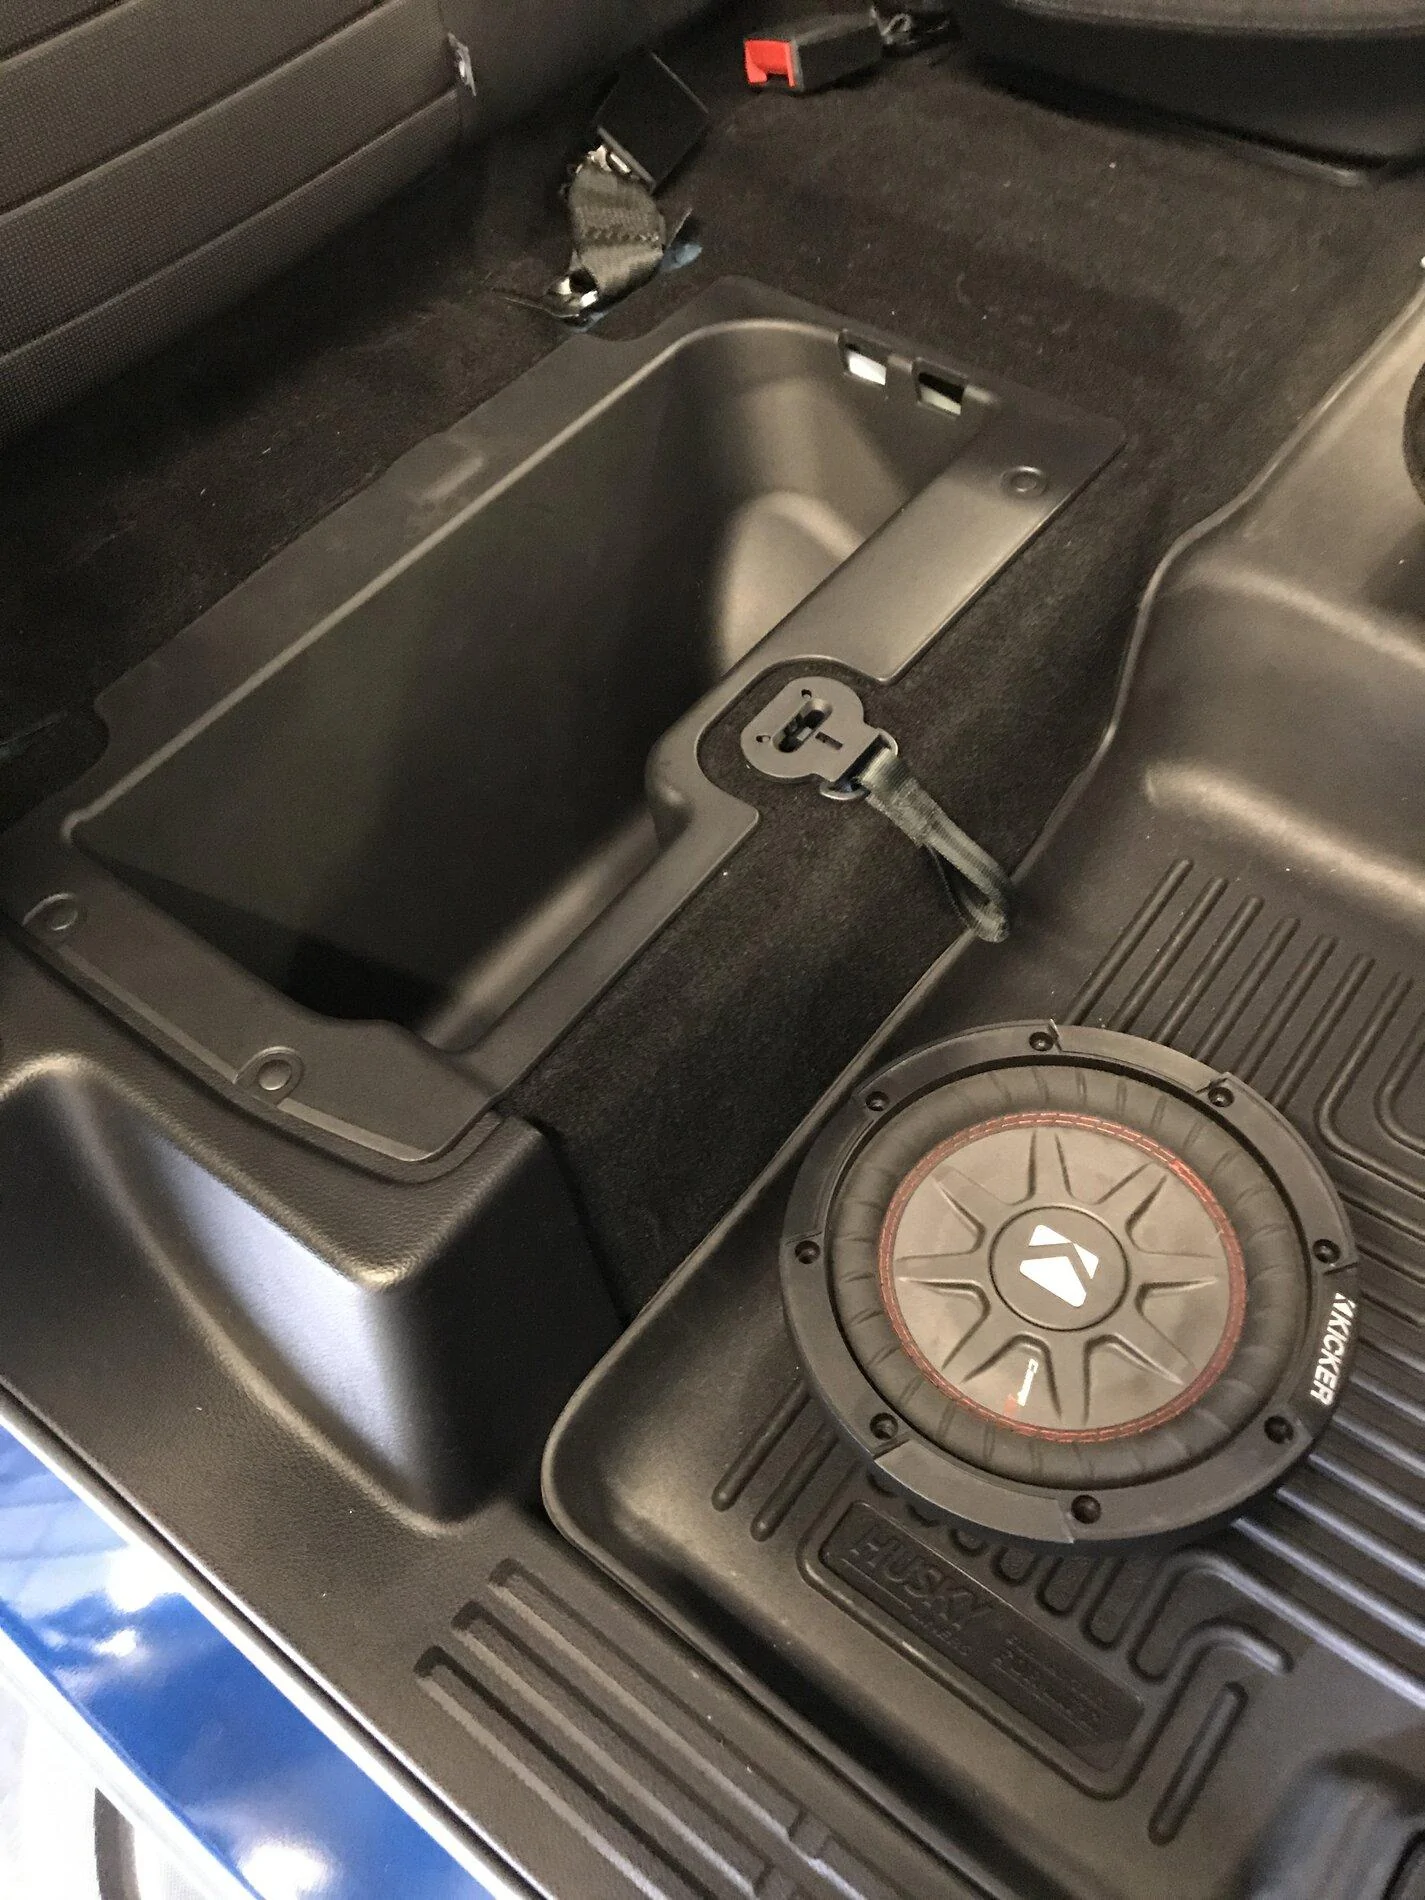
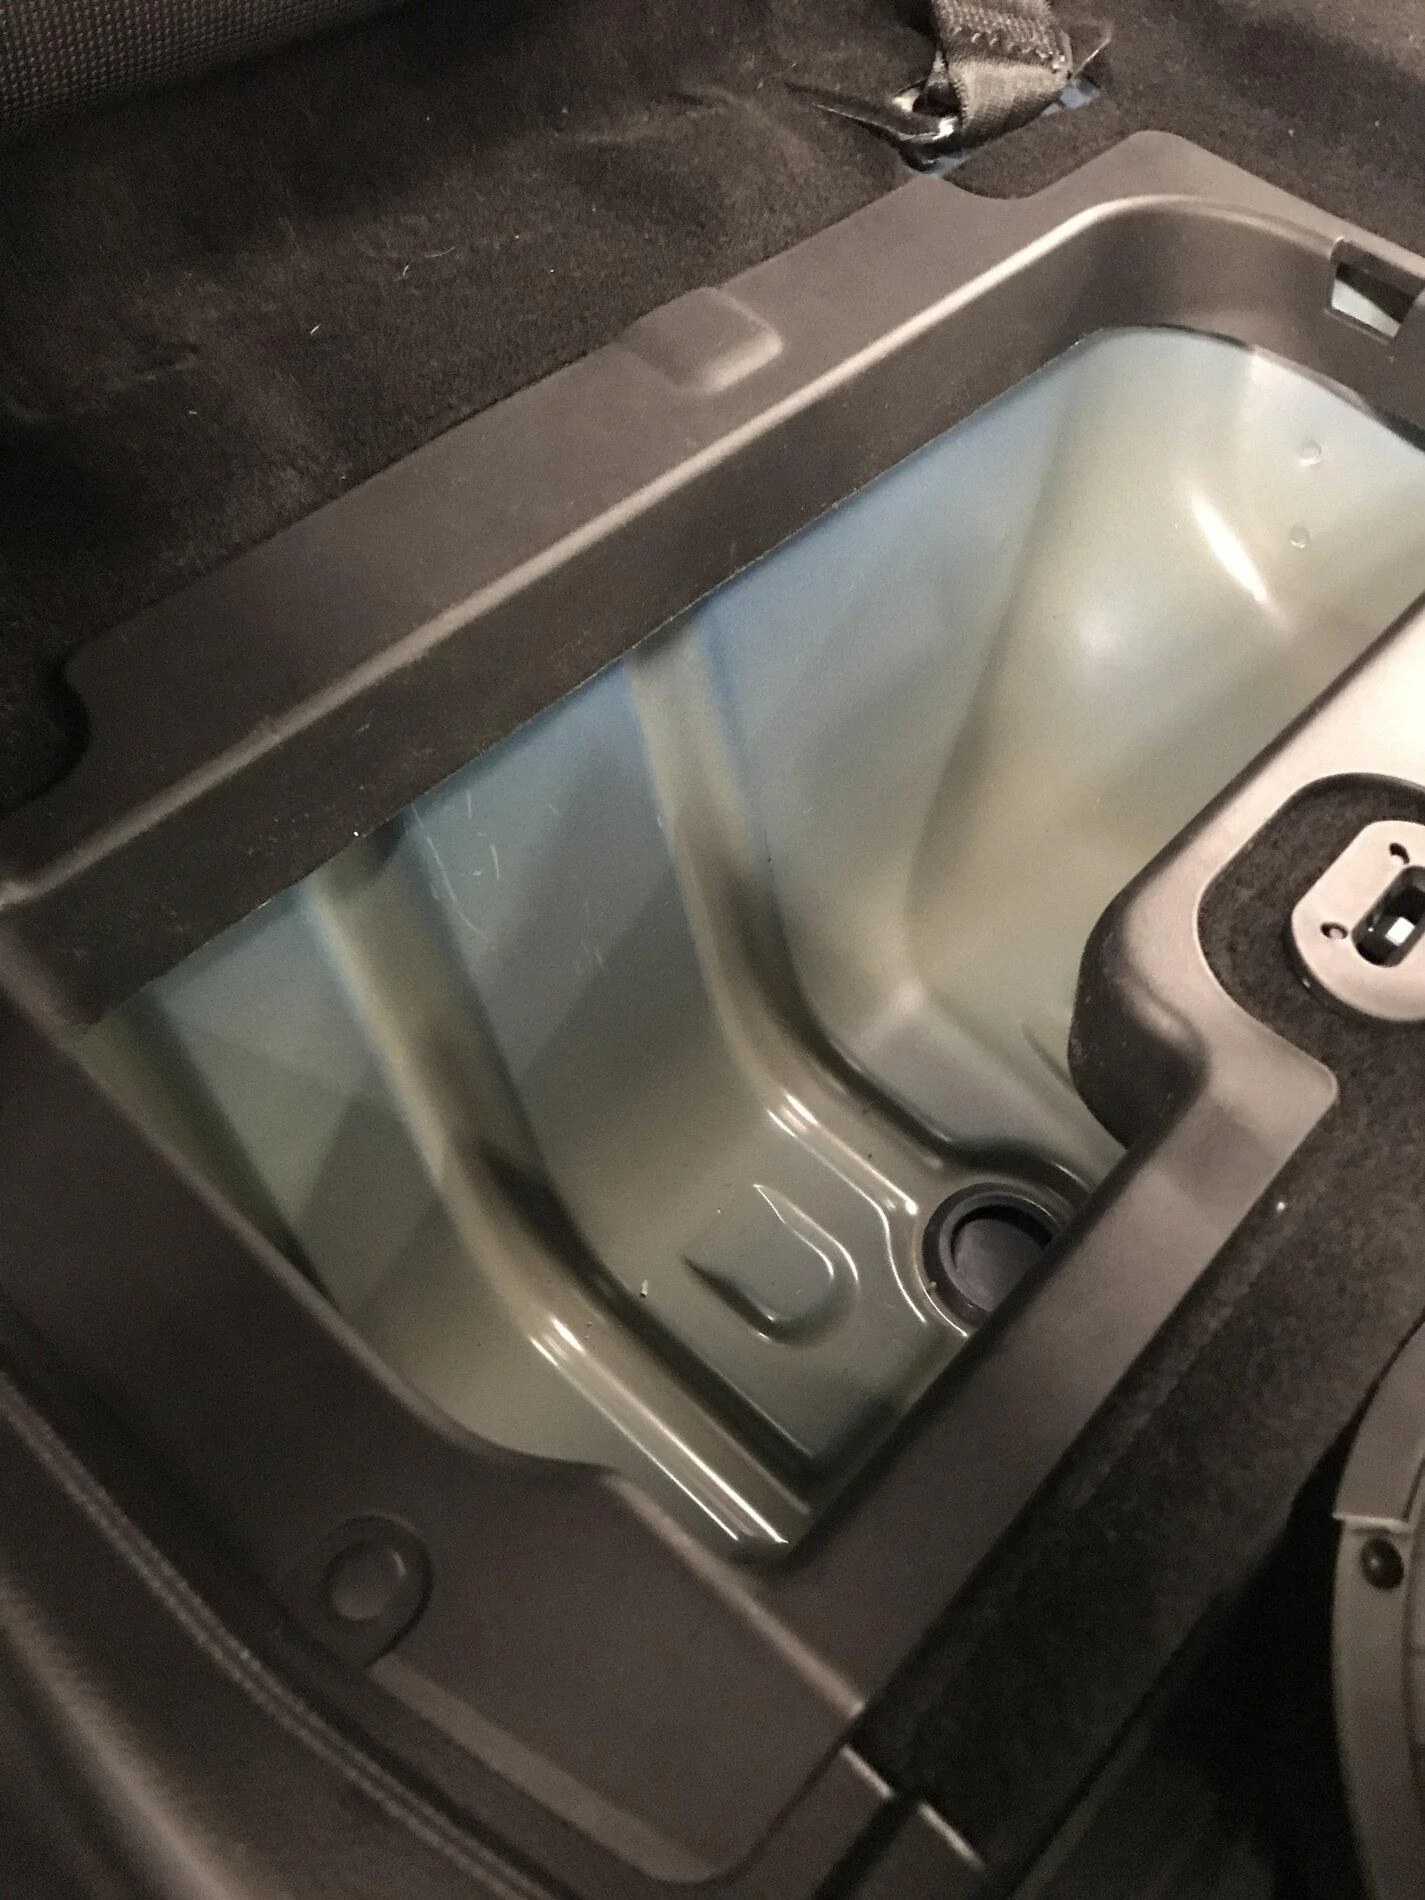
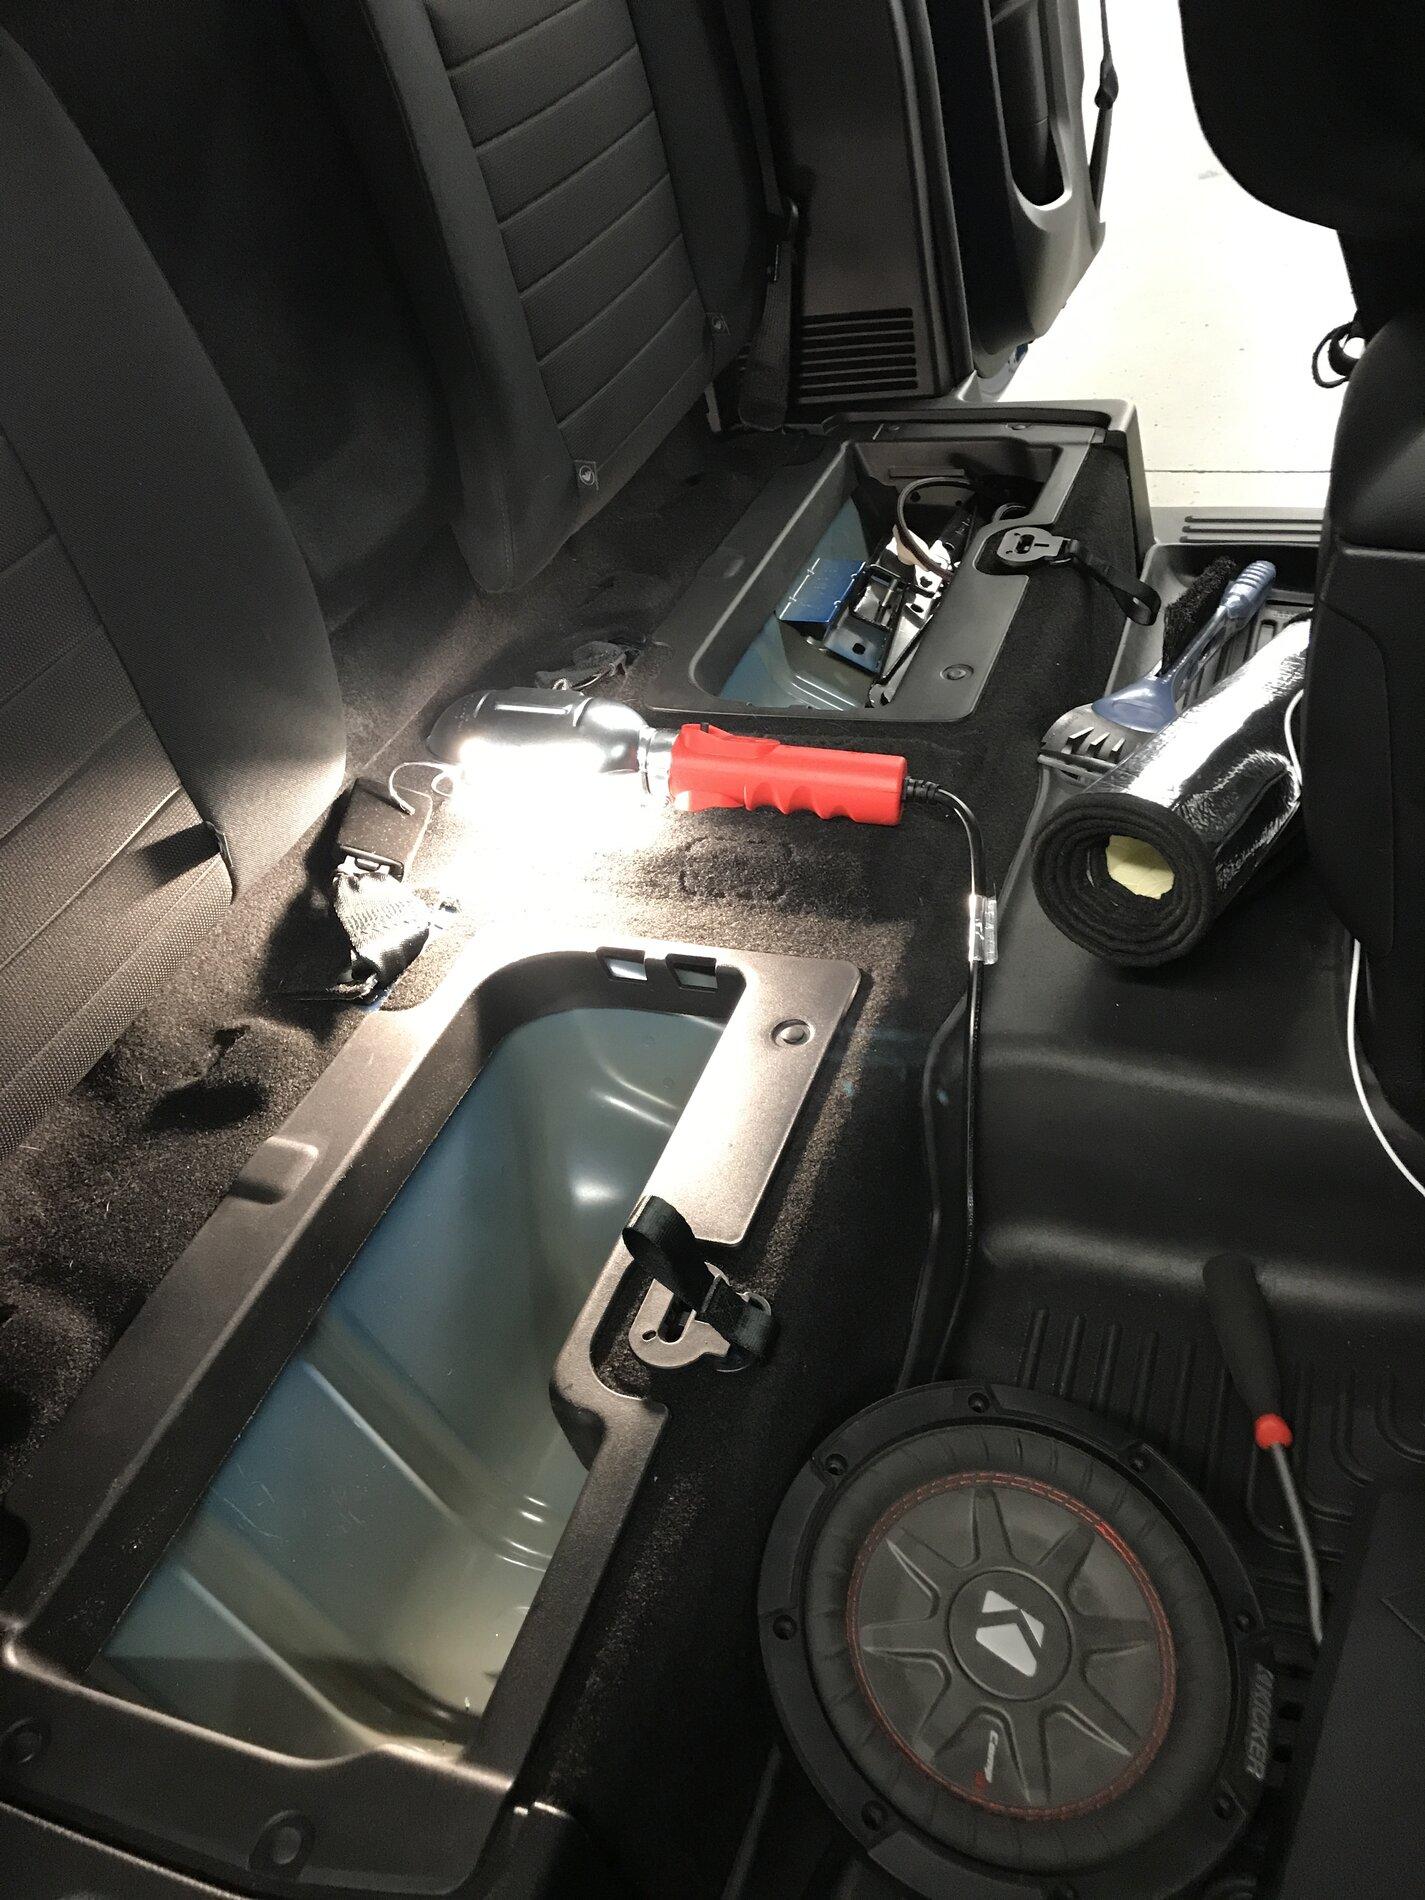
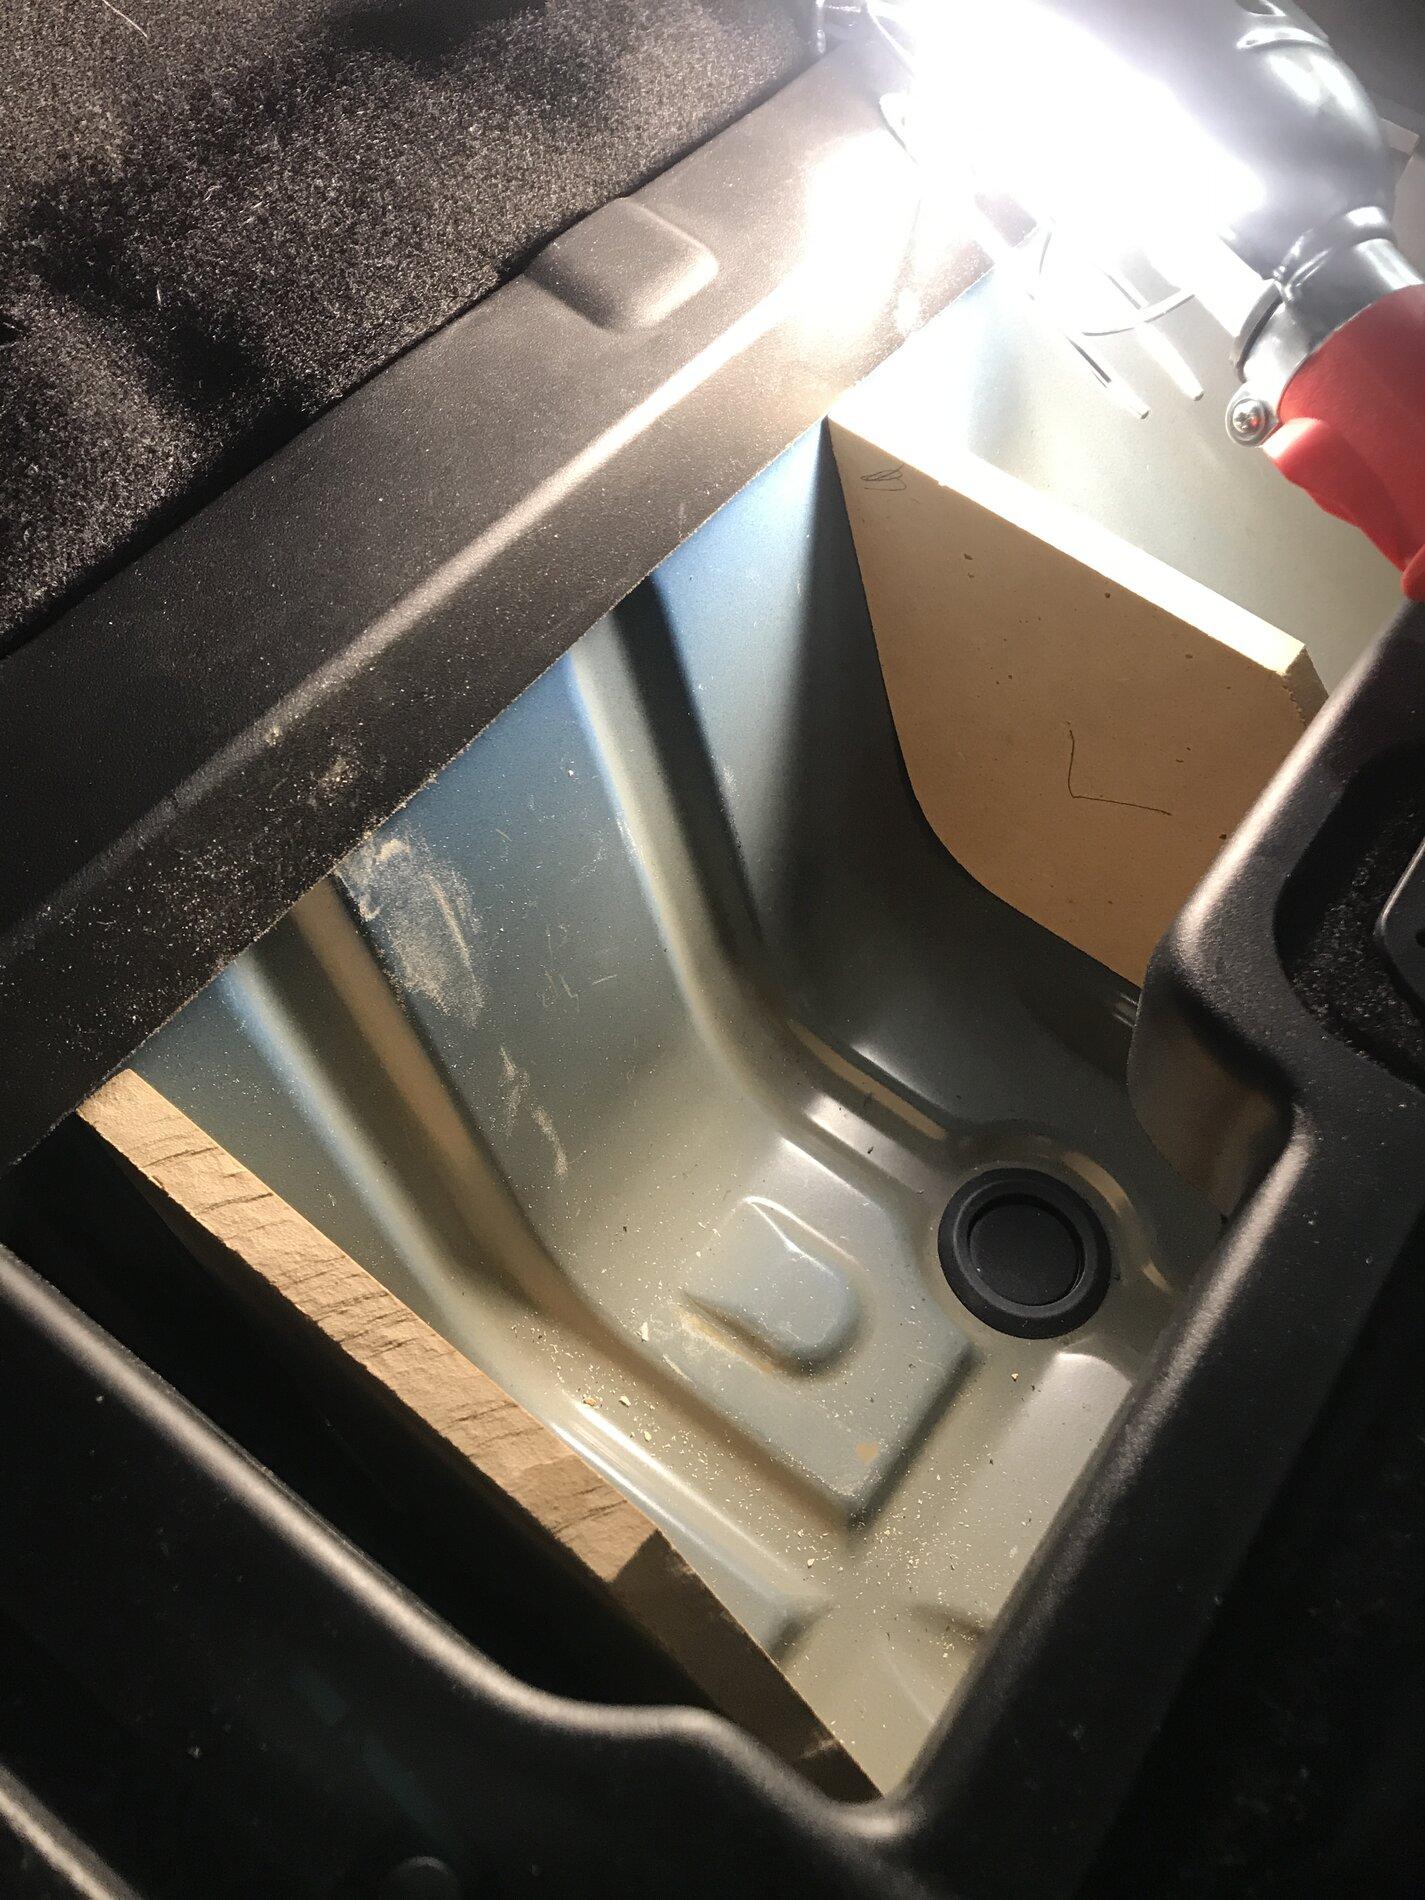
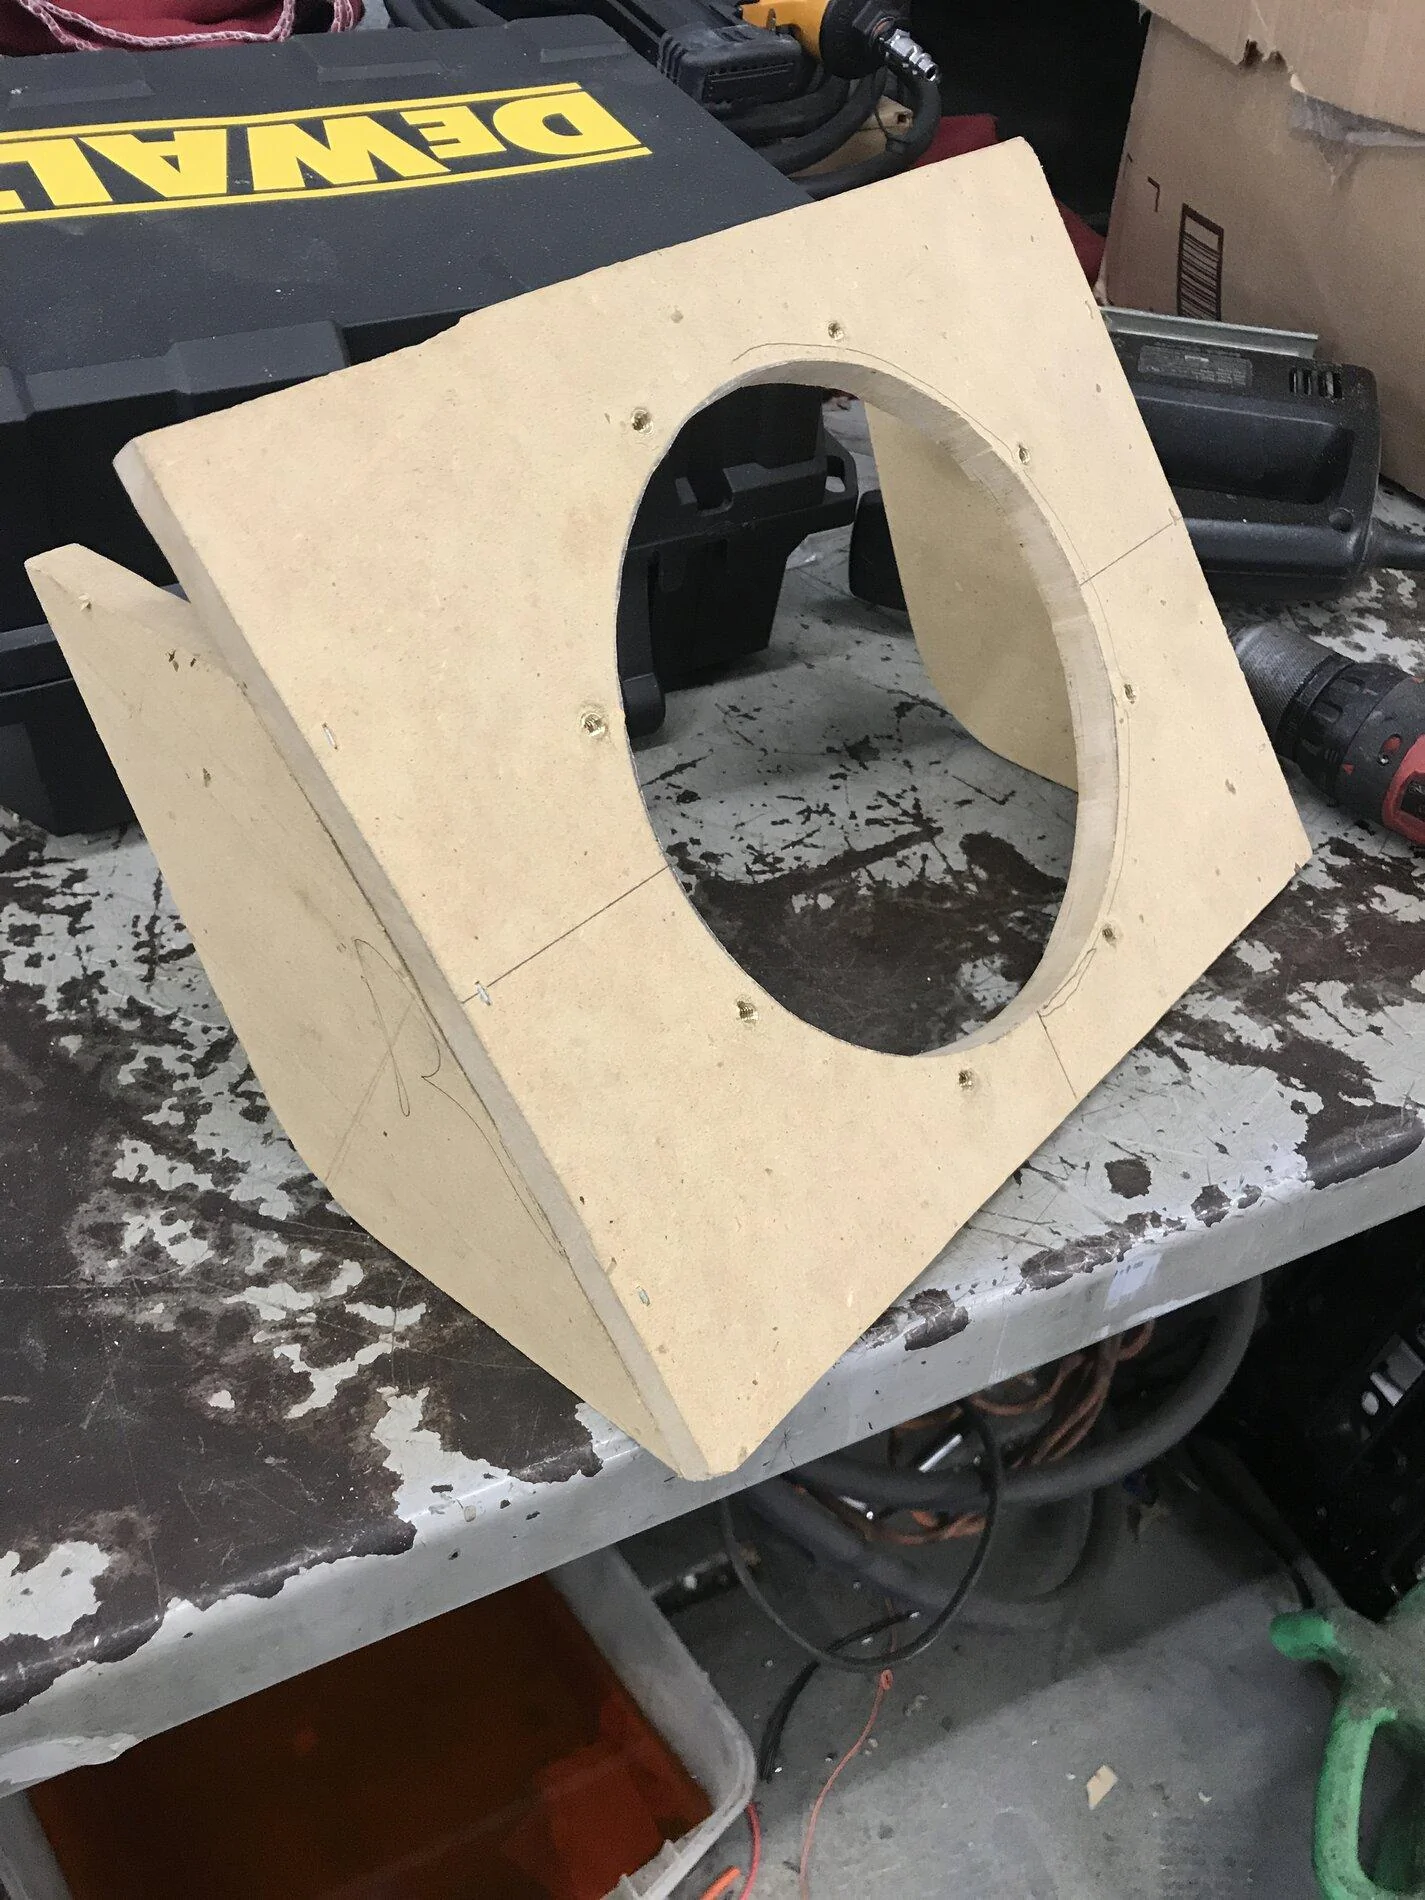
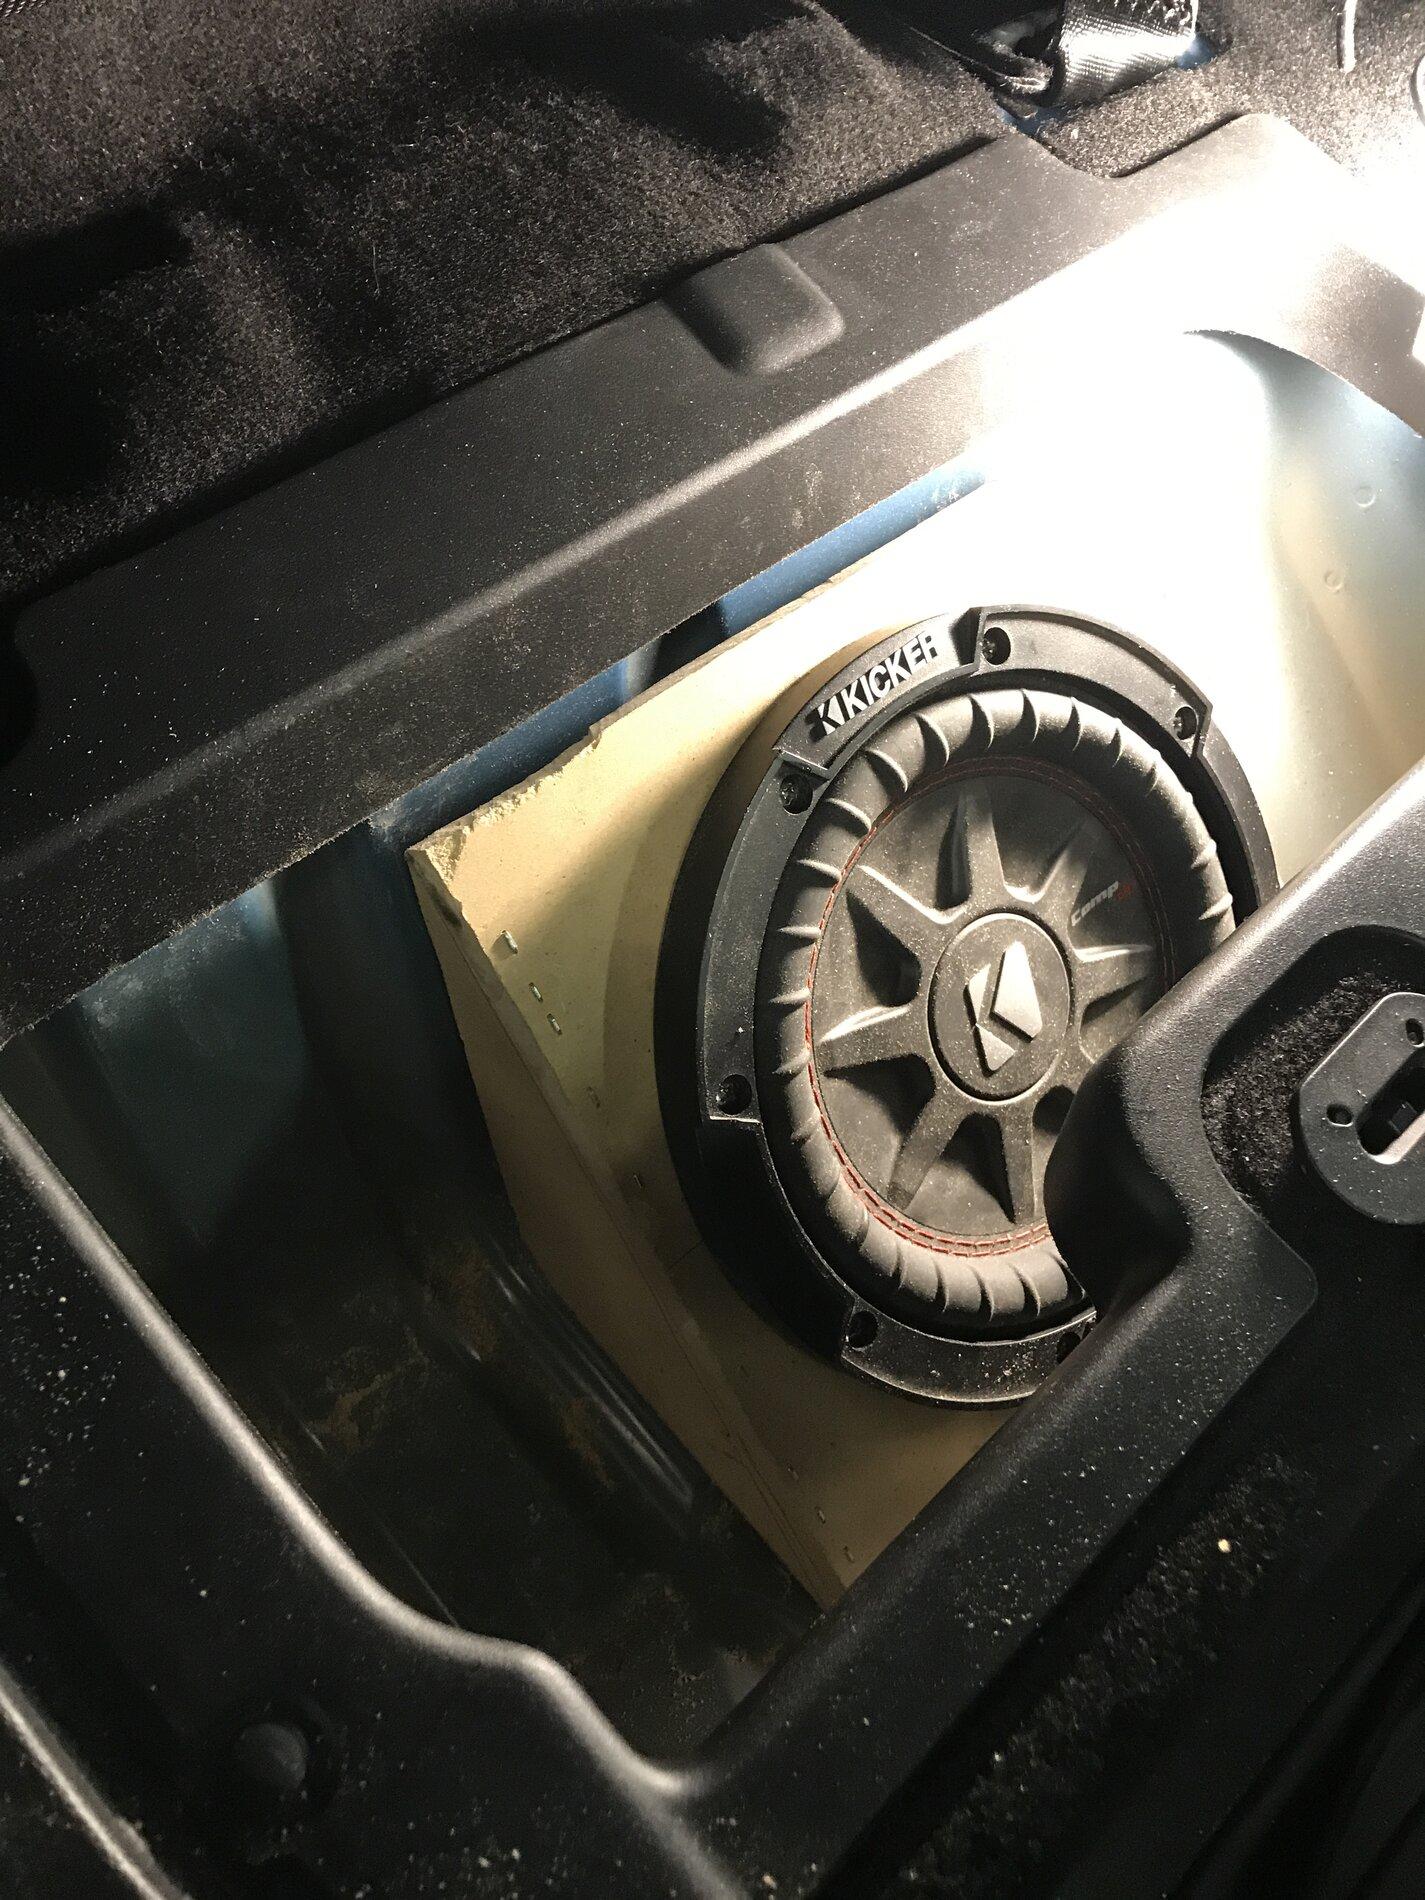
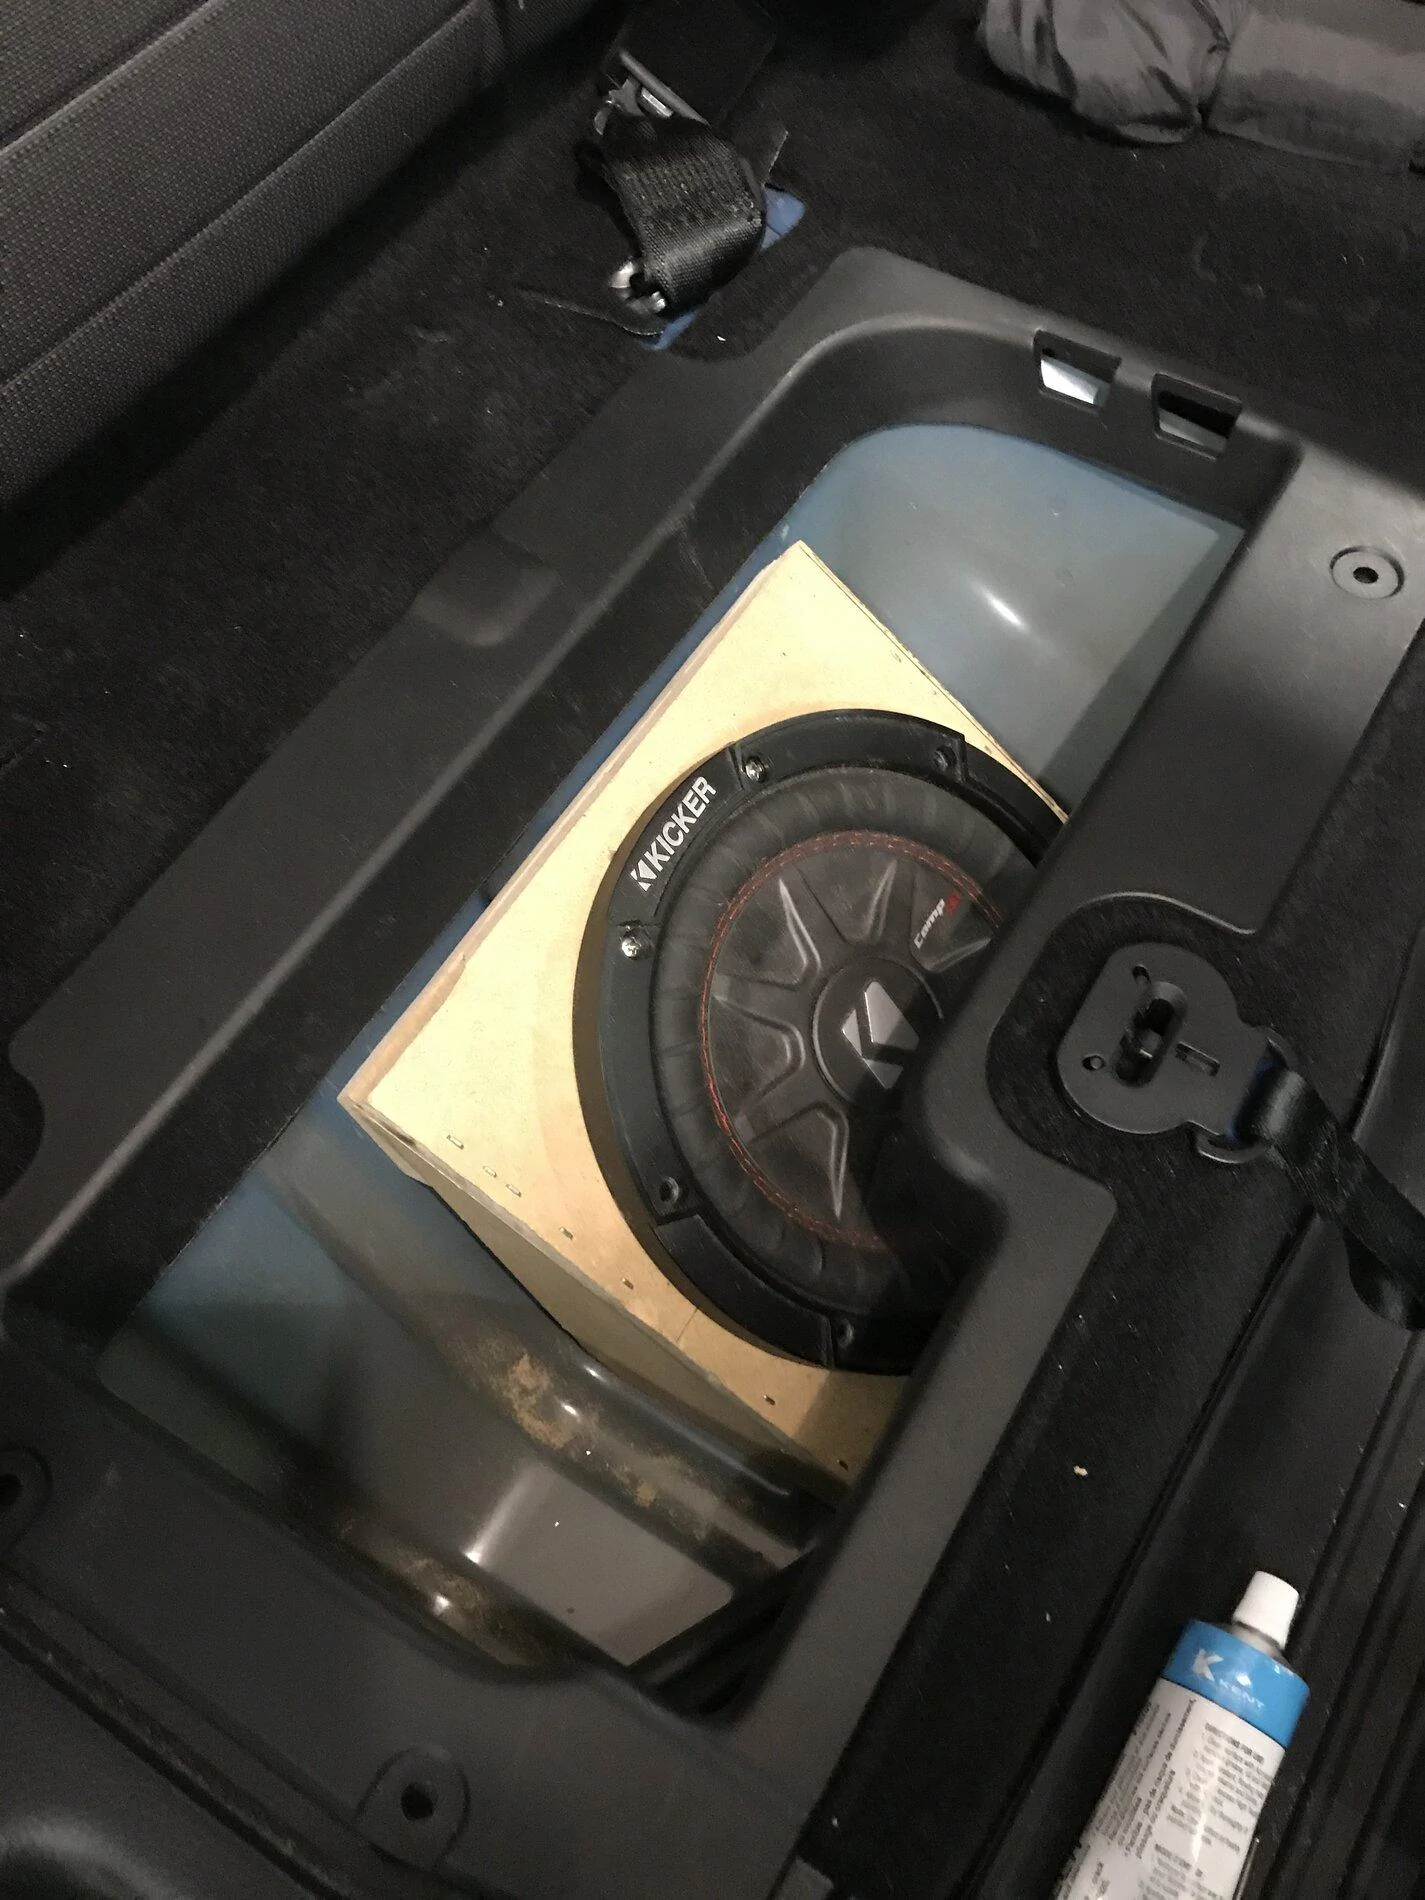
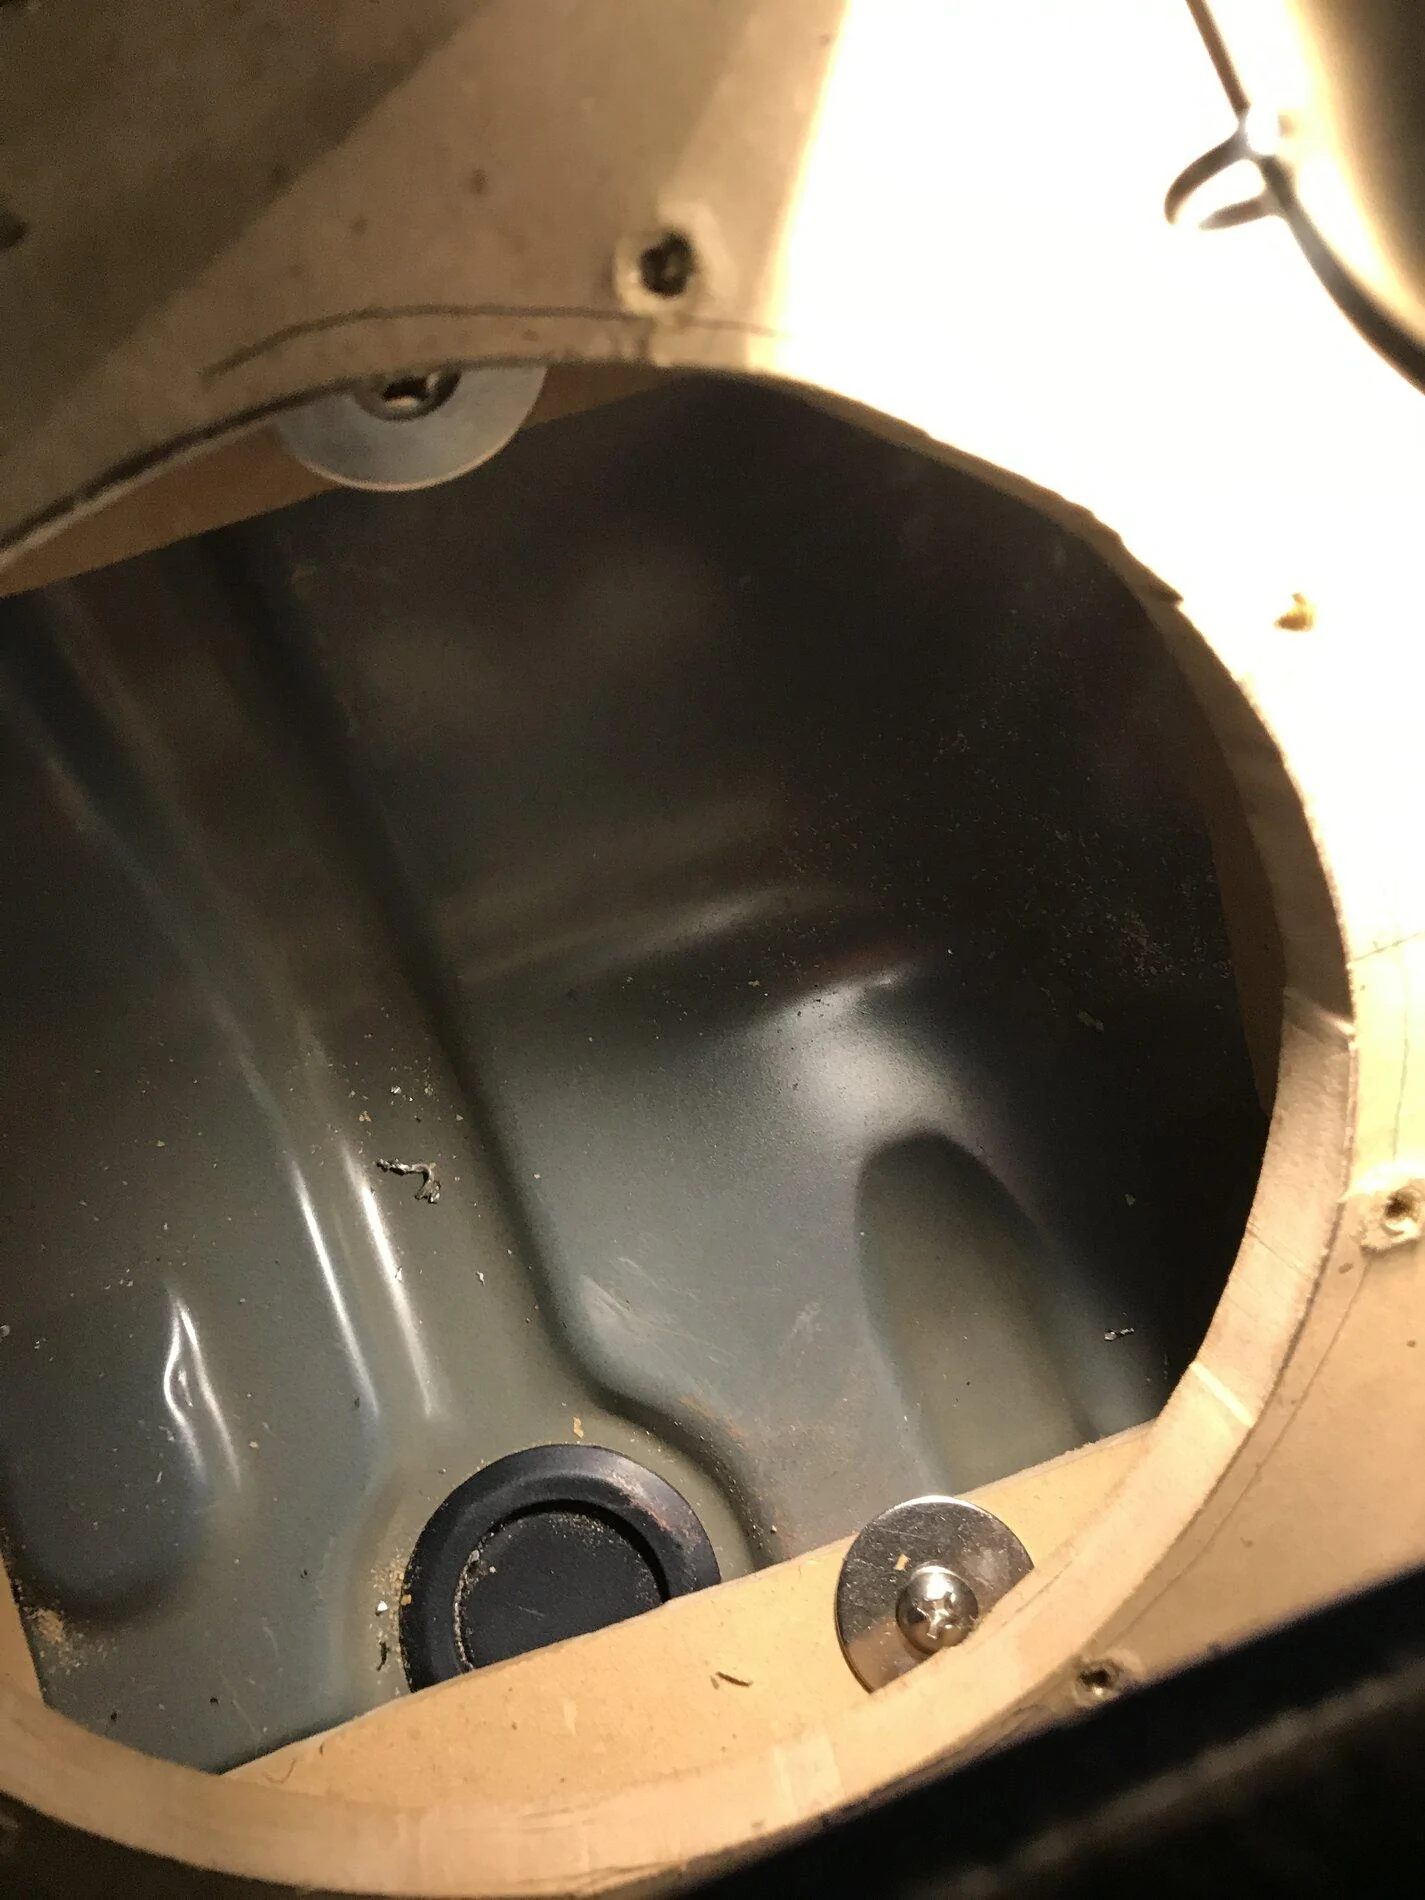
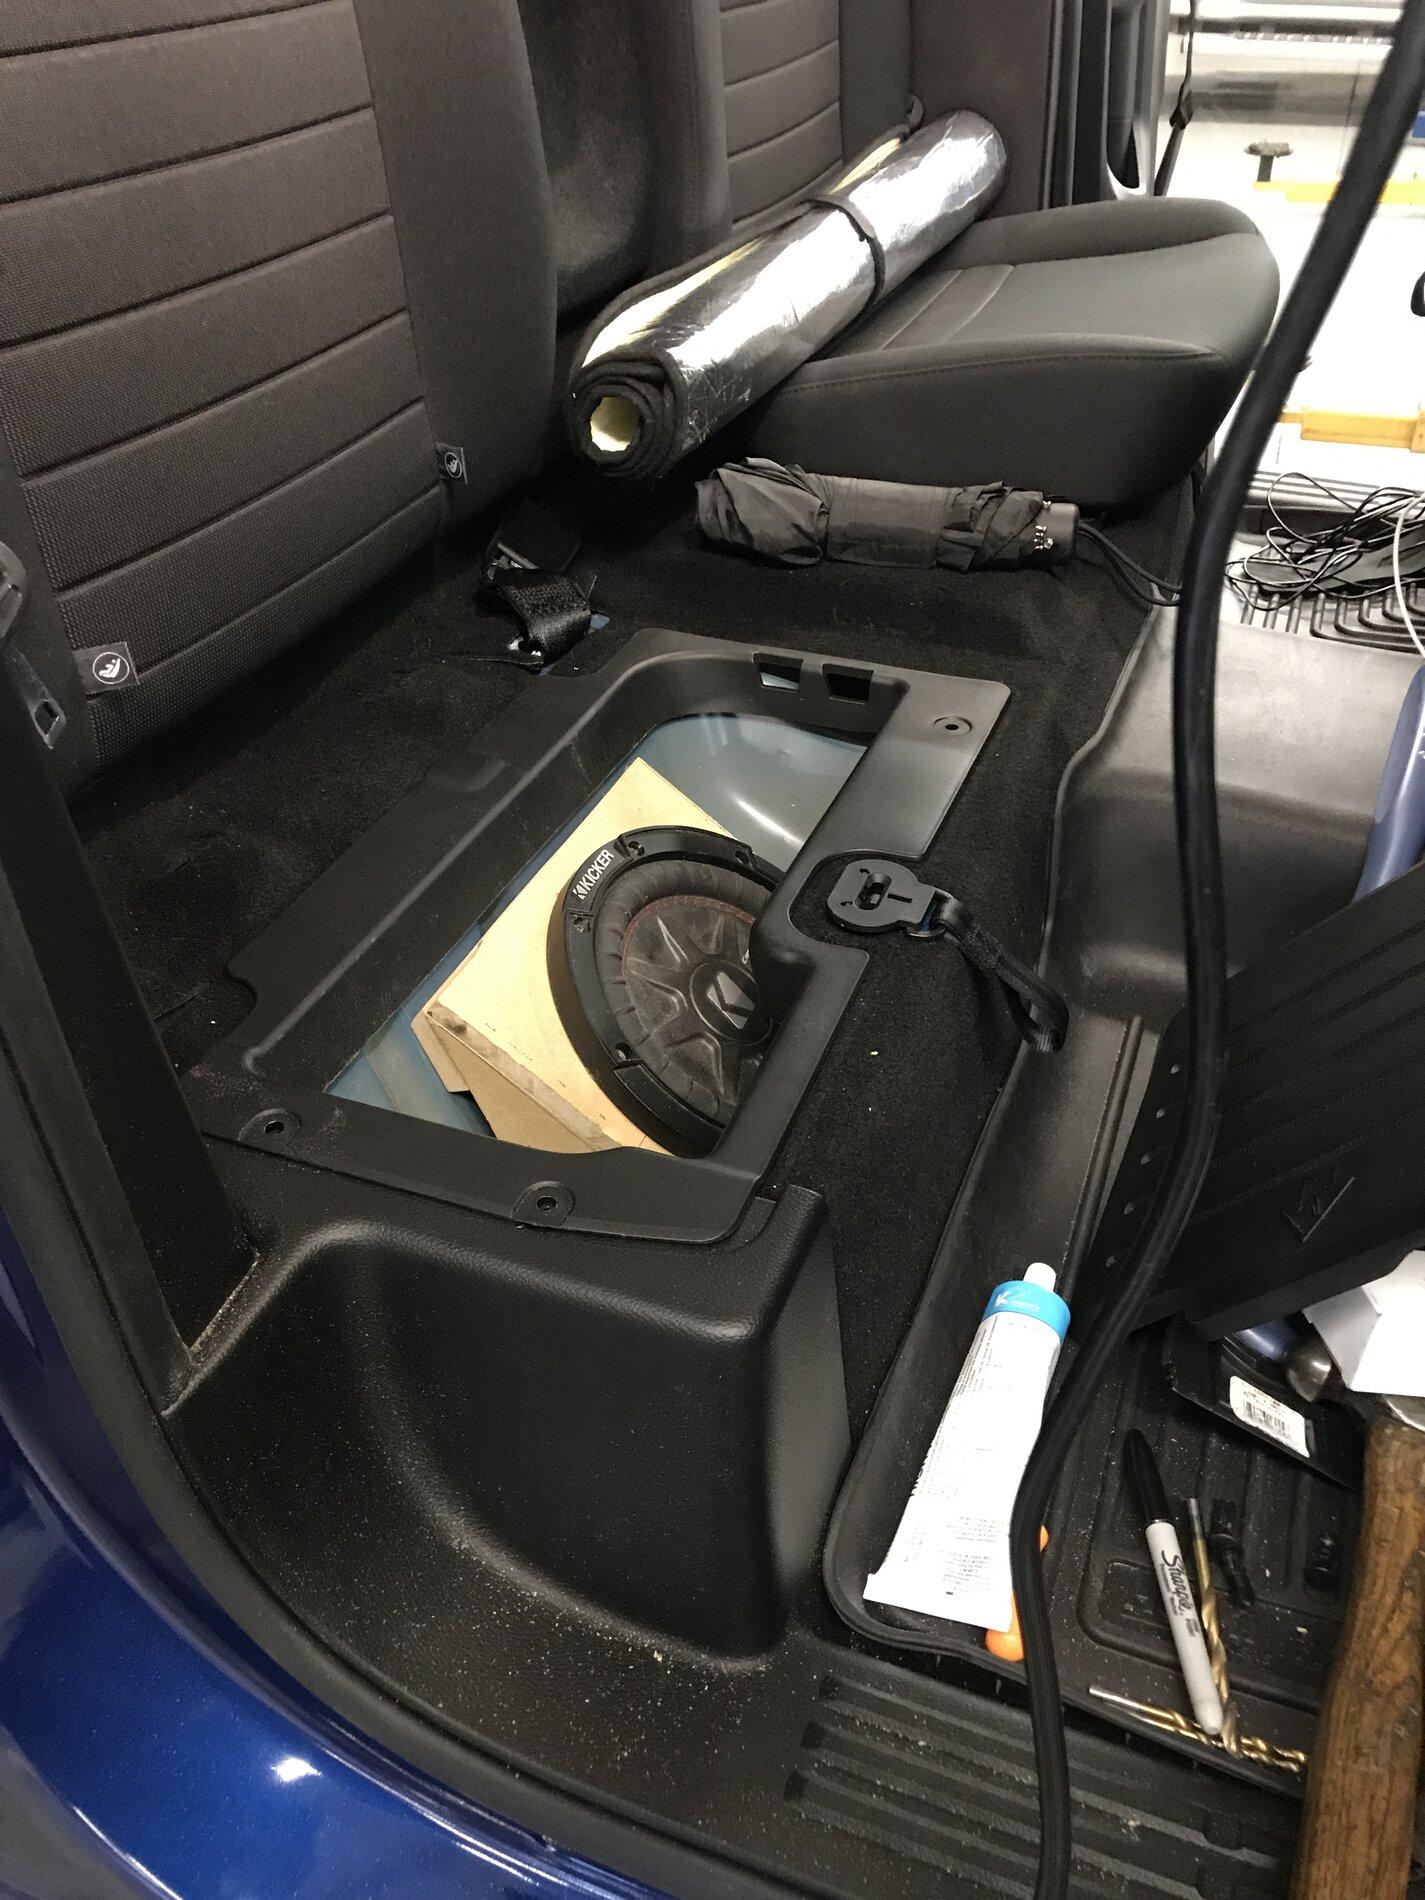
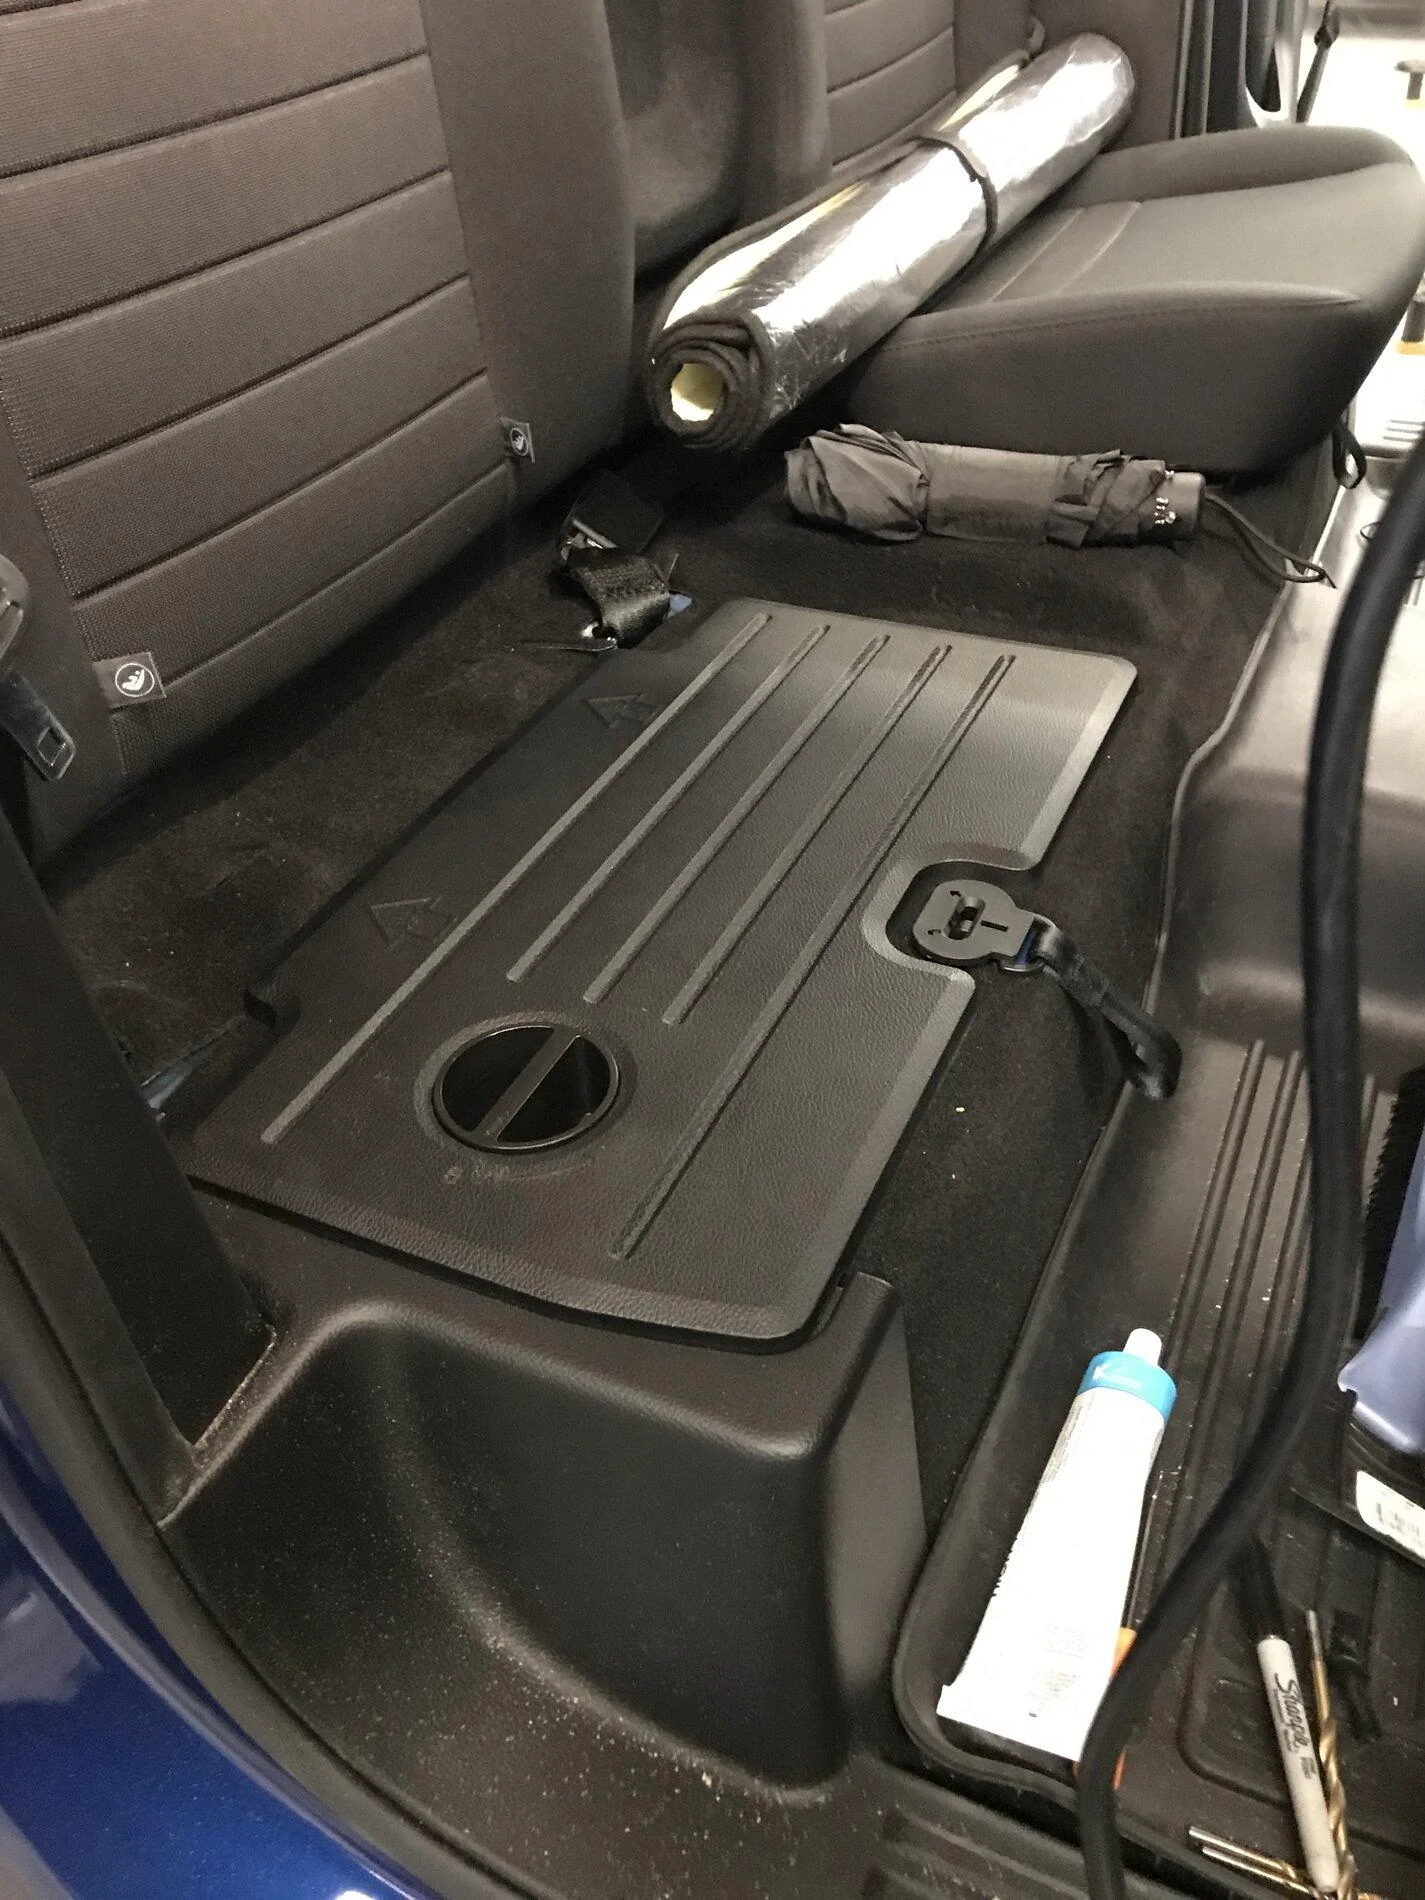
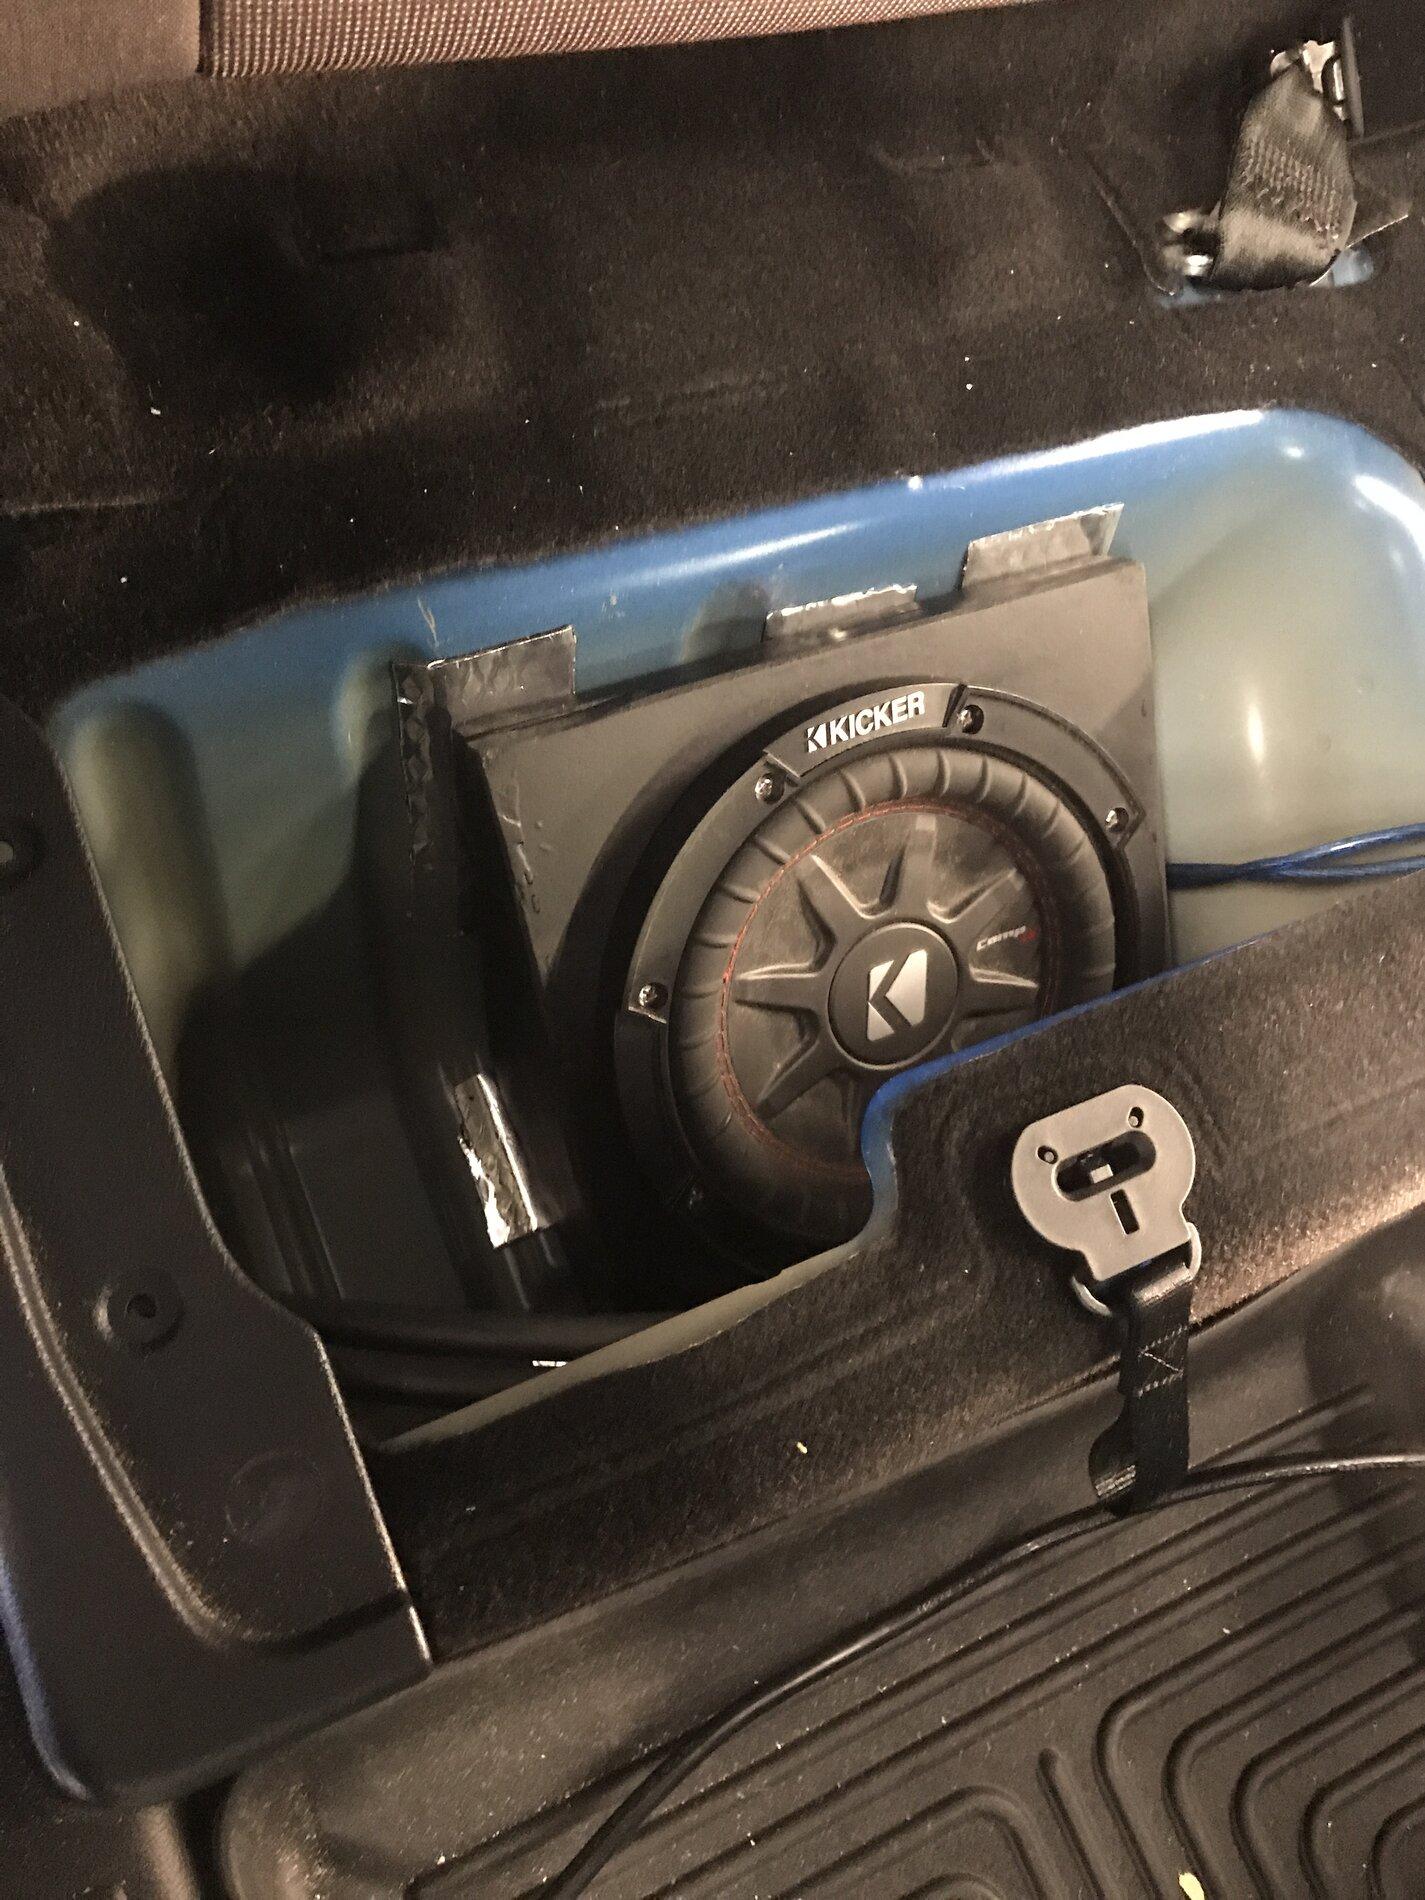
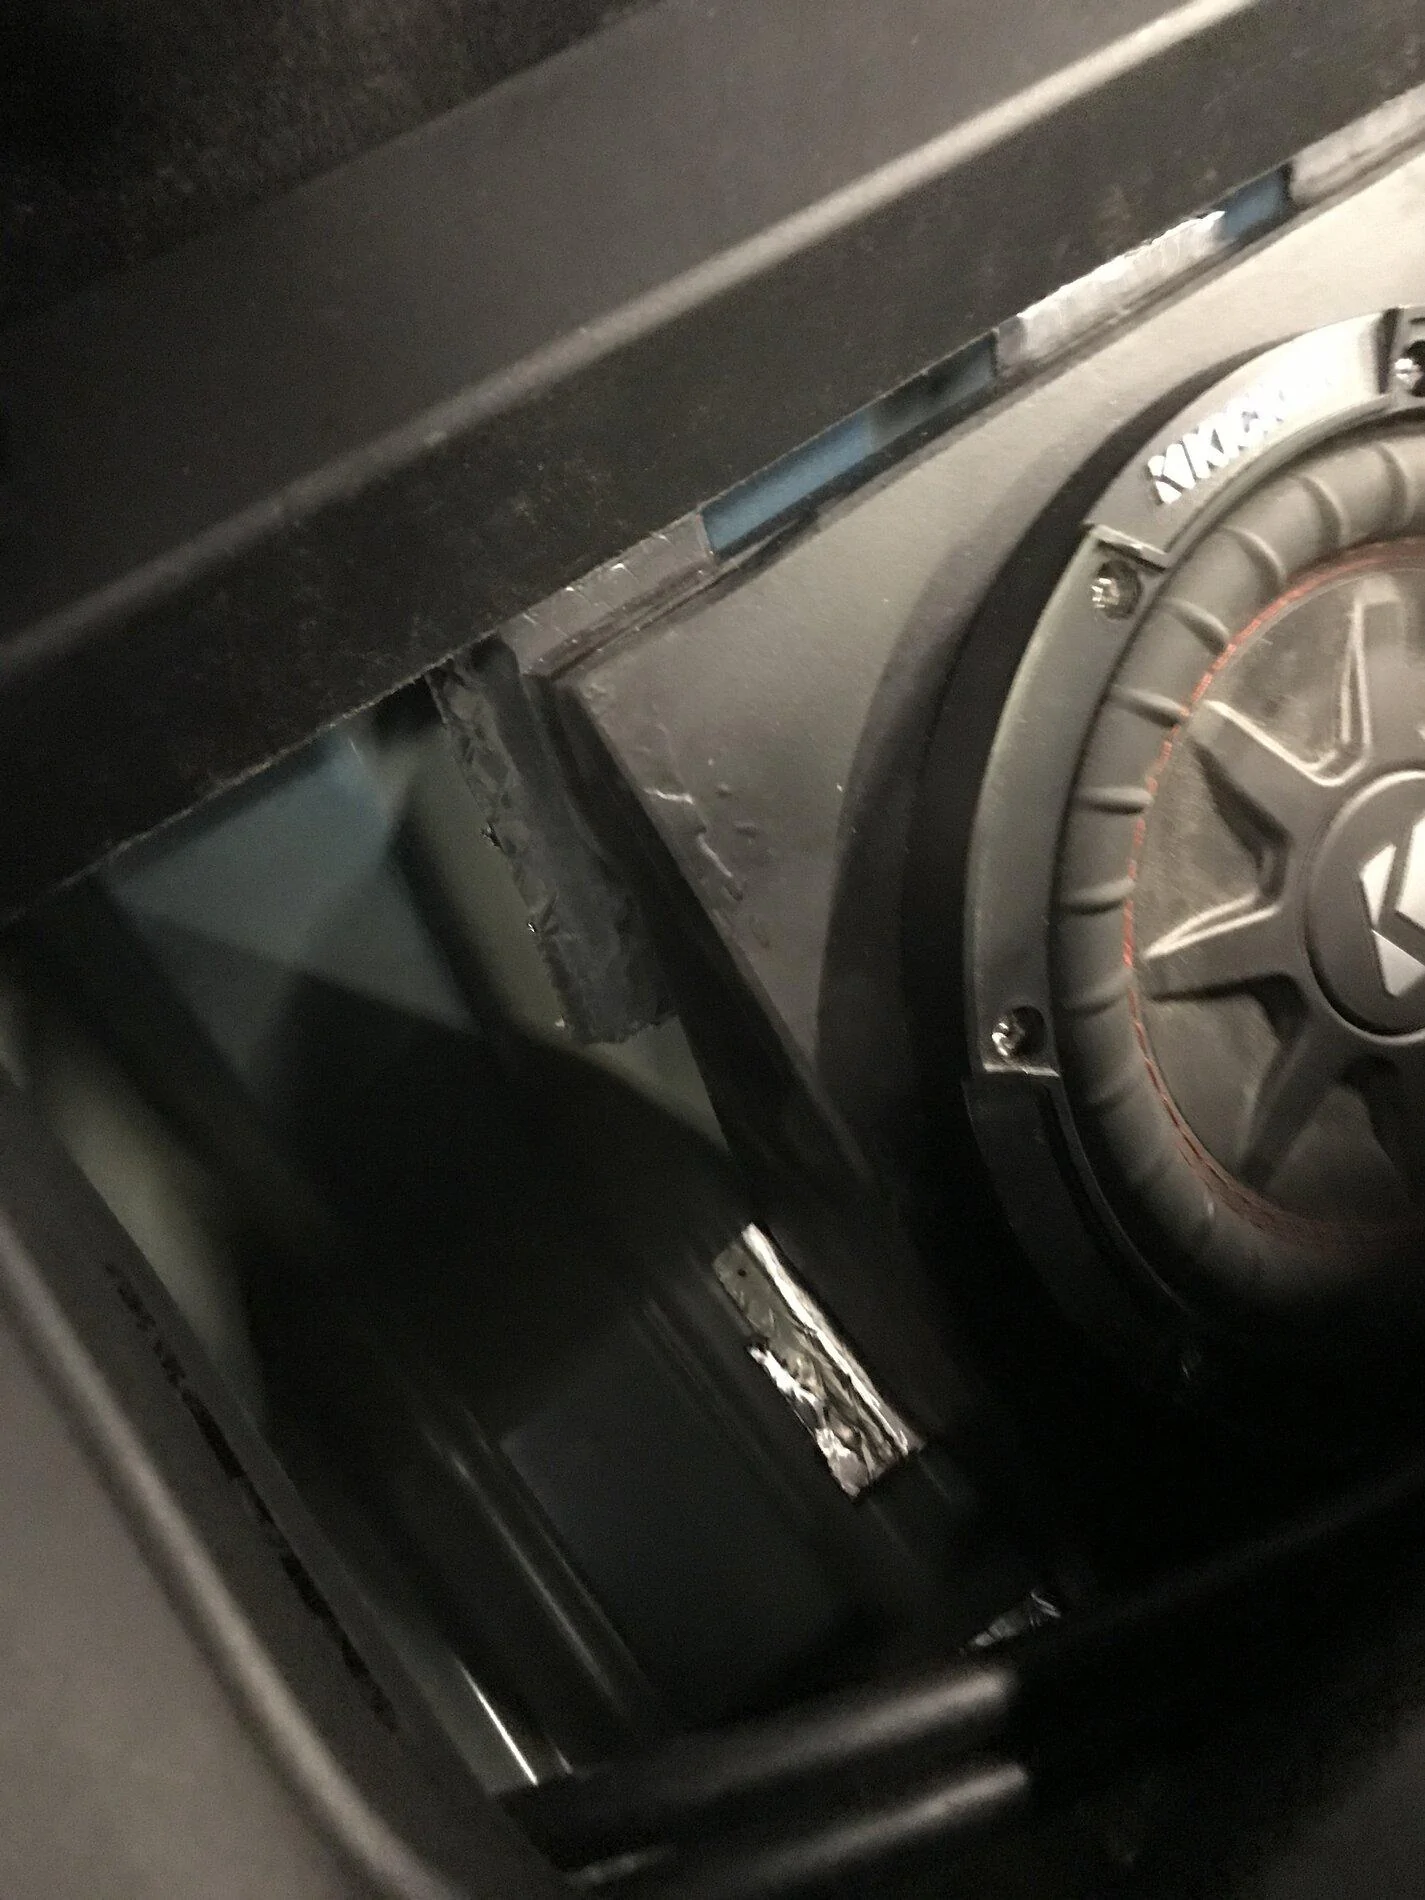
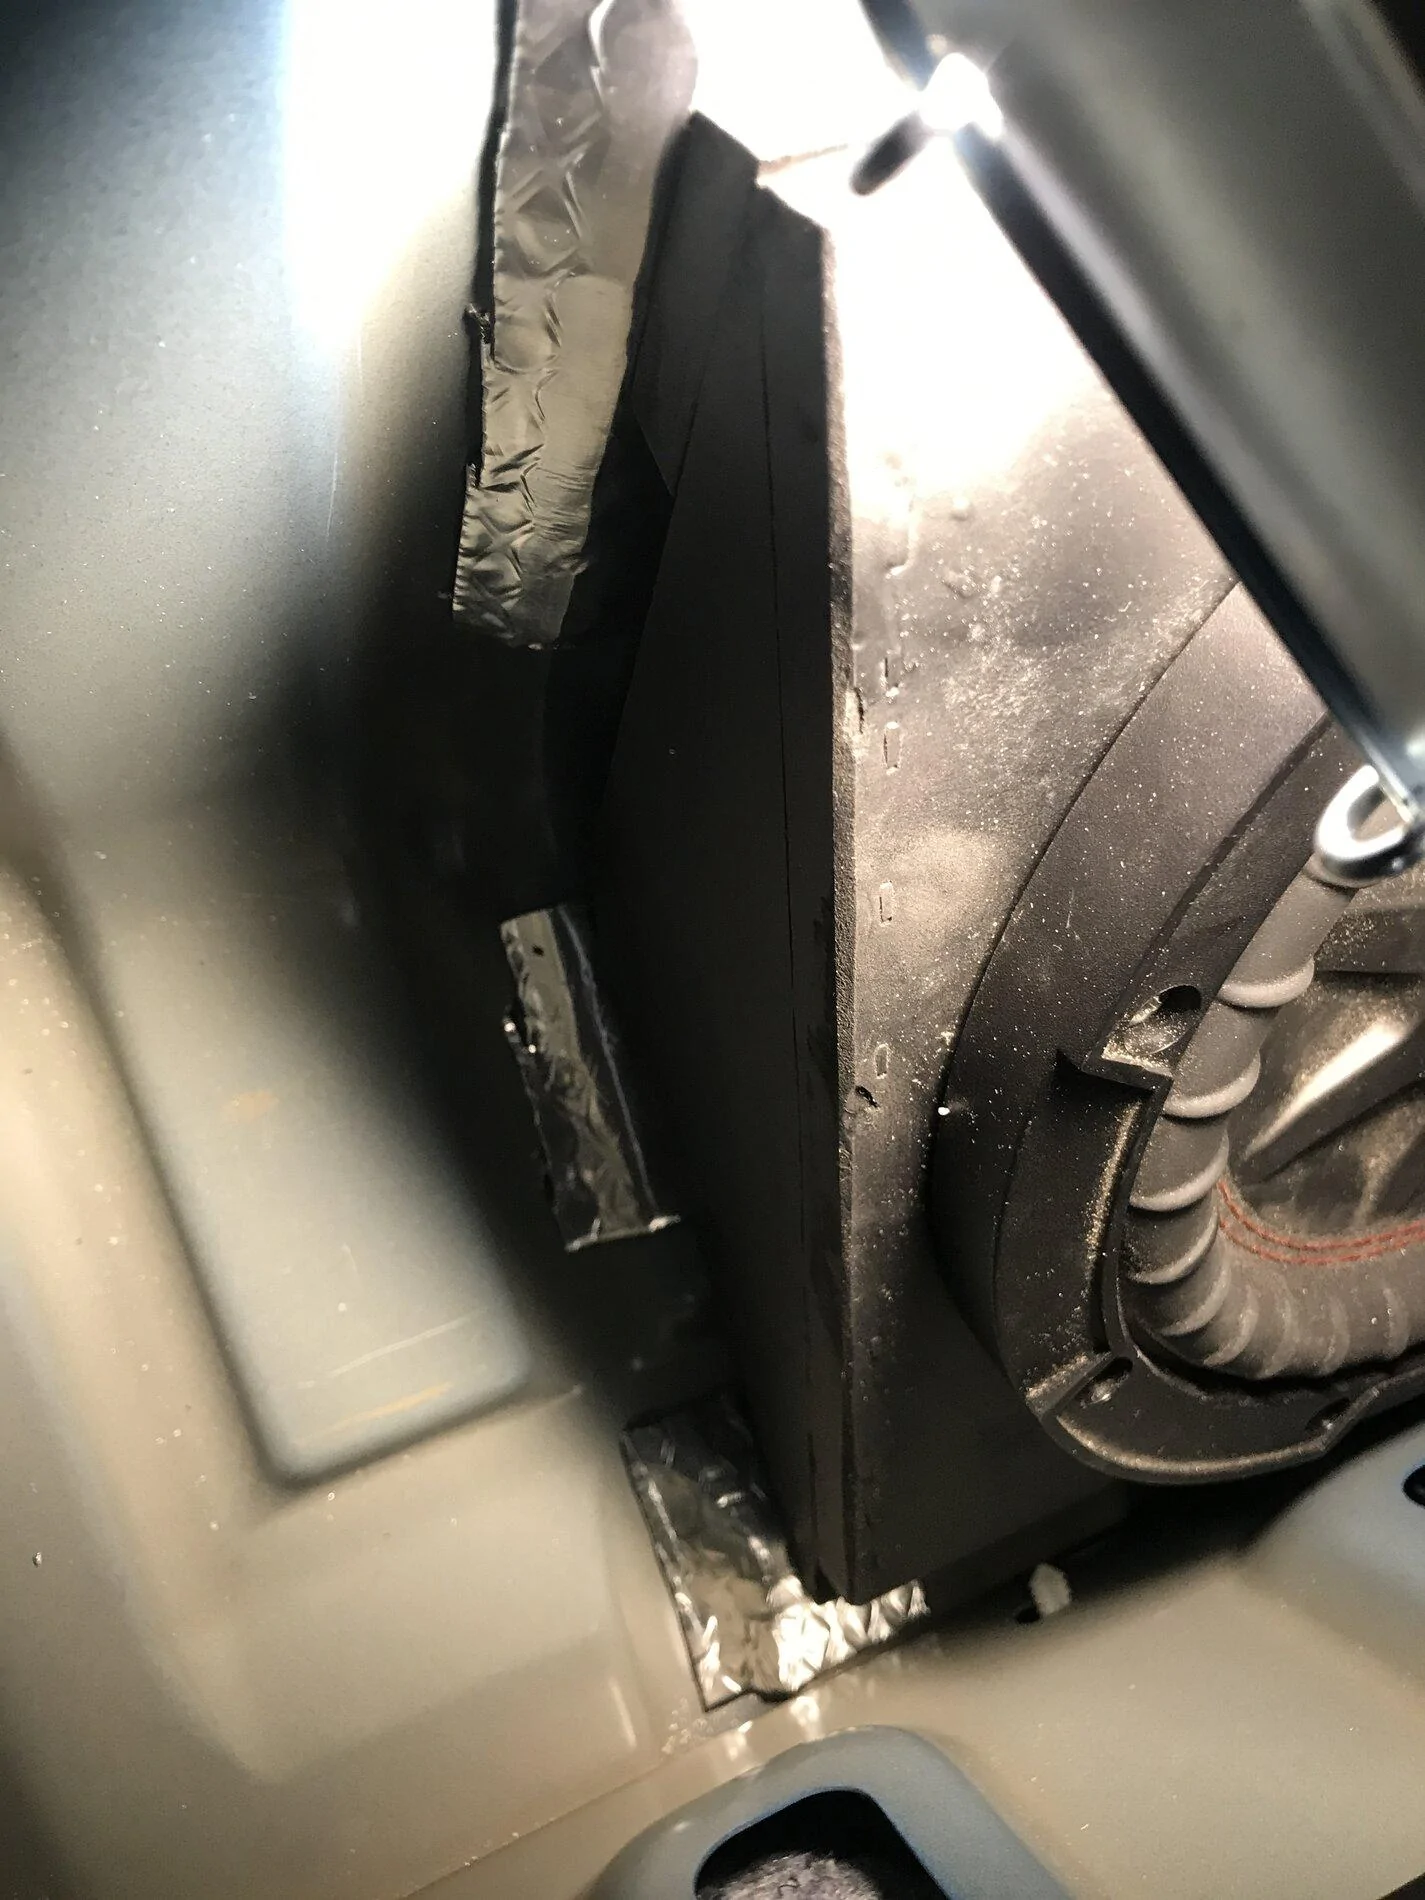
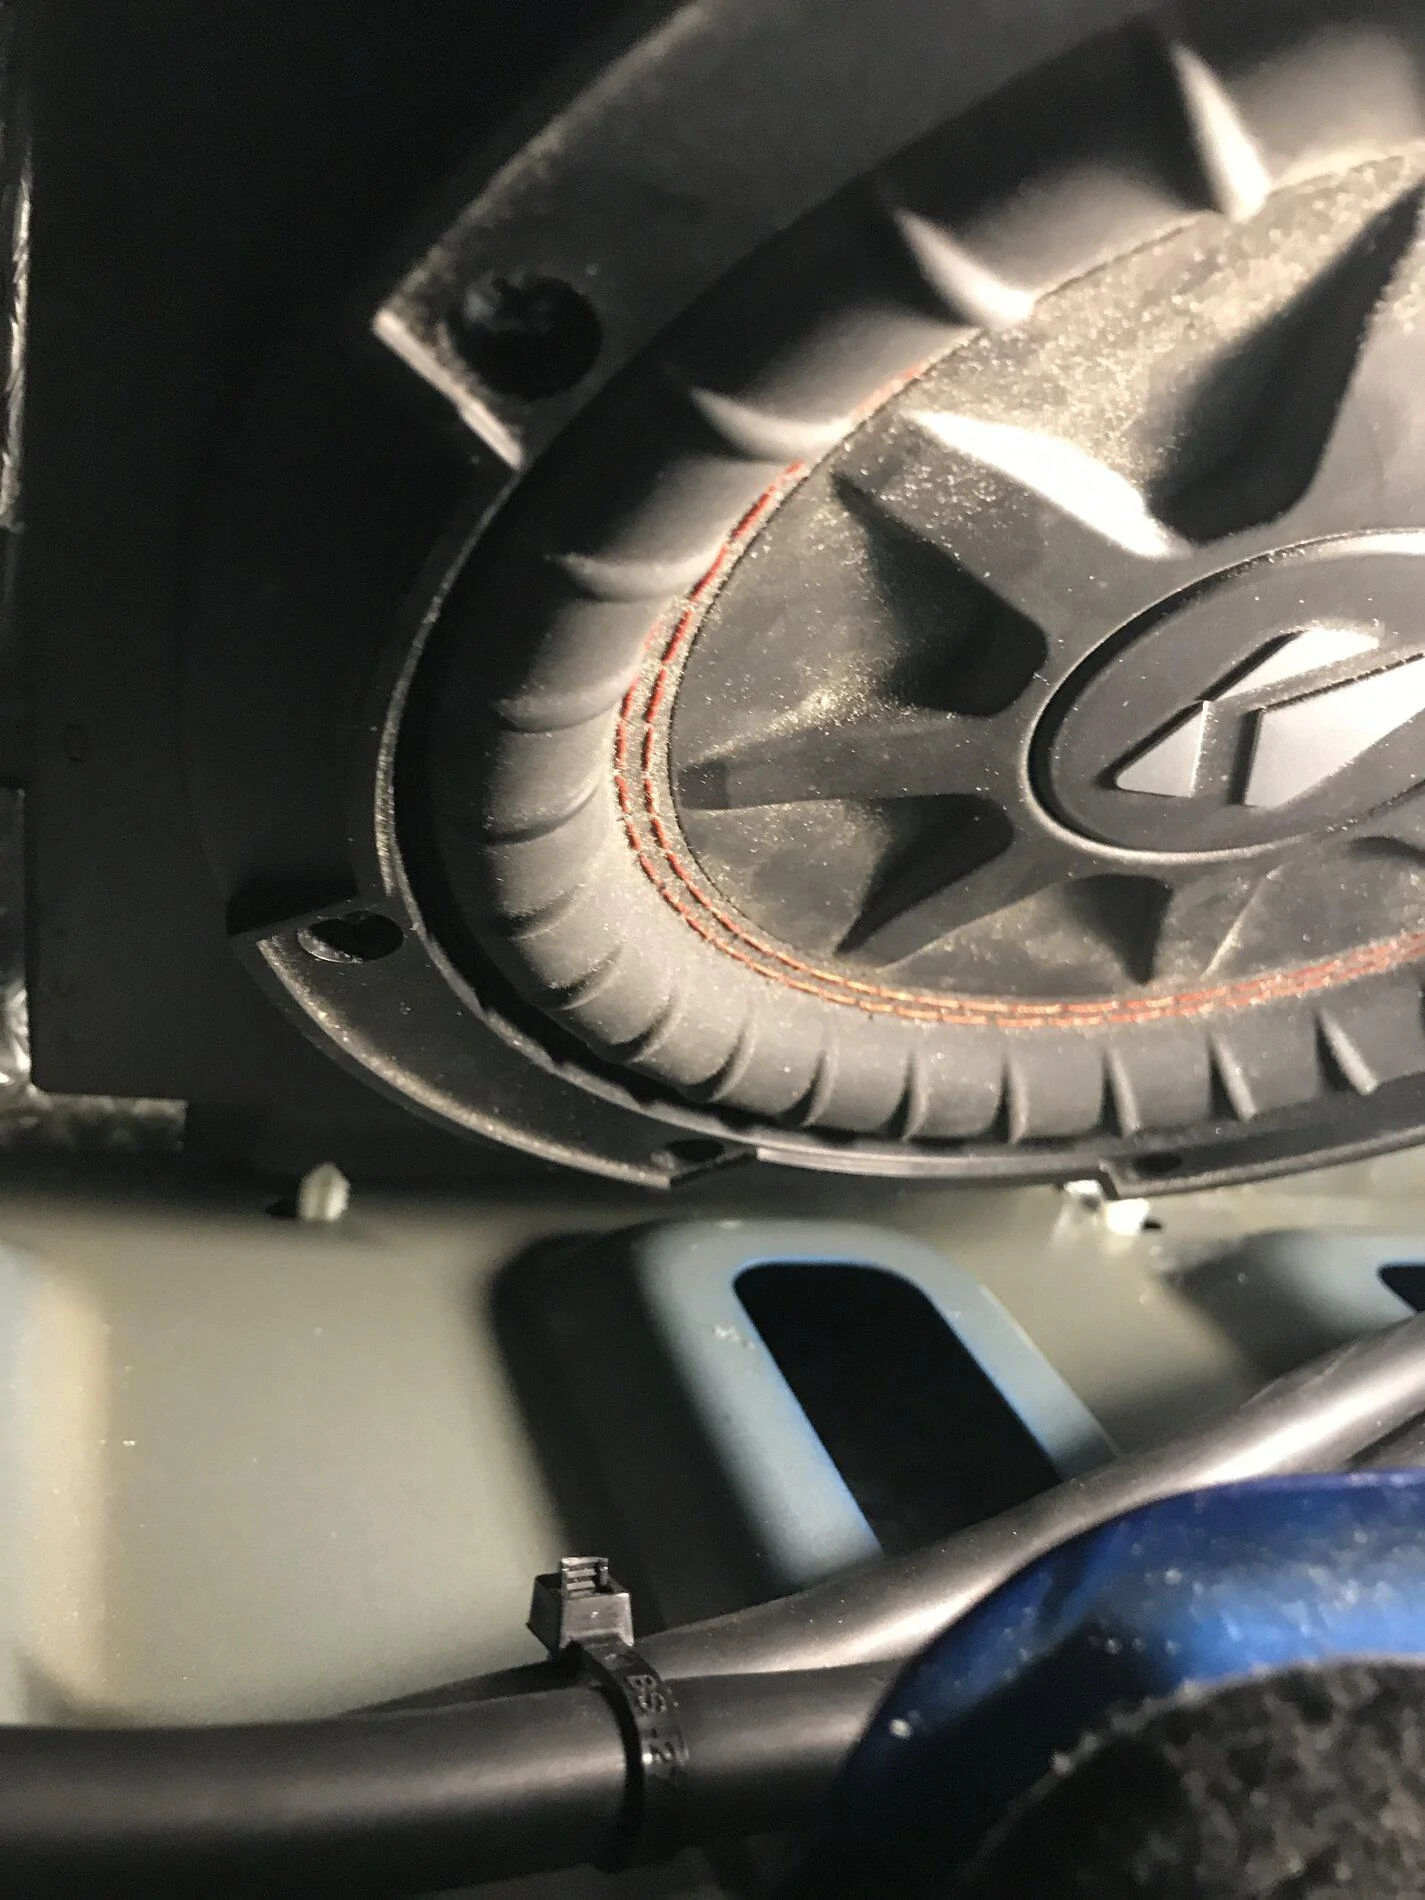
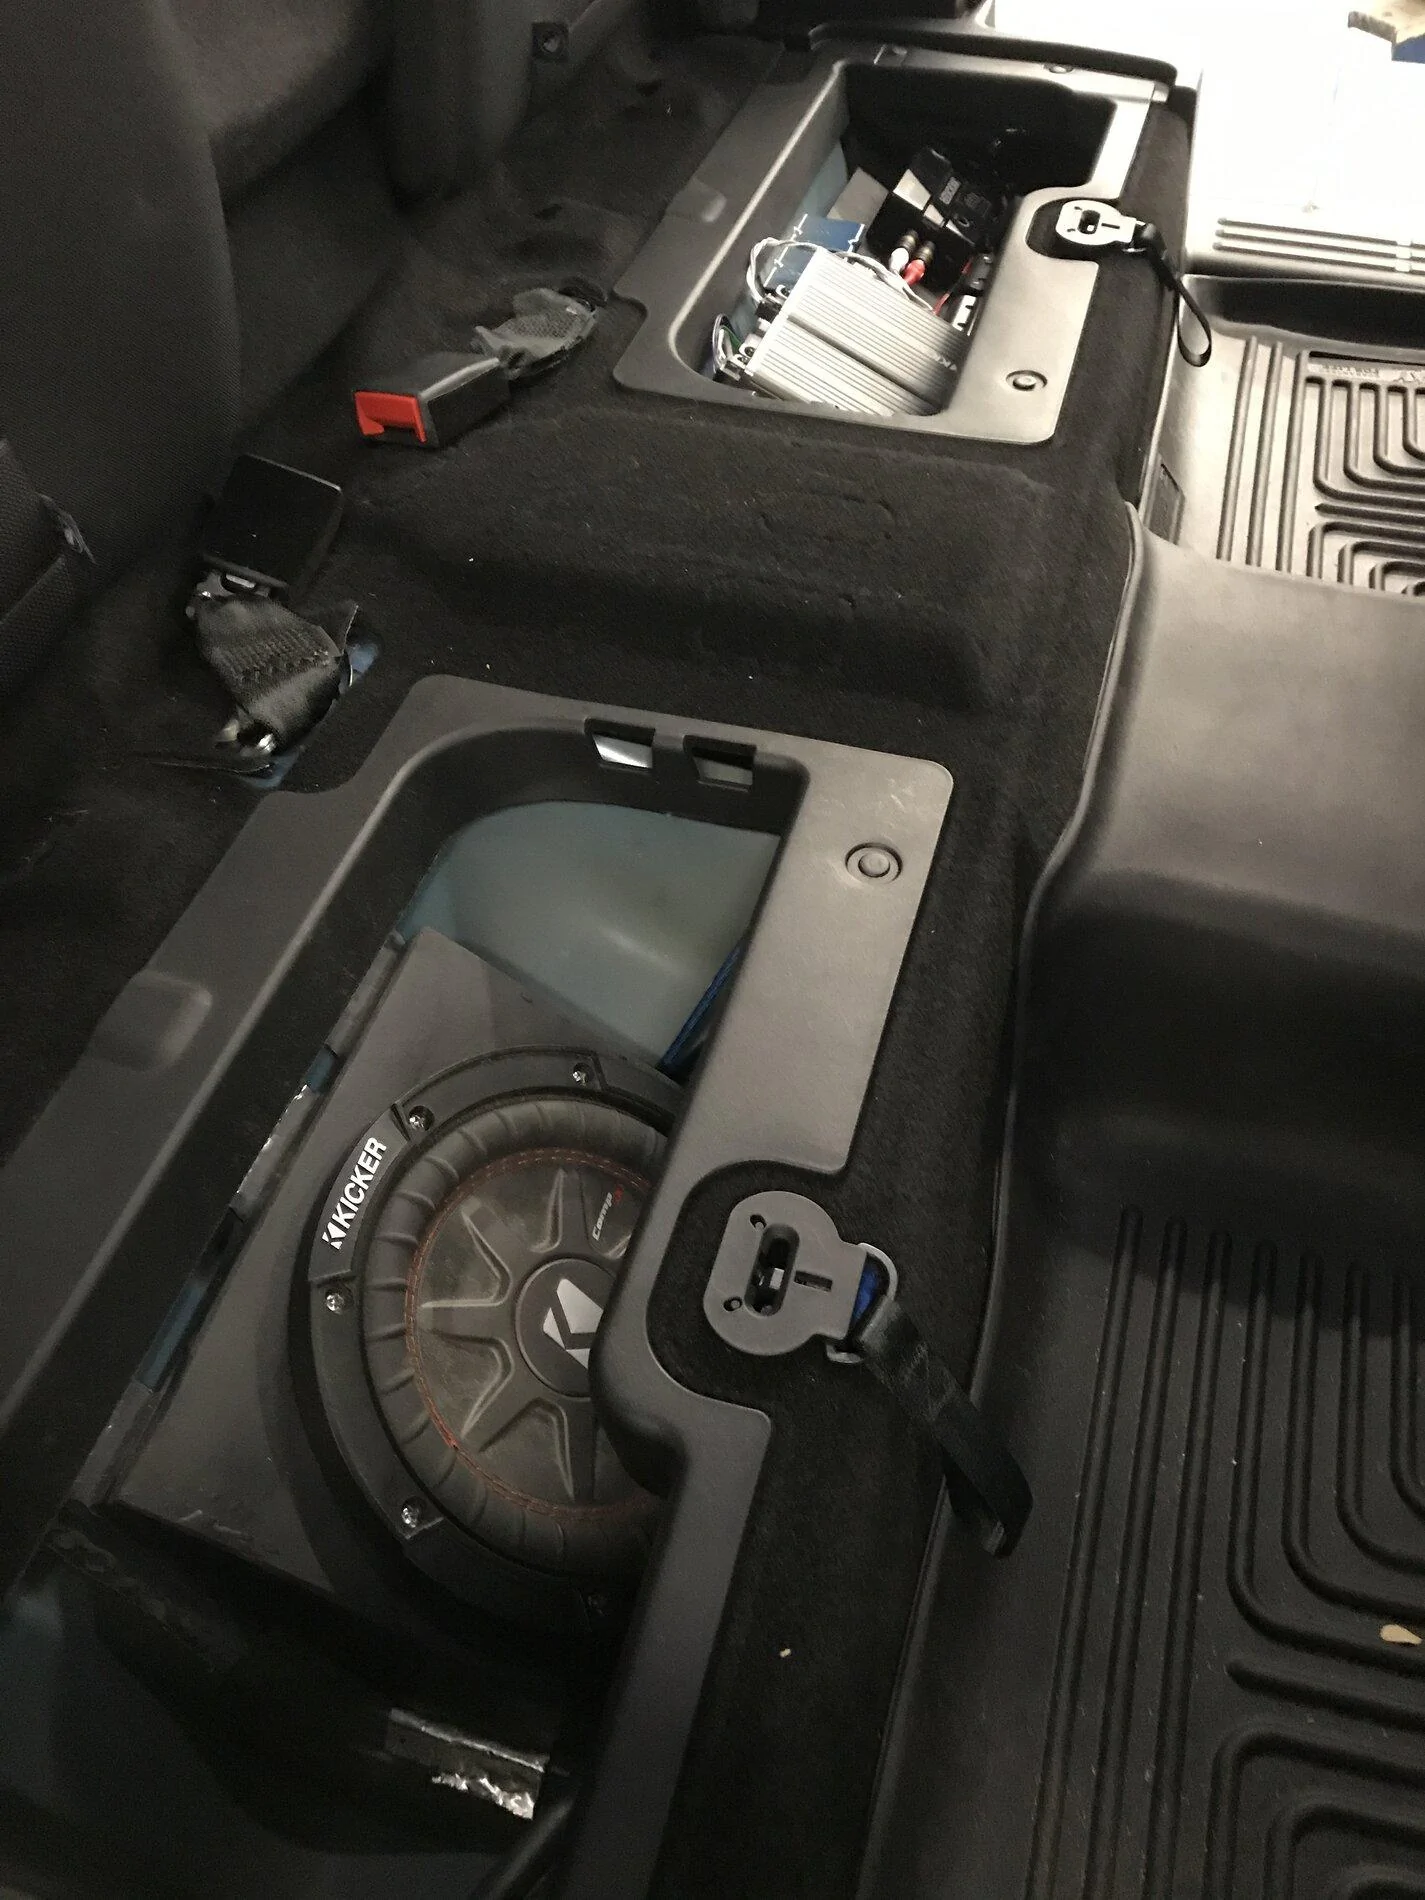
I have 2 Kicker low profile 150-300w RMS 8-inch subs gathering dust, so I did some inspection of the right rear hidey hole to see if installing one 8-inch sub is possible. Might not go in the way one would expect, but I’m betting I can get one in there, so I took some rough measurements for the future.

Stay tuned...
Sponsored

 
OP
OP
Plinky

Plinky

Active Member
First Name
Chris
Joined
May 3, 2020
Threads
2
Messages
25
Reaction score
40
Location
Dallas, TX
Vehicle(s)
2019 Ranger XLT SuperCab
Occupation
automotive technician
A bunch of parts showed up, along with a slow day at work, so got a little accomplished today.
amp board.JPG


Didn't have the room I was wanting (not like I have much choice in this vehicle), so I reassessed & made another mounting board for the amps, boosters, distro blocks, & LOC. Amazing how much 1 1/4 inch makes (TWSS).
amp board test fit.JPG

hidey hole mod.JPG


hidey cover.JPG


seat bottom.JPG


Like a glove! Plan is to also put some fairly stiff packing foam I have from headliner shipping containers underneath this to keep it from rattling around. I did have to make a slight modification to the hidey hole lid as it was hitting the 4 channel amp, but very minimal. The lid latch does hit the LOC, but it doesn't mar it, may have to put some felt tape on the lid in that area to keep rattles down. So far, fully assembled you can't tell anything's under there, but I will eventually have to buy one of those swing out boxes for jack storage.
power wire route.JPG


Power wire will route through here, with some vacuum line around the perimeter of the hole, & covered with Noico mat to keep the sharp edge at bay. From there it'll head up the driver side through the bulkhead into the engine compartment. If I have any that'll fit I'll probably install a rivnut & make a ground point nearby here for everything rather than look for an existing one. More on that soon.

amp board wires.JPG


I also have to make this look somewhat prettier. Once again...more on that later.
 
OP
OP
Plinky

Plinky

Active Member
First Name
Chris
Joined
May 3, 2020
Threads
2
Messages
25
Reaction score
40
Location
Dallas, TX
Vehicle(s)
2019 Ranger XLT SuperCab
Occupation
automotive technician
Weekend off, so I wasted Saturday at work working on the Supercab.

Got the amp power & ground wiring ran through the bulkhead via a 3/8 inch hole about 1 1/2 inches northeast of the main engine harness pass-thru with a pass-thru grommet of it's own. I did cover it with braided sleeve tubing & secured with zip ties for protection & I must stress if you attempt this routing, do not let the wire rub against anything on the brake system - brake lines or the EBCM. I've seen a certain electronic retailer radio install nightmare on a brand new Cavalier that required a complete brake system replacement (power wire shorted to brake lines), so better safe than sorry, not accepting responsibility if it happens to you.

IMG_3255.JPG


From the engine compartment side:

IMG_3256.JPG


Routing was pretty straightforward, alongside the body harness to the rear seats. Thankfully, the trim panels can be removed from the bottom up, so no need to remove the complete LR cab quarter trim.

IMG_3257.JPG


The seat looks like it was spot welded to the floor, so looks good enough of a spot for a ground. If not, I'll find somewhere else. I still have some rivnuts left.

IMG_3258.JPG


Split a small piece of vacuum line to cover the sharp edge of the seat opening, then covered with Noico mat:

IMG_3260.JPG
IMG_3261.JPG


All done here for the moment.

IMG_3262.JPG
 
OP
OP
Plinky

Plinky

Active Member
First Name
Chris
Joined
May 3, 2020
Threads
2
Messages
25
Reaction score
40
Location
Dallas, TX
Vehicle(s)
2019 Ranger XLT SuperCab
Occupation
automotive technician
Time to get creative...

IMG_3264.JPG


Nothing under the hidey hole on this side, so a bracket bolted to the body will work here.

IMG_3267.JPG
IMG_3268.JPG


First things first...make some space.

IMG_3269.JPG


Fun with an air powered sawzall.

IMG_3272.JPG


A little massaging with a DA sander & voila:

IMG_3273.JPG


In comparison to the driver side:

IMG_3274.JPG


With the help of a contour gauge & some more DA sanding skills I have the beginnings of a sub bracket.

IMG_3275.JPG


Mock up in the hidey hole.
BTW, the LED bulbs for the old school shop lights at Lowes are awesome. No BS USB charging cable, brighter than the lights that use said charging cables, & no holes burnt in the upholstery.

KOMY3652.JPG


That's all for now.
 
OP
OP
Plinky

Plinky

Active Member
First Name
Chris
Joined
May 3, 2020
Threads
2
Messages
25
Reaction score
40
Location
Dallas, TX
Vehicle(s)
2019 Ranger XLT SuperCab
Occupation
automotive technician
A picture-less update for today. Been busy dealing with work, then dealt with the deep freeze in Texas last week. Got to work Saturday to attempt finishing the amplifier & sub install. Didn't get the sub figured out yet, but I did get the Key 200.4 up & running. Wiring up the amp board wasn't like Dean & Fernando at 5-Star, but it works & is safe considering there just isn't any room in that storage compartment to make it look pretty, and I tried like hell to do so.

FORScan did it's trick with removing factory DSP & turning on the line level outputs (there's a post somewhere on this forum about all that). I also changed the chime source to the IPC only, so only the speaker in the IPC will sound chimes, & no more muted audio on safety warnings (safety warning still present, just audio signals not sent to ACM).

The PAC LD-10 boosters worked as they should. Looking at a sine wave from the radio on a Picoscope the voltage from the radio output peaked at just about 3 volts at max volume without clipping. Measuring at the amplifier input connector the line boosters bumped that up to just under 6 volts without clipping (amp can take up to10v hi or lo level per Kicker). Performed the KEY auto setup & set the gain levels per the amp manual (set the KEY Xover to 80Hz) - definite difference in audio quality & output. Hits real friggin' hard for an amp that fits in the palm of my hand. There is a bit more clarity in the top end, as well as no clipping of the low end. It is a definite improvement.

Big question is for how long as the amp gets pretty hot pretty quick, no matter where I set the input or gain levels (4volts, 1/2 gain on the amps, etc). I have a feeling this thing is gonna Chernobyl just like the cheap Fosgate amps I tried on my Focus years ago. I accomplished what I intended (get a good sound from the factory head), but I just don't feel the amp will hold up. If anyone has any experience with these amps, by all means chime in & offer some advice.

To make matters even better, I just now found out that Idatalink now has a Maestro RR/RR2 firmware, t-harness, & dash kit for the '19-20 model Rangers with MFT without a factory amplifier (about $300 for the RR & install kit). So, it looks like I may be redoing the entire setup & installing my old Kenwood head (or newer) & JL amplifier (upgrading to 75w RMS speakers as well). Yay for possible 4 awg wire install. :facepalm:


CashSeeAO

Well-Known Member
First Name
John
Joined
Sep 23, 2020
Threads
8
Messages
84
Reaction score
142
Location
Central New Mexico
Vehicle(s)
2023 Ranger XLT
Occupation
Semi-retired engineer
Big question is for how long as the amp gets pretty hot pretty quick, no matter where I set the input or gain levels (4volts, 1/2 gain on the amps, etc). I have a feeling this thing is gonna Chernobyl just like the cheap Fosgate amps I tried on my Focus years ago. I accomplished what I intended (get a good sound from the factory head), but I just don't feel the amp will hold up. If anyone has any experience with these amps, by all means chime in & offer some advice.
It’s interesting that your amp runs hot. I have the same amp, and it runs lukewarm in my opinion. It appears that the major differences between our configurations are my amp 1) is mounted under the driver seat, 2) also uses line level input but without voltage boost from the PACs, and 3) runs full range (no crossover cut off). These differences should not cause a big difference in operating temperature. . ???
 
OP
OP
Plinky

Plinky

Active Member
First Name
Chris
Joined
May 3, 2020
Threads
2
Messages
25
Reaction score
40
Location
Dallas, TX
Vehicle(s)
2019 Ranger XLT SuperCab
Occupation
automotive technician
It’s interesting that your amp runs hot. I have the same amp, and it runs lukewarm in my opinion. It appears that the major differences between our configurations are my amp 1) is mounted under the driver seat, 2) also uses line level input but without voltage boost from the PACs, and 3) runs full range (no crossover cut off). These differences should not cause a big difference in operating temperature. . ???
I originally set the preamp voltage at 4 volts at max volume, & had the crossover off so as to run full range. Just yesterday evening I pulled out the oscilloscope & verified the voltages, adjusted to 6 volts (which should be safe per Kicker) & set the crossover to 80Hz since I will be getting the sub running soon.

Well, under normal operation it runs about lukewarm, but that's not why people put amplifiers in their vehicles. At 22-25 on the volume knob it doesn't take long to get toasty. My JL 5-channel could do that constantly & never even get lukewarm.

Idk...kinda like guitar modeling amps. They all claim that they act, feel, & sound like tube amps, but after you play through an actual tube amp you throw that modeling amp in the trash because it just isn't the same. These mini amps can do what some of the big amps can do, but not for as long or as efficiently without self destructing. Maybe I'll try stuffing the JL in there? Who knows...
 
Last edited:
OP
OP
Plinky

Plinky

Active Member
First Name
Chris
Joined
May 3, 2020
Threads
2
Messages
25
Reaction score
40
Location
Dallas, TX
Vehicle(s)
2019 Ranger XLT SuperCab
Occupation
automotive technician
Installing the subwoofer today. Started out with this, but ended up trashing it & slimming up the speaker mounting board on the sides by about 2 inches. Big problem aside from little to no space is major carnage to the compartment lid would be needed for it to fit as it sticks up about an inch or two, plus the inboard side of the pocket conforms upward to form the transmission tunnel, so this will be a massage to fit on the inboard side of the "enclosure". Installed some brass inserts for the speaker mounting bolts as well.
IMG_3412.JPG


After measuring about twenty times & cutting about ten I came up with this. The angle of the speaker now allows the lid to be installed without modifications, plus there's enough room to add some brackets to bolt it to the body.

NVMD0048.JPG


After adding the brackets & installing some rivnuts to bolt it all down. I sealed the rivnuts with body shop clear seam sealer to keep water leaks at bay. Could probably use some silicone sealer as well.

JEZO3631.JPG


It's not going anywhere.

LAFN7029.JPG


DCSZ8440.JPG
GCYF8102.JPG


NZAY9408.JPG


Final piece. Never claimed to be an artisan woodworker, but it fits snuggly & it's pretty solid now, & will be even more so after I fill in the seams & smooth it all out. Not sure if I'll carpet it, might just paint it black. Hopefully next weekend this will get wrapped up. Have to insulate the pocket, then finalize the wiring, & setup the sub amplifier.

I'm pretty sure it's not gonna be the best sounding sub install ever, but I'm not looking to blow the windows out & I'm all about discrete rather than show everything to the world.
 
OP
OP
Plinky

Plinky

Active Member
First Name
Chris
Joined
May 3, 2020
Threads
2
Messages
25
Reaction score
40
Location
Dallas, TX
Vehicle(s)
2019 Ranger XLT SuperCab
Occupation
automotive technician
Install is somewhat done. Now well into the tweaking phase. Bass still feels weak, could be either the fact there's still some openings in the sub mount or the tune on the amp. Might try filling in the gaps with some shipping foam I have or even better use some insta-foam to fill in the voids & trim to fit. Overall, the sub mount is rock solid; it won't budge one bit.

Was using the improper signal to dial in the 4-channel amp (0db 1000hz sine wave tone per Kicker, not what I used), waiting on some 8-pin connectors to isolate the speaker outs from the 4 channel amp so I can disconnect the outputs & set the gains properly without blowing my ear drums completely out. Ended up trying to adjust to proper signal, amp is barely off the lowest setting, no longer getting hot. But, just from that episode, it's clear the almost 6 volt preamp voltage I set it at is a little hot, so I'll lower the preamp voltage to an even 5 volts & redo the 4-channel auto setup, maybe all of it (maybe a little overkill on the sub), & see where everything ends up.

IMG_3481.JPG


IMG_3486.JPG


IMG_3483.JPG


IMG_3482.JPG


IMG_3485.JPG


IMG_3487.JPG
 
OP
OP
Plinky

Plinky

Active Member
First Name
Chris
Joined
May 3, 2020
Threads
2
Messages
25
Reaction score
40
Location
Dallas, TX
Vehicle(s)
2019 Ranger XLT SuperCab
Occupation
automotive technician
I believe I am officially done. Another slow day at work, so on to tweaking.

Originally I had 2 sixteen pin GT150 Deplhi connectors joining 2 sets of 9-wire between the head unit & the amp board. Problem with that is the Key 200.4 has the speaker outputs on the same connector as the power, ground, & remote turn on, so I couldn't set the gain levels without blowing out what's left of my hearing.

Ended up swapping the 16-pin at the amp board with 2 8-pin GT150 Delphi connectors, separating the inputs/outputs, thus enabling me to disable the speaker outputs & set the gain levels painlessly.

In a nutshell: dropped the 4-ch amp input voltage to 4 volts (with the PAC line boosters), set the crossover back to 80hz from 120hz, & re-ran the auto setup. Allowed me to actually move the gain knobs off of zero & actually push the amp harder (used 1000hz sine wave signal).

For the 500.1 amp I had to redo the KeyLOC setup. Voltage was a bit low initially (like 2.9v), which would explain the weak sub output. After redoing the KeyLOC setup I was able to push the output voltage to the 500.1 input up to almost 10 volts, but evened it out at 4 volts like the 200.4. Re-ran the algorithm for the 500.1 (using the 0db 50hz signals for the KXMA and KMA amplifiers to set the gain matching & not the 500.1 gainmatch sweep tone) & lowered the crossover to around 80 hz, & added some bass boost.

High & lows coming through much clearer now. Subwoofer is definitely moving air, as the low end is much fuller without distortion. I have some distortion free midbass once again as well.

Hope this was useful & entertaining. Good luck on your own build. ;)
 

onobeka

Well-Known Member
Joined
Jan 20, 2021
Threads
9
Messages
389
Reaction score
1,137
Location
Romania
Vehicle(s)
2018 Ford ranger 2.2 European model
Congratulations, great project and great write-up!!
I have a couple (actually more) of questions:
- you've said that just changing the speakers made a dramatic difference, next to the deadening. In this setup were you driving the speakers directly by the OEM head-unit, without a micro amp (kicker key), right?
- what speakers are those? I am interested in the components on the front only, were there any issues with mounting depth?
- sound deadening: did you only do deadening or also used material for absorption?
- you were mentioning the amp is getting hot, but which amp? The Kicker 200.4 or the subwoofer one, 500.1?
- why did you choose to install the 200.4 in the back and not in the dash behind the head-unit? I see the value in what you did, but it also means running a hell more wires from behind the dash to the amp and back to the OEM speaker harness.

Thank you in advance! As you've probably guessed I am looking forward for an improvement only in the front for now: speakers + micro amp. Either Kicker or Alpine ...
 
OP
OP
Plinky

Plinky

Active Member
First Name
Chris
Joined
May 3, 2020
Threads
2
Messages
25
Reaction score
40
Location
Dallas, TX
Vehicle(s)
2019 Ranger XLT SuperCab
Occupation
automotive technician
Congratulations, great project and great write-up!!
I have a couple (actually more) of questions:
- you've said that just changing the speakers made a dramatic difference, next to the deadening. In this setup were you driving the speakers directly by the OEM head-unit, without a micro amp (kicker key), right?
- what speakers are those? I am interested in the components on the front only, were there any issues with mounting depth?
- sound deadening: did you only do deadening or also used material for absorption?
- you were mentioning the amp is getting hot, but which amp? The Kicker 200.4 or the subwoofer one, 500.1?
- why did you choose to install the 200.4 in the back and not in the dash behind the head-unit? I see the value in what you did, but it also means running a hell more wires from behind the dash to the amp and back to the OEM speaker harness.

Thank you in advance! As you've probably guessed I am looking forward for an improvement only in the front for now: speakers + micro amp. Either Kicker or Alpine ...
Installed Rockford Fosgate P1675 & P1675-S (components). Ordered everything from Crutchfield because they threw in Metra mounting brackets & wiring adapters for free (along with free shipping). No issues with mounting depth. Was running them through the unadulterated OEM head at first, no amps. The difference was so dramatic I had to reset/adjust the eq.

For deadening I Noico matted the doors just around the speakers mounting area & the door skin just behind the speaker (didn’t feel like covering the entire door). Also installed Stinger Fast Rings around all door speakers. Can’t remember, but I might’ve had to trim a bit off the solid piece that goes on the door skin behind the front speakers as the window might interfere.

The ampS were getting hot because I originally had the gains set too high. Now they get fairly warm when going wide open, but not nearing nuclear like at first.

I installed 8-pin connectors at the amp side of the 9-wire so I could disconnect the speaker outputs from the 200.4 & set the gain levels without killing my ears. If I get a moment I’ll take & post a picture.

Use a 0db 1000hz sine wave signal to set the 200.4 levels. I had better results using a 0db 50hz signal to set the gain level on the 500.1 instead of the gain match track Kicker recommends.

I do driveability, electrical, a/c, & trim work for a living, so I get pretty much all the evaporator core replacements, which usually require dash removal. I set everything up so it could be easily disconnected & set aside for serviceability. It only takes disconnecting the t-harness & snipping a few zip ties to get the 9-wire harness out of the way to pull the dash.

Nothing makes a difficult job even worse more than unknown equipment up inside the dash.

Case in point: I had to pull a dash to replace a mode door actuator on a 3/4 ton GMC truck last week. Doesn’t pay crap under warranty, but on a virgin vehicle it’s not too bad...until you “professionally” install an aftermarket alarm in the vehicle.

Everything was zip tied, butt connected, & t-tapped to the dash & steering column. Nothing was made to disconnect for service (and the customer was a royal dick about it). It took longer to deal with that madness than the job itself.

Hope that answered your questions. Gonna try & get back to sleep. Have a good day.
 

onobeka

Well-Known Member
Joined
Jan 20, 2021
Threads
9
Messages
389
Reaction score
1,137
Location
Romania
Vehicle(s)
2018 Ford ranger 2.2 European model
Thank you very much!
" Was running them through the unadulterated OEM head at first, no amps. The difference was so dramatic I had to reset/adjust the eq" ... do you mean to set the eq from the Sync3 settings or Forscan? I mean at this initial stage you had no DSP or amp.
What do you actually mean by "dramatic" :).?

Have a good night sleep!
 

spieghts451

Well-Known Member
First Name
Jason
Joined
Mar 23, 2020
Threads
6
Messages
53
Reaction score
26
Location
Mississippi
Vehicle(s)
2019 Ranger xlt supercrew
Occupation
Welder
A picture-less update for today. Been busy dealing with work, then dealt with the deep freeze in Texas last week. Got to work Saturday to attempt finishing the amplifier & sub install. Didn't get the sub figured out yet, but I did get the Key 200.4 up & running. Wiring up the amp board wasn't like Dean & Fernando at 5-Star, but it works & is safe considering there just isn't any room in that storage compartment to make it look pretty, and I tried like hell to do so.

FORScan did it's trick with removing factory DSP & turning on the line level outputs (there's a post somewhere on this forum about all that). I also changed the chime source to the IPC only, so only the speaker in the IPC will sound chimes, & no more muted audio on safety warnings (safety warning still present, just audio signals not sent to ACM).

The PAC LD-10 boosters worked as they should. Looking at a sine wave from the radio on a Picoscope the voltage from the radio output peaked at just about 3 volts at max volume without clipping. Measuring at the amplifier input connector the line boosters bumped that up to just under 6 volts without clipping (amp can take up to10v hi or lo level per Kicker). Performed the KEY auto setup & set the gain levels per the amp manual (set the KEY Xover to 80Hz) - definite difference in audio quality & output. Hits real friggin' hard for an amp that fits in the palm of my hand. There is a bit more clarity in the top end, as well as no clipping of the low end. It is a definite improvement.

Big question is for how long as the amp gets pretty hot pretty quick, no matter where I set the input or gain levels (4volts, 1/2 gain on the amps, etc). I have a feeling this thing is gonna Chernobyl just like the cheap Fosgate amps I tried on my Focus years ago. I accomplished what I intended (get a good sound from the factory head), but I just don't feel the amp will hold up. If anyone has any experience with these amps, by all means chime in & offer some advice.

To make matters even better, I just now found out that Idatalink now has a Maestro RR/RR2 firmware, t-harness, & dash kit for the '19-20 model Rangers with MFT without a factory amplifier (about $300 for the RR & install kit). So, it looks like I may be redoing the entire setup & installing my old Kenwood head (or newer) & JL amplifier (upgrading to 75w RMS speakers as well). Yay for possible 4 awg wire install. :facepalm:
I installed new speakers, added inline active converter and amplifier to my ranger. Now I can’t hear voice assistance or Siri. They hear me but I can’t hear them. What u think?
Sponsored


Top