aaronsusername
Member
- Thread starter
- #1
Replaced my air intake damper actuator today. I've been able to hear/see it dancing around after the vehicle is shut off as it searched for position, and I was intermittently getting FCIM code B11F0:15-08 - Air Intake Damper Position Sensor Additional Fault Symptom: - Circuit Short To Battery Or Open in FORScan. So I went ahead and replaced it (AB3Z19E616A) today. Mission accomplished, captured the steps here:
Start with truck off. I didn't disconnect the battery, but I'm sure it wouldn't hurt.
1) Pull the glove box out.
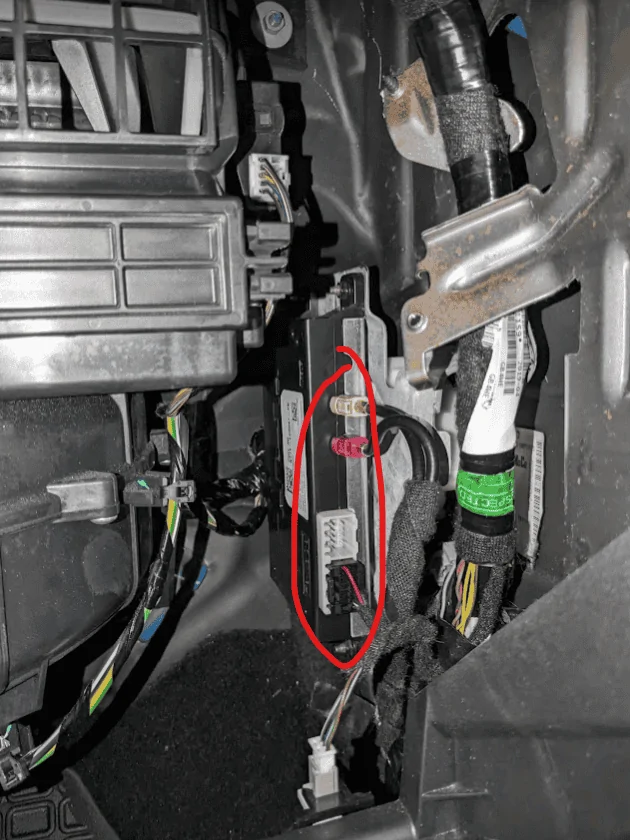
2) Disconnect the single electrical connector and two coax connectors from the telematics control unit. The coax's each have a little tab you push in on the colored section to release, then pull out.
*Door retractor thingy not shown for clarity

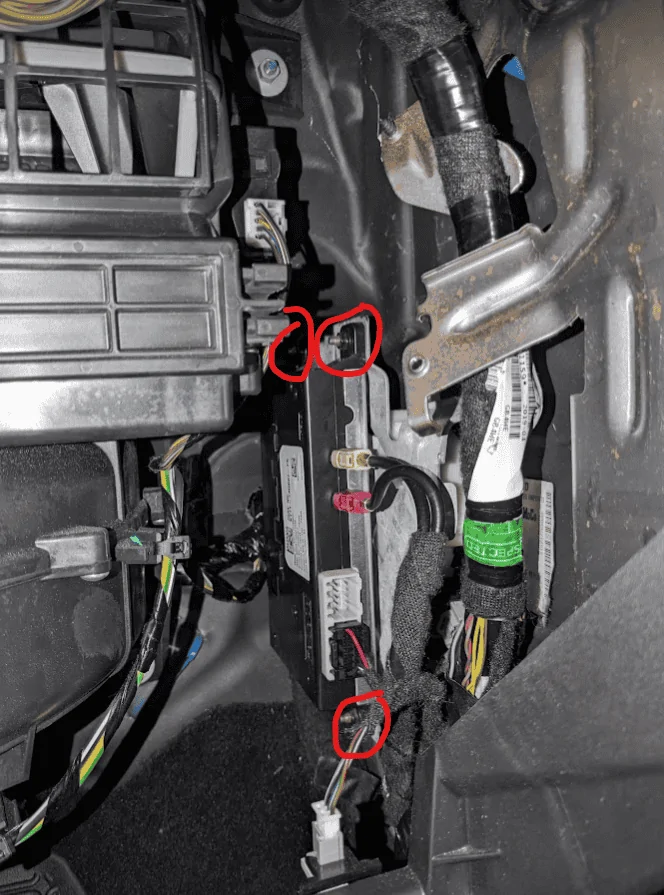
3) Remove the three nuts holding the TCU in place (8 mm socket). Remove the TCU and set asside.
*Door retractor thingy not shown for clarity

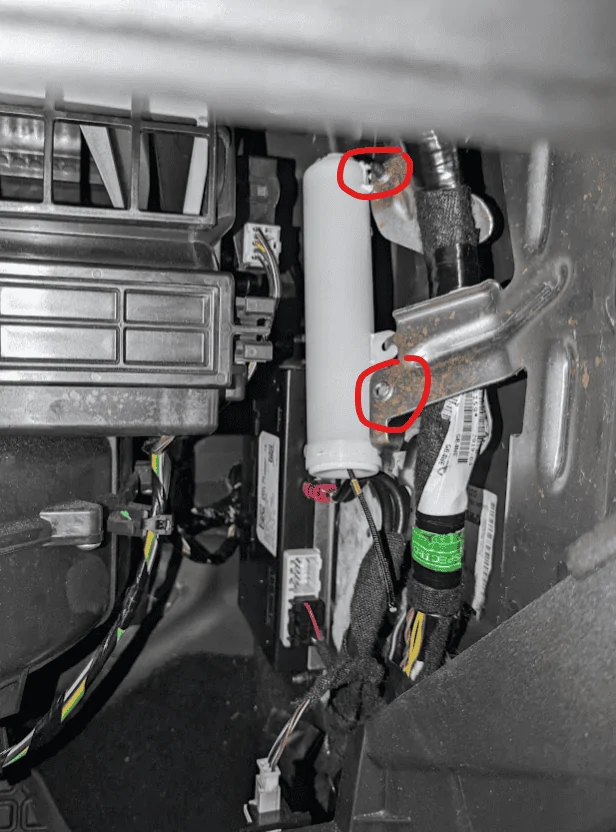
4) Remove the white cylindrical glove box retractor string thing. The screws come in from the front, so you have to do this blind with a T20 torx. Full disclosure, the previous owner of my truck had already broken the string, so I removed the bottom screw and then just broke off the plastic wing and tossed the retractor instead of getting the top screw. I think its doable to get the top screw?

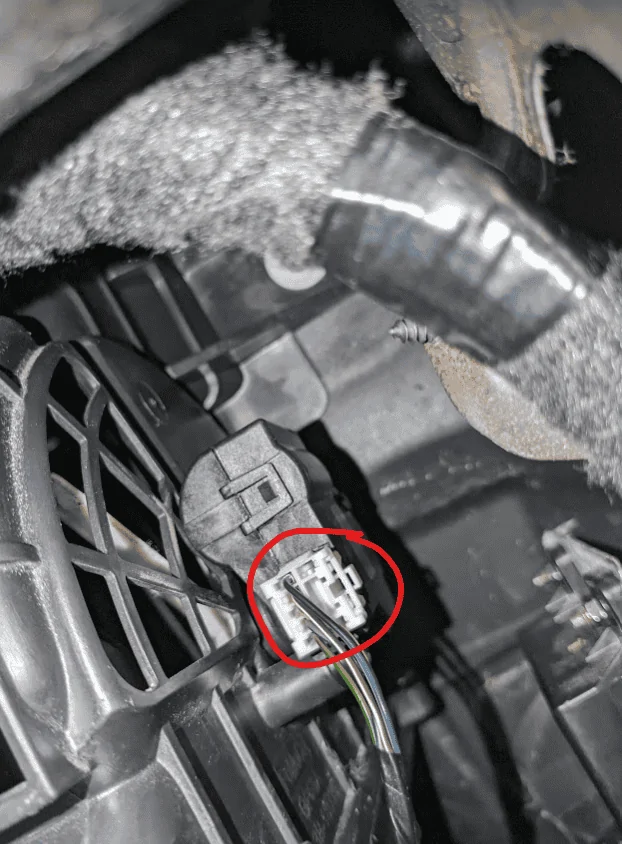
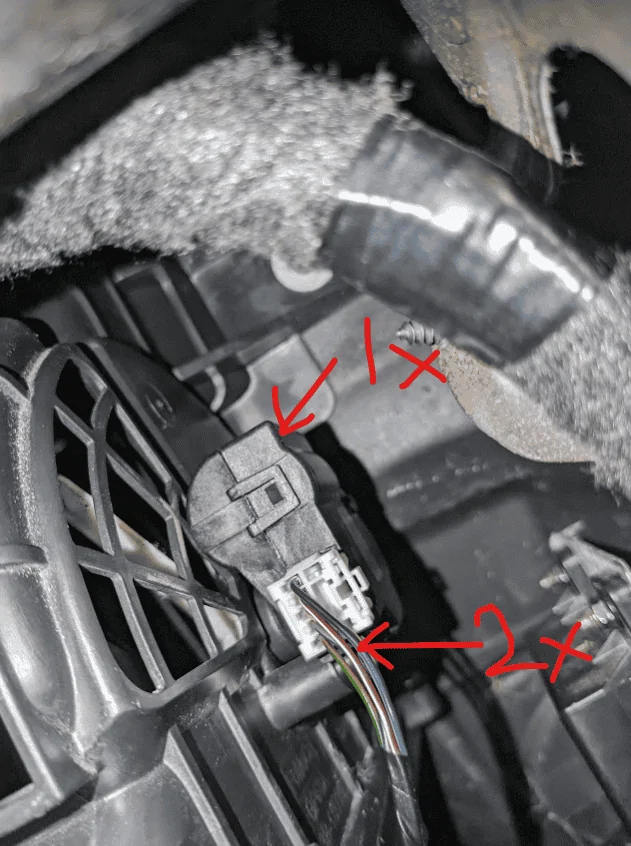
5) Disconnect the air intake damper connector.

6) Remove the three phillips screws holding the damper actuator in place. Pull the actuator out from the intake case.

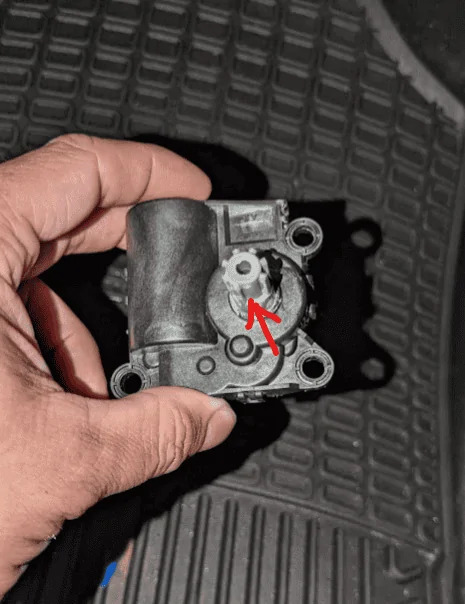
7) Insert the new actuator. Note that the shaft has one spline missing to align with a corresponding feature on the damper. You'll have to rotate the actuator to get them aligned, then push in, then rotate back to mounting position.

8) Re-install the three Phillips screws. This is the fun part, you'll love it. Cordless right angle ratchet did top and bottom rear, bottom front took the smallest 1/4 ratchet I had and a bit due to clearance with the TCU mounting stud.
9) Re-connect the actuator cable.
10) Re-install the glove box retractor thing and the telematics unit. The coax connectors just push straight in until they click.
11) Fire up the truck, test the AC in several modes, watch the door move on command and smile. Note, when in auto mode cooling it will keep the door in recirc even if the recirc button isn't pressed/lighted (the button just overrides auto to force recirc I think). So don't panic and think its not working at all. Taking it out of auto gives the button full control in cooling mode. Clear FCIM codes as required.
12) Reinstall the glove box.

Start with truck off. I didn't disconnect the battery, but I'm sure it wouldn't hurt.
1) Pull the glove box out.
2) Disconnect the single electrical connector and two coax connectors from the telematics control unit. The coax's each have a little tab you push in on the colored section to release, then pull out.
*Door retractor thingy not shown for clarity
3) Remove the three nuts holding the TCU in place (8 mm socket). Remove the TCU and set asside.
*Door retractor thingy not shown for clarity
4) Remove the white cylindrical glove box retractor string thing. The screws come in from the front, so you have to do this blind with a T20 torx. Full disclosure, the previous owner of my truck had already broken the string, so I removed the bottom screw and then just broke off the plastic wing and tossed the retractor instead of getting the top screw. I think its doable to get the top screw?
5) Disconnect the air intake damper connector.
6) Remove the three phillips screws holding the damper actuator in place. Pull the actuator out from the intake case.
7) Insert the new actuator. Note that the shaft has one spline missing to align with a corresponding feature on the damper. You'll have to rotate the actuator to get them aligned, then push in, then rotate back to mounting position.
8) Re-install the three Phillips screws. This is the fun part, you'll love it. Cordless right angle ratchet did top and bottom rear, bottom front took the smallest 1/4 ratchet I had and a bit due to clearance with the TCU mounting stud.
9) Re-connect the actuator cable.
10) Re-install the glove box retractor thing and the telematics unit. The coax connectors just push straight in until they click.
11) Fire up the truck, test the AC in several modes, watch the door move on command and smile. Note, when in auto mode cooling it will keep the door in recirc even if the recirc button isn't pressed/lighted (the button just overrides auto to force recirc I think). So don't panic and think its not working at all. Taking it out of auto gives the button full control in cooling mode. Clear FCIM codes as required.
12) Reinstall the glove box.

Sponsored
Last edited:
")