puda
Well-Known Member
- Thread starter
- #1
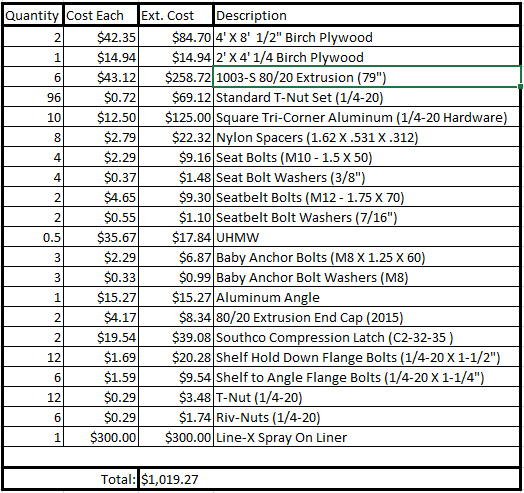
I'm posting this for anyone looking for people who may be researching different ways to tackle a rear seat delete. It is very similar in design to the only commercially available product I am aware of. I have made a few changes in the overall design to suit my needs, specifically a shelf as opposed to a drawer. Feel free to ask questions, I'll start off with posting my parts list and pricing, as you can see this style of "cabinetry" for a truck is quite expensive. However, I see value in the strength to weight ratio of this design. I also never played with extrusion so I wanted to try it out and get some familiarity. I can say I definitely learned quite a few lessons along the way!

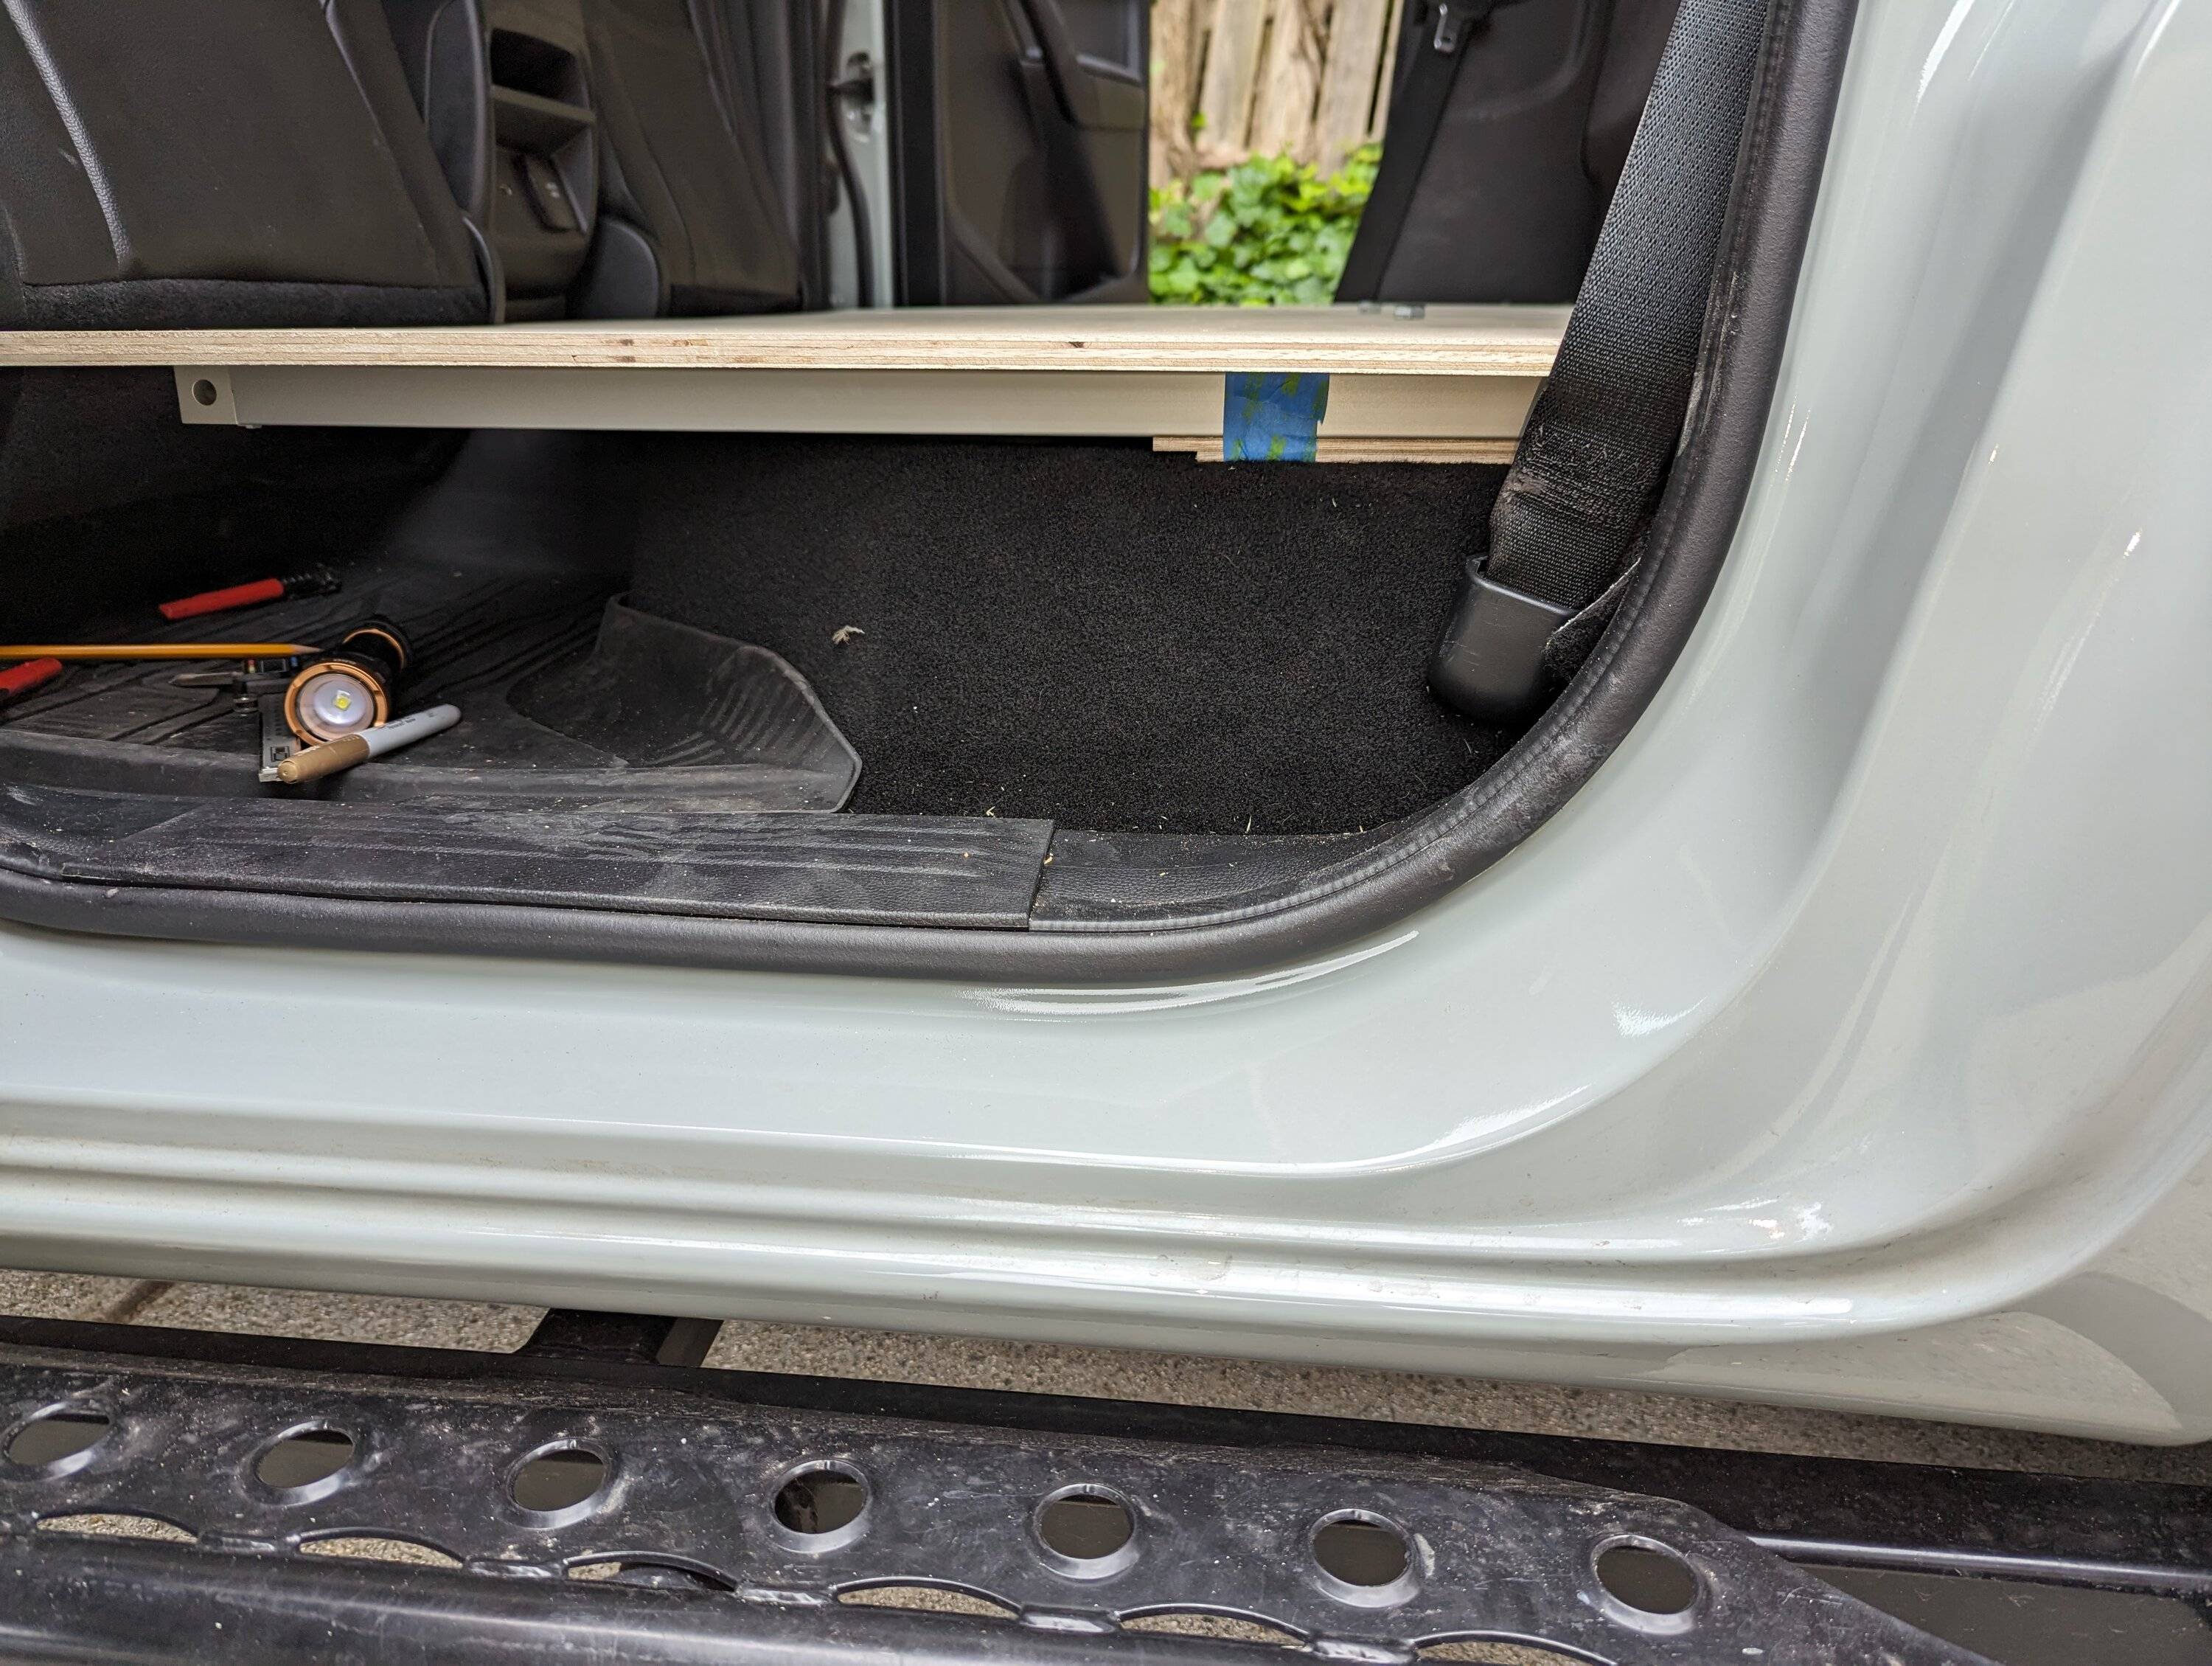
Step 1: Remove the factory seat and tuck the center belt behind the panel.

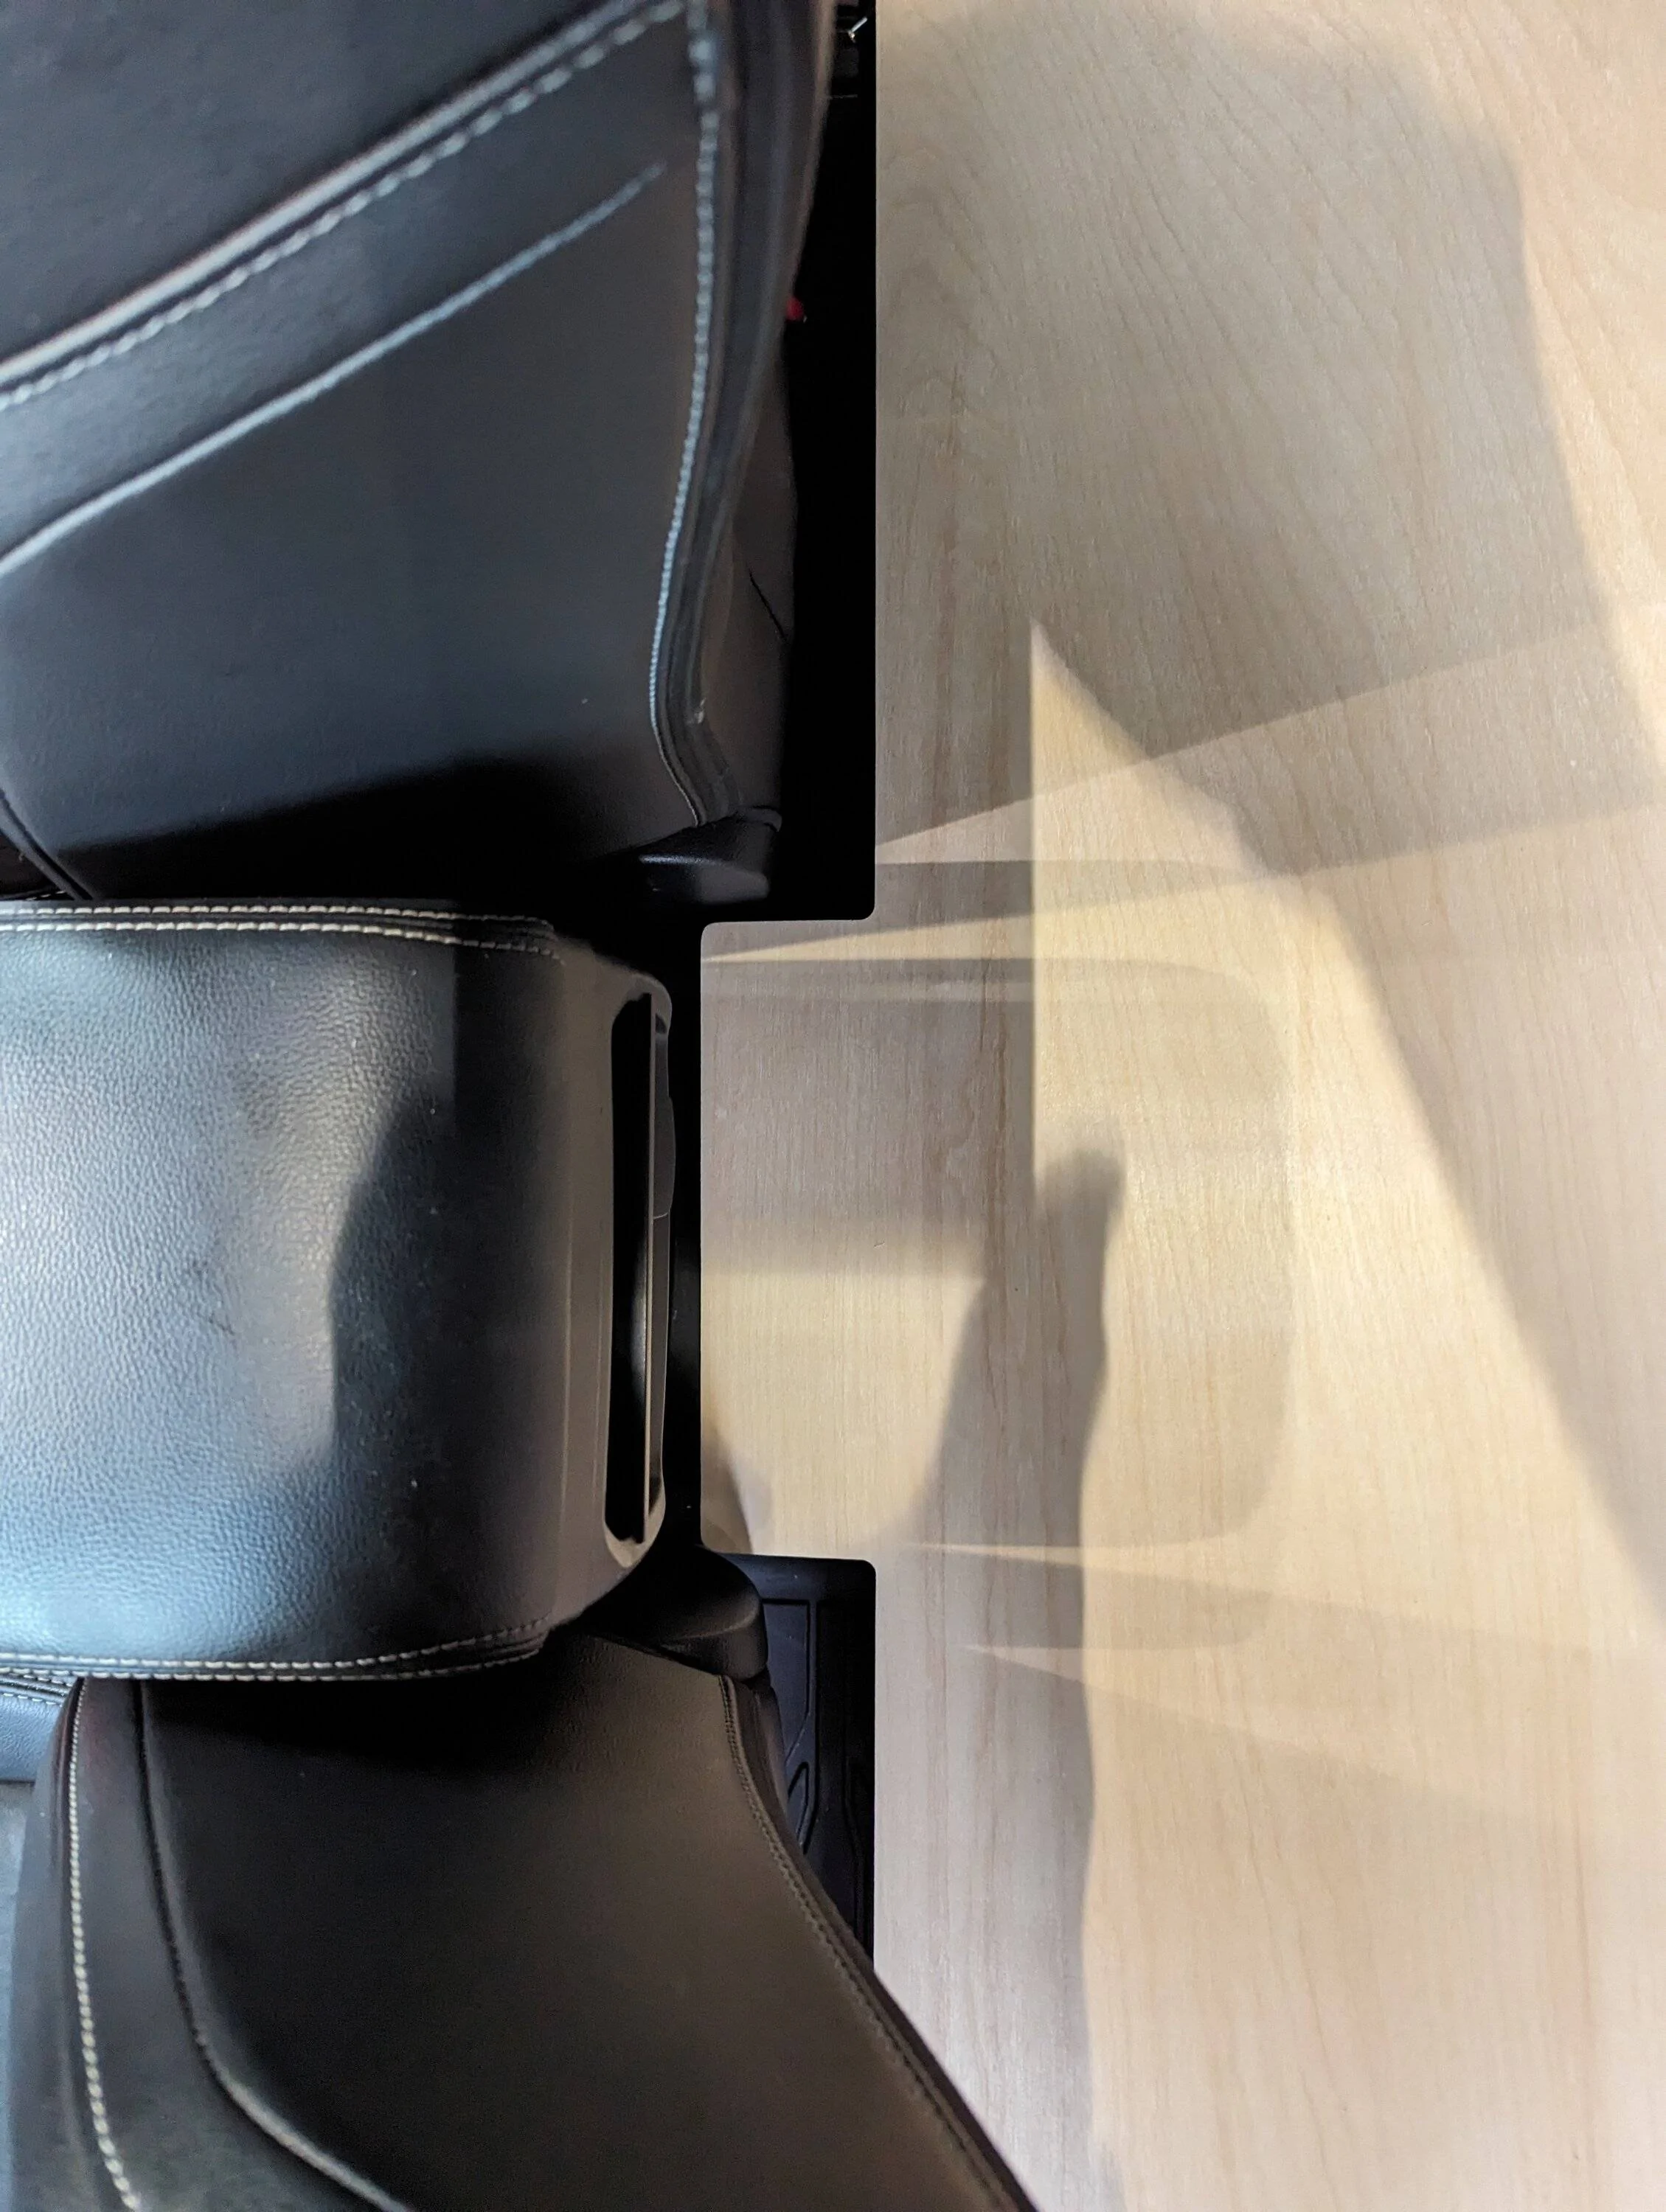
Step 2: Create 4 separate template pieces to help me to figure out the different locations to add spacers and extrusion for strength. There are very few locations under the seat that are flat and usable.

Step 3: I created 1 large template by pattern routing the 4 smaller pieces. Fine tuning around the back side to give some relief where there is wiring and the jack mounting bracket.
There was also some fine tuning on the front as things didn't quite line up when I was eyeballing with the template pieces.
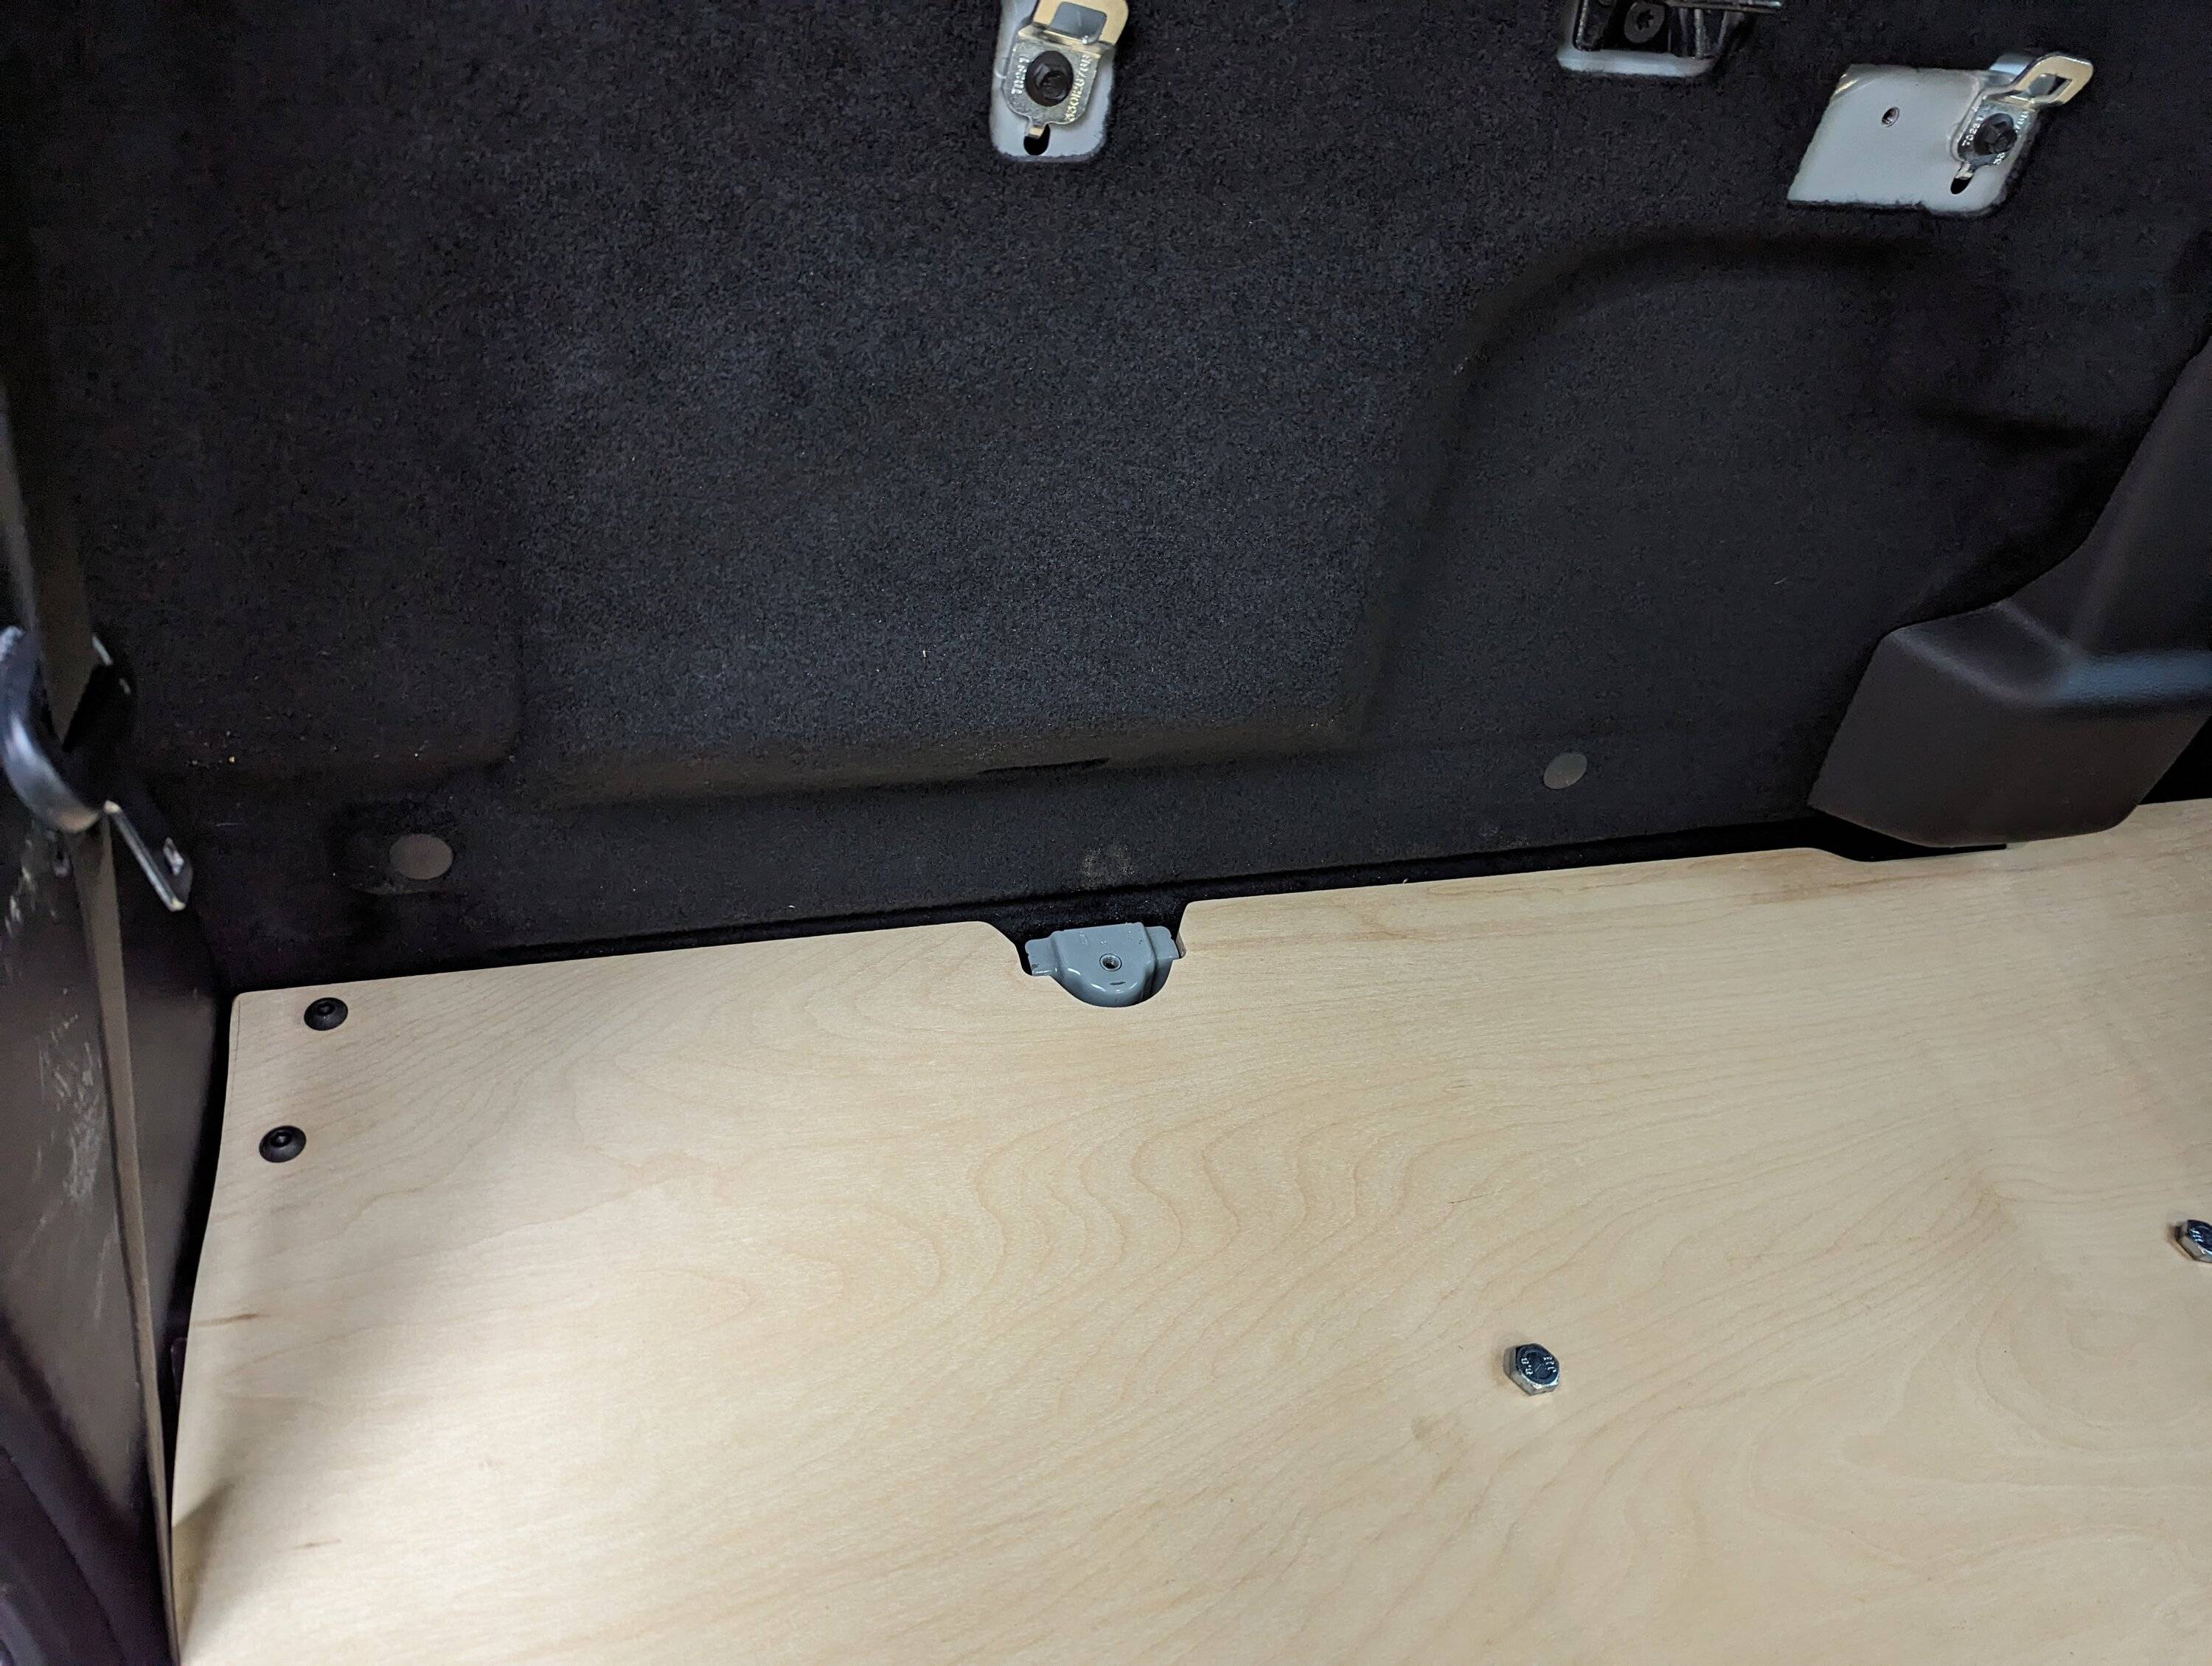
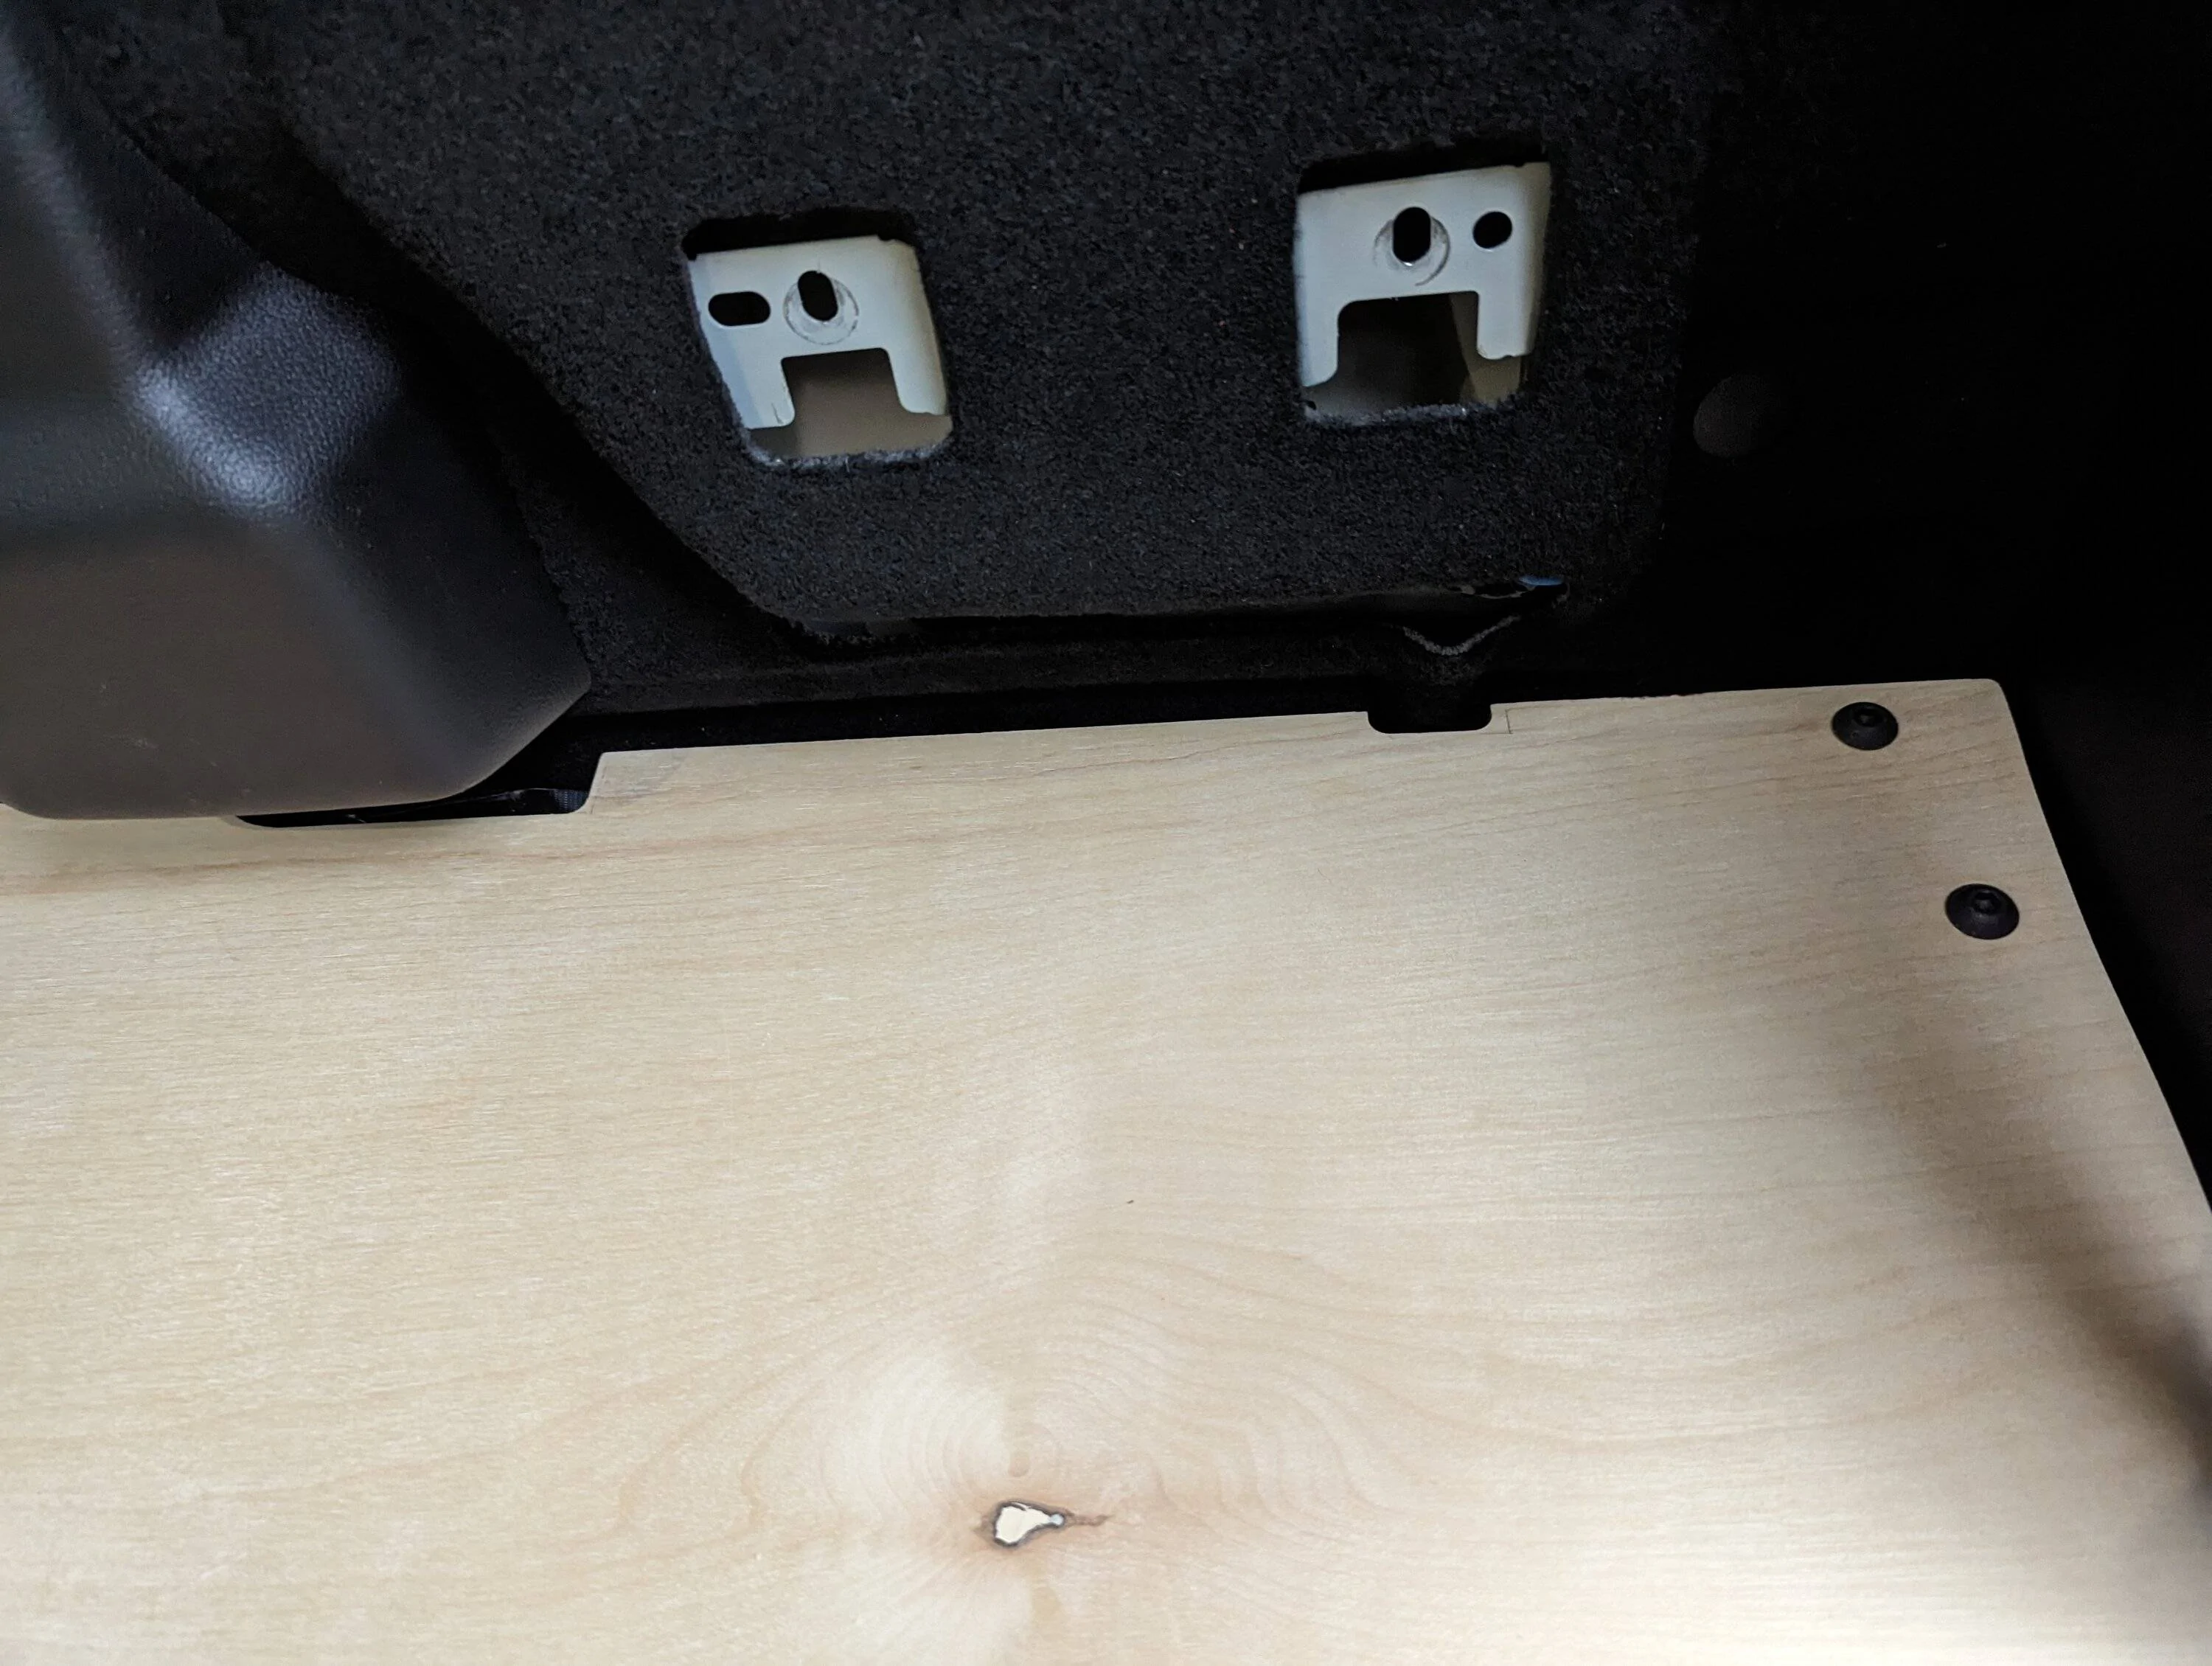
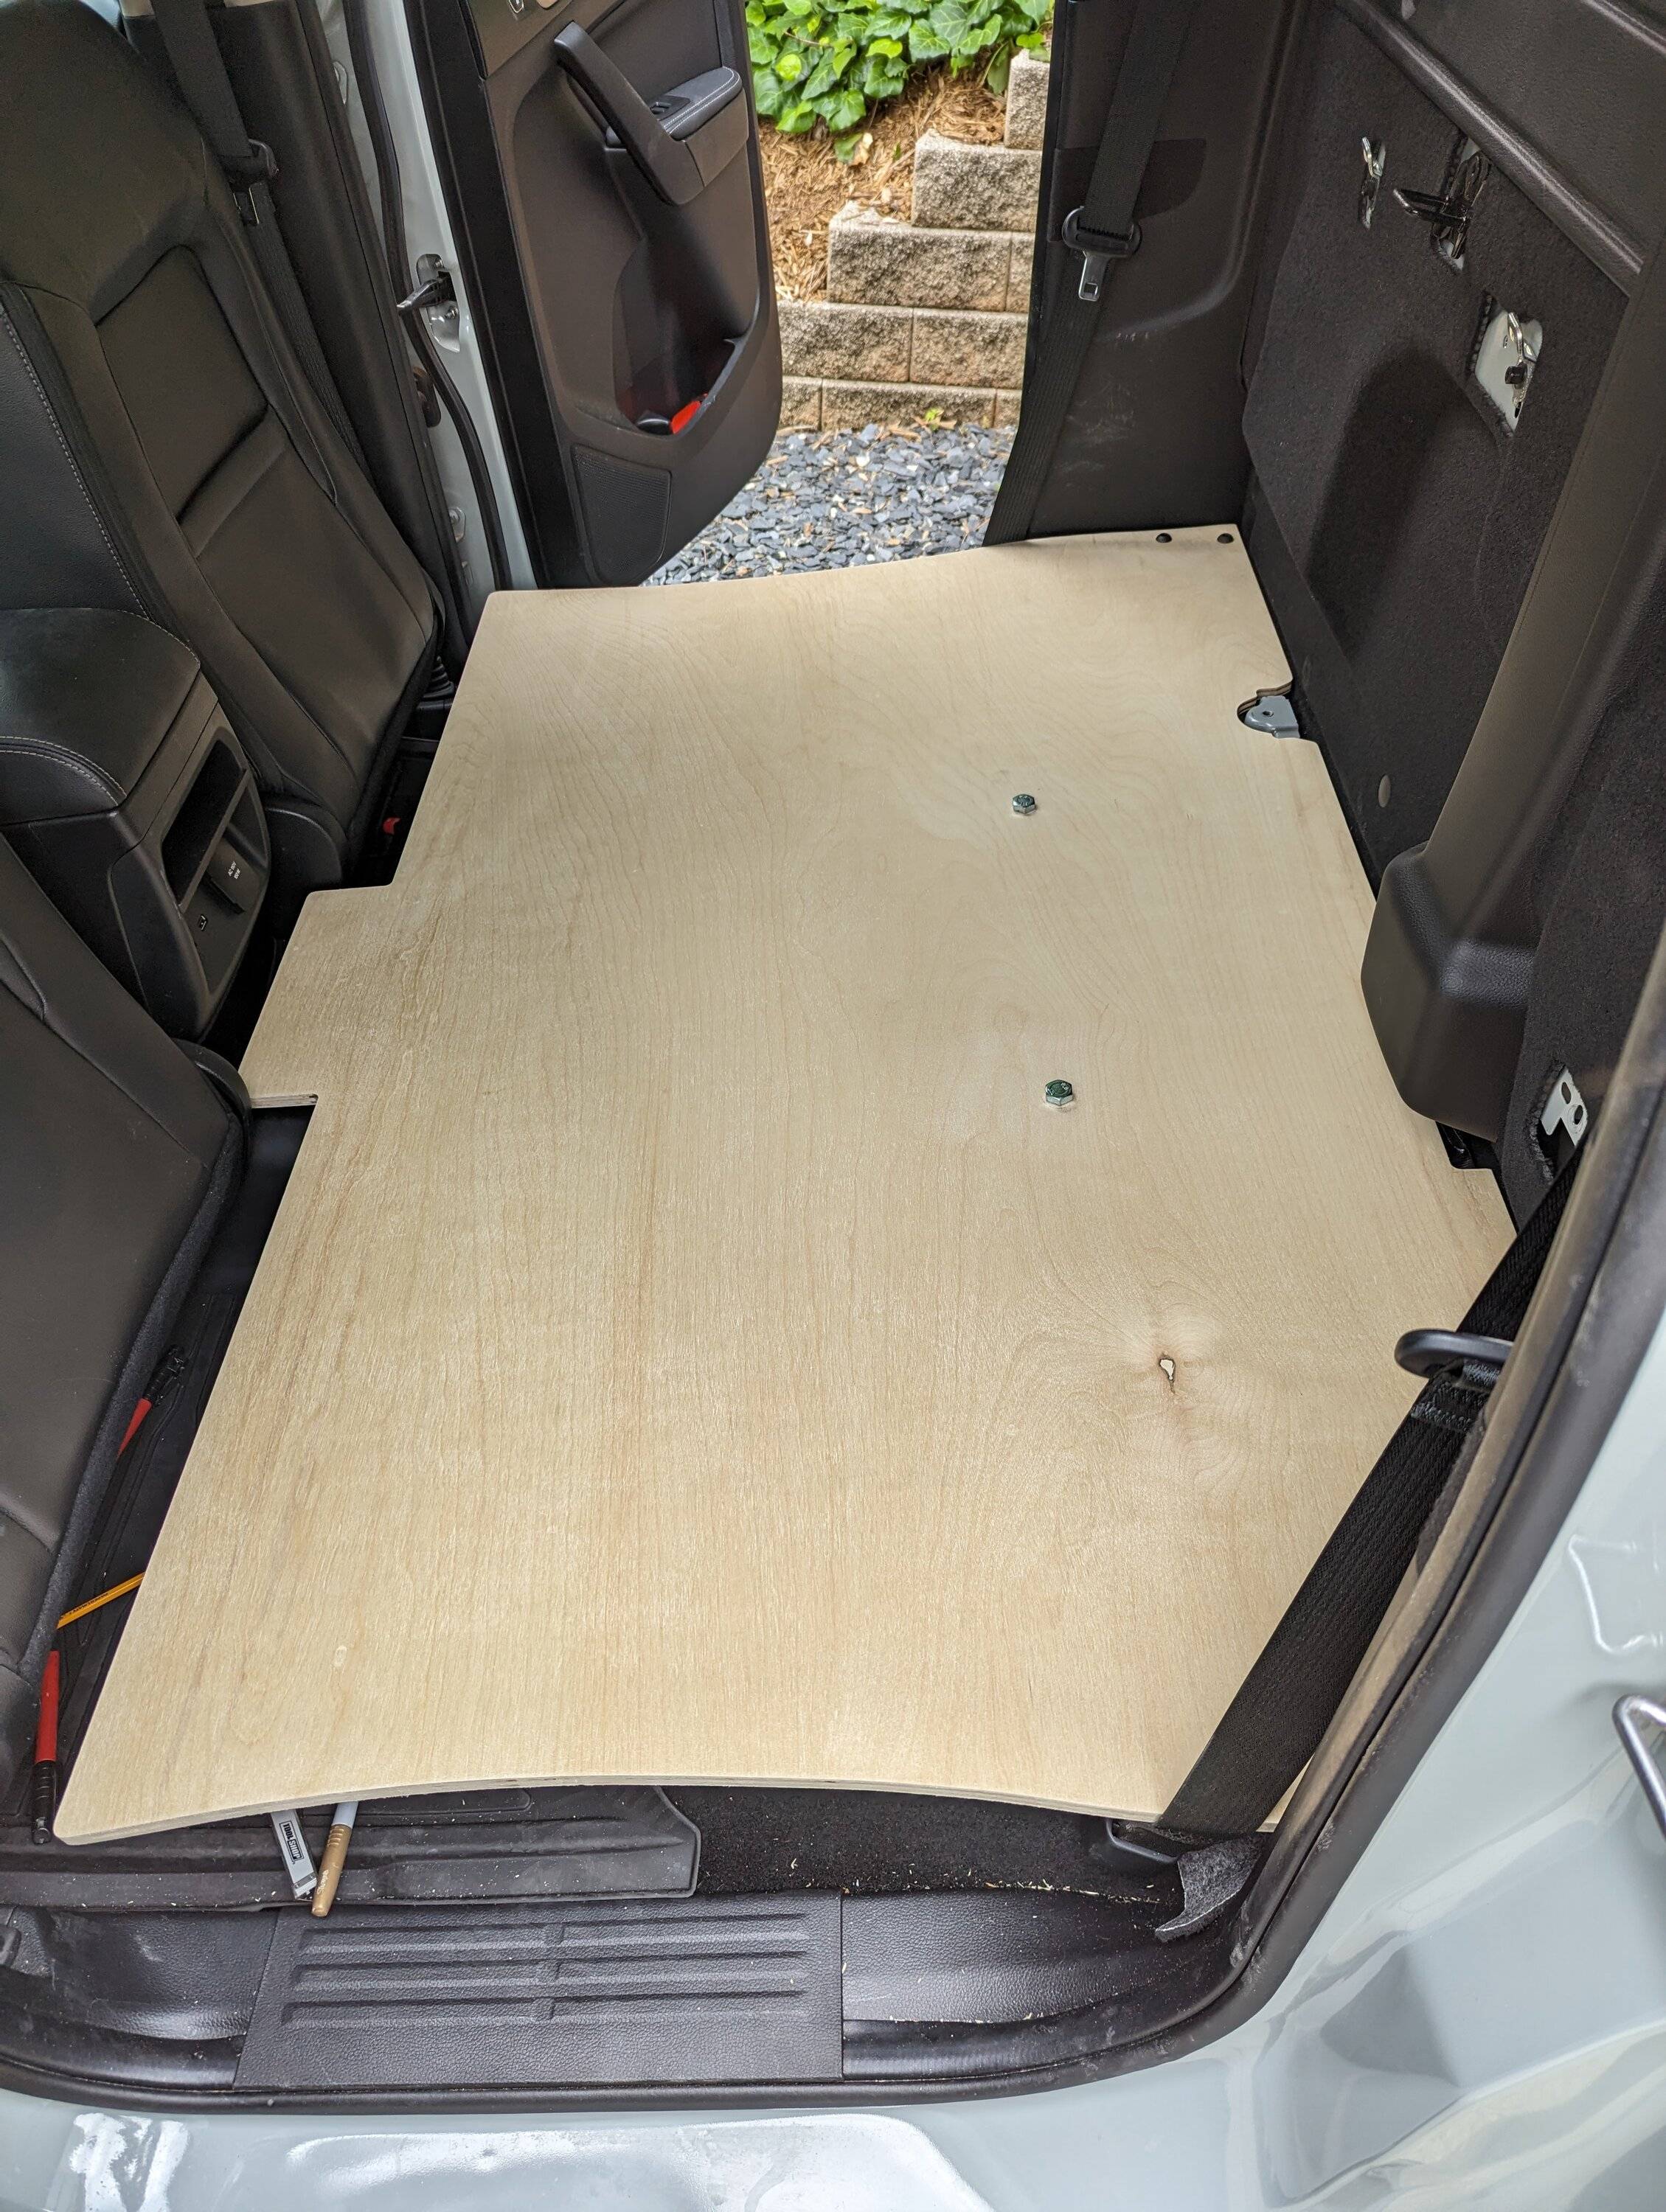
Step 4: Test fit final base panel and verify screw holes in correct location. I was pretty excited at this point as things looked like they were working out just how I wanted.
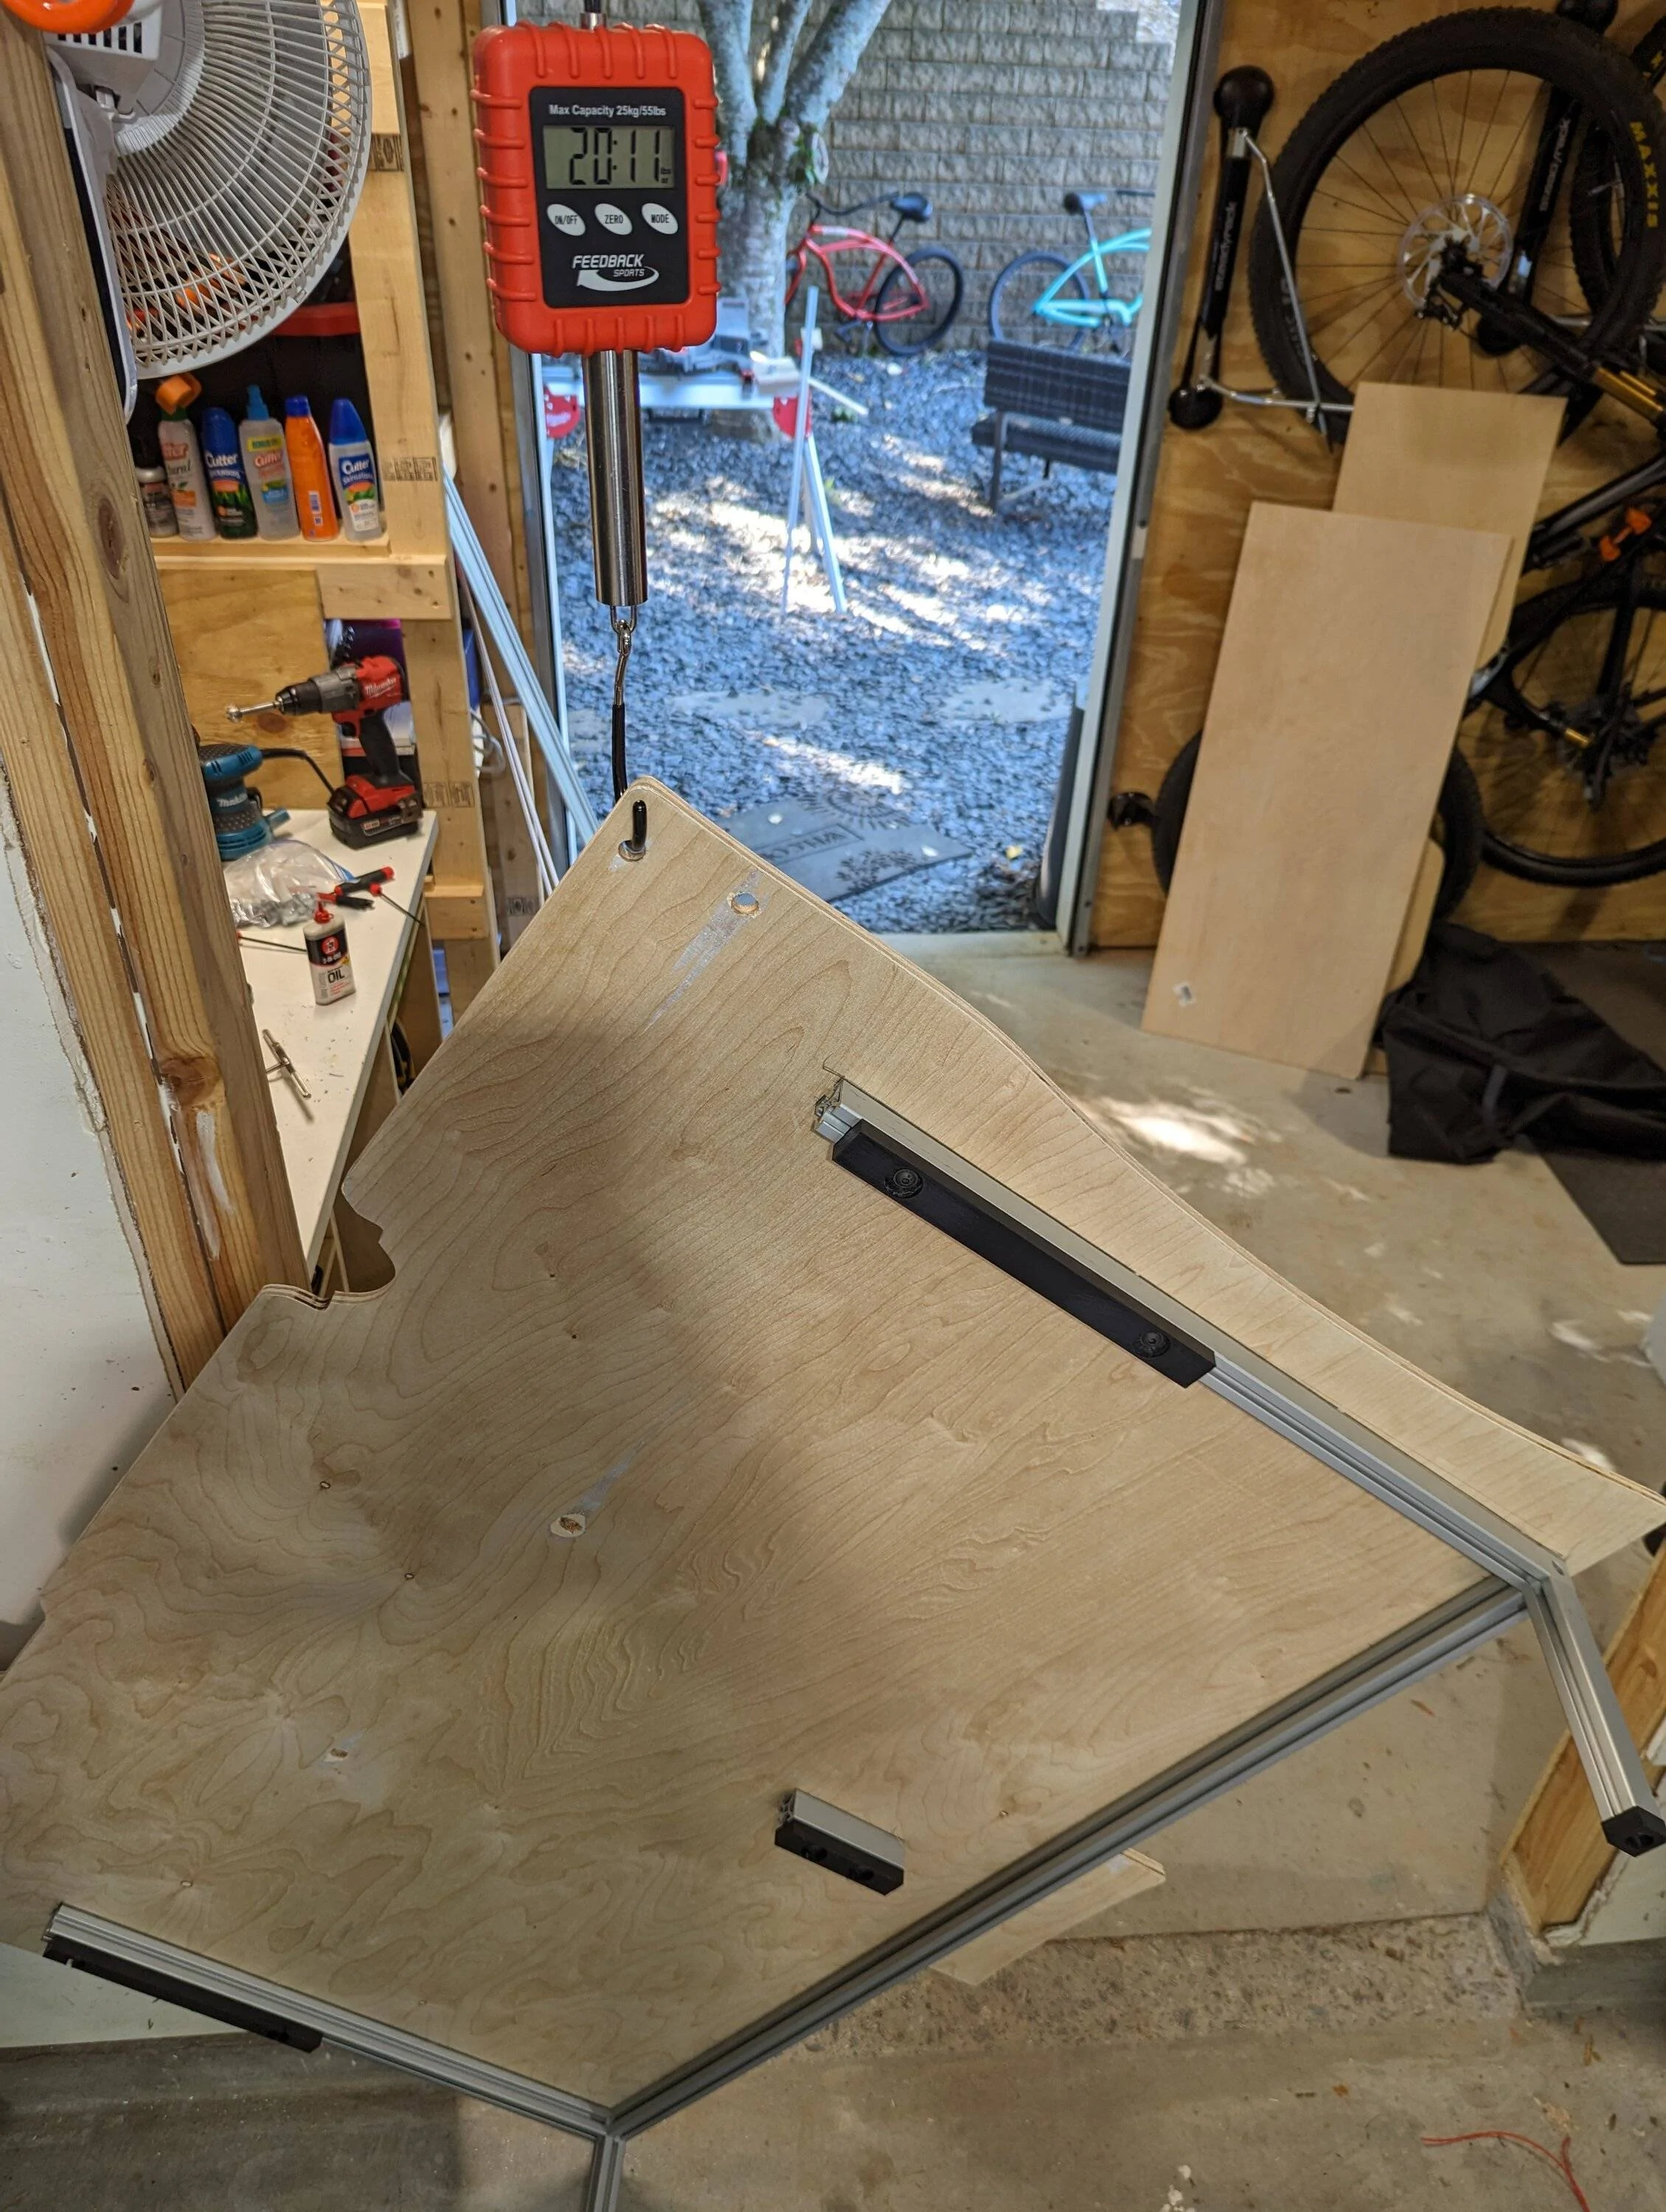
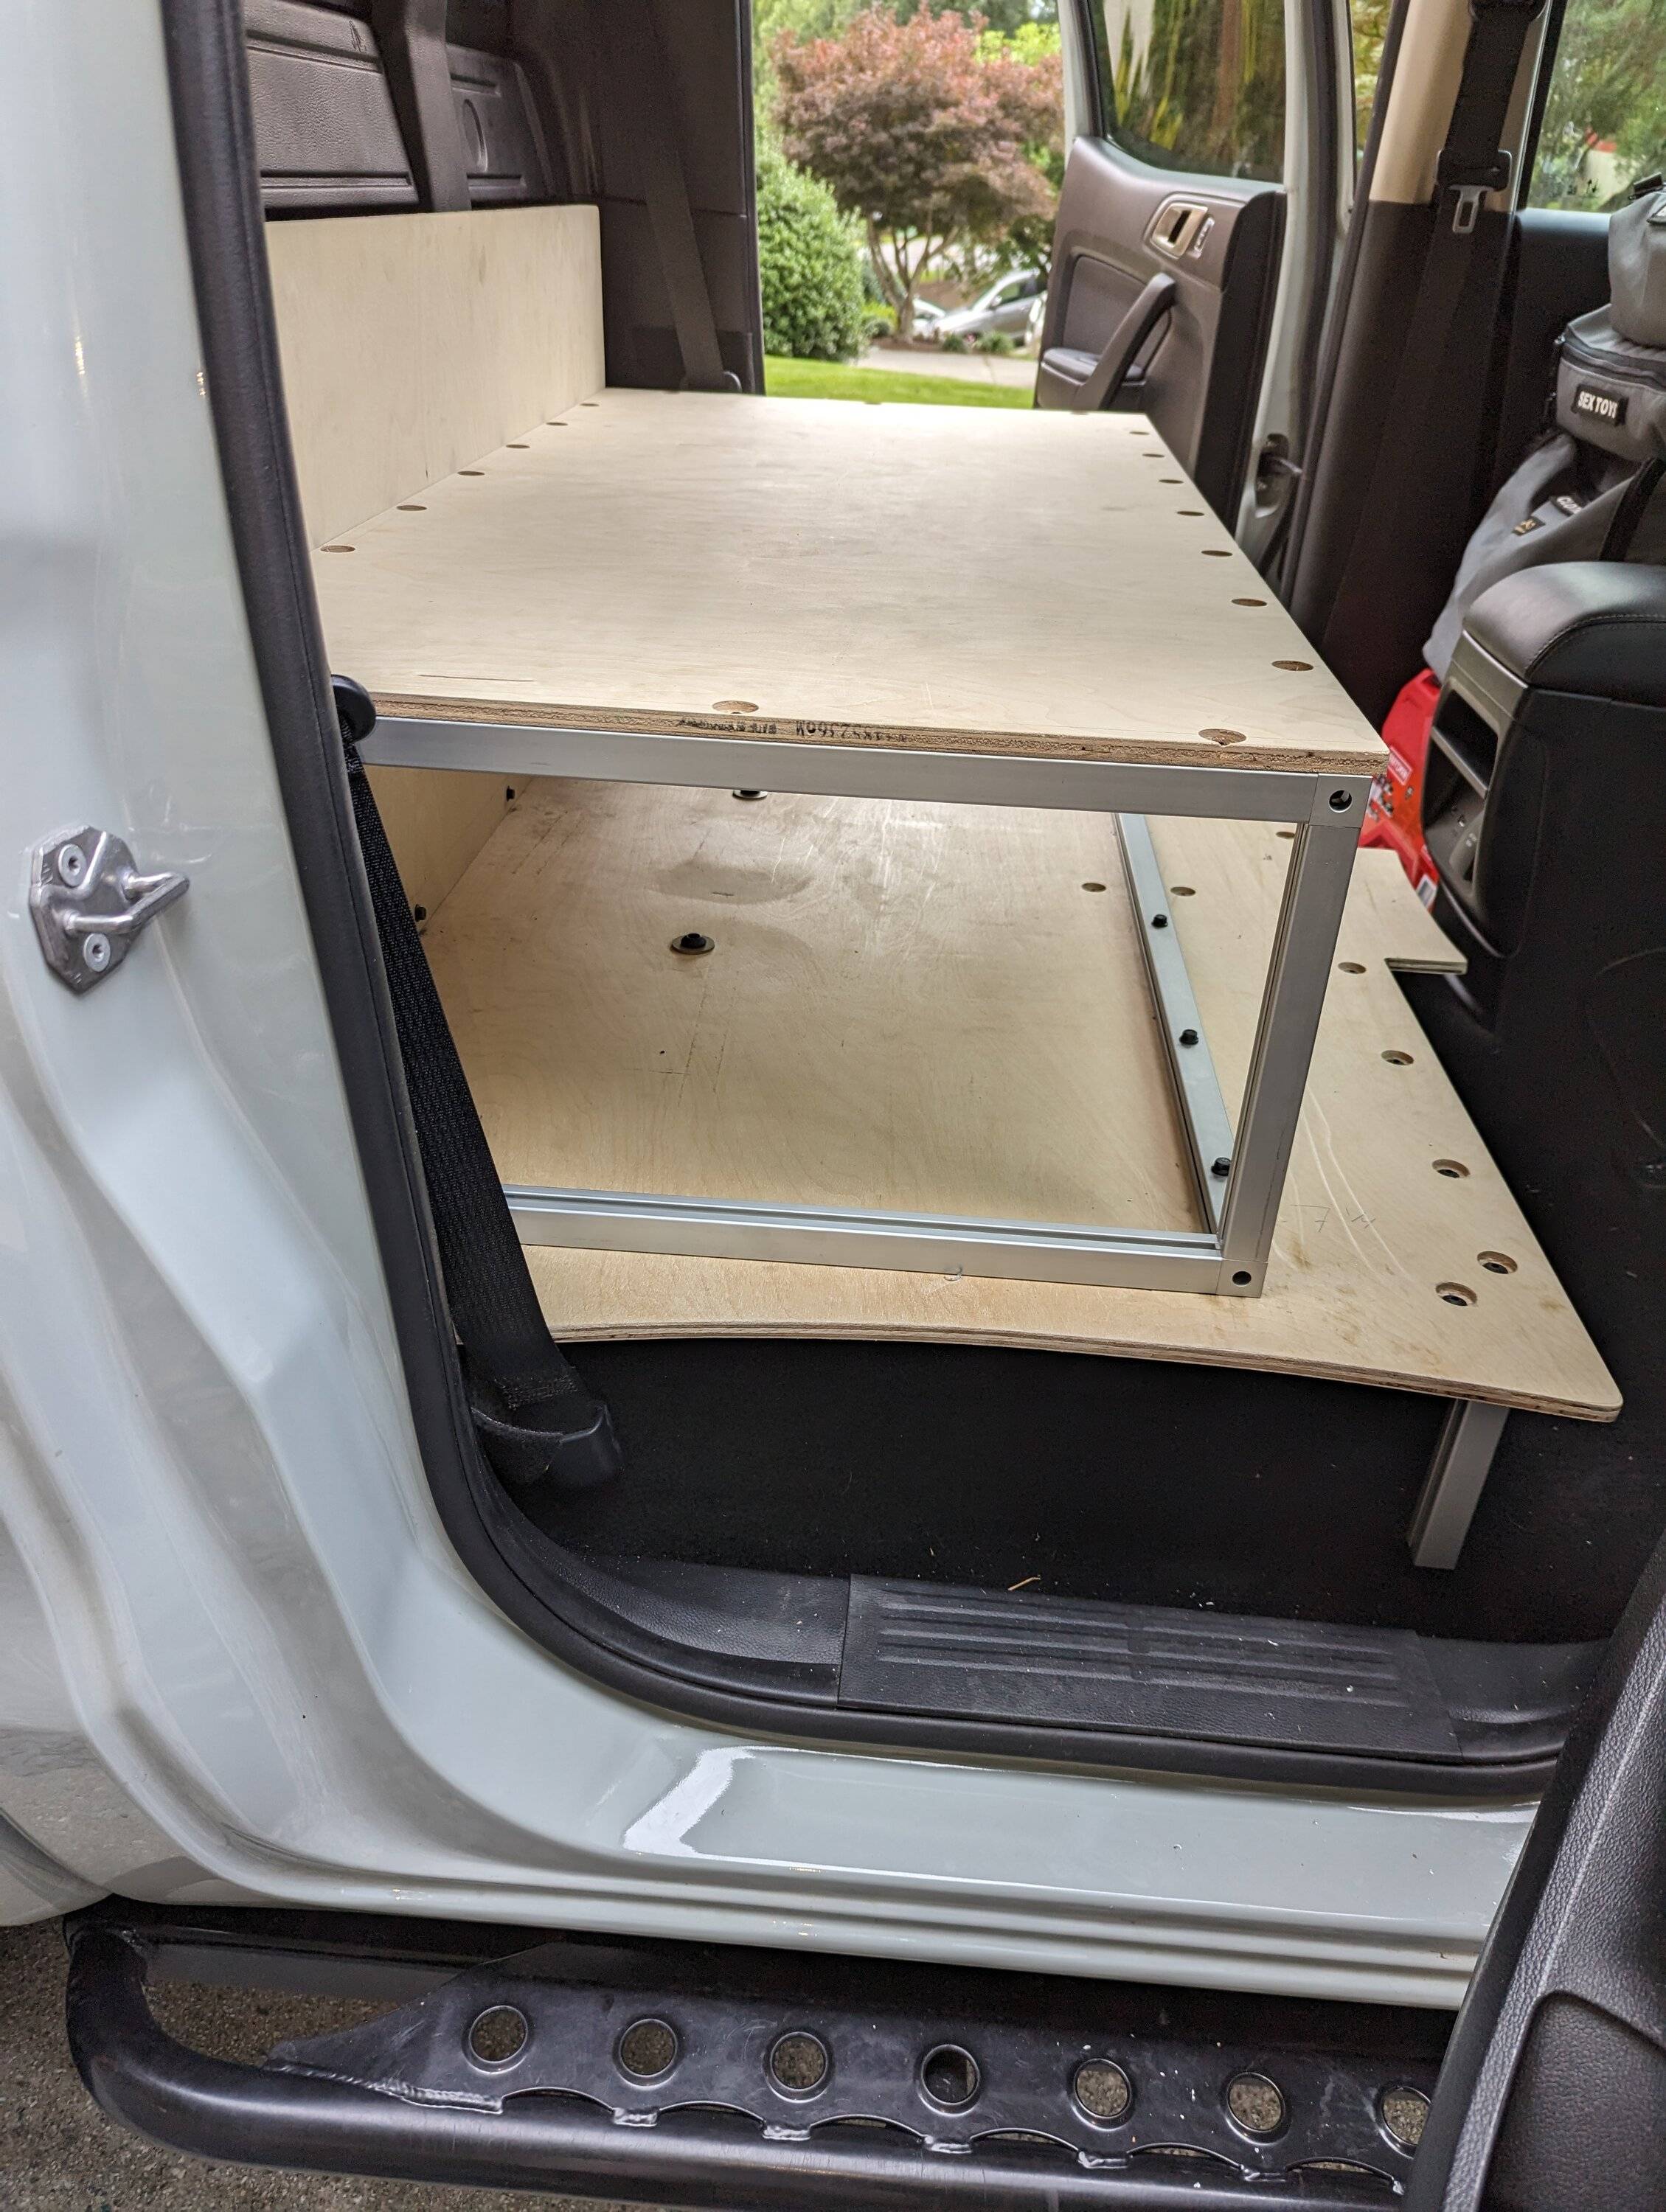
Step 5: Attach extrusion to base plate. As you can see, the base alone weighs about 20 pounds. If I wasn't concerned with a place for the dog on top of all the gear I would have just stopped at this point. The back wall doesn't really need coverage in my opinion, plus it keeps even more space available.
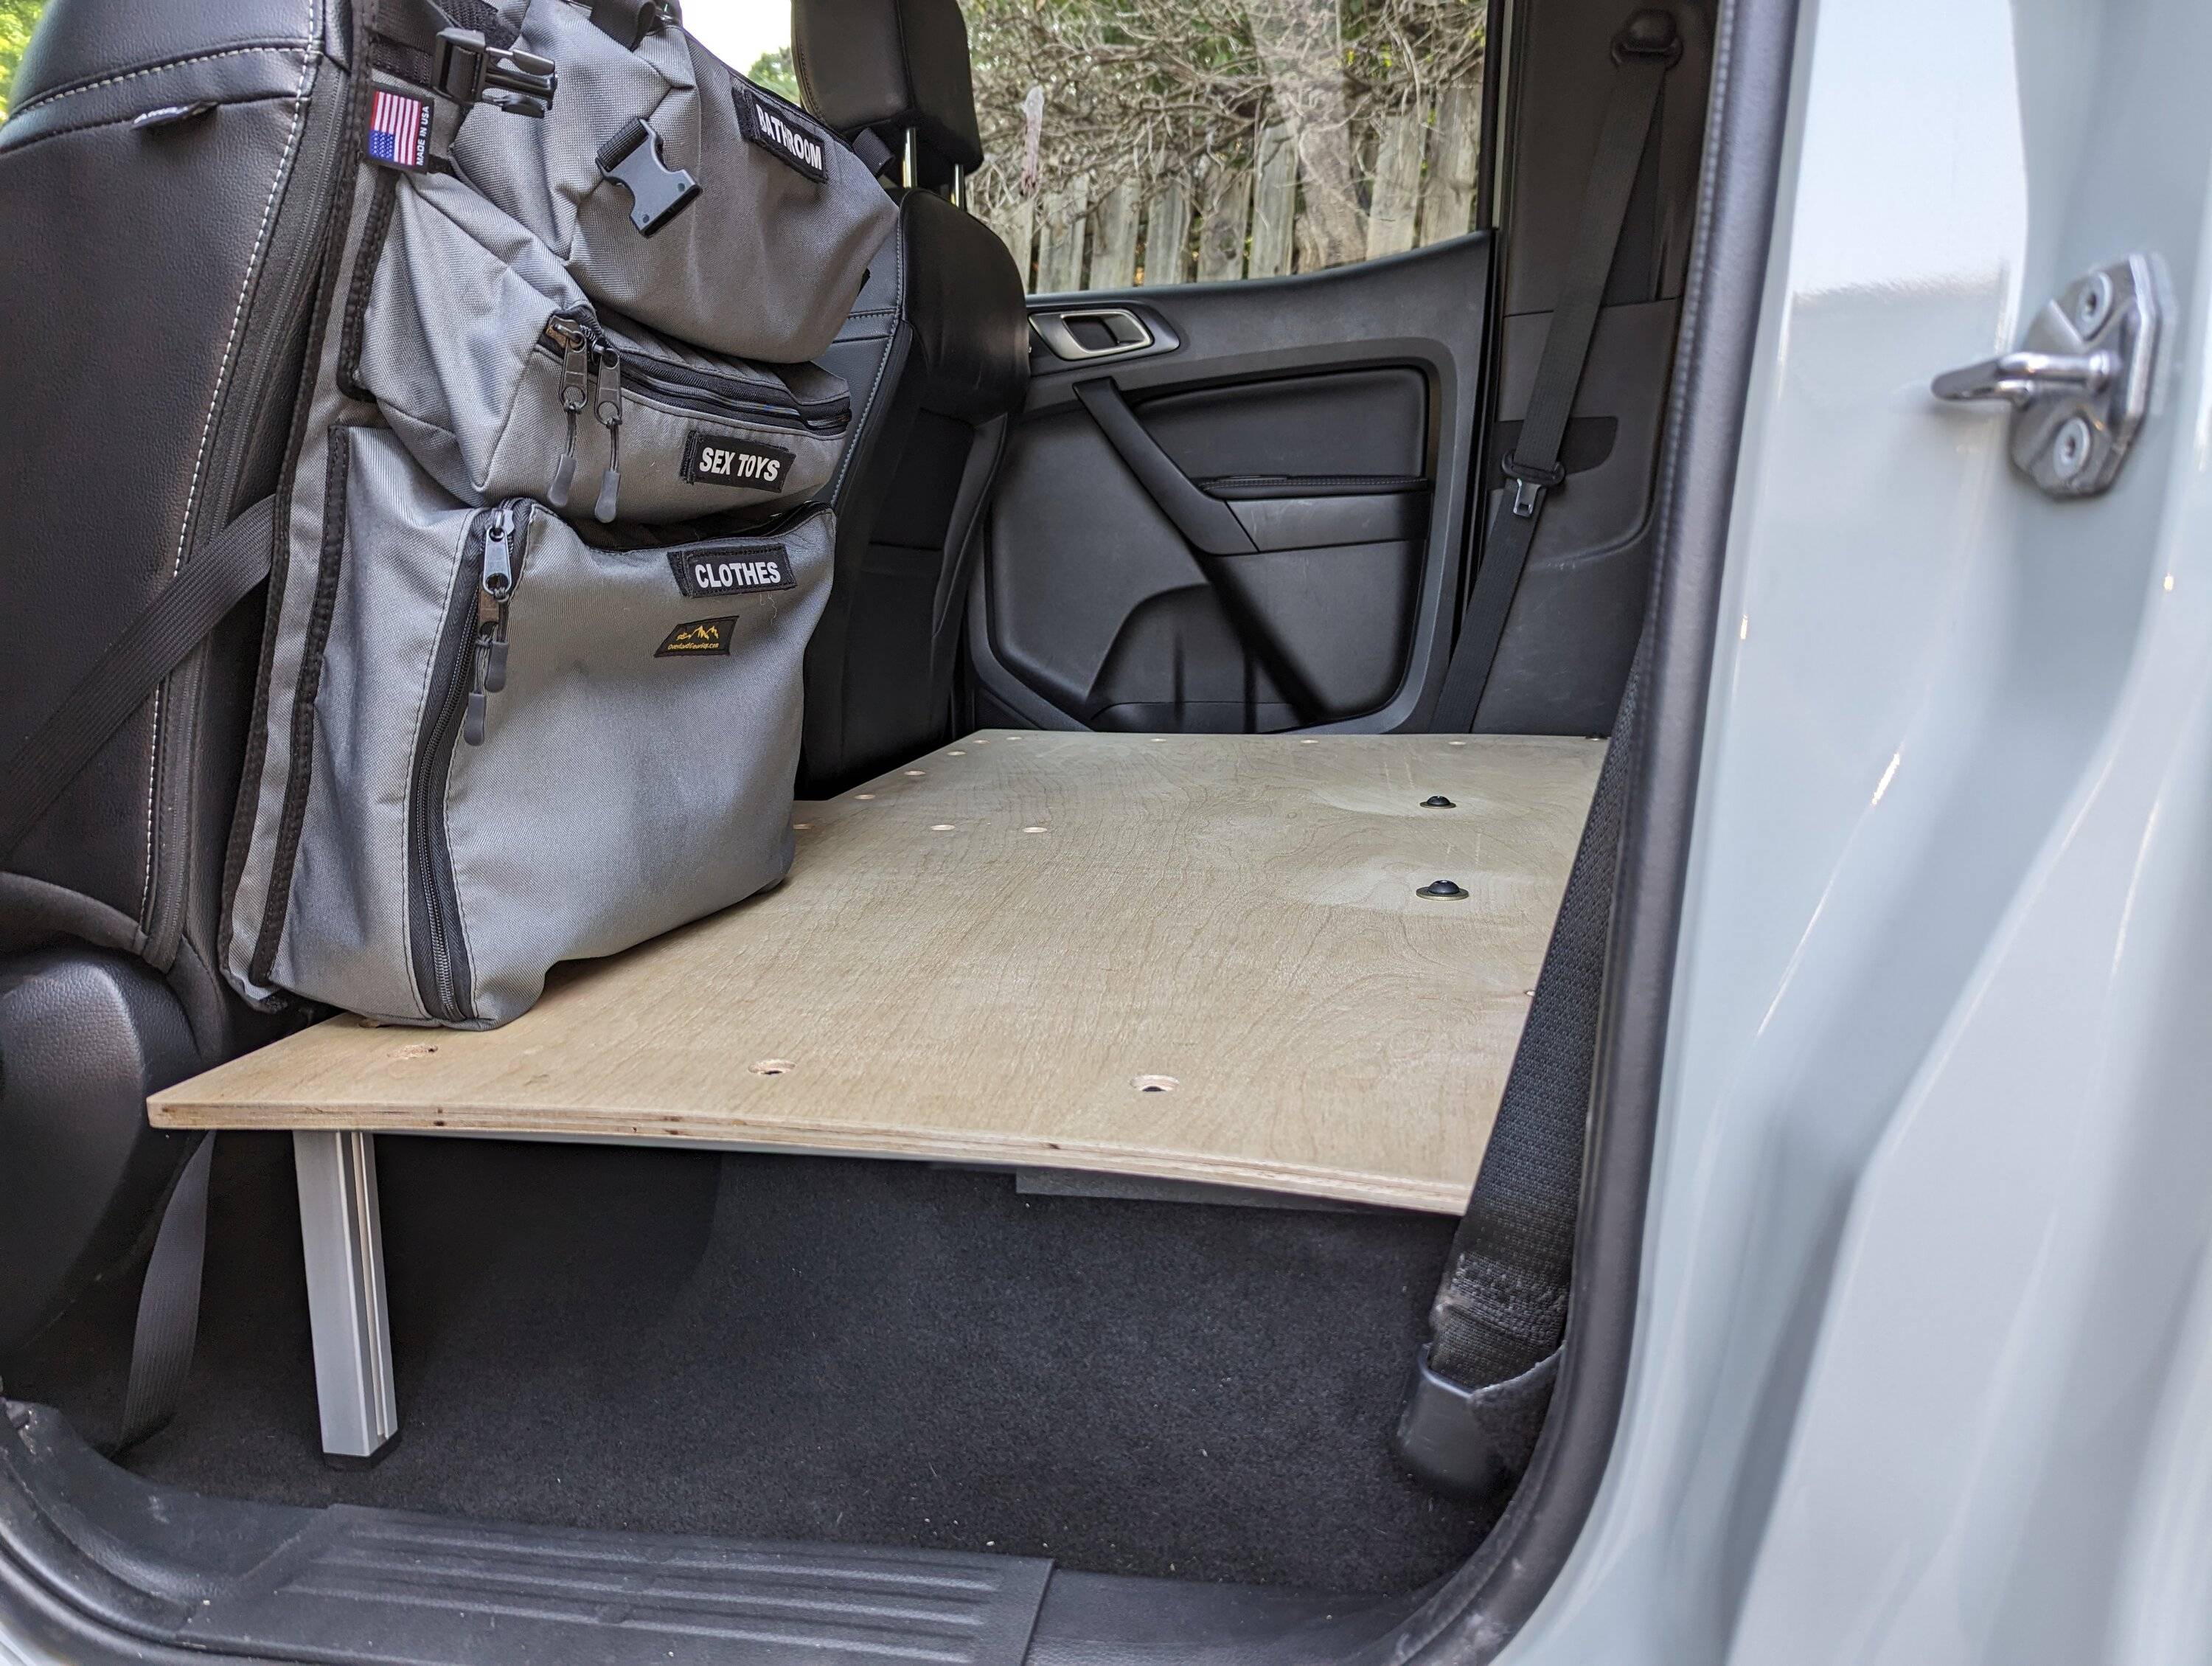
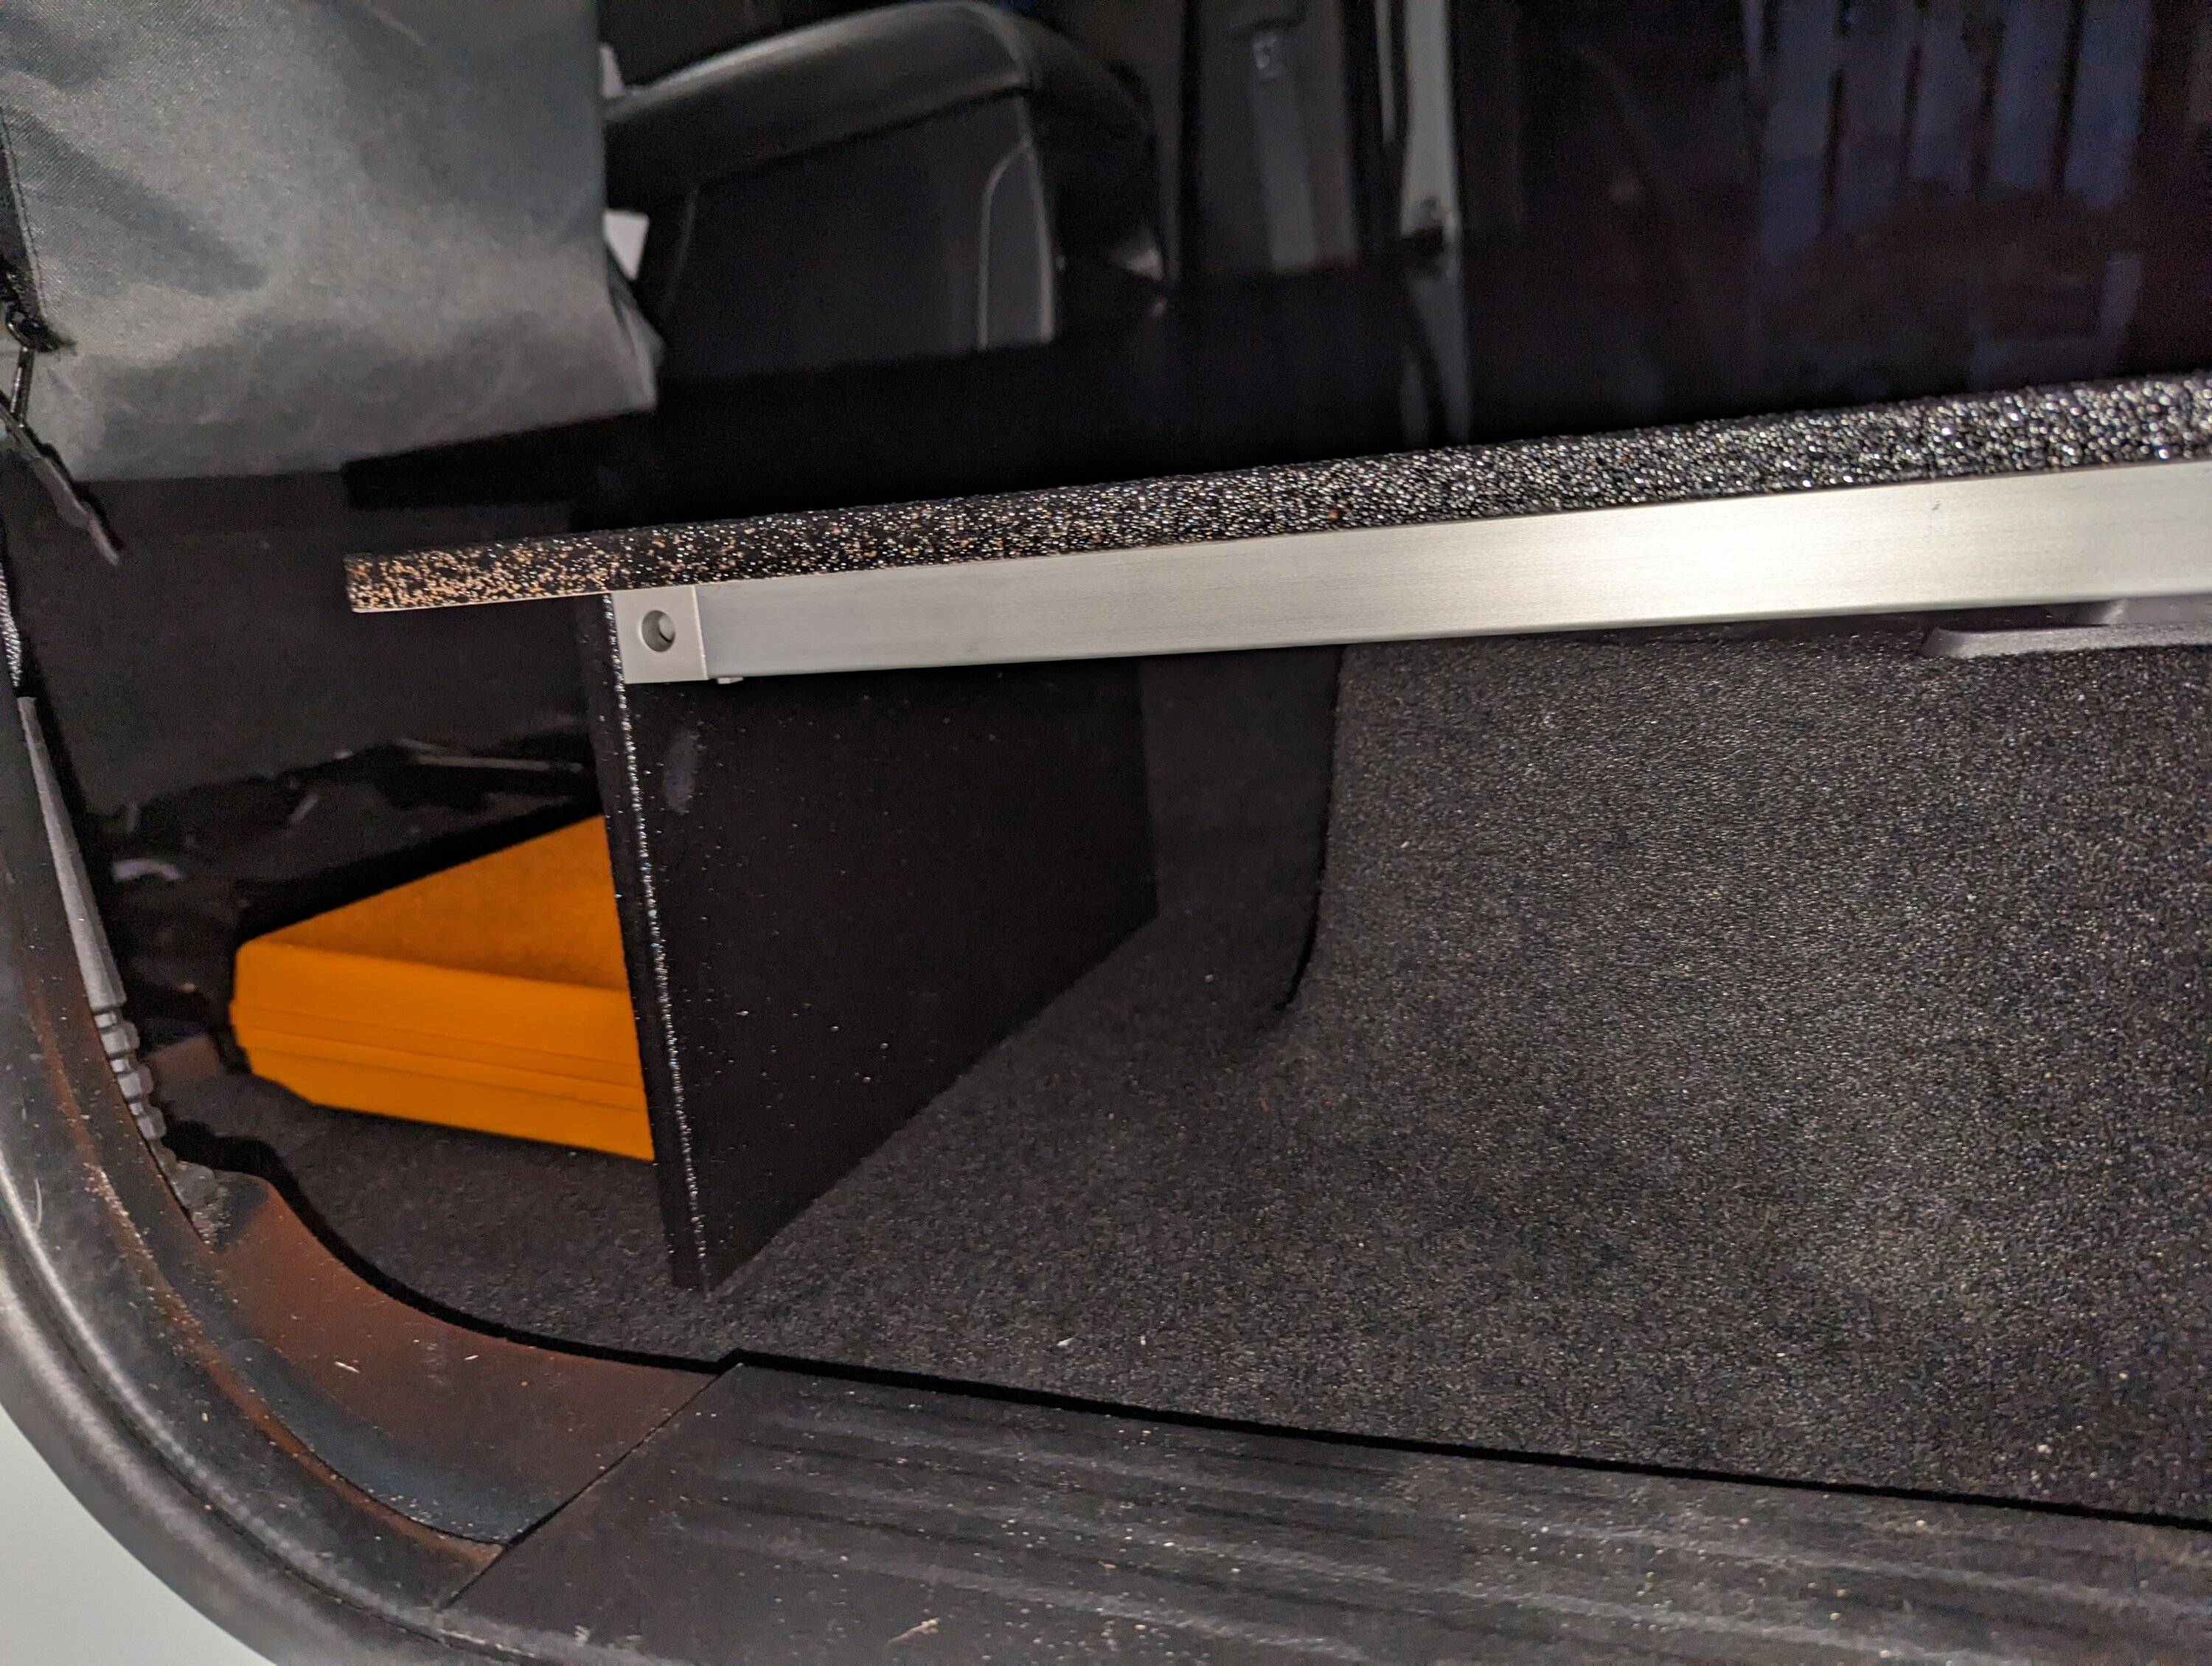
Step 6: Test fit with extrusion installed. I verified I had even spacing between the floor and the bottom of the base plate. My driveway is anything but level so I was hoping this would give me a level base in the end. I went with legs in my design as I wanted to be able to store shoes down below. Most other designs have a piece of plywood running across the entire bottom creating a "cabinet" with access holes above.
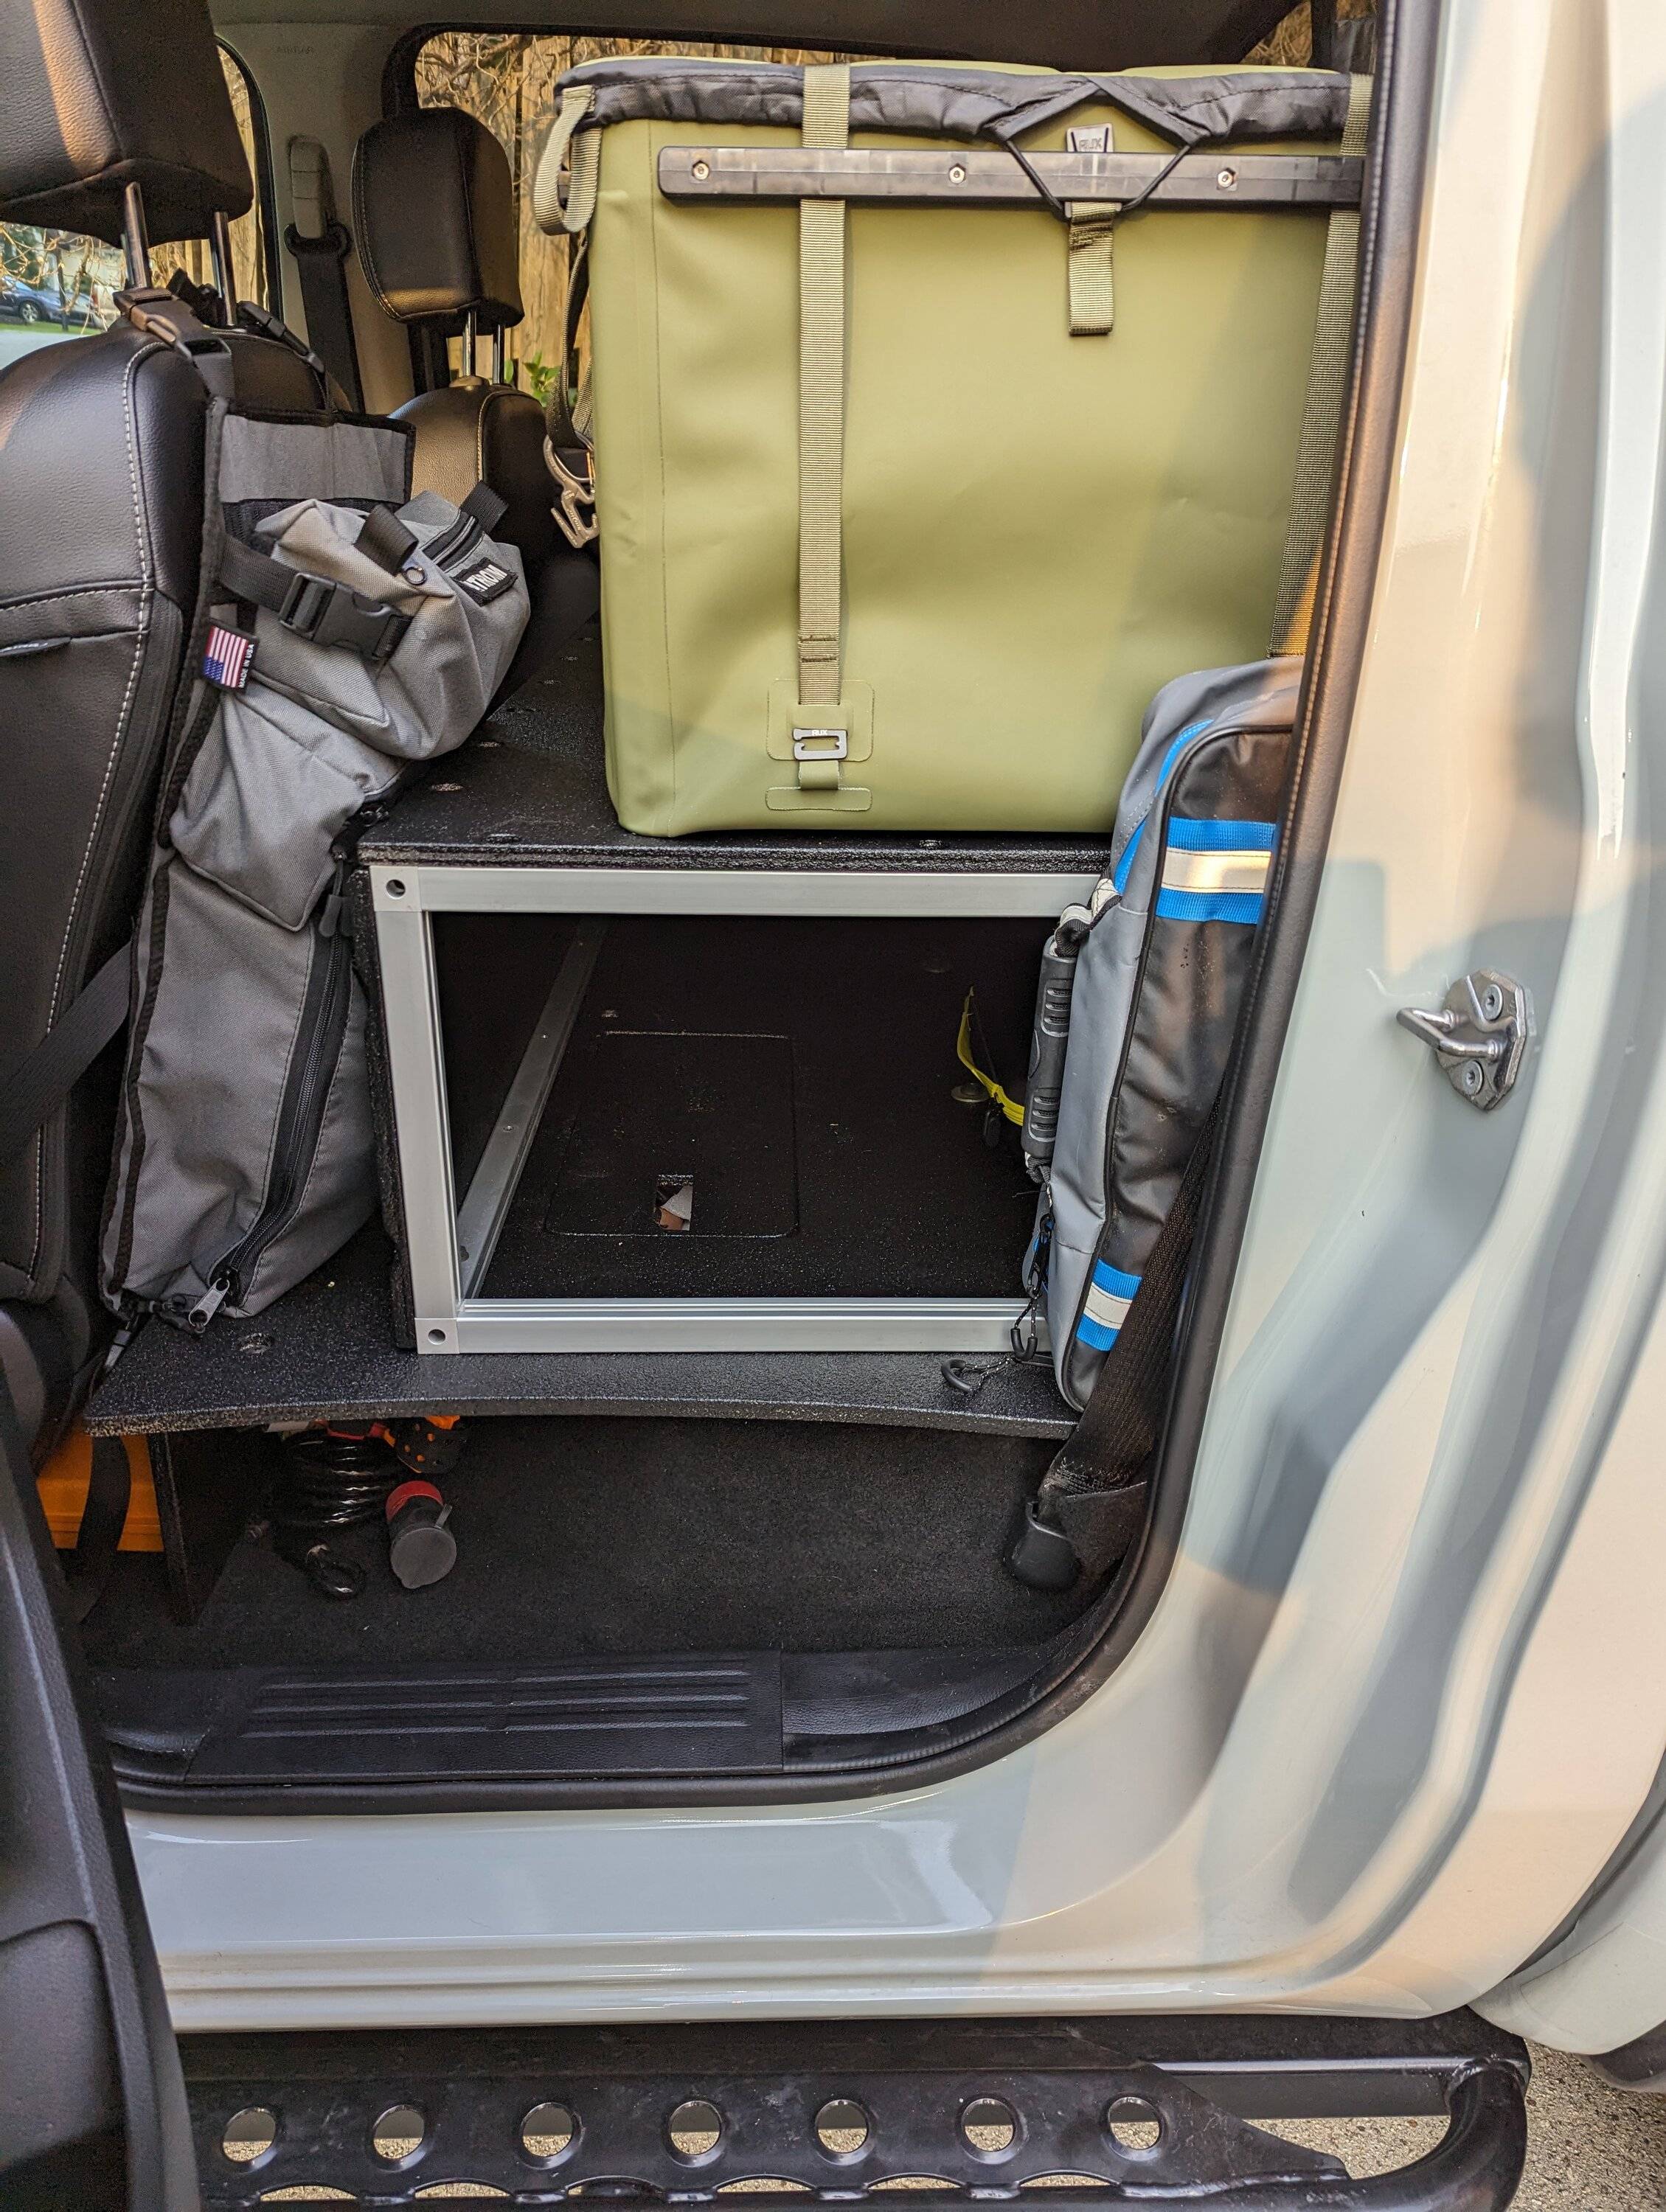
Step 7: Begin construction on aluminum frame for top deck. This is pretty straightforward and another place where I deviated from the commercially available product. I wanted to incorporate the back piece into the top deck as I will always have a top deck. The commercially available product has the back panel isolated from the drawer option because the drawer/top deck are an additional option.
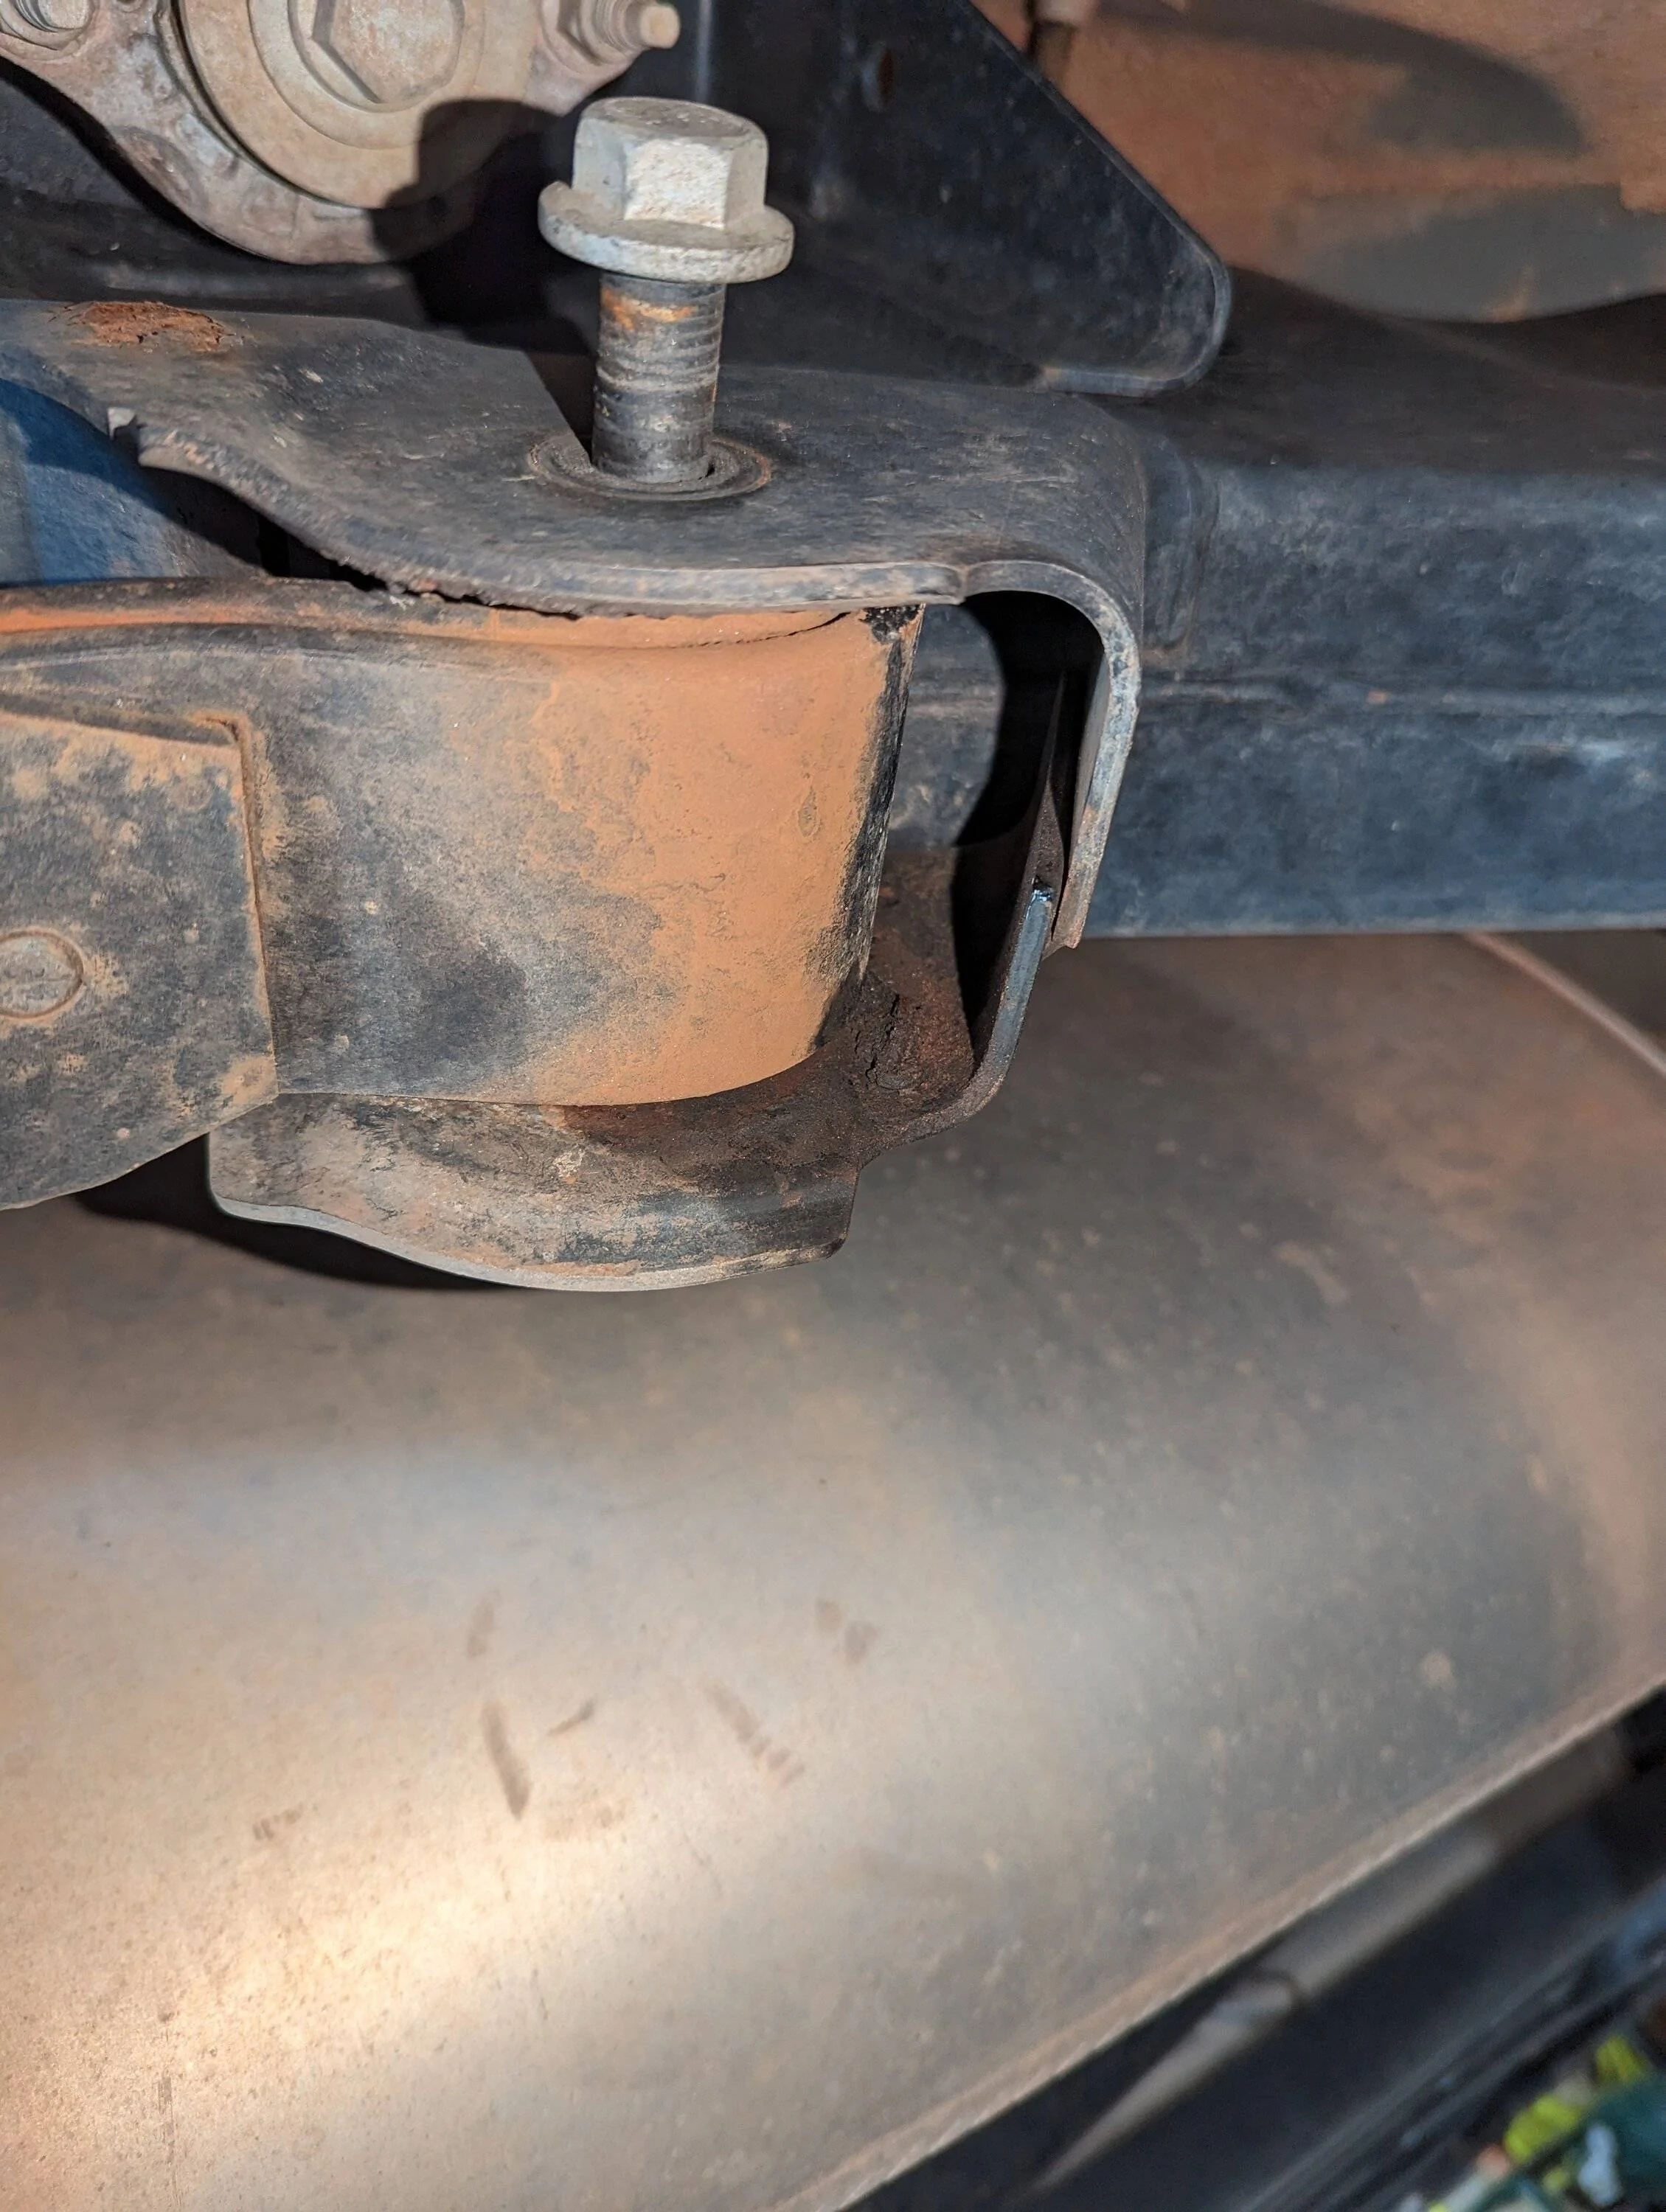
Step 8: Work on getting cutouts on back piece for center seatbelt panel, jack bracket, and amplifier wiring. It may be worth noting at this point I decided to forego reinstalling the factory subwoofer. I drove around without it for a week and put it back in for a few days and saw minimal gains with the style of music I listen to. This gives a TON more room as the enclosure for the sub is obnoxiously massive.
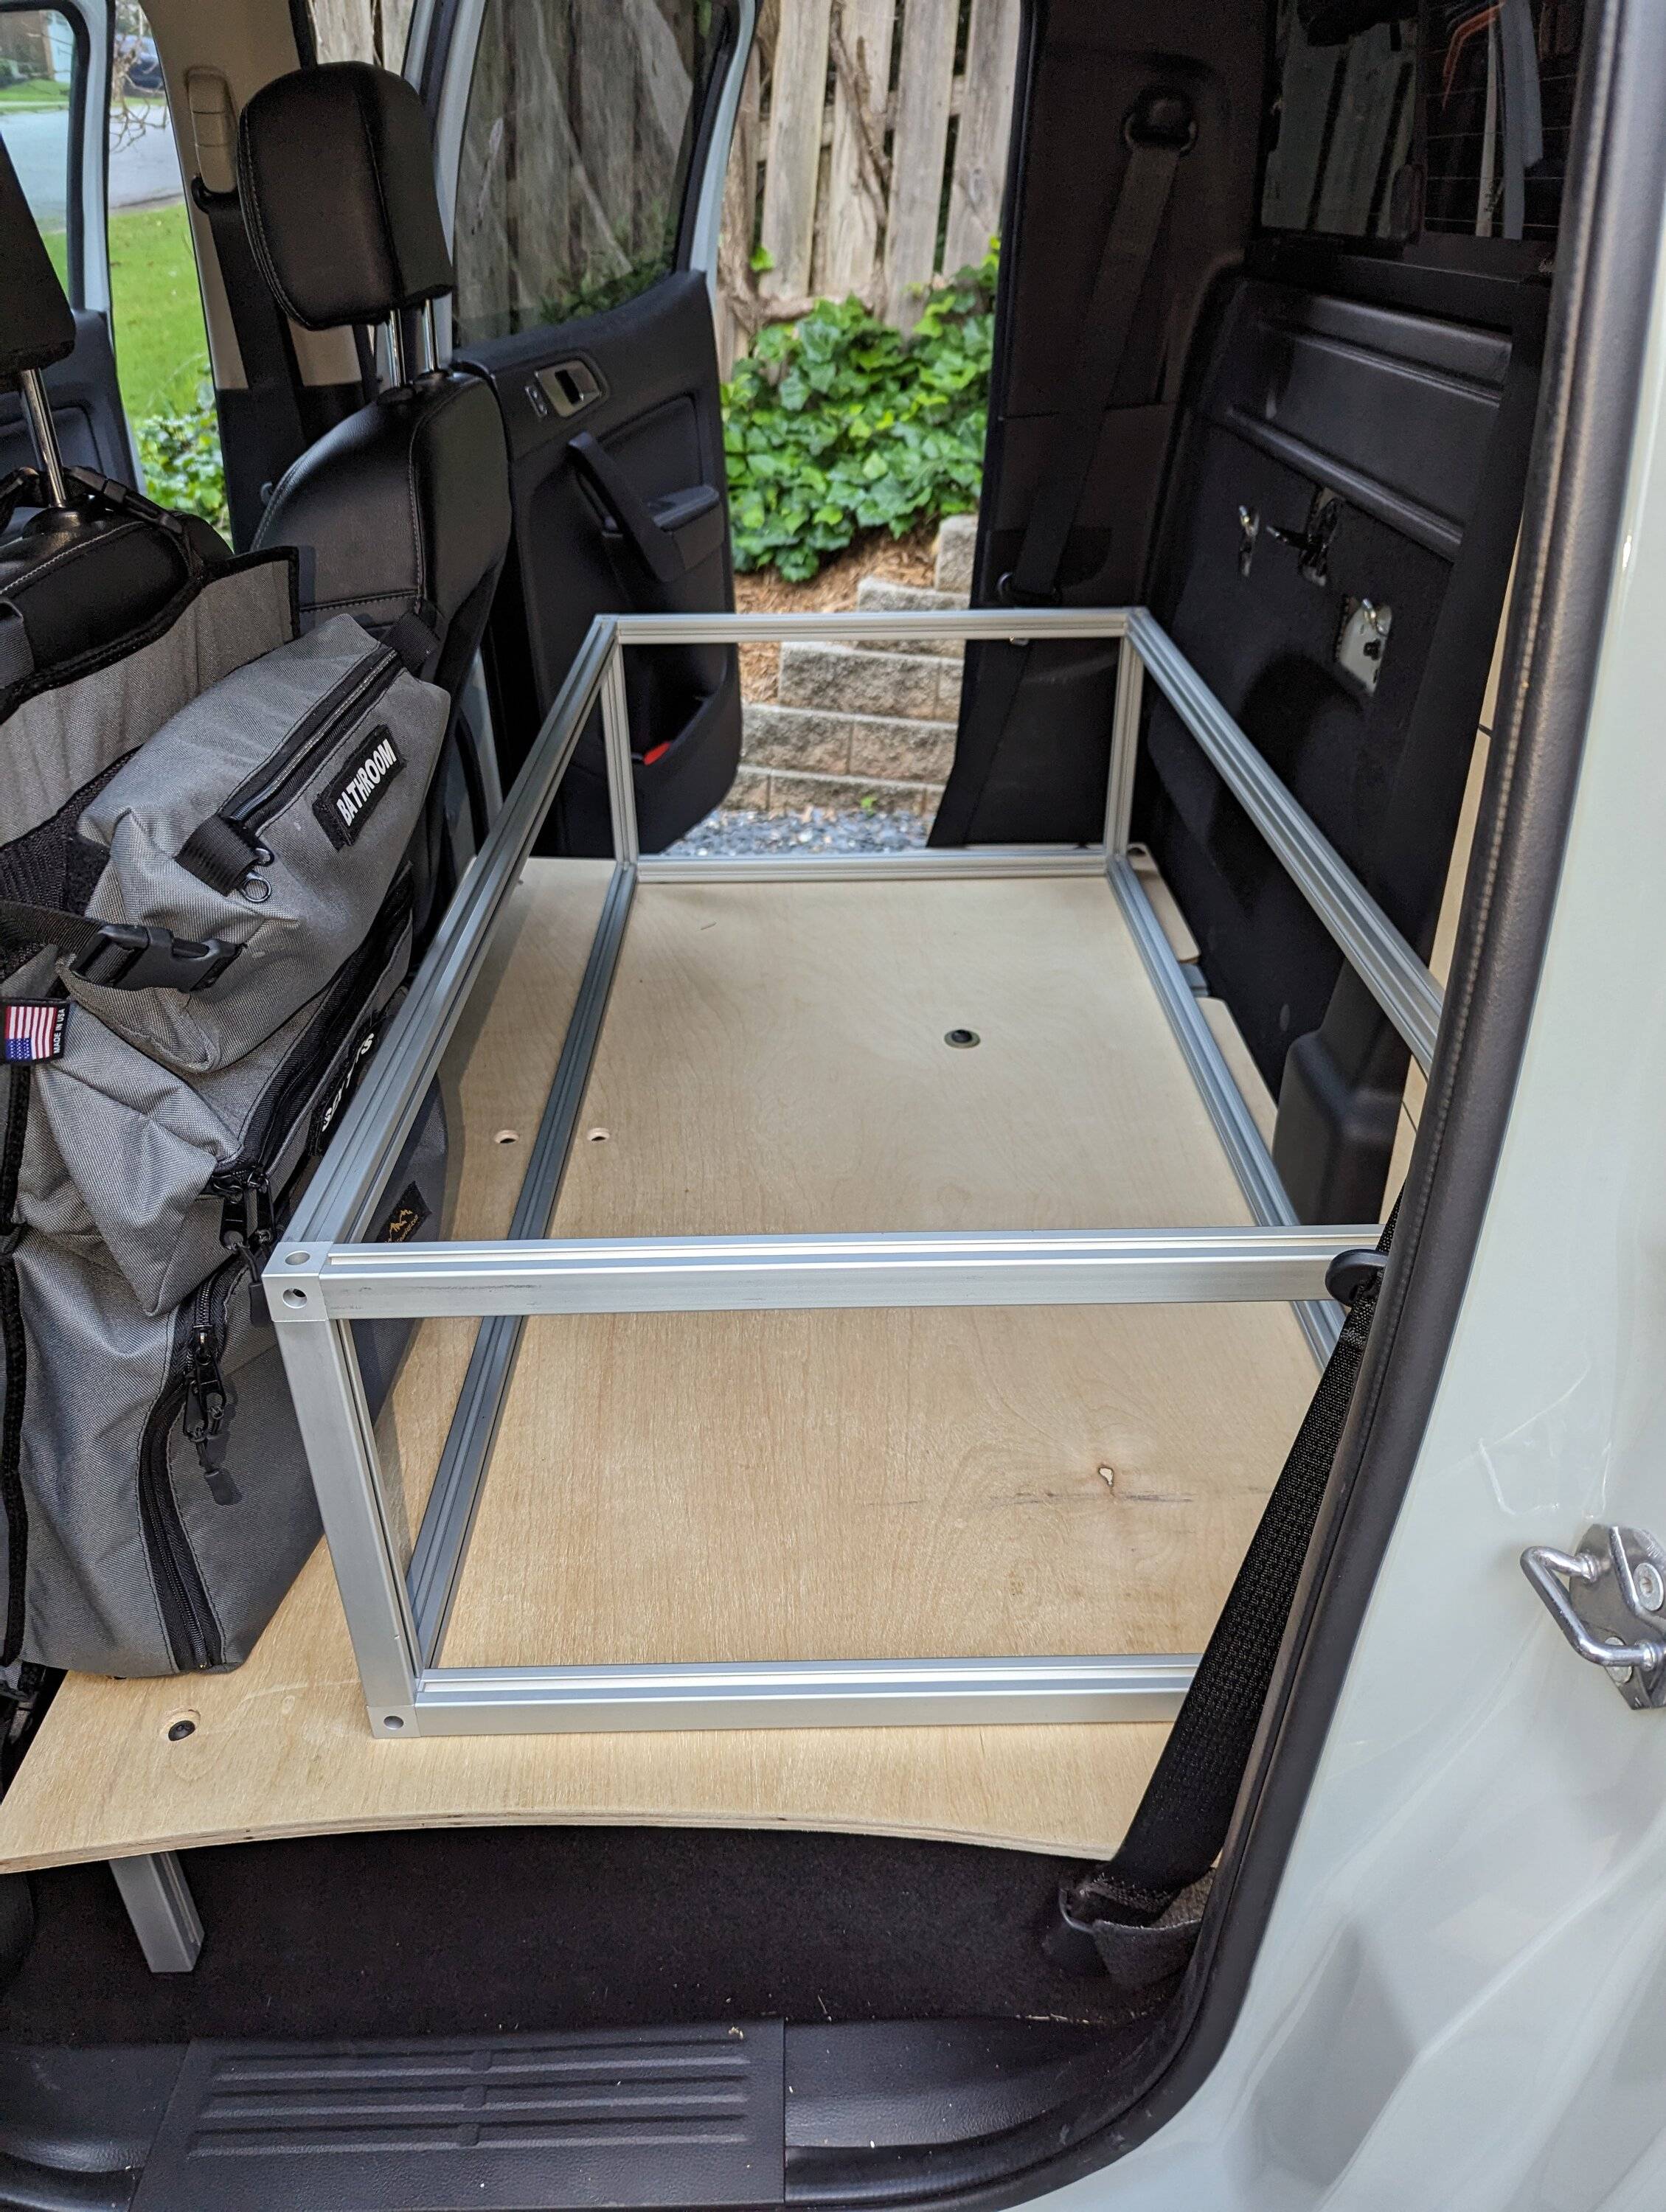
Step 9: Build top deck piece.
Step 10: Well, it should be to build the front panel. But, I got stuck sourcing leaf spring bolts when I realized I was about to lose one!
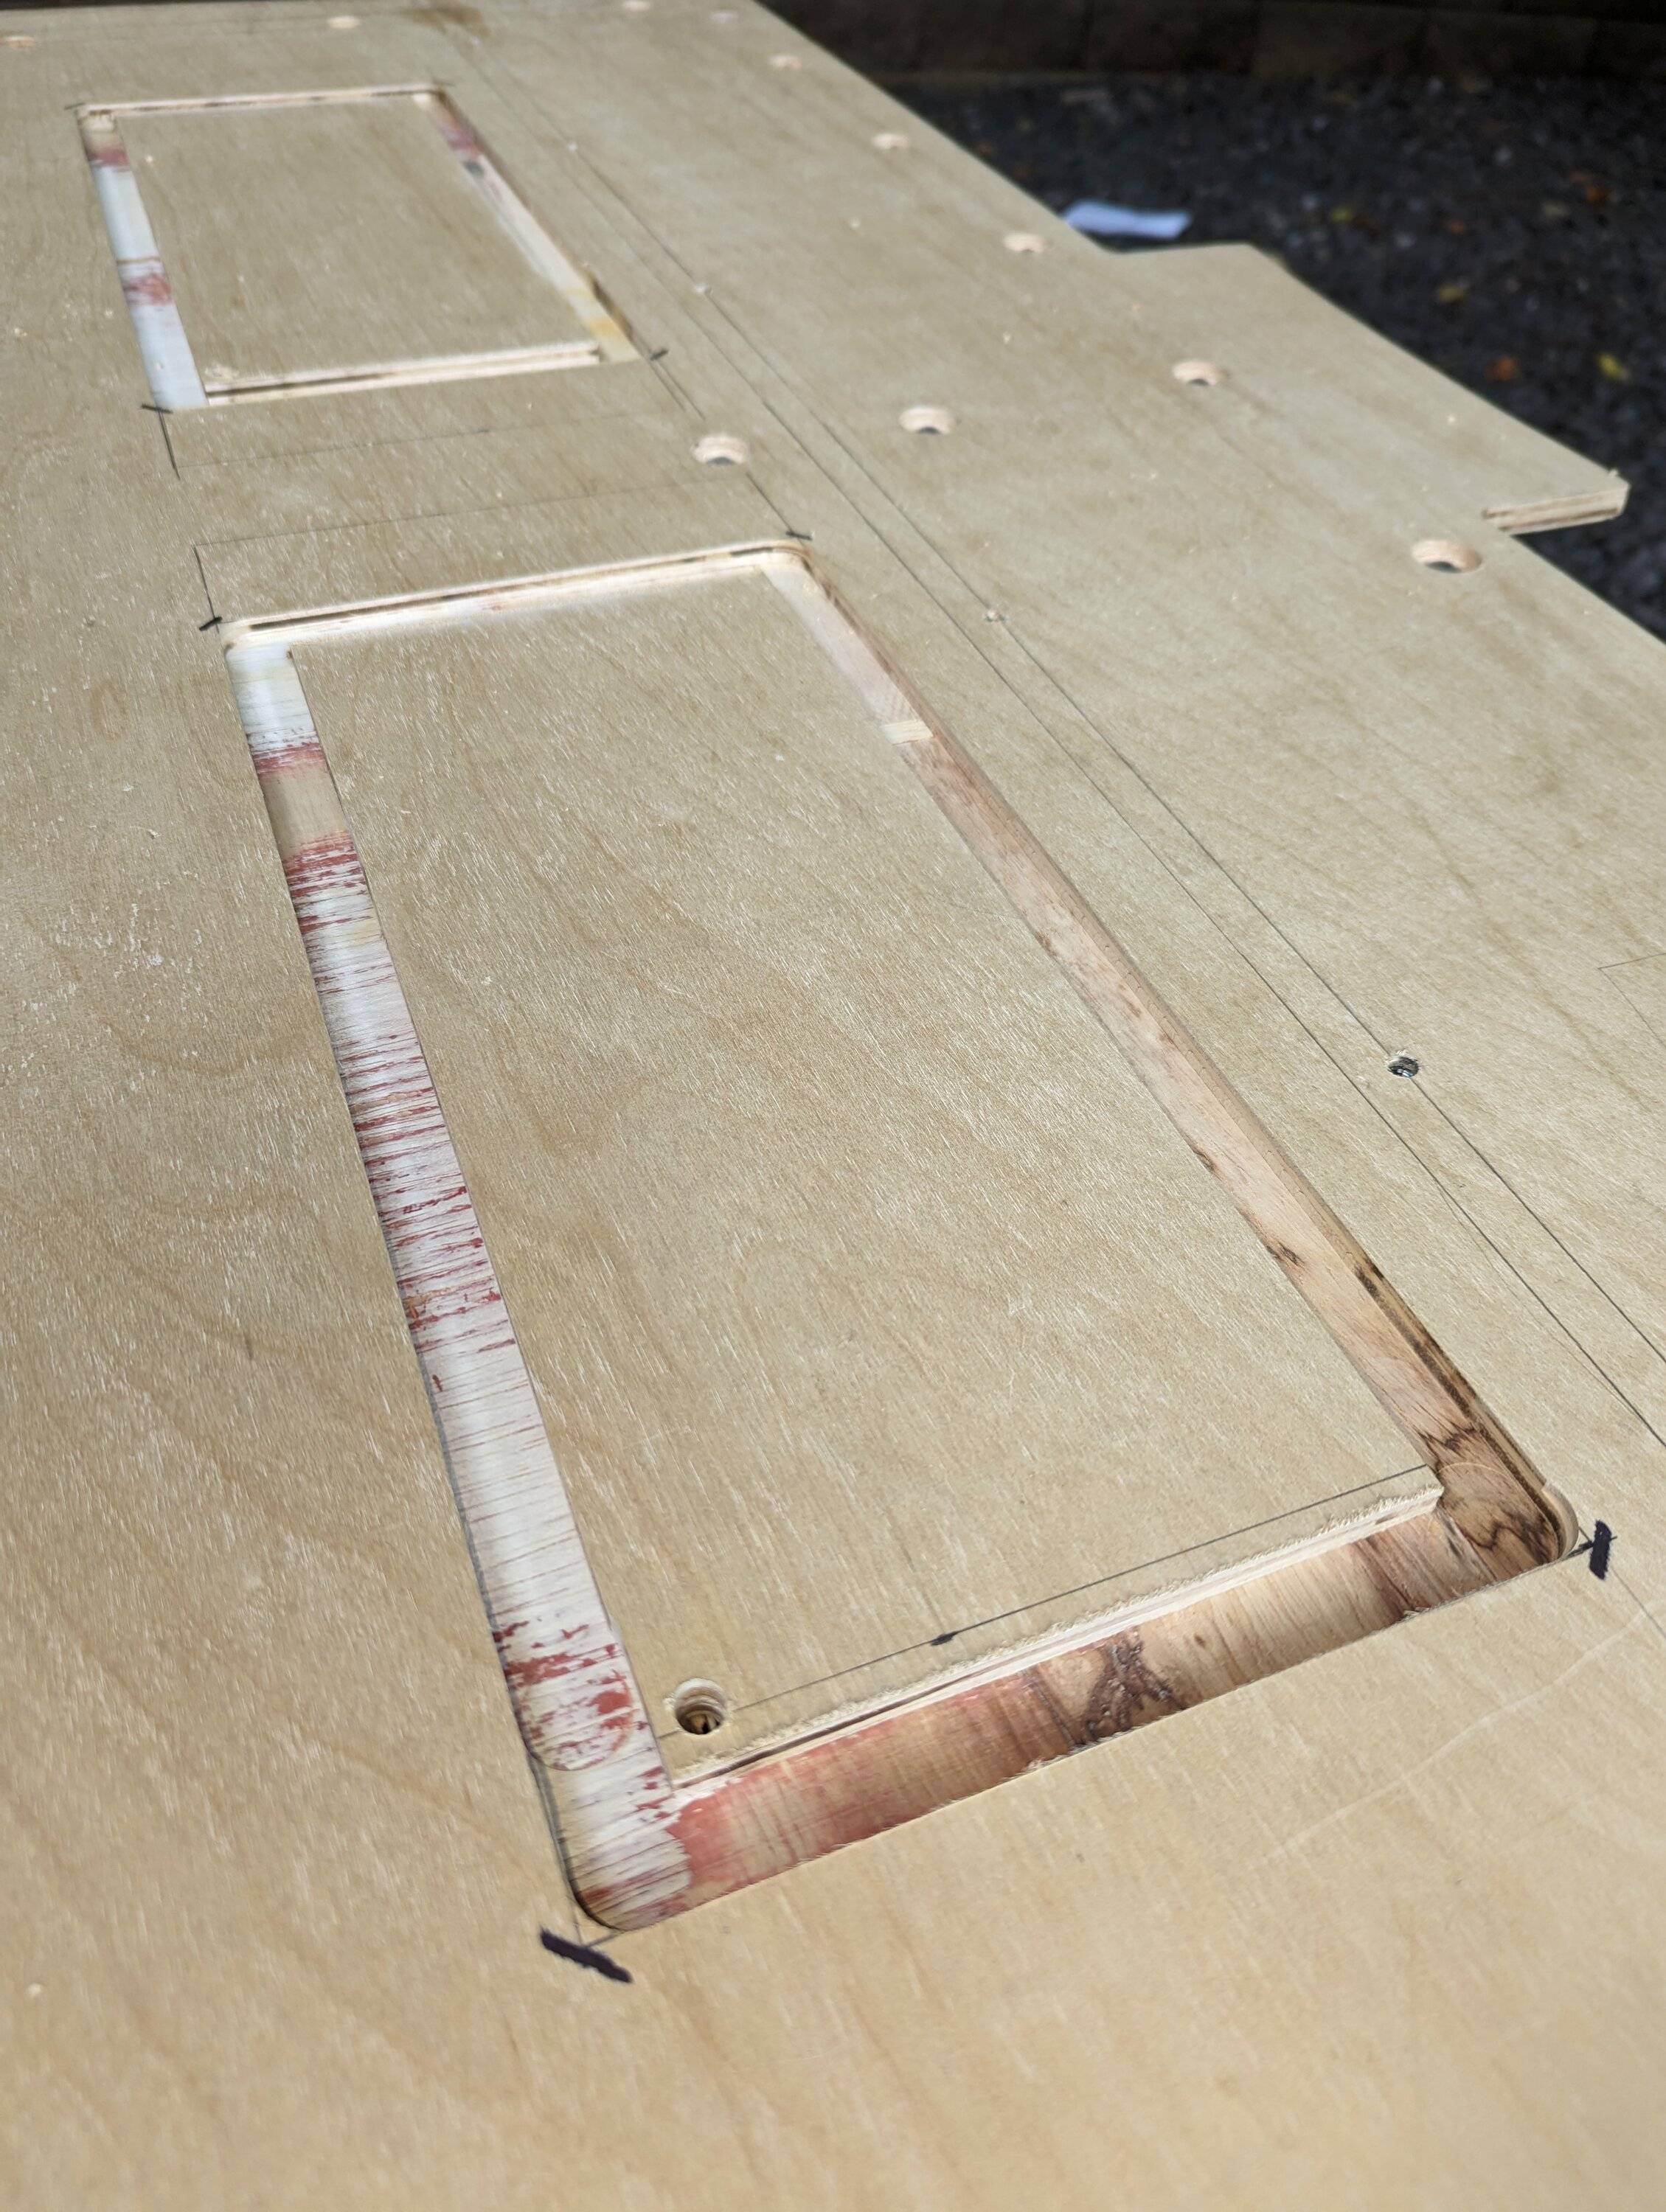
Step 11: Cutouts for access panels for the under seat delete storage bins. I used a track router to get the outline and then a jig-saw to remove the center sections. This was kind of a hack way of doing it but I was ready to just be done at this point. If I did it again I would do most of the cuts with a track saw.
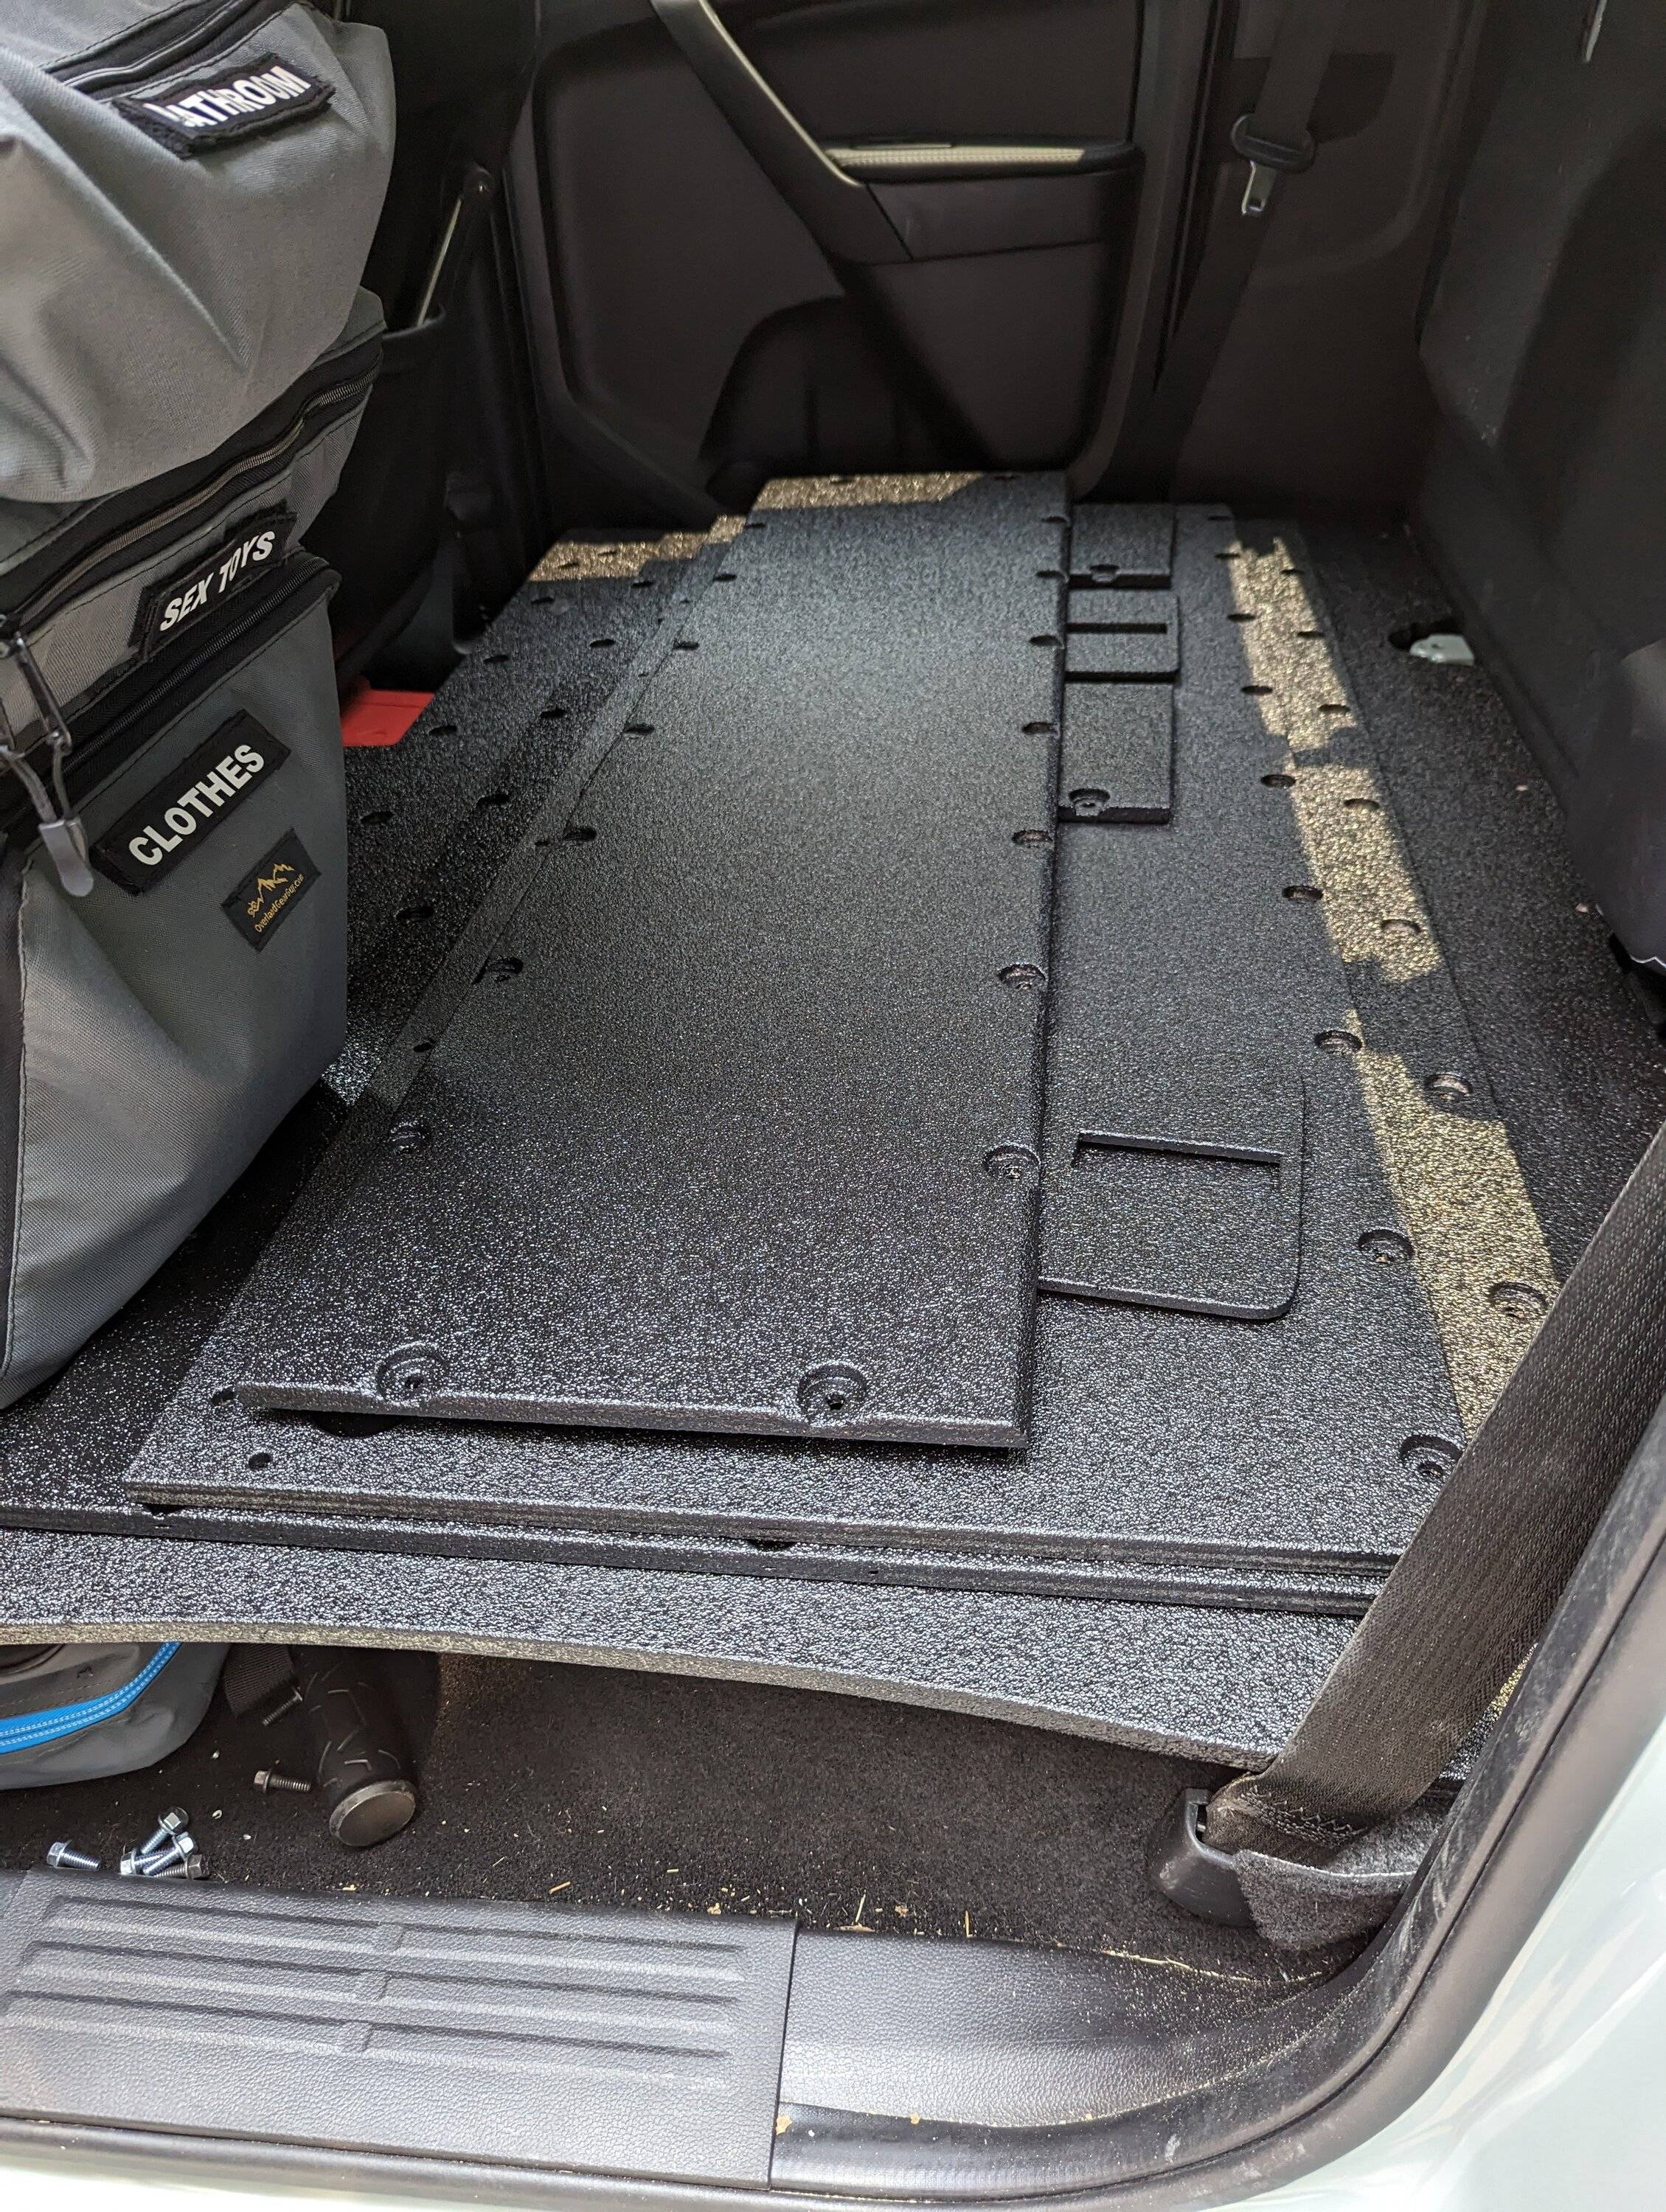
Step 12: Line-X of Lawrenceville gave me a nice thin coating. This was probably the biggest "splurge" on this project, but I did a couple of test pieces with DIY spray and I was not excited about the results. The line-x makes it seem like truck jewelry, so I'm glad I went this route.
Step 13: Re-assemble. I also decided to using the plywood legs in front as there seemed to be a lot of pressure on extrusion legs. I figured this would help distribute the load, I'll just have to find somewhere else to put shoes.
Step 14: Install latches on storage access covers. I need to do a little re-work to get the latches to work right so for right now this is how things are. I've got a trip to the outer banks this weekend and some LED's that need installing so the latches will wait for another day. This is how things ended up, I'm really happy with how things turned out.
CHEERS!
Step 1: Remove the factory seat and tuck the center belt behind the panel.

Step 2: Create 4 separate template pieces to help me to figure out the different locations to add spacers and extrusion for strength. There are very few locations under the seat that are flat and usable.
Step 3: I created 1 large template by pattern routing the 4 smaller pieces. Fine tuning around the back side to give some relief where there is wiring and the jack mounting bracket.
There was also some fine tuning on the front as things didn't quite line up when I was eyeballing with the template pieces.
Step 4: Test fit final base panel and verify screw holes in correct location. I was pretty excited at this point as things looked like they were working out just how I wanted.
Step 5: Attach extrusion to base plate. As you can see, the base alone weighs about 20 pounds. If I wasn't concerned with a place for the dog on top of all the gear I would have just stopped at this point. The back wall doesn't really need coverage in my opinion, plus it keeps even more space available.
Step 6: Test fit with extrusion installed. I verified I had even spacing between the floor and the bottom of the base plate. My driveway is anything but level so I was hoping this would give me a level base in the end. I went with legs in my design as I wanted to be able to store shoes down below. Most other designs have a piece of plywood running across the entire bottom creating a "cabinet" with access holes above.
Step 7: Begin construction on aluminum frame for top deck. This is pretty straightforward and another place where I deviated from the commercially available product. I wanted to incorporate the back piece into the top deck as I will always have a top deck. The commercially available product has the back panel isolated from the drawer option because the drawer/top deck are an additional option.

Step 8: Work on getting cutouts on back piece for center seatbelt panel, jack bracket, and amplifier wiring. It may be worth noting at this point I decided to forego reinstalling the factory subwoofer. I drove around without it for a week and put it back in for a few days and saw minimal gains with the style of music I listen to. This gives a TON more room as the enclosure for the sub is obnoxiously massive.

Step 9: Build top deck piece.
Step 10: Well, it should be to build the front panel. But, I got stuck sourcing leaf spring bolts when I realized I was about to lose one!
Step 11: Cutouts for access panels for the under seat delete storage bins. I used a track router to get the outline and then a jig-saw to remove the center sections. This was kind of a hack way of doing it but I was ready to just be done at this point. If I did it again I would do most of the cuts with a track saw.
Step 12: Line-X of Lawrenceville gave me a nice thin coating. This was probably the biggest "splurge" on this project, but I did a couple of test pieces with DIY spray and I was not excited about the results. The line-x makes it seem like truck jewelry, so I'm glad I went this route.
Step 13: Re-assemble. I also decided to using the plywood legs in front as there seemed to be a lot of pressure on extrusion legs. I figured this would help distribute the load, I'll just have to find somewhere else to put shoes.
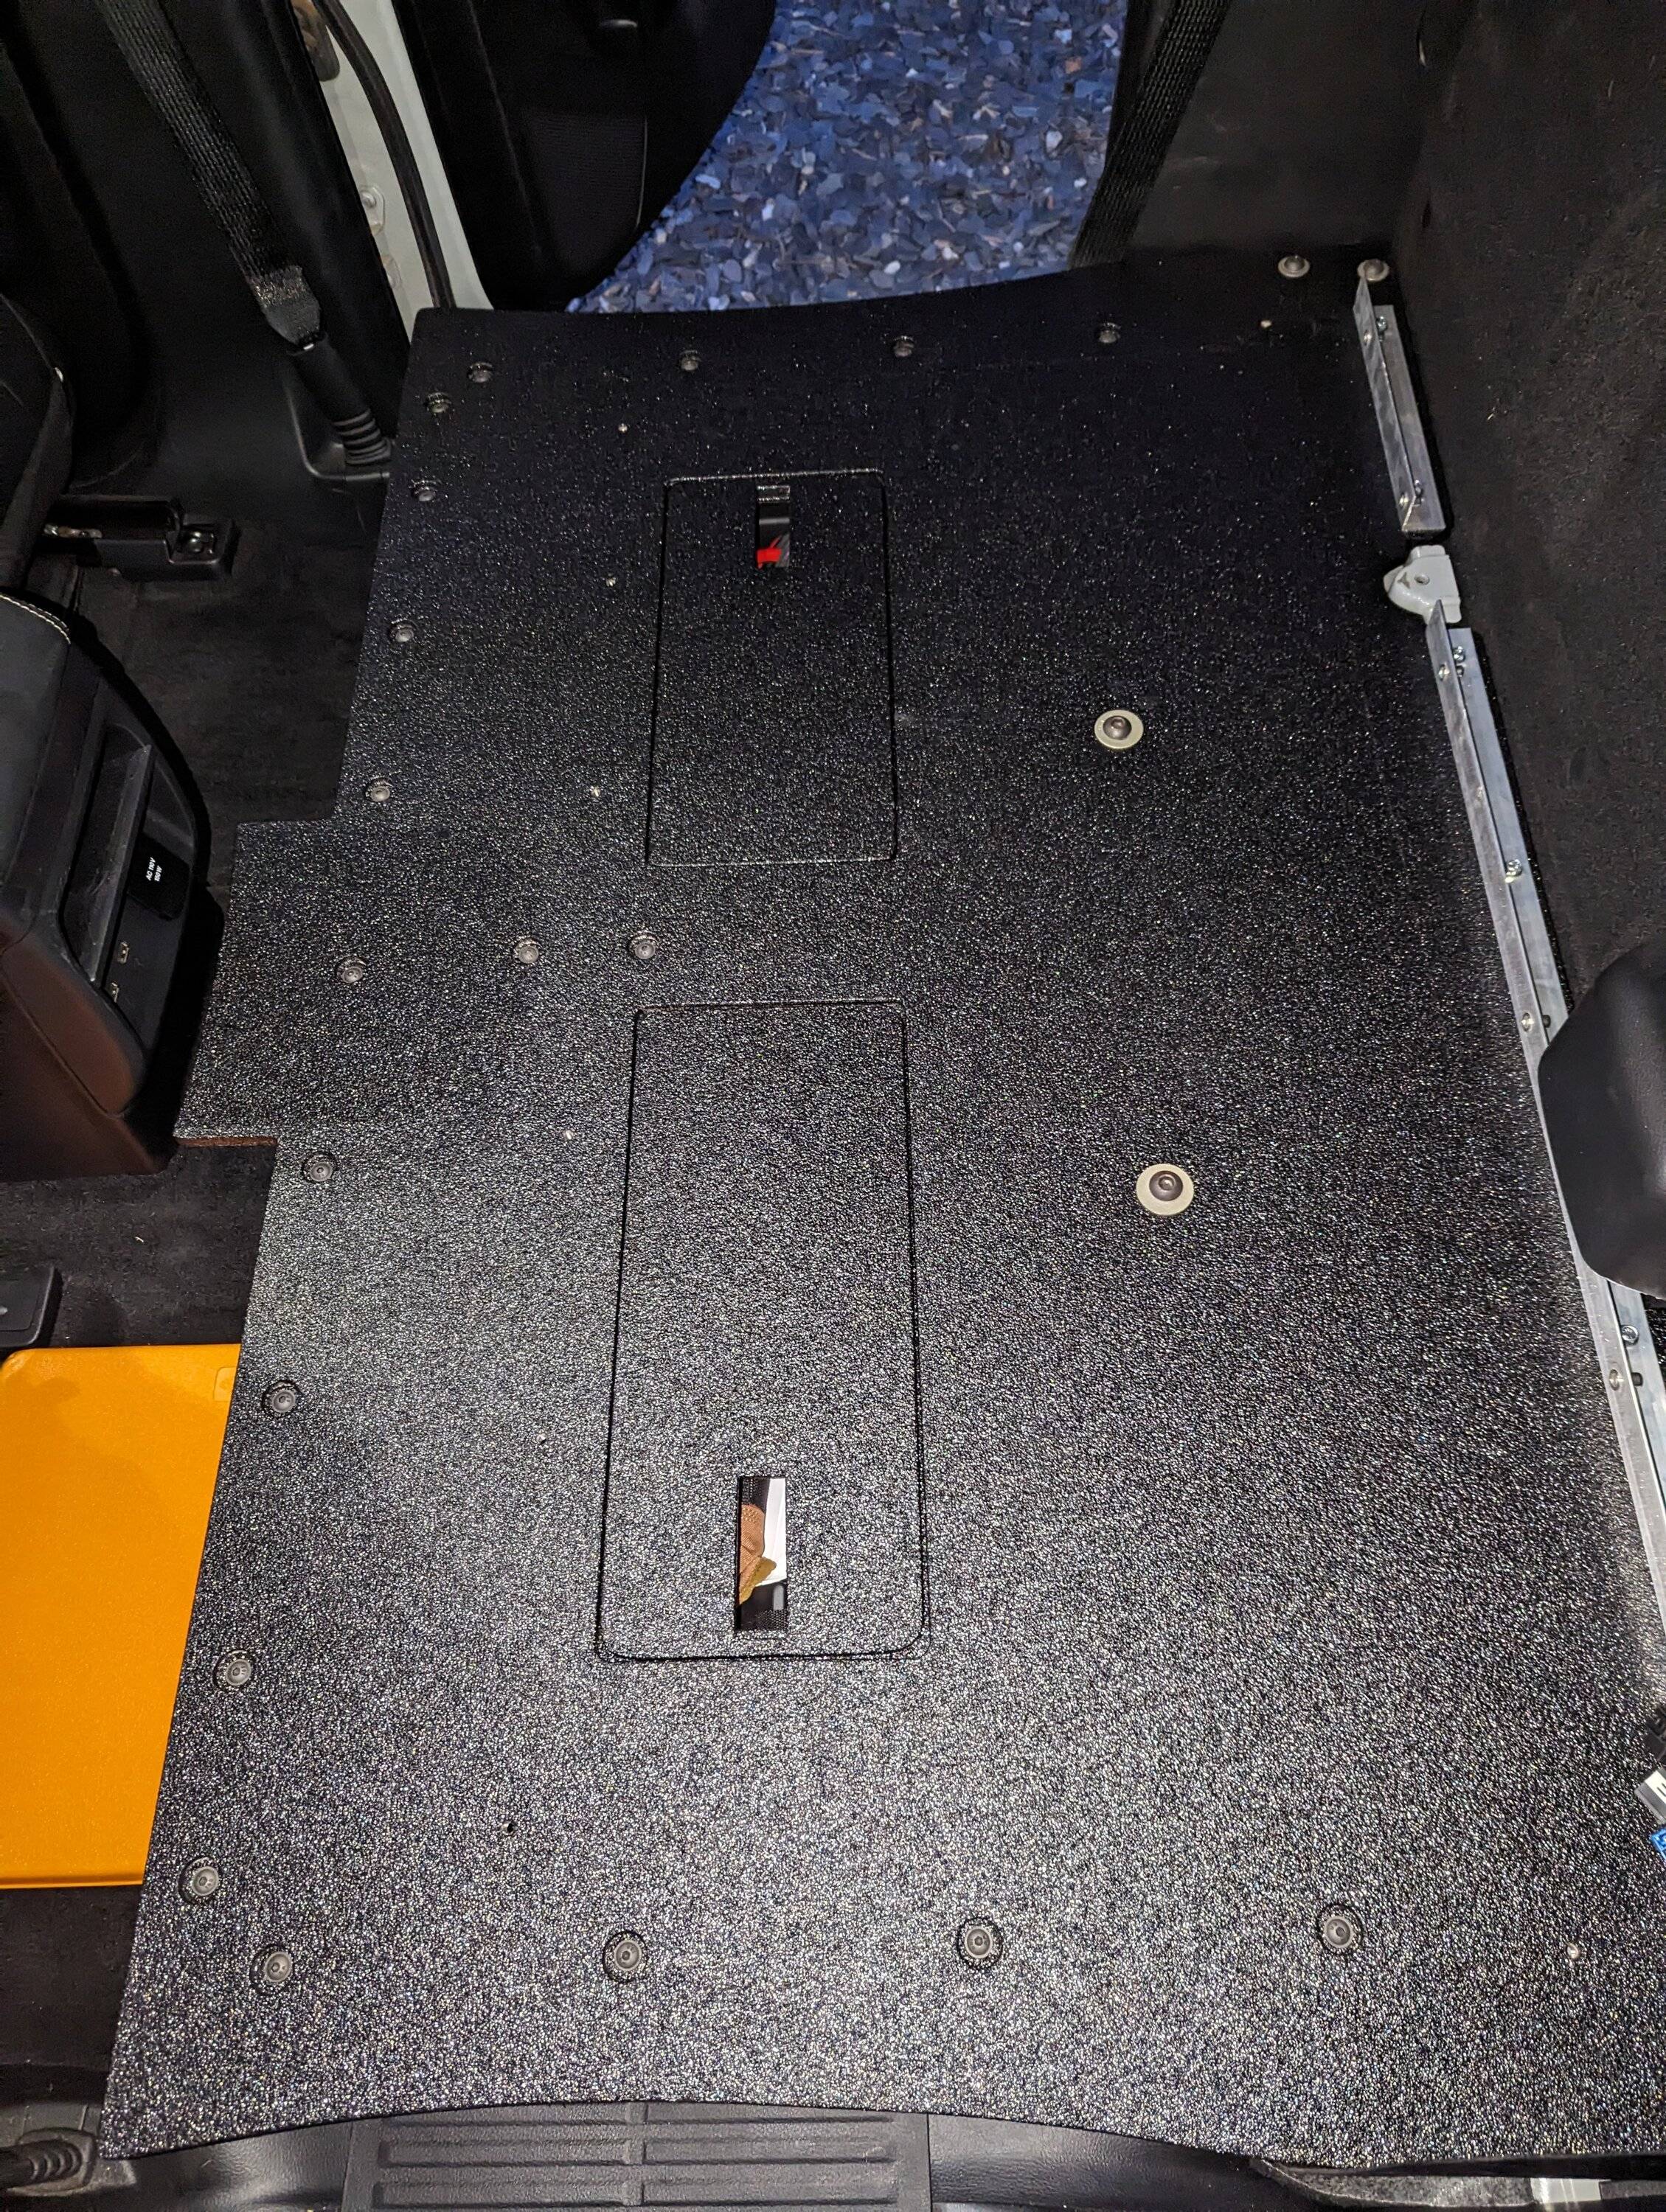
Step 14: Install latches on storage access covers. I need to do a little re-work to get the latches to work right so for right now this is how things are. I've got a trip to the outer banks this weekend and some LED's that need installing so the latches will wait for another day. This is how things ended up, I'm really happy with how things turned out.
CHEERS!
Sponsored
Last edited:

