daczone
Well-Known Member
- Thread starter
- #1
This is a DIY for those interested in a bit of a hack or mod to add this option to your truck. Sharing with the group...
This is a AS-IS DIY project that you will do at your our risk.


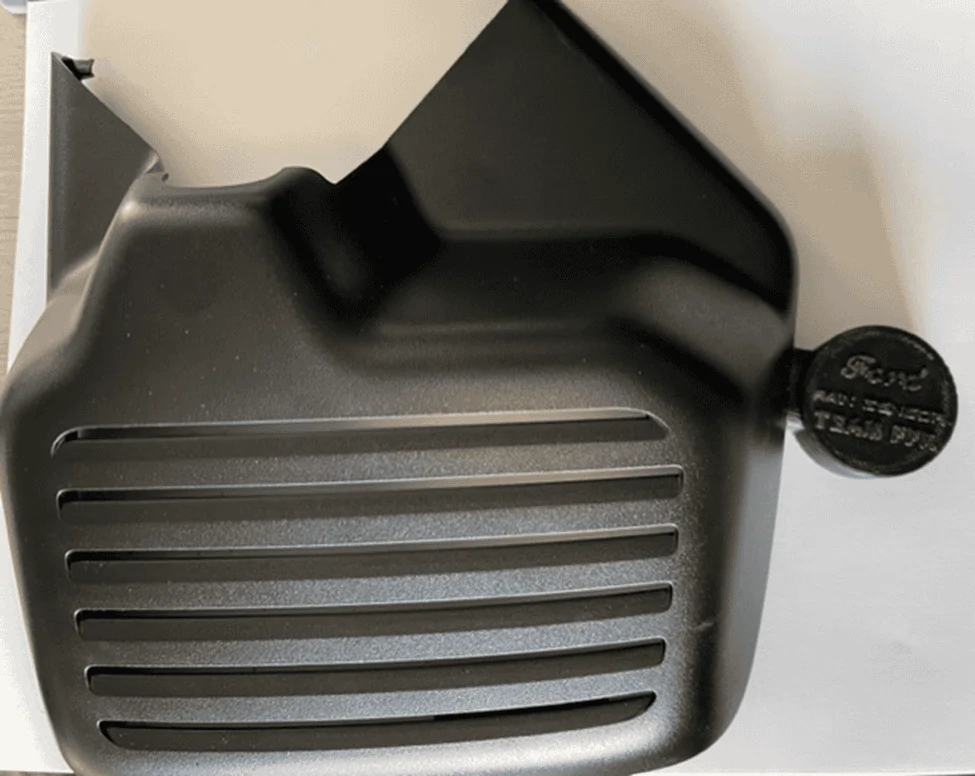
I designed a quick 3D cover. You can print this yourself or have someone do it for you. Search for https://www.thingiverse.com/thing:5905369
I designed this to allow room for the sensor and pad. Note the FORD Sensor has gel already applied. If you have a lip on your sensor, you need gel as the sensor must sit FLAT against the windshield with no air bubbles. No lip, no gel. To install you will need to notch your camera cover behind your mirror to run the square piece into and run the wiring. (3 wires). How do I plan to keep the sensor on the windshield. A small amount of silicon should keep it in place.

You will need the Rain Sensor… Normally this attaches to the windshield in this mount (see below) which is clear glass. However vehicles without this option have the factory black FRIT covering the hole. FIRT is ceramic paint that is backed onto the windshield. It does NOT come off.

This is a AS-IS DIY project that you will do at your our risk.

I designed a quick 3D cover. You can print this yourself or have someone do it for you. Search for https://www.thingiverse.com/thing:5905369
I designed this to allow room for the sensor and pad. Note the FORD Sensor has gel already applied. If you have a lip on your sensor, you need gel as the sensor must sit FLAT against the windshield with no air bubbles. No lip, no gel. To install you will need to notch your camera cover behind your mirror to run the square piece into and run the wiring. (3 wires). How do I plan to keep the sensor on the windshield. A small amount of silicon should keep it in place.
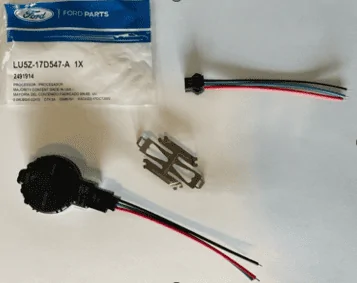
You will need the Rain Sensor… Normally this attaches to the windshield in this mount (see below) which is clear glass. However vehicles without this option have the factory black FRIT covering the hole. FIRT is ceramic paint that is backed onto the windshield. It does NOT come off.
So here is my mod. Print a little 3d cover and hang the sensor to the right of the mirror/camera cover on the passenger side. This mod puts the rain sensor to the right of the mirror with the cover over it much like what comes factory on many vehicles. I used a 3 pin connector (slightly modified to fit) the factory plug from AMAZON (Search for 3 PIN LED CONNECTOR) and will find them. Sorry I don’t have the exact part number as I bought these a long time ago. You will need to trim the plastic as pin 1 of the connector has a notch in it. I used a razor blade and just did a 45 on that edge of the connector. Don’t force the connector into the sensor, it will slide on with little effort. There will be no tang to hold the connector in place, but you can wrap it with a piece of electrical tape or heat shrink if you are concerned about it coming loose. Mine is snug and stays in place.
Rain Sensor wiring:
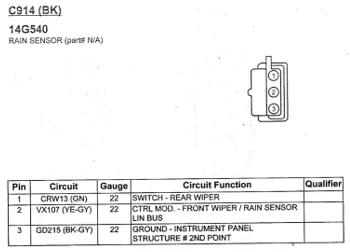
What the complete circuit looks like:
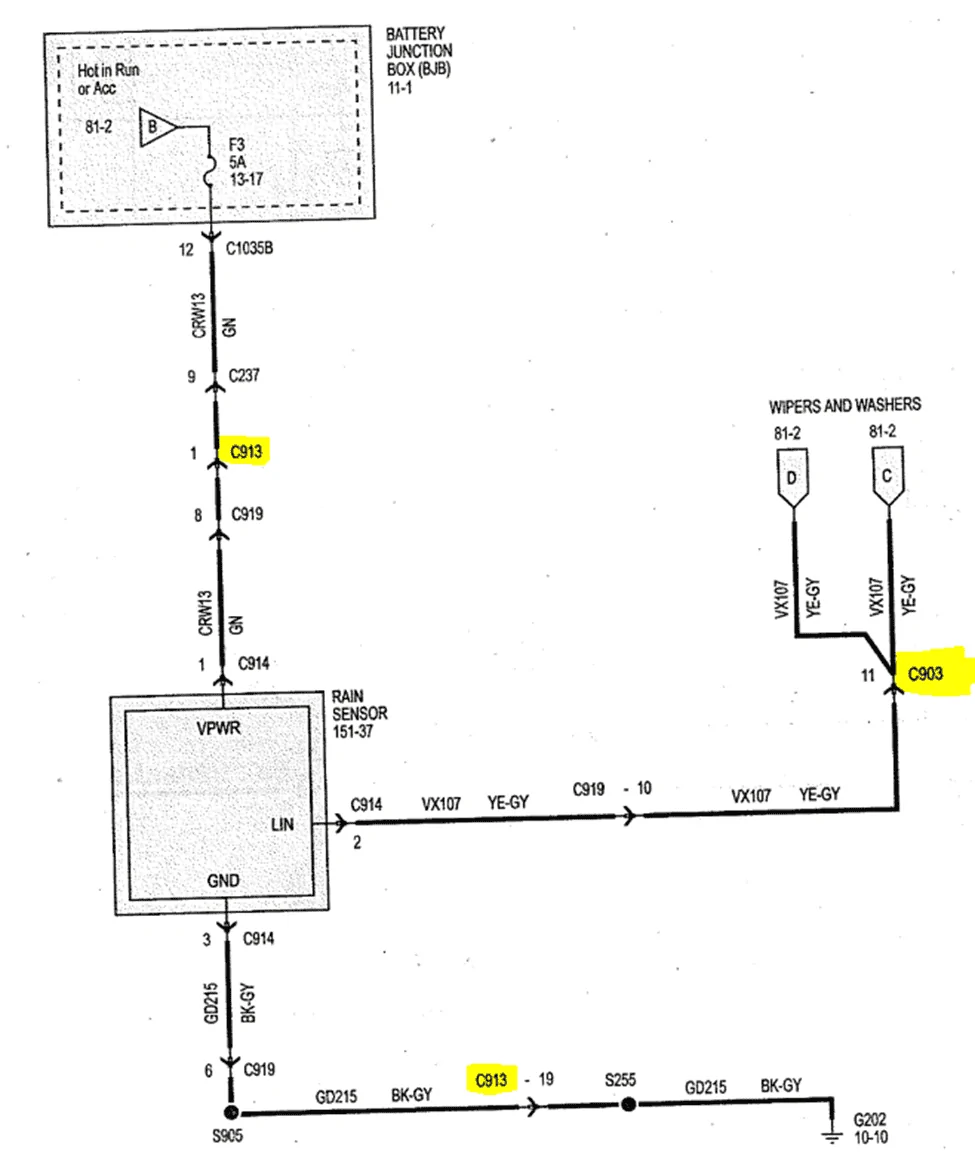
Pretty straight forward. The Sensor goes to switched 12v, Ground and Rain Sense. Problem the connector C903 (Drivers side A Pillar) on my truck has nothing in Pin 11 (Yep Ford saving money). So we need to keep on tracing that wire…. Rain Sense goes to 81-2 D / 81-2 C (Wiring Diagram)
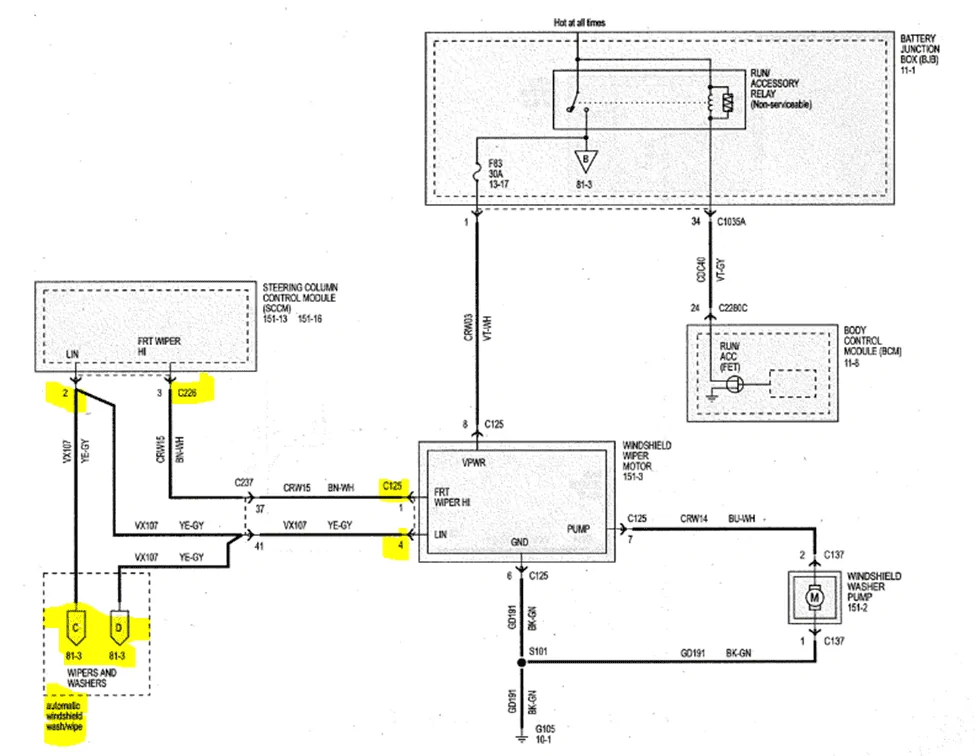
Which connects to Pin 4 @ Connector C125 (At the Wiper Motor) Yellow wire for my 2020 Ranger or Pin 2 @ Connector C226 (The SCCM module located under the steering wheel) Also a Yellow wire for my 2020 Ranger. 3 bolts to remove the bottom of the steering console. And tap that wire. I like to solder my connections. So here it is:
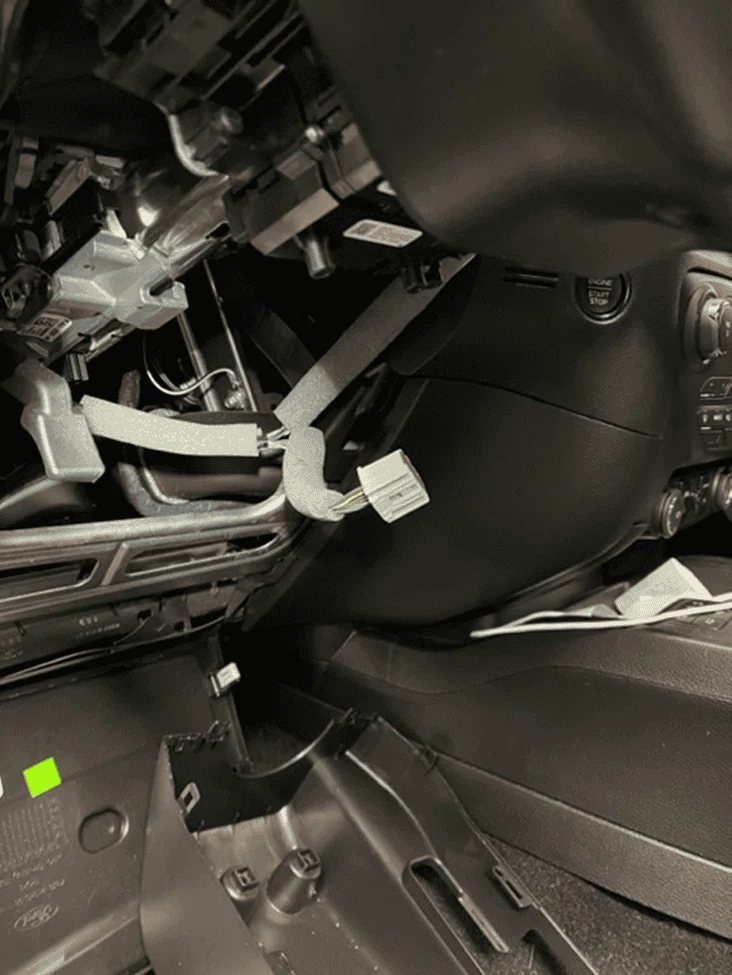
Connector unplugged
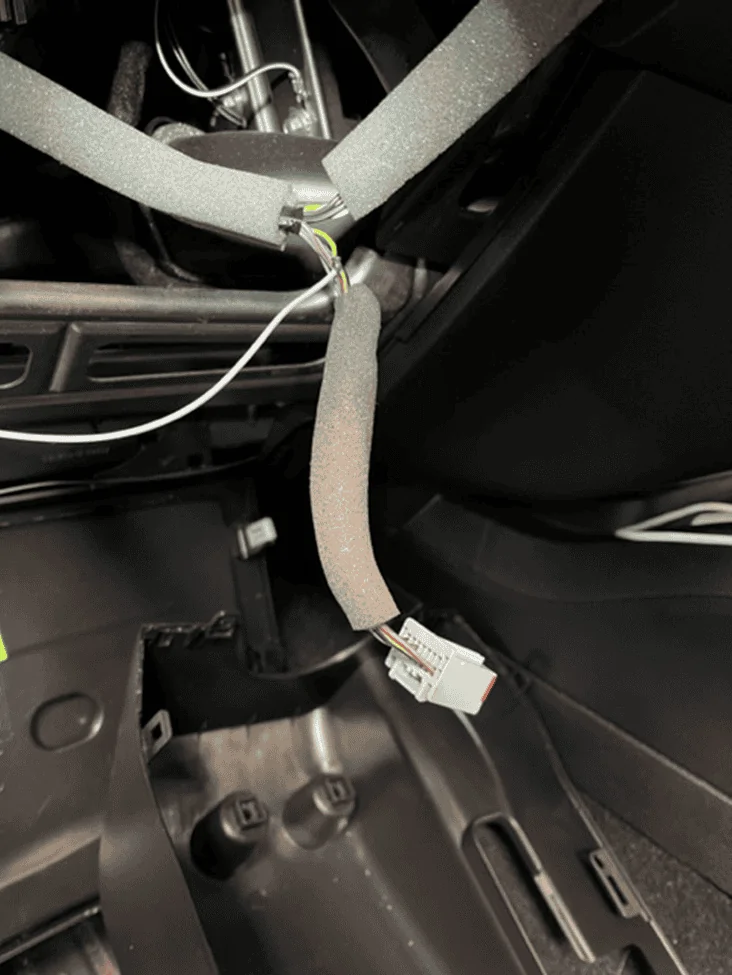
Yellow wire going to the connector @ PIN 2
While you are here grab switched power and ground @ the fuse block. (MAKE SURE to use SWITCHED POWER), And always use a fuse. I used a fuse tap I had on hand.

Wires ran. These run under the headliner and down the drivers side A pillar.

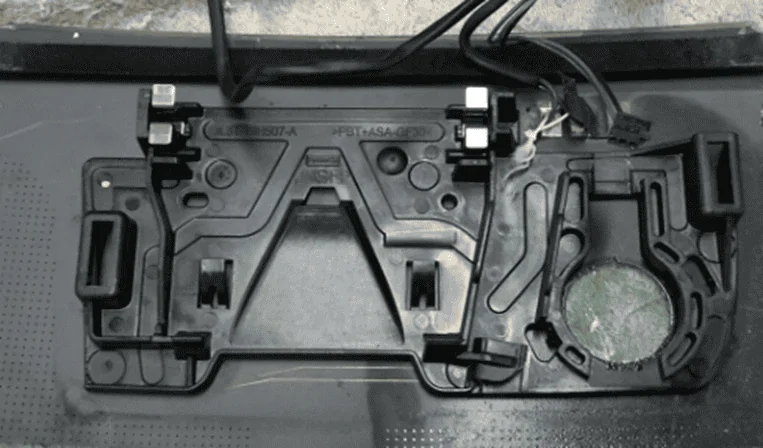
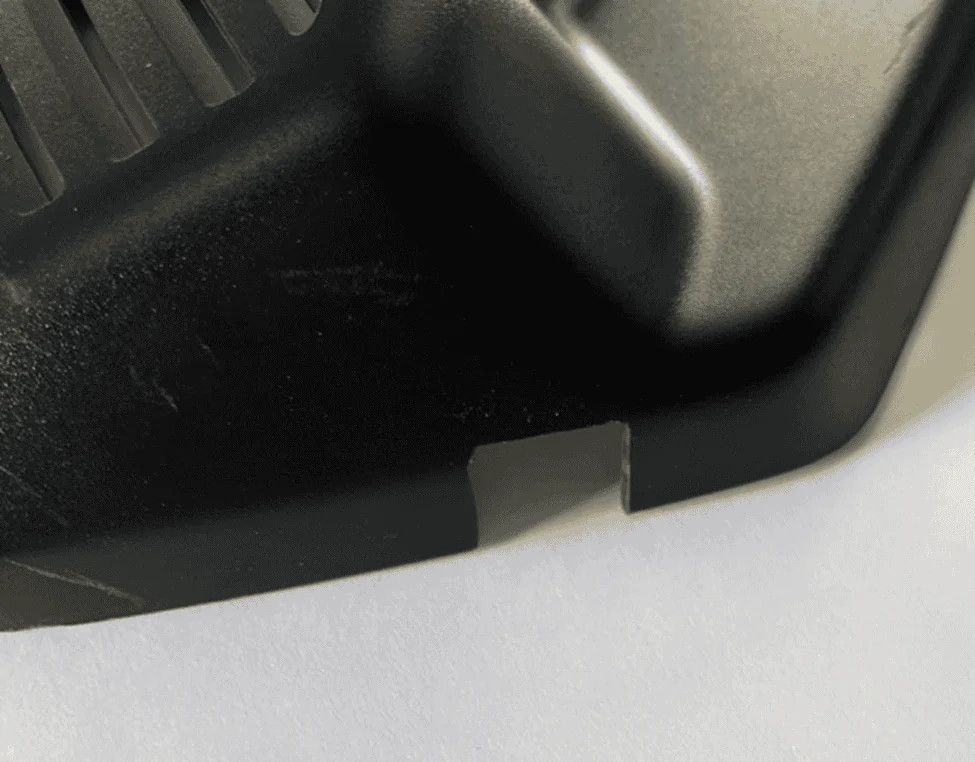
You will notch your camera cover (behind the mirror) something like this. I used a dremel which made quick work of it, but a file or hacksaw would probably work. Use your 3D printer cover as a template.

Which will then look something like this. You can put a little bit of black RTV to keep it attached and hide the 2 pieces.

It should fit into the slot and will look something like this. The sensor will be mounted to the windshield under the cover.
Not sure if this is required but I also replaced my WiperSwitch for the one that includes AUTO on the stalk. The part number is kb3z17a553a
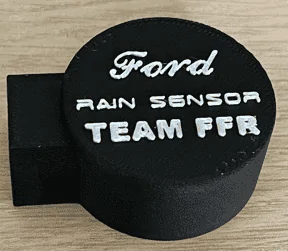
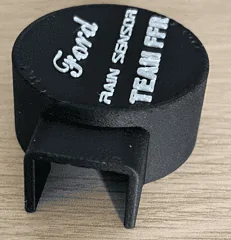
I printed my cover with Carbon Fiber Filament and white letting on top for vanity..


Feel free to make any corrections to this project. Happy Hacking!
While you are here grab switched power and ground @ the fuse block. (MAKE SURE to use SWITCHED POWER), And always use a fuse. I used a fuse tap I had on hand.
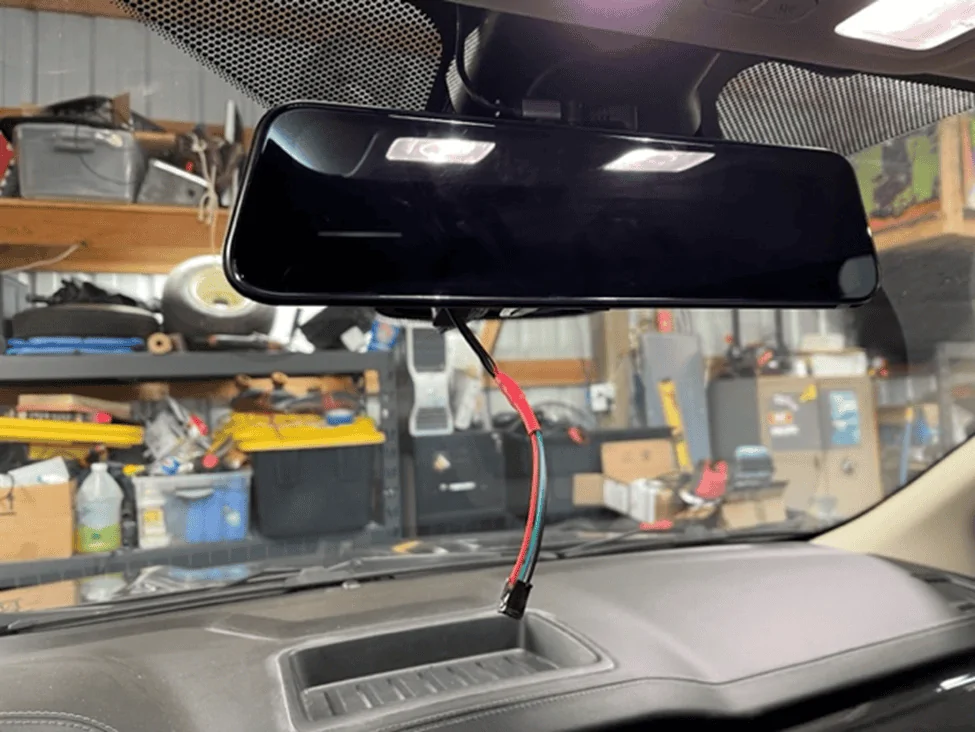
Wires ran. These run under the headliner and down the drivers side A pillar.
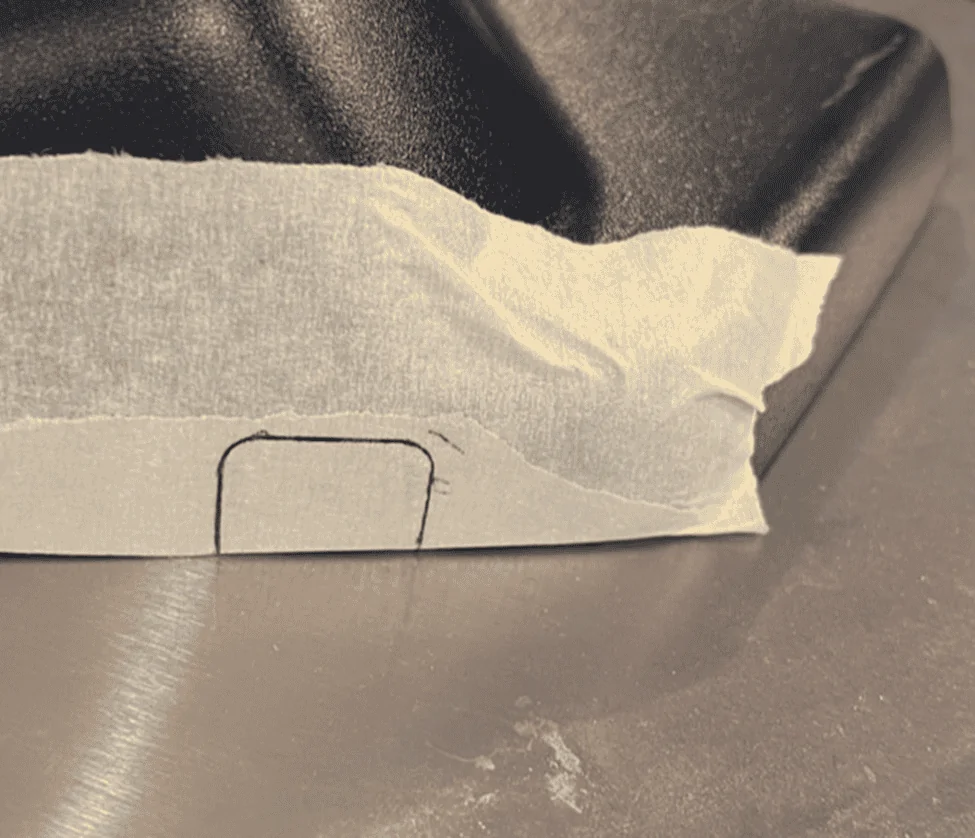
You will notch your camera cover (behind the mirror) something like this. I used a dremel which made quick work of it, but a file or hacksaw would probably work. Use your 3D printer cover as a template.
Which will then look something like this. You can put a little bit of black RTV to keep it attached and hide the 2 pieces.
It should fit into the slot and will look something like this. The sensor will be mounted to the windshield under the cover.
Not sure if this is required but I also replaced my WiperSwitch for the one that includes AUTO on the stalk. The part number is kb3z17a553a
I printed my cover with Carbon Fiber Filament and white letting on top for vanity..

Feel free to make any corrections to this project. Happy Hacking!
Sponsored