Sponsored

FortyWater12 - Wedge Camper Build

OP
OP
fortywater12

fortywater12

Well-Known Member
First Name
Evan
Joined
May 17, 2021
Threads
16
Messages
249
Reaction score
441
Location
Sacramento, CA
Vehicle(s)
2019 Ranger XLT FX4
Occupation
Engineer
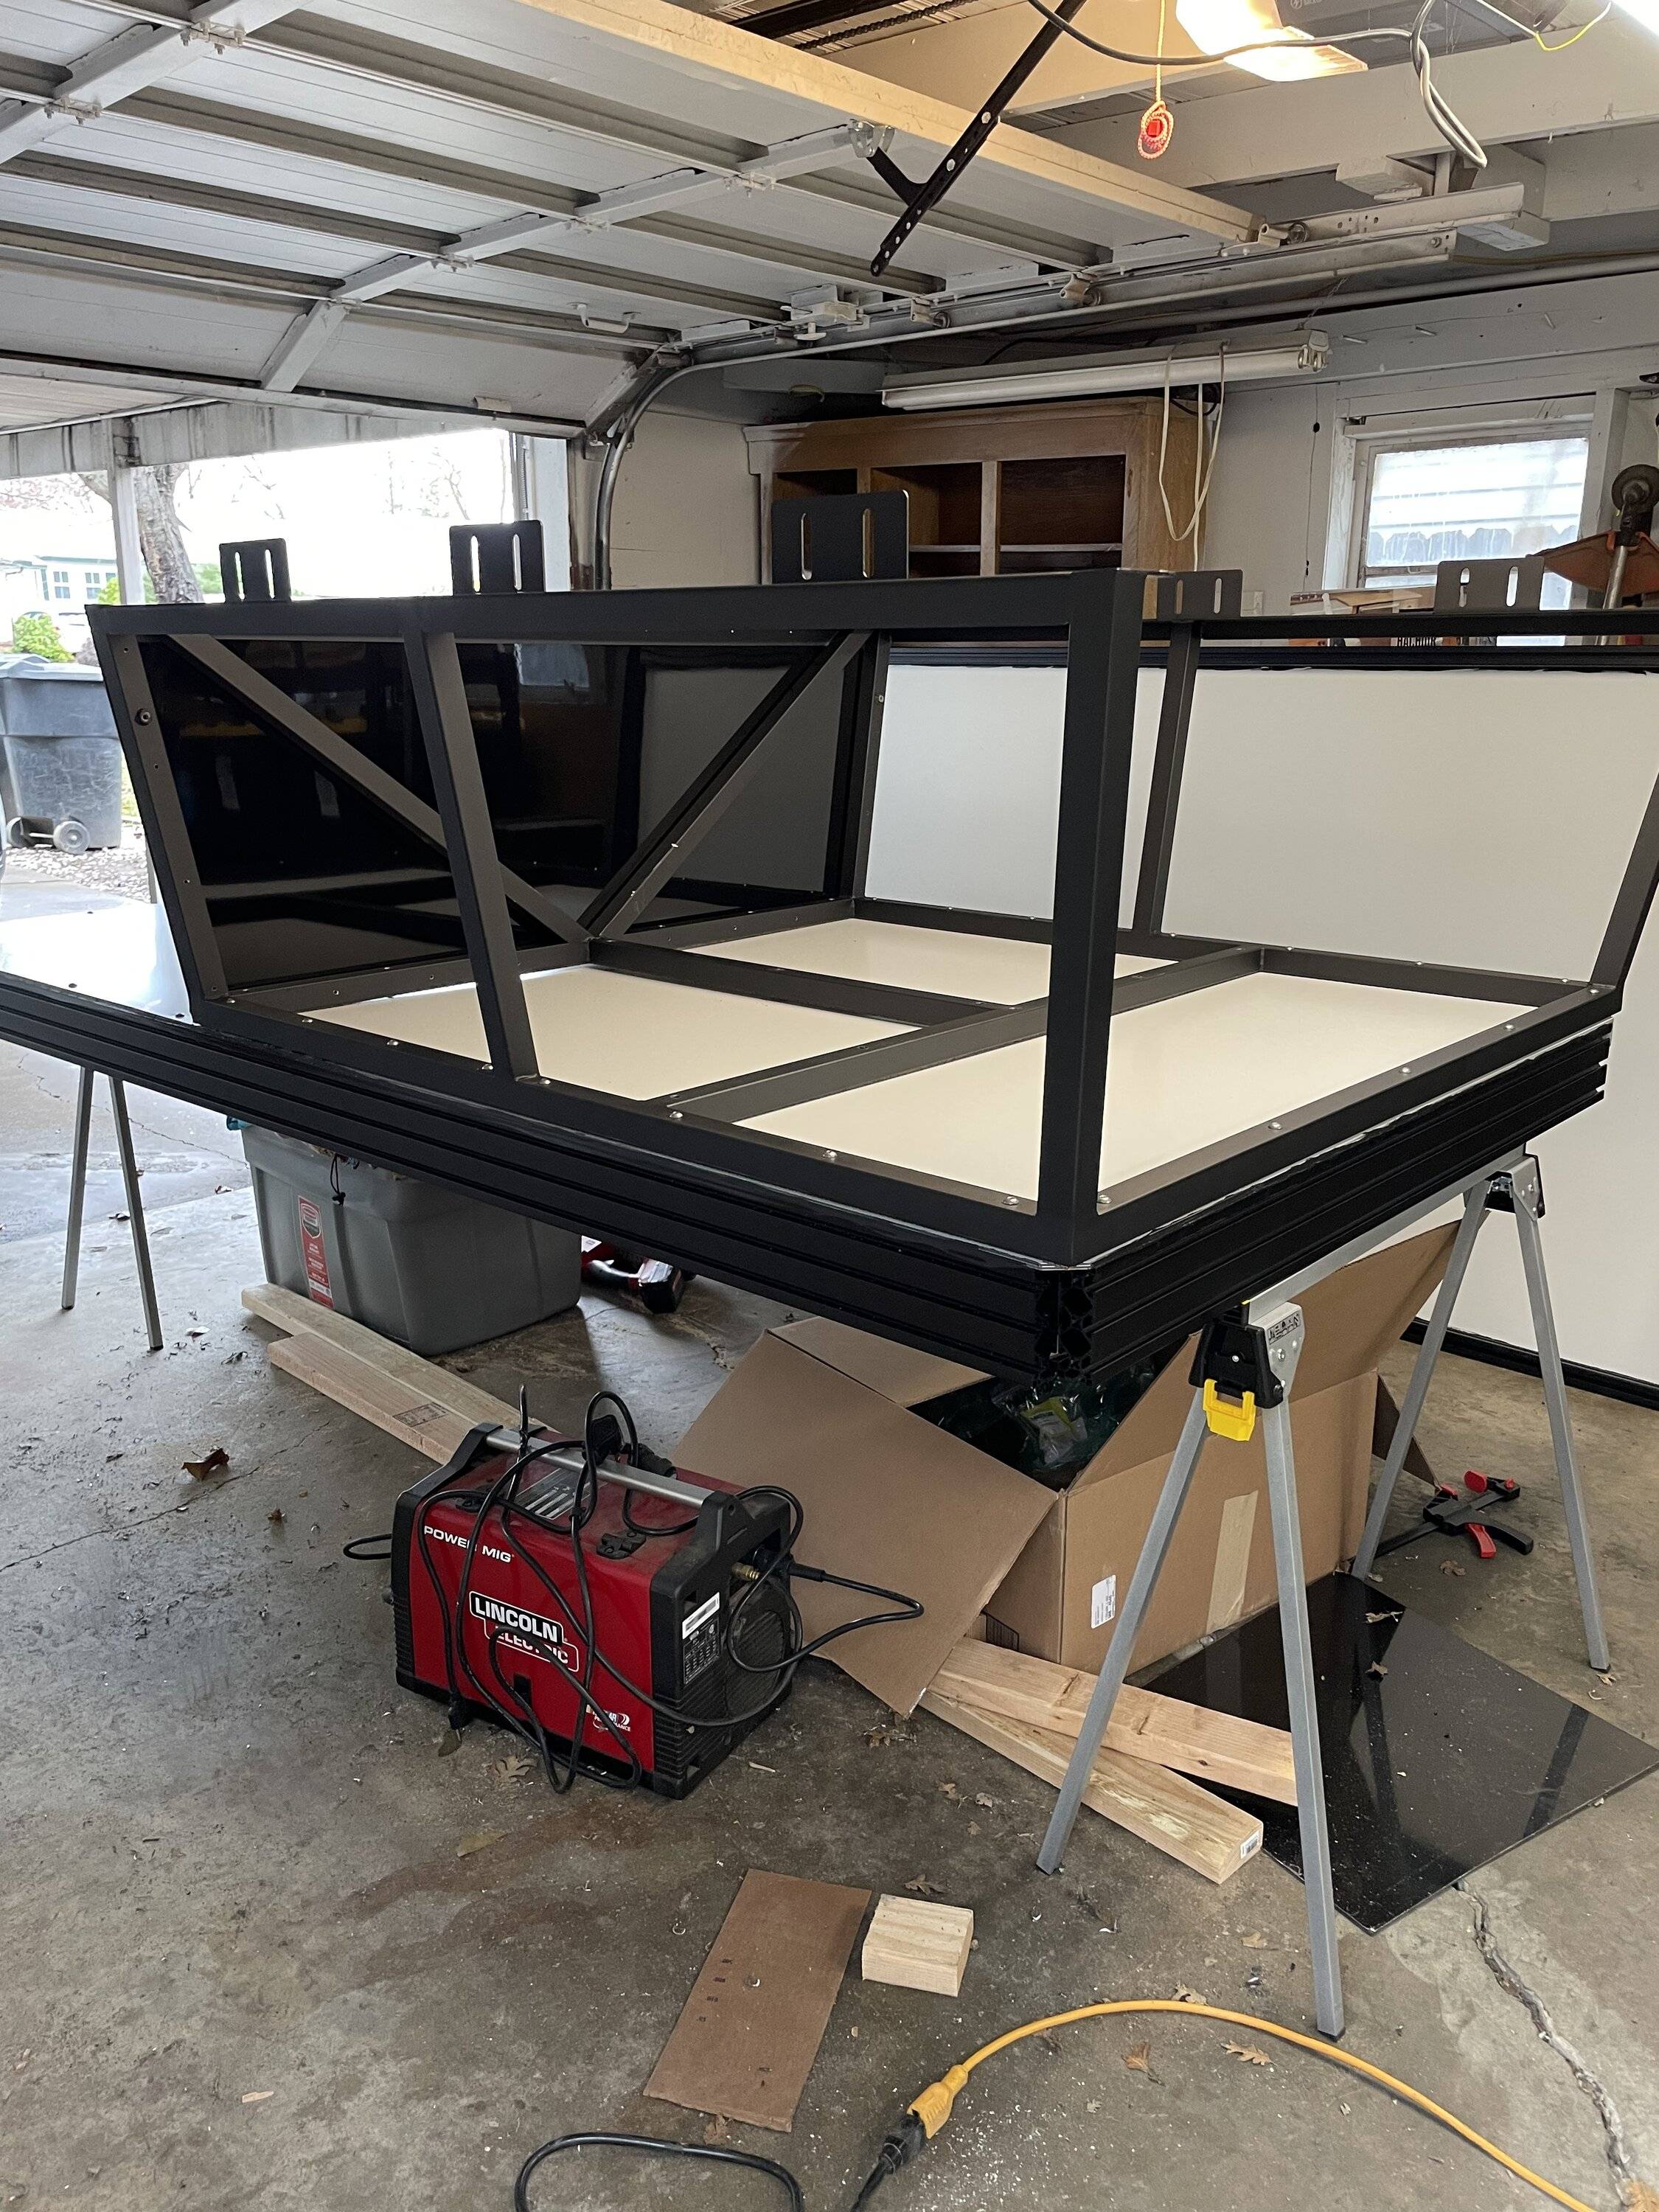
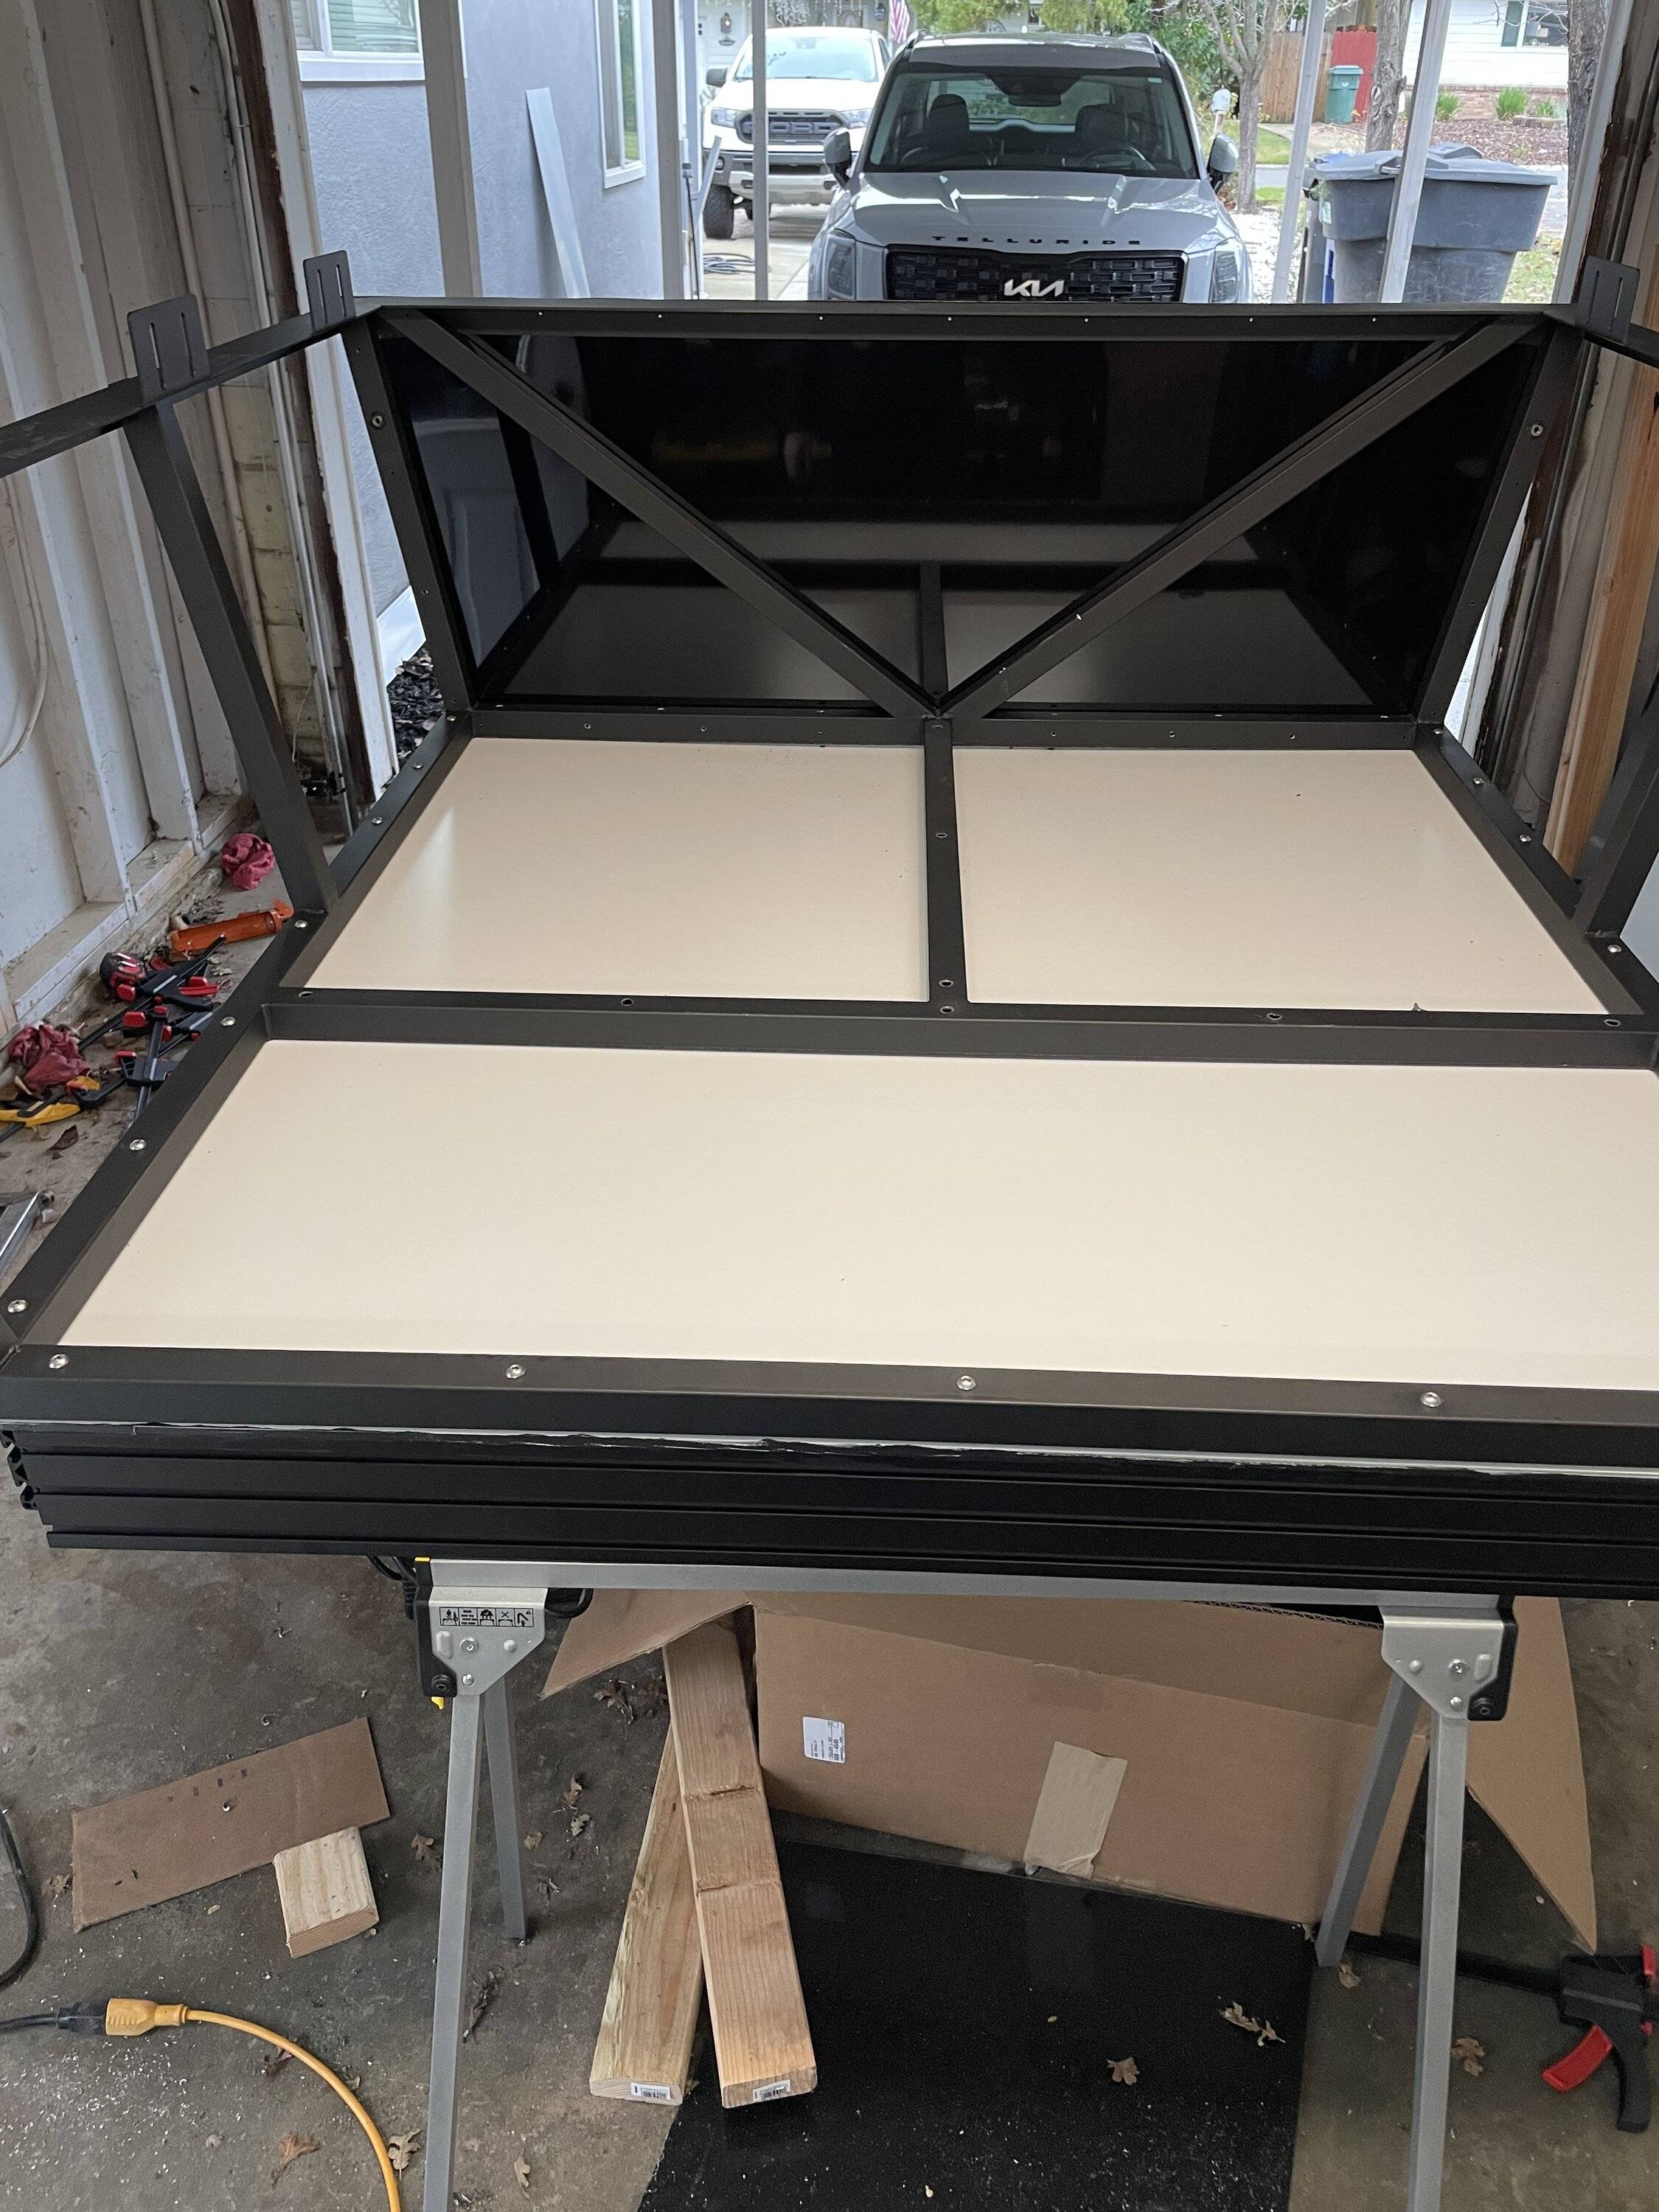
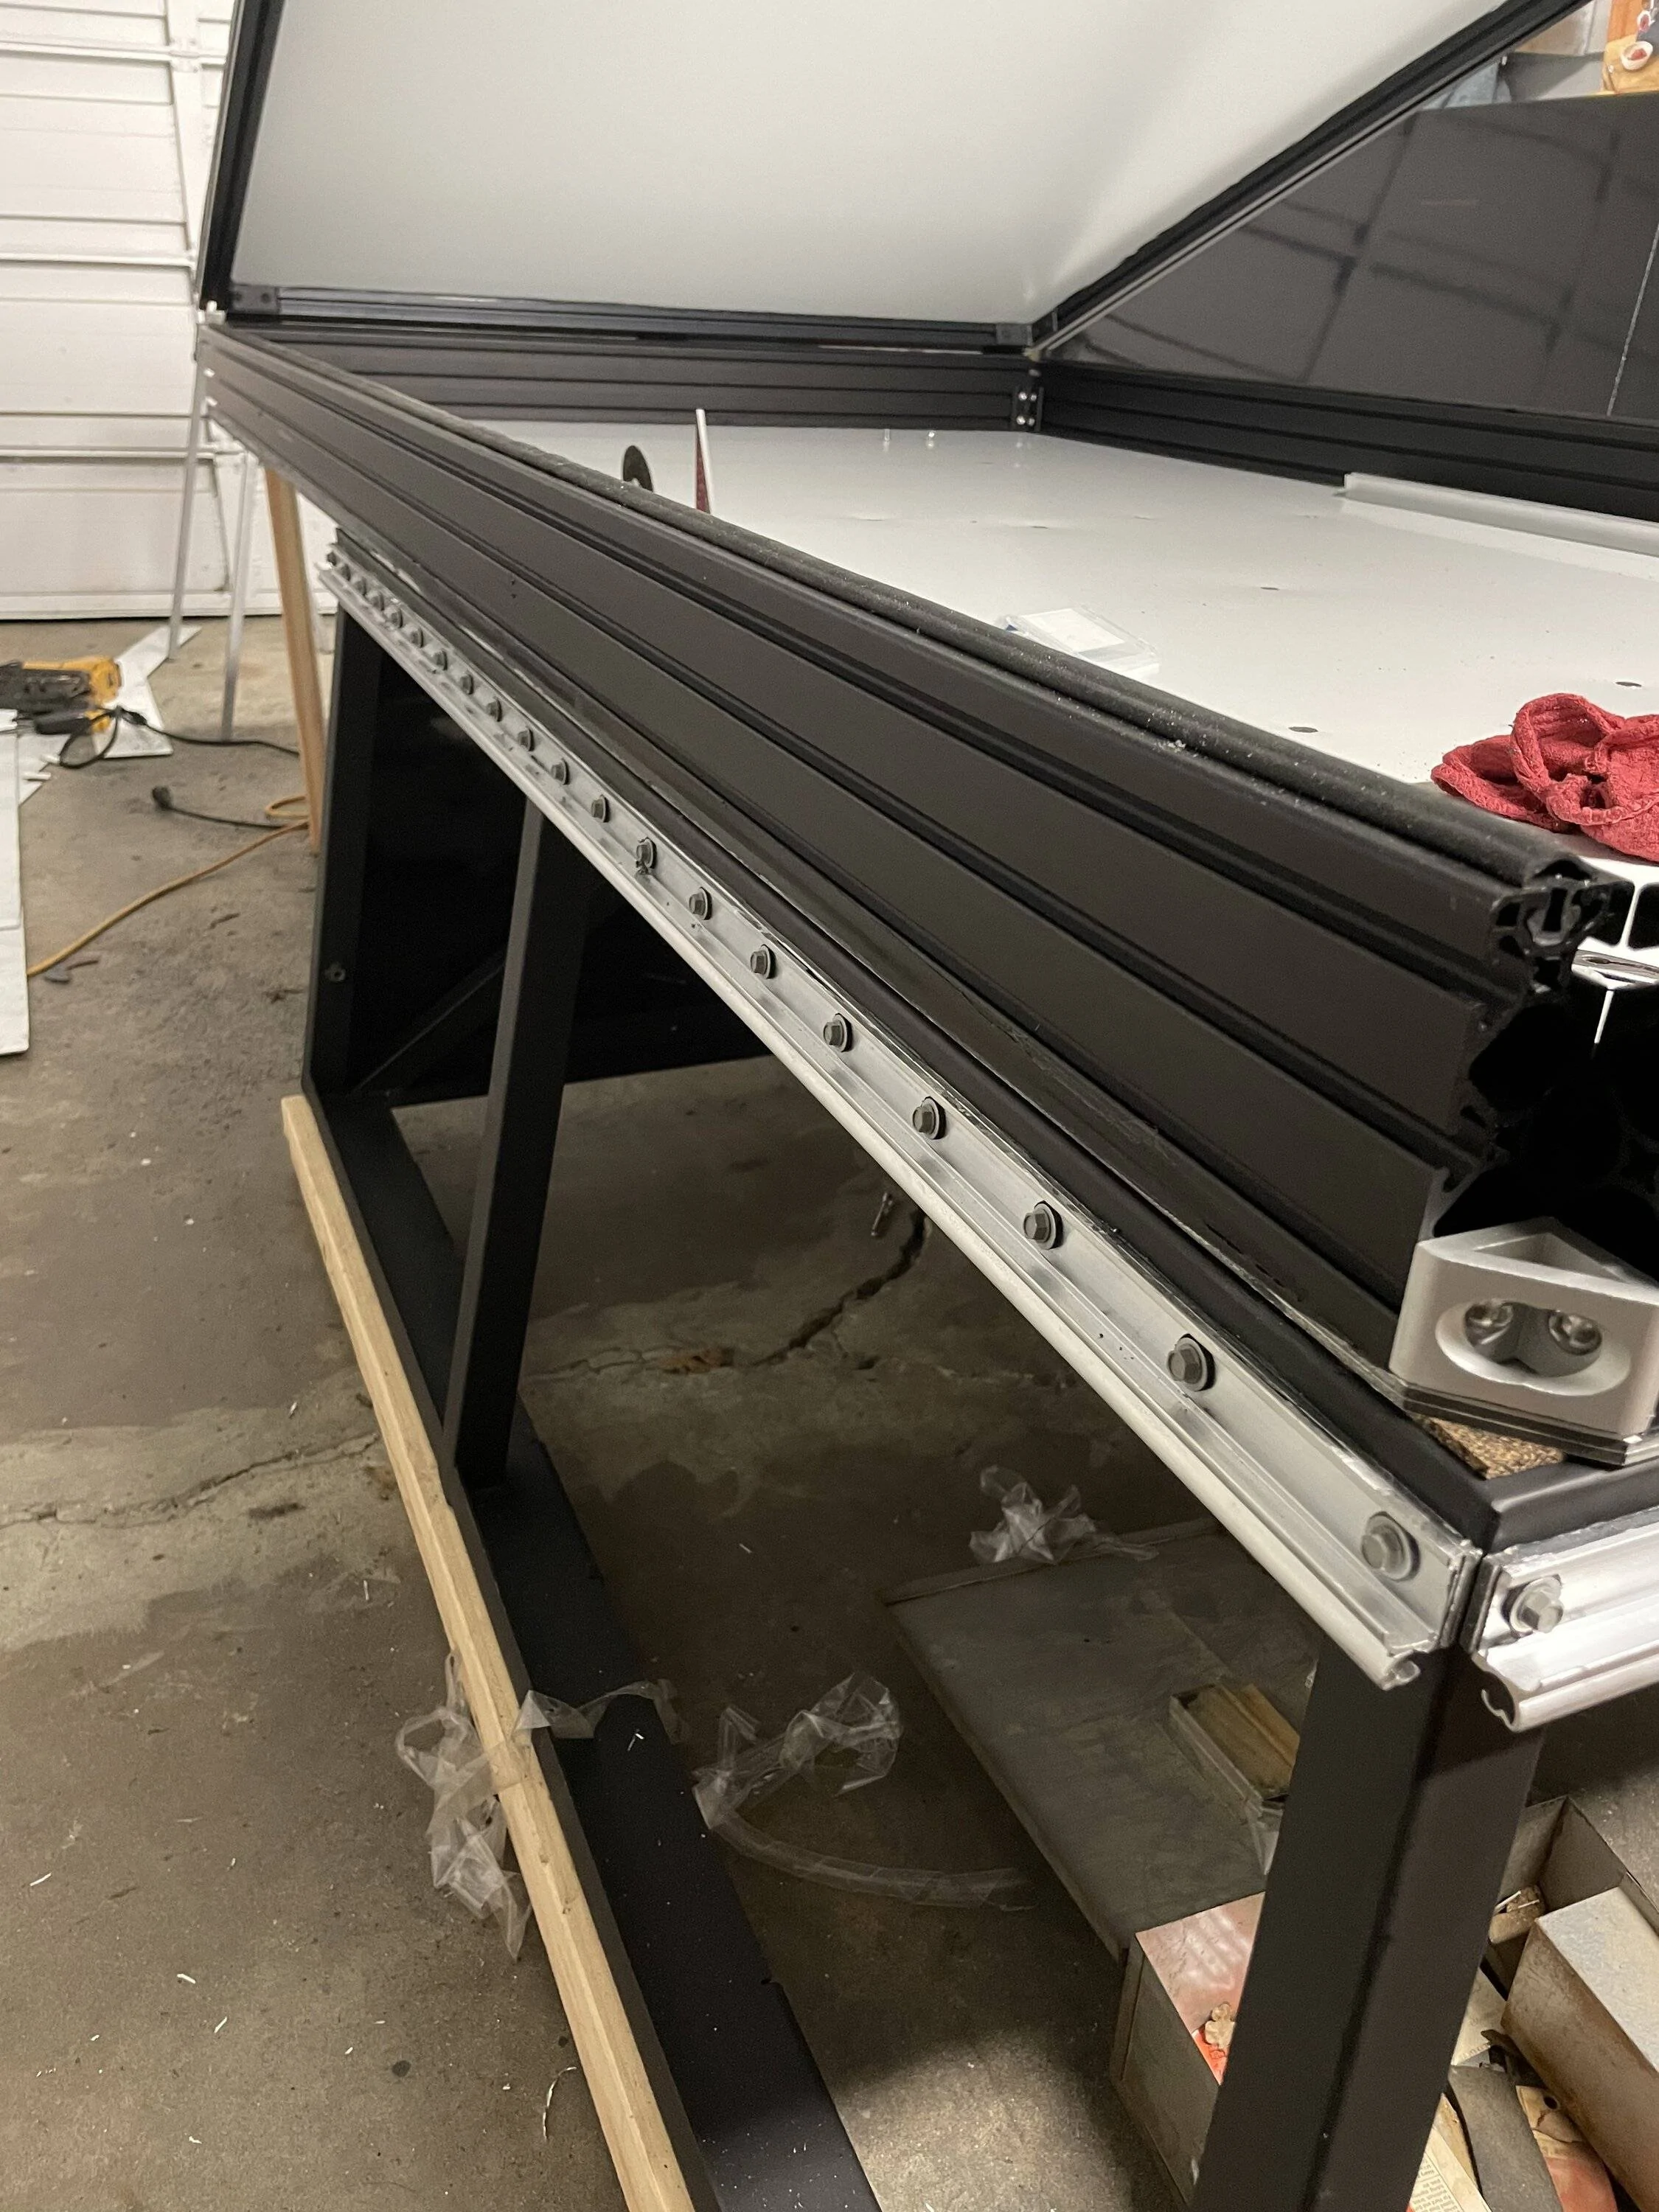
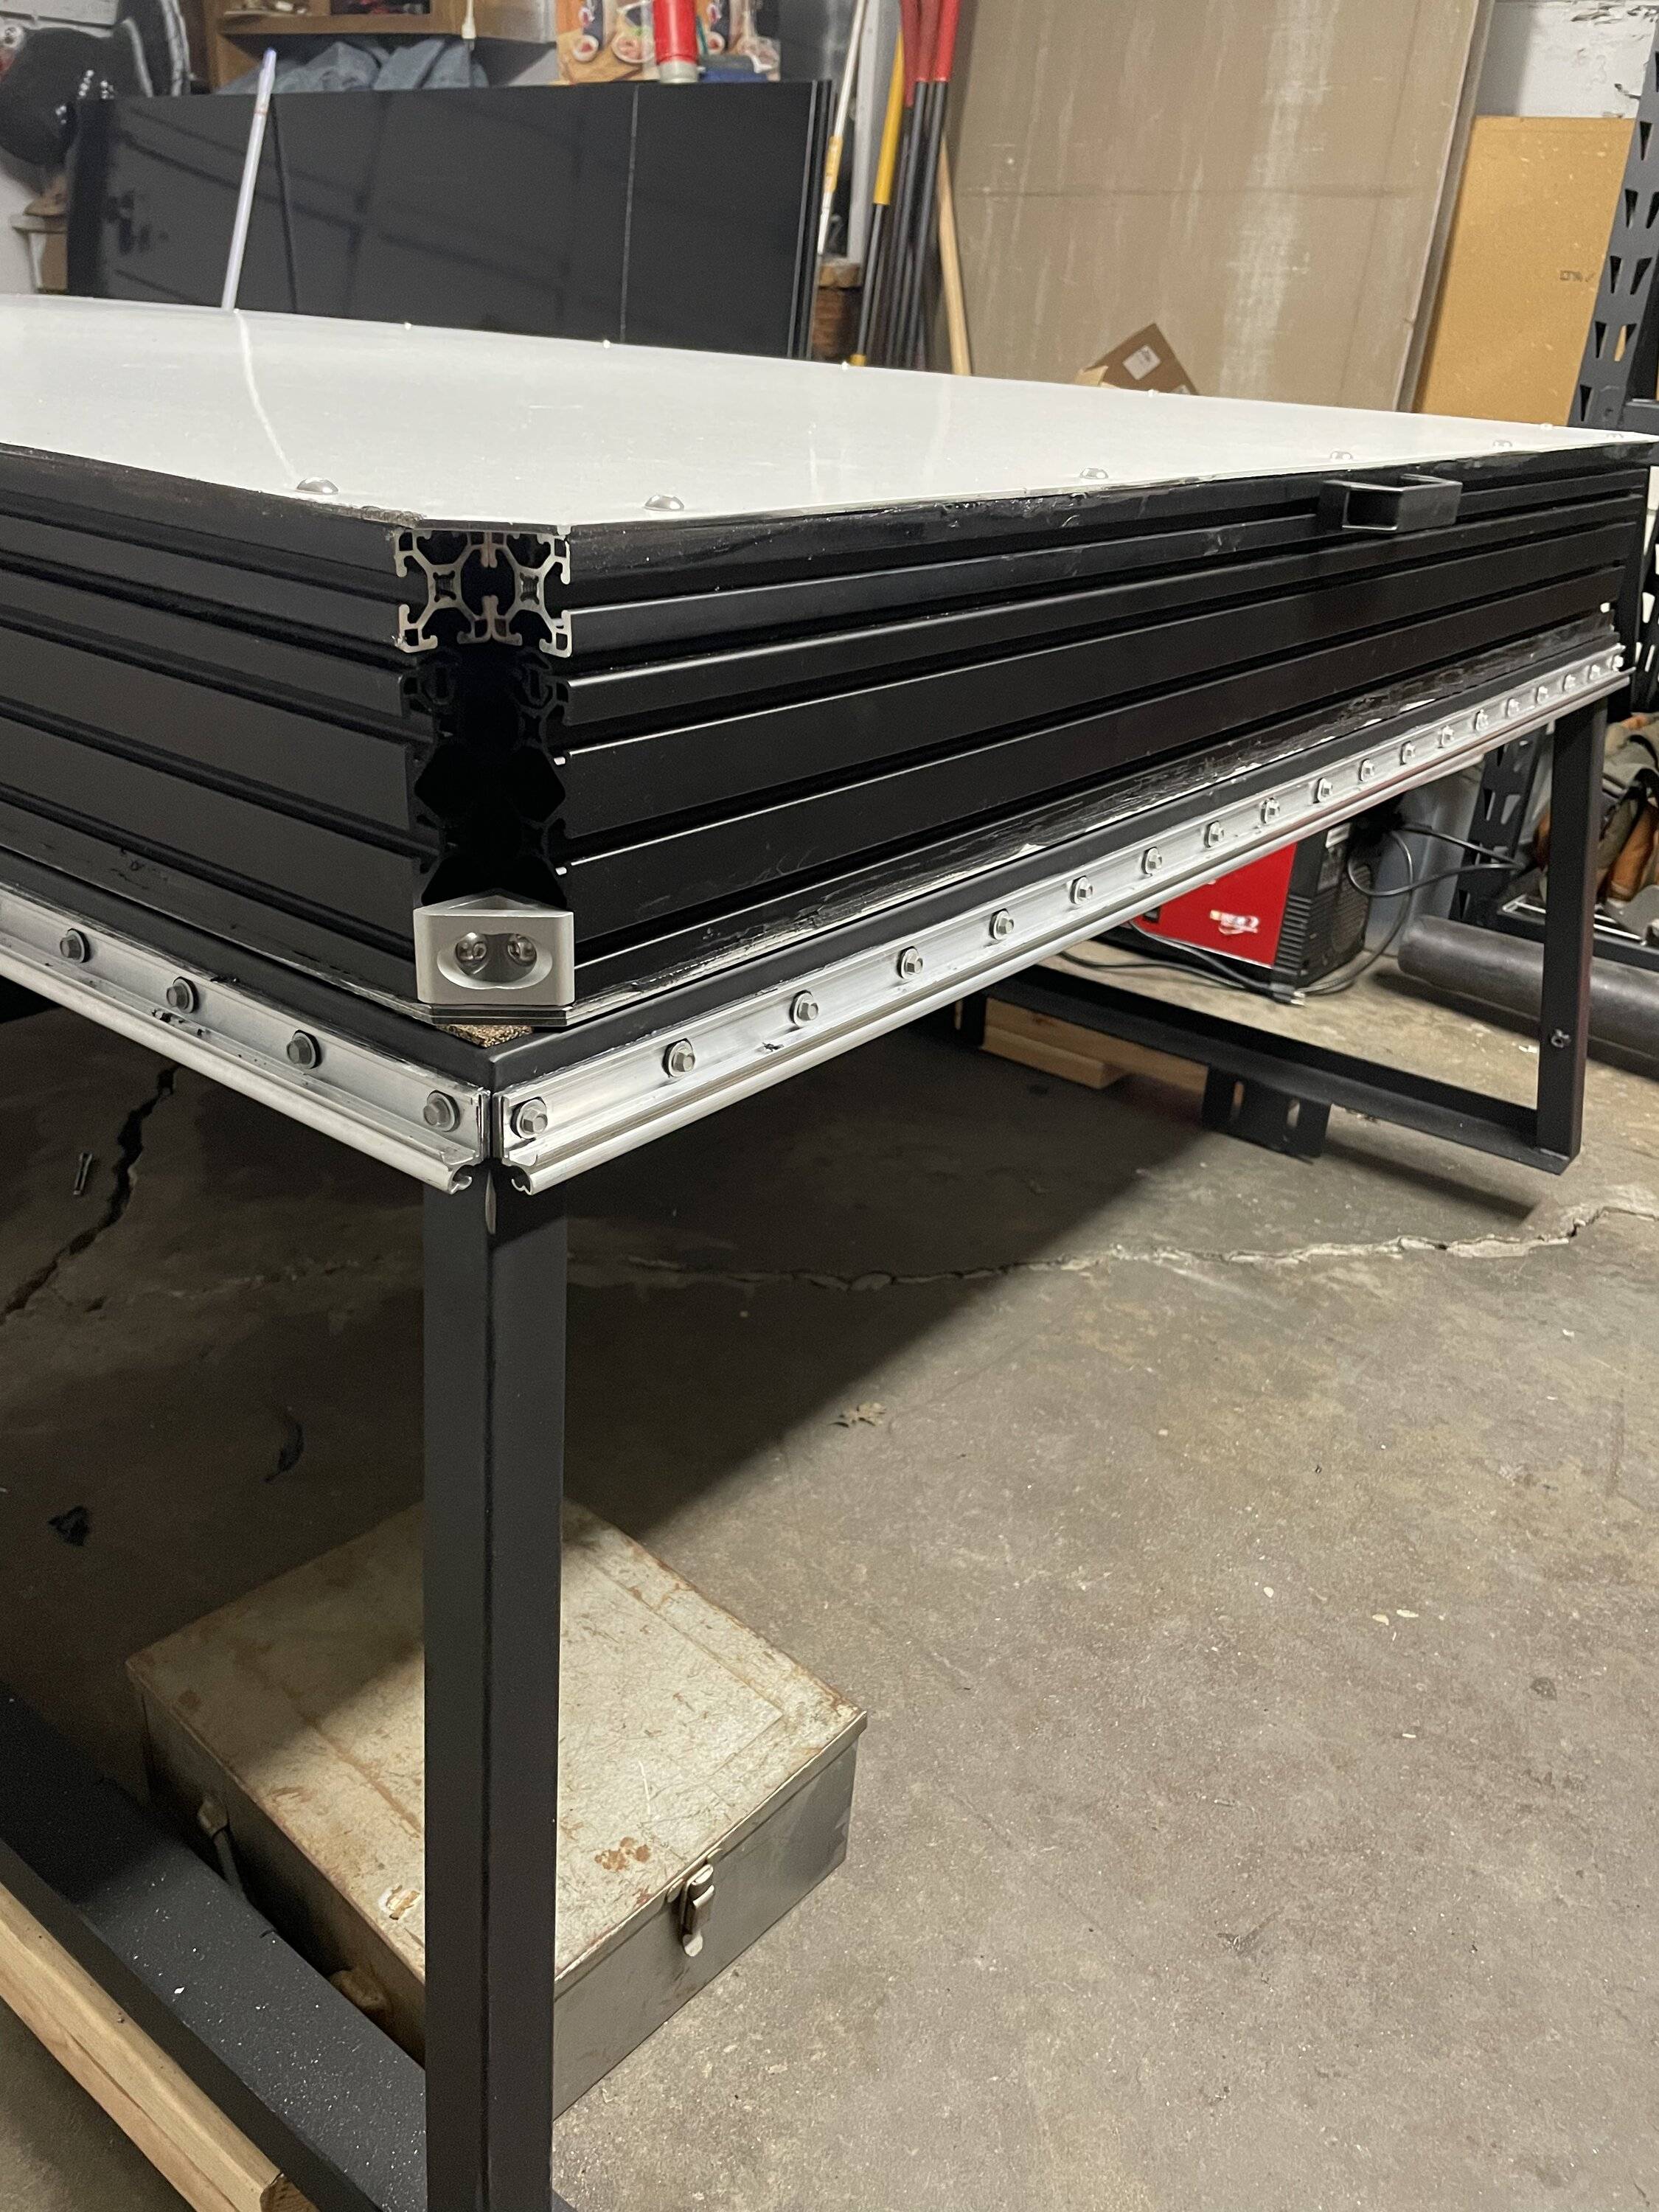
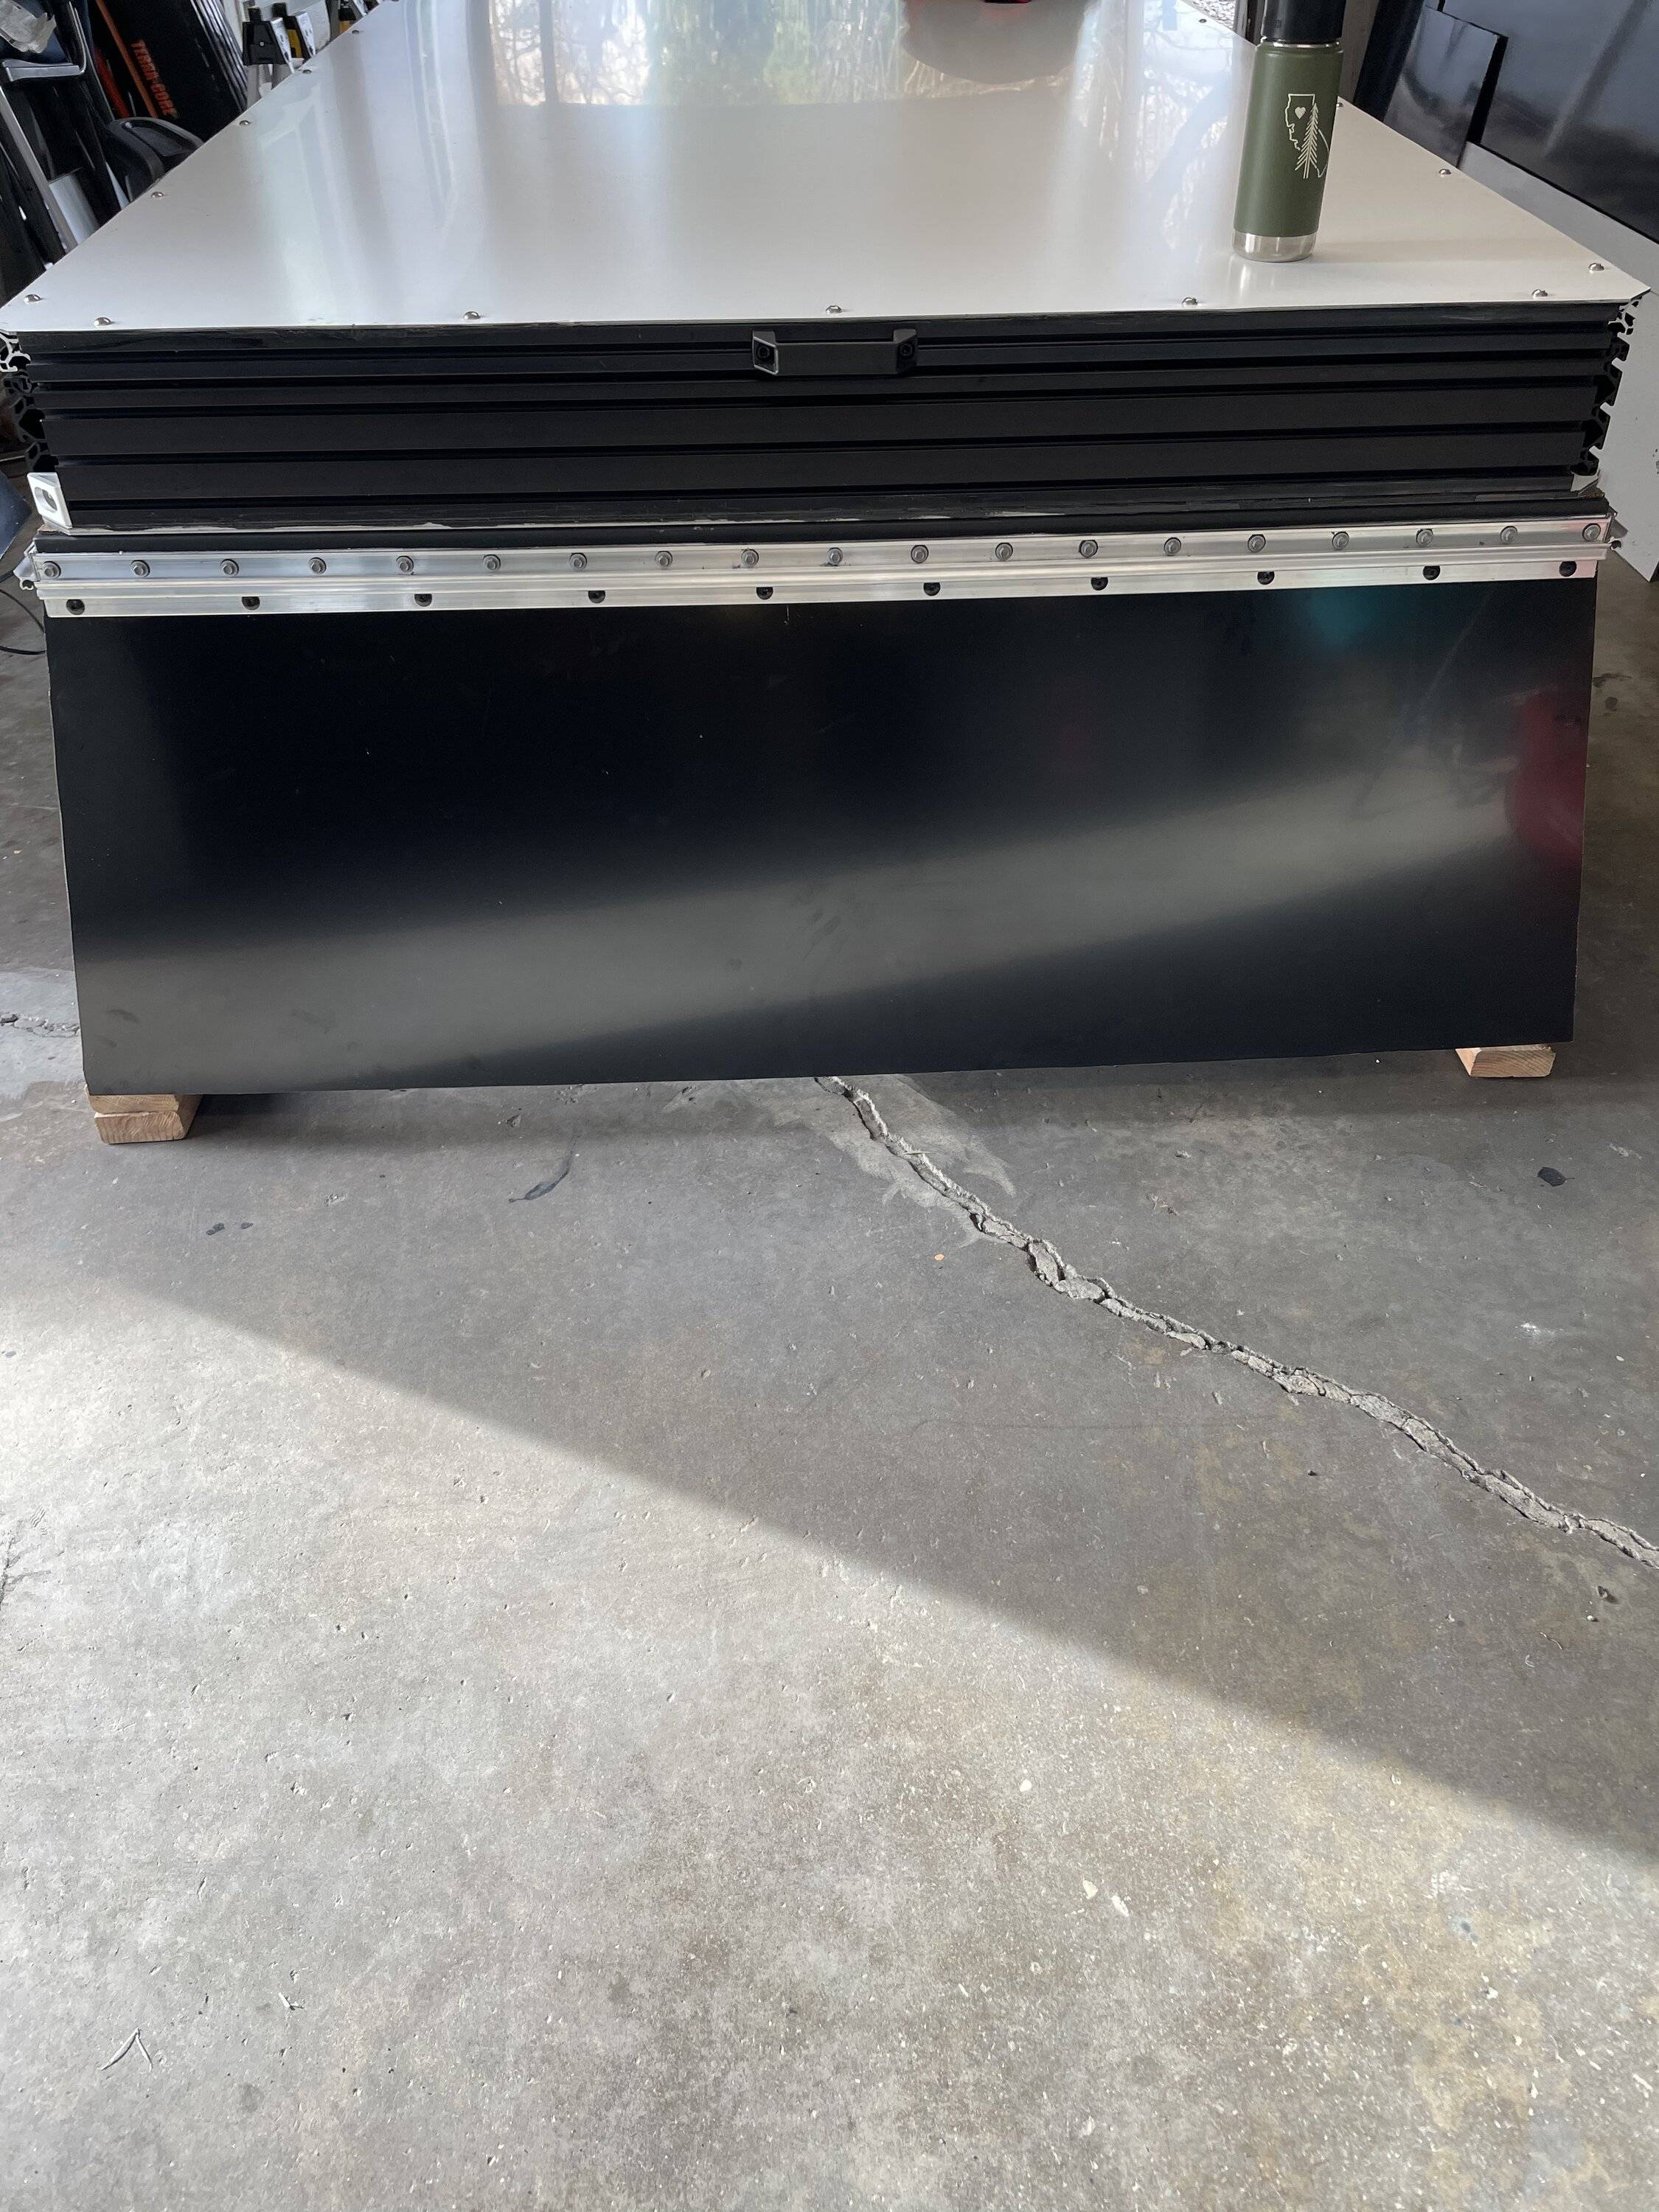
Got the floor panel glued/laminated together last night. Threw down about 2/3 a tube worth of liquid nail adhesive on the panel and clamped them together. Really straight forward.

Cure time is 24 hours so I will mark out and drill my mounting holes tonight. After that, I will be taking a break heading into the weekend to spend time with family for Thanksgiving. Hope everyone has a safe Thanksgiving!

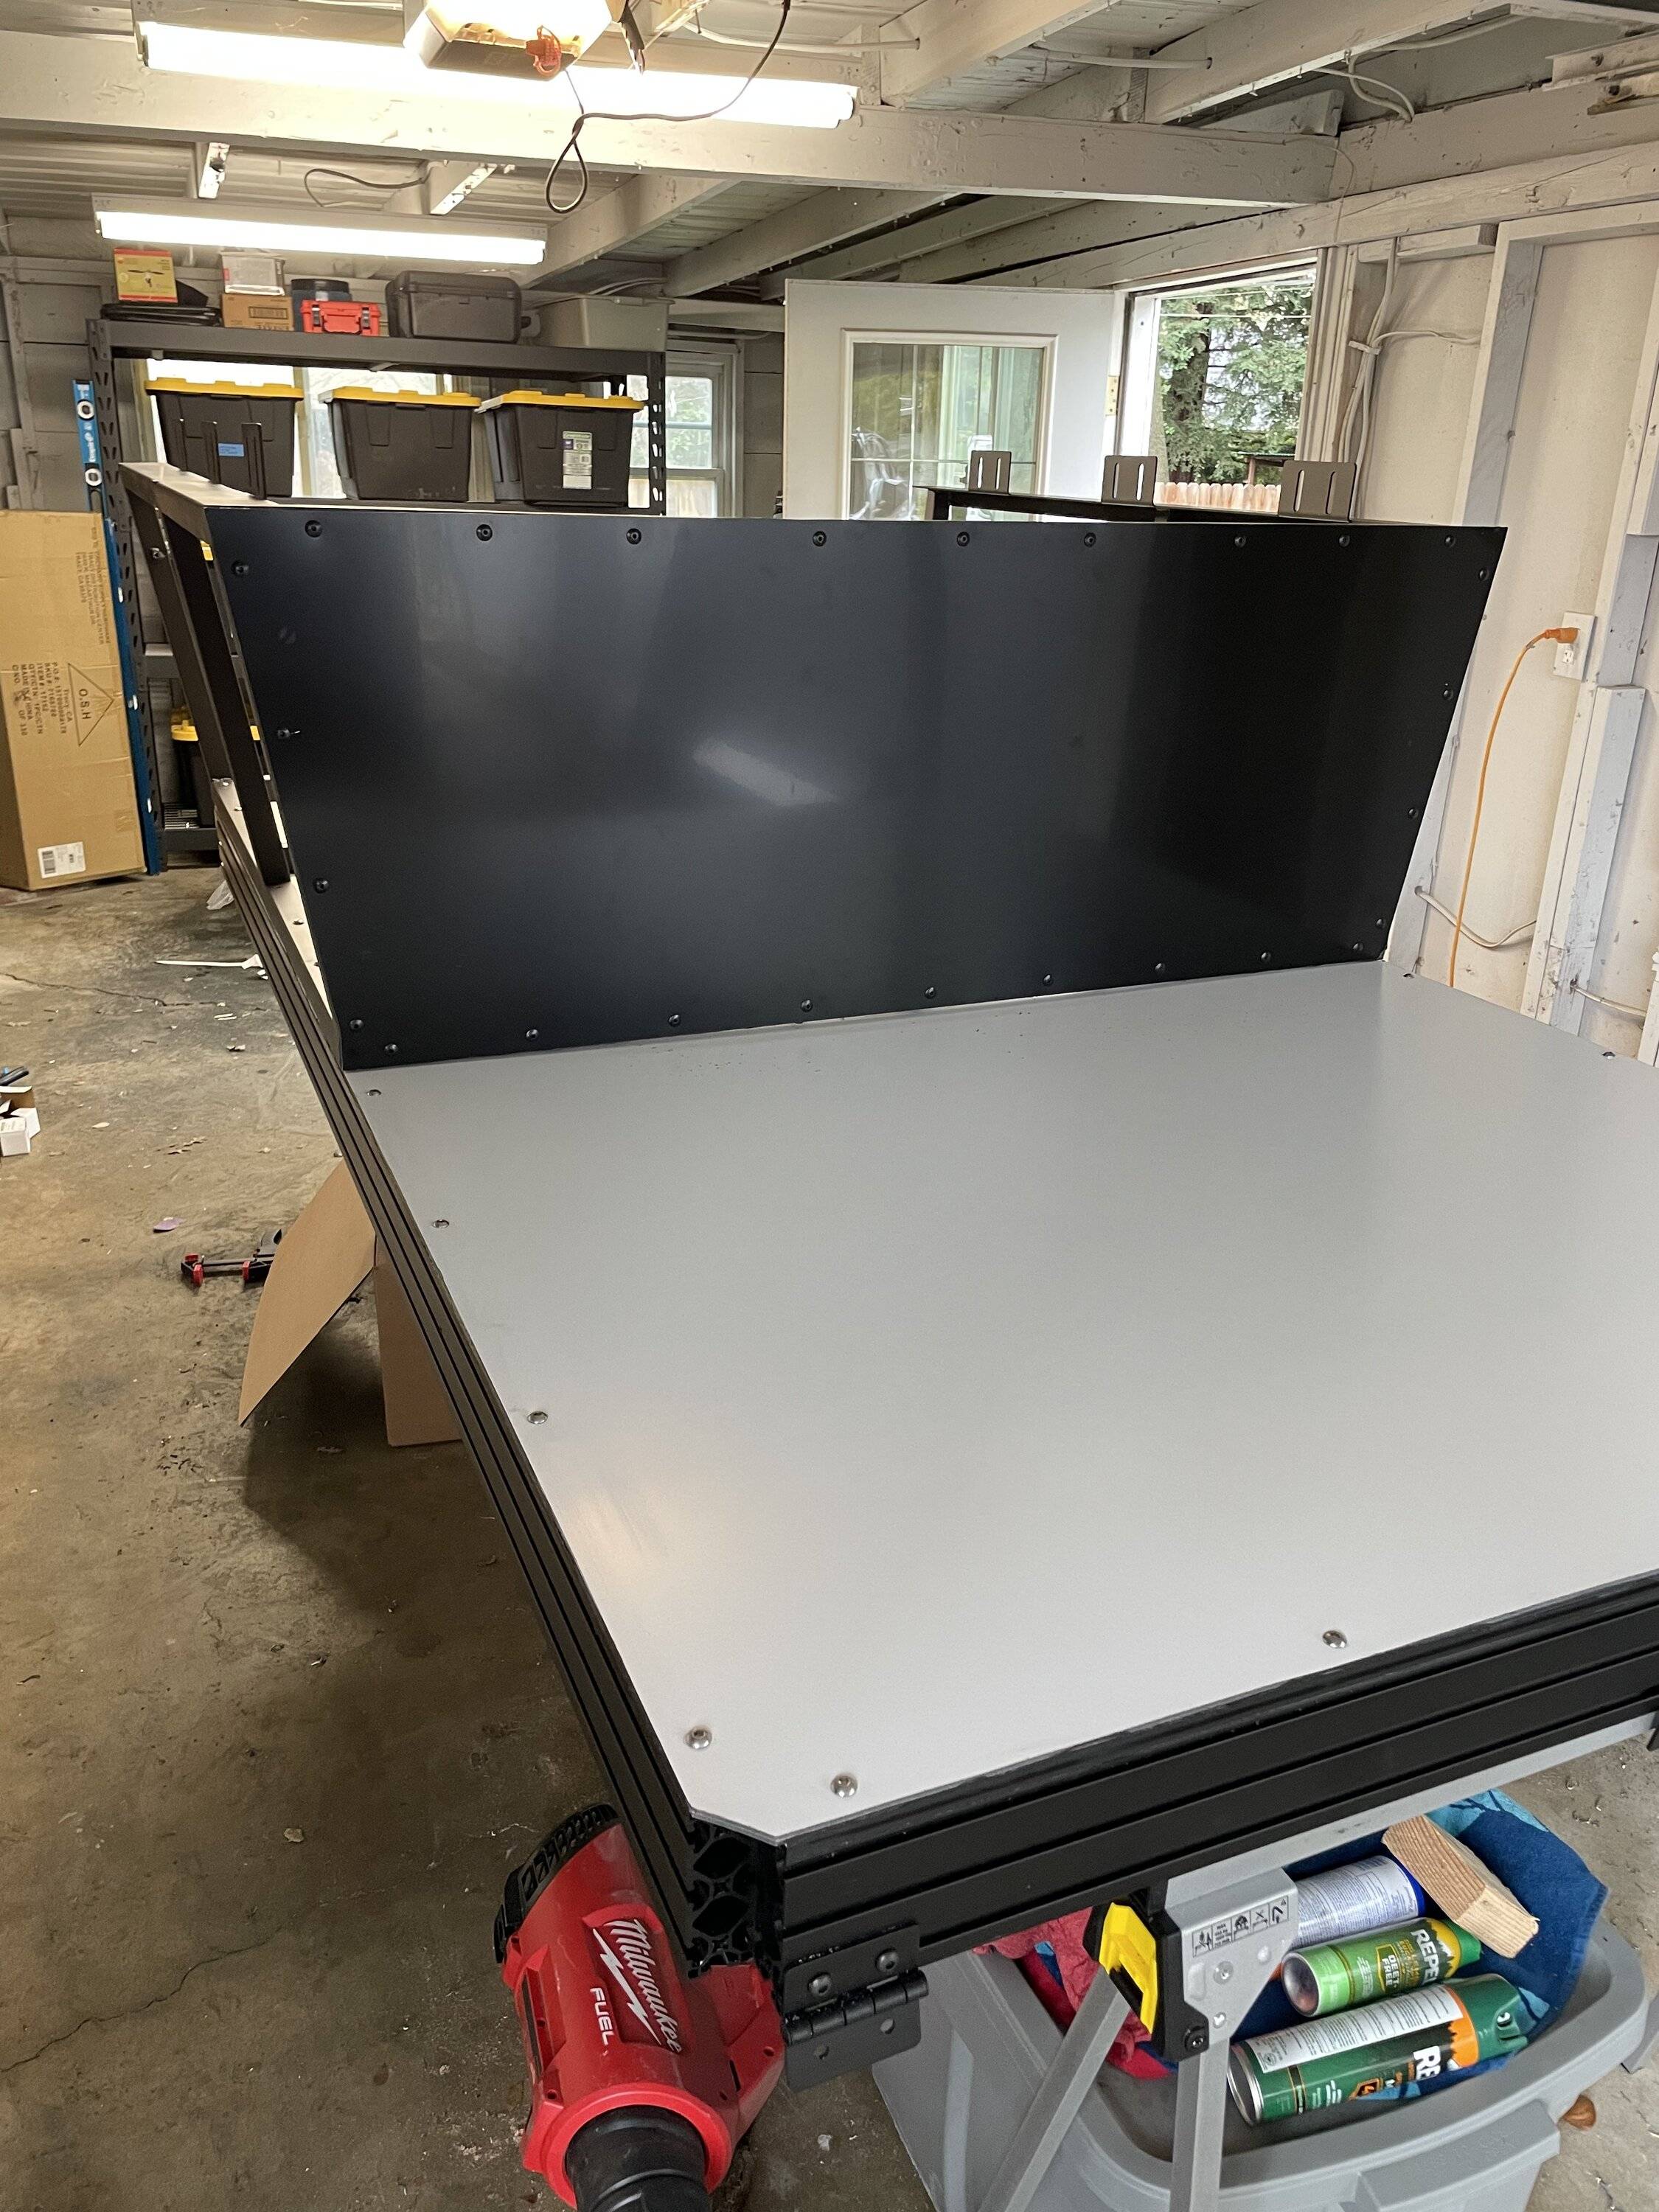
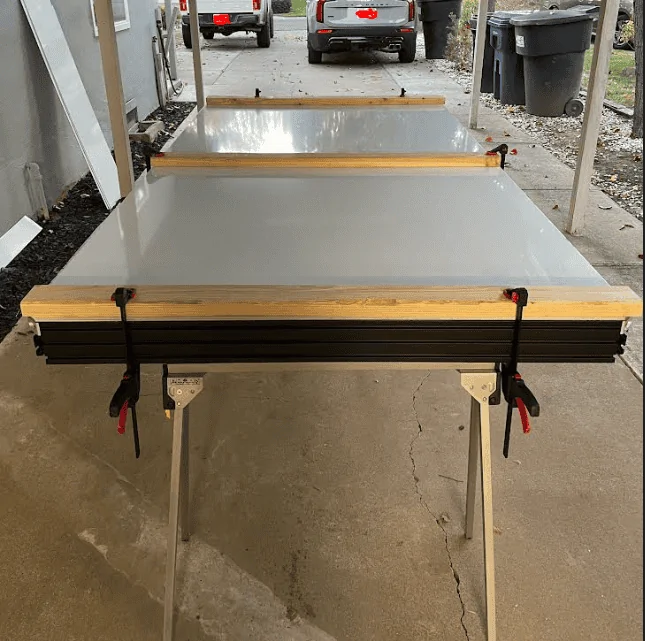
Liquid nail on bottom sheet:


1669132302725.webp


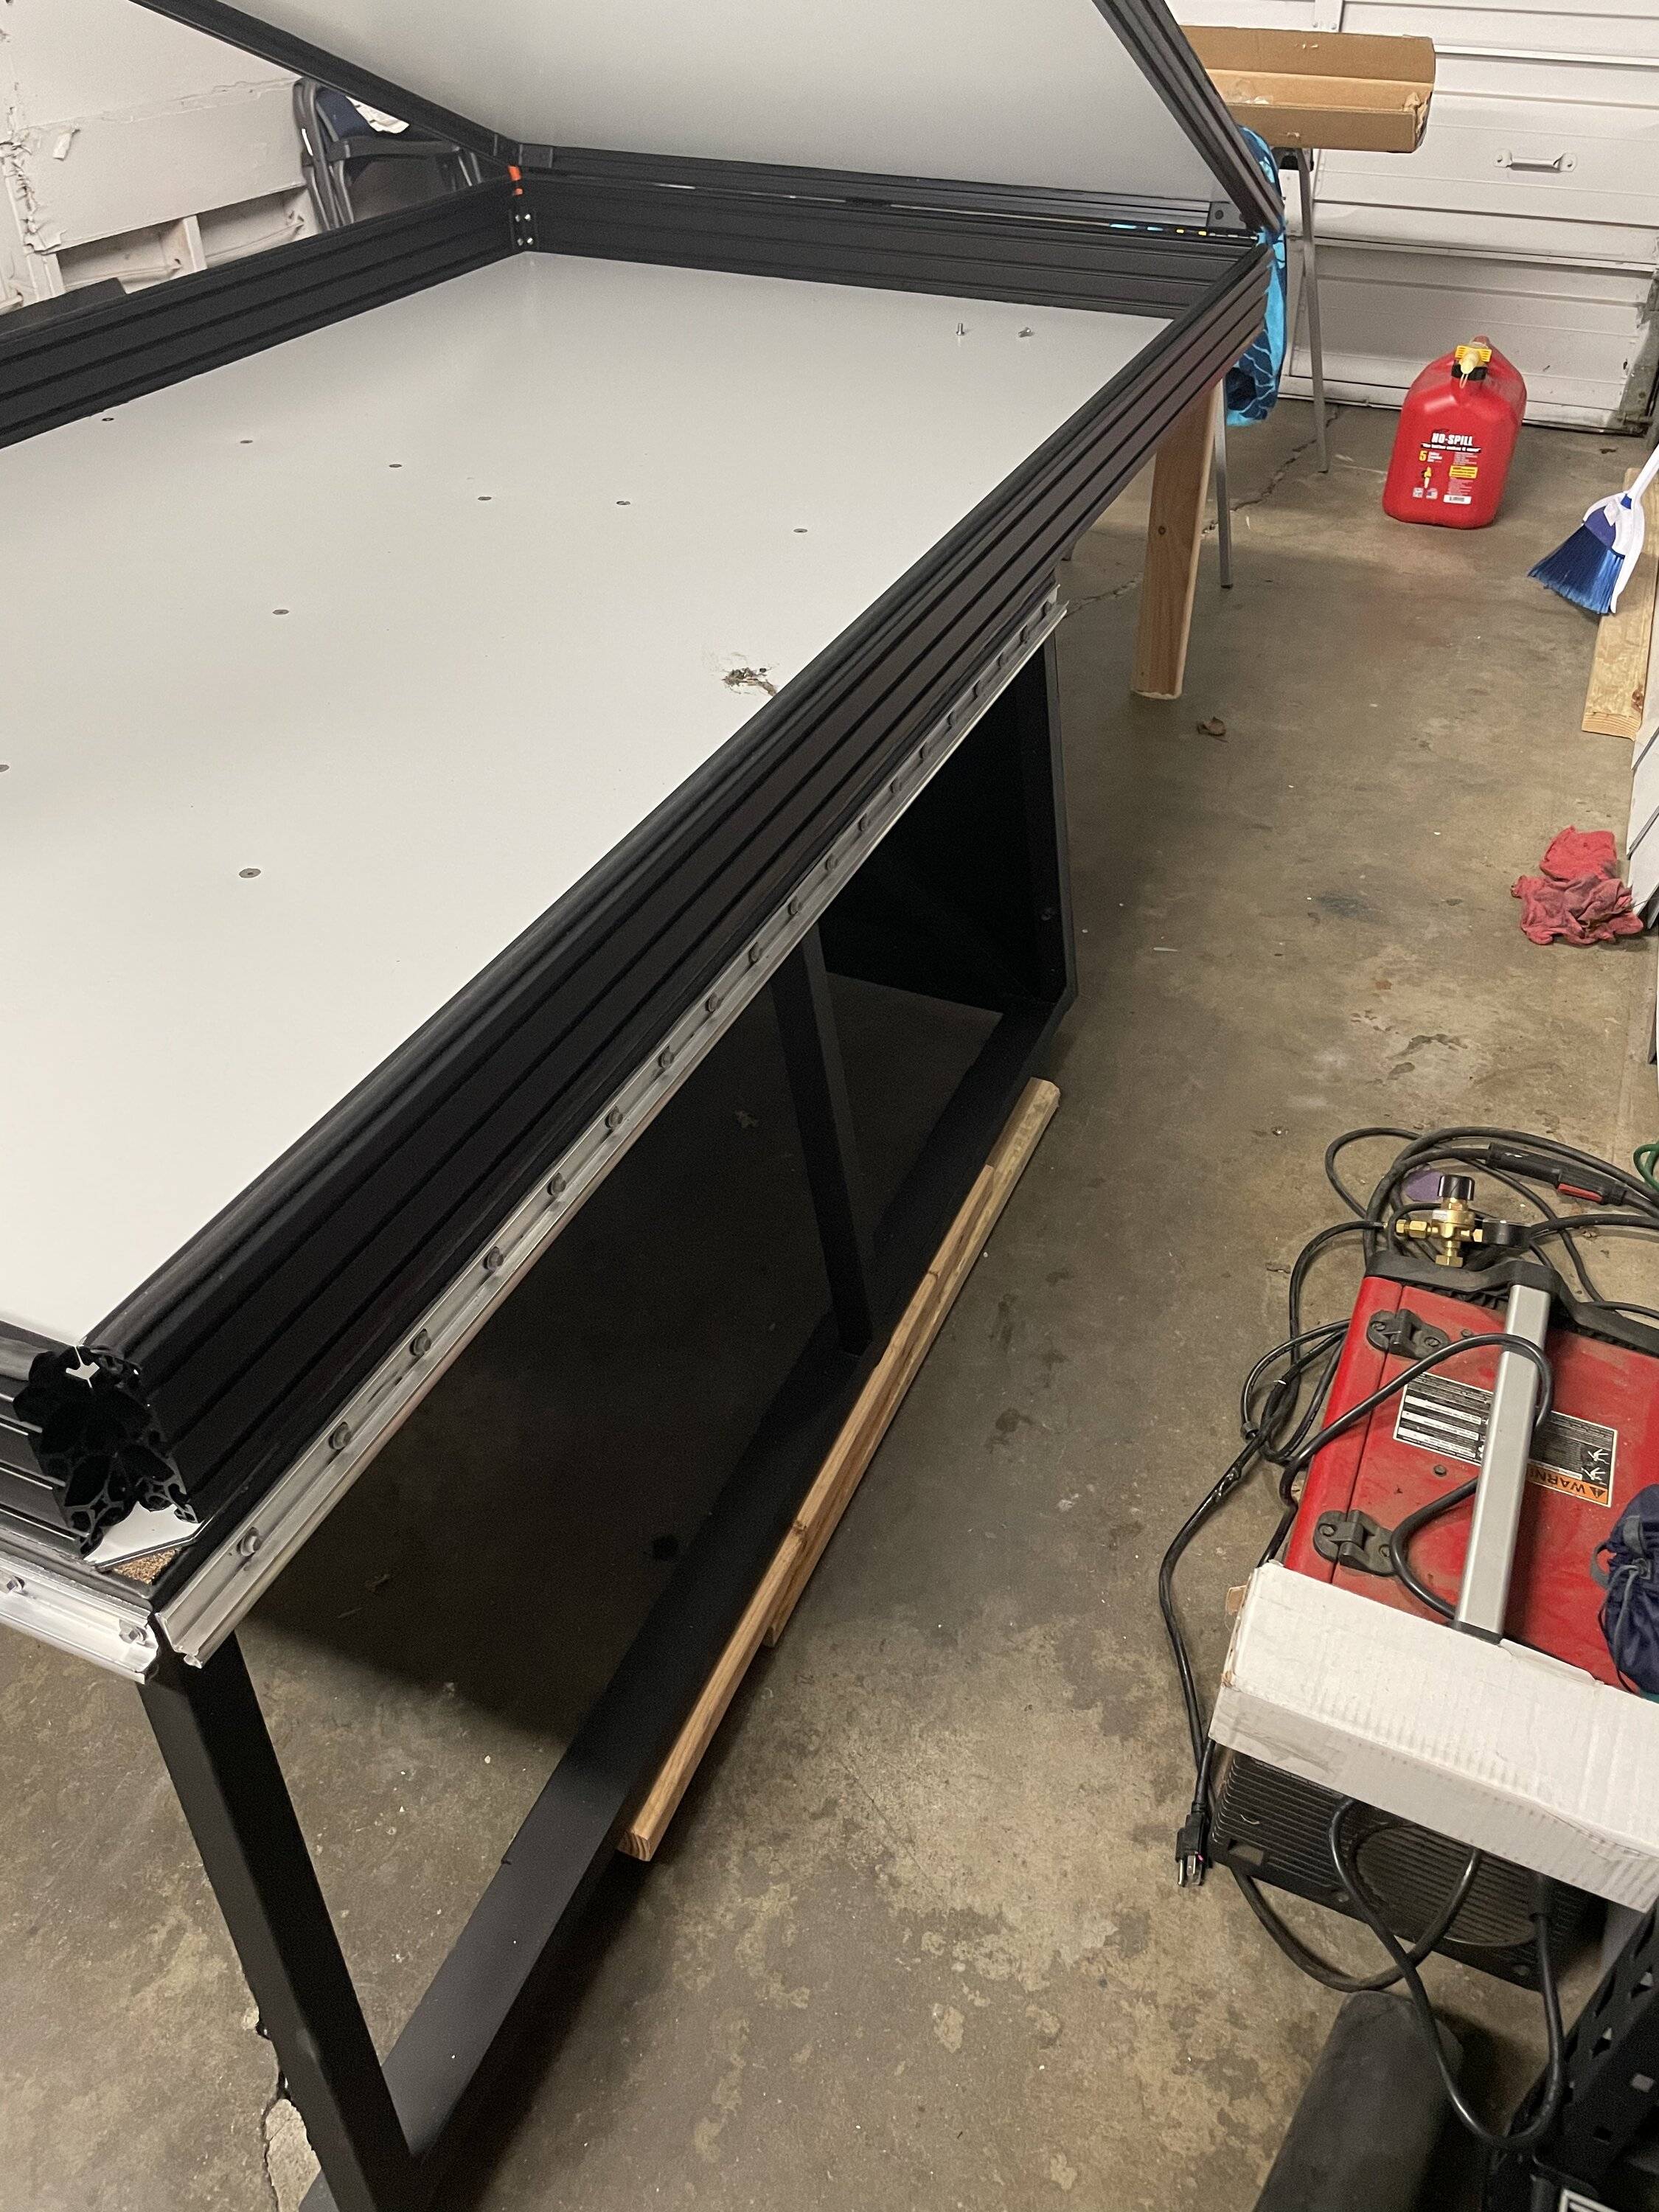
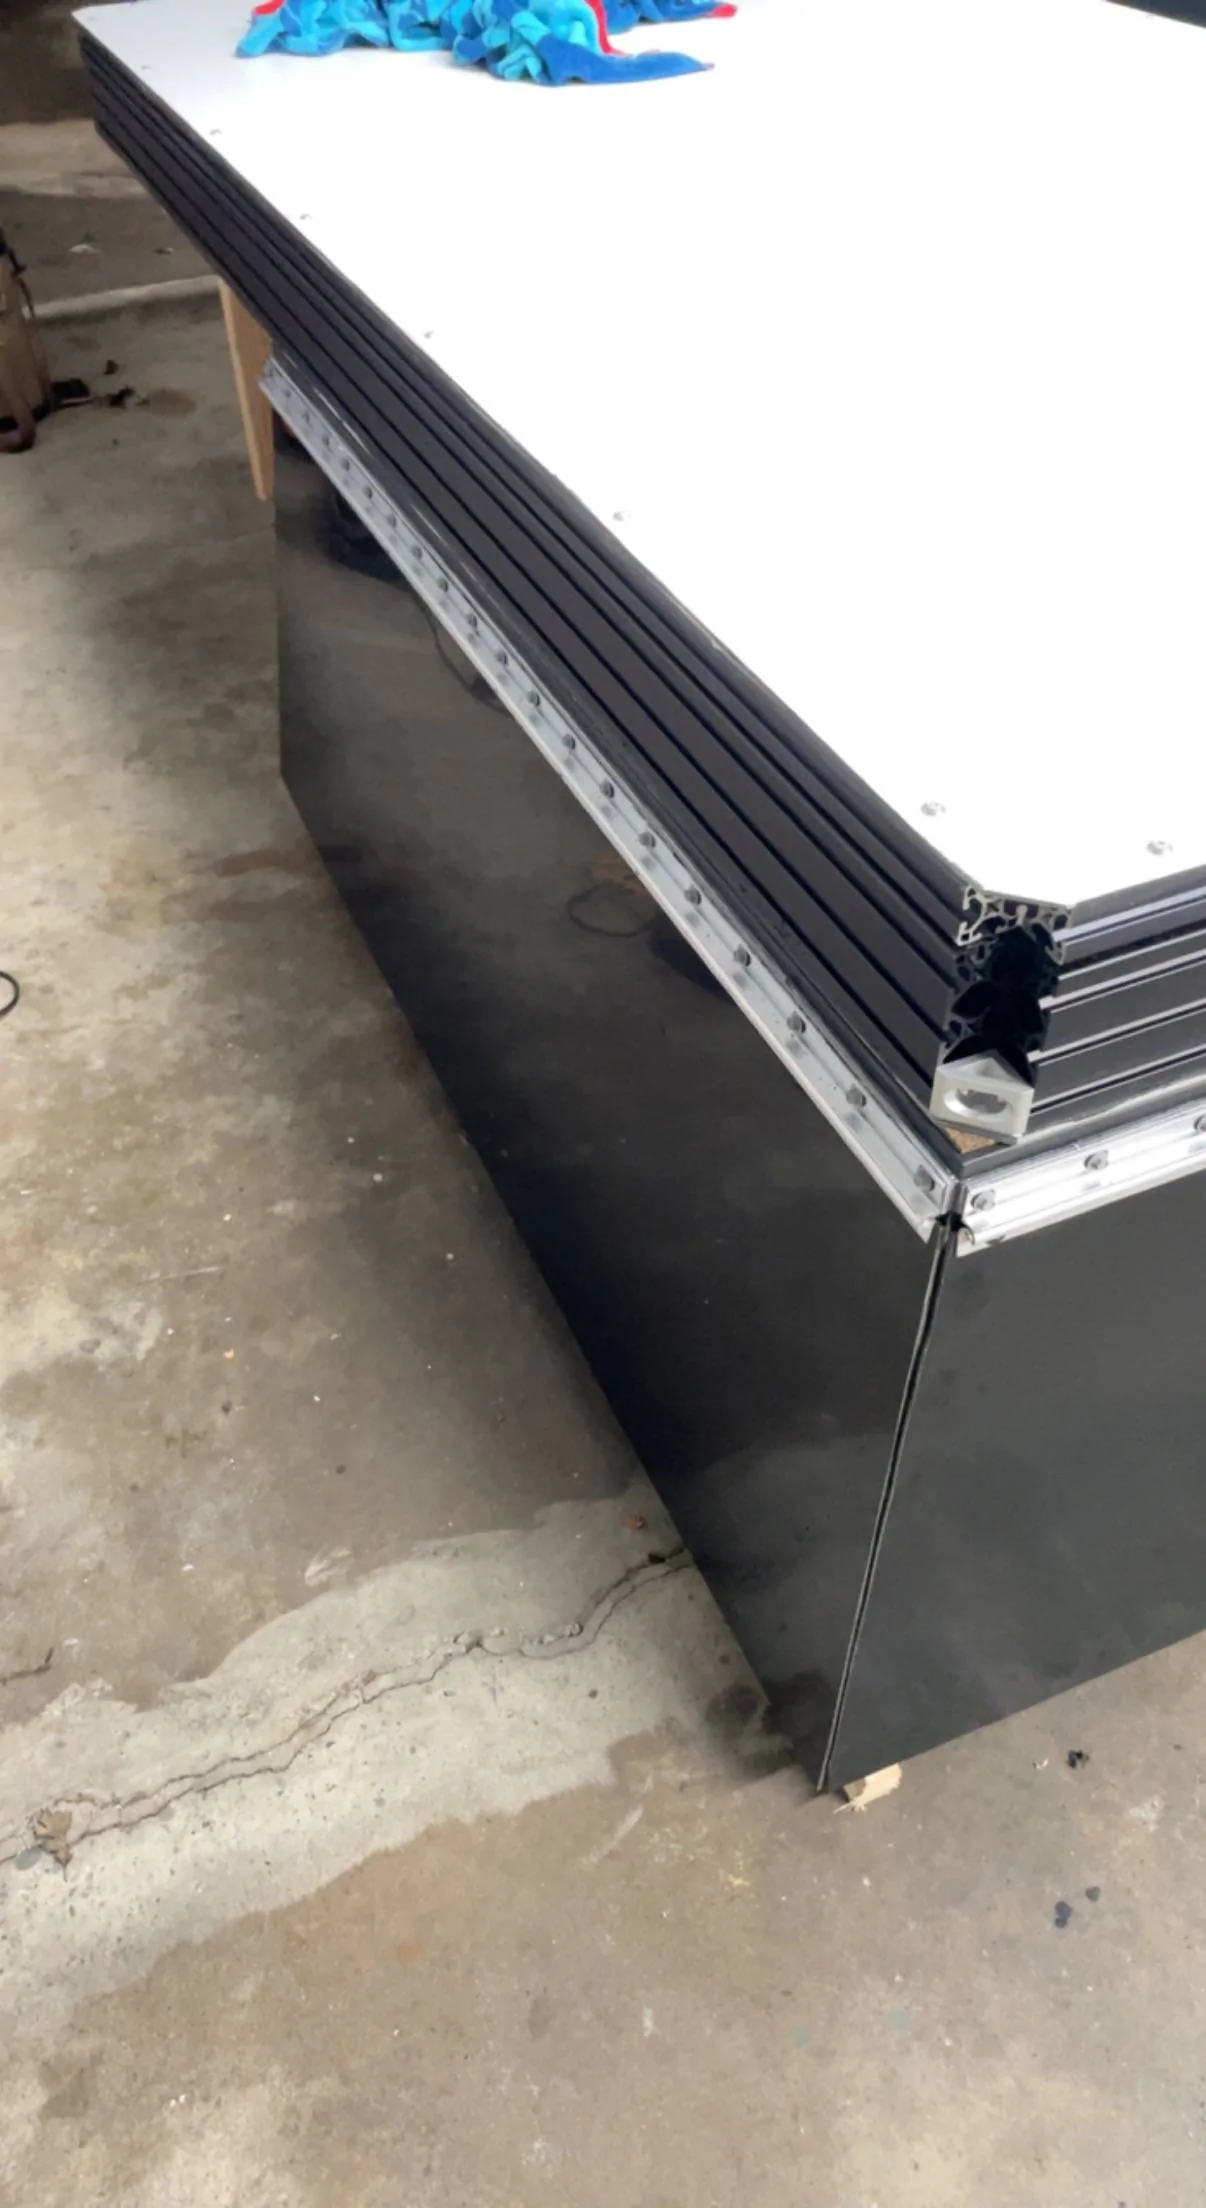
Clamped together with 2x4s across the top:

1669132347722.webp


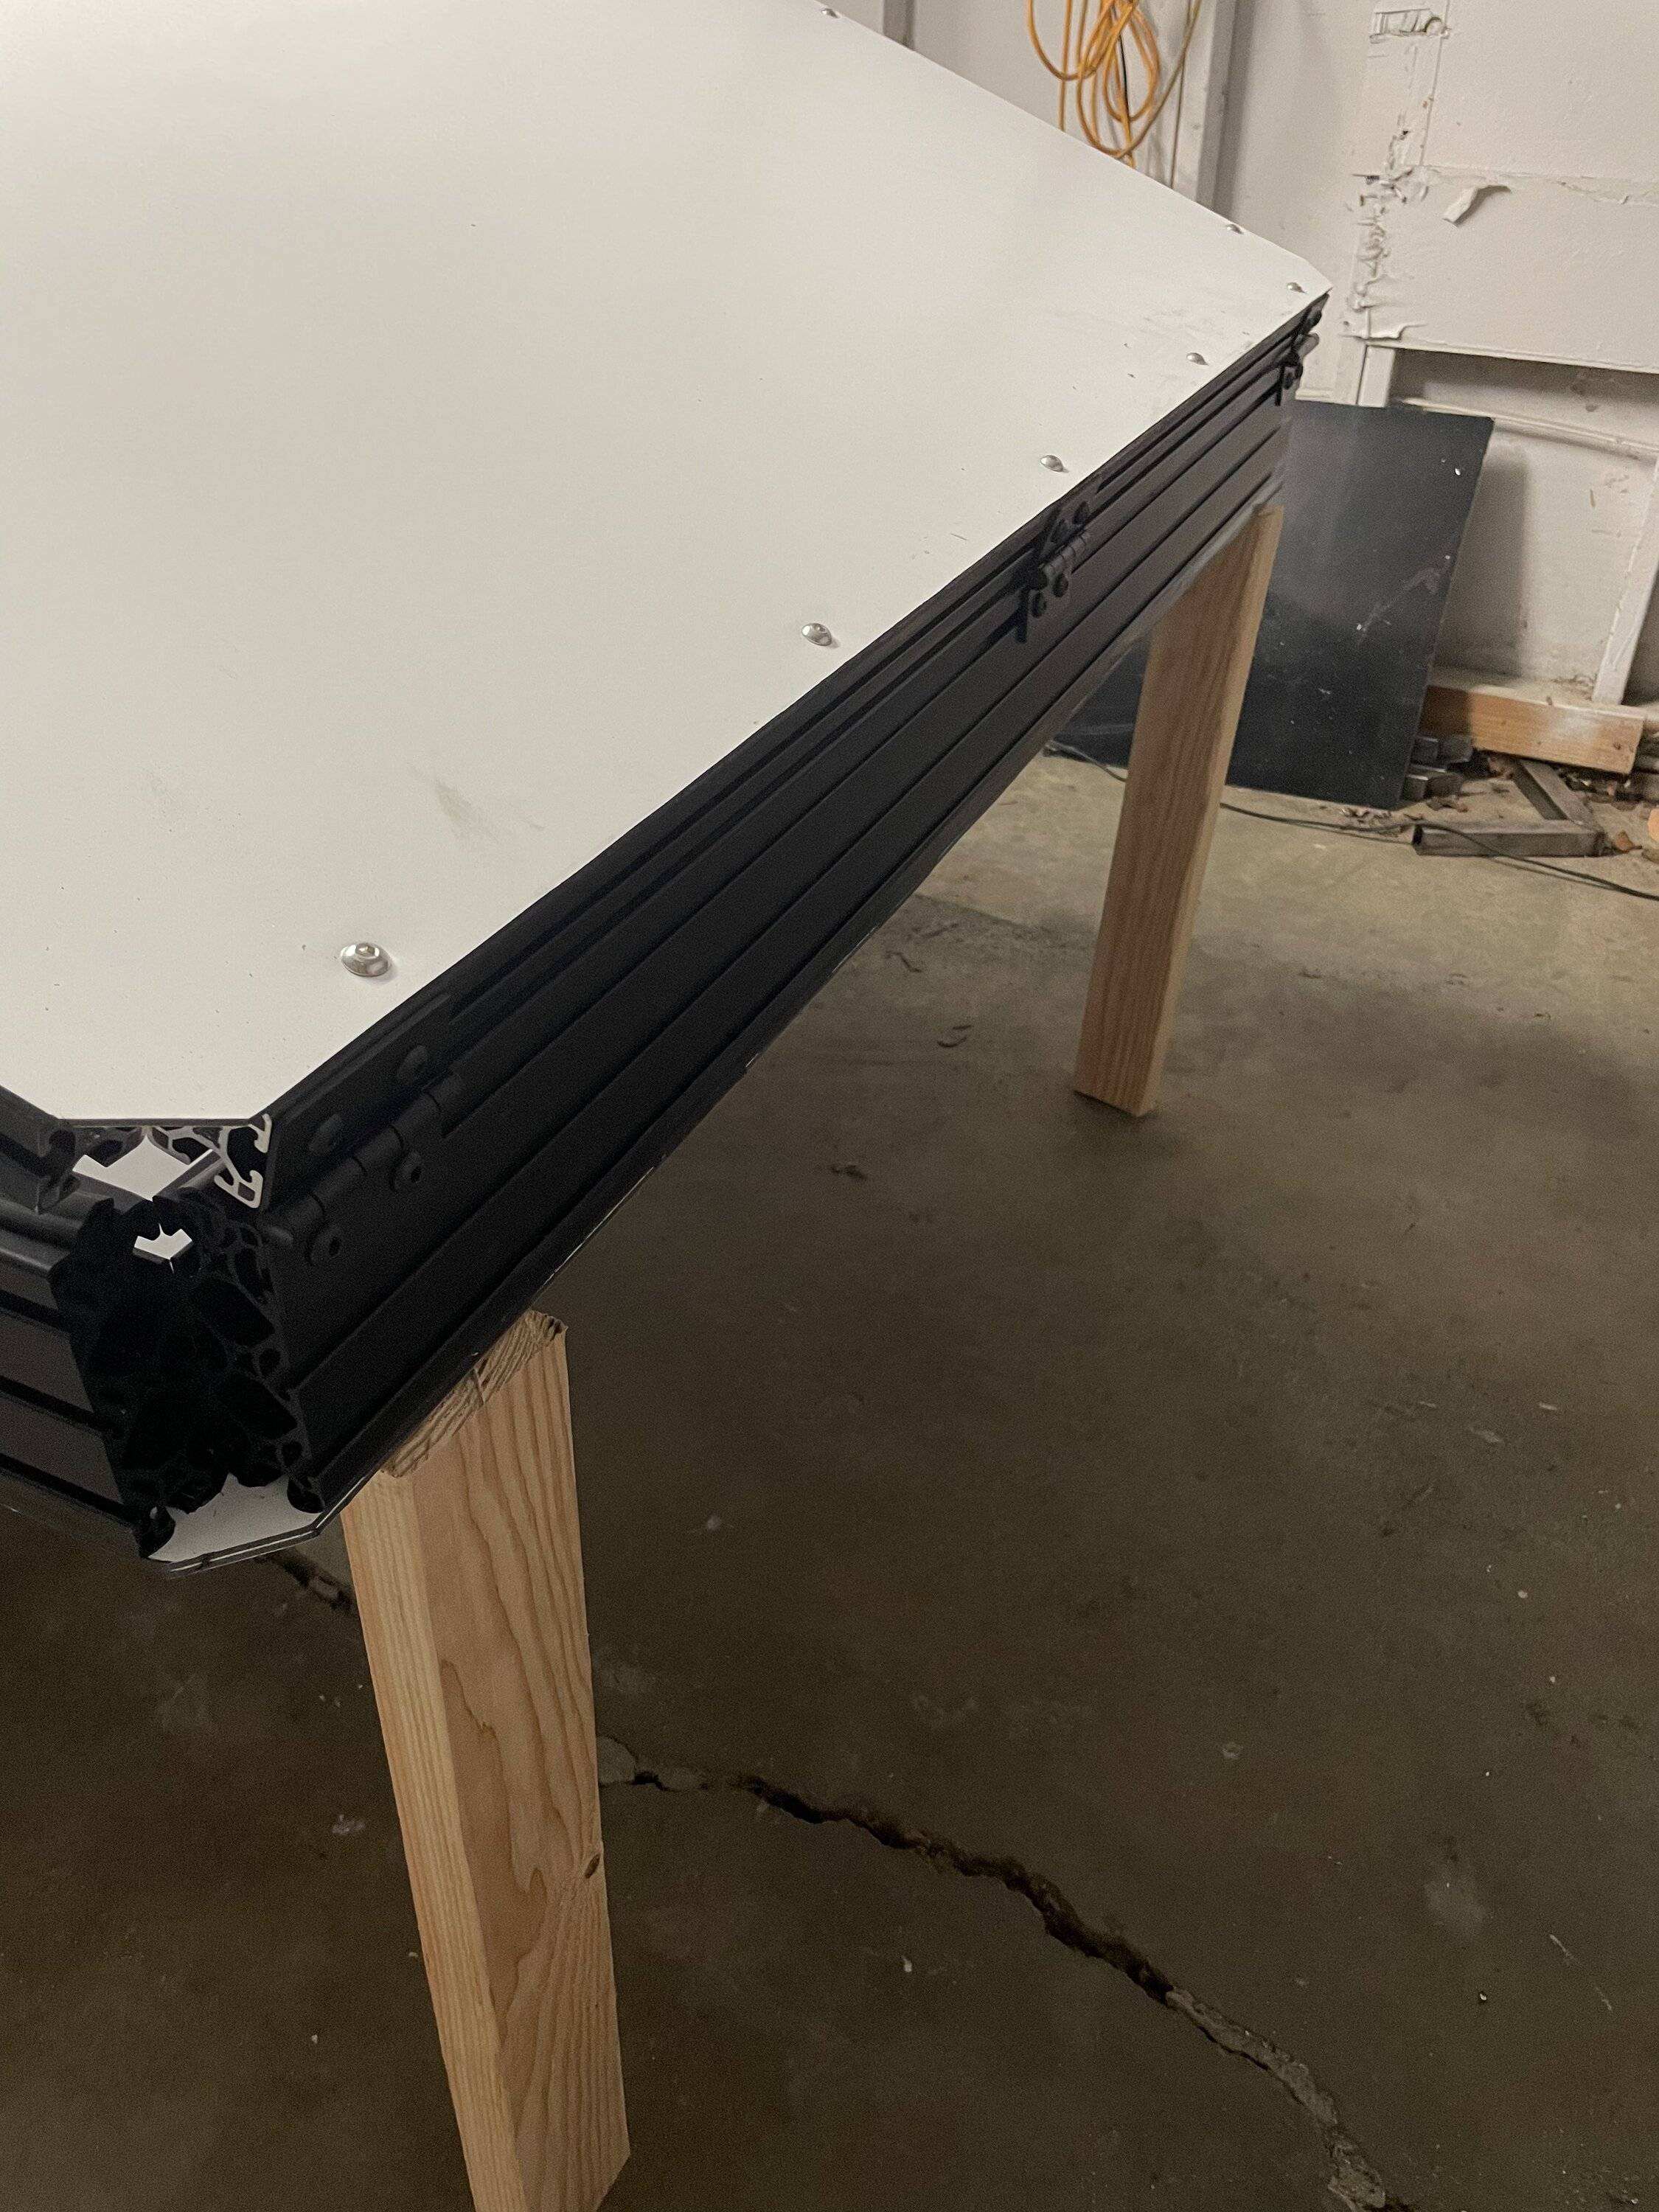
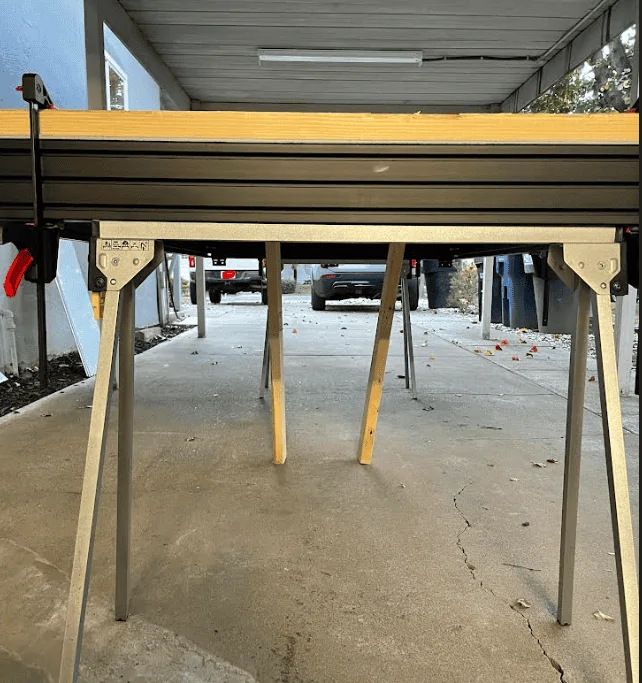
Added some center supports to keep pressure on the 2 sheets in the middle. Without these the center bows and the top 2x4 doesn't make good contact with the full span of the sheet in the center.

1669132462944.webp
Sponsored

 
OP
OP
fortywater12

fortywater12

Well-Known Member
First Name
Evan
Joined
May 17, 2021
Threads
16
Messages
249
Reaction score
441
Location
Sacramento, CA
Vehicle(s)
2019 Ranger XLT FX4
Occupation
Engineer
OK thread has been dead for a minute but I have been working on it when I have time. Made good progress on the frame, and it is finally all done and painted.

I was able to mount the front bulkhead panel last night as well! Riveted it on with black flush-mount rivets. I sandwiched some rubber/cork gasket between the panel and the frame. I will go around and seal the outside edges with polyurethane as well.

1672329466126.webp


Now that the bulkhead panel is on, the next step is mounting the wedge to the frame. Hoping to do this in the next couple of days!
 

RangerRick15

Active Member
First Name
Rick
Joined
Dec 29, 2021
Threads
4
Messages
30
Reaction score
31
Location
Northern Virginia
Vehicle(s)
2020 Ranger XLT FX4 SuperCrew
Occupation
Operations
Awesome stuff. Thanks for taking the time to share your build & lessons for the forum. I’ll be tackling a project similarly in the next year or two.

What ended up being your actual bed rail to top of space frame height?

Unsolicited thoughts:

I saw a video self review of a build that had water get into the “sealed” space frame tube, freeze, and swell. The rivets may not be 100% sealed for example. Could intentionally leave a drain hole. Or perhaps your paint/coating accounts for this.

Alu-cab and other DIY take advantage of the space between the cab and overhang, by adding u-channel or other slot /slider mechanism to store a custom camp table, or, slide out shower supports.
 
OP
OP
fortywater12

fortywater12

Well-Known Member
First Name
Evan
Joined
May 17, 2021
Threads
16
Messages
249
Reaction score
441
Location
Sacramento, CA
Vehicle(s)
2019 Ranger XLT FX4
Occupation
Engineer
Awesome stuff. Thanks for taking the time to share your build & lessons for the forum. I’ll be tackling a project similarly in the next year or two.

What ended up being your actual bed rail to top of space frame height?

Unsolicited thoughts:

I saw a video self review of a build that had water get into the “sealed” space frame tube, freeze, and swell. The rivets may not be 100% sealed for example. Could intentionally leave a drain hole. Or perhaps your paint/coating accounts for this.

Alu-cab and other DIY take advantage of the space between the cab and overhang, by adding u-channel or other slot /slider mechanism to store a custom camp table, or, slide out shower supports.
Thanks for the response and taking the time to read my thread! The height from bedrail to top of the space frame ended up being 22”. The fit should be perfect I think - I’ll share pictures next week when I get it on my truck.

I wish you the best on your build, If you have any questions don’t hesitate to reach out, I’ll share as much as I can on this thread too.

As to your build points, that is a great idea and I’ll have to look into it the channel for maximizing the storage space. I totally forgot about the water intrusion/freezing, but had heard that as well. I’m going to drill some drain holes this week for sure! Cheers


OP
OP
fortywater12

fortywater12

Well-Known Member
First Name
Evan
Joined
May 17, 2021
Threads
16
Messages
249
Reaction score
441
Location
Sacramento, CA
Vehicle(s)
2019 Ranger XLT FX4
Occupation
Engineer
Got my space frame mounted to the wedge this week and sealed! I used a rubber/cork gasket in between the metal frame the max metal. I also ran beads of polyurethane sealant between the max metal and the extrusion to make sure it’s water tight. Bolts go through the frame and mate with t-slot nuts in the extrusion frame, effectively sandwiching everything together when it is torqued down. Once the urethane cures I will go back and touch up any open gaps.

I still have to add my support bolts in the center of the frame, hence the small gap in the center of the panel and frame as seen in some of the photos. I will countersink these bolts from the top side and use flat head bolts with a nylon lock nut on the bottom.

4809E4A7-ED98-4042-9E69-3B8858E55350.jpeg

0AA71B38-76BB-4CA9-8F53-397AB6A284DF.jpeg

1324F3DD-737C-4C8F-9981-FCA867CD06F3.jpeg

15847903-7BAA-4355-AFAC-53EC5FB6B813.jpeg

EA1A0A1B-FDCA-47C7-BFC2-BCAC2352DD44.jpeg
 
OP
OP
fortywater12

fortywater12

Well-Known Member
First Name
Evan
Joined
May 17, 2021
Threads
16
Messages
249
Reaction score
441
Location
Sacramento, CA
Vehicle(s)
2019 Ranger XLT FX4
Occupation
Engineer
Put in some solid hours today working on the wedge camper. Got it flipped and added the countersunk support bolts in the center of the frame.

I also put the pop top on and attached the front hinges. After that, I added my thick channel gasket between the top and bottom of the wedge for when it’s closed. Lastly, attached my hurricane hinge for all of the doors! Lots of progress and she’s really coming together!

087A29F1-0C3F-4FA4-8597-93ED89204A2E.jpeg


BAC9E9AB-55F6-4443-B713-D43D6629E541.jpeg


913D222C-8FE6-4398-84A8-76C1318B1616.jpeg


032D6905-9C7C-4255-8159-8F270C8C052C.jpeg


I chose to go with the hurricane hinge because it has a built-in gutter as seen below. It’s also a continuous hinge that nests inside itself making it extremely waterproof. This will help with water running down the inside of the panels during rain or when I wash the truck. I also added a strip of the panel material behind the hurricane hinge to fur it out slightly so the panel can rest properly against the gasket on the frame.

BB434820-E4F2-4DF3-966A-E14820F12AD8.jpeg


I attached the hurricane hinge with some self tappers that are used for sheet metal roofing. They have a built-in rubber gasket so they seal water tight when torqued down.

D7893FDA-21AD-4130-9D54-0EF529040926.jpeg


9704FC6E-9538-4EF9-8977-6AFDFA8F30F5.jpeg


Tomorrow I’m going to mess around with my hinges a bit more and possibly cut out my door panels.
 
OP
OP
fortywater12

fortywater12

Well-Known Member
First Name
Evan
Joined
May 17, 2021
Threads
16
Messages
249
Reaction score
441
Location
Sacramento, CA
Vehicle(s)
2019 Ranger XLT FX4
Occupation
Engineer
Well, made an error yesterday and forgot to factor in the thickness of my panel gasket when making my shims for the hurricane hinges. Because of this, my spacing was going to be off where the panel meets the frame and it was going to be an issue. I added a second shim the same thickness to all of my hinges this morning and it ended up being perfect. Had to do about 2 hours of rework, but I’m happy I caught it and it came apart and went back together smoothly. Pictured below is the hinge mounted with the double shim. You can also see the spacing between the panel and the frame. It should be perfect with the gasket.

588B7EAB-9B2F-4395-8857-DFCE660E1972.jpeg


I got my rear panel riveted to the hurricane hinge and trimmed to size. I found the easiest way to do this was rough cut an oversized rectangle and then first rivet the hinge to the panel. Since the hurricane hinge is two halves that slide into each other, one half stays mounted to the camper and the other can be removed. You’ll rivet the half that can be removed to your rough cut panel.

After that, I mated the two halves back together on the camper and traced the true size of the panel with sharpie. I then pulled it back off and cut the panel to size using my markings. I think it turned out really well! Also saved me the hassle of using measurements and straight edges etc.

450FB370-D9C1-4A20-897D-F3E08E7610B4.jpeg


Re-shimming my hinges and doing this first panel took me about 3 hours today. I kinda lost motivation for the day after this and wanted to watch the Niner game so I stopped here for today haha.

This week my goal is to get my other panels mounted and then start messing with panel stiffeners, gas struts, and locks! I’ll also be running my canvas material to a guy in Grass Valley who will be sewing all of that. This will be the one thing I outsource in order to save time and ensure I have a quality tent.
 
OP
OP
fortywater12

fortywater12

Well-Known Member
First Name
Evan
Joined
May 17, 2021
Threads
16
Messages
249
Reaction score
441
Location
Sacramento, CA
Vehicle(s)
2019 Ranger XLT FX4
Occupation
Engineer
First side panel went on last night. I’ll do the other side tonight then all of my panels will be done!

B6D69EA7-5F3E-4C41-81FF-287B64441B92.jpeg


I am a little concerned with how much the doors open since the rivet interferes with the hinge right about 90 degrees. I would have liked to get 100-110 degrees of opening but we will see how it looks mounted on the truck.

If it becomes a big issue, I may have to drill out my rivets and use a slim nut with a flathead on the backside to try and get another 10 degrees or so of opening angle.
 
Last edited:

Rhino

Well-Known Member
First Name
jacob
Joined
May 26, 2022
Threads
7
Messages
1,620
Reaction score
3,583
Location
idk help!
Vehicle(s)
2017f150 scarb? 4x4, 24 xr150L , 2023 klx300r, 24 tenere 700
Occupation
professional anime watcher!
Vehicle Showcase
1
topper looks great so far! how much do you think its costed to build? and what do you plan on doing for the fabric sides for the tent?
 

9zero1790

Well-Known Member
First Name
Mark
Joined
Nov 29, 2021
Threads
50
Messages
7,142
Reaction score
24,331
Location
DFW Texas
Vehicle(s)
21 super crew fx4 sport
Occupation
air breather
awesome work so far! i am excited to see how it turns out. wish i had the skill and goodies to make one myself.
 
OP
OP
fortywater12

fortywater12

Well-Known Member
First Name
Evan
Joined
May 17, 2021
Threads
16
Messages
249
Reaction score
441
Location
Sacramento, CA
Vehicle(s)
2019 Ranger XLT FX4
Occupation
Engineer
topper looks great so far! how much do you think its costed to build? and what do you plan on doing for the fabric sides for the tent?
I have about $3600-3700 into it right now I think. That is all in with extra stops to the hardware store to buy odds and ends etc. The google spreadsheet on my first post details out all the materials needed down to the penny. I think I had originally budgeted $3,500 for all of my materials.

For the tent I am using a 600D polyester canvas that is coated with polyurethane for water resistance. I'll have YKK zippers and bug netting for the windows. It will attach to the aluminum extrusion with awning track, sometimes referred to as "keder rail". I am outsouring this portion of the build to a local upholstery guy. I bought all of the material and will pay his labor rate of $90/hour. He will not only be able to do it 10x faster than I would, but it will also look 10x better haha.

awesome work so far! i am excited to see how it turns out. wish i had the skill and goodies to make one myself.
Honestly, this is my first time ever doing something like this. I like to consider myself a DIYer and have remodeled a house and previously wrenched on my vehicles before, but never really fabricated anything like this. I am thankful for my friends who have helped me along the way with the metal working as I am a VERY novice welder. Also thankful for the internet, I read, re-read, and then re-read the how to thread I shared from TacomaWorld many times before I embarked on this journey haha.
 
OP
OP
fortywater12

fortywater12

Well-Known Member
First Name
Evan
Joined
May 17, 2021
Threads
16
Messages
249
Reaction score
441
Location
Sacramento, CA
Vehicle(s)
2019 Ranger XLT FX4
Occupation
Engineer
I got my last door panel on last night. I drilled the rivet holes roughly 1/8" lower on the hinge this time and this allowed the door to open much more and not interfere with the top hinge. With this, I was able to achieve my 110 degrees of opening which was awesome.

I went back and ground/sanded down some of the other rivets where they interfere with the hinge to provide a bit of relief and this worked great for the other panels. I will fine tune this over the weekend when I mount my gas struts.

The plan for the remainder of the week is to add some panel stiffeners to prepare for the mounting of my gas struts this weekend. I will also try and layout where I want to add my SouthCo latches.

1673461940503.webp
Sponsored


Top