Rascalrider
Well-Known Member
- Thread starter
- #1
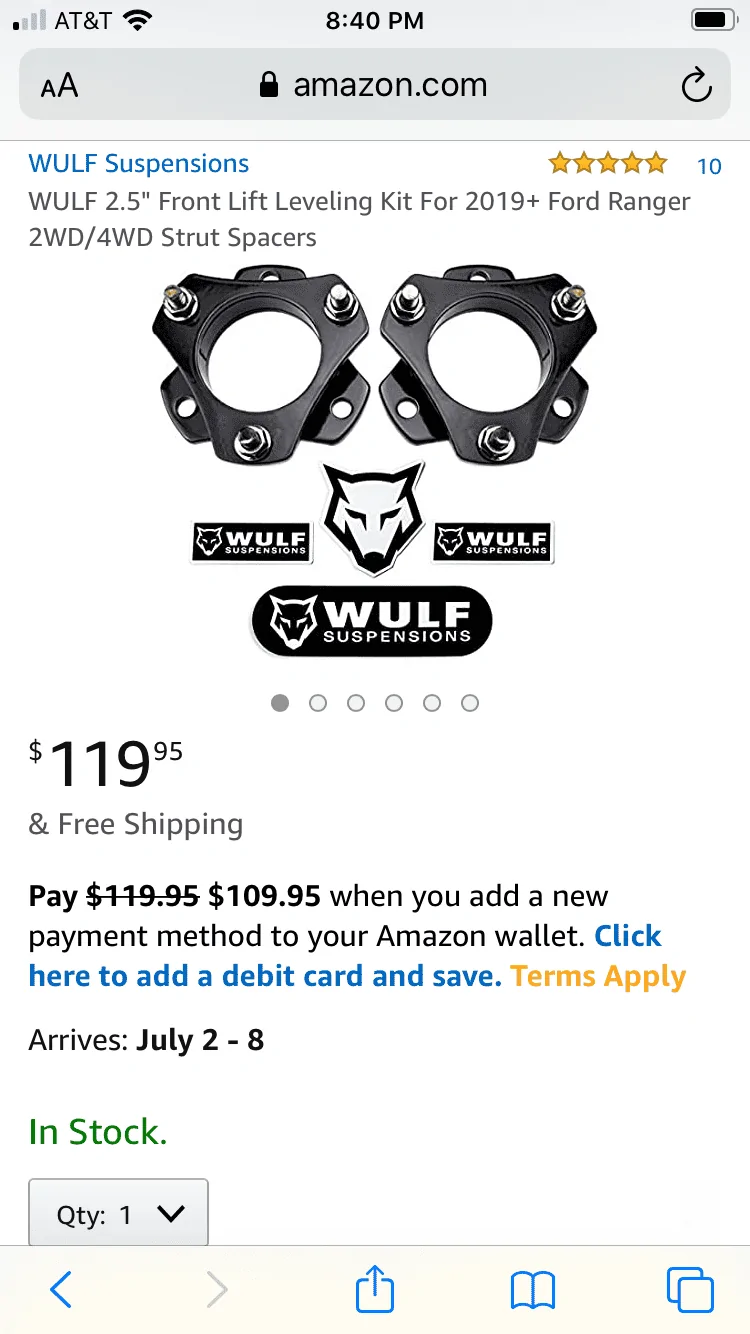
Anyone have any experience with this particular kit W833825.

Sponsored
Thanks for the reply!! That’s the kinda info I was looking for!! I will probably go the same route you did.I was going to order these but when I saw that Amazon was out of stock I went looking for other spacer kits and I found that Wulf is likely just reselling the same kit from Suspension Specialists. Wulf Suspensions is even using the exact same pictures on their Amazon and website that Suspension Specialists have posted up.
Anyway so I ordered the spacers from Suspension Specialists since they were cheaper and have free shipping. The kit was delivered in just a few days. And I installed in about an hour with no problems.
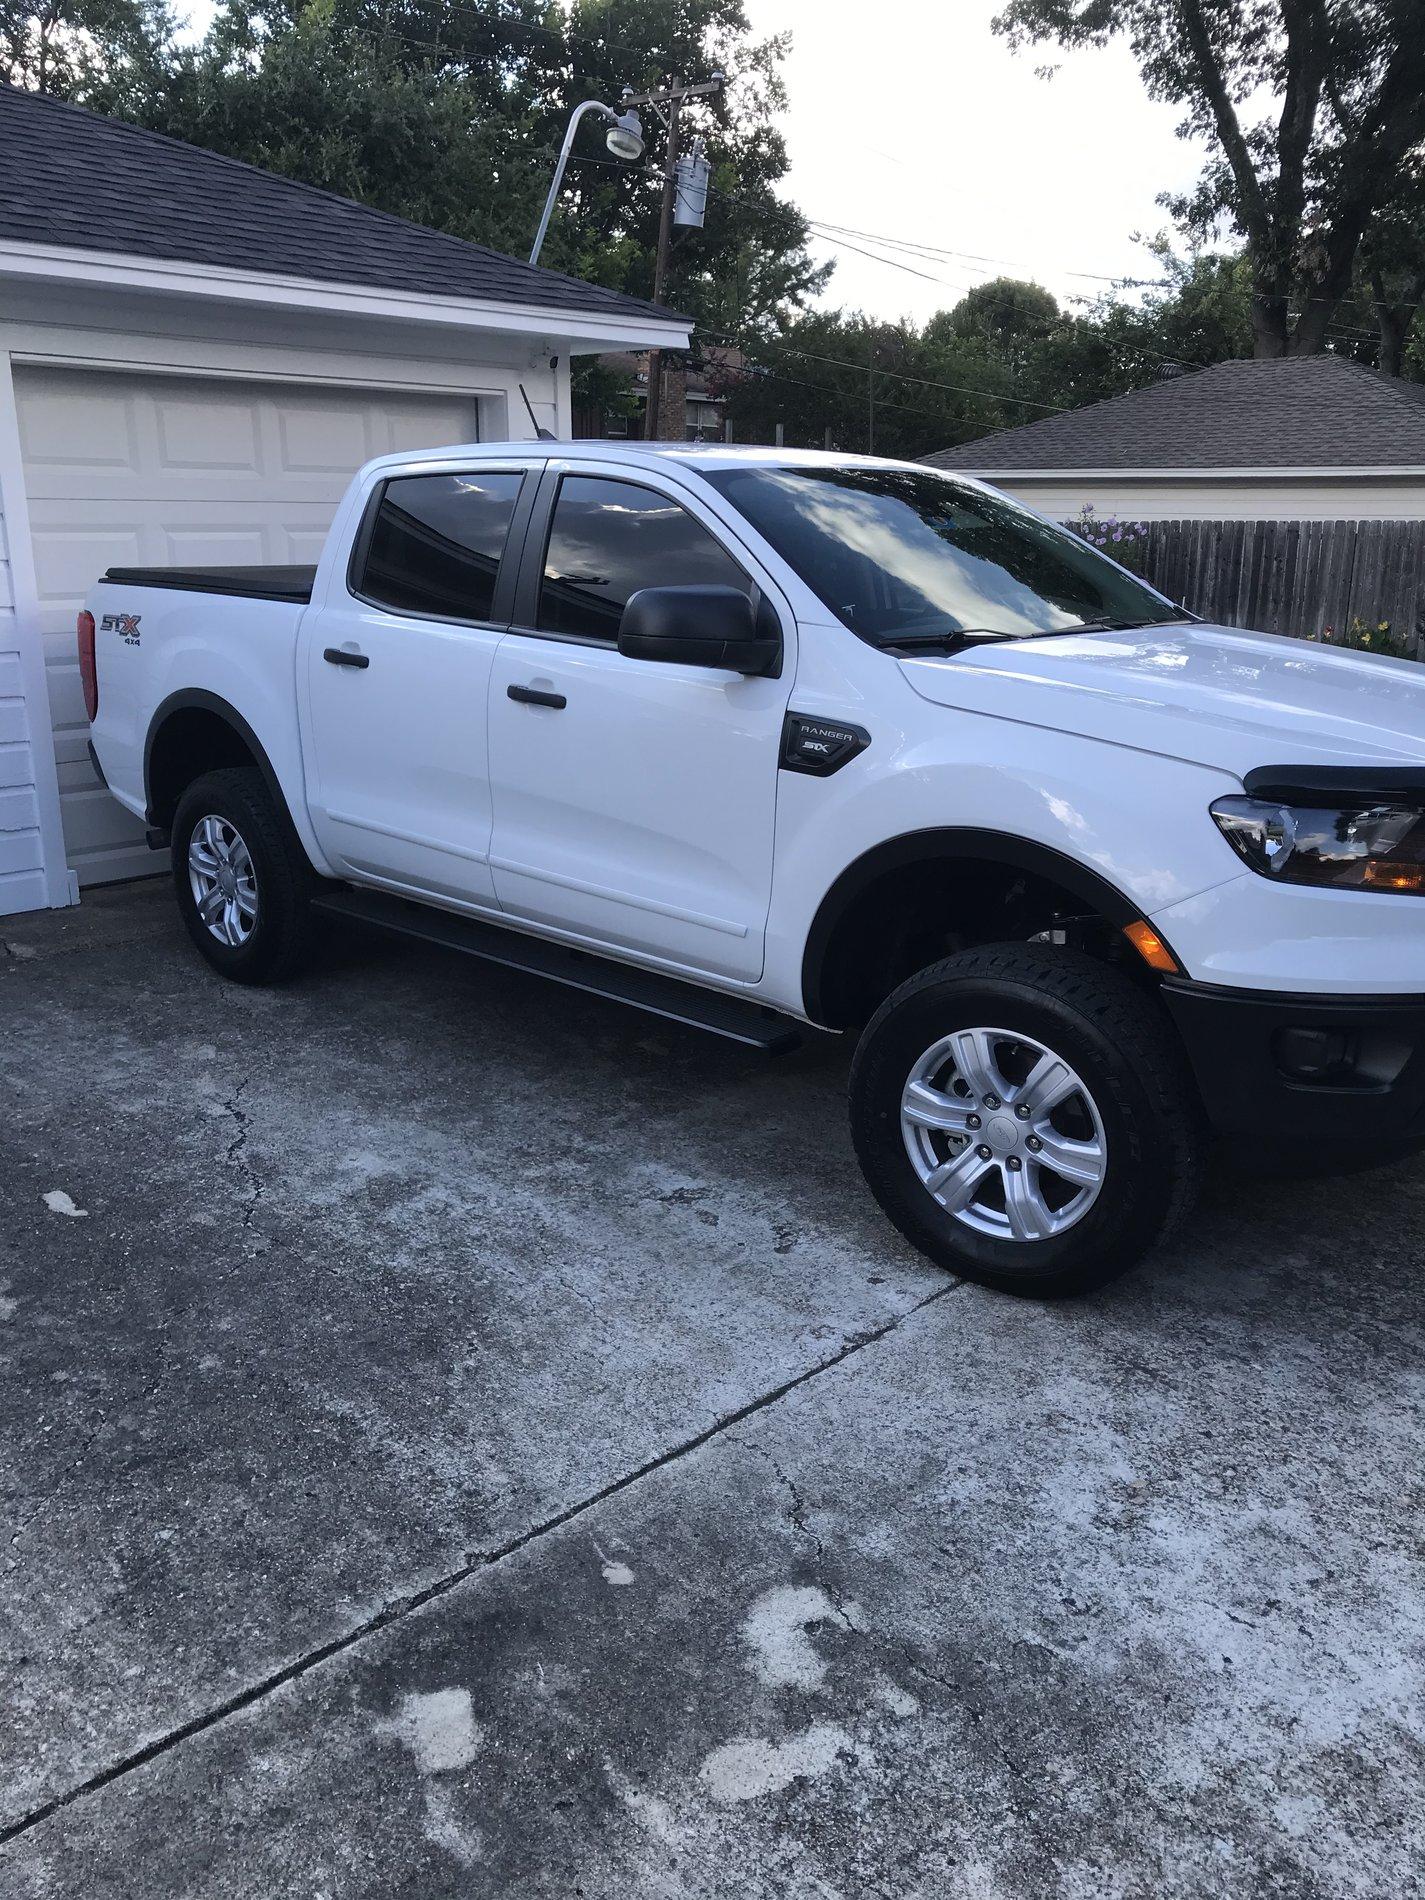
These trucks really do look so much better with them installed, and honestly I'd say ride quality is improved as well. Before I installed them the front end just felt loose to me. Almost like being on a boat. After installing the leveling kit while there's still some of that rolling sensation is there but it is significantly better. Even the wife who is nearly oblivious when it comes to cars commented about it being much better and wanted to know what I did.
Kit ordered so share any installment tips you may have!I was going to order these but when I saw that Amazon was out of stock I went looking for other spacer kits and I found that Wulf is likely just reselling the same kit from Suspension Specialists. Wulf Suspensions is even using the exact same pictures on their Amazon and website that Suspension Specialists have posted up.
Anyway so I ordered the spacers from Suspension Specialists since they were cheaper and have free shipping. The kit was delivered in just a few days. And I installed in about an hour with no problems.
These trucks really do look so much better with them installed, and honestly I'd say ride quality is improved as well. Before I installed them the front end just felt loose to me. Almost like being on a boat. After installing the leveling kit while there's still some of that rolling sensation is there but it is significantly better. Even the wife who is nearly oblivious when it comes to cars commented about it being much better and wanted to know what I did.
The couple things I did to make the installation easier was I unbolted the front calipers and hung them off the metal to flex brake line bracket with a coat hanger. I did this so the flex line would not be over stretched when pushing down on the lower control arm when reinstalling the strut assembly. Make sure to have some small metric wrenches handy for the tie-rod and upper ball joint. This is to hold the stud while removing/installing the nuts/upper control arm.Kit ordered so share any installment tips you may have!
Sounds like I will make an appointment with my partner in crime with the shop and the lift! LolThe couple things I did to make the installation easier was I unbolted the front calipers and hung them off the metal to flex brake line bracket with a coat hanger. I did this so the flex line would not be over stretched when pushing down on the lower control arm when reinstalling the strut assembly. Make sure to have some small metric wrenches handy for the tie-rod and upper ball joint. This is to hold the stud while removing/installing the nuts/upper control arm.
The other notable thing was after bolting the spacer kit to the strut, the mounting stud orientation will be 180 off. When you spin it around so the top three bolts will line up, the bottom mount stud plate will be facing the wrong way and will make getting those in the lower control arm an absolute pain in the butt. You have two choices here. You can install the strut in lower control arm first, then while pushing down on it to cleat the top mount point, push the strut assembly towards the center of the truck at the same time. Not an easy feat if you're by yourself mind you. Or you can rotate the top mount and spring assembly on the strut 180 so the bottom mount is in the same orientation as when it came out. The entire spring assembly will spin on the strut, it's a bit stiff but it'll turn allowing you to rotate it. To do this place the lower strut mount between your feet and grab the top of the strut with the spacer installed and twist. If you choose to rotate the spring/mount assembly on the strut get it as close to 180 as possible then use painters tape on the lower studs so they wont scratch the control arms and temporarily install the top mount studs in with the outboard nut to hold it in place. Now you can grab the strut and twist it the last little bit so the bottom studs line up to the control arm. You may need to lift up on the strut assembly while pushing down on the lower control arm to get enough clearance for the lower studs to slip in. It'll make sense once you get it all apart and go to reinstall it.
The last thing is make sure to have some blue loctite handy. You will want to use it on the spacer nuts, and the tie rod nut.