Tfcurranjr
Well-Known Member
- First Name
- Tom
- Joined
- Sep 4, 2020
- Threads
- 3
- Messages
- 79
- Reaction score
- 188
- Location
- Gig Harbor WA
- Vehicle(s)
- 2019 Ranger XLT
- Occupation
- Retired USAF pilot
- Thread starter
- #1
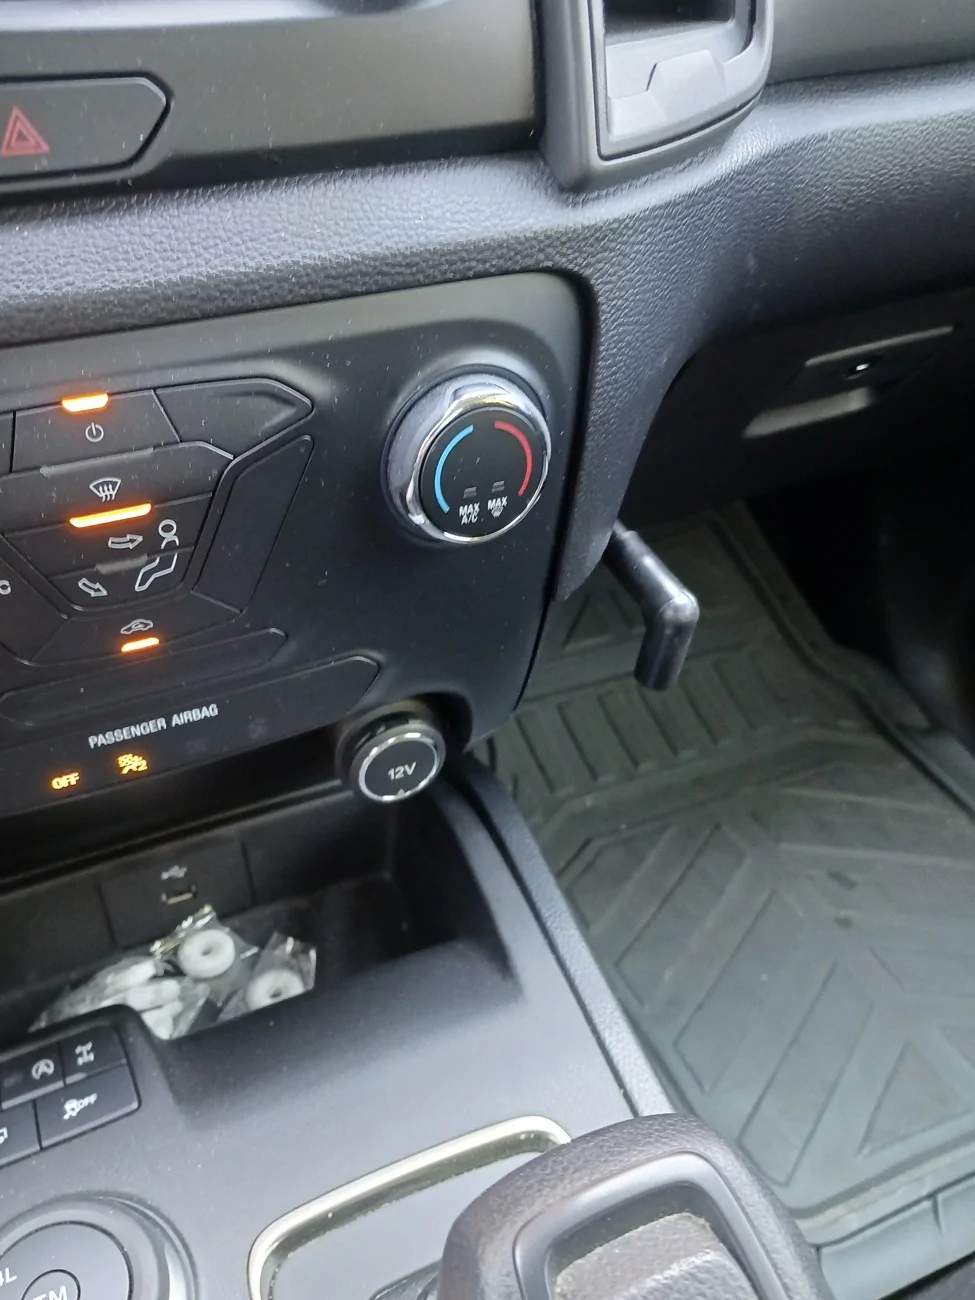
My 2019 XLT currently has 66,900 miles. At @ 65K miles, I started to experience the ‘asymmetric’ A/C scenario with cold air blowing out the right side, and extremely hot air coming out the left. It was random and sporadic, and would often heal itself, so I ignored it for a few months.
Then last week, it started making the loud behind-the-dash “clicking” noises every time I manipulated the climate controls…and even sometimes when I was not…
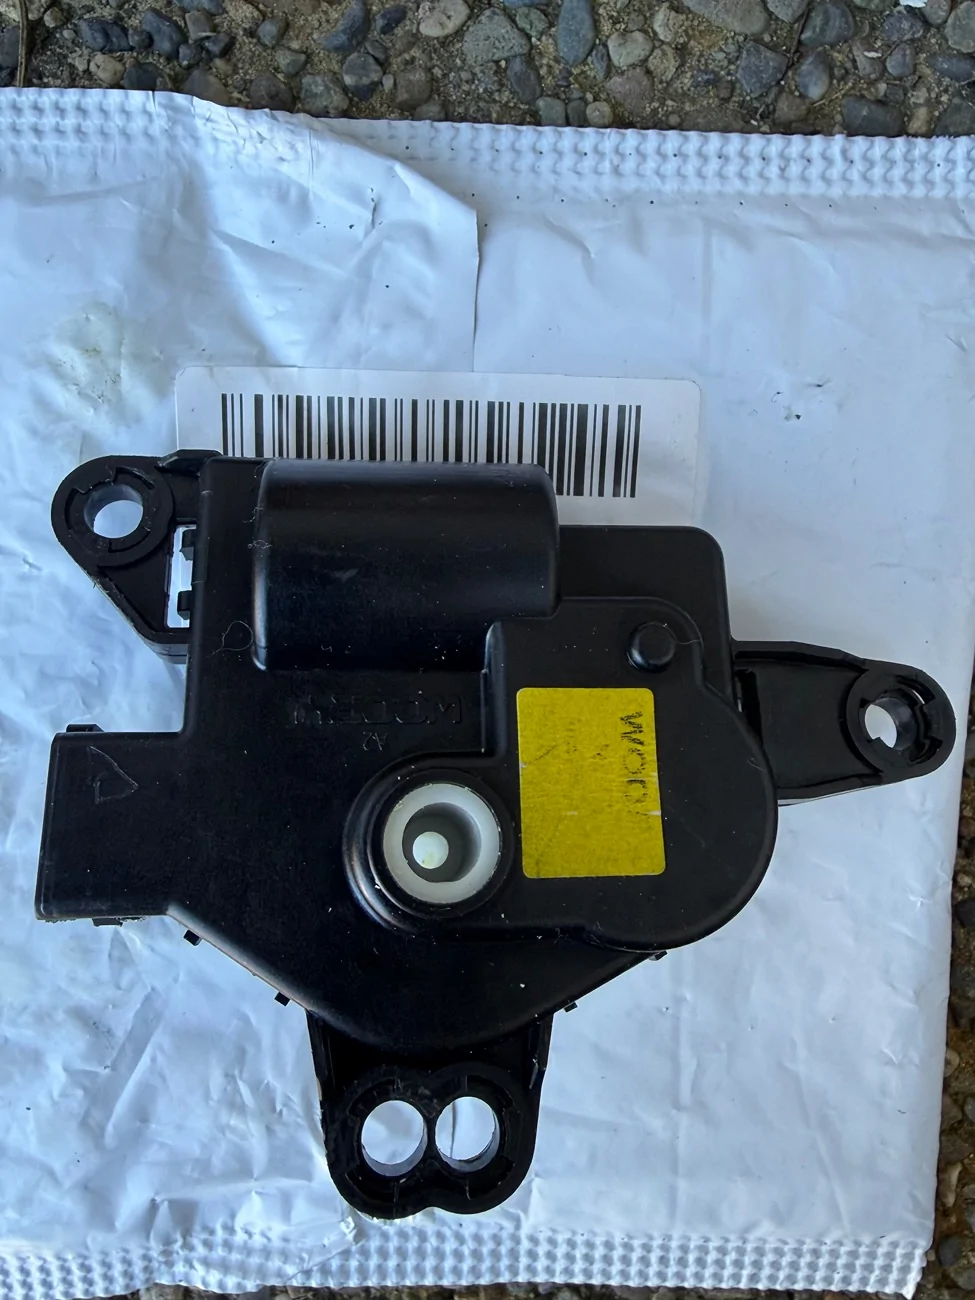
So, after much handwringing I decided to try replacing the now-infamous “Air Conditioner Heater-Actuator” (Part #: AB3Z-19E616-BA) by myself.
I was a little concerned about the lack of detailed YouTube videos that accurately document the whole process, start to finish. I did find a couple that took you up through removal of the old one, but even they were somewhat incomplete…and they then left you with the impression that putting the new one in is so easy, no further guidance is required.
Now, I pride myself on being a fairly accomplished shade tree mechanic: I’ve done pretty much everything you can do to a car, without ever waving a white flag and dragging it to a shop.
But…this…by far…was the biggest “pain-in-the-butt” project I’ve taken on. NO, I did not document it with a video: Which is good thing, otherwise all you’d see is the dark underbelly of the driver-side dashboard, fleeting shots of my tool-strewn interior, and you’d hear enough F-bombs, “G#@ D@!n it” and “what a piece of s@#t”…that even a sailor would blush.
These are just some observations from my adventure: So, If you’ve already done this yourself…you can stop reading here.
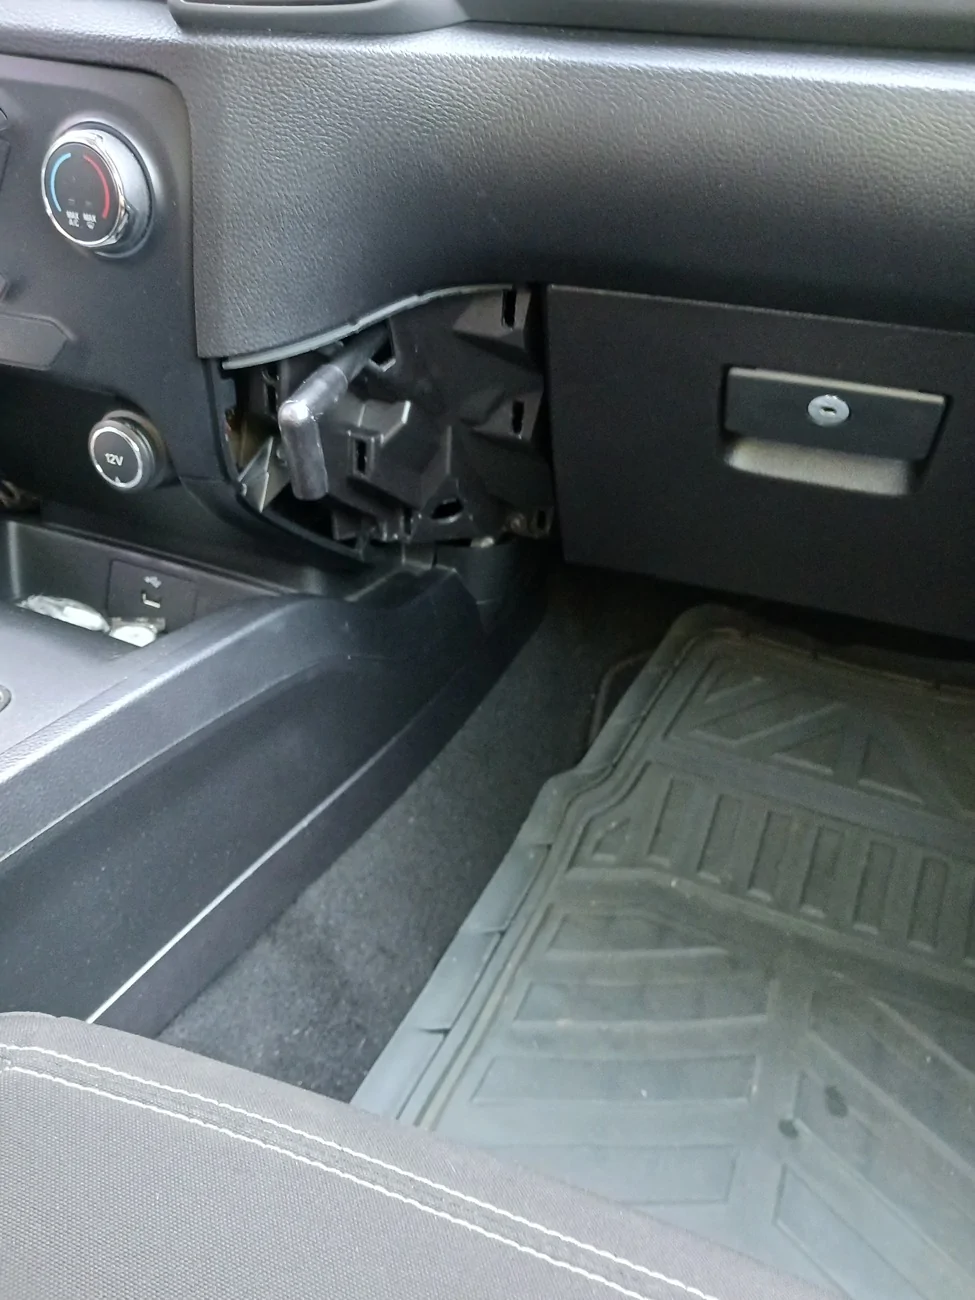
Besides removing the big ‘clip on’ access panel under the steering column, the side panel next to the tranny hump, and the removable metal brace (4 bolts), there’s also the two-piece plastic duct that vents hot air to driver’s feet. The detachable, flared end piece has a temperature sensor plugged into it; however, the other piece is attached to the heater itself, behind the dashboard, and is a formidable obstacle if you’re trying to reach behind the REAL barrier, the non-removable vertical metal support brace that shields the actuator itself…
I’ve seen pix of guys that have removed the heater plumbing completely, however, if you try to yank this piece out of the way, you’ll likely break it off from its ‘anchor point’…which is also unreachable. I ended up just repositioning it as I attempted to access the actuator; I recommend using tape or string to hold it in whatever position is the least annoying to you. Either way, good luck trying to get a good seal between it and the heater outlet during re-assembly...
Much has been said about accessing the three screws that hold the actuator in place. Seems fairly straight forward…not. The “front and rear” ones, or “left and right” ones if you prefer, seem like they should be easy to reach. Actually, the rear/right one (i.e., towards rear of truck, to your right, closest to you, etc....) is not too bad, once you get the heater duct out of the way. OTOH, I found the front/left one (i.e., towards front of truck, to your left, furthest from you, etc.…) to be almost as royal a pain in the butt as the notorious “middle one”. It’s buried up high near a support structure, and although it’s not physically ‘blocked’, it is tough to fish around for, especially if you’re not really small or double-jointed. I highly recommend using a small extendable inspection mirror to help you geolocate the screw(s).
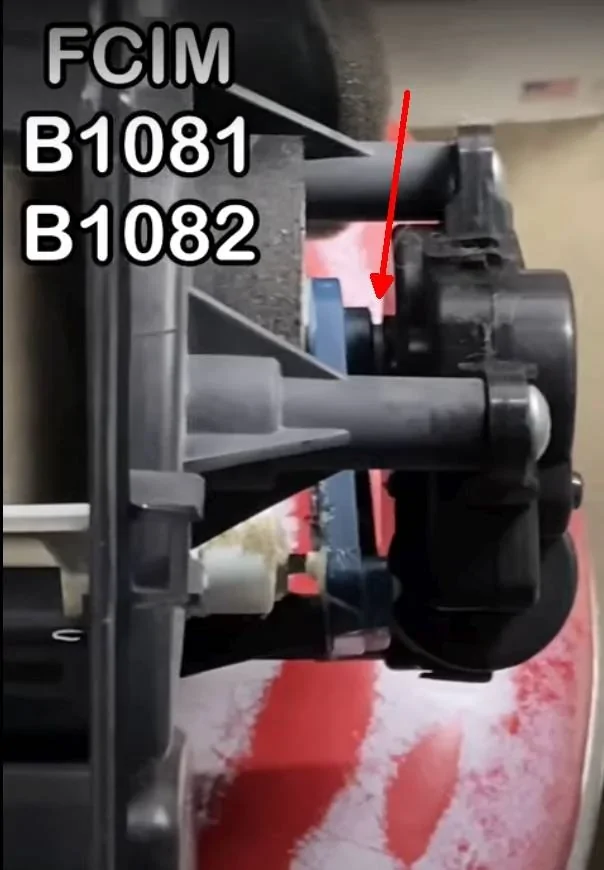
Finally, the notorious “middle screw”, which is hidden behind the vertical metal brace that blocks visibility of, and easy access to, the actuator itself. “Middle screw” is an appropriate name because it is essentially giving you the middle finger as it dares you to reach it.
Trust me, although you may be tempted to spend time energy, and skin, coming up with creative ways to reach around behind the metal brace to access that screw…it is nearly IMpossible.
The accepted method of drilling a hole in the brace works well, assuming you guess correctly on location. However, the holes I’ve seen guys drill appeared only big enough to insert a screwdriver through (BTW, they’re all Phillips screws), which meant still retrieving and then re-inserting the screw by reaching around the brace.
A better technique: Drill a BIG hole…big enough that you can get the screw itself in & out through the hole. There are plenty of creative ways to secure the screw to the screwdriver tip, so it doesn’t drop off during transit. You won’t compromise the truck’s structural integrity & Ford doesn’t care anyway. (However, I also recommend stuffing a rag in the space below the actuator to catch any dropped screws…and an extendable magnet helps if you need to fish them out as well.)
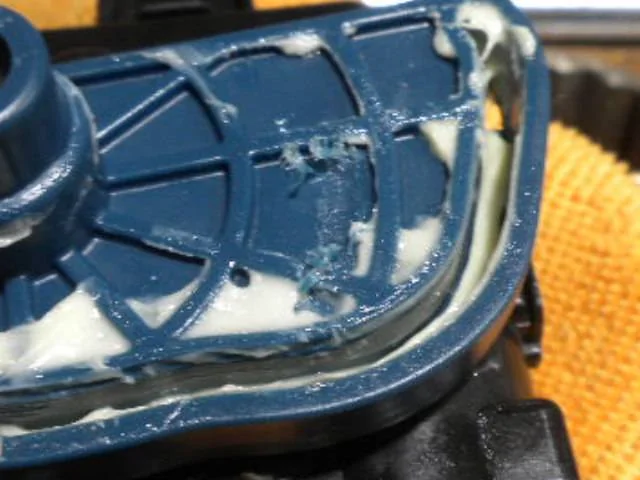
Some comments on the actuator itself…assuming you haven’t given up yet. Once the three screws are removed, don’t expect it to fall off on its own. Mine took a fair bit of wiggling & tugging…enough that I though maybe a 4th screw was still holding it in place. When it does come loose, you can get it out through the space on either side of the vertical brace. Expect it to have a LOT of white lithium grease smeared on the back; don’t forget to replicate that on your new one.
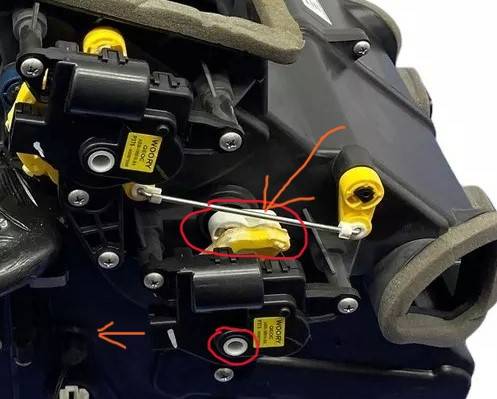
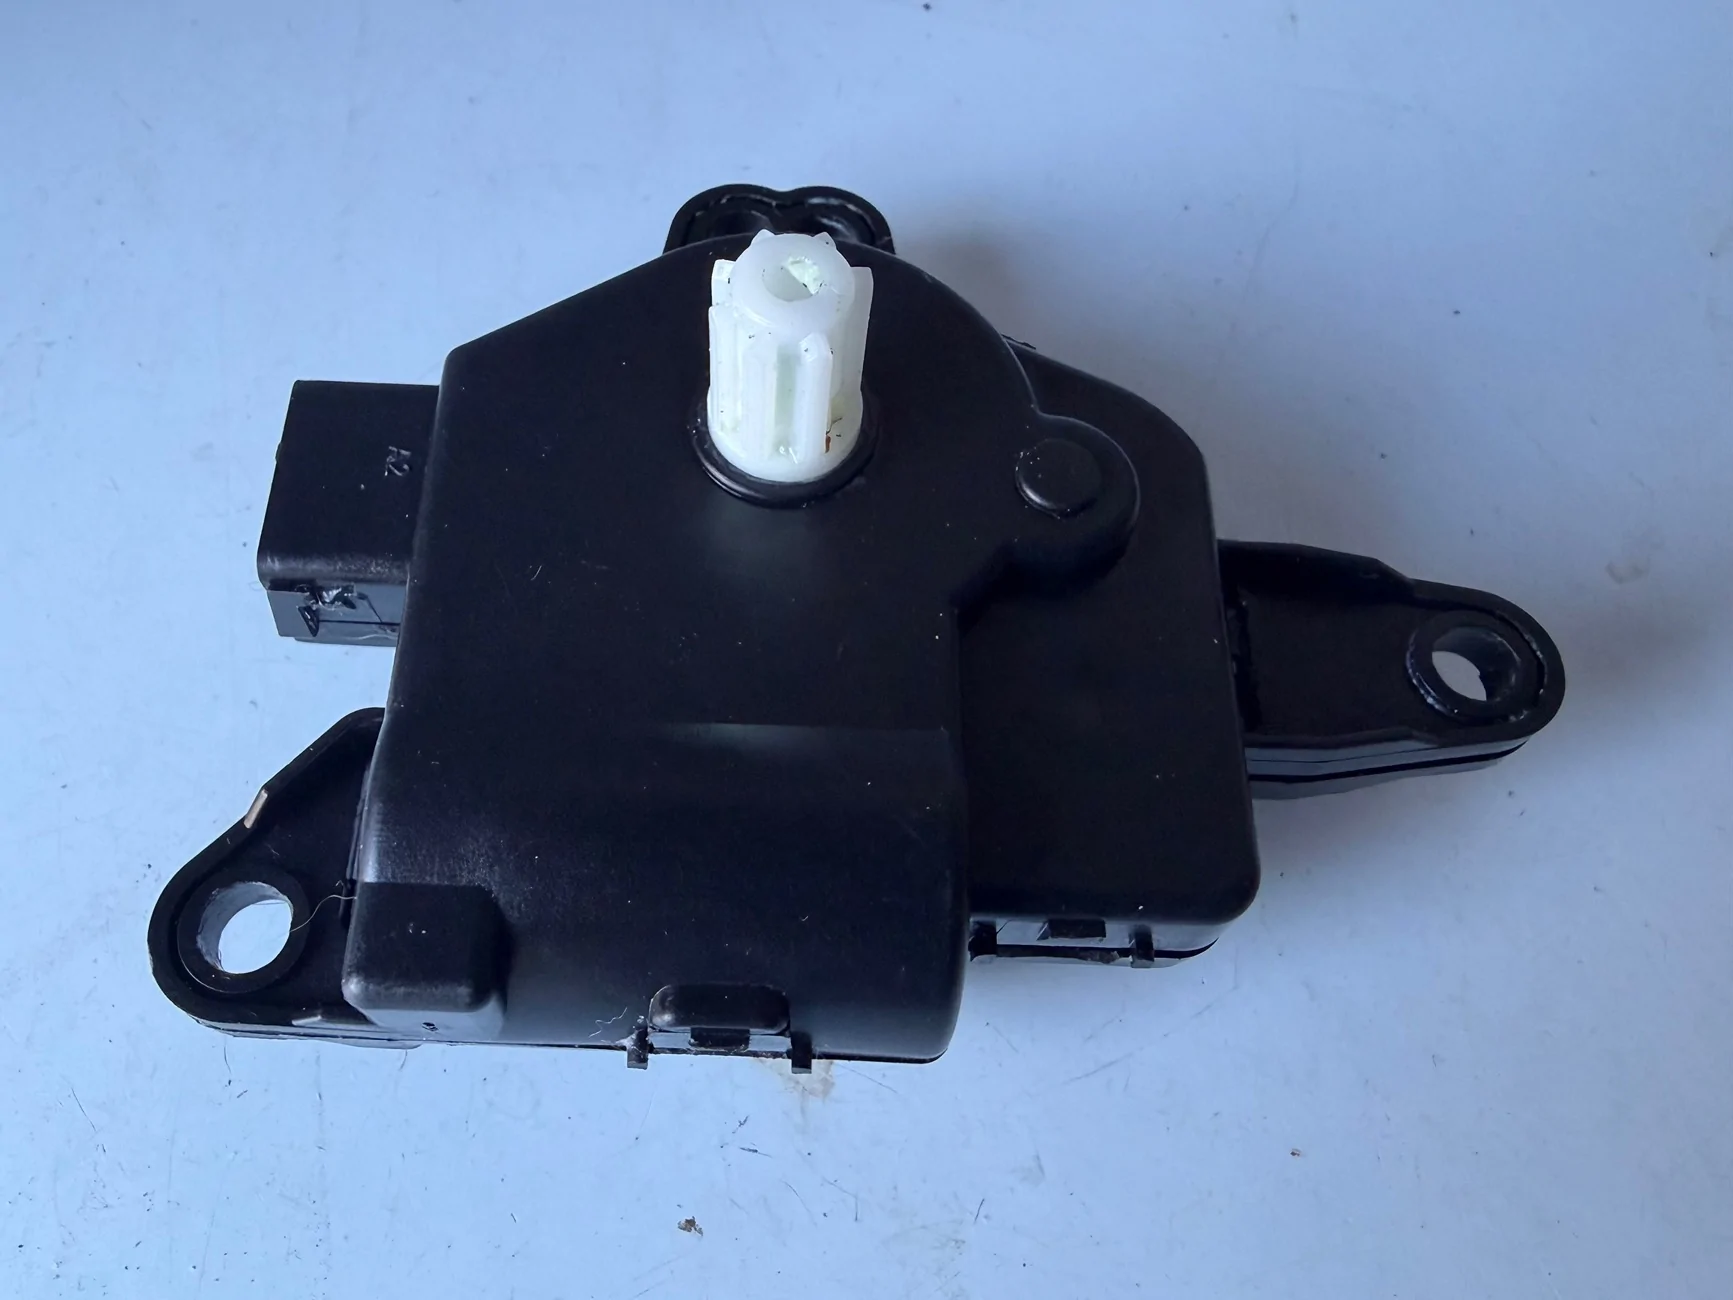
The actuator will have a yellow “arm” (my word) attached that you’ll likely have to re-use (unless you buy a Ford OEM assembly with one included). It slides on the shaft that protrudes from the actuator; it also took some effort to get it off. It is “keyed” to only go on one way. When I tried to insert it on my new actuator, it would not slide all the way down the shaft; even with a fair amount of ‘emphasis’. This is critical. Note how close to the old actuator it sits: it needs to be that close to your new one. Also, DO NOT attempt to turn/spin the yellow actuator arm manually…it won’t budge.
I ended up ordering another replacement actuator and the arm did slide all the way down the shaft with some coaxing.
After all that, it’s fixed. Works like a champ; no clicking.
It was more challenging than I expected, but live and learn, and worth NOT paying a Ford dealer to fix it.
Again, expect to use a lot of grease…and good luck.
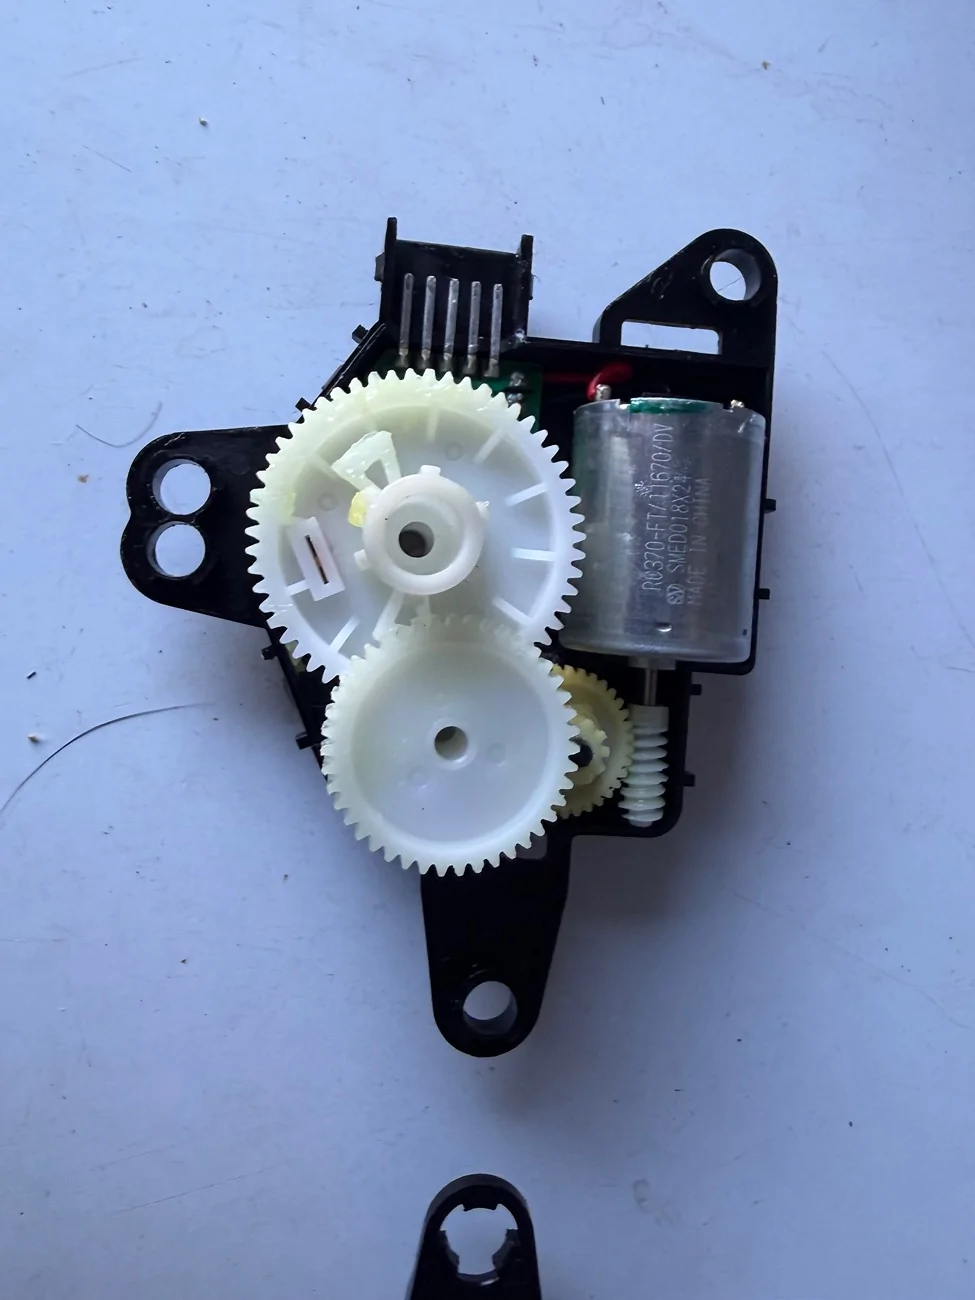
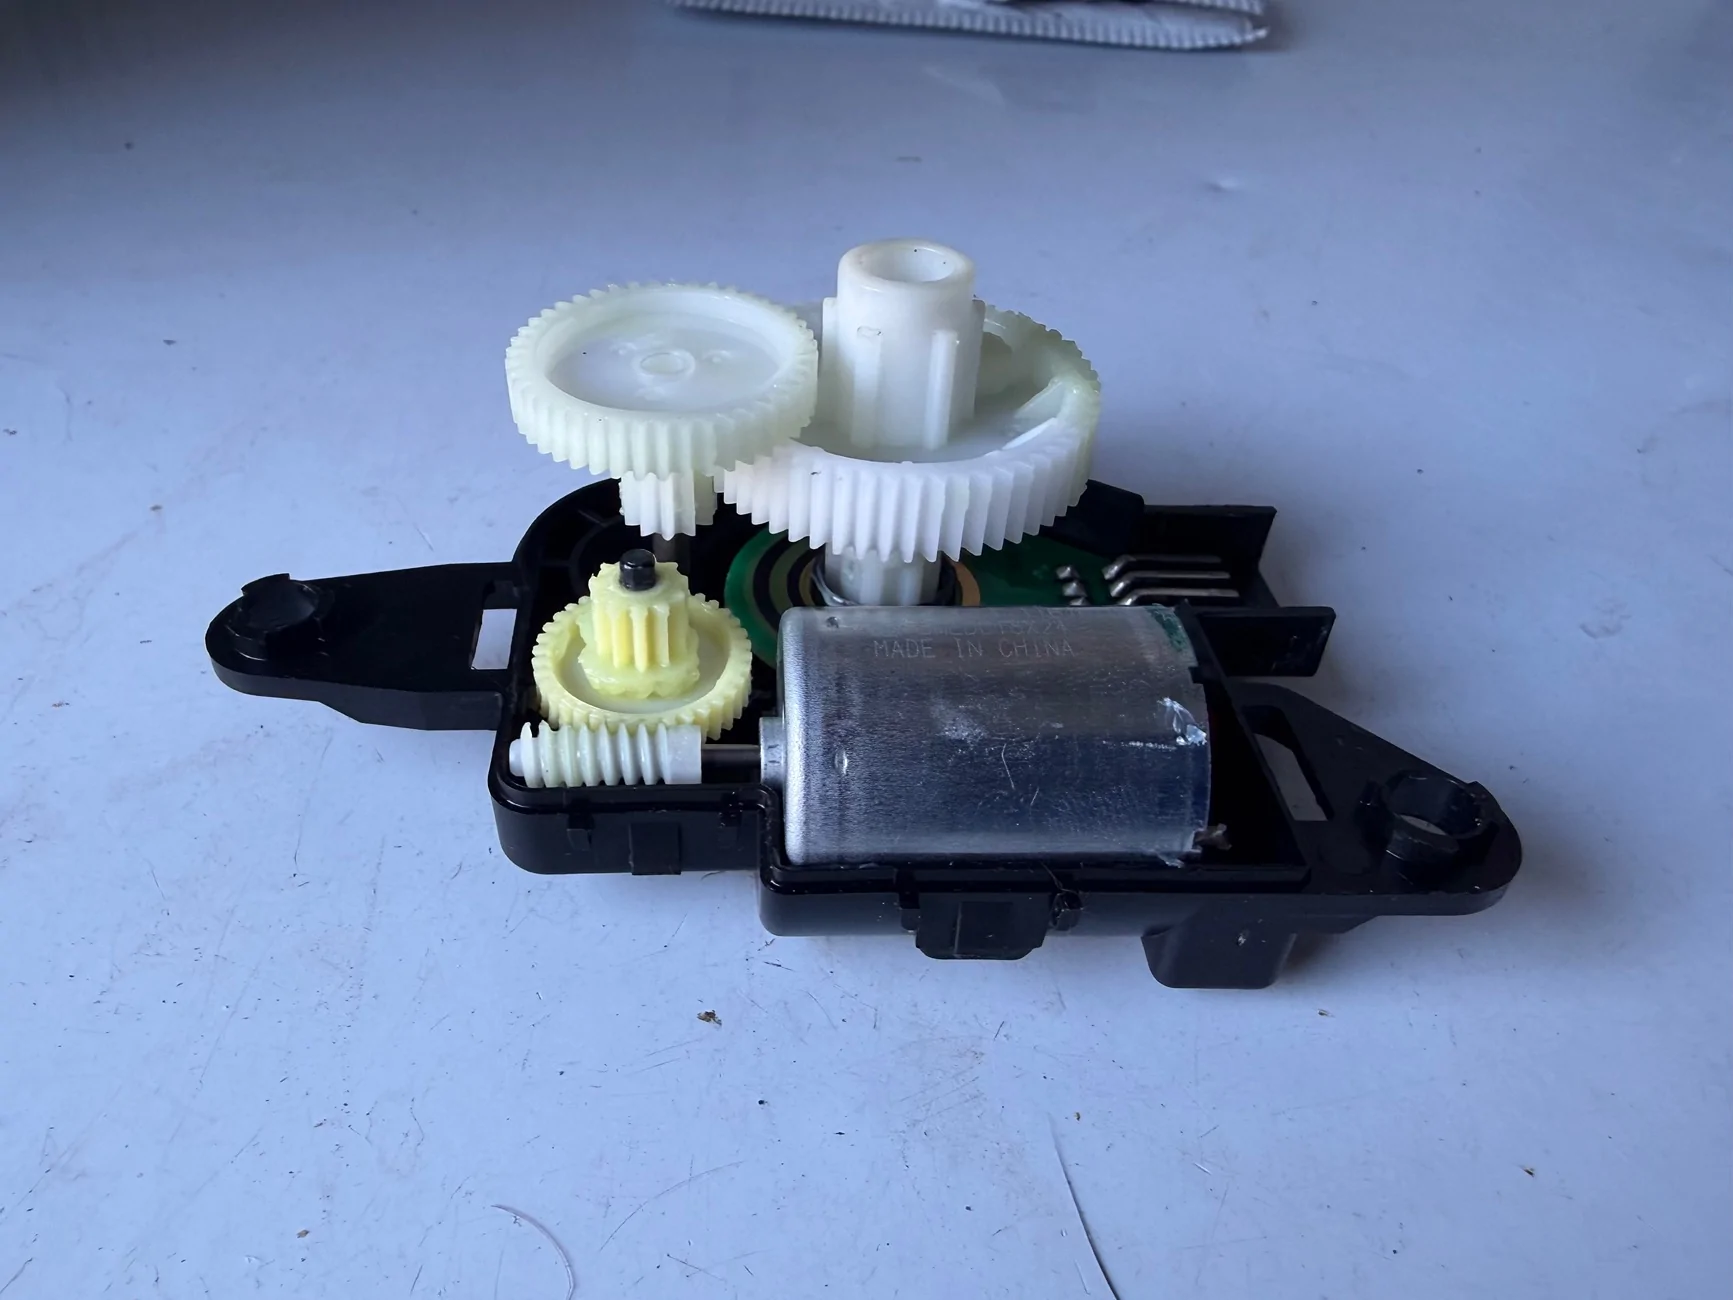
Attached are a couple ‘3-D’ shots of my old one. Note all the gear teeth were intact, so that ‘clicking’ noise is not from broken actuator teeth.


Then last week, it started making the loud behind-the-dash “clicking” noises every time I manipulated the climate controls…and even sometimes when I was not…
So, after much handwringing I decided to try replacing the now-infamous “Air Conditioner Heater-Actuator” (Part #: AB3Z-19E616-BA) by myself.
I was a little concerned about the lack of detailed YouTube videos that accurately document the whole process, start to finish. I did find a couple that took you up through removal of the old one, but even they were somewhat incomplete…and they then left you with the impression that putting the new one in is so easy, no further guidance is required.
Now, I pride myself on being a fairly accomplished shade tree mechanic: I’ve done pretty much everything you can do to a car, without ever waving a white flag and dragging it to a shop.
But…this…by far…was the biggest “pain-in-the-butt” project I’ve taken on. NO, I did not document it with a video: Which is good thing, otherwise all you’d see is the dark underbelly of the driver-side dashboard, fleeting shots of my tool-strewn interior, and you’d hear enough F-bombs, “G#@ D@!n it” and “what a piece of s@#t”…that even a sailor would blush.
These are just some observations from my adventure: So, If you’ve already done this yourself…you can stop reading here.
Besides removing the big ‘clip on’ access panel under the steering column, the side panel next to the tranny hump, and the removable metal brace (4 bolts), there’s also the two-piece plastic duct that vents hot air to driver’s feet. The detachable, flared end piece has a temperature sensor plugged into it; however, the other piece is attached to the heater itself, behind the dashboard, and is a formidable obstacle if you’re trying to reach behind the REAL barrier, the non-removable vertical metal support brace that shields the actuator itself…
I’ve seen pix of guys that have removed the heater plumbing completely, however, if you try to yank this piece out of the way, you’ll likely break it off from its ‘anchor point’…which is also unreachable. I ended up just repositioning it as I attempted to access the actuator; I recommend using tape or string to hold it in whatever position is the least annoying to you. Either way, good luck trying to get a good seal between it and the heater outlet during re-assembly...
Much has been said about accessing the three screws that hold the actuator in place. Seems fairly straight forward…not. The “front and rear” ones, or “left and right” ones if you prefer, seem like they should be easy to reach. Actually, the rear/right one (i.e., towards rear of truck, to your right, closest to you, etc....) is not too bad, once you get the heater duct out of the way. OTOH, I found the front/left one (i.e., towards front of truck, to your left, furthest from you, etc.…) to be almost as royal a pain in the butt as the notorious “middle one”. It’s buried up high near a support structure, and although it’s not physically ‘blocked’, it is tough to fish around for, especially if you’re not really small or double-jointed. I highly recommend using a small extendable inspection mirror to help you geolocate the screw(s).
Finally, the notorious “middle screw”, which is hidden behind the vertical metal brace that blocks visibility of, and easy access to, the actuator itself. “Middle screw” is an appropriate name because it is essentially giving you the middle finger as it dares you to reach it.
Trust me, although you may be tempted to spend time energy, and skin, coming up with creative ways to reach around behind the metal brace to access that screw…it is nearly IMpossible.
The accepted method of drilling a hole in the brace works well, assuming you guess correctly on location. However, the holes I’ve seen guys drill appeared only big enough to insert a screwdriver through (BTW, they’re all Phillips screws), which meant still retrieving and then re-inserting the screw by reaching around the brace.
A better technique: Drill a BIG hole…big enough that you can get the screw itself in & out through the hole. There are plenty of creative ways to secure the screw to the screwdriver tip, so it doesn’t drop off during transit. You won’t compromise the truck’s structural integrity & Ford doesn’t care anyway. (However, I also recommend stuffing a rag in the space below the actuator to catch any dropped screws…and an extendable magnet helps if you need to fish them out as well.)
Some comments on the actuator itself…assuming you haven’t given up yet. Once the three screws are removed, don’t expect it to fall off on its own. Mine took a fair bit of wiggling & tugging…enough that I though maybe a 4th screw was still holding it in place. When it does come loose, you can get it out through the space on either side of the vertical brace. Expect it to have a LOT of white lithium grease smeared on the back; don’t forget to replicate that on your new one.
The actuator will have a yellow “arm” (my word) attached that you’ll likely have to re-use (unless you buy a Ford OEM assembly with one included). It slides on the shaft that protrudes from the actuator; it also took some effort to get it off. It is “keyed” to only go on one way. When I tried to insert it on my new actuator, it would not slide all the way down the shaft; even with a fair amount of ‘emphasis’. This is critical. Note how close to the old actuator it sits: it needs to be that close to your new one. Also, DO NOT attempt to turn/spin the yellow actuator arm manually…it won’t budge.
I ended up ordering another replacement actuator and the arm did slide all the way down the shaft with some coaxing.
After all that, it’s fixed. Works like a champ; no clicking.
It was more challenging than I expected, but live and learn, and worth NOT paying a Ford dealer to fix it.
Again, expect to use a lot of grease…and good luck.
Attached are a couple ‘3-D’ shots of my old one. Note all the gear teeth were intact, so that ‘clicking’ noise is not from broken actuator teeth.
Sponsored
Last edited:

 ) the heater box is warped and replacing just the actuator is usually just a band aide and short term fix. When mine went on my '19 I just pulled the actuator out and then twice a year just flipped the silver knob from heat - ac. I wasn't confident that my local dealership could tear the whole dash out and put it back without any squeaks or rattles. There's several in this thread who've had theirs replaced and/or DIY their own and IIRC a few tried doing just the actuator only mohave it fail later on.