OldHippy
Well-Known Member
- First Name
- Michael
- Joined
- Jan 23, 2025
- Threads
- 6
- Messages
- 144
- Reaction score
- 228
- Location
- Central Ga.
- Vehicle(s)
- 2020 Ranger XLT 4X4
- Occupation
- Retired
- Thread starter
- #1
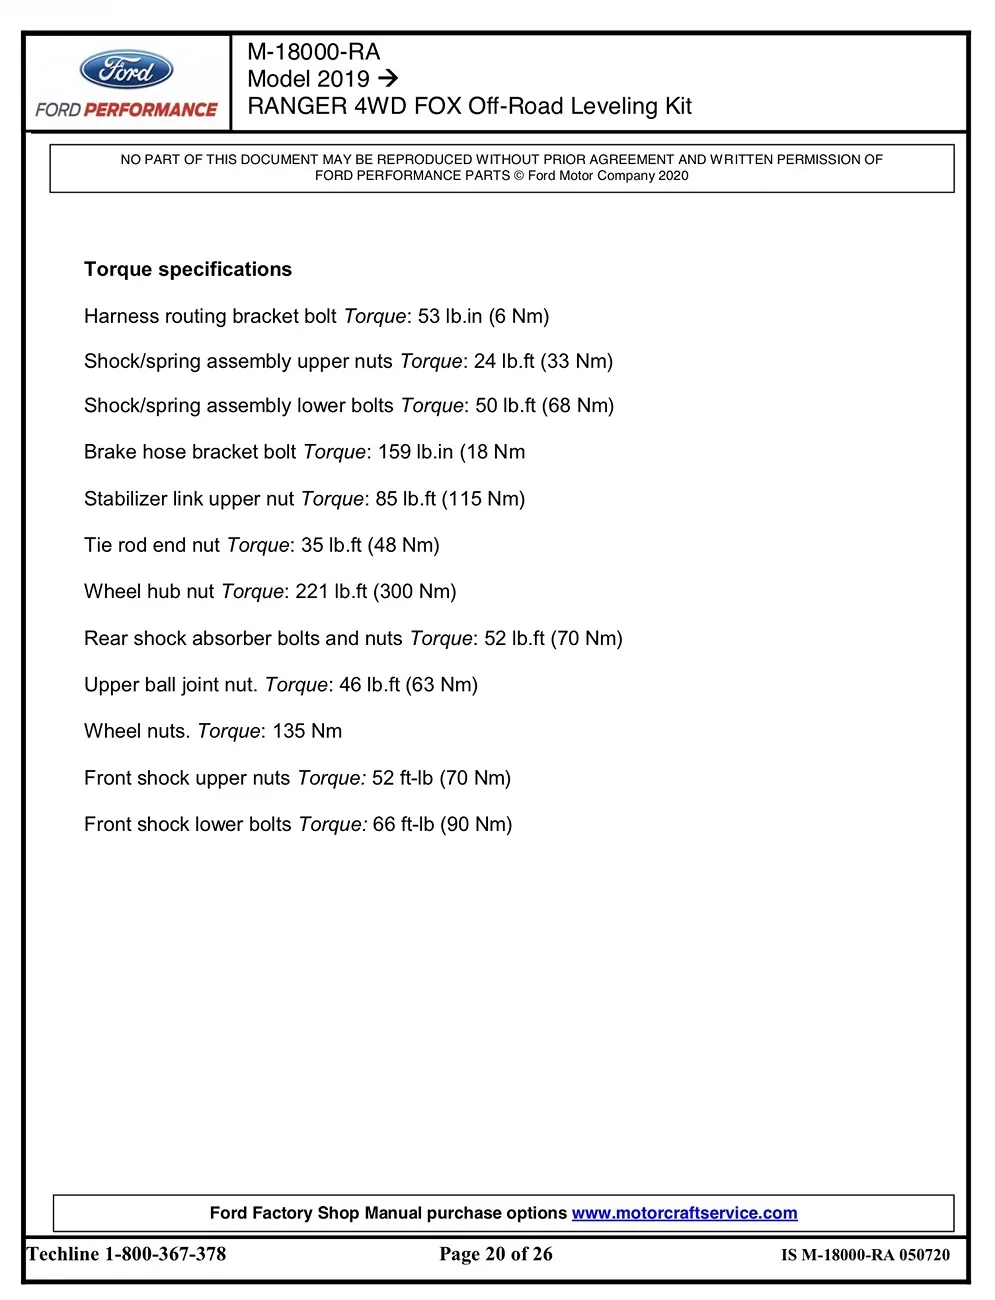
Where can I find a step by step tutorial on removing and replacing front coilovers on my 2020 xlt 4x4?
I have seen so many supposed videos. But they all seem to jump around and many do more talking than actually Showing what to do.
Some say disconnect Everything, remove brakes and tie rods and sway bar and everything else. And some say thats not necessary. Thought I had it figured out a while back. But WOW, the more I look the more differing procedures I see. One thing I Don't want to do is pull my CV apart, like I have seen warning about. Any Common sense help will be much appreciated. Thnx
Sponsored